Handling Multiple Records and Final Output in OIC Integration (Part 6)
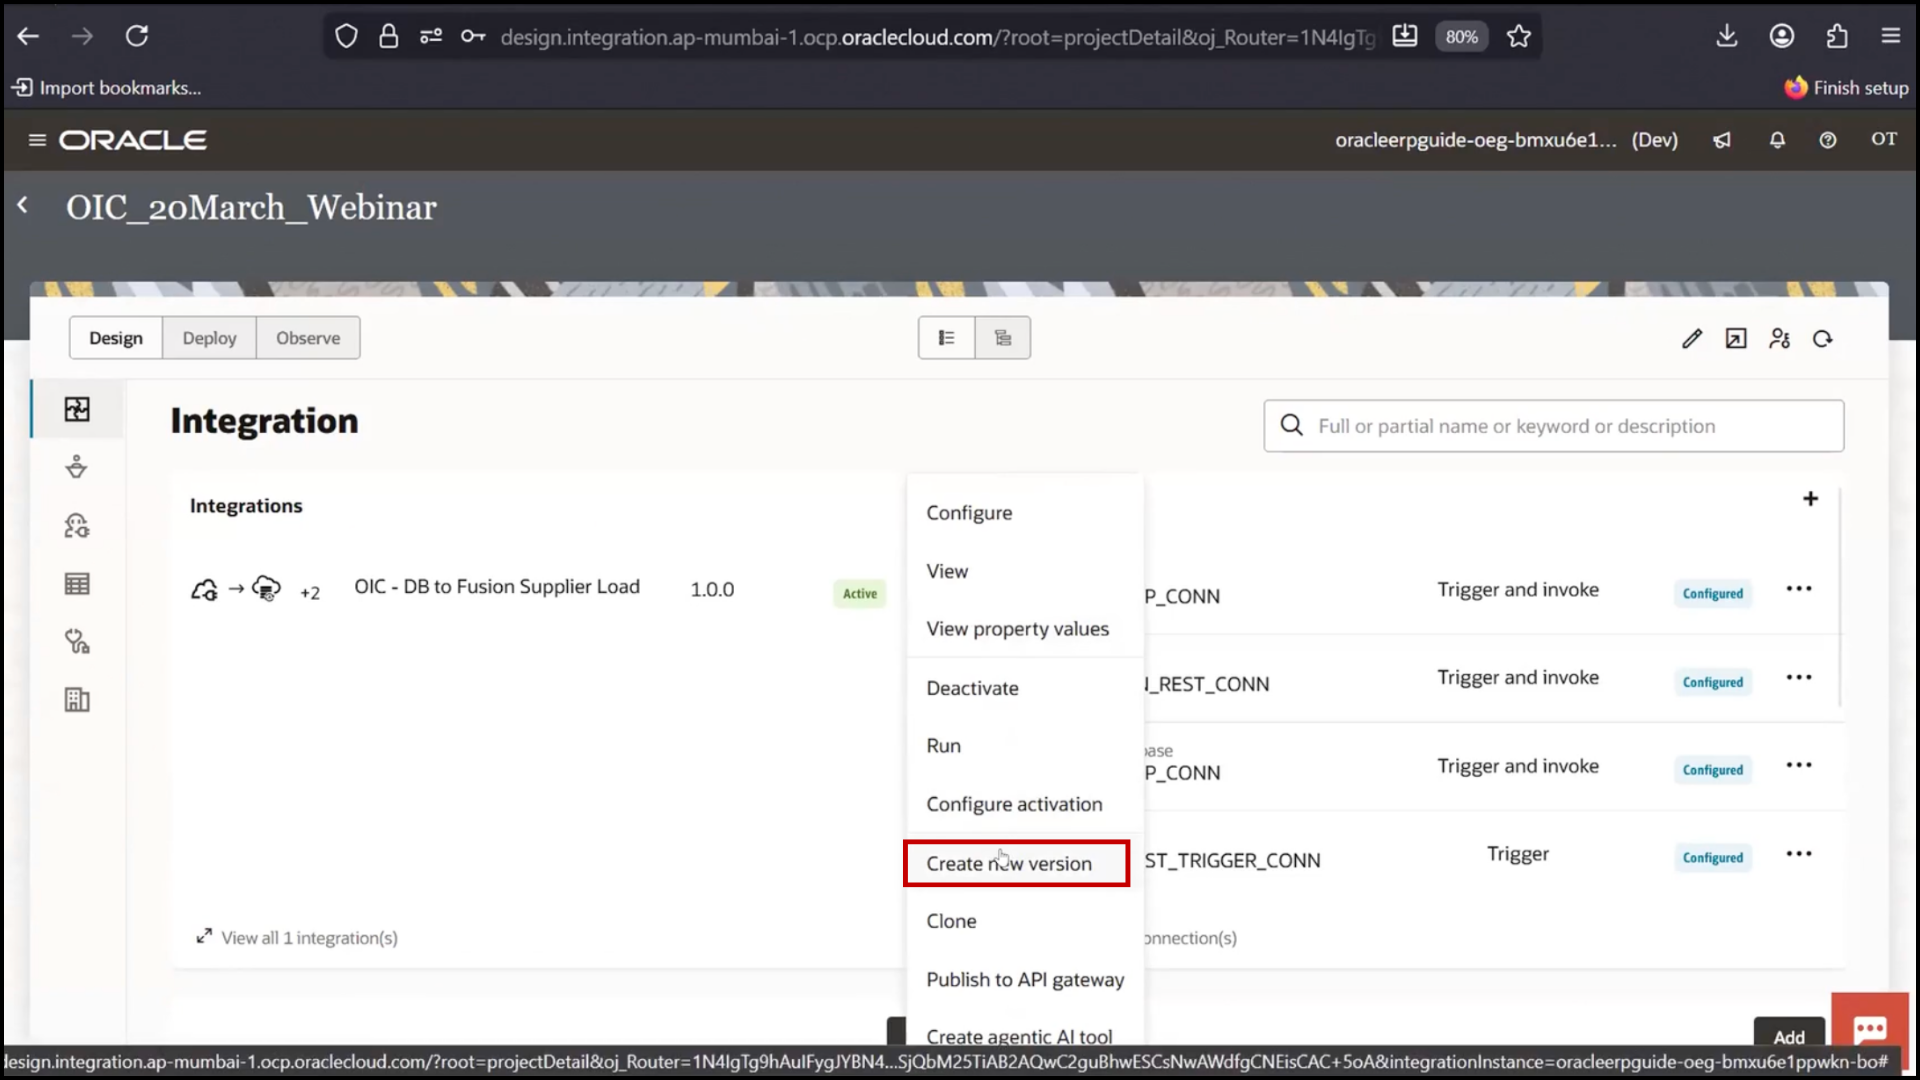
Creating New Version of Integration
1. Go to existing integration
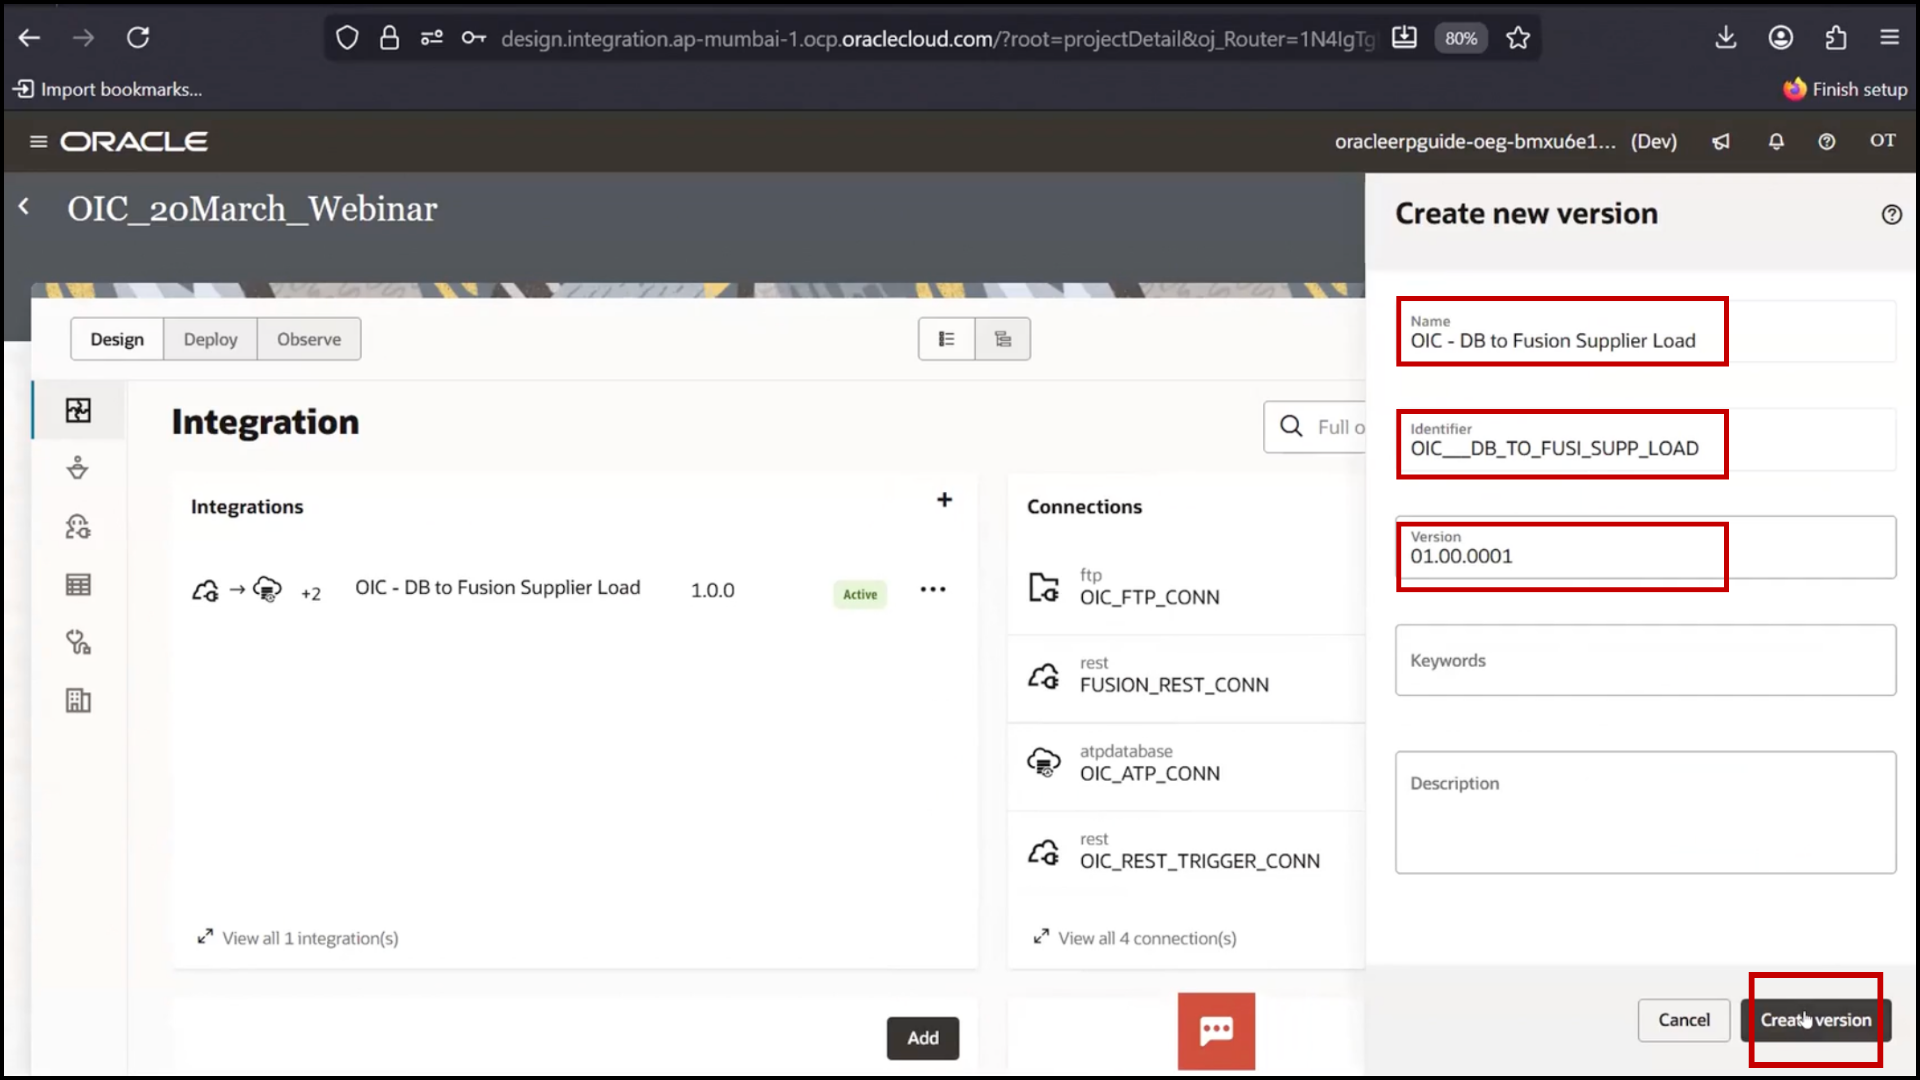
2. Click on Create Version
3. Enter version name: 1.01
4. Click Create Version
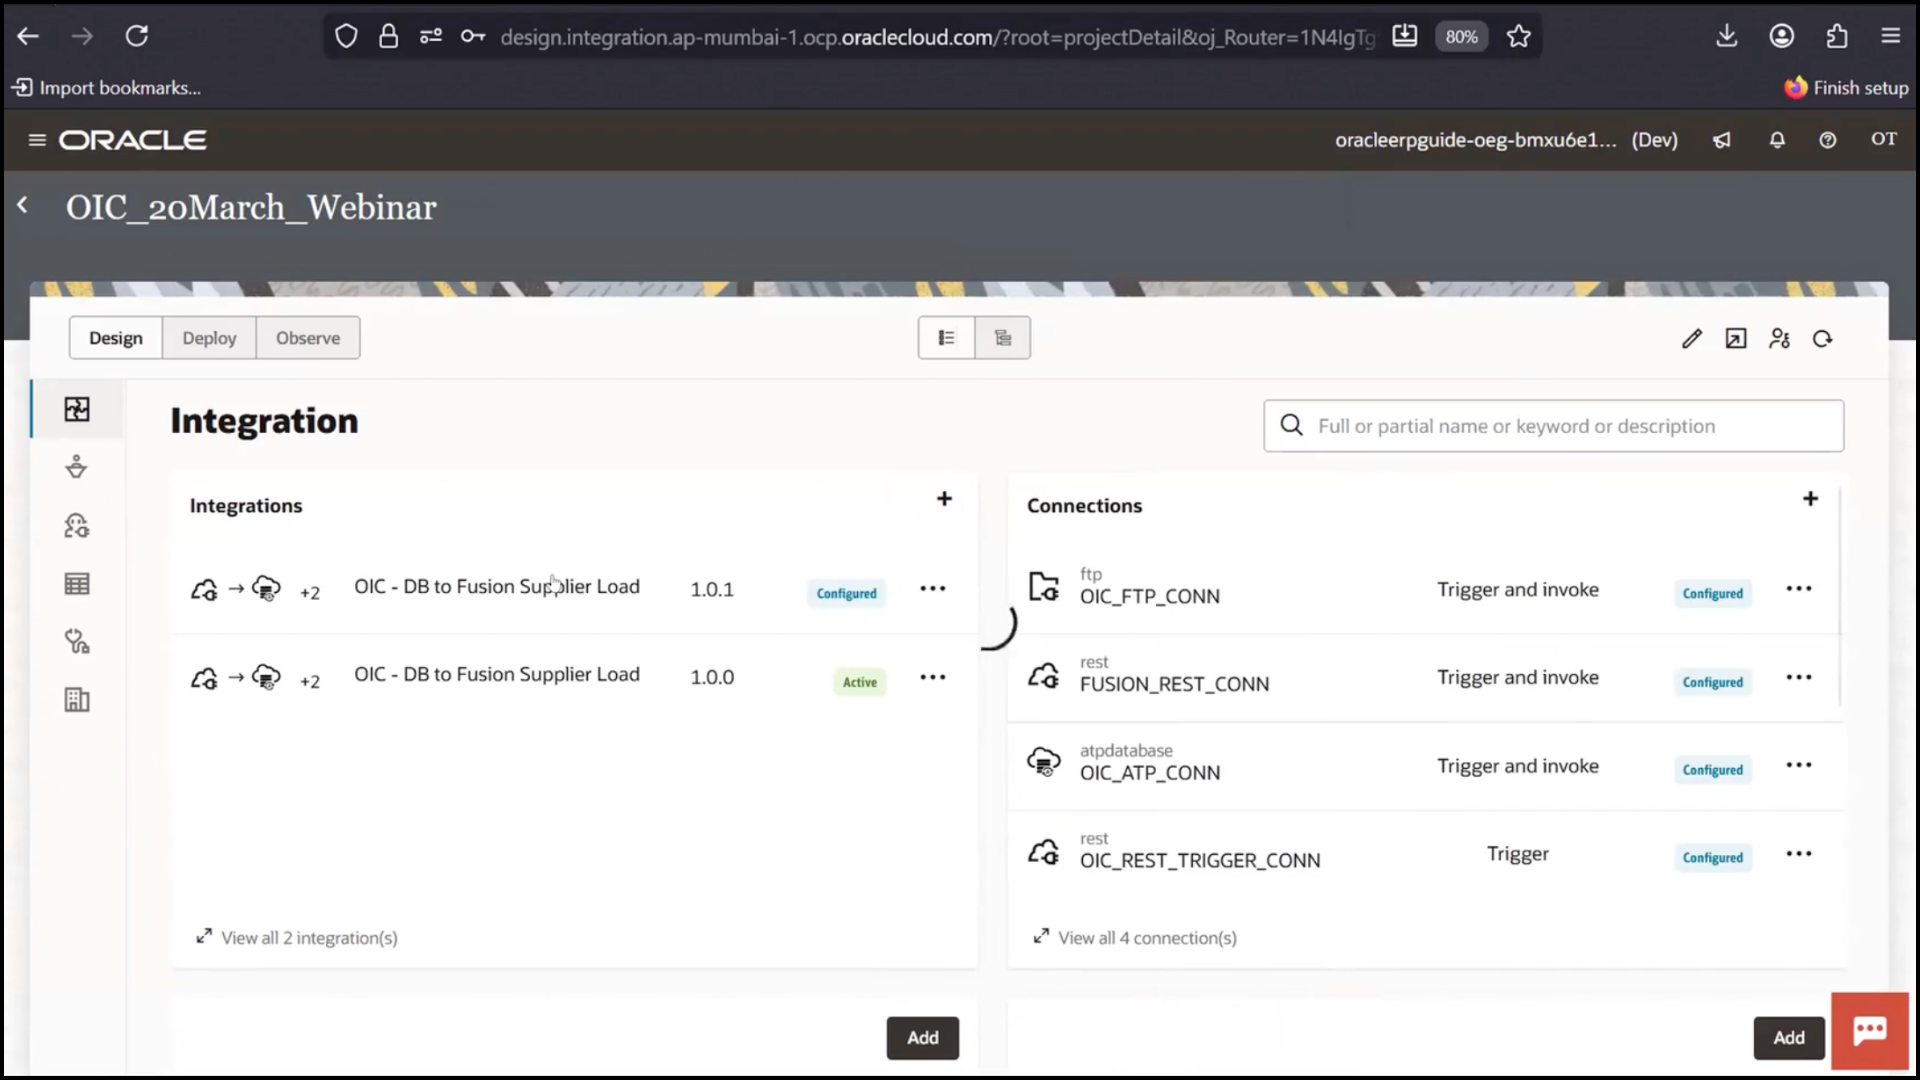
5. Observe two integrations are now available (old and new version)
Understanding Multiple Records Handling
1. Open the new version integration
2. Go to Mapper section
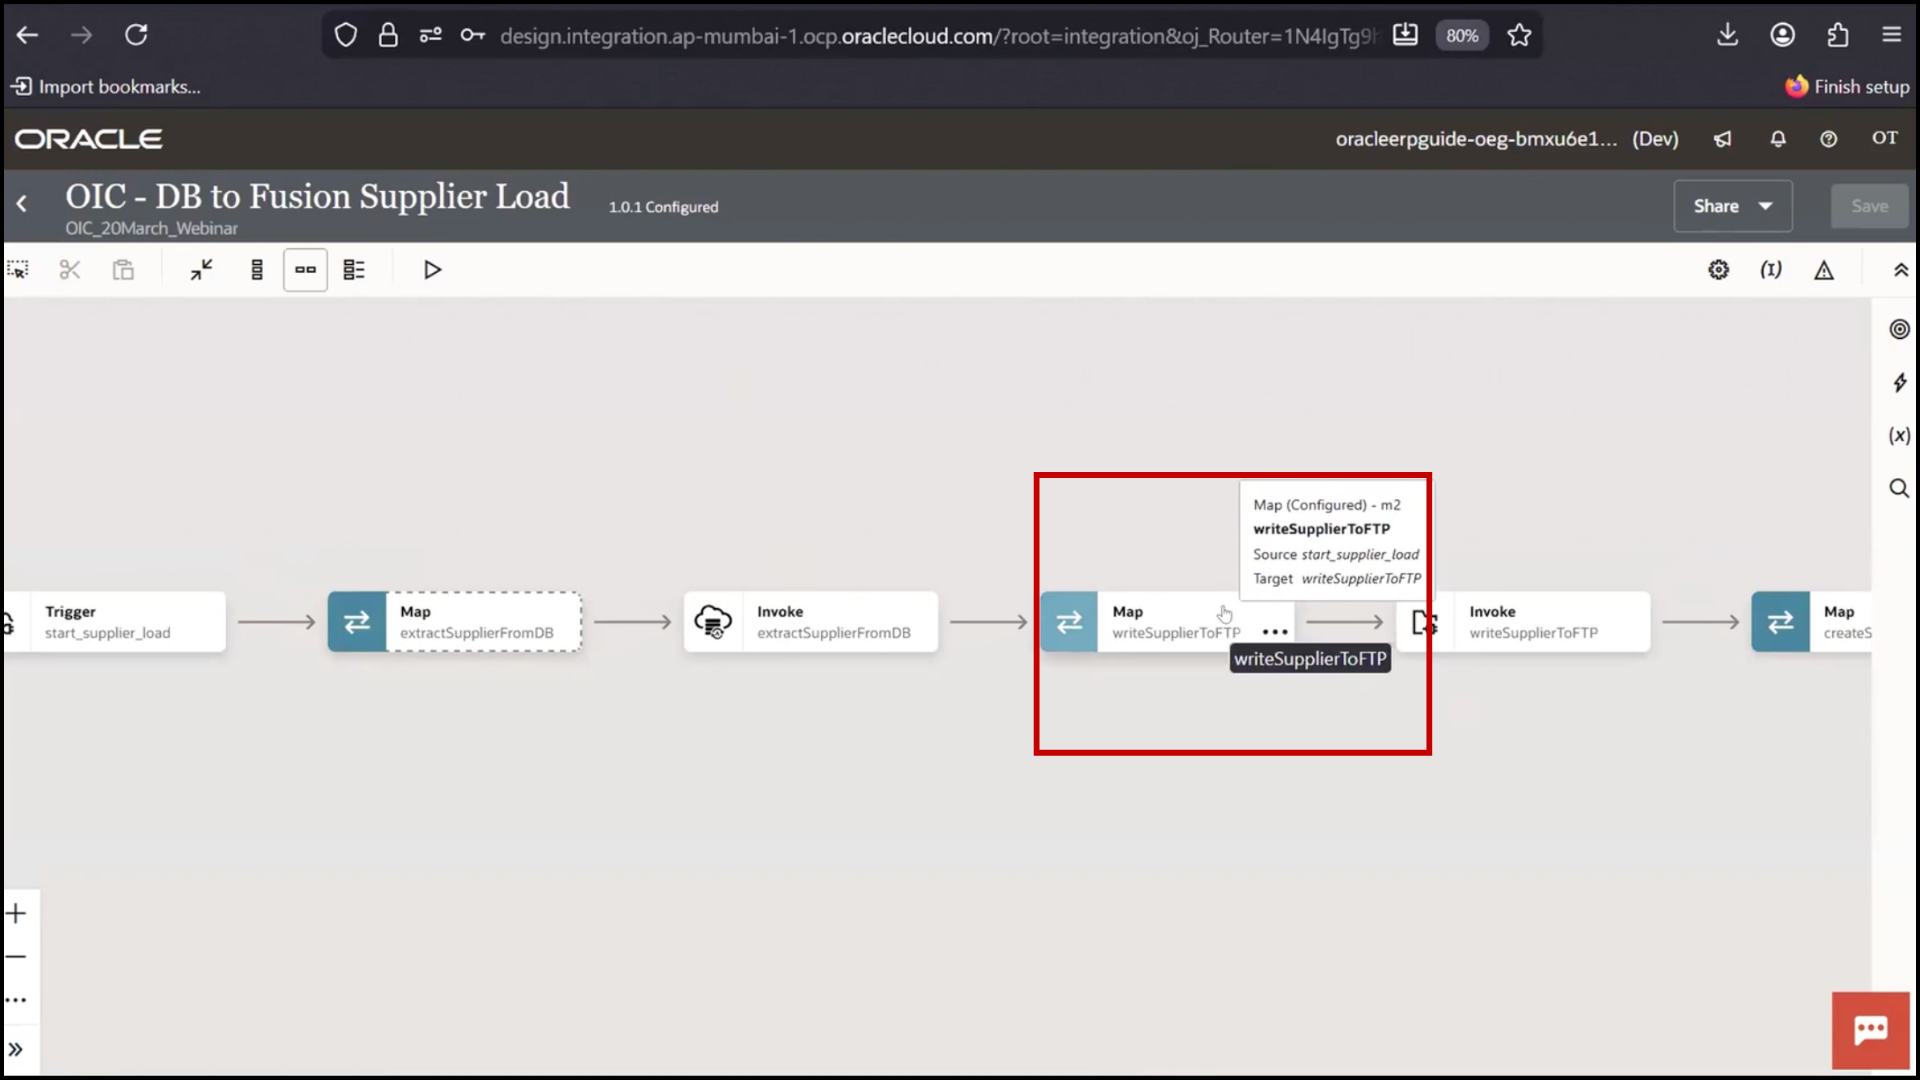
3. Observe All Suppliers node
4. Identify it as single object or array using symbol
5. Verify Extract Suppliers is also an array
6. Understand both source and target support multiple records
7. Note FTP can handle array directly without loop
8. Note Fusion creation requires looping
9. Save
Adding For Each Loop
1. Go to Actions section
2. Locate For Each under Logic
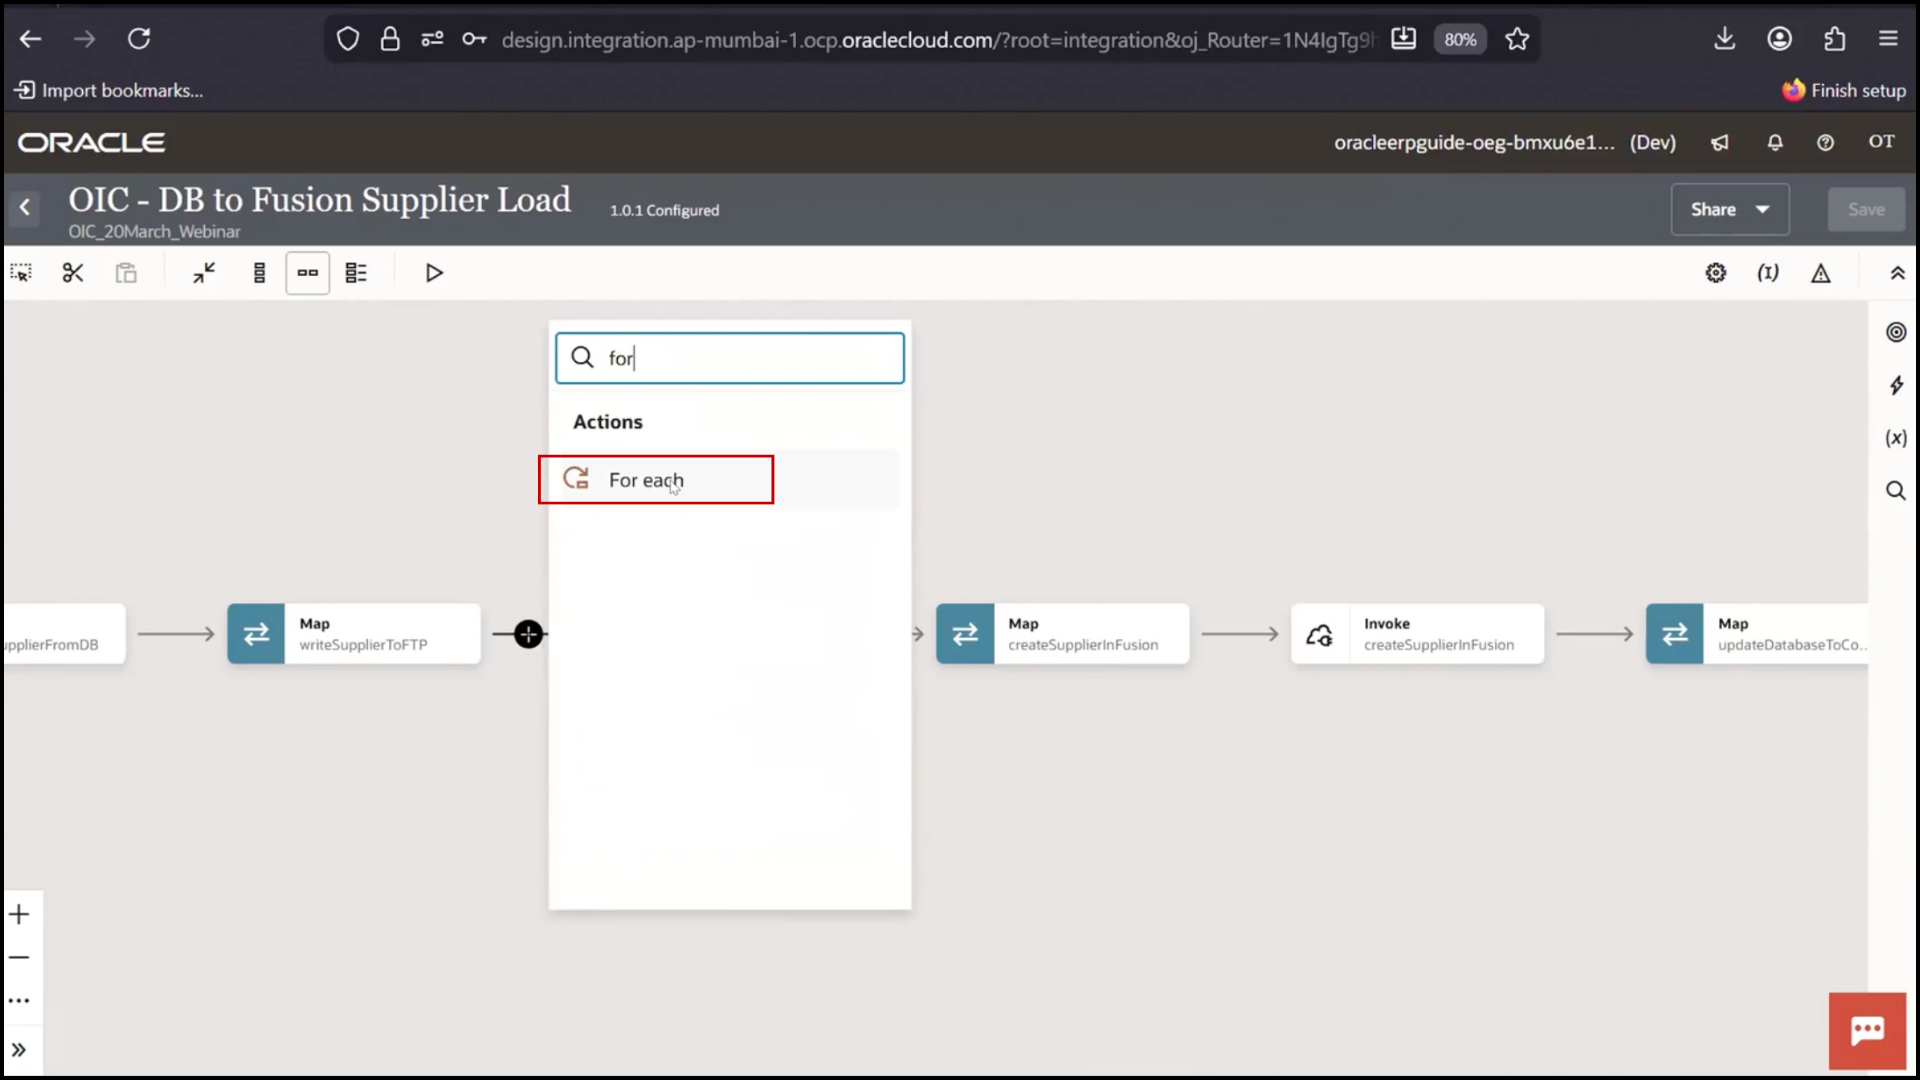
3. Drag and drop For Each into flow
4. If drag fails, click + button
5. Search For Each
6. Select For Each
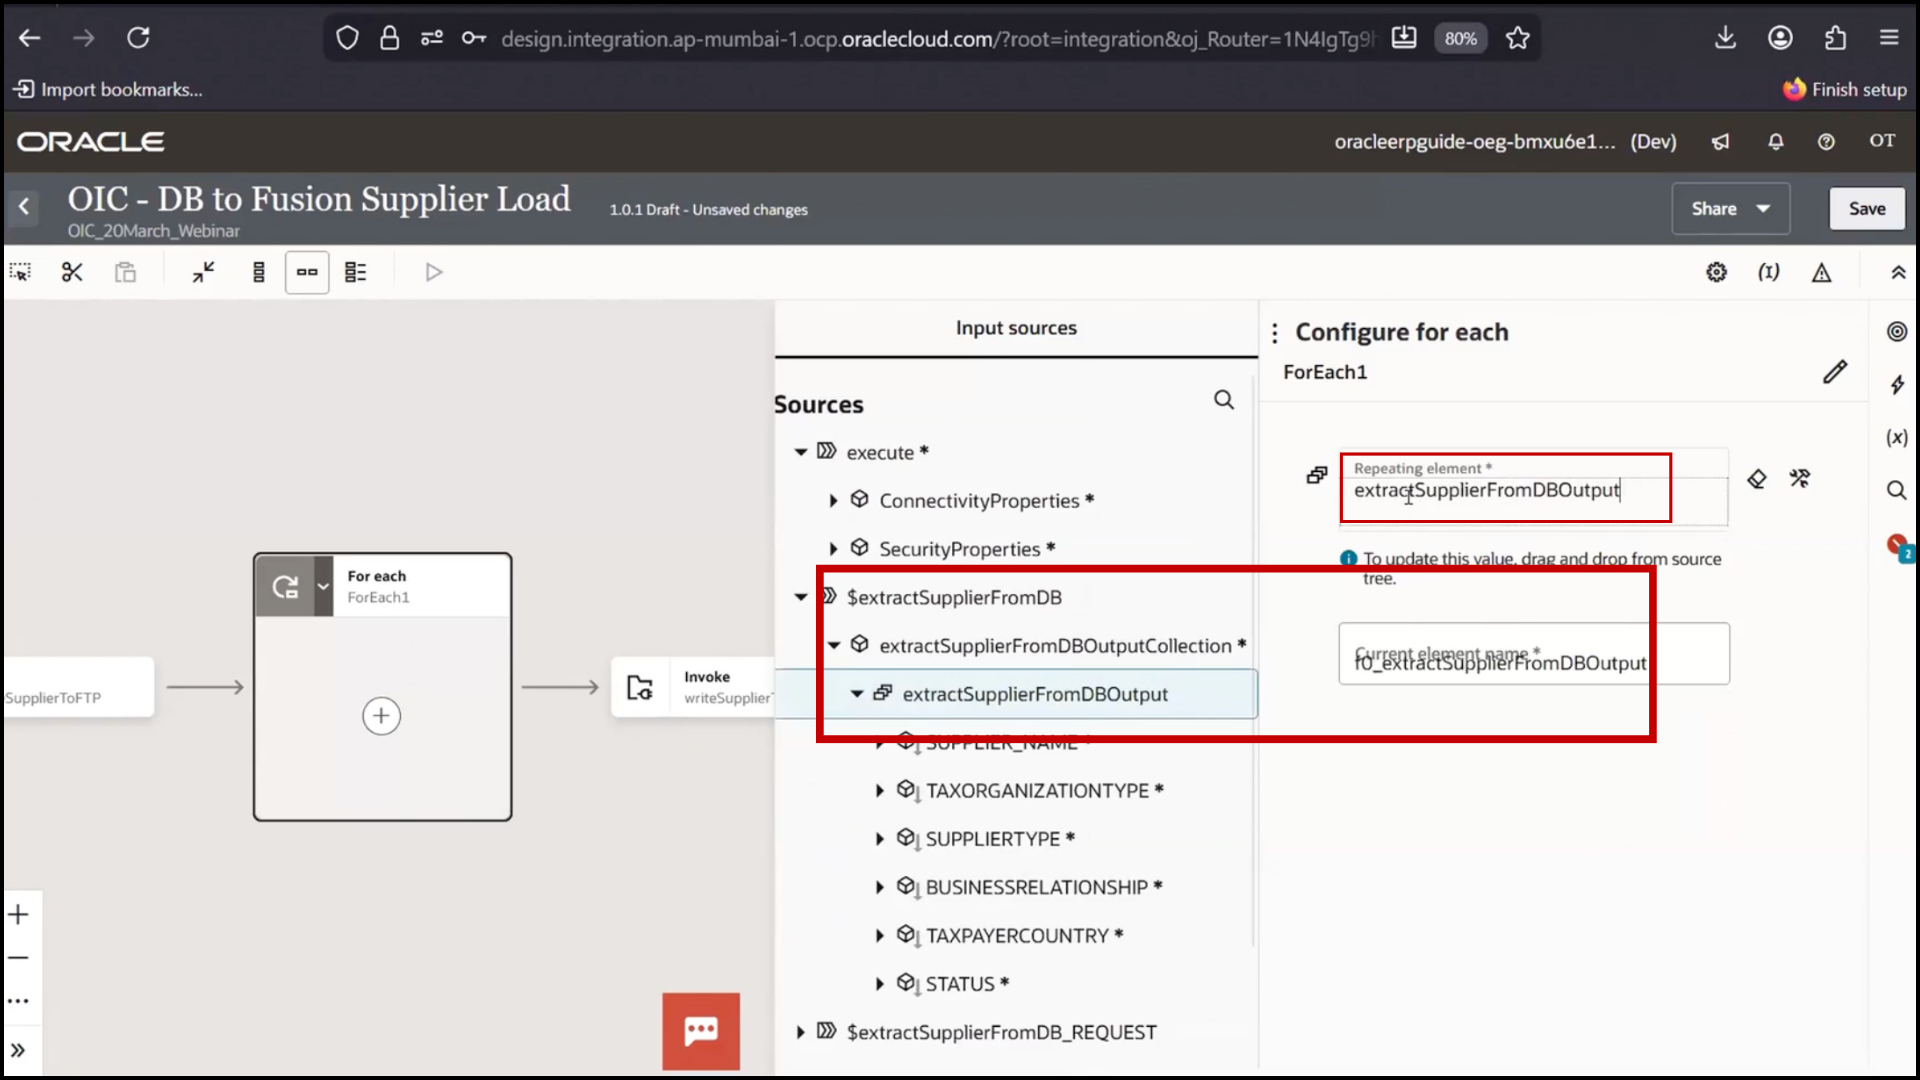
Configuring For Each Loop
1. Select repeating element from DB response array
2. Drag array object into For Each
3. Set variable name: Current Supplier
4. Confirm loop will iterate for each record
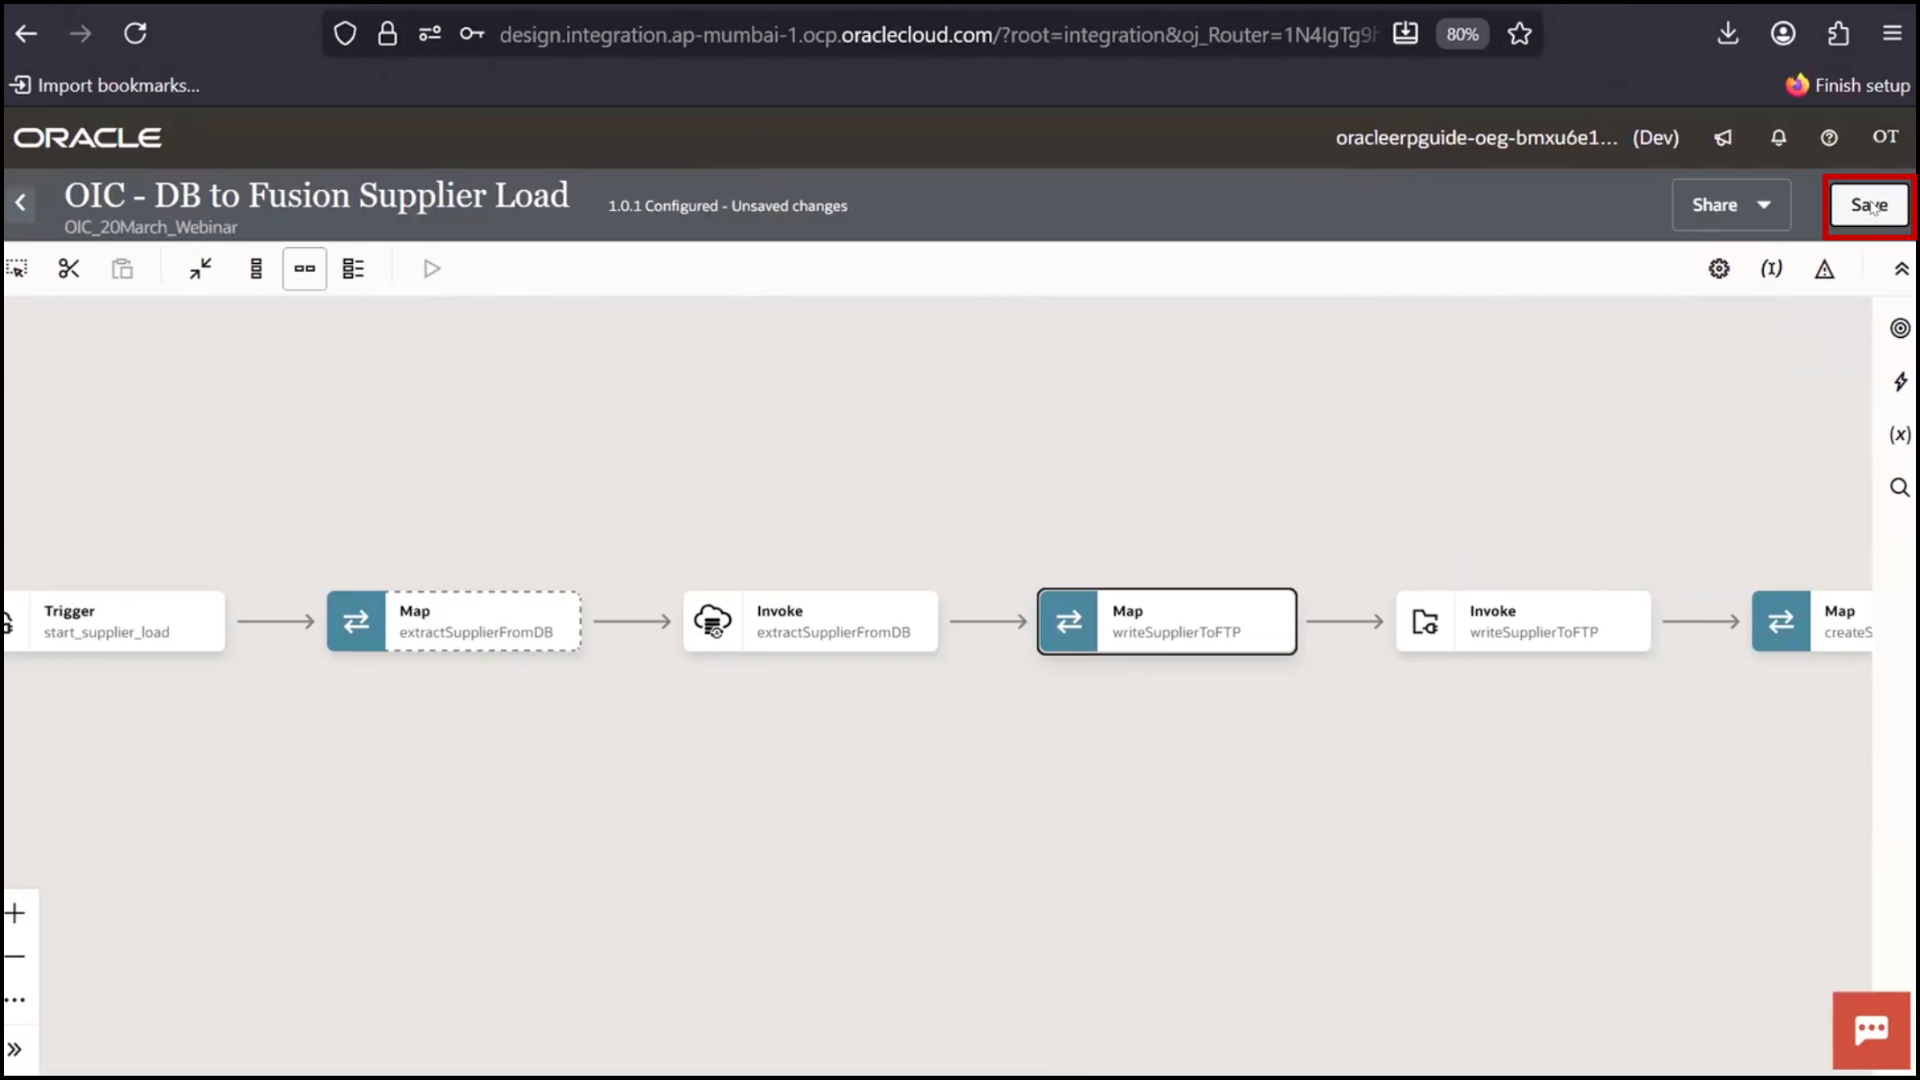
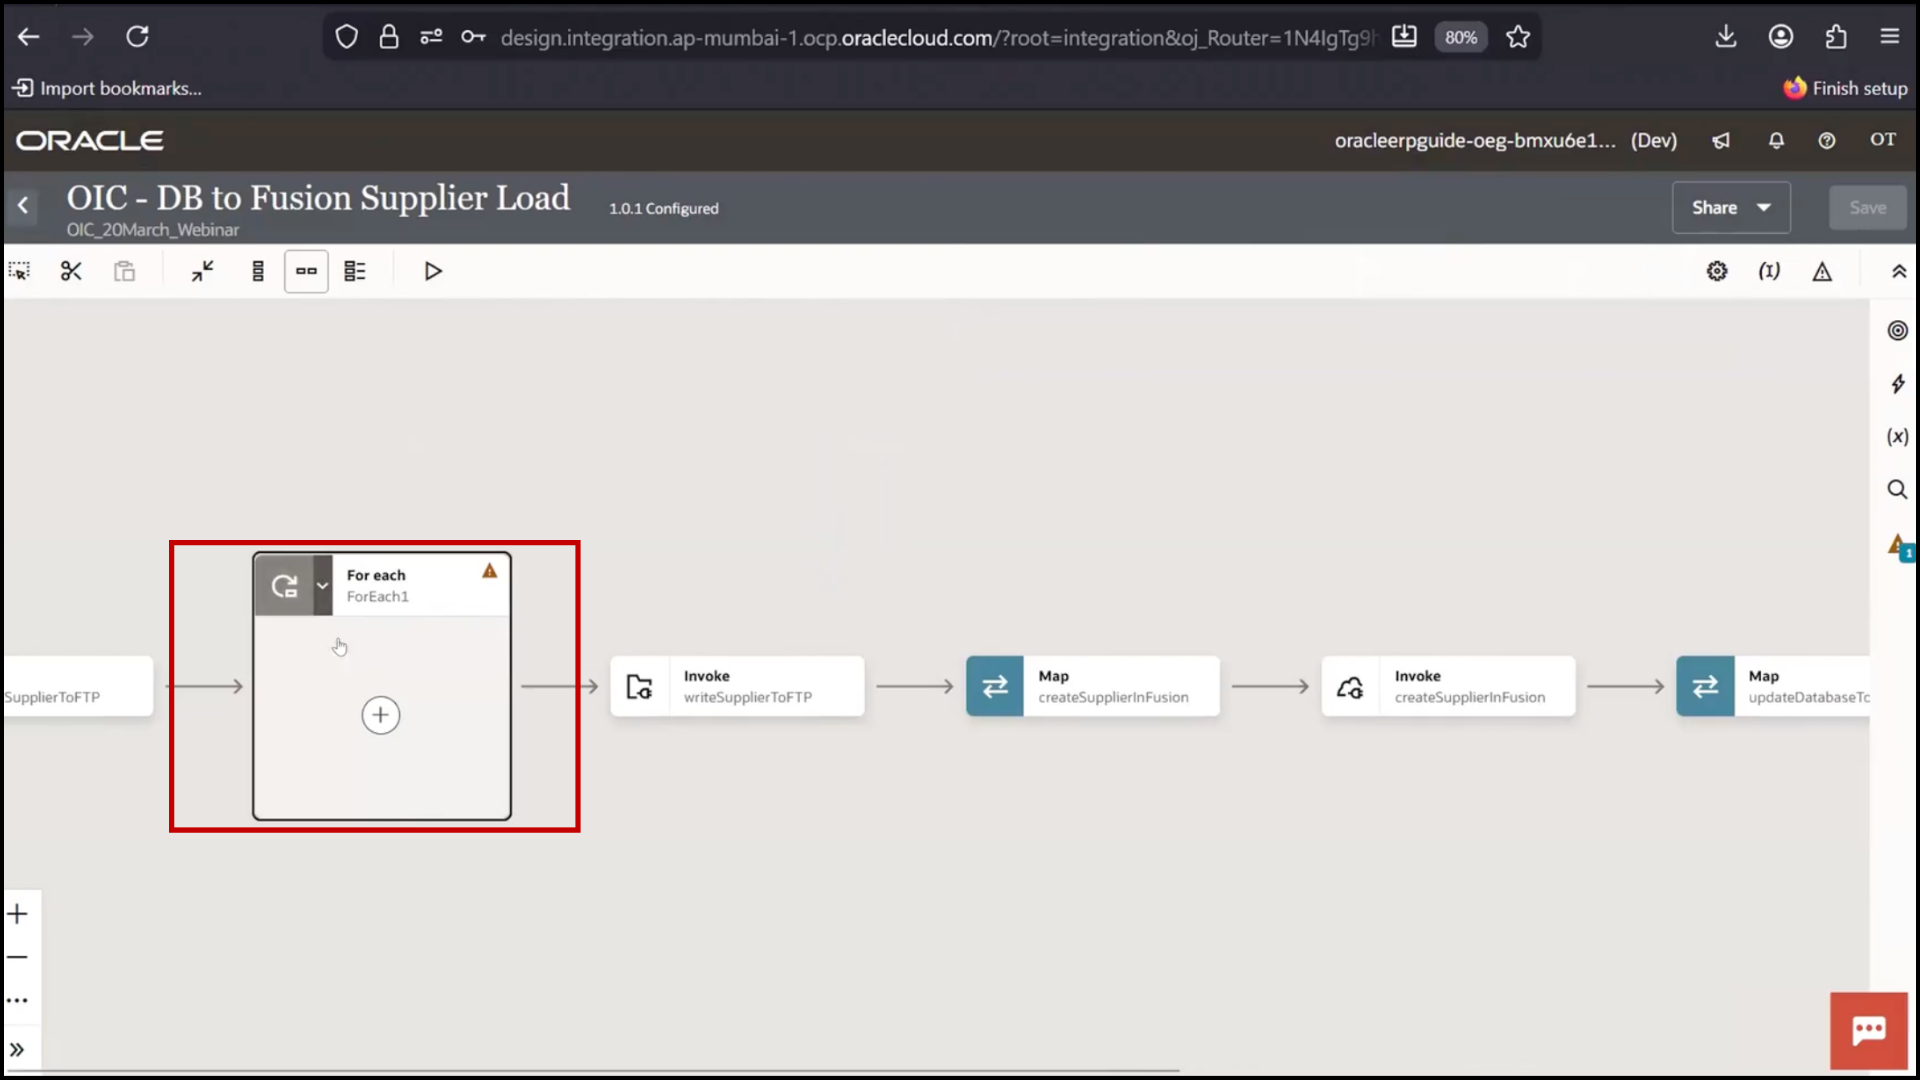
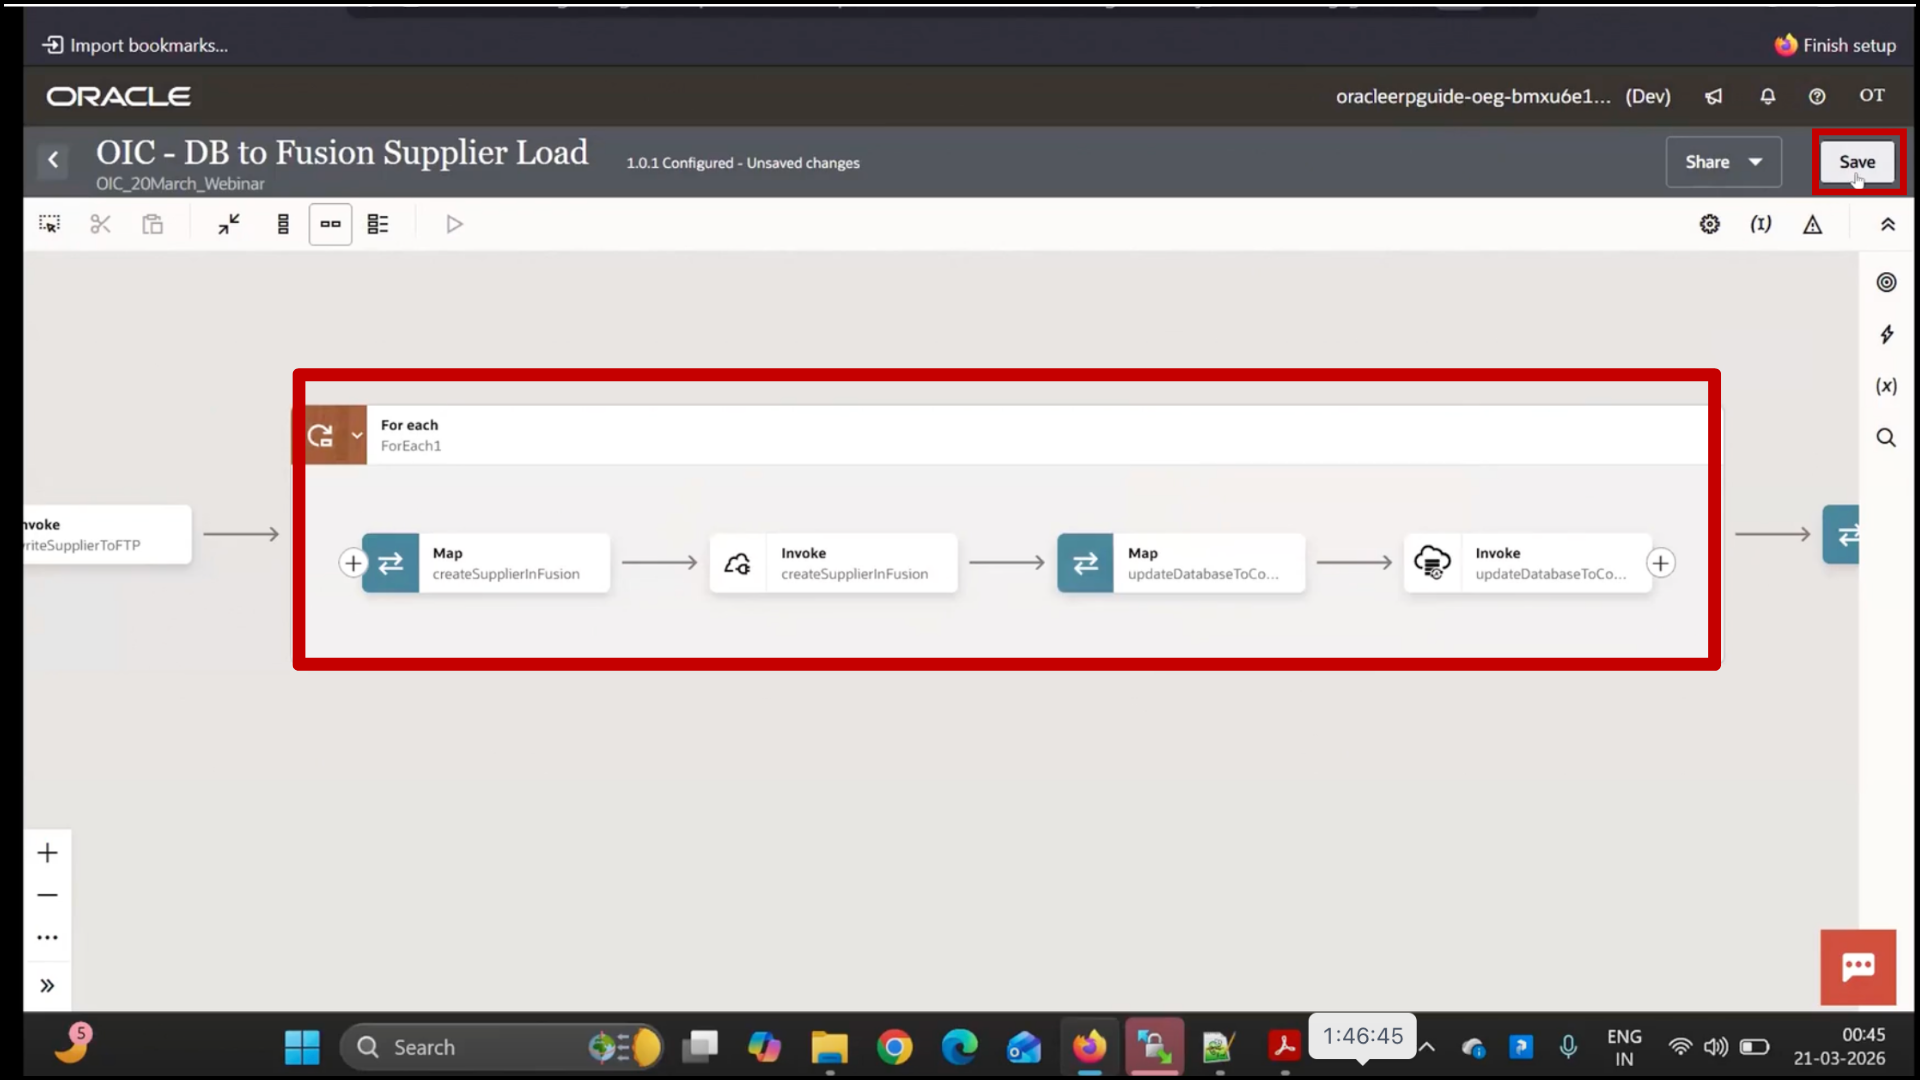
Repositioning Loop
1. Identify correct placement (after FTP step)
2. Select For Each
3. Click Cut
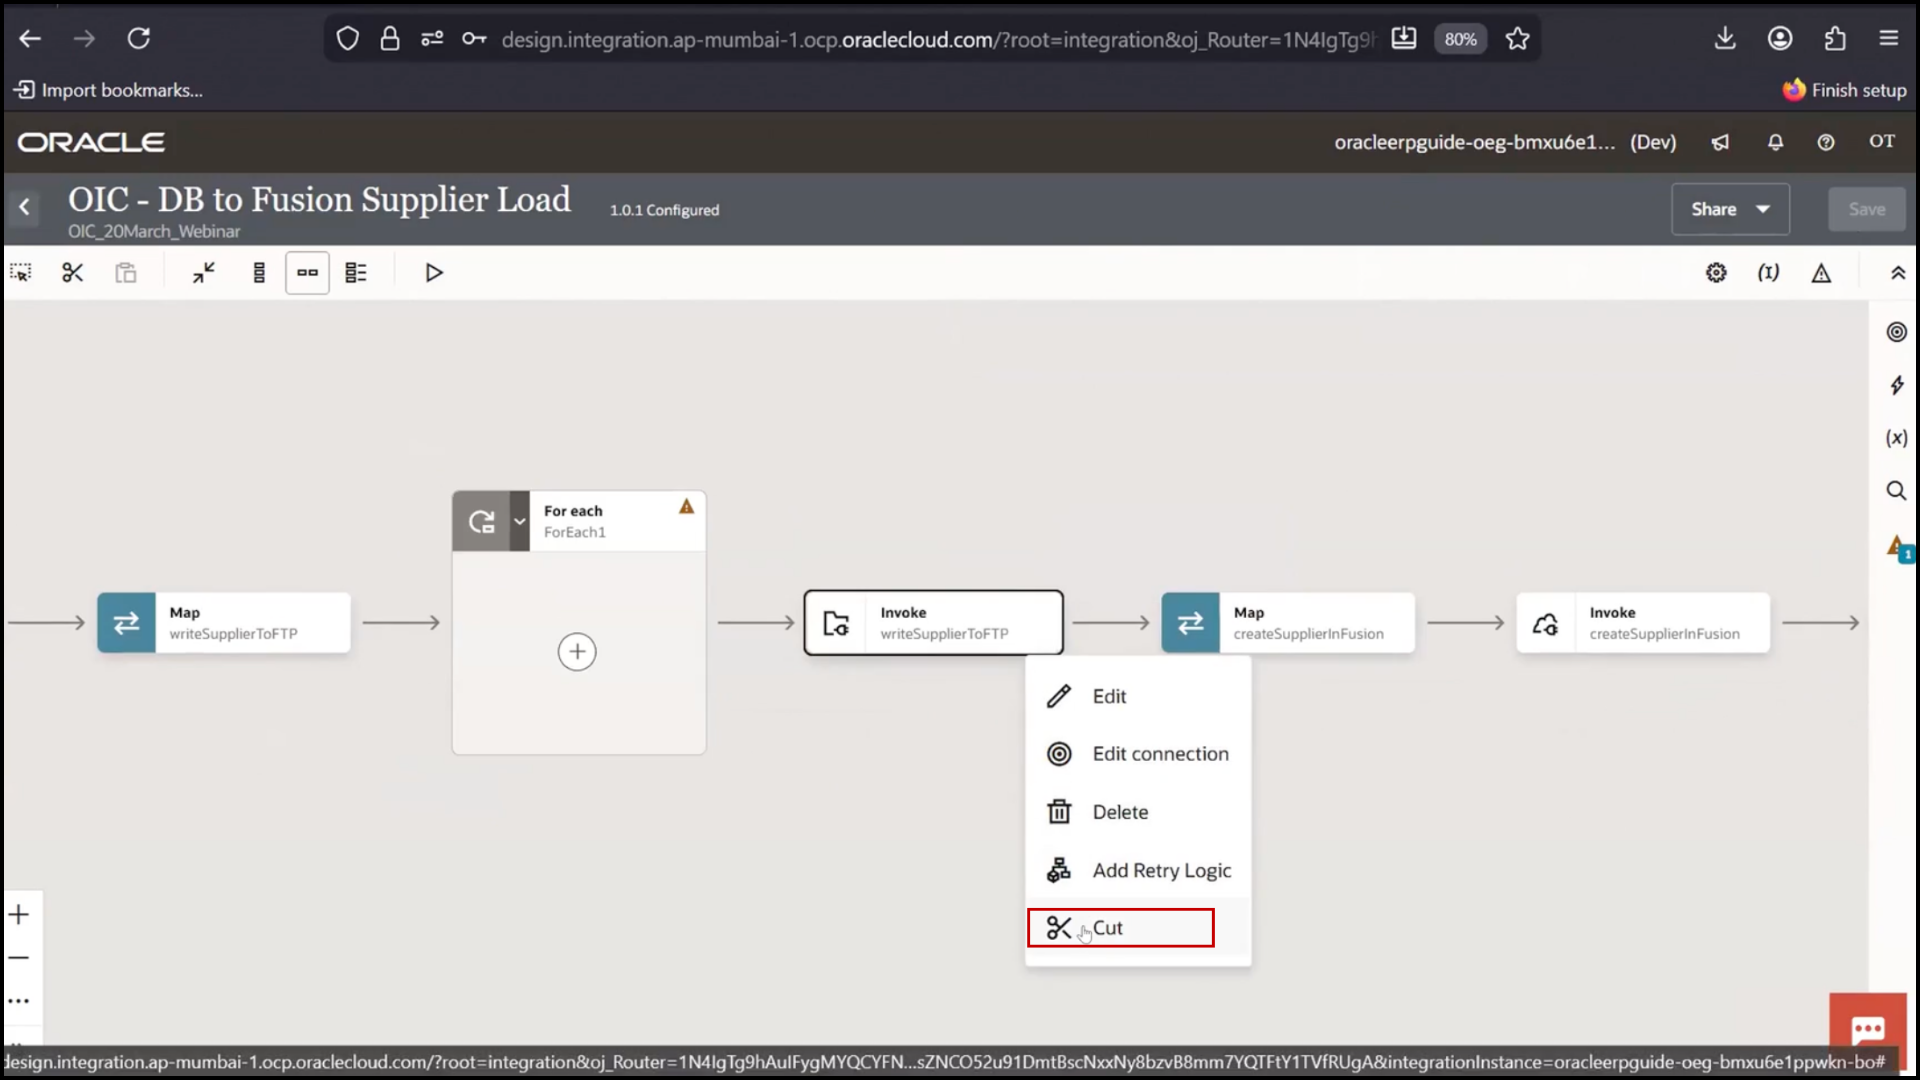
4. Move to correct position
5. Click Paste
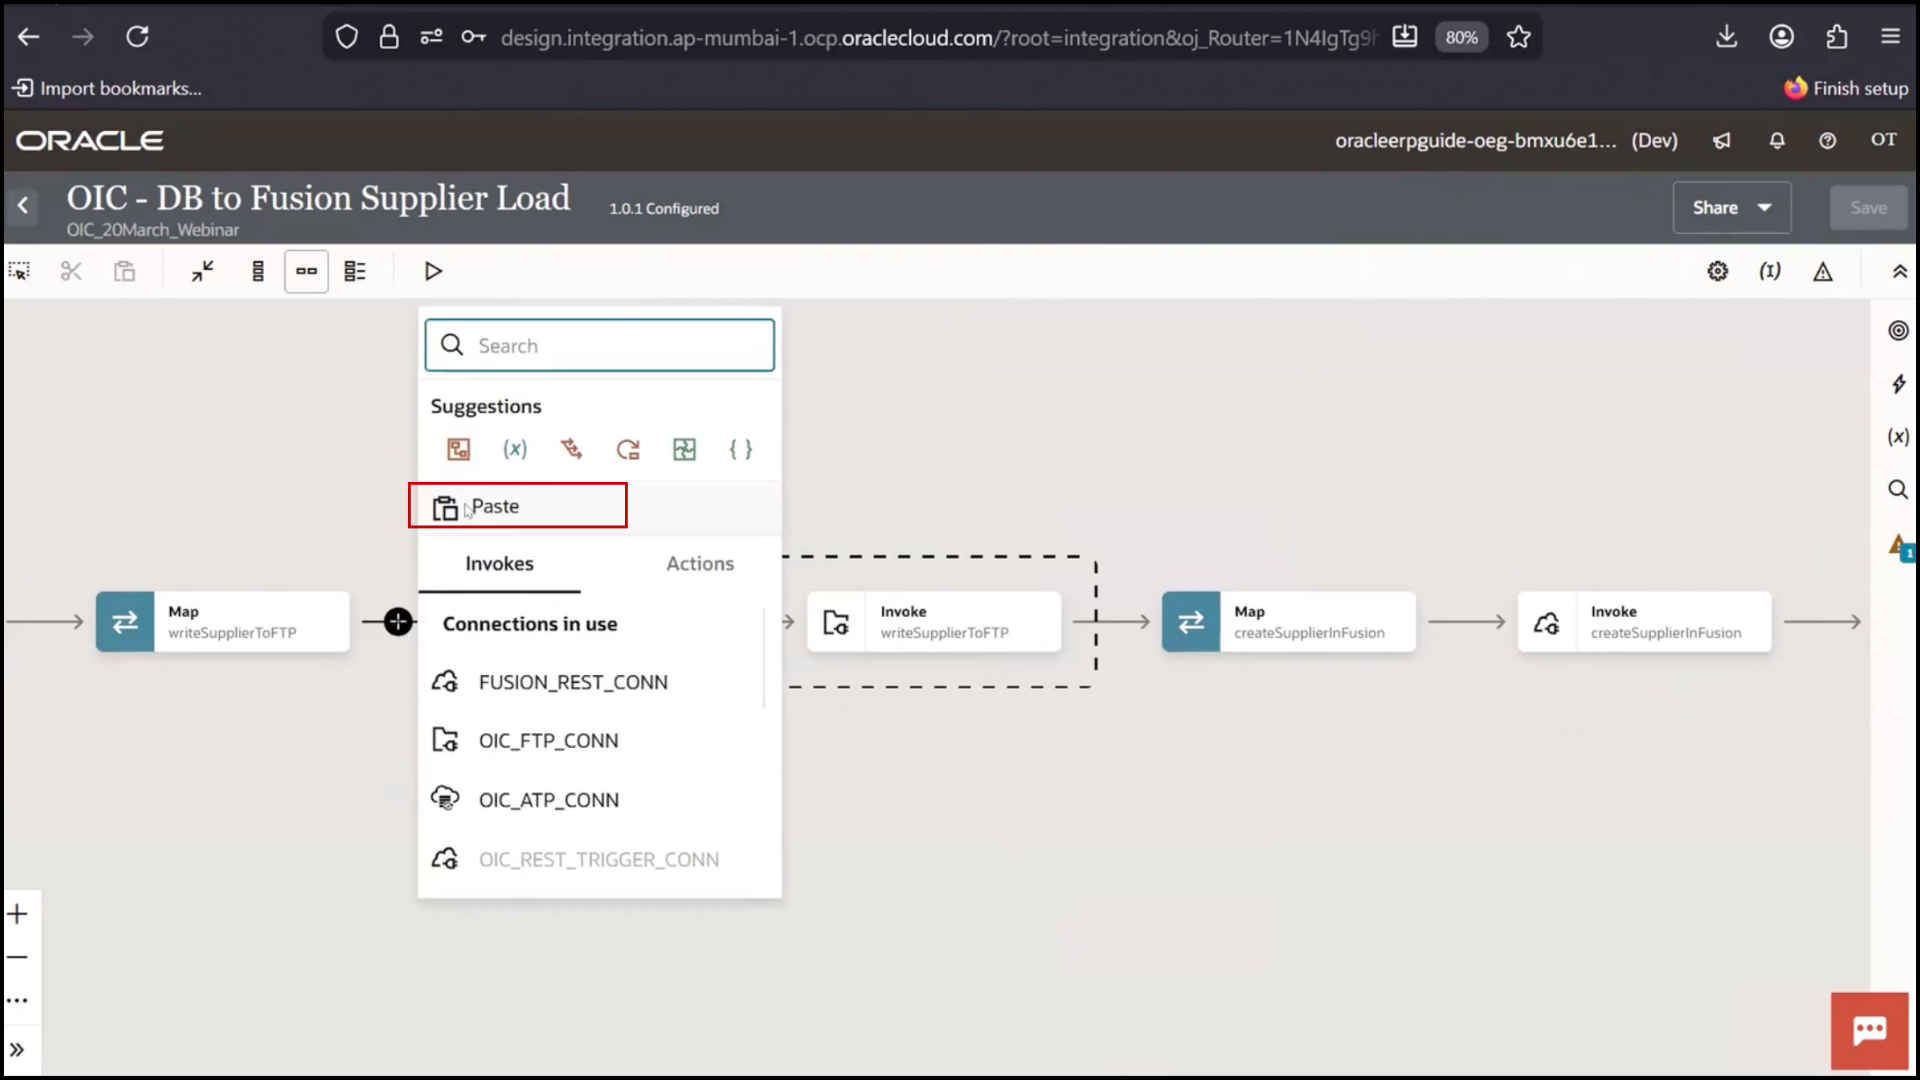
6. Click Save
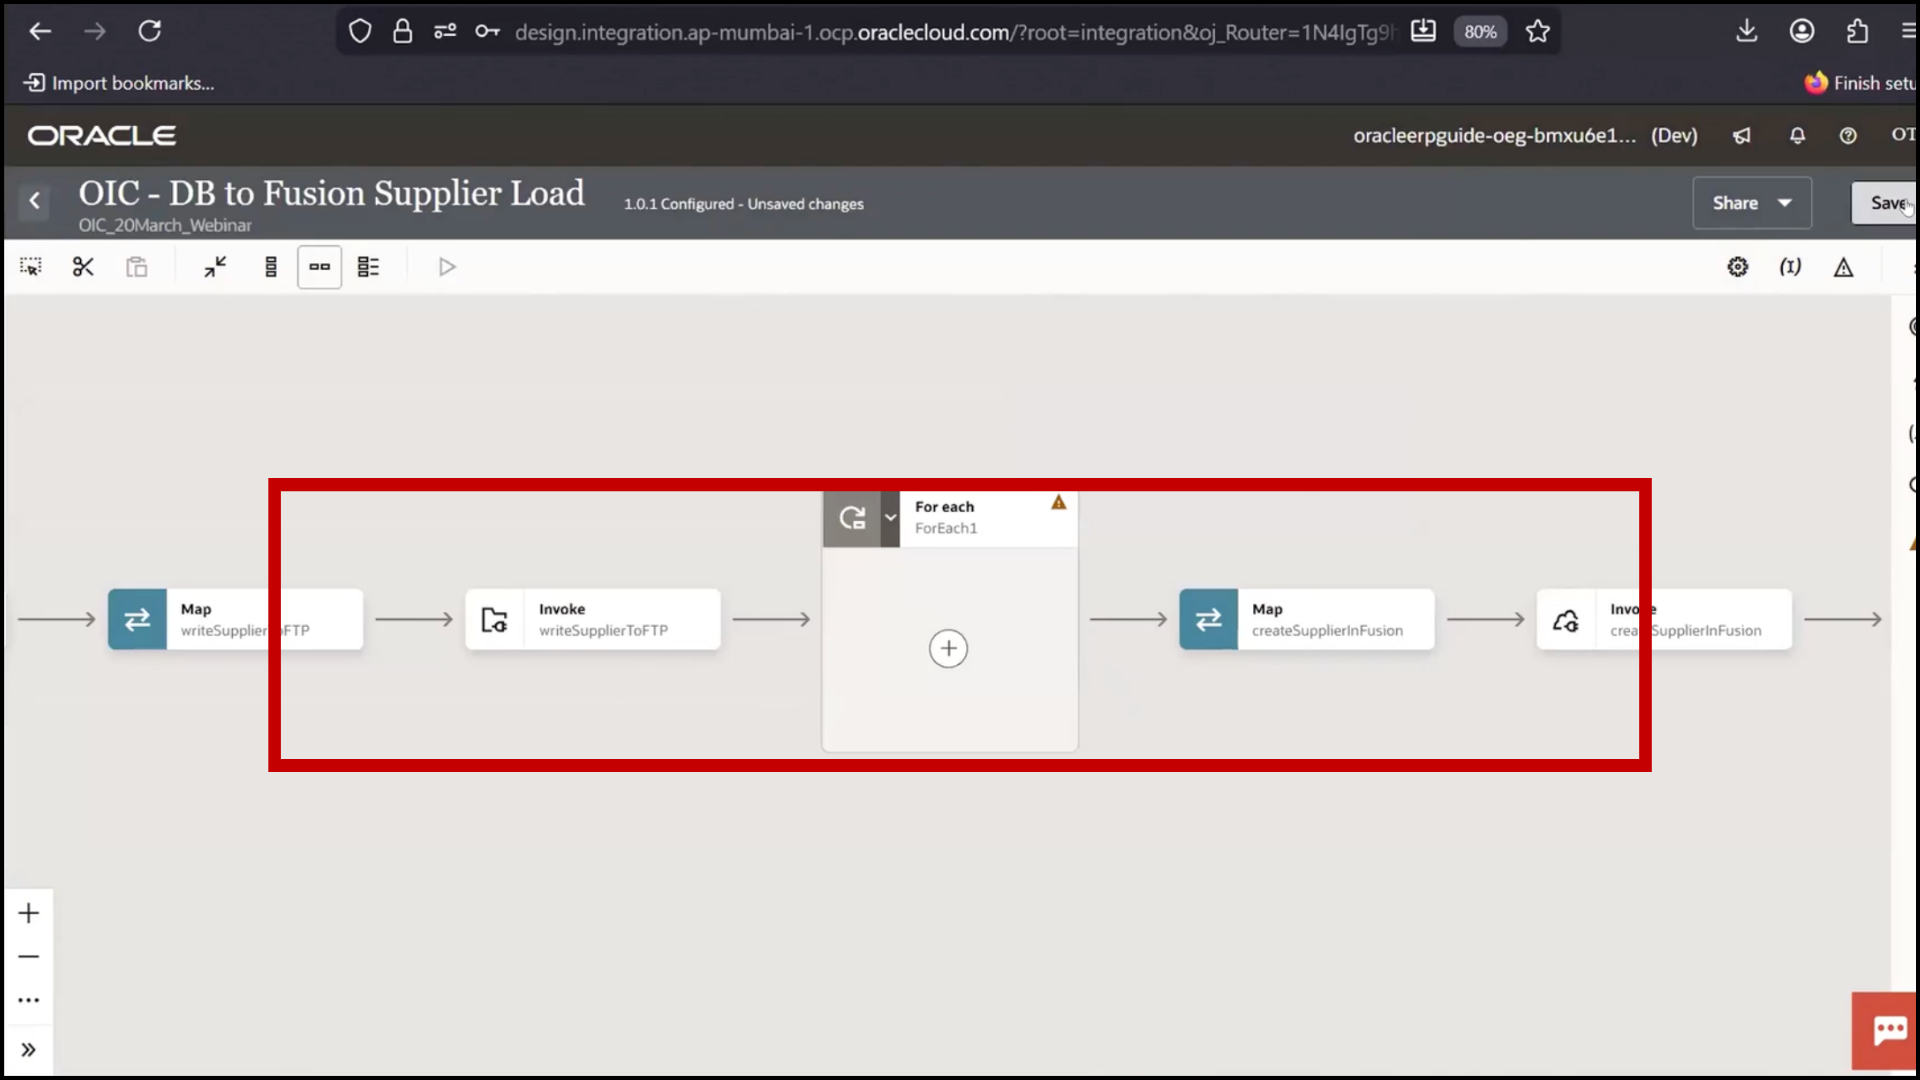
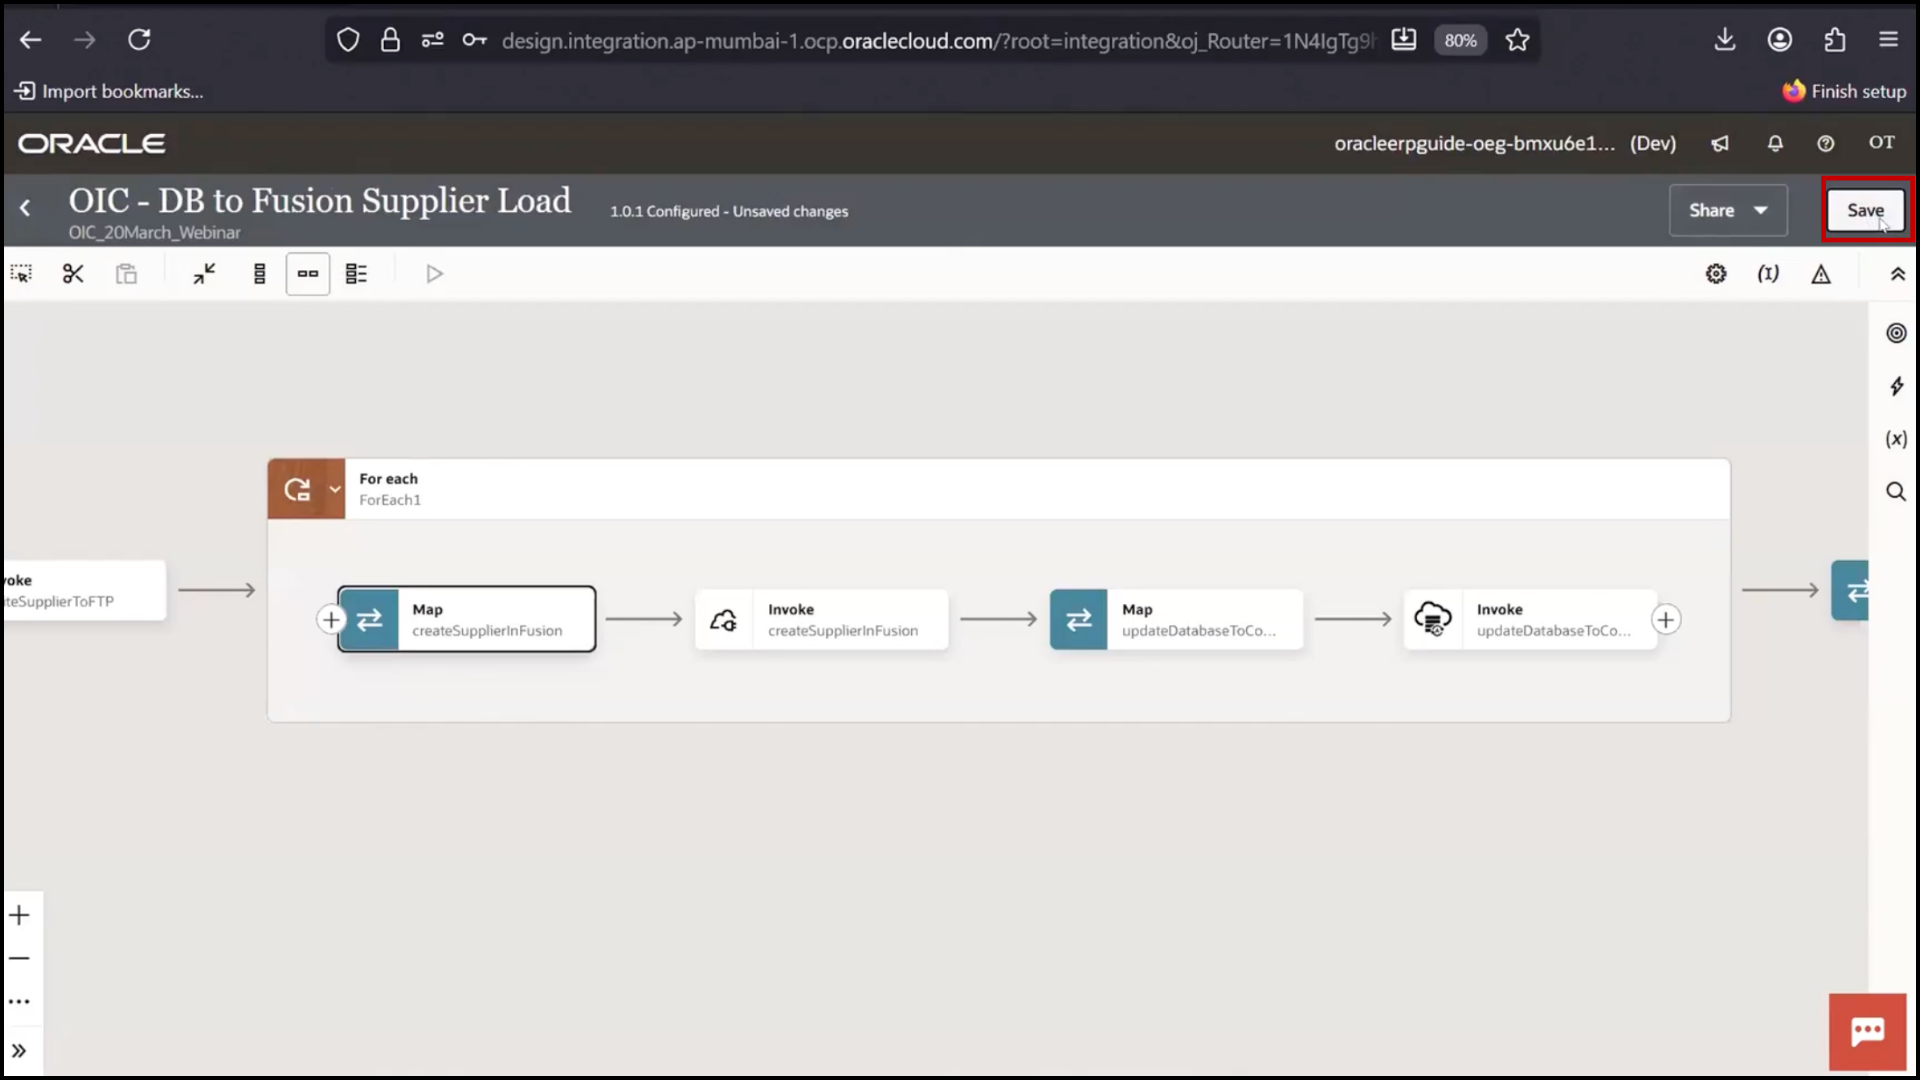
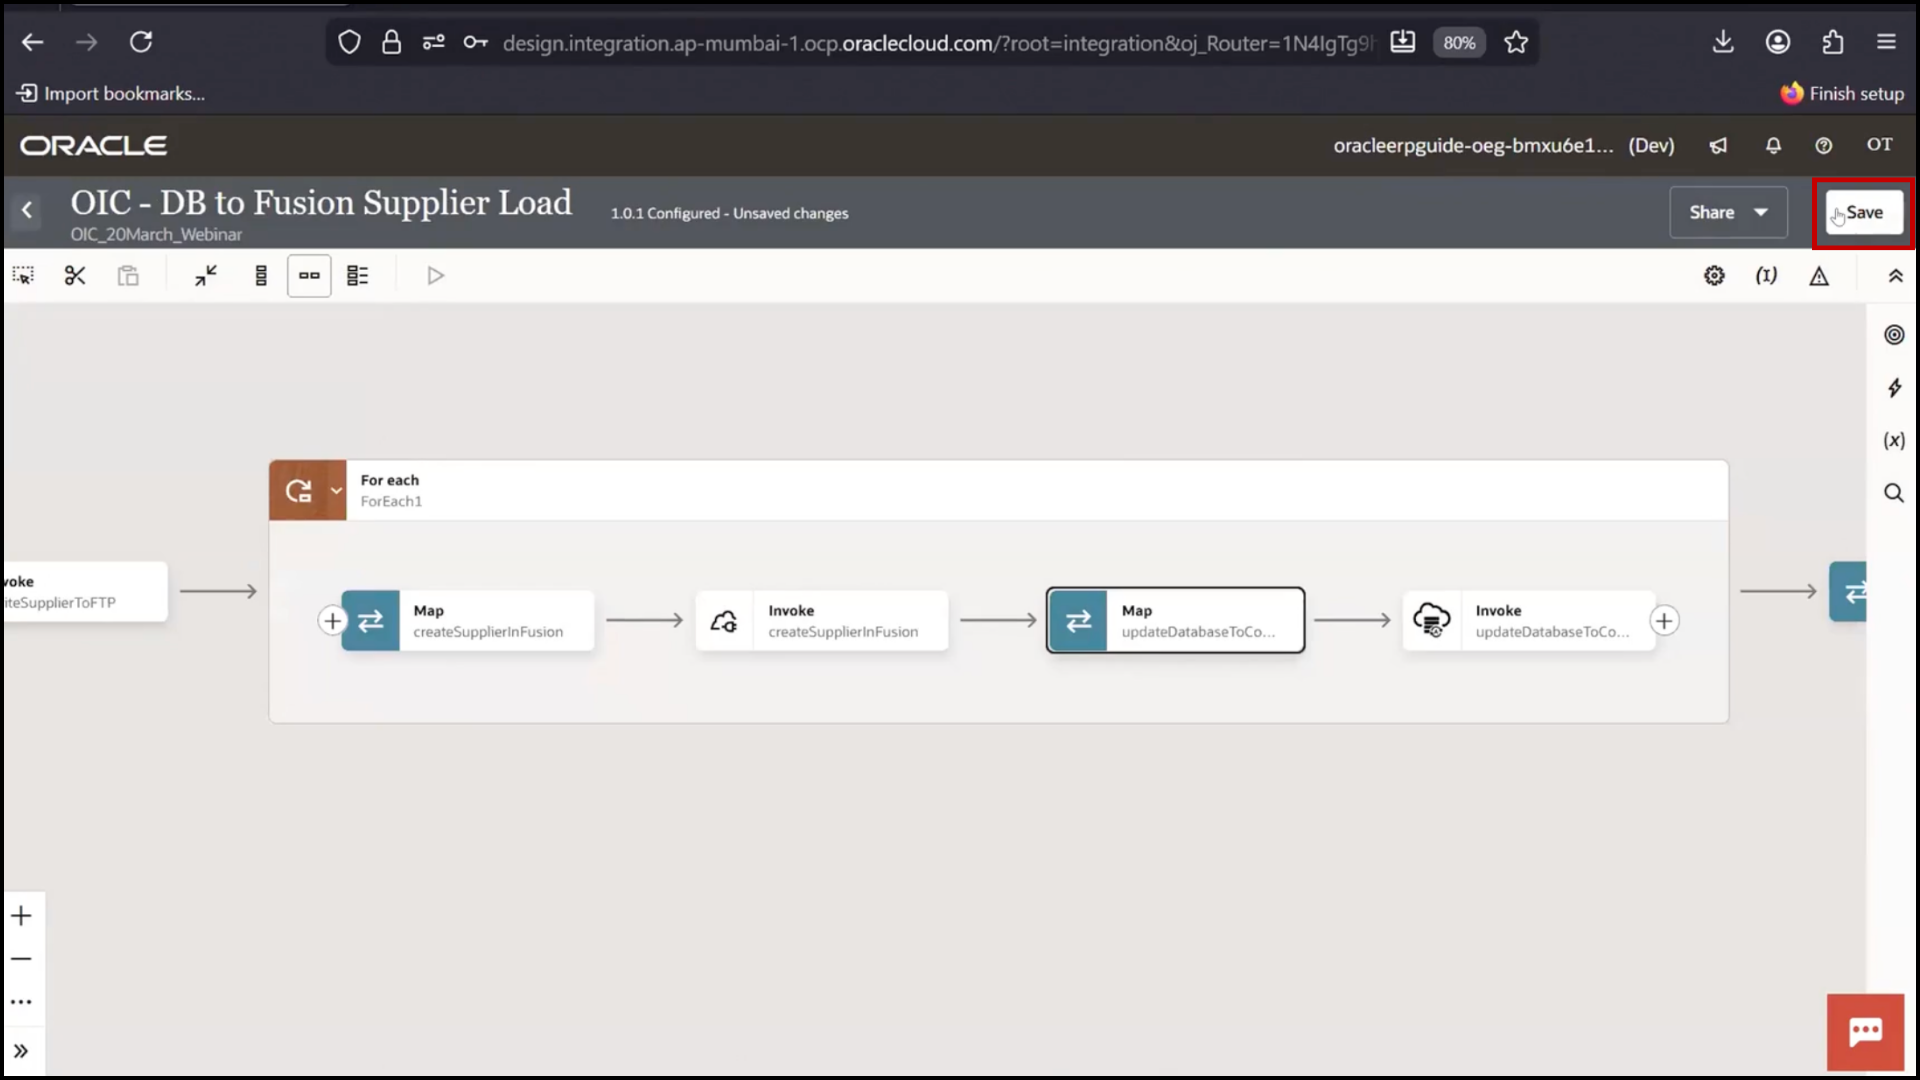
Moving Steps Inside Loop
1. Select multiple steps (Fusion + DB update)
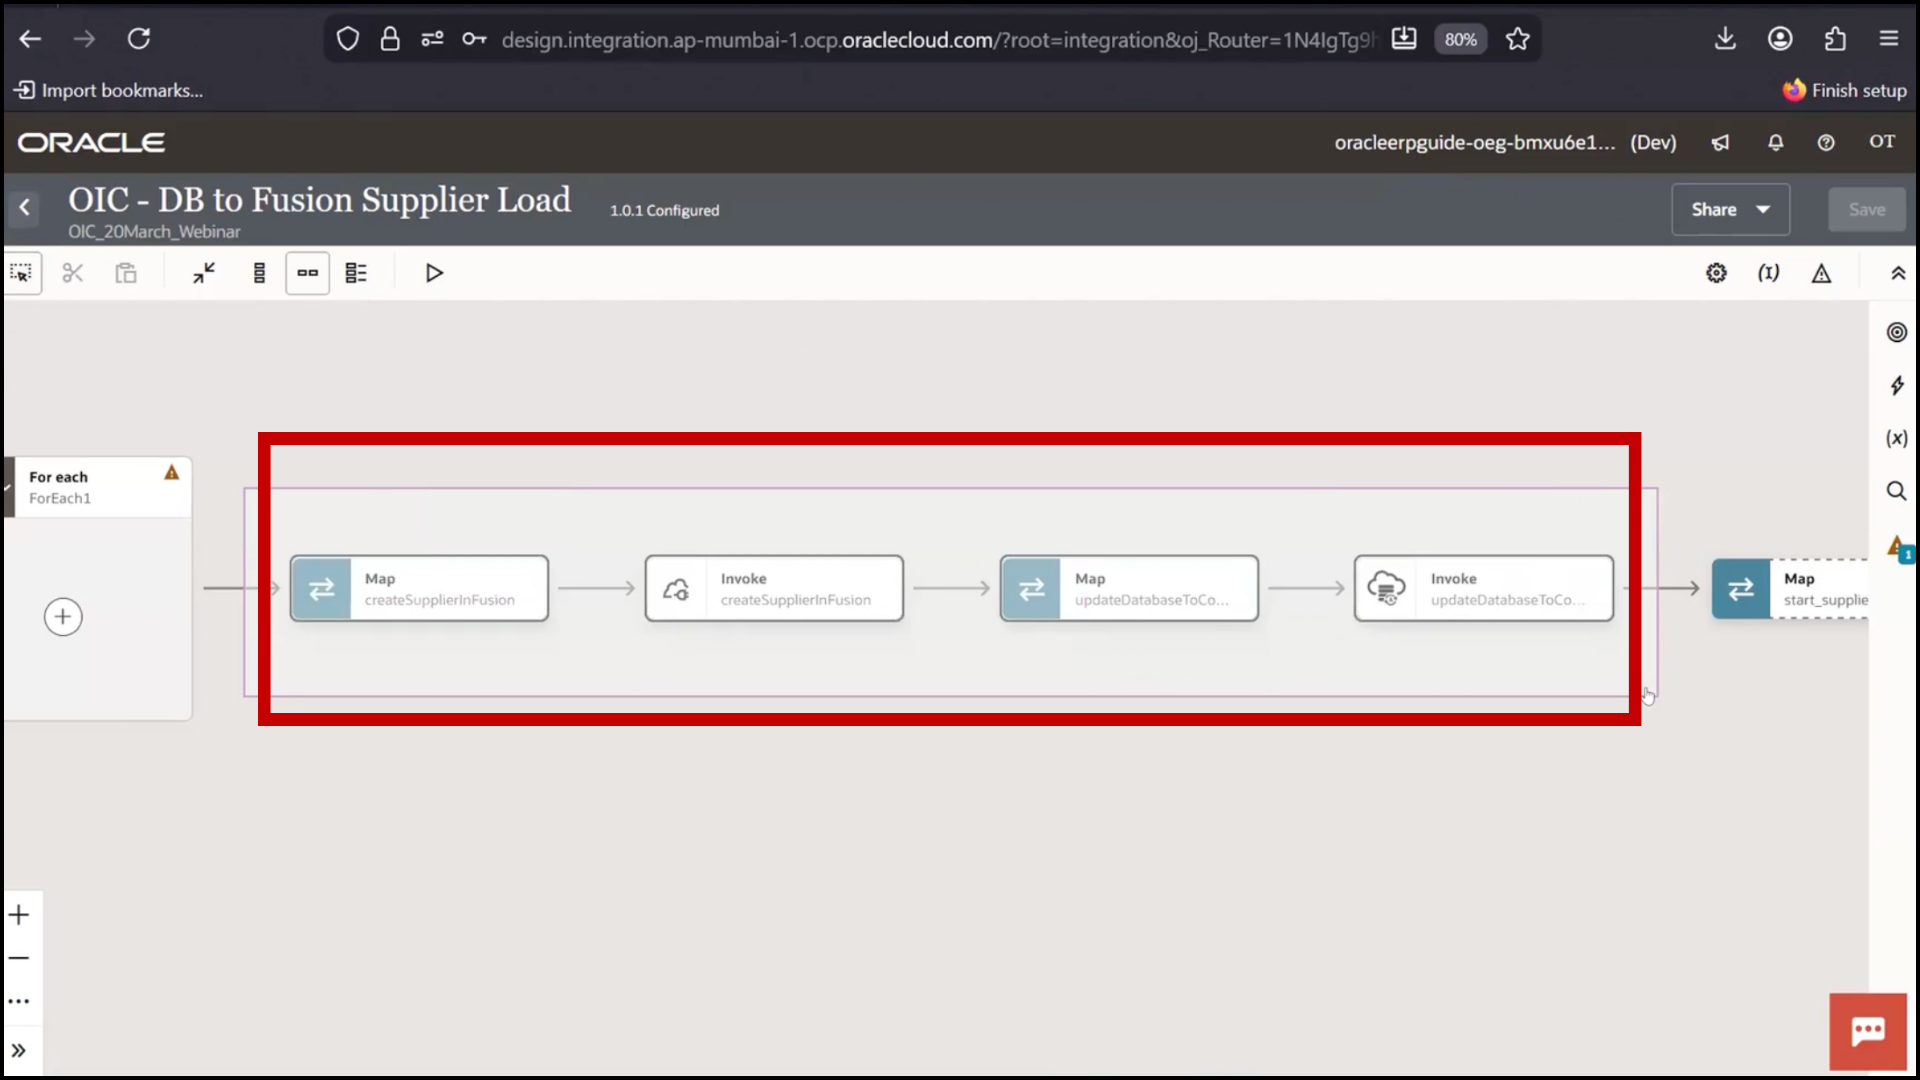
2. Use Select option
3. Click Cut
4. Click + inside For Each
5. Paste steps inside loop
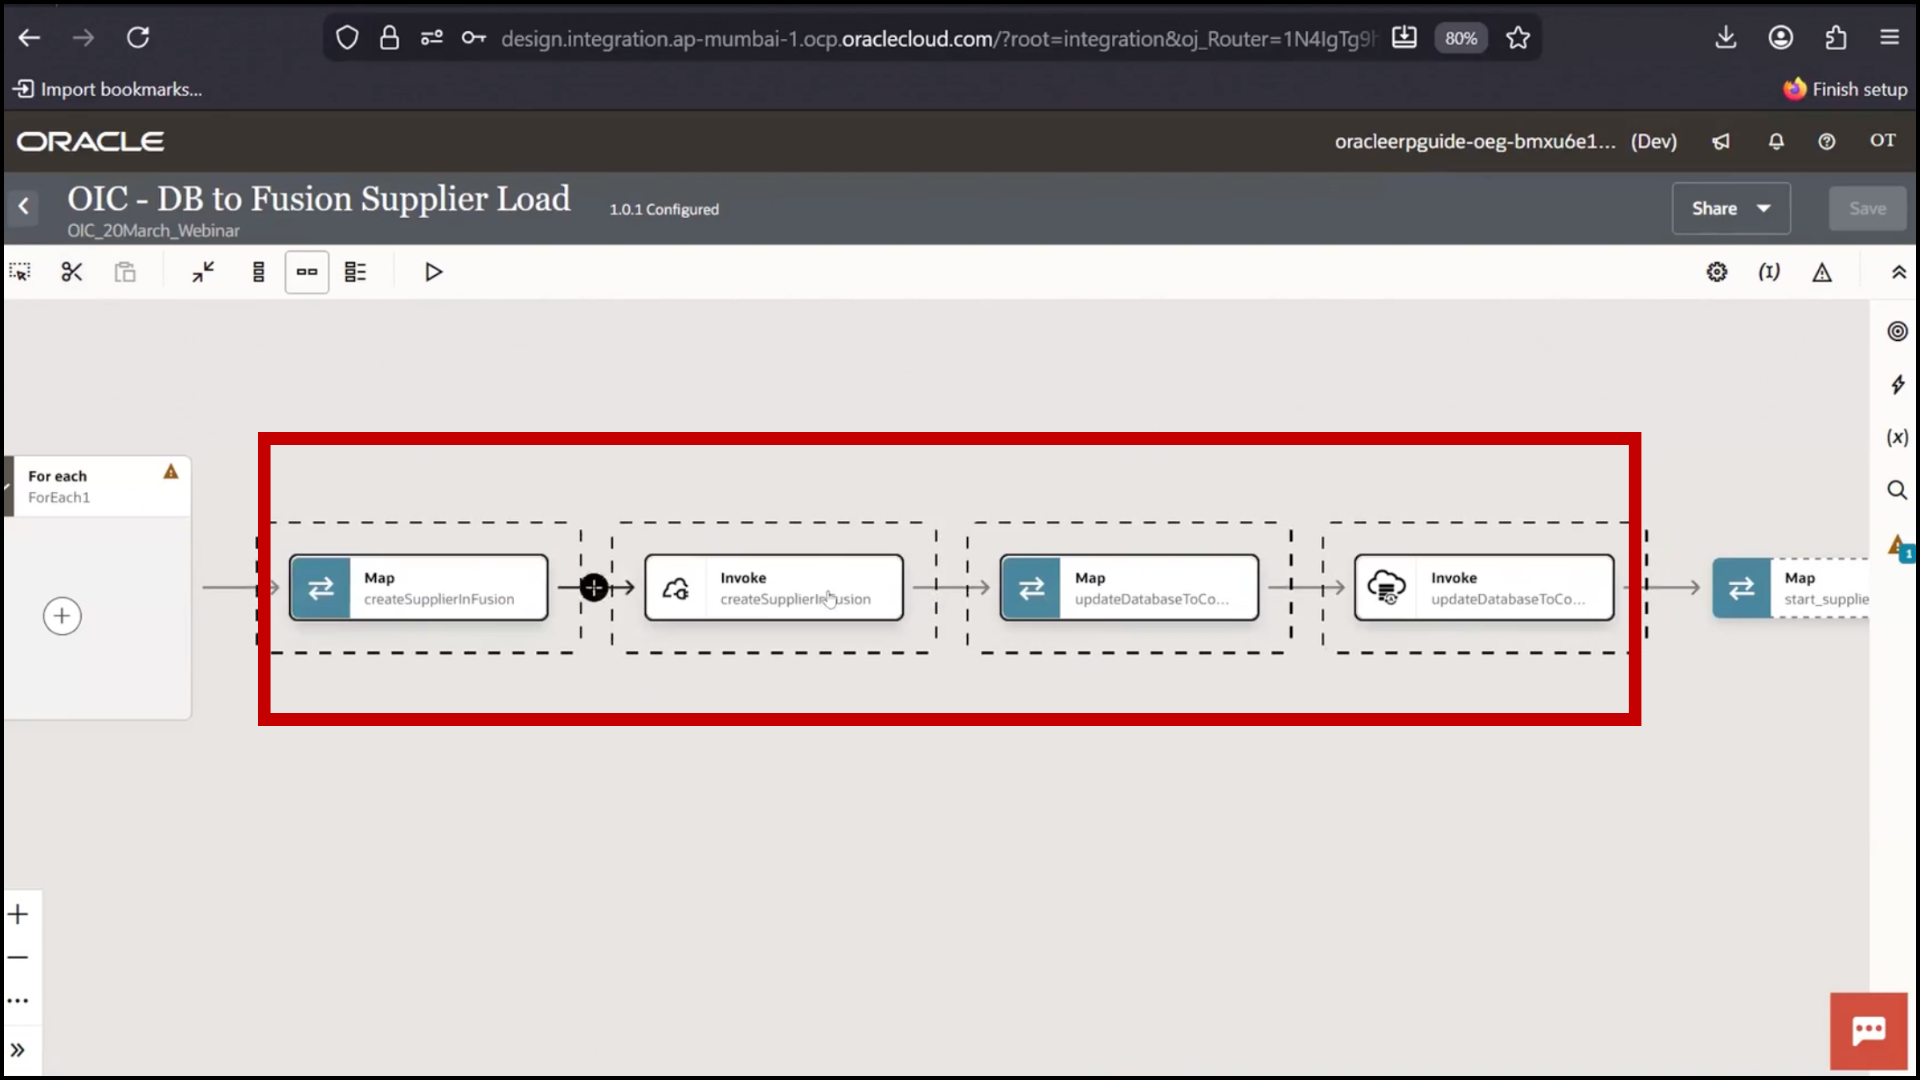
6. Click Save
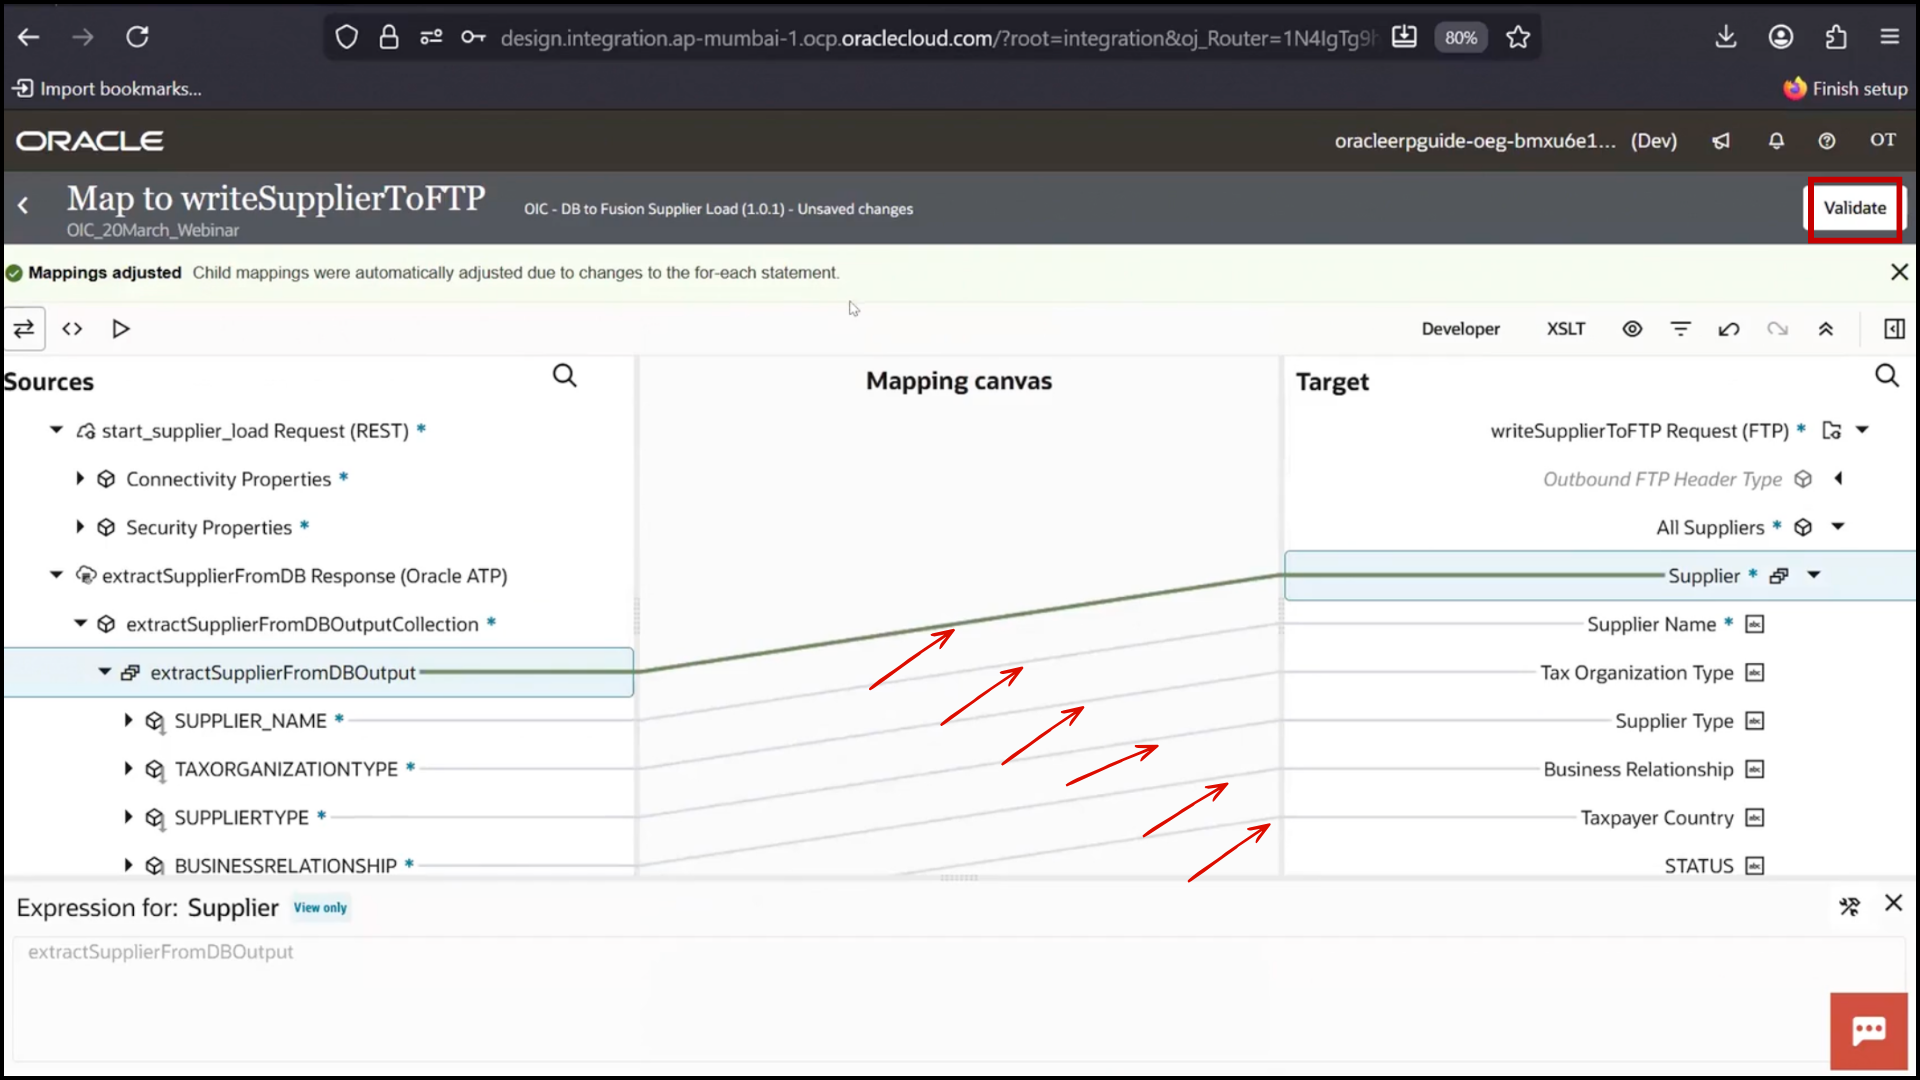
Updating Mapping for Fusion
1. Open Mapper for Fusion step
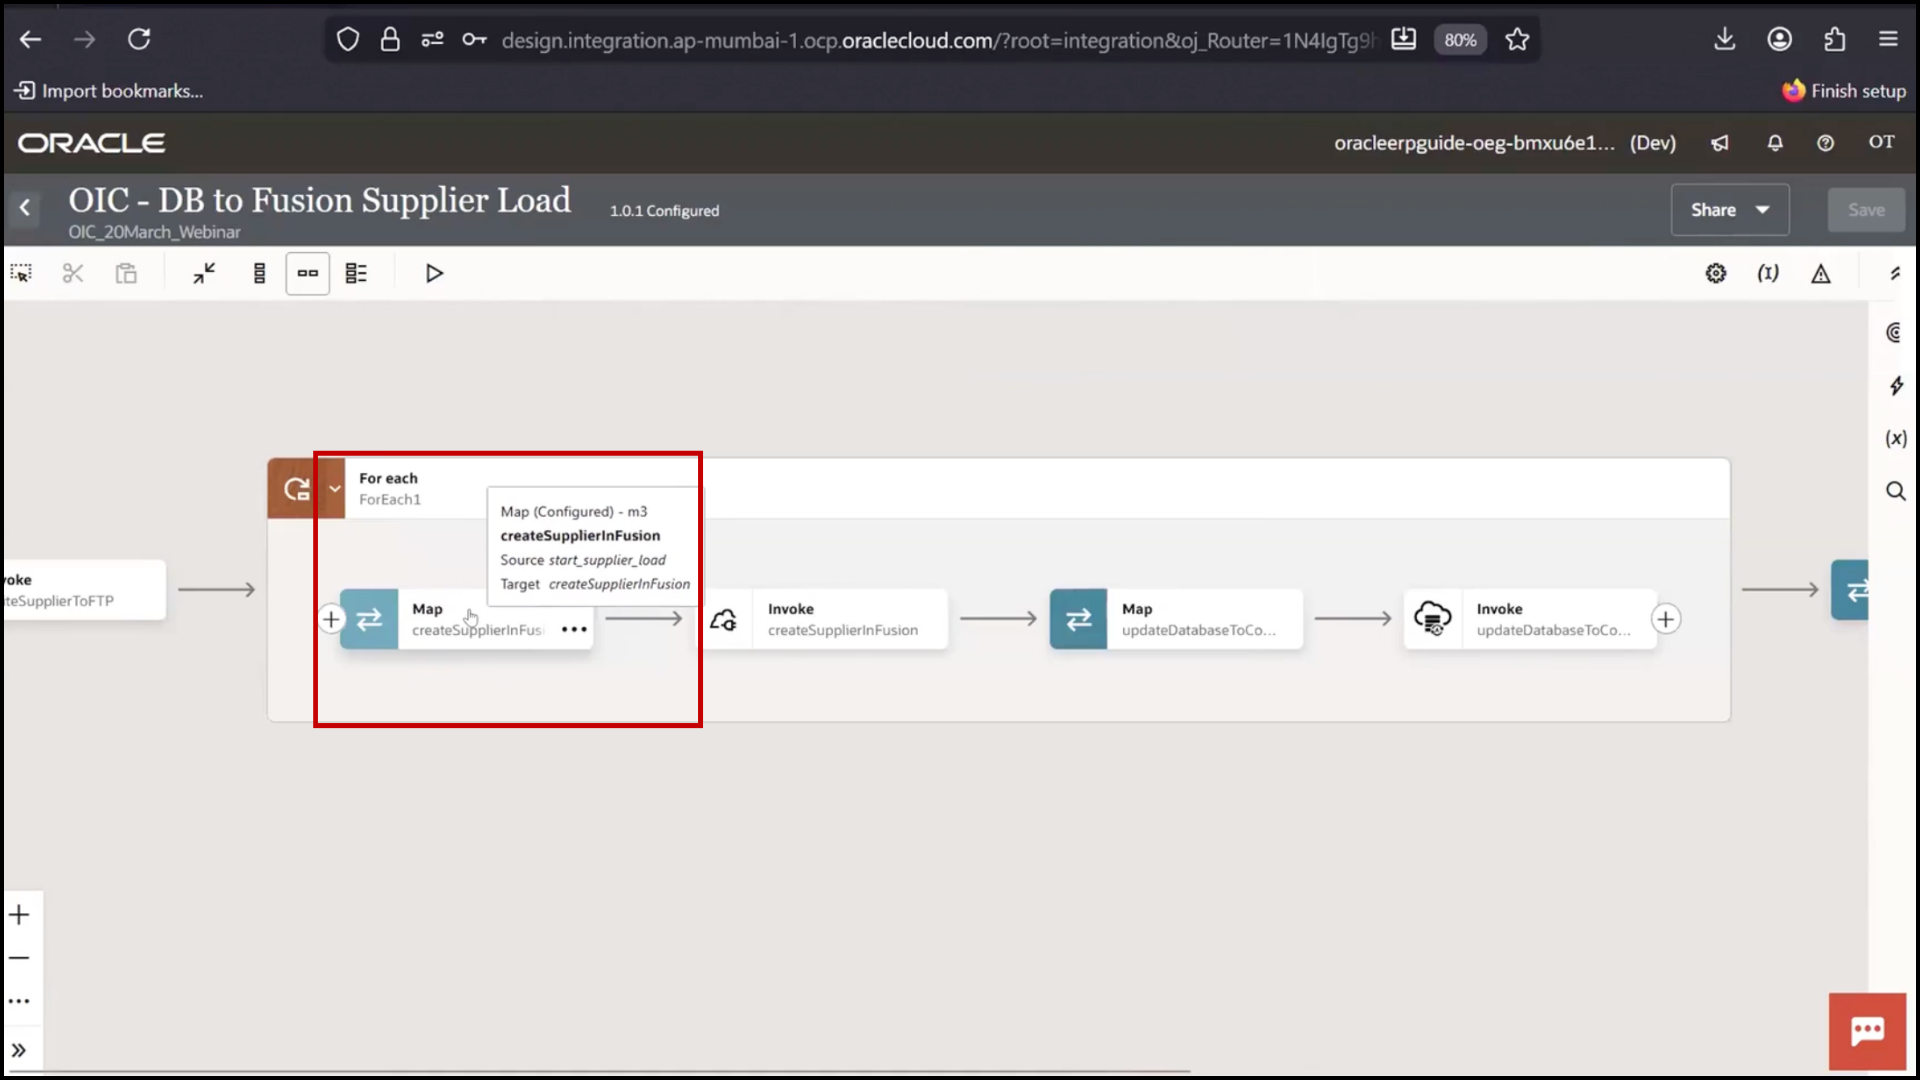
2. Remove existing mappings
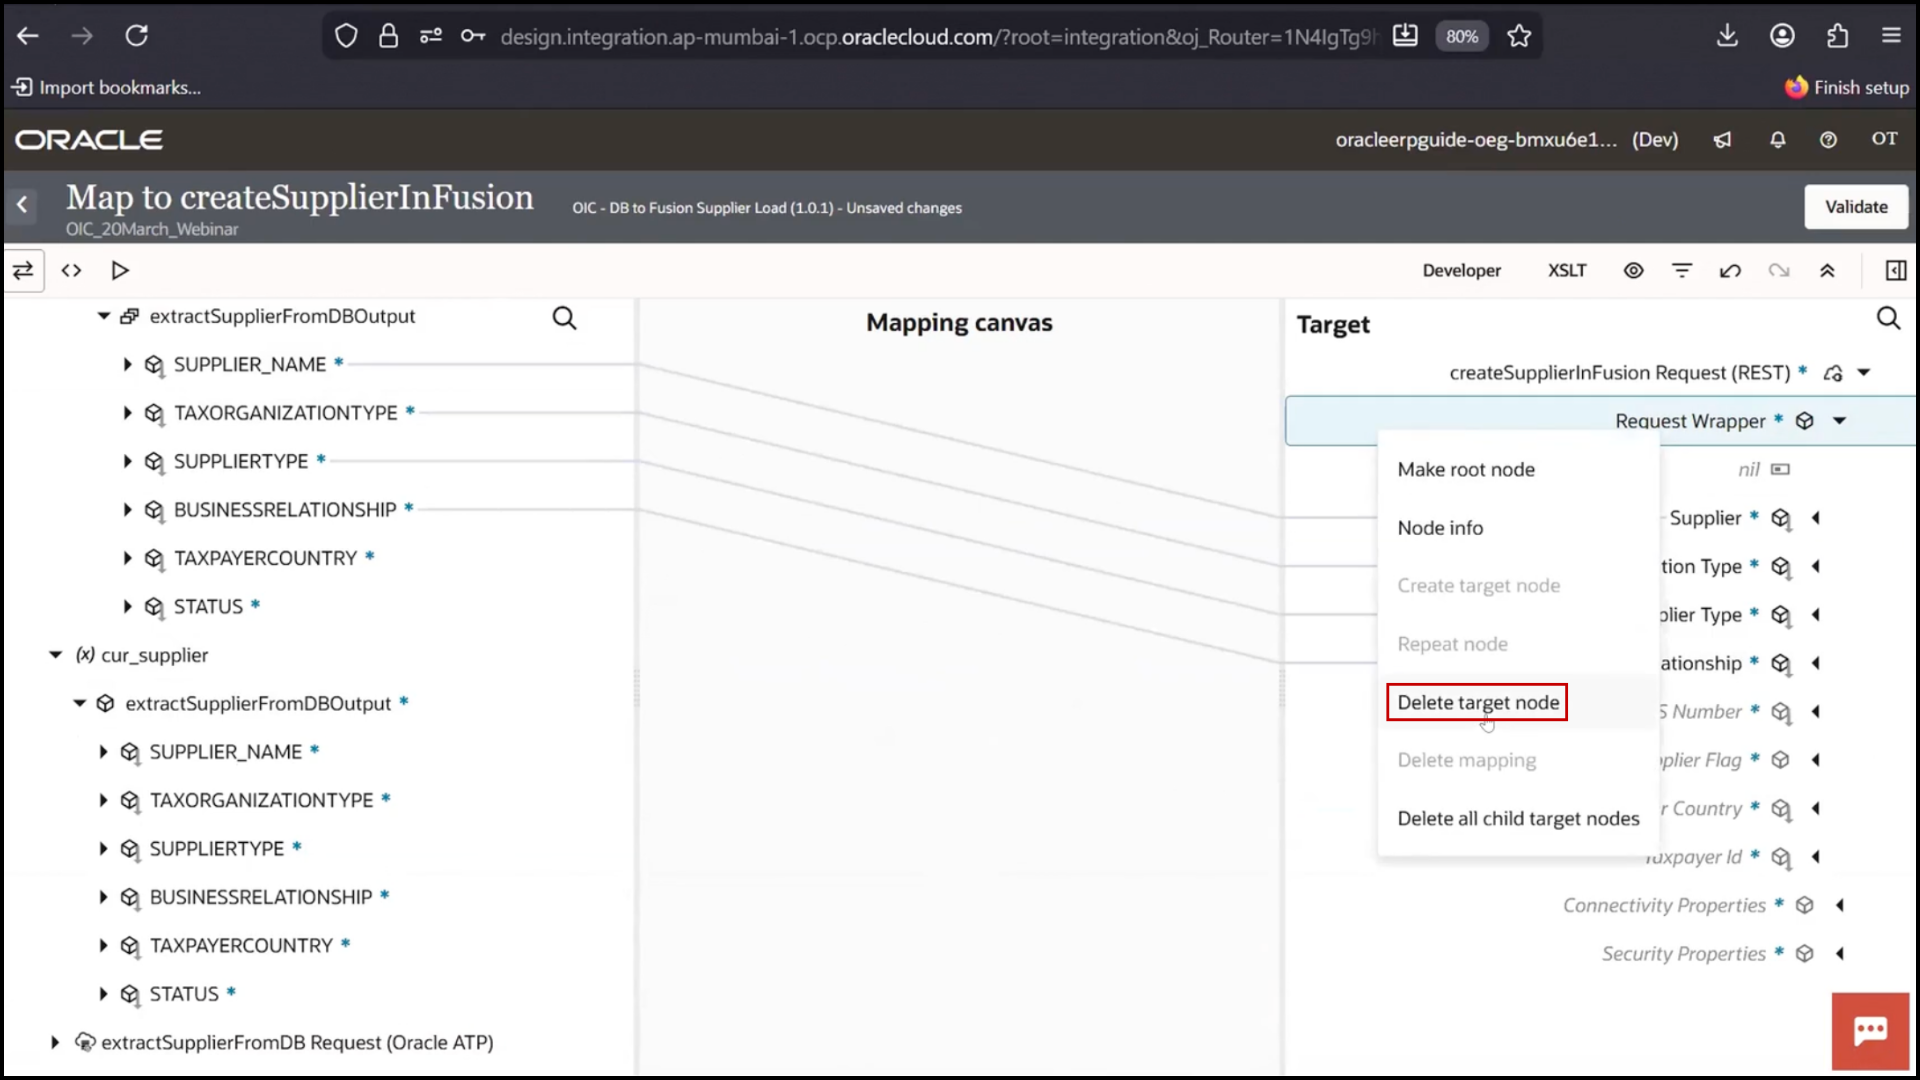
3. Remove from parent to clear all mappings
a. Map fields again using Current Supplier:
b. Taxpayer Country
c. Tax Organization Type
d. Supplier Name
4. Click Validate
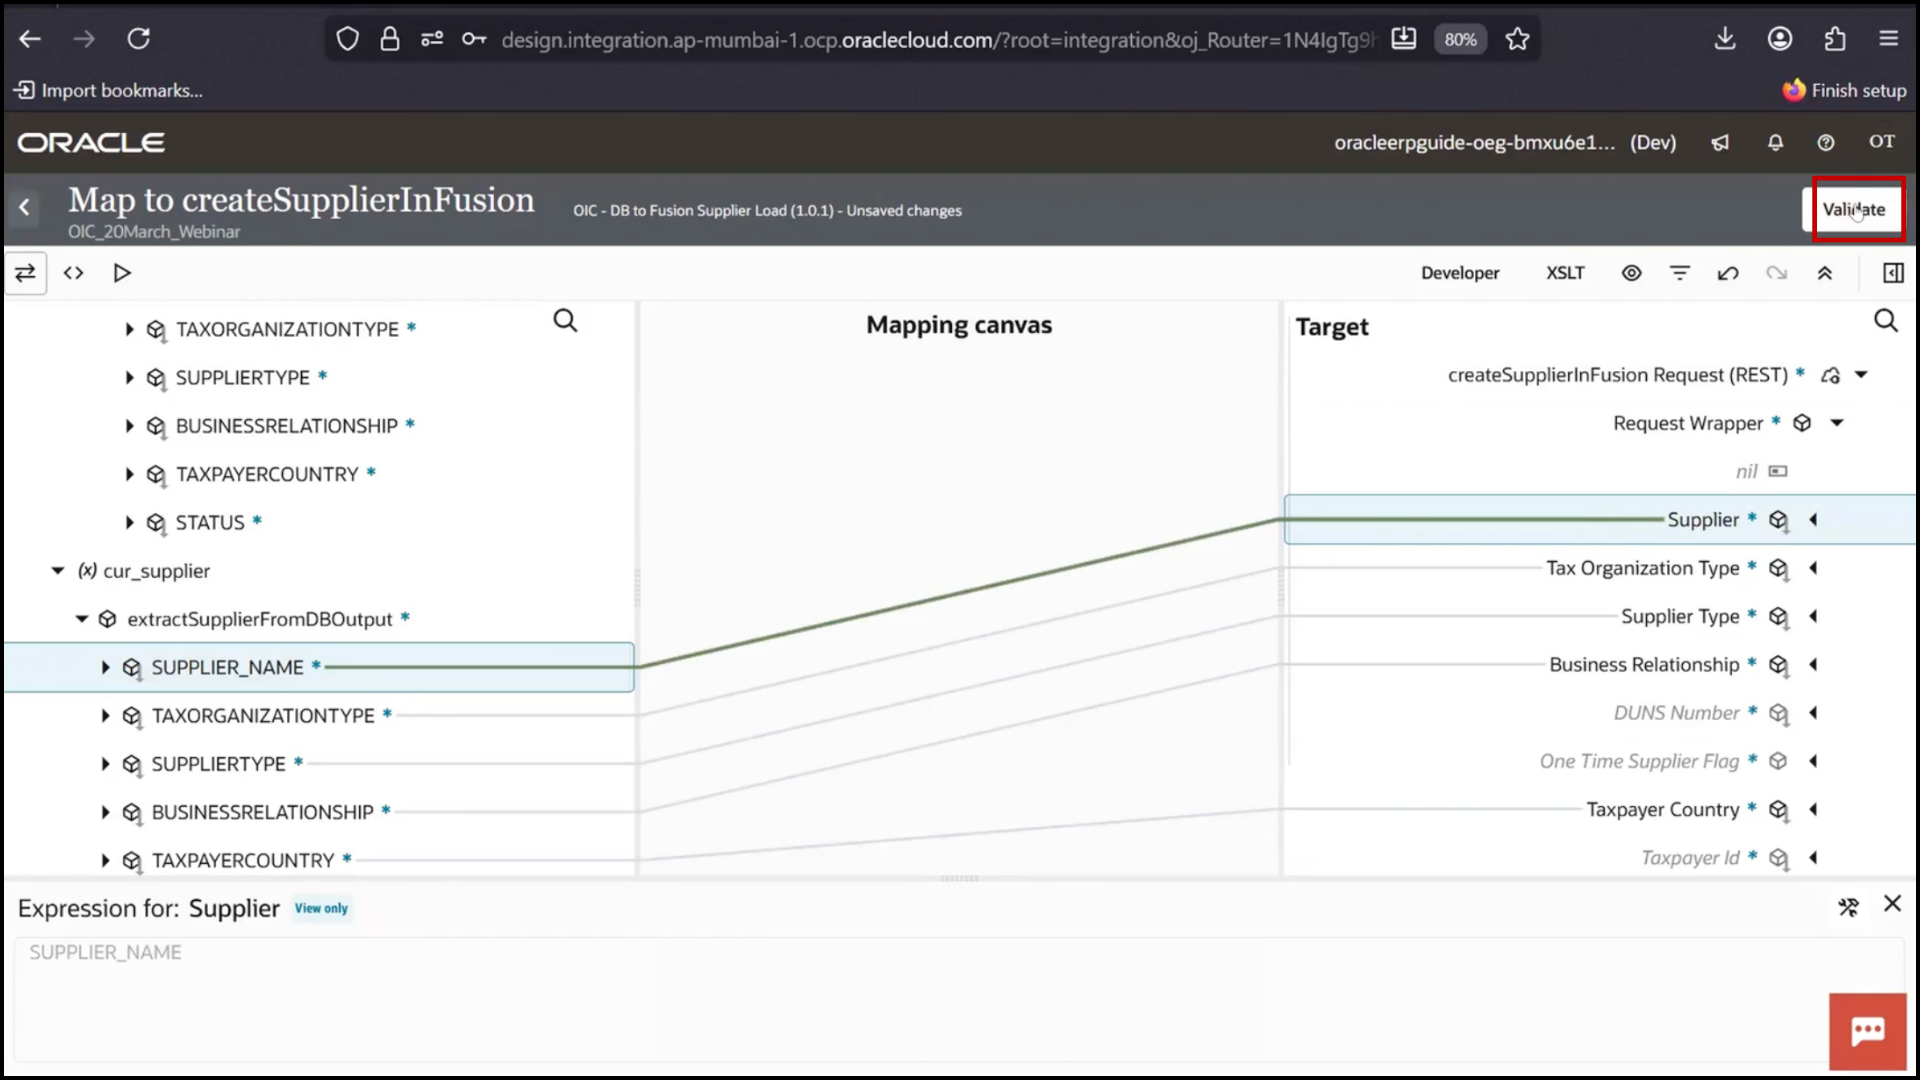
5. Click Save
Updating Mapping for Database Update
1. Open Mapper for DB update step
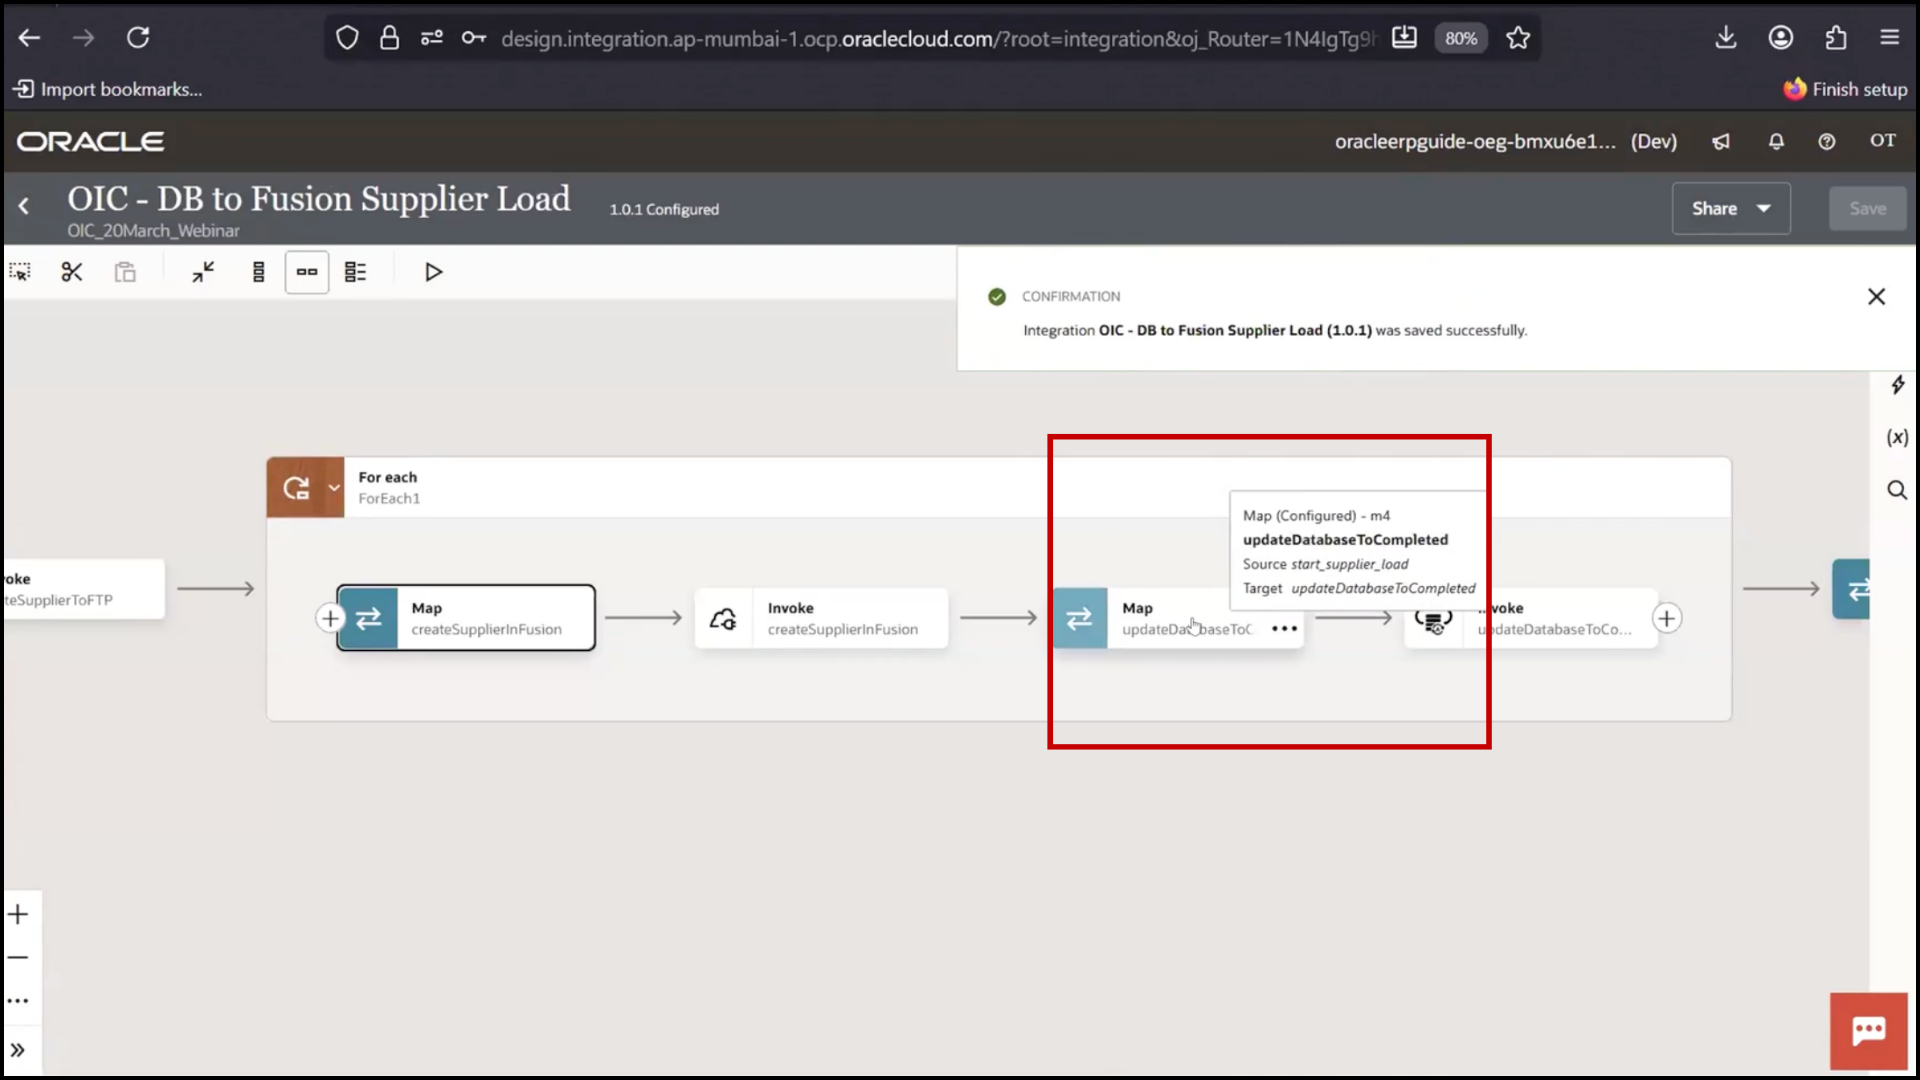
2. Remove old mapping from DB response
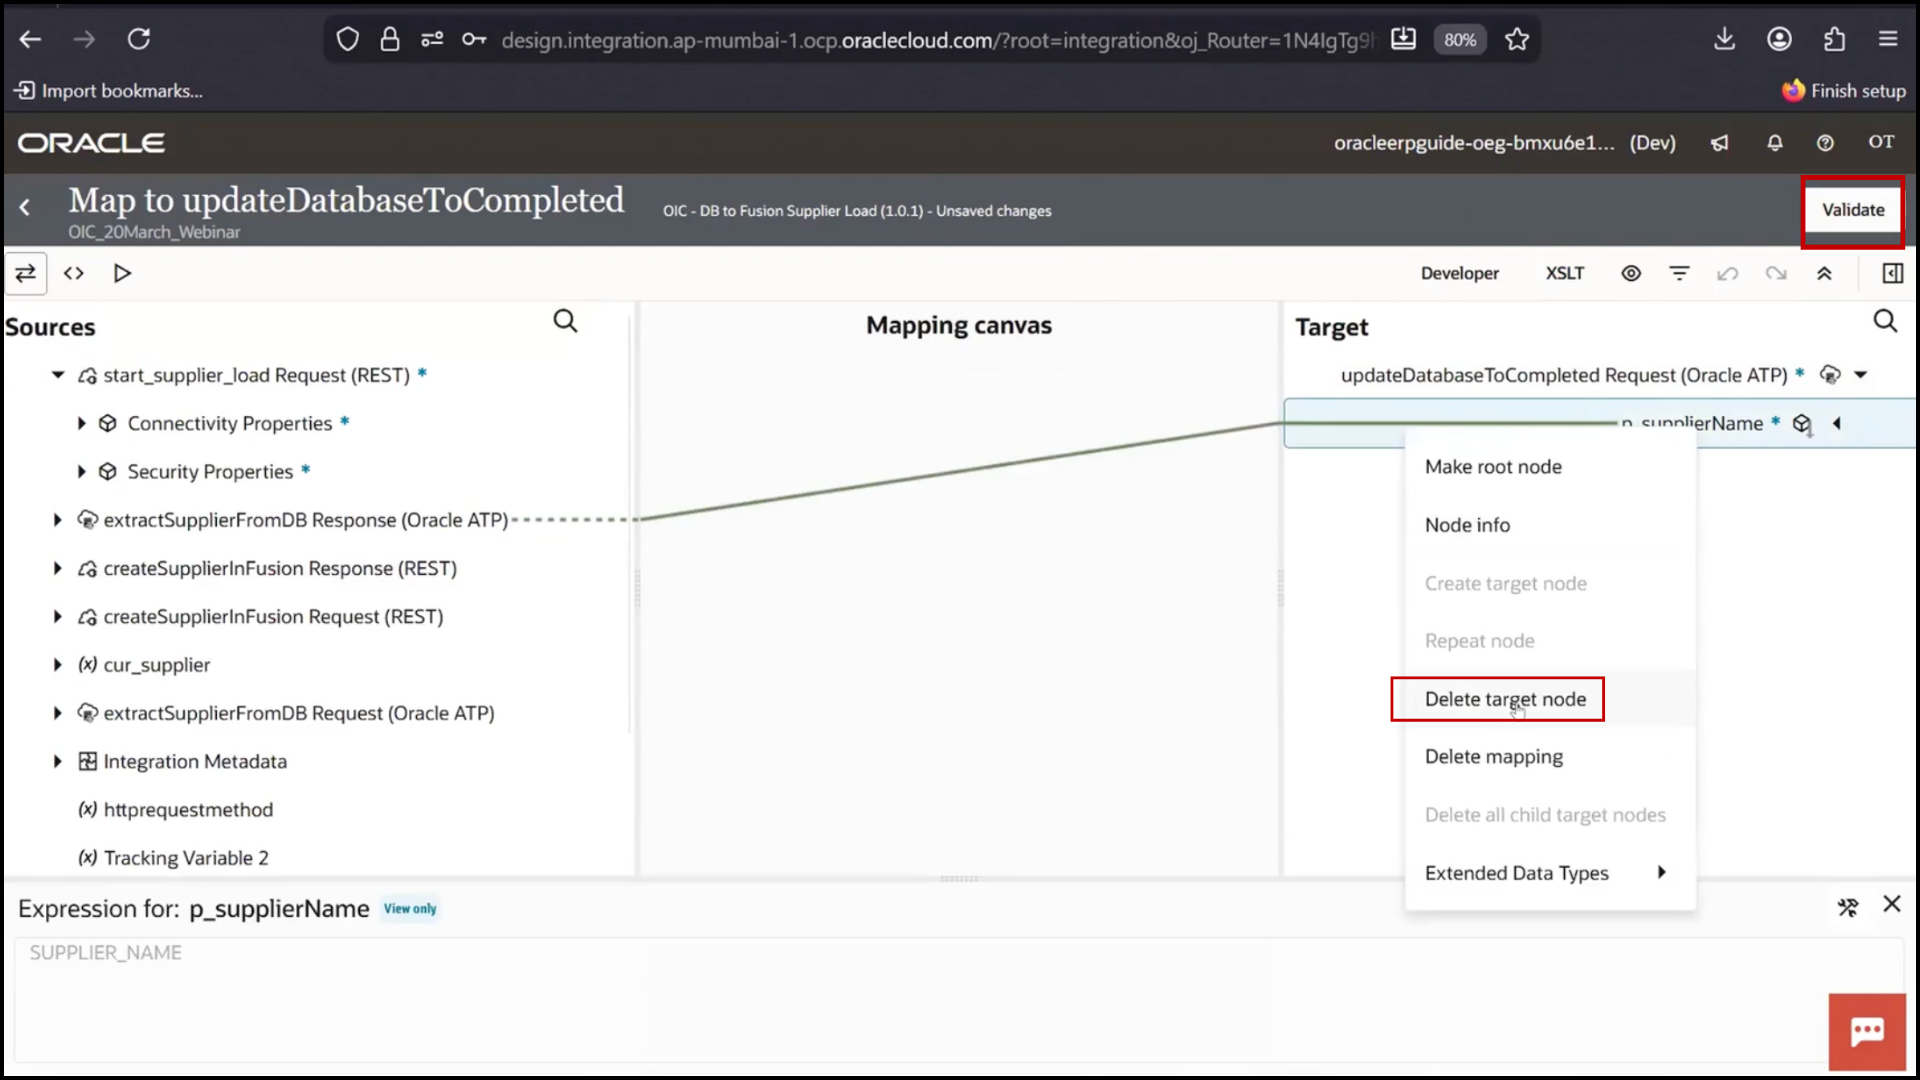
3. Map Supplier Name from Current Supplier
4. Click Validate
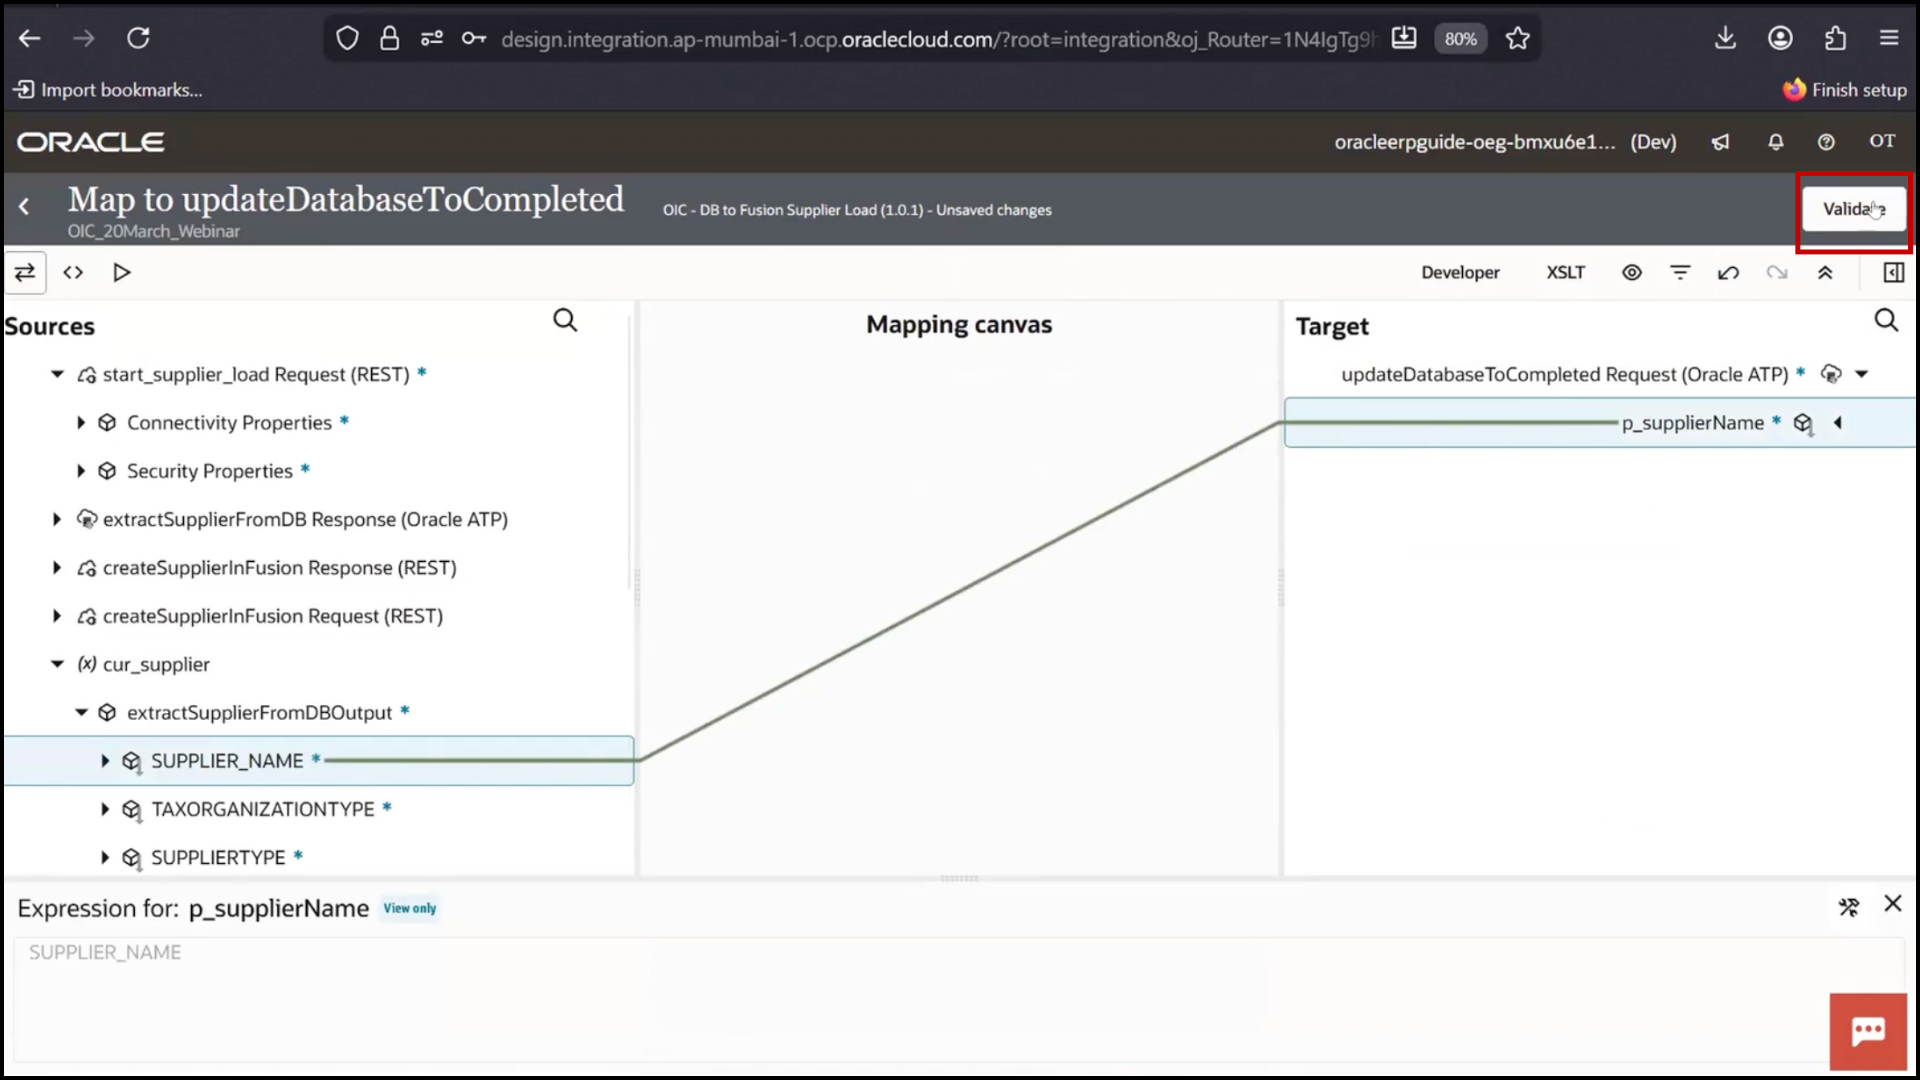
5. Click Save
Activating New Version
1. Click Activate
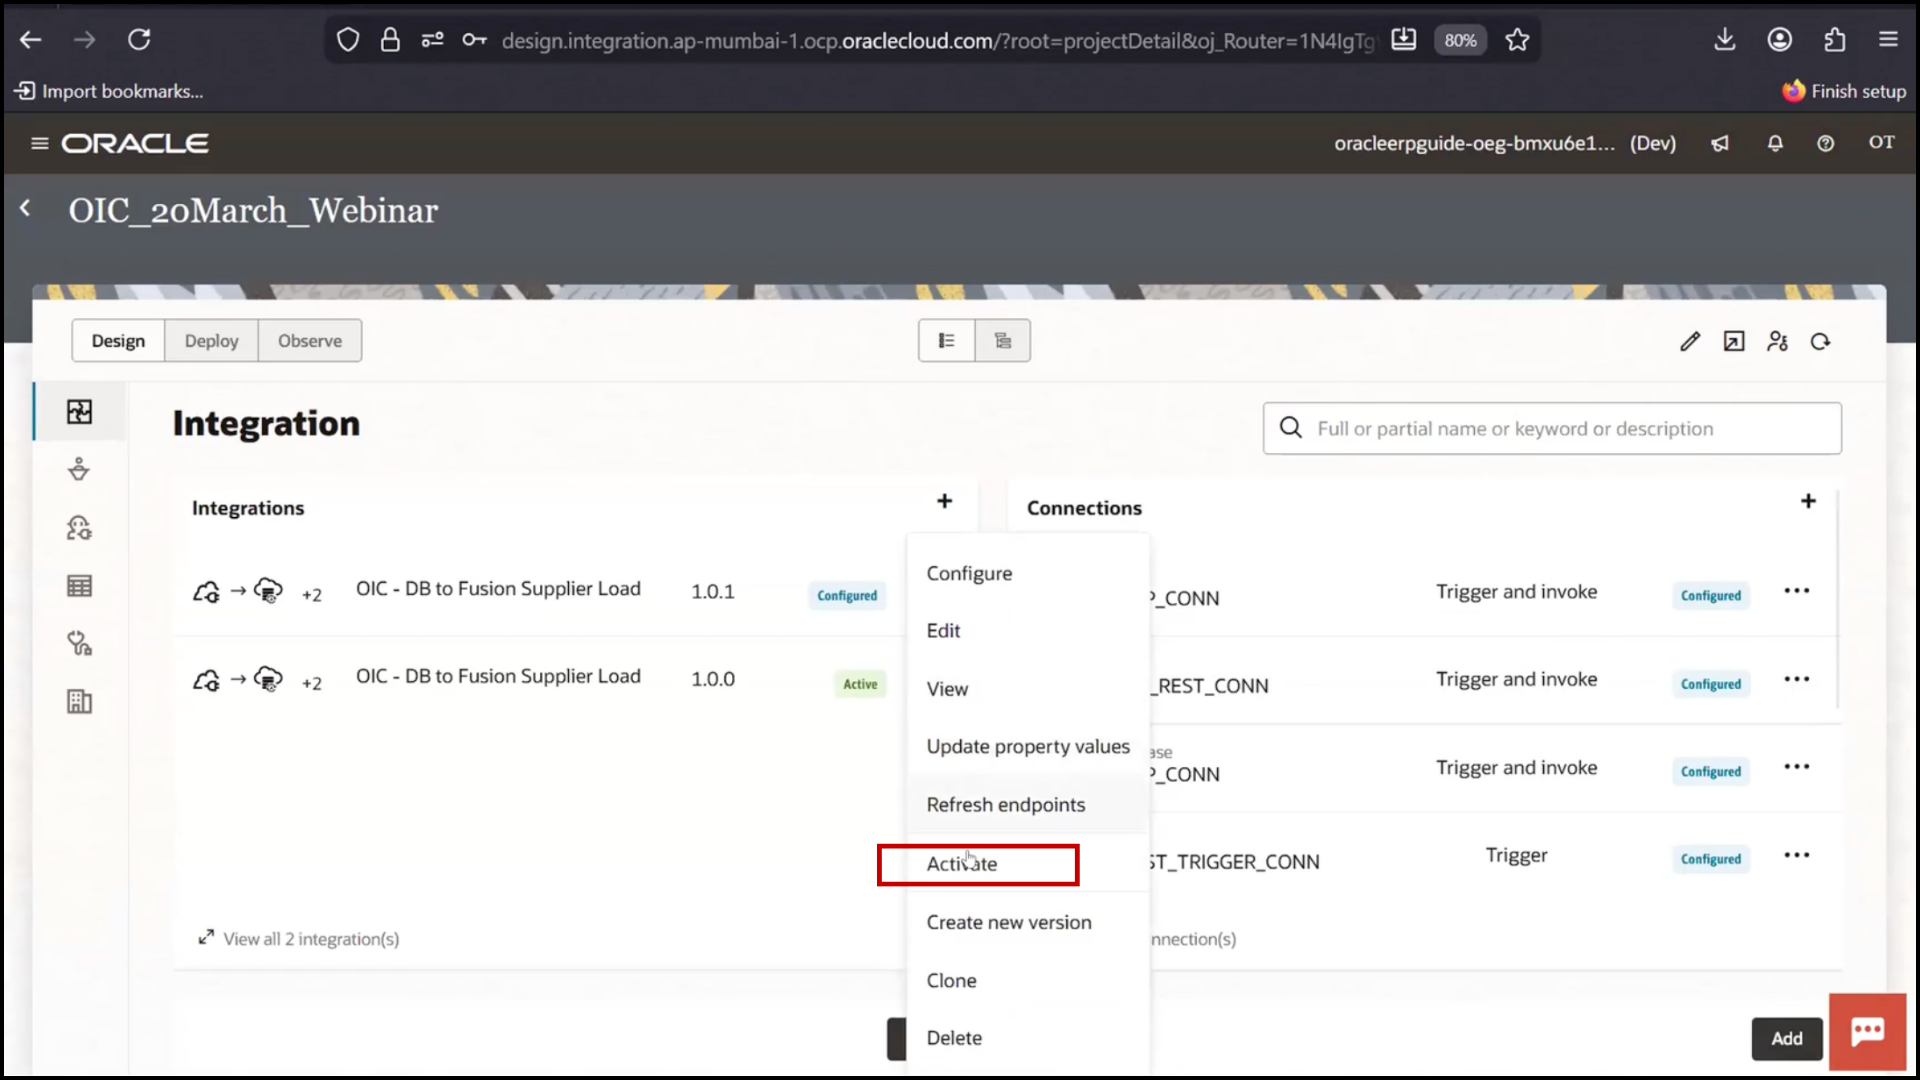
2. Confirm activation
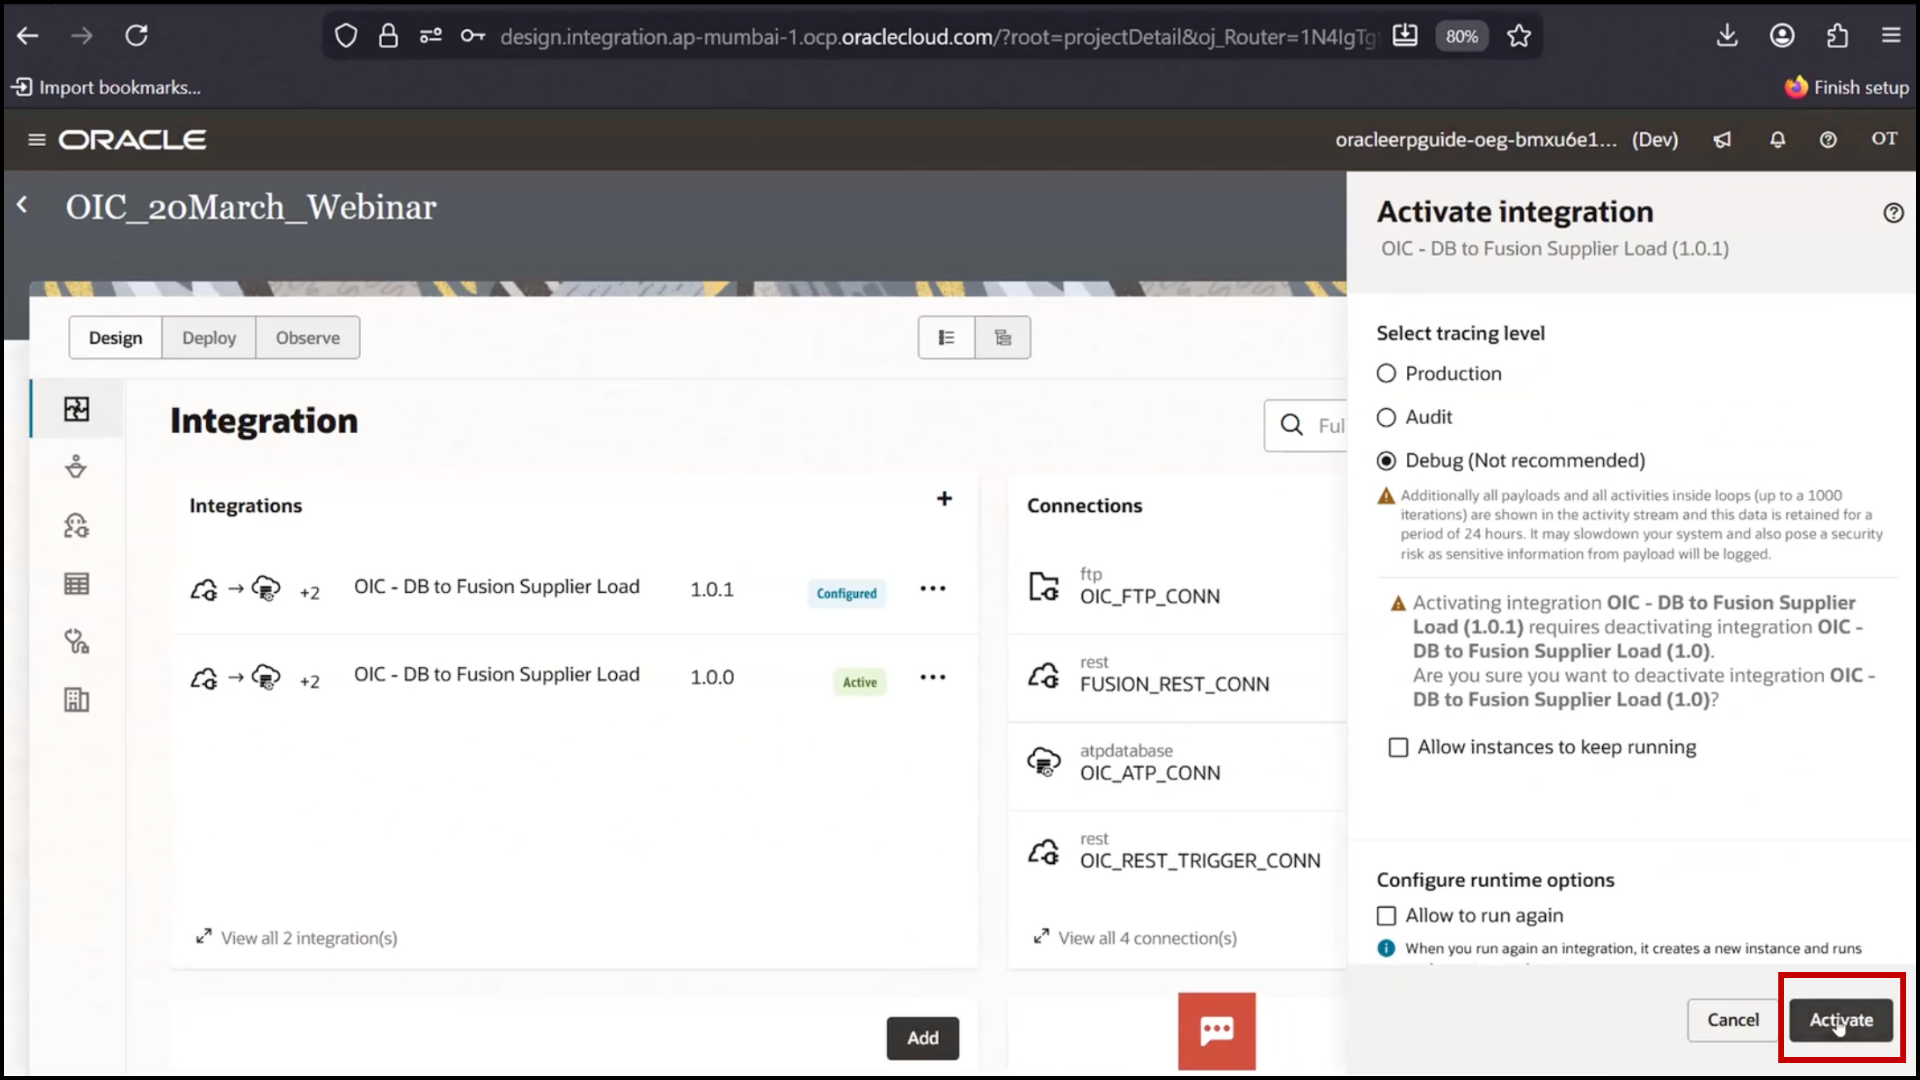
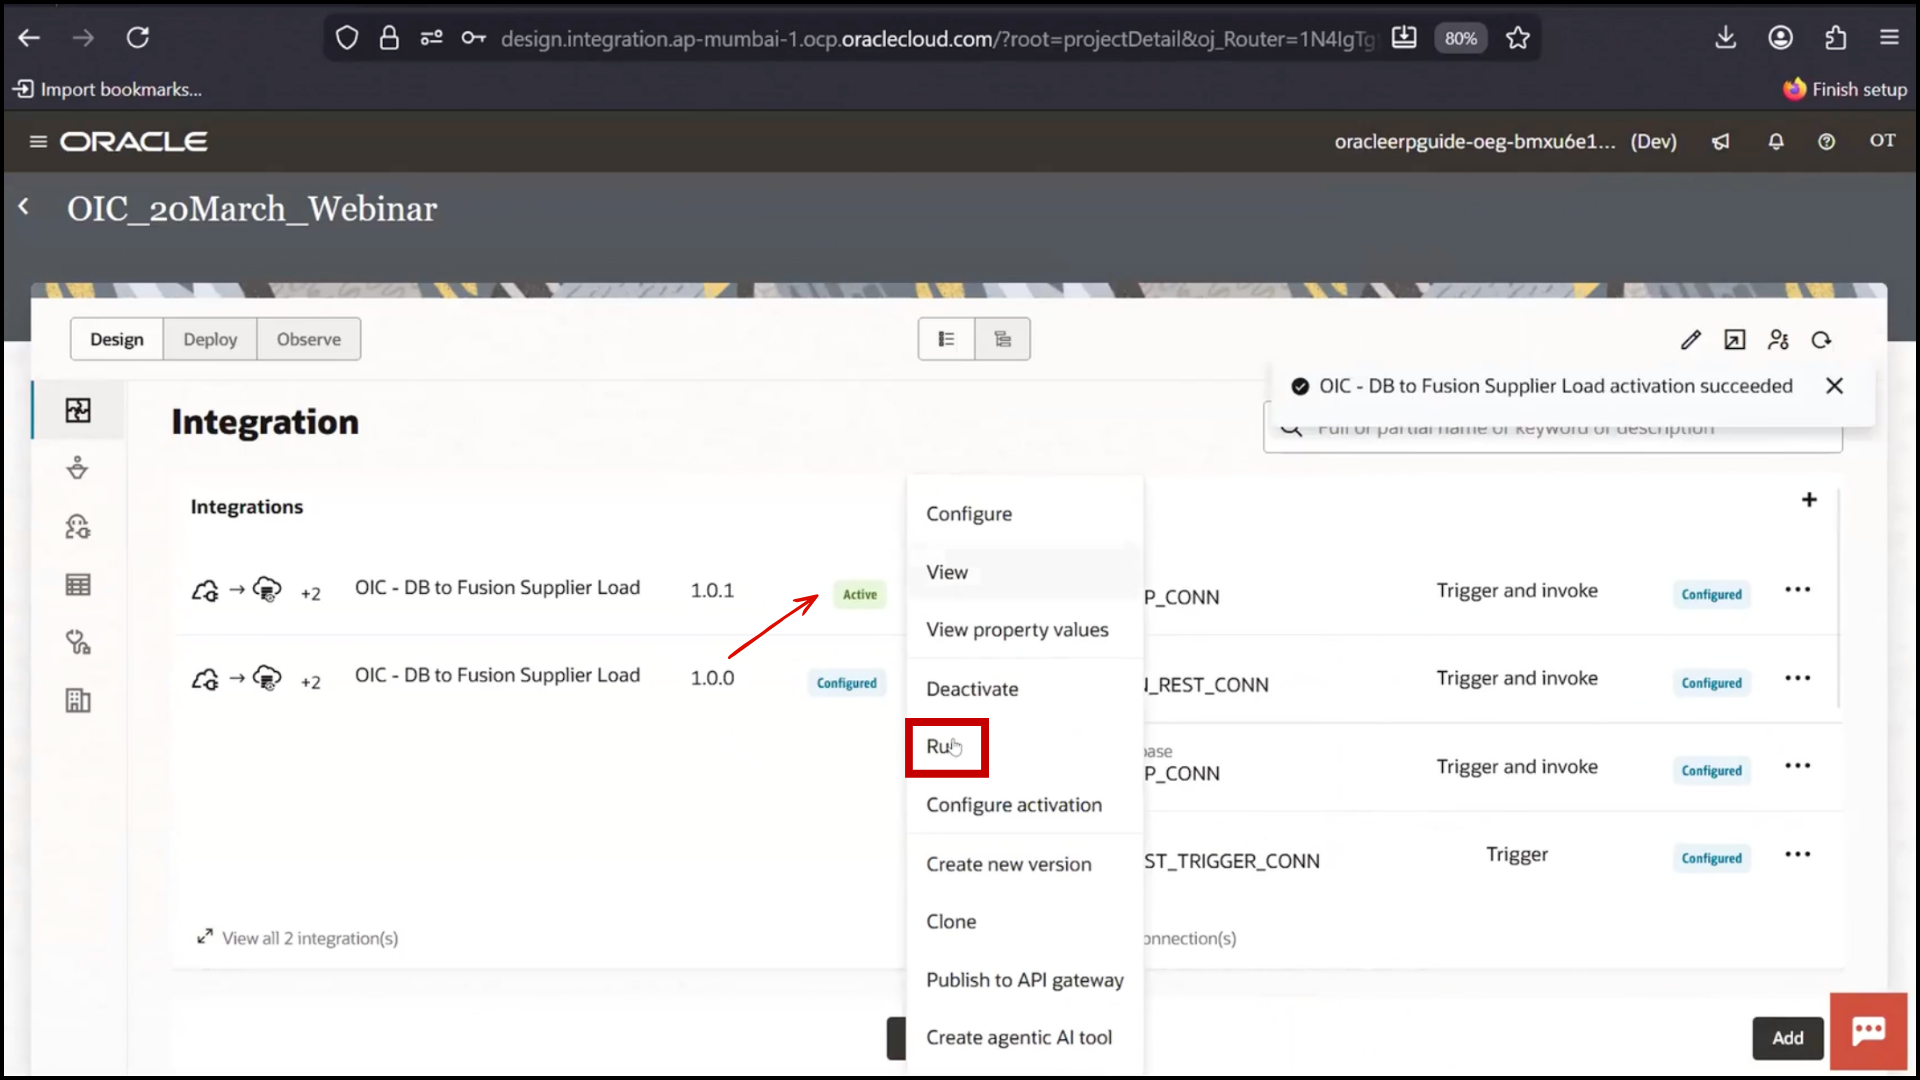
3. Observe previous version gets deactivated
4. Click Refresh
5. Confirm status Active
Testing with Single Record
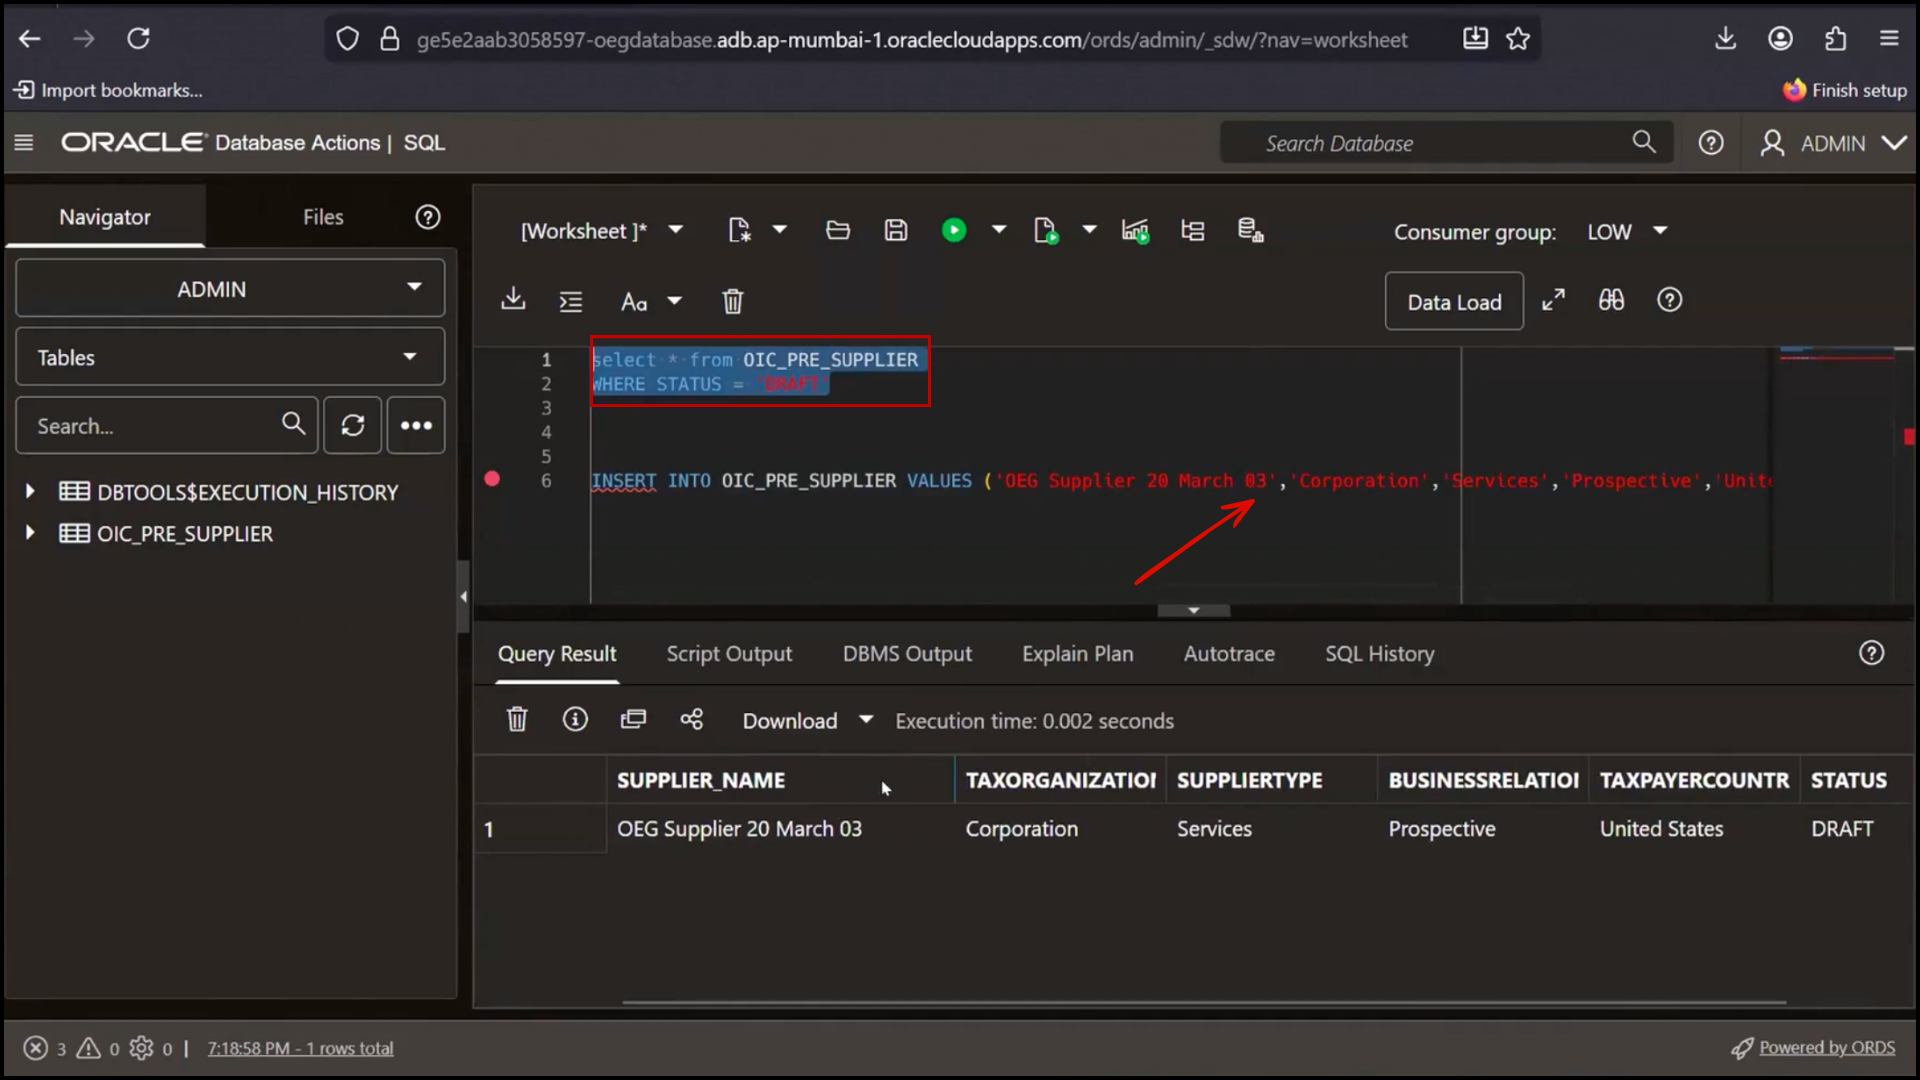
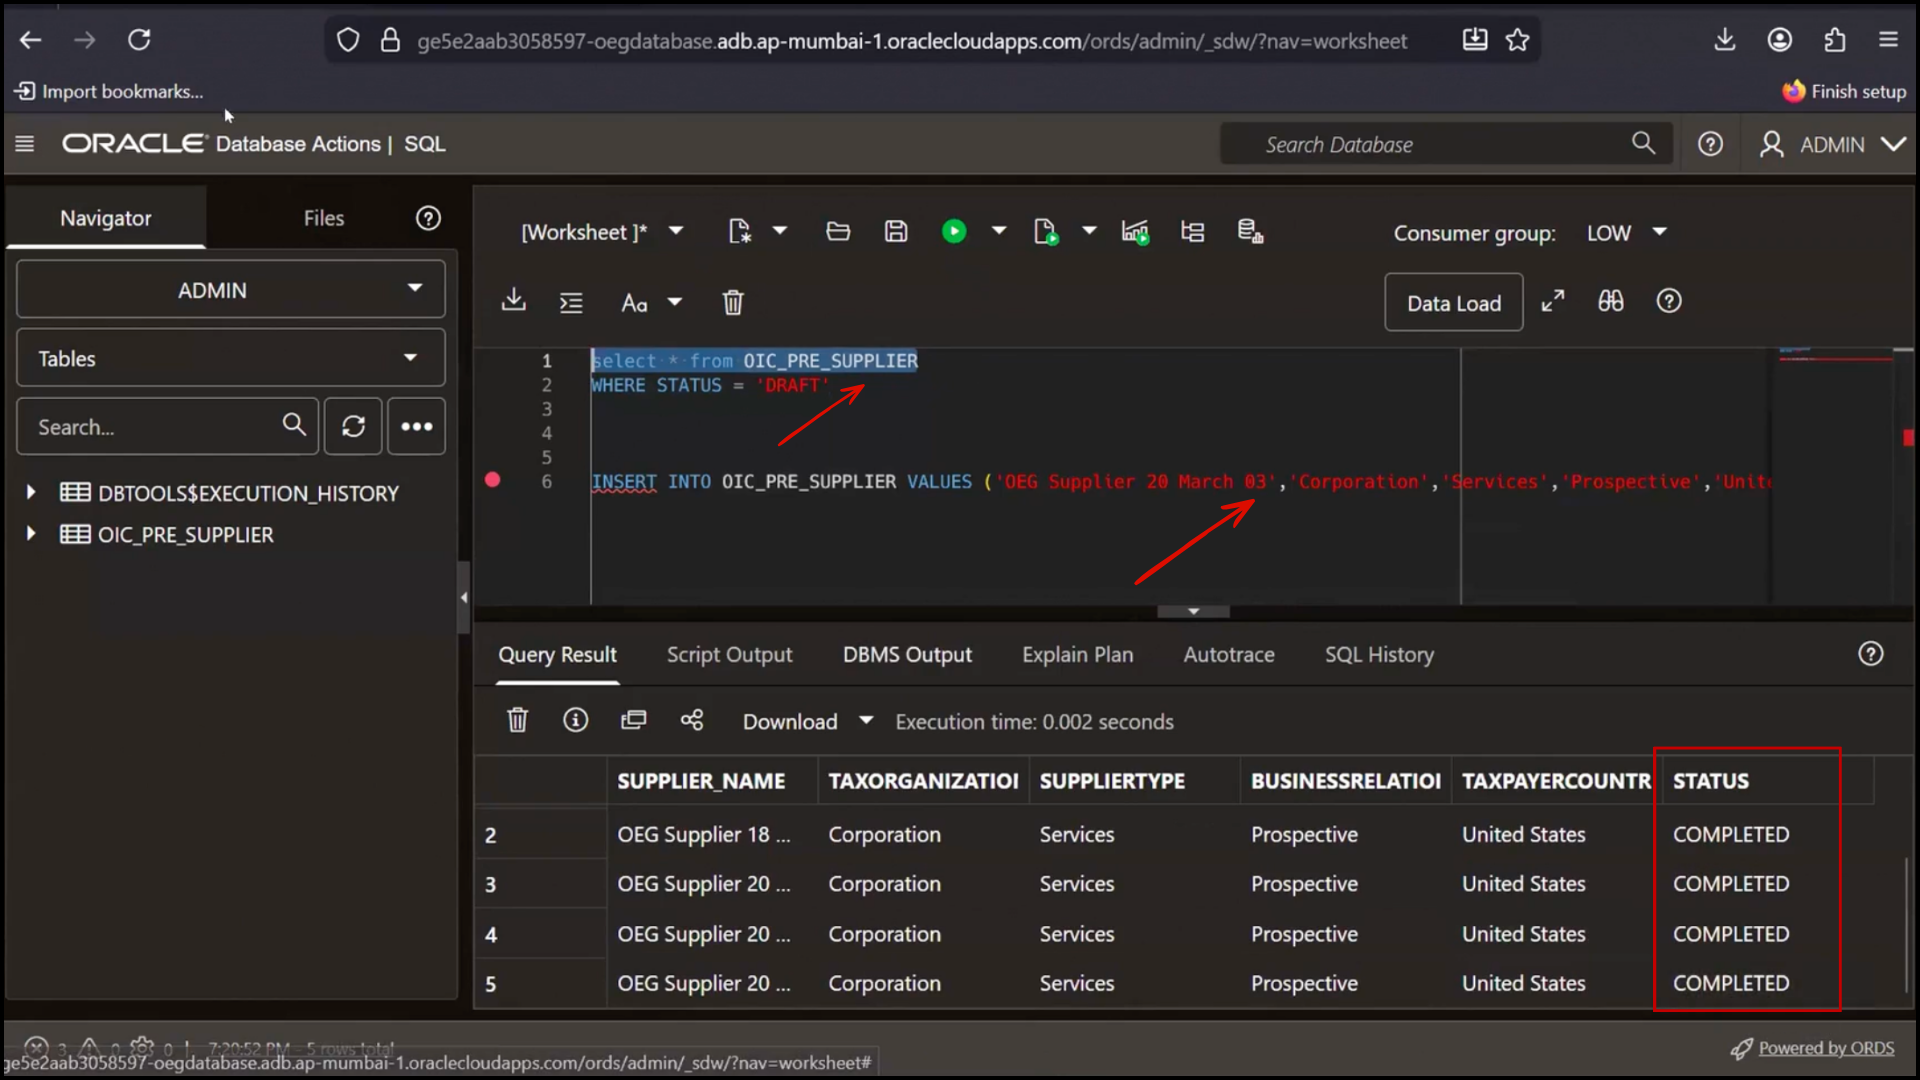
1. Insert one new record in database
2. Run query to verify Draft status
3. Confirm record does not present in Fusion
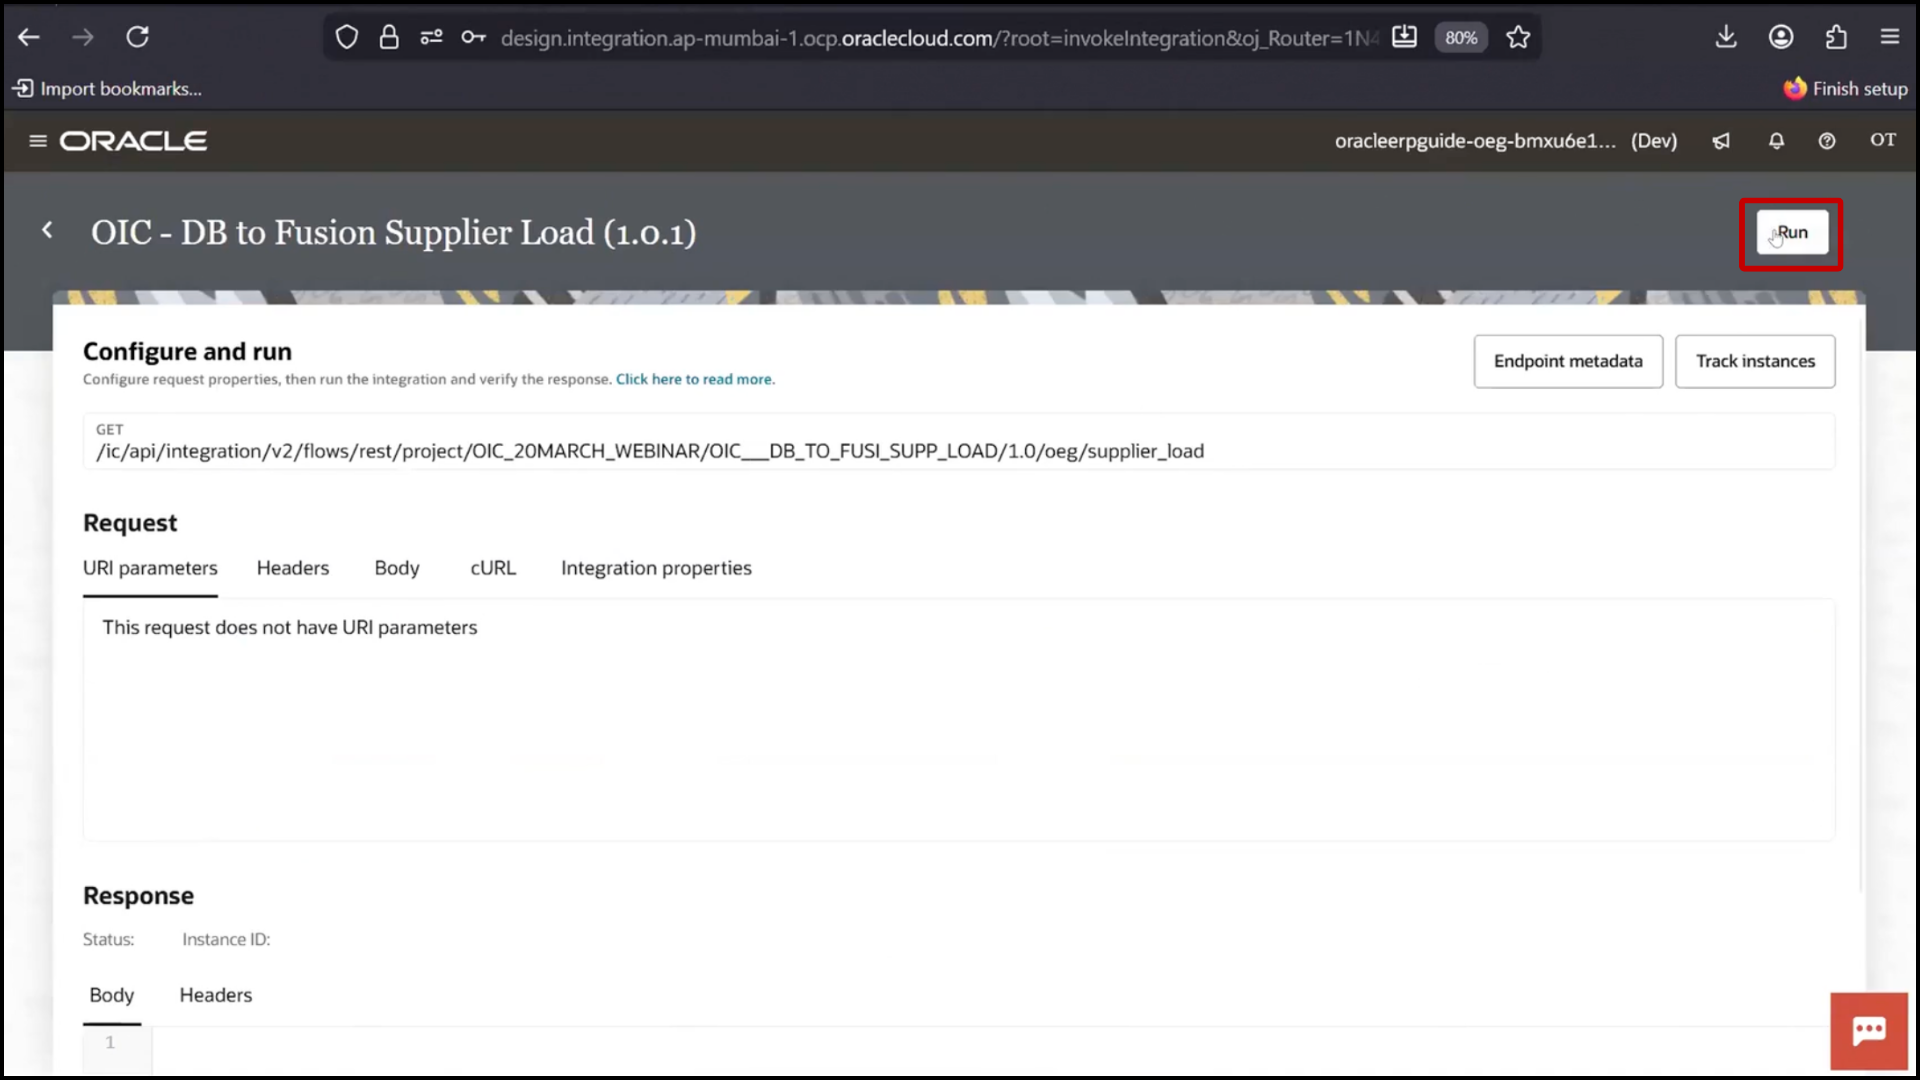
4. Go to OIC
5. Click Run
6. Wait for completion
Verifying Single Record Execution
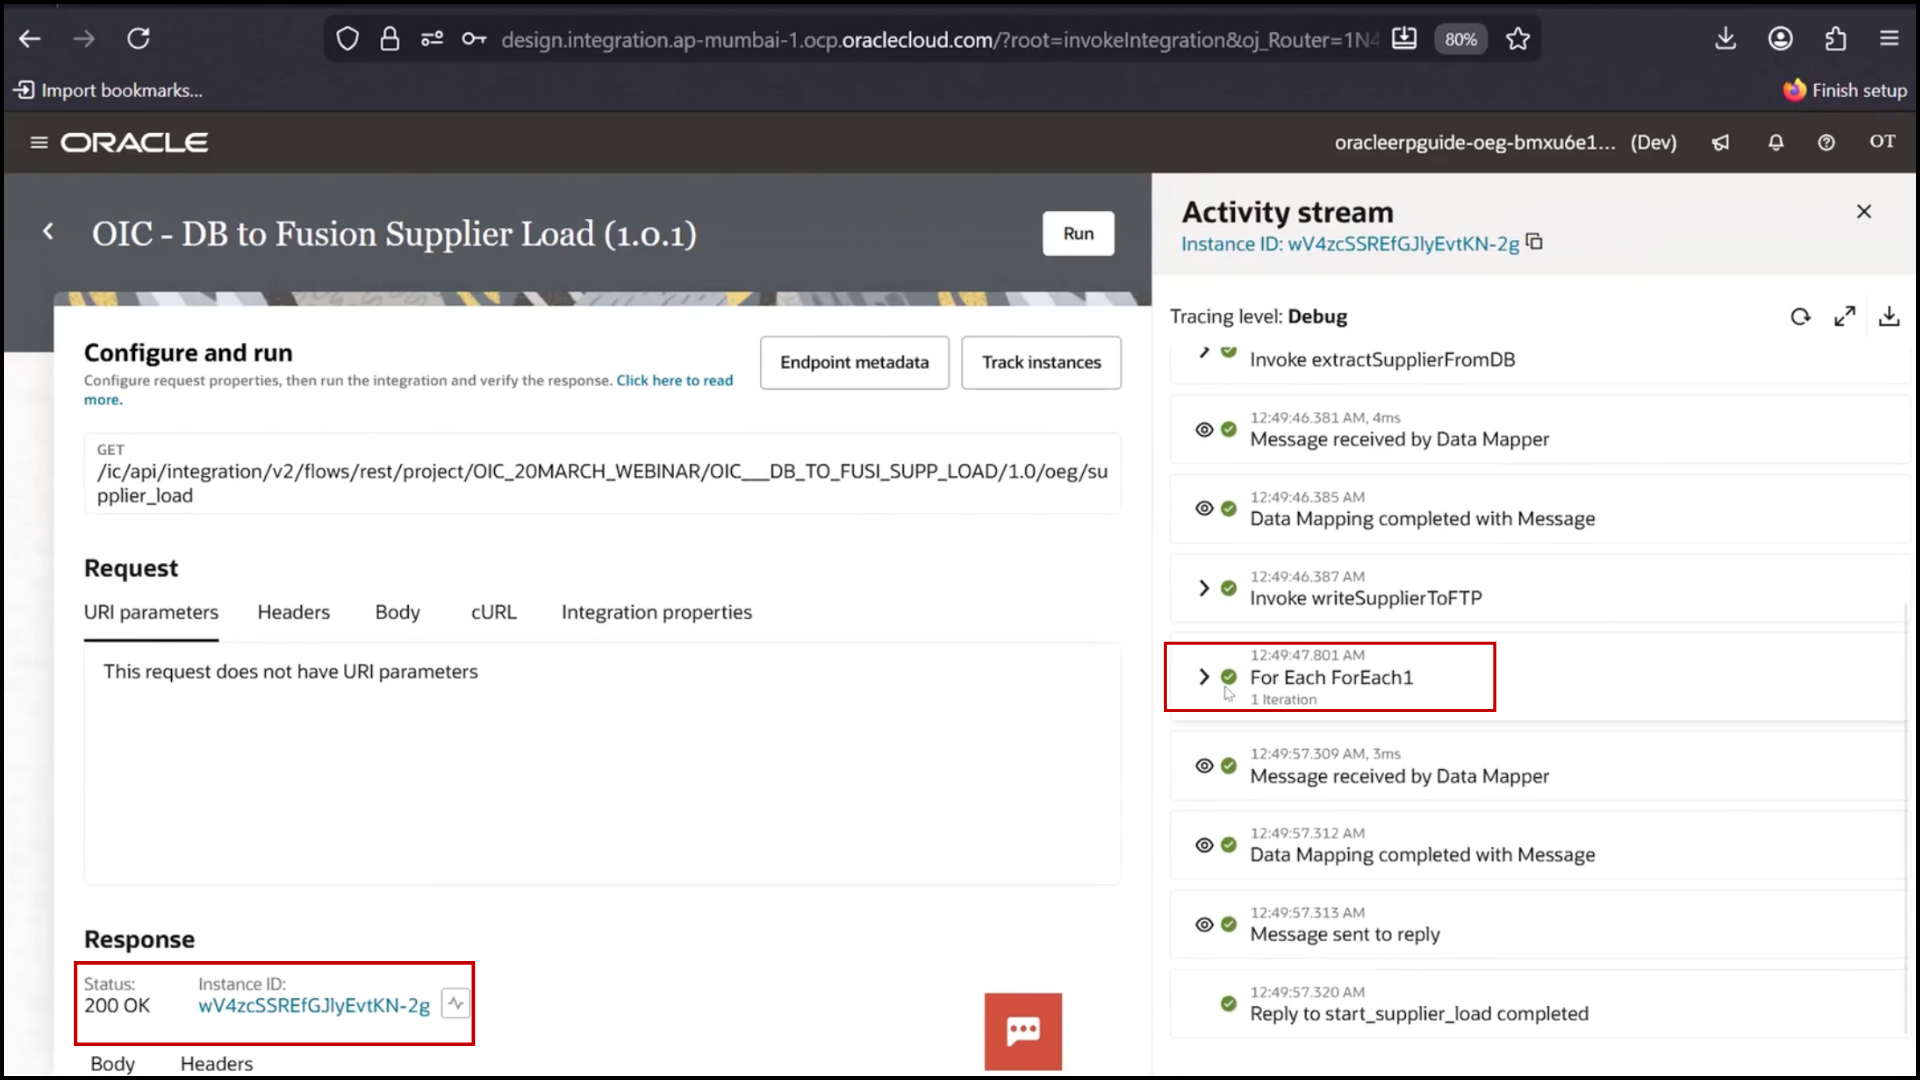
1. Open Instance ID
2. Check flow execution
3. Verify For Each executed one time
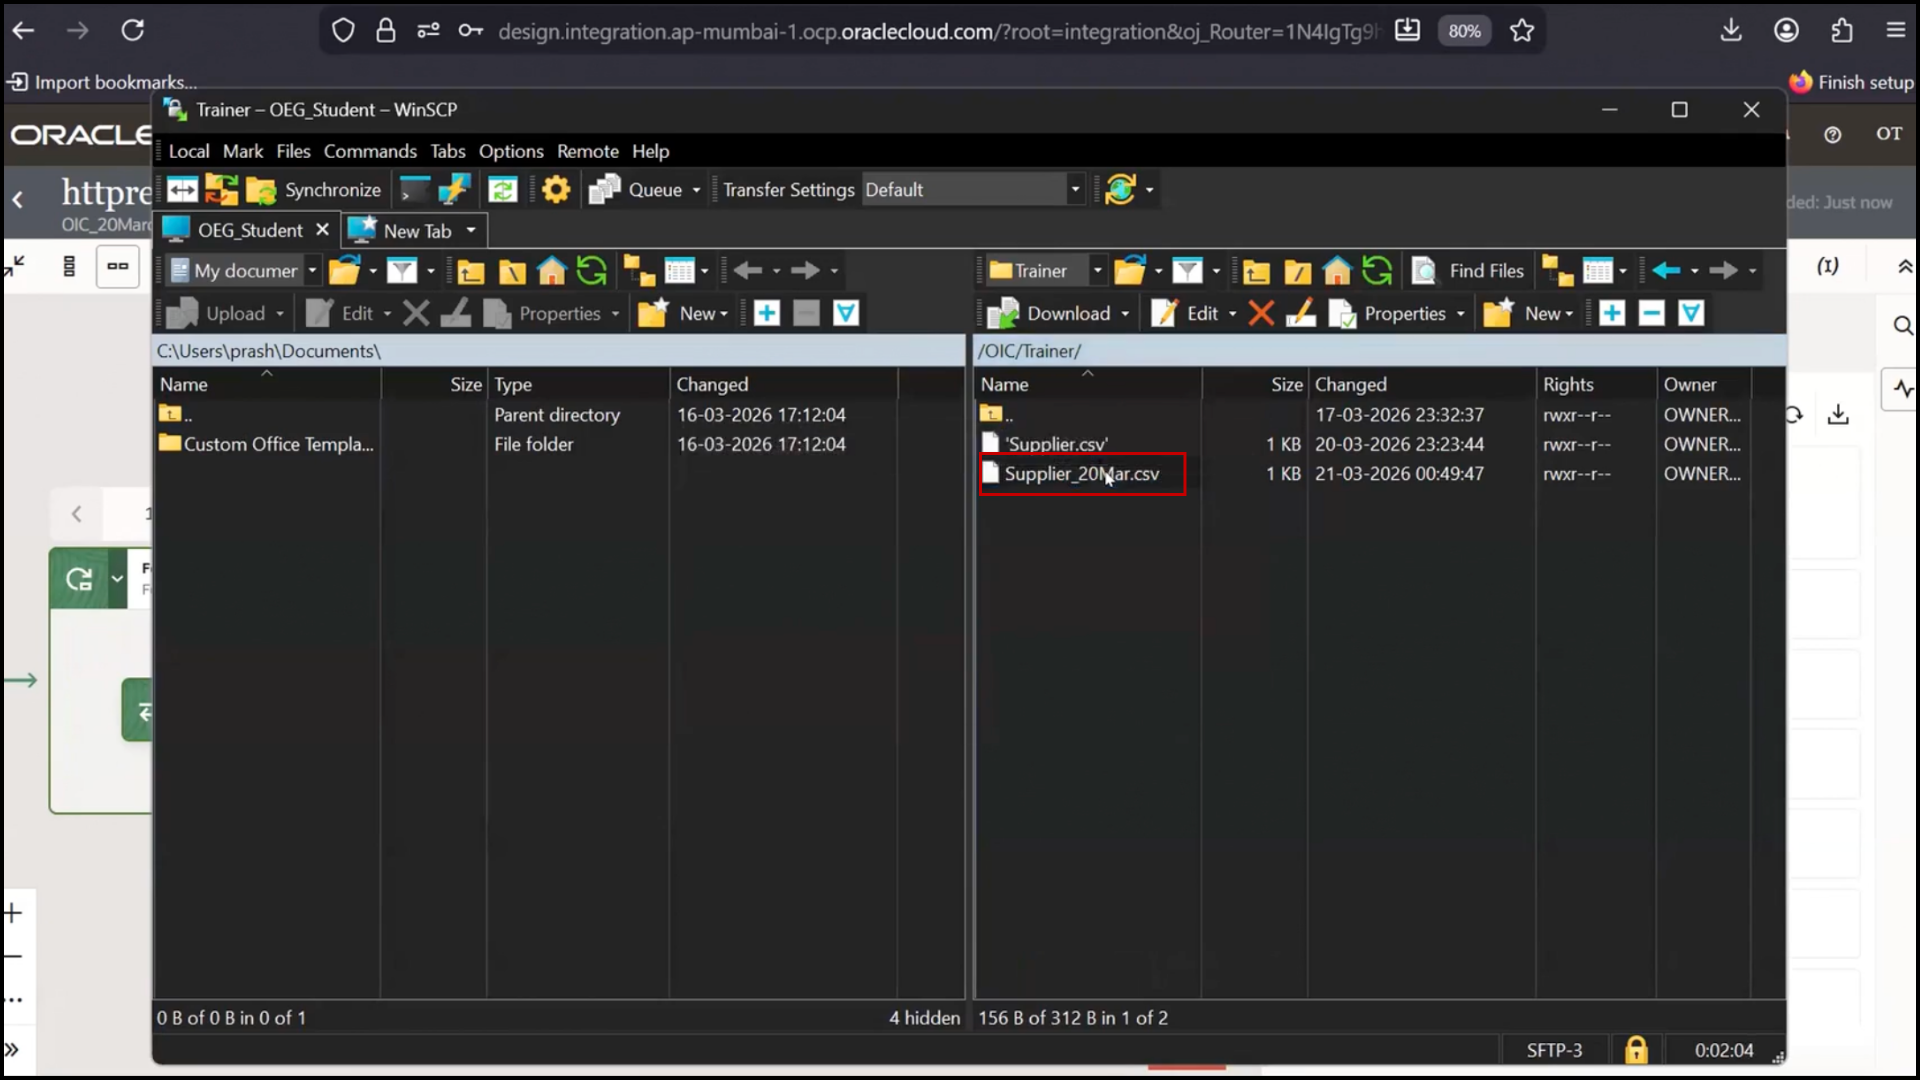
4. Check FTP file
5. Confirm new record added
6. Check database
7. Confirm status updated to Completed
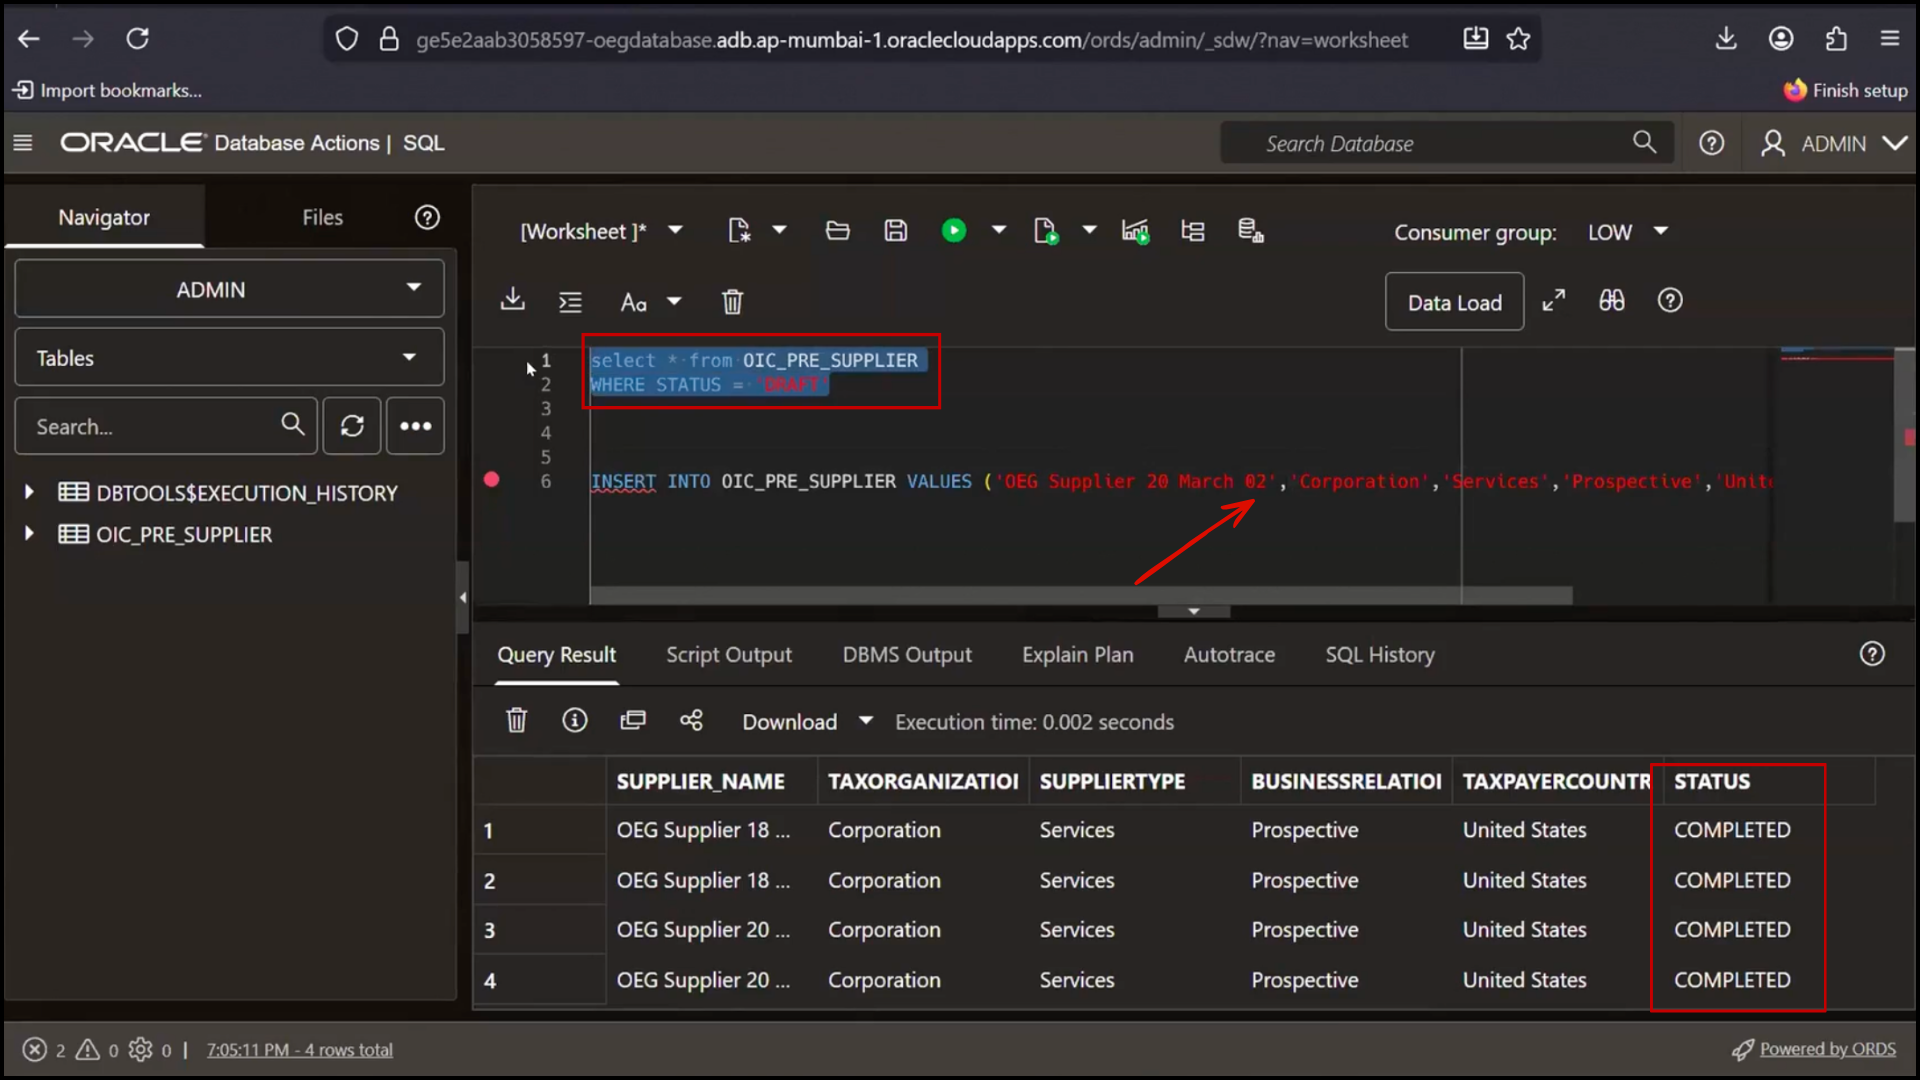
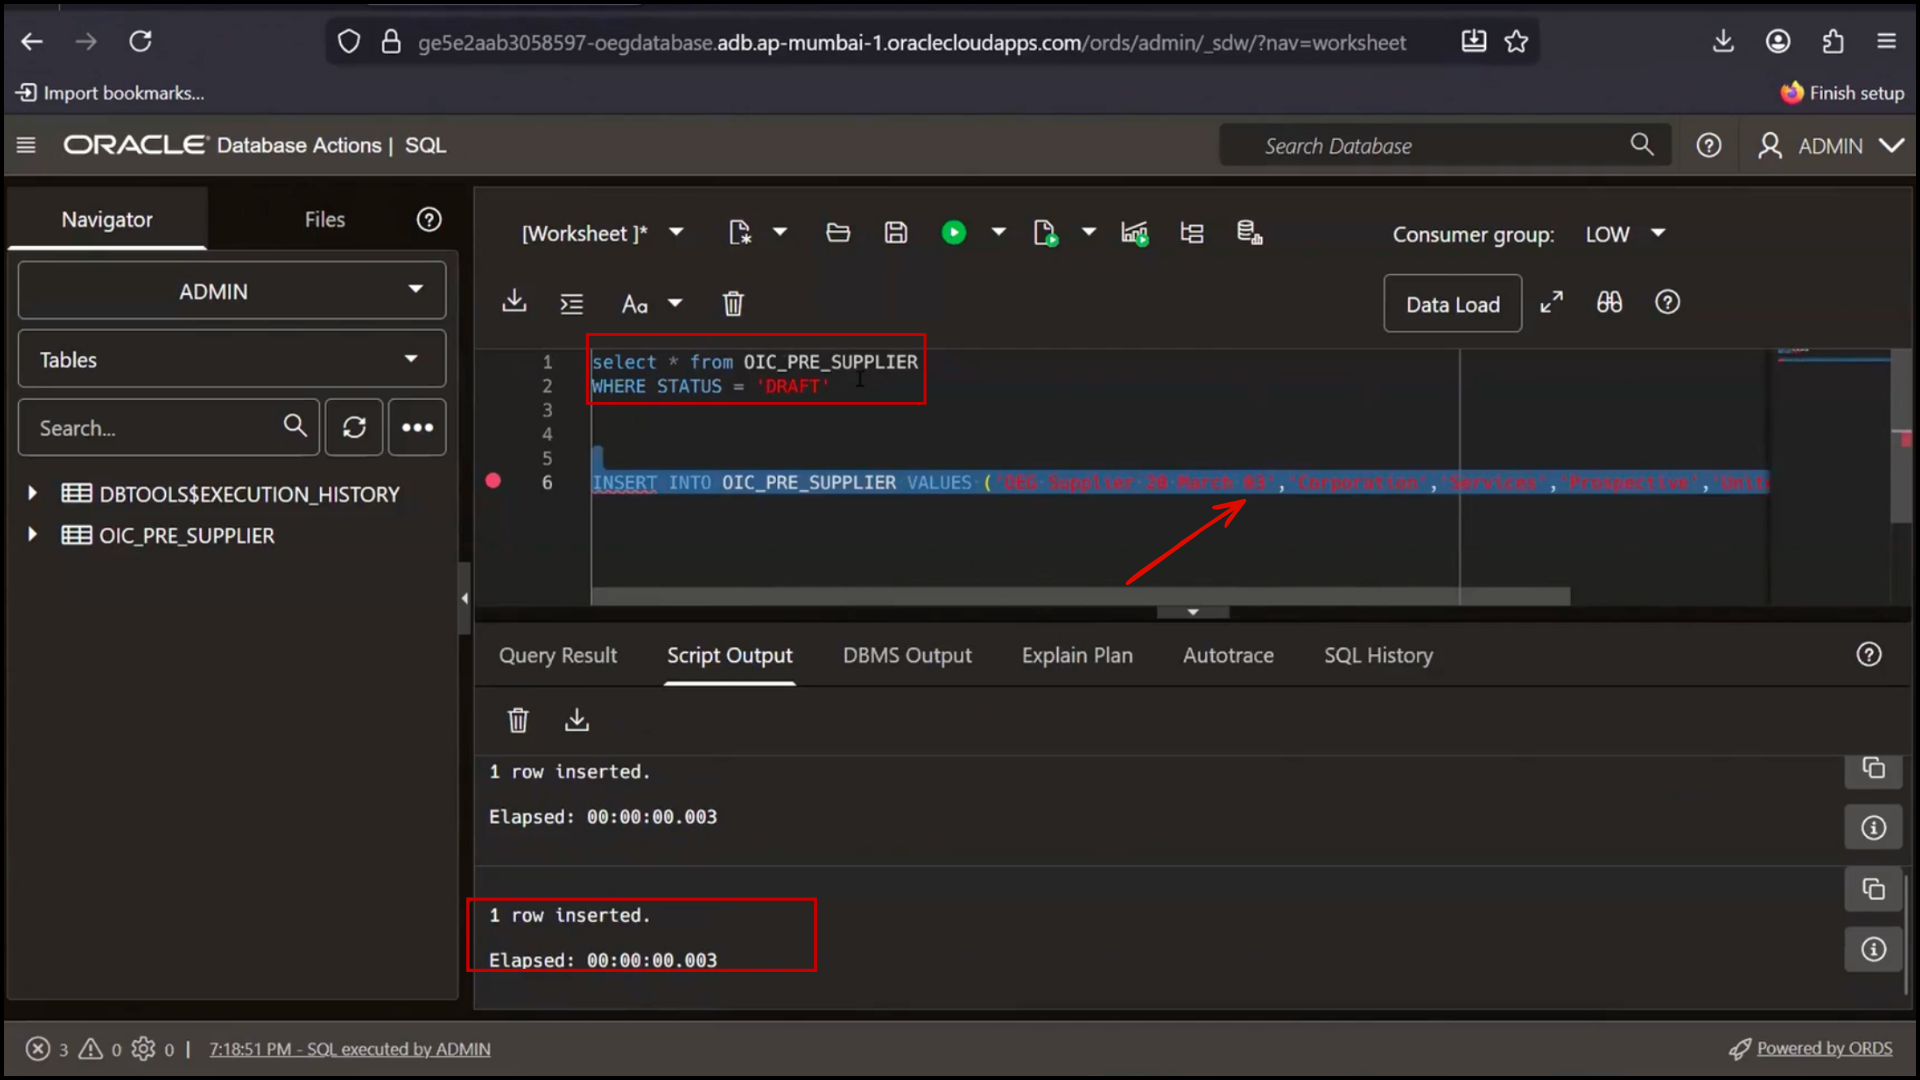
8. 1 Row inserted
9. Check Fusion
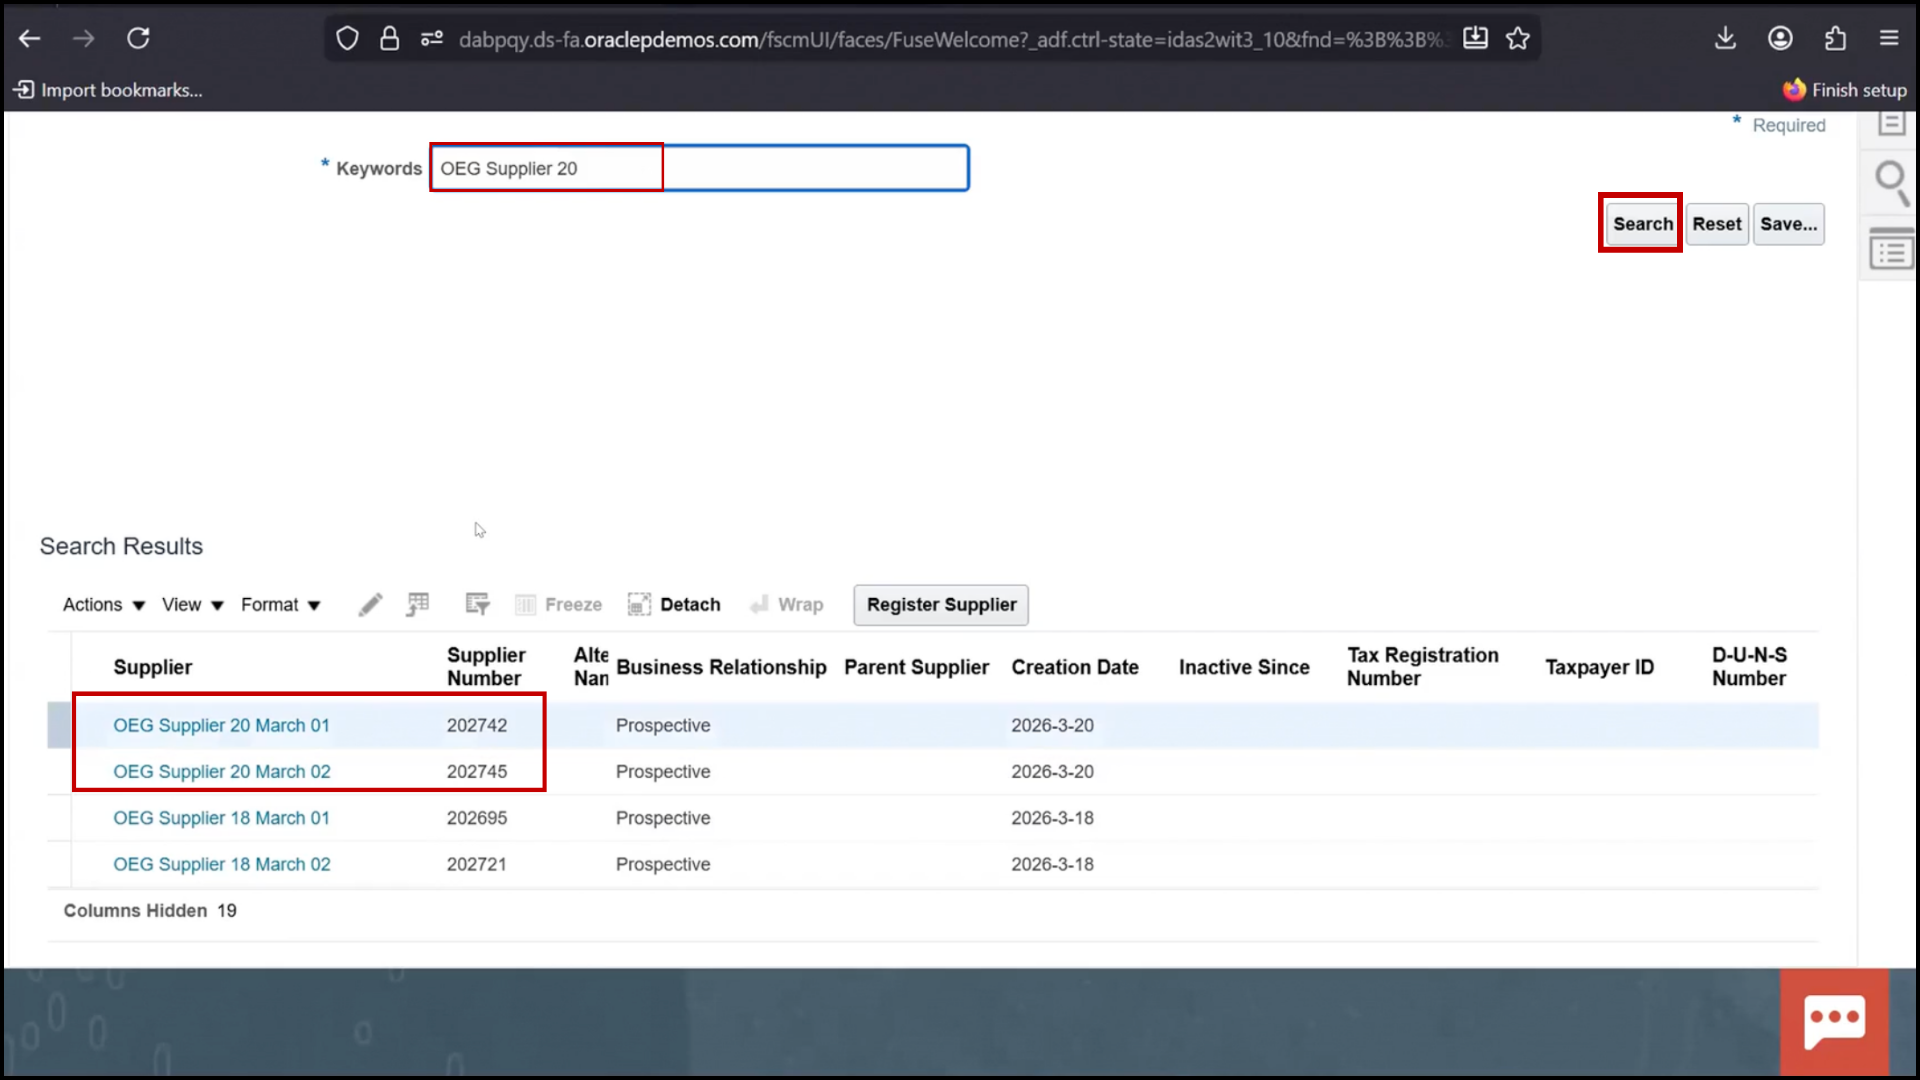
10. Confirm new supplier created
Testing with Multiple Records
1. Insert multiple records (e.g., 3 records)
2. Run query to verify Draft records
3. Confirm records do not present in Fusion
4. Go to OIC
5. Click Run
6. Wait for execution
Verifying Multiple Record Execution
1. Open Instance ID
2. Check flow diagram
3. Verify For Each executed multiple times (based on records)
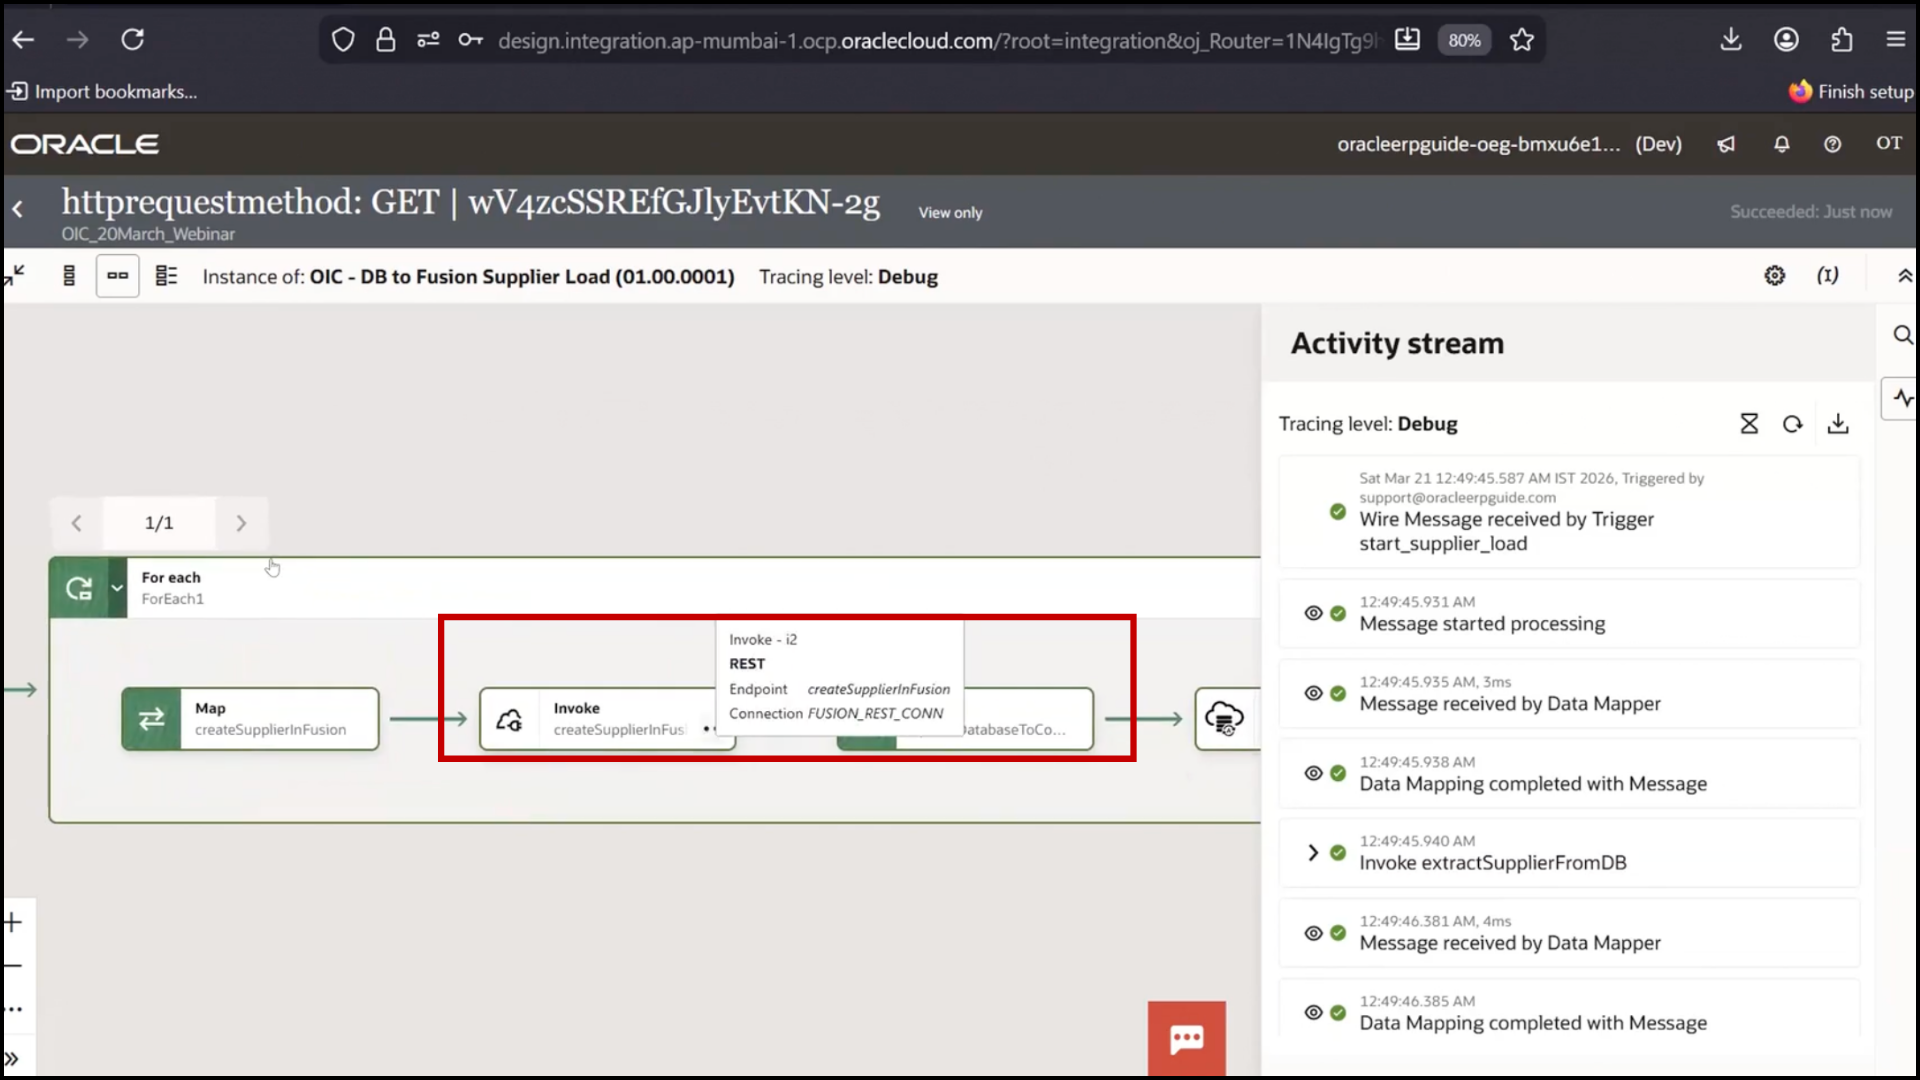
4. Confirm loop count (e.g., 3 times)
5. Check database
6. Verify all records marked as Completed
7. Check FTP file
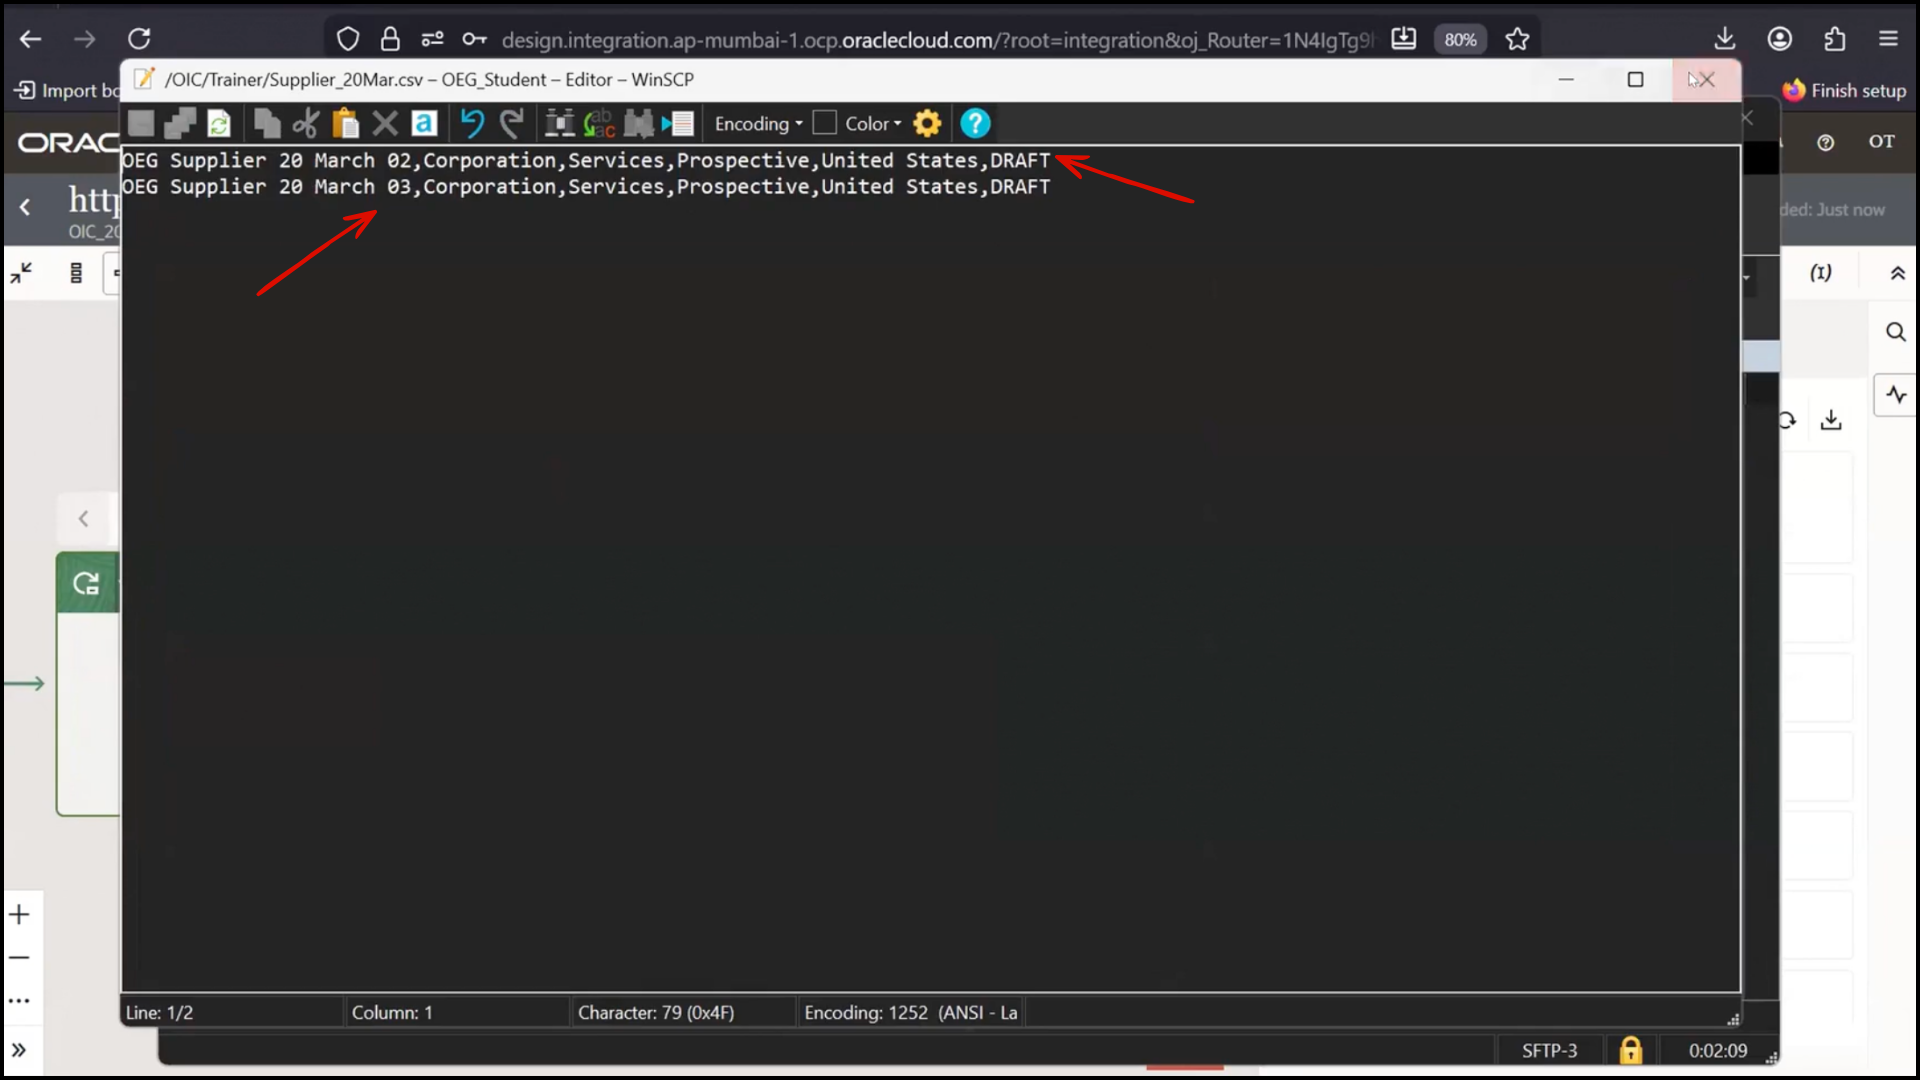
8. Confirm multiple new entries added
9. Check Fusion
10. Verify all new suppliers created
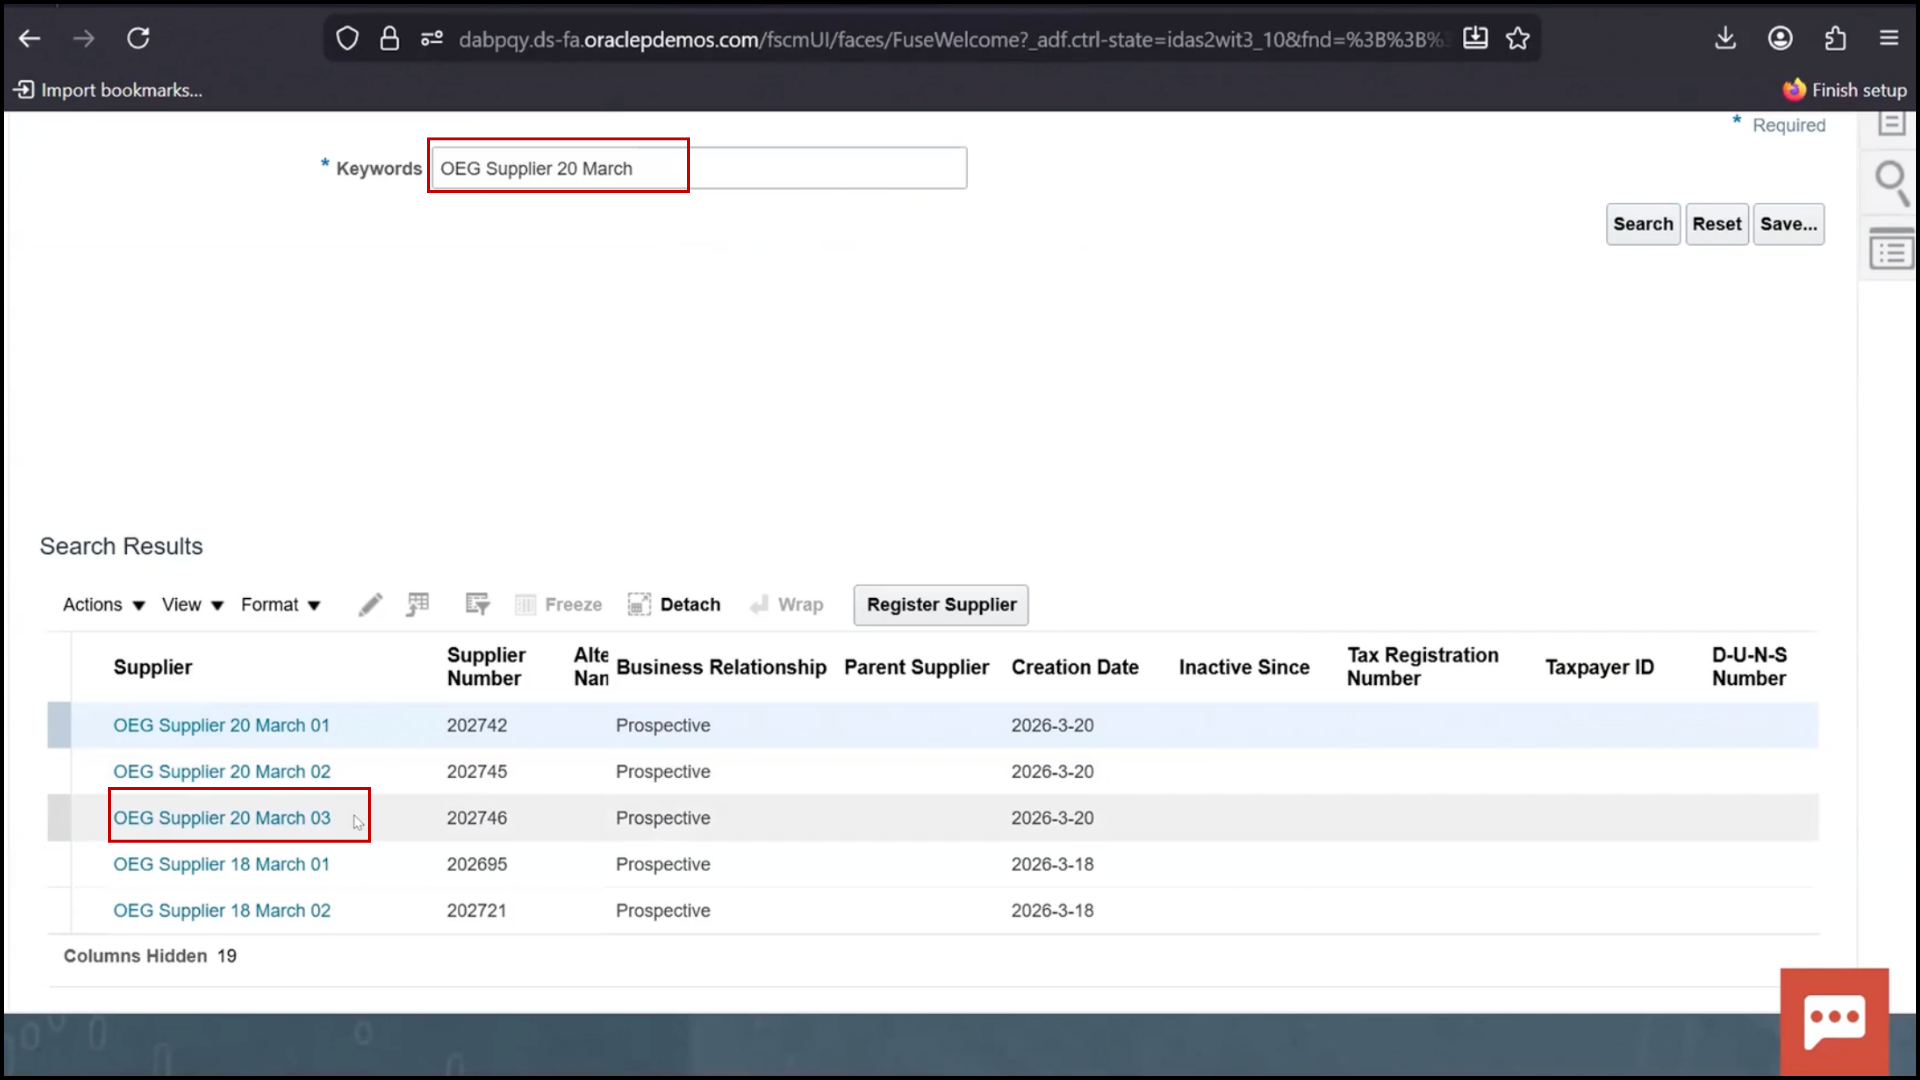
11. Search (OEG)
Final Outcome
1. Integration works for single record
2. Integration works for multiple records
3. A loop ensures each record is processed individually
4. Data flows correctly across Database, FTP, and Fusion
5. The system remains synchronized across all platforms
Data Flow Logic
1. Only records with Draft status are processed
2. After processing:
3. Status updated to Completed
4. Prevents reprocessing
File Handling Logic
1. Two approaches:
a. Create new file each time
b. Append to existing file (used here)
Automation Capability
1. Integration can be scheduled:
2. Daily
3. Every few hours
4. Based on business needs
Final Outcome
After execution:
System | Result
Database | Status updated
Fusion | Supplier created
FTP | File updated
Conclusion
This Blog demonstrates how to:
Build real integration using OIC
Connect multiple systems
Automate data movement
Maintain data consistency
The OracelErpGuide emphasizes that OIC simplifies integration by providing a low-code platform with built-in adapters and security.