Introduction to Inventory Management (As Explained in Training)
Before getting into the Oracle instance and starting the setups, it is important to first understand what exactly Inventory Management is.
Inventory Management is a core module in an ERP system. It plays a critical role in helping organizations track, control, and manage their stock efficiently.
This module allows businesses to record every movement of inventory, including:
- Purchasing goods
- Receiving items into stock
- Issuing items for production or sales
- Transferring inventory between locations
- Performing adjustments
- Conducting physical stock counts
The primary objective of Inventory Management is to ensure the following:
- The right quantity of inventory
- At the right time
- At the right location
By doing this, organizations can:
- Avoid stock-outs
- Reduce excess inventory
- Minimize operational costs
- Ensure smooth business operations
After understanding this, we now proceed to the system and begin the end-to-end setup of Inventory Management in Oracle Cloud.
Starting the Setup in Oracle Instance
The trainer now shares the screen and begins working inside the Oracle Cloud instance.
We will start performing complete inventory setups step-by-step.
User Roles and Data Access (Important Configuration)
Before proceeding further with inventory transactions, it is important to understand how users, roles, and data access work in the system.
Why This Is Required
In a real-time environment:
- Multiple users work simultaneously
- Different users perform different tasks
- Access must be controlled and synchronized
For example:
- Some users create transactions
- Some assign roles
- Some manage data access
To ensure everything works properly and in sync, Oracle provides a program.
Running “User and Role Synchronization Process”
To synchronize roles and data access across users:
Step-by-Step Action:
- Navigate to the Scheduled Processes / Program section
- Select the program:
- Run User and Role Synchronization Process
- Click on Submit
What Happened in Training
- When the trainer tried to submit the process
- The system threw an error:
Reason:
- The program was already scheduled in the backend
- It is likely running on a frequency basis automatically
Action Taken:
- The trainer clicked on Cancel
- No need to submit again
Understanding Role-Based Access
Not all users should have access to everything.
Key Concept:
- Access is role-based
- Roles are assigned based on job responsibilities
Examples:
- Inventory Users
- Can perform inventory-related transactions
- Buyers
- Can work on purchase orders
Important Rule:
Only assign:
- Required roles
- Required data access
This ensures:
- Security
- Proper segregation of duties
- Controlled system usage
1. Initial System Access
1. Log in to Oracle ERP instance
2. Wait for the home screen to load
3. View the landing page
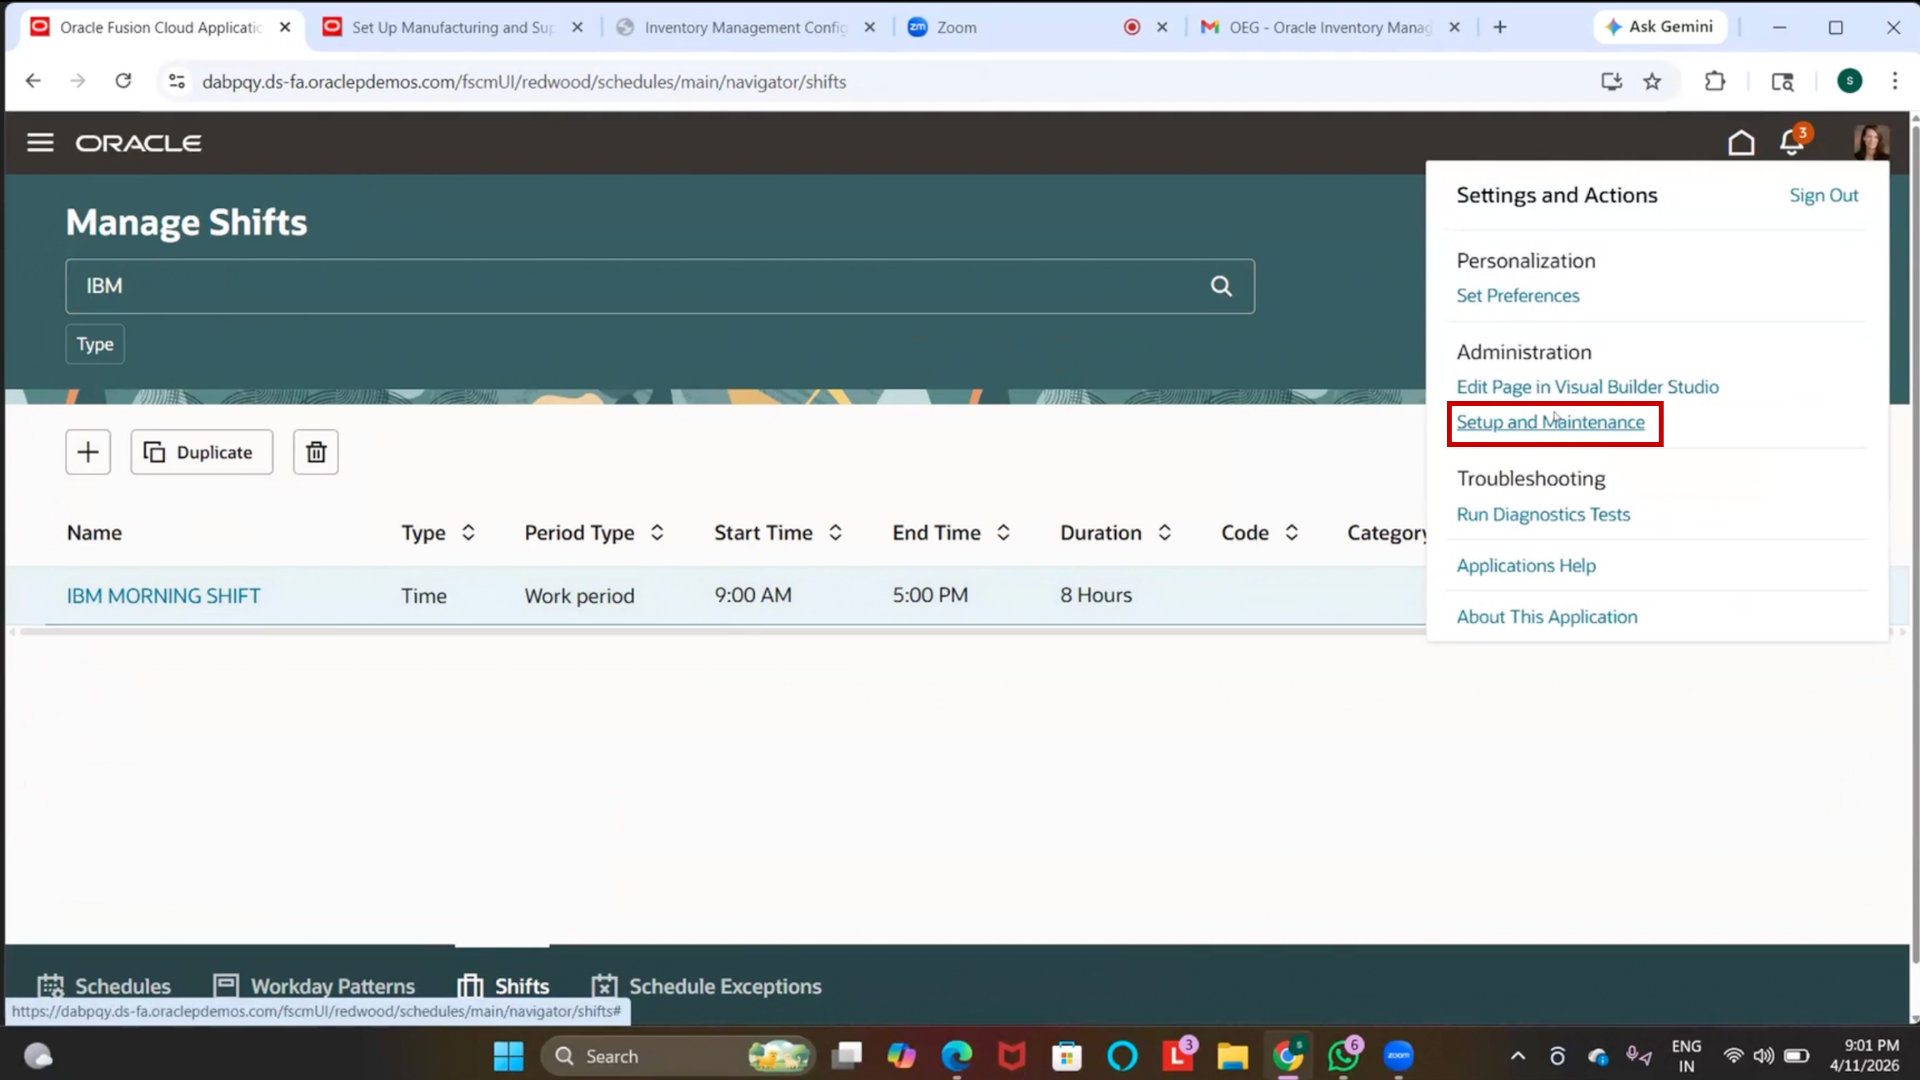
2. Navigate to Setup and Maintenance
1. Click on Setup and Maintenance
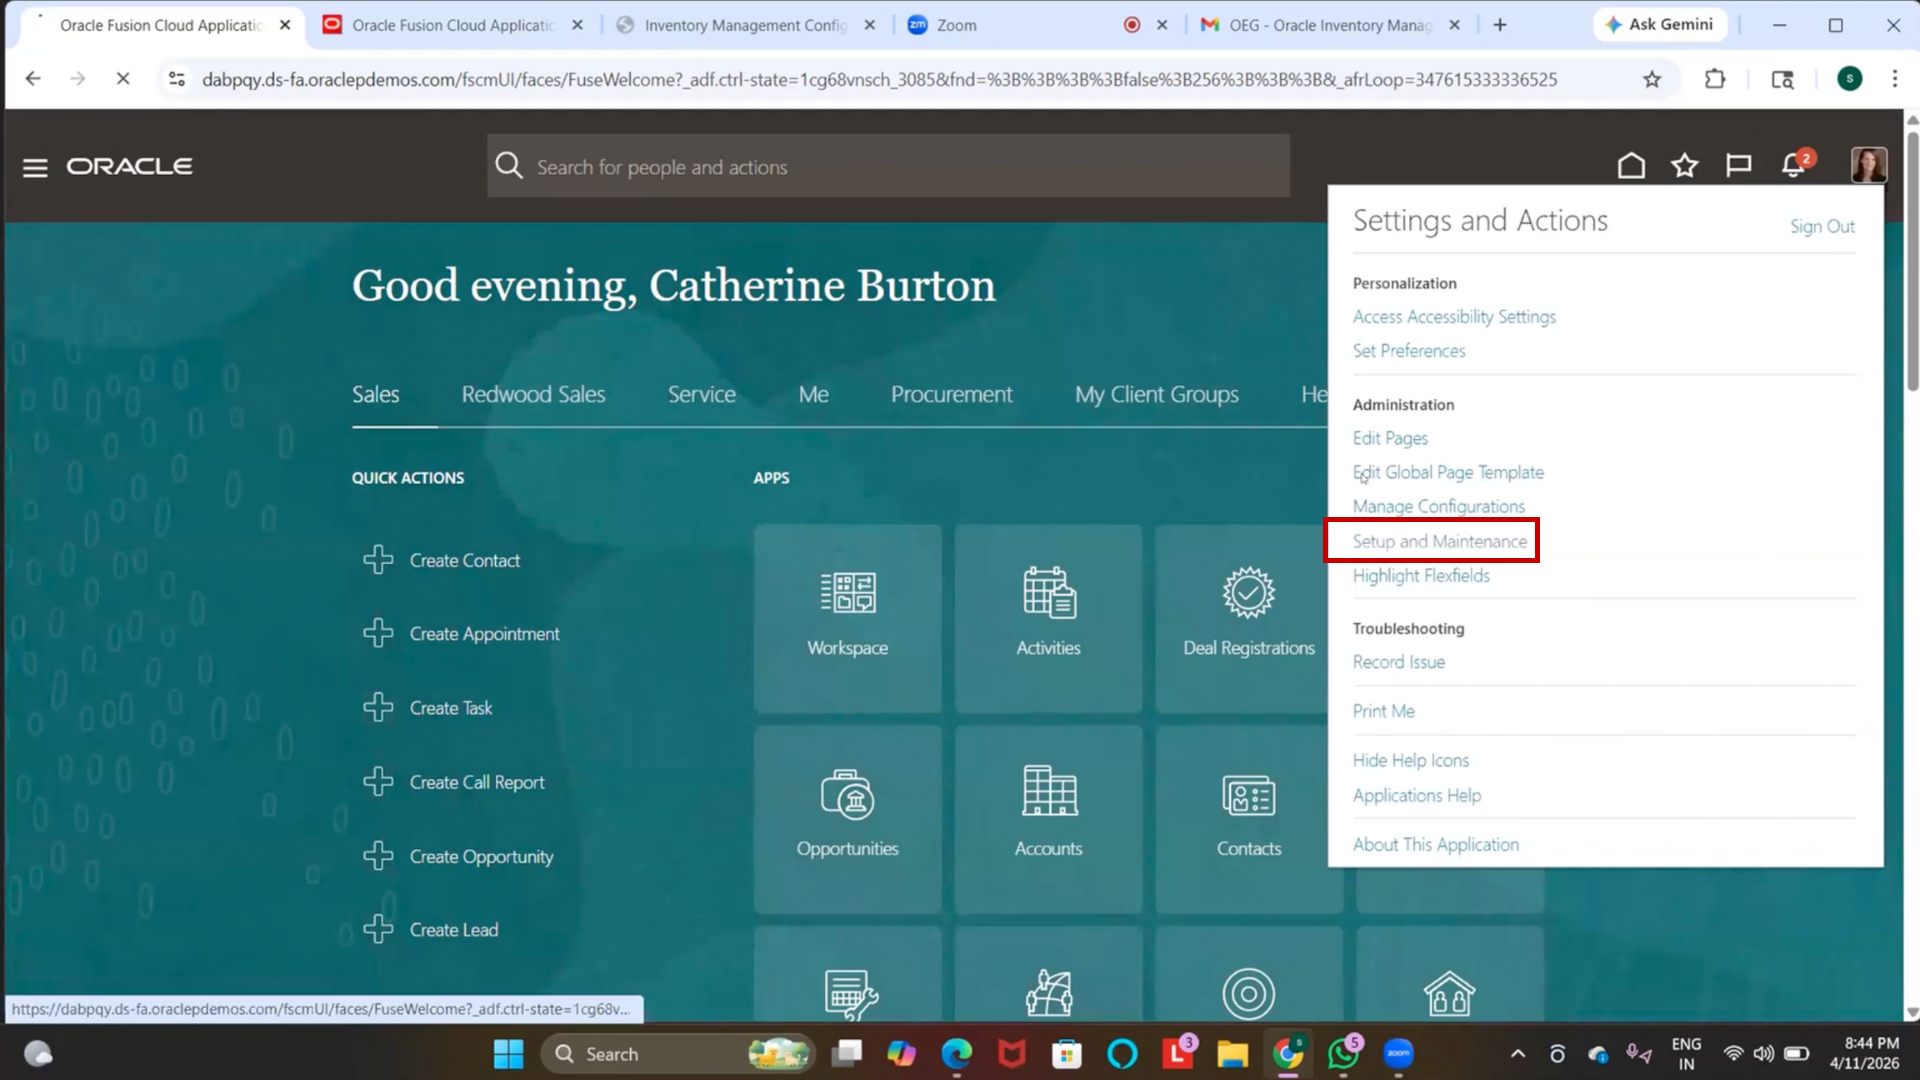
2. Wait for the page to load
3. Open Offerings
1. Click on Actions
2. Click on Go to Offerings
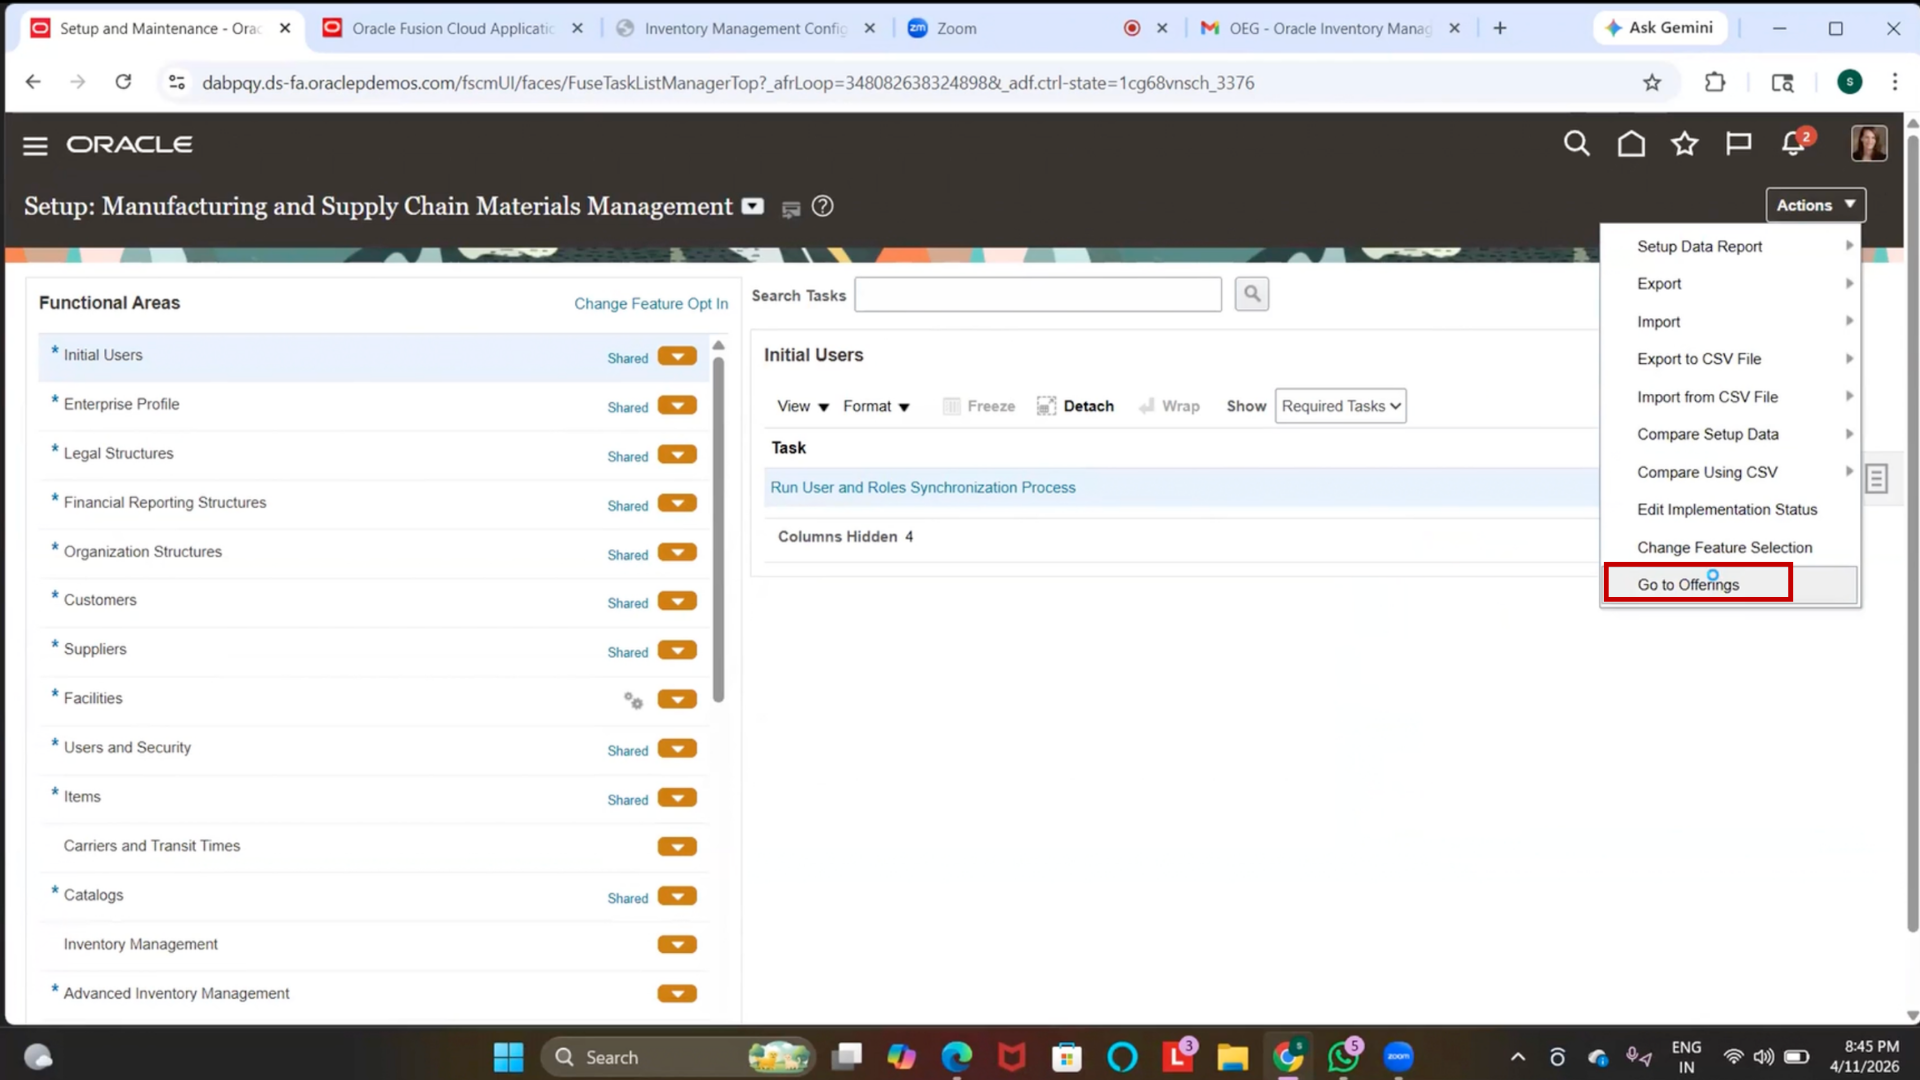
3. Wait for Offerings page to load
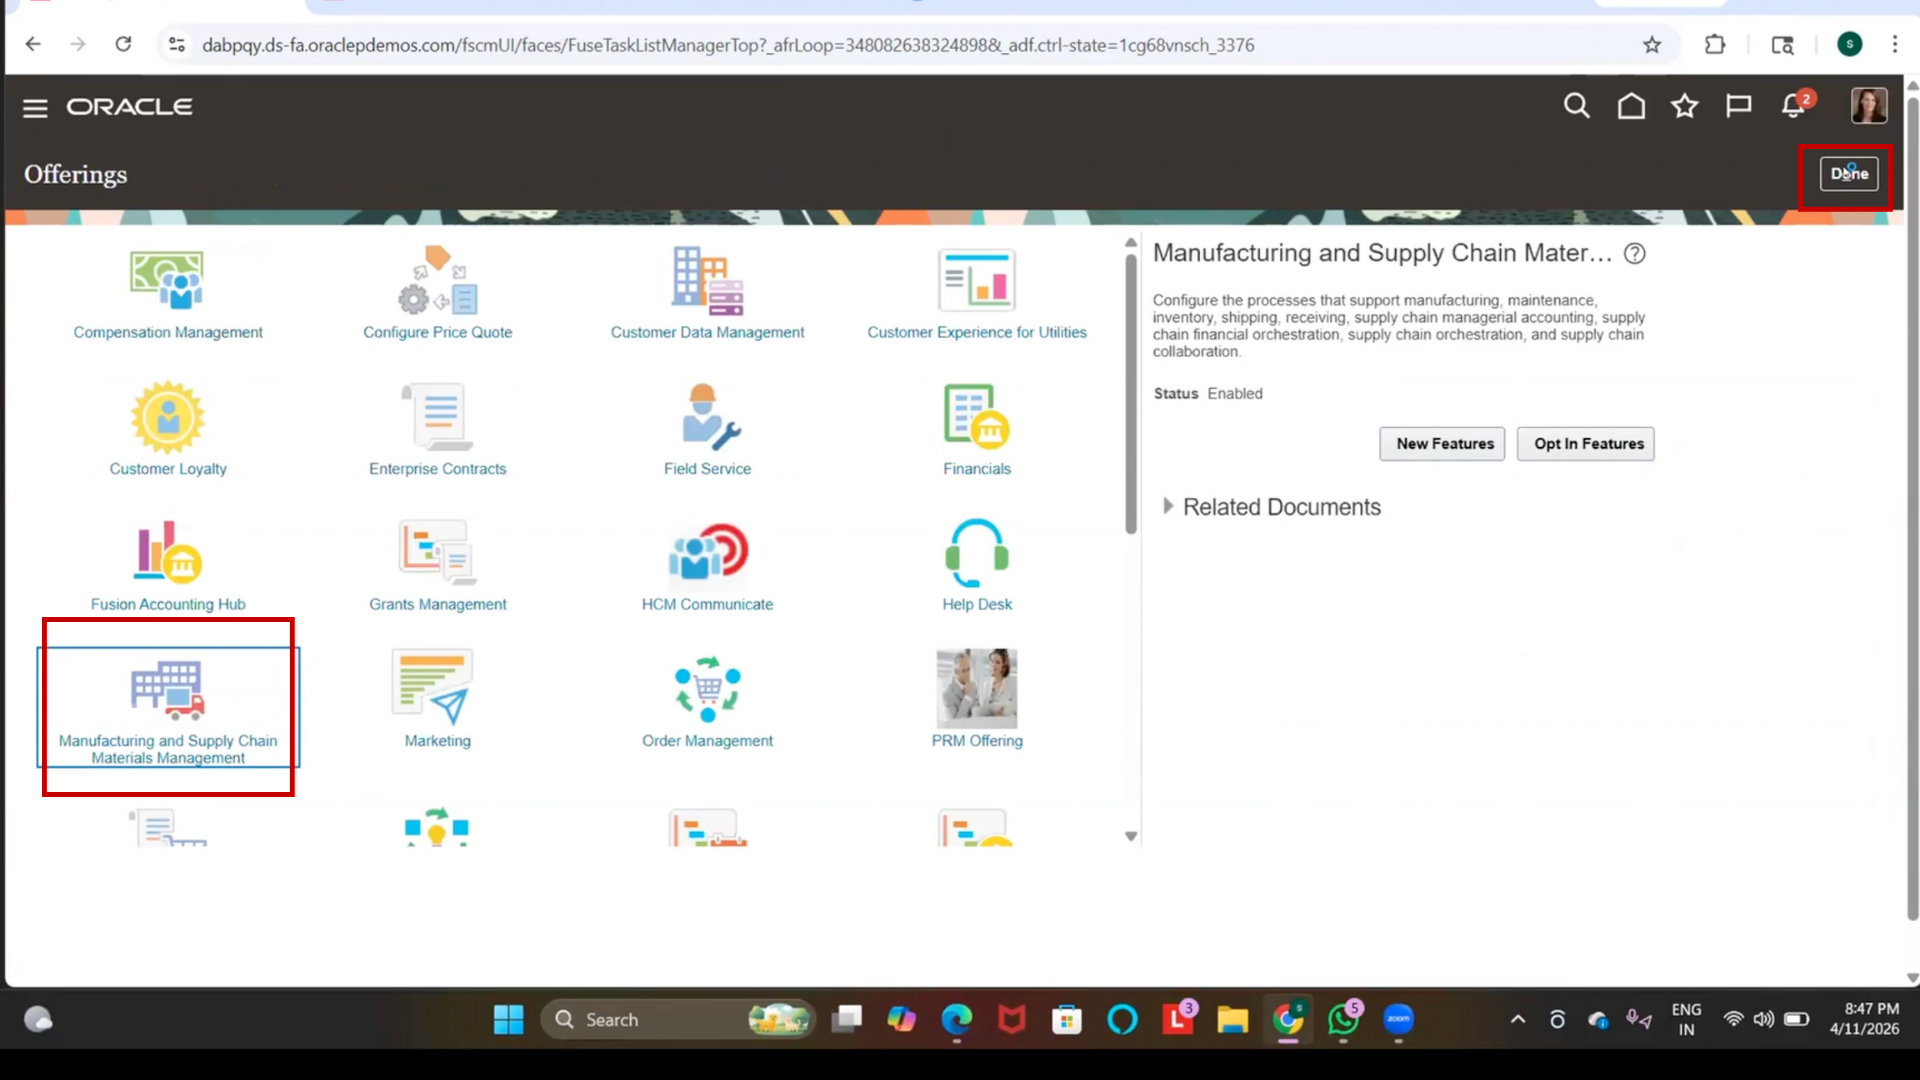
4. Select Inventory Module
1. Click on Manufacturing and Supply Chain Materials Management
5. Open Opt-In Features
1. Click on Opt-In Features
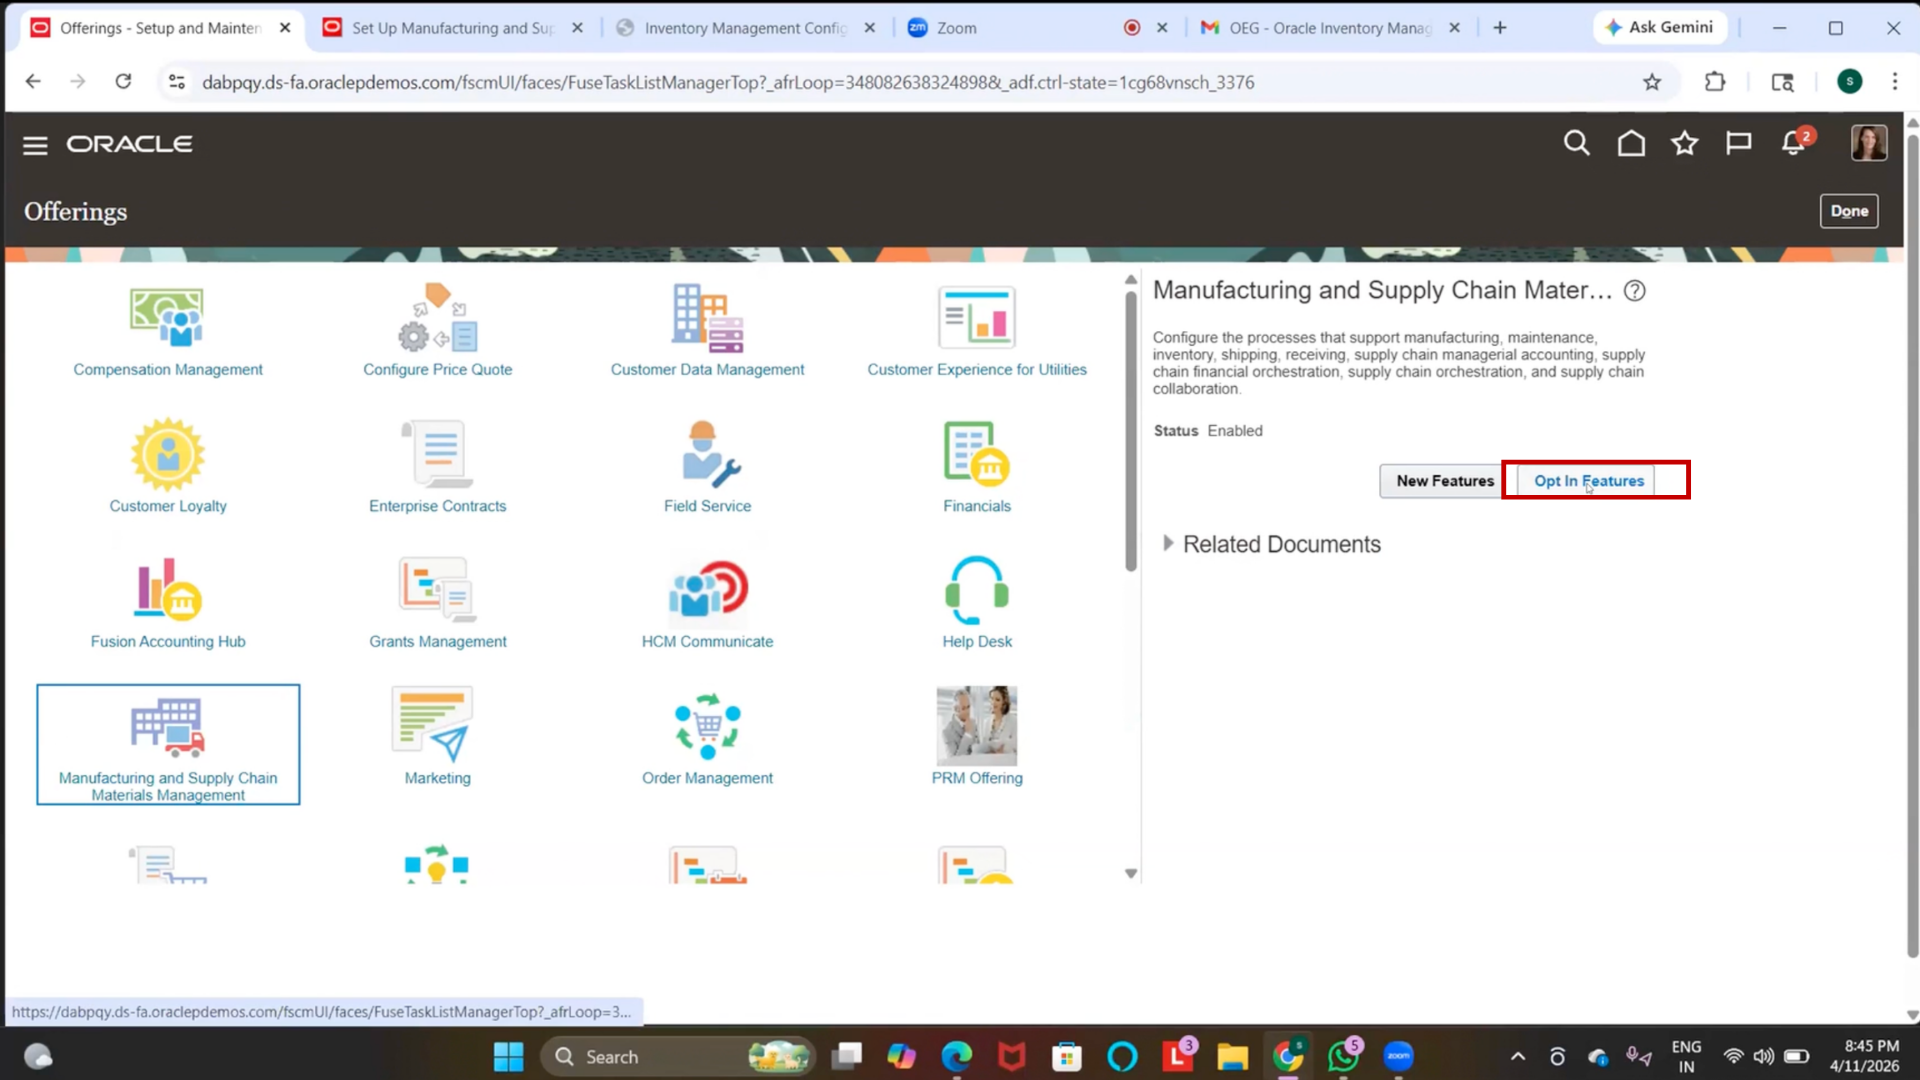
2. Wait for the page to load
6. Enable Inventory Feature
1. Locate Inventory Management
2. Click on the edit icon
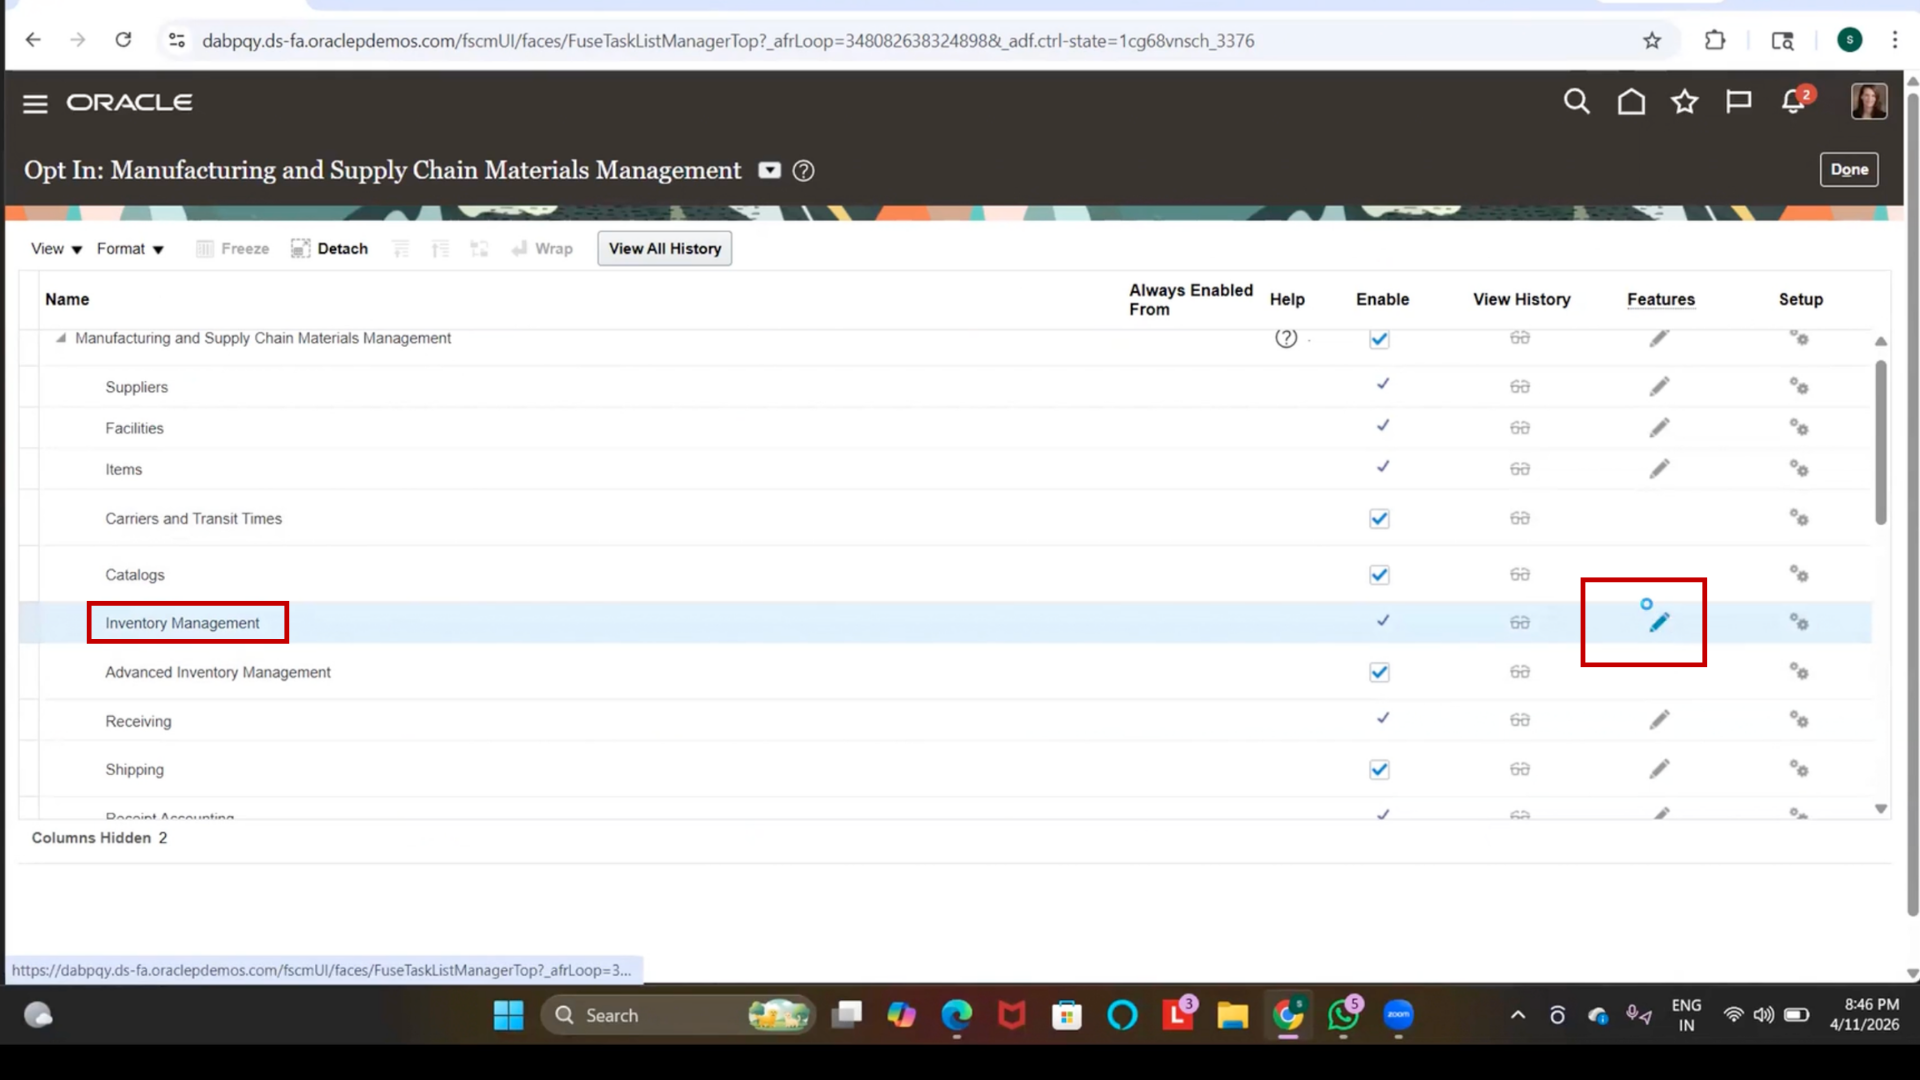
3. Wait for features list to load
4. Scroll through features
5. Locate “Use Approvals for Movement Requests.”
6. Click on the checkbox.
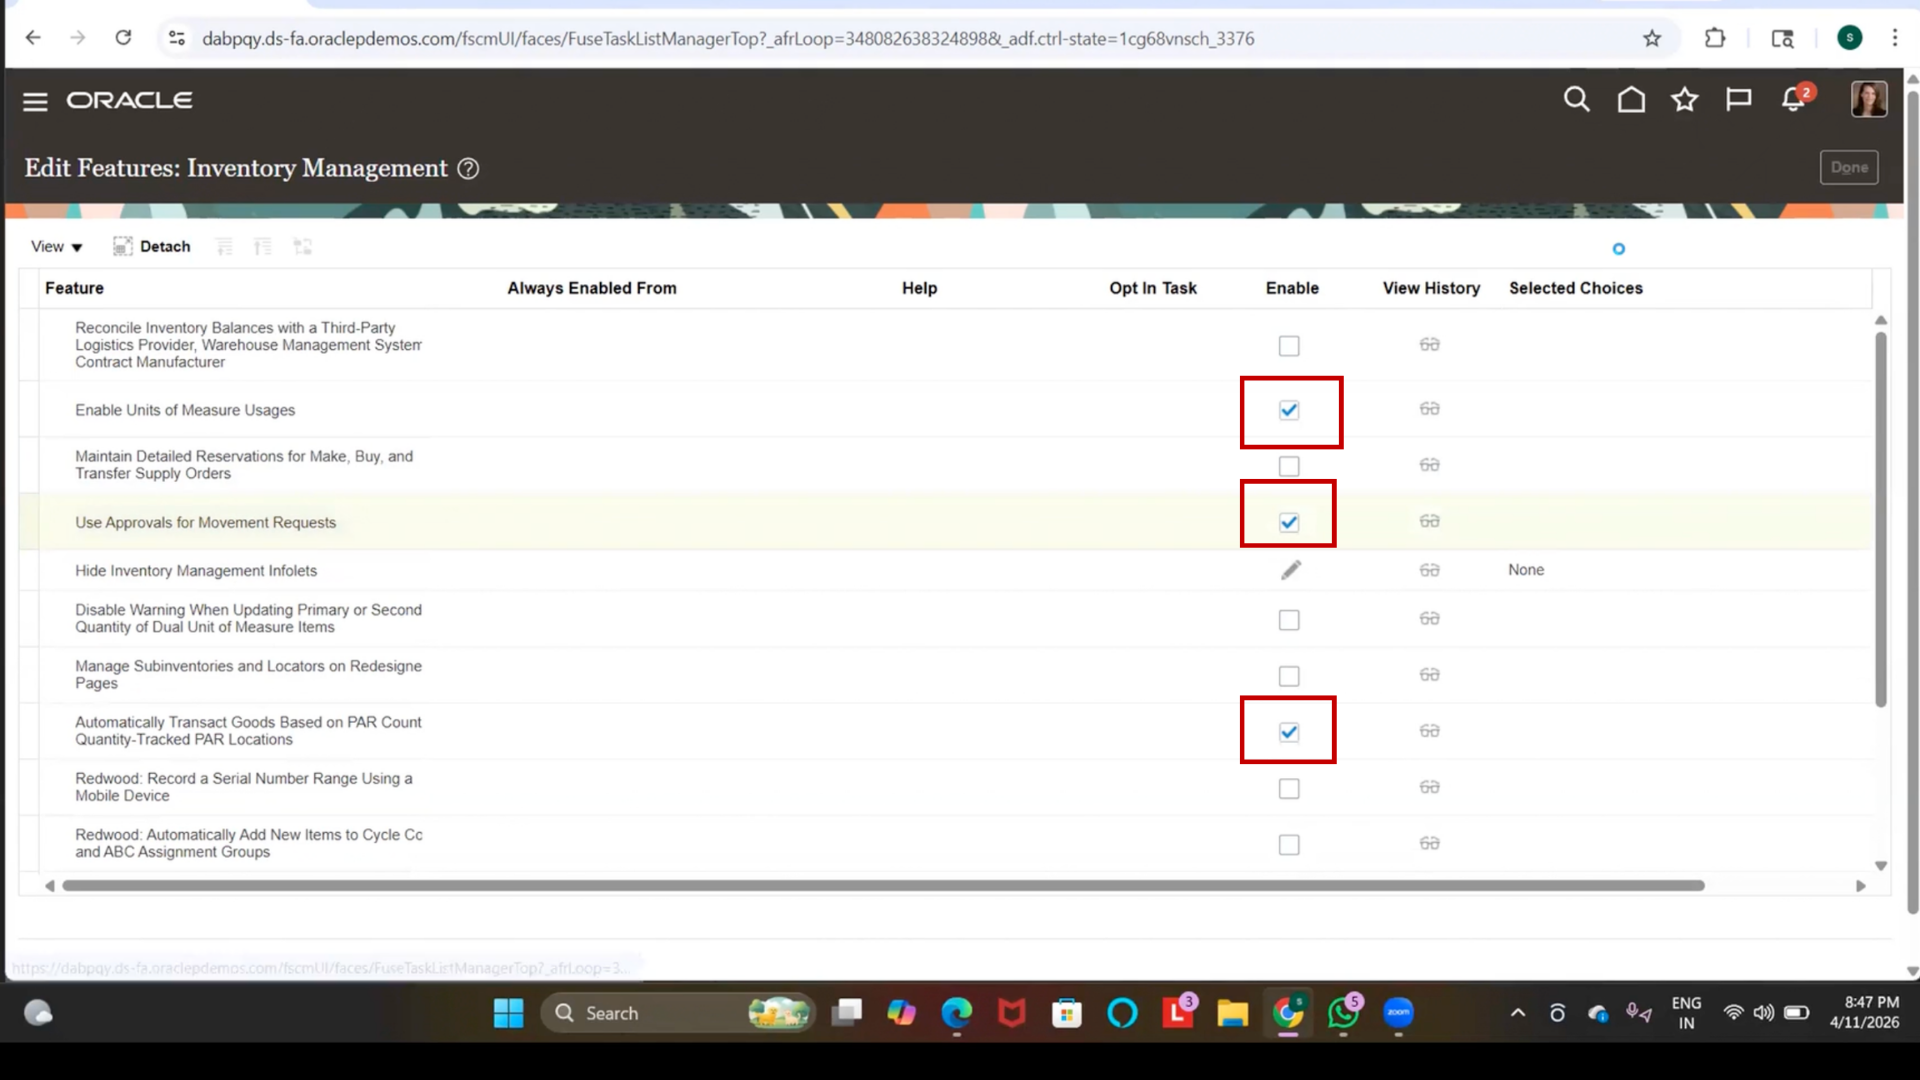
7. Verify checkbox is selected
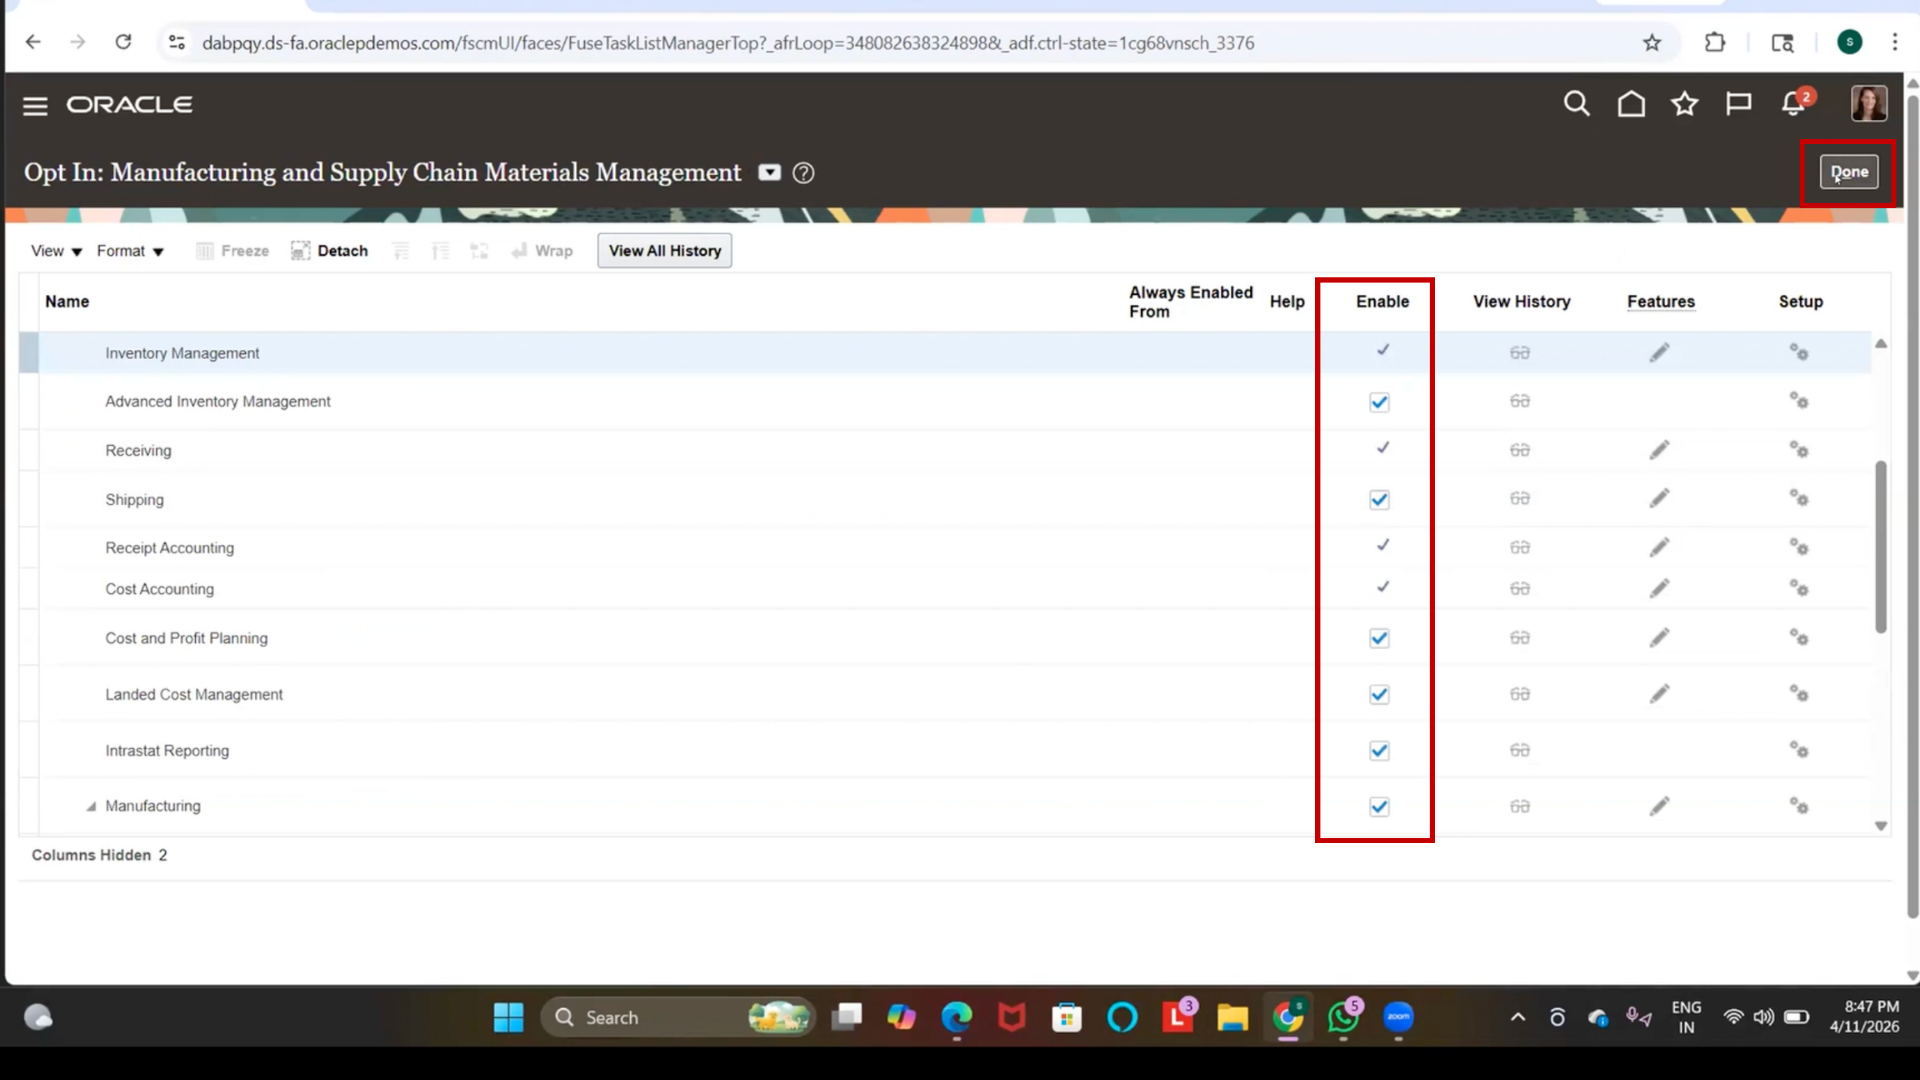
8. Click Done
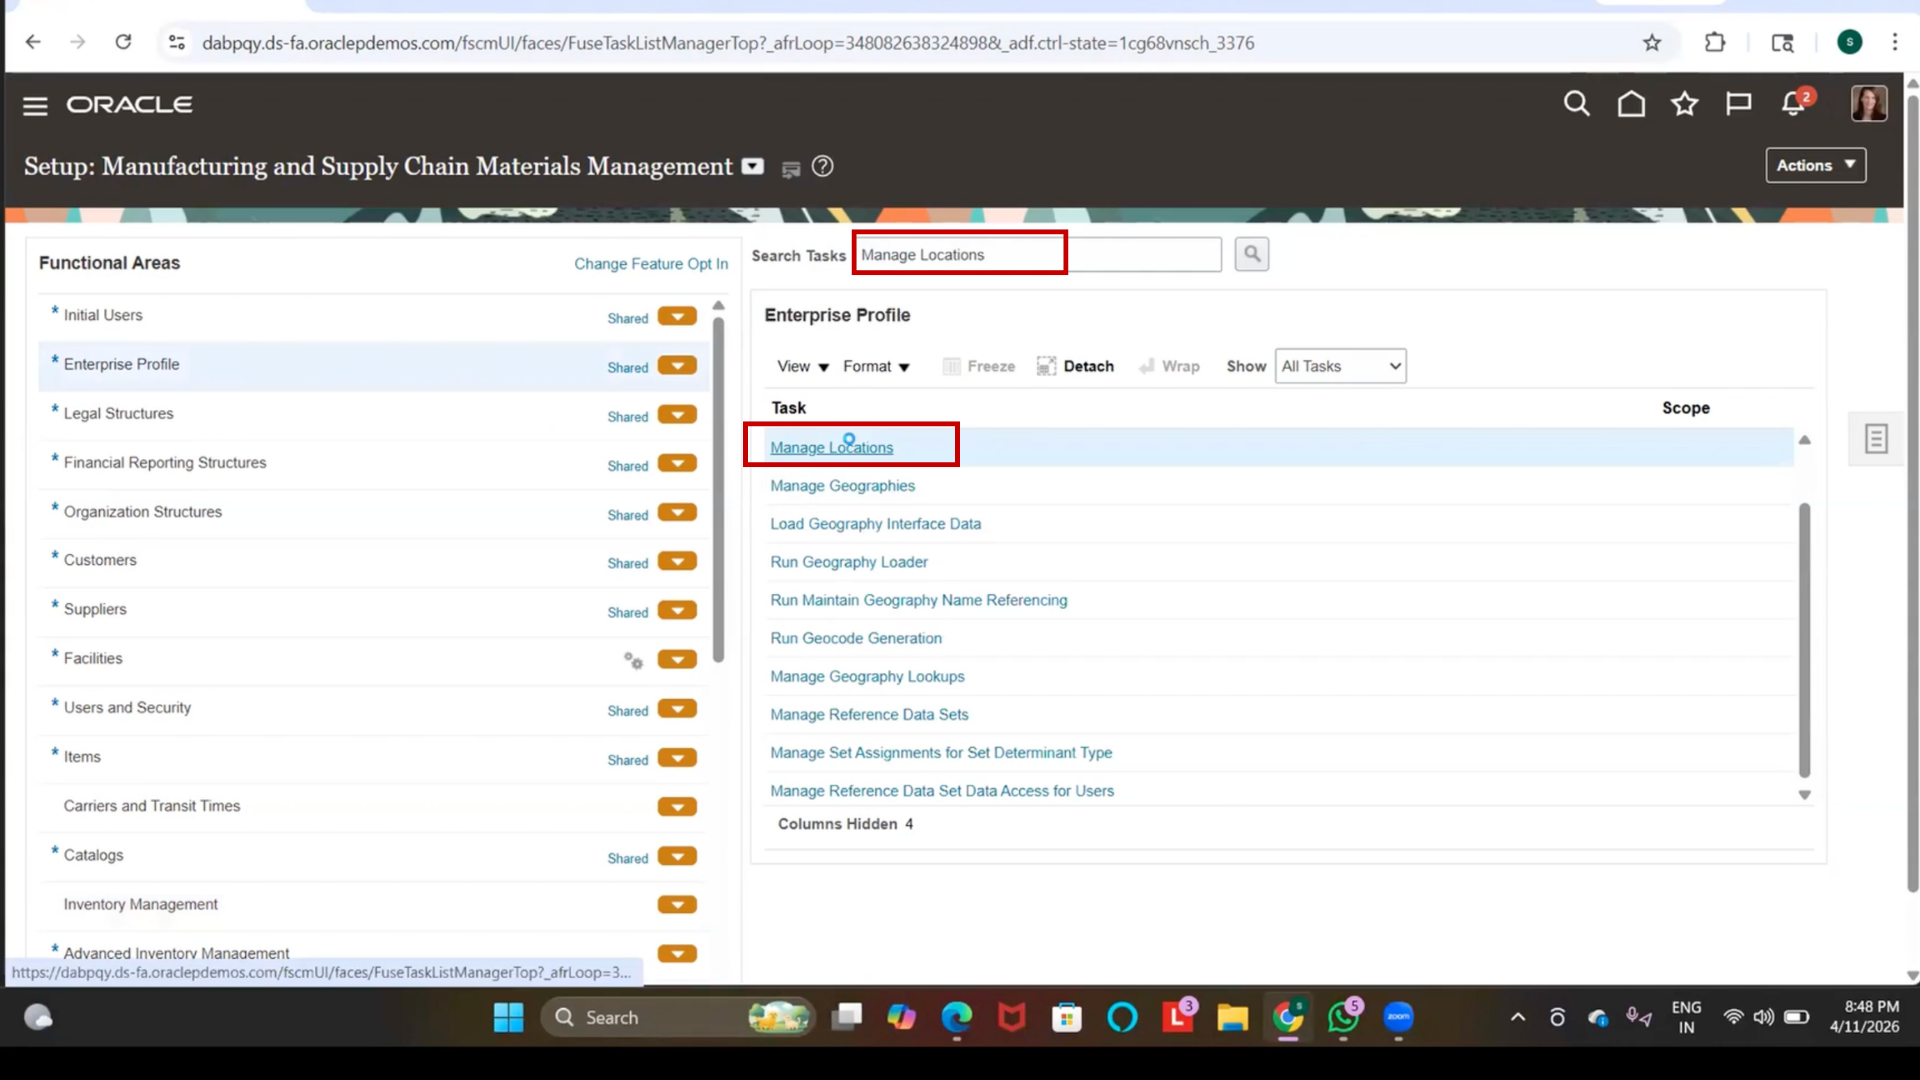
7. Search Manage Locations
1. Click on the search bar
2. Type “Manage Locations”
3. Press Enter

4. Click on Manage Locations

5. Wait for page to load
8. Create Location
1. Click on Create
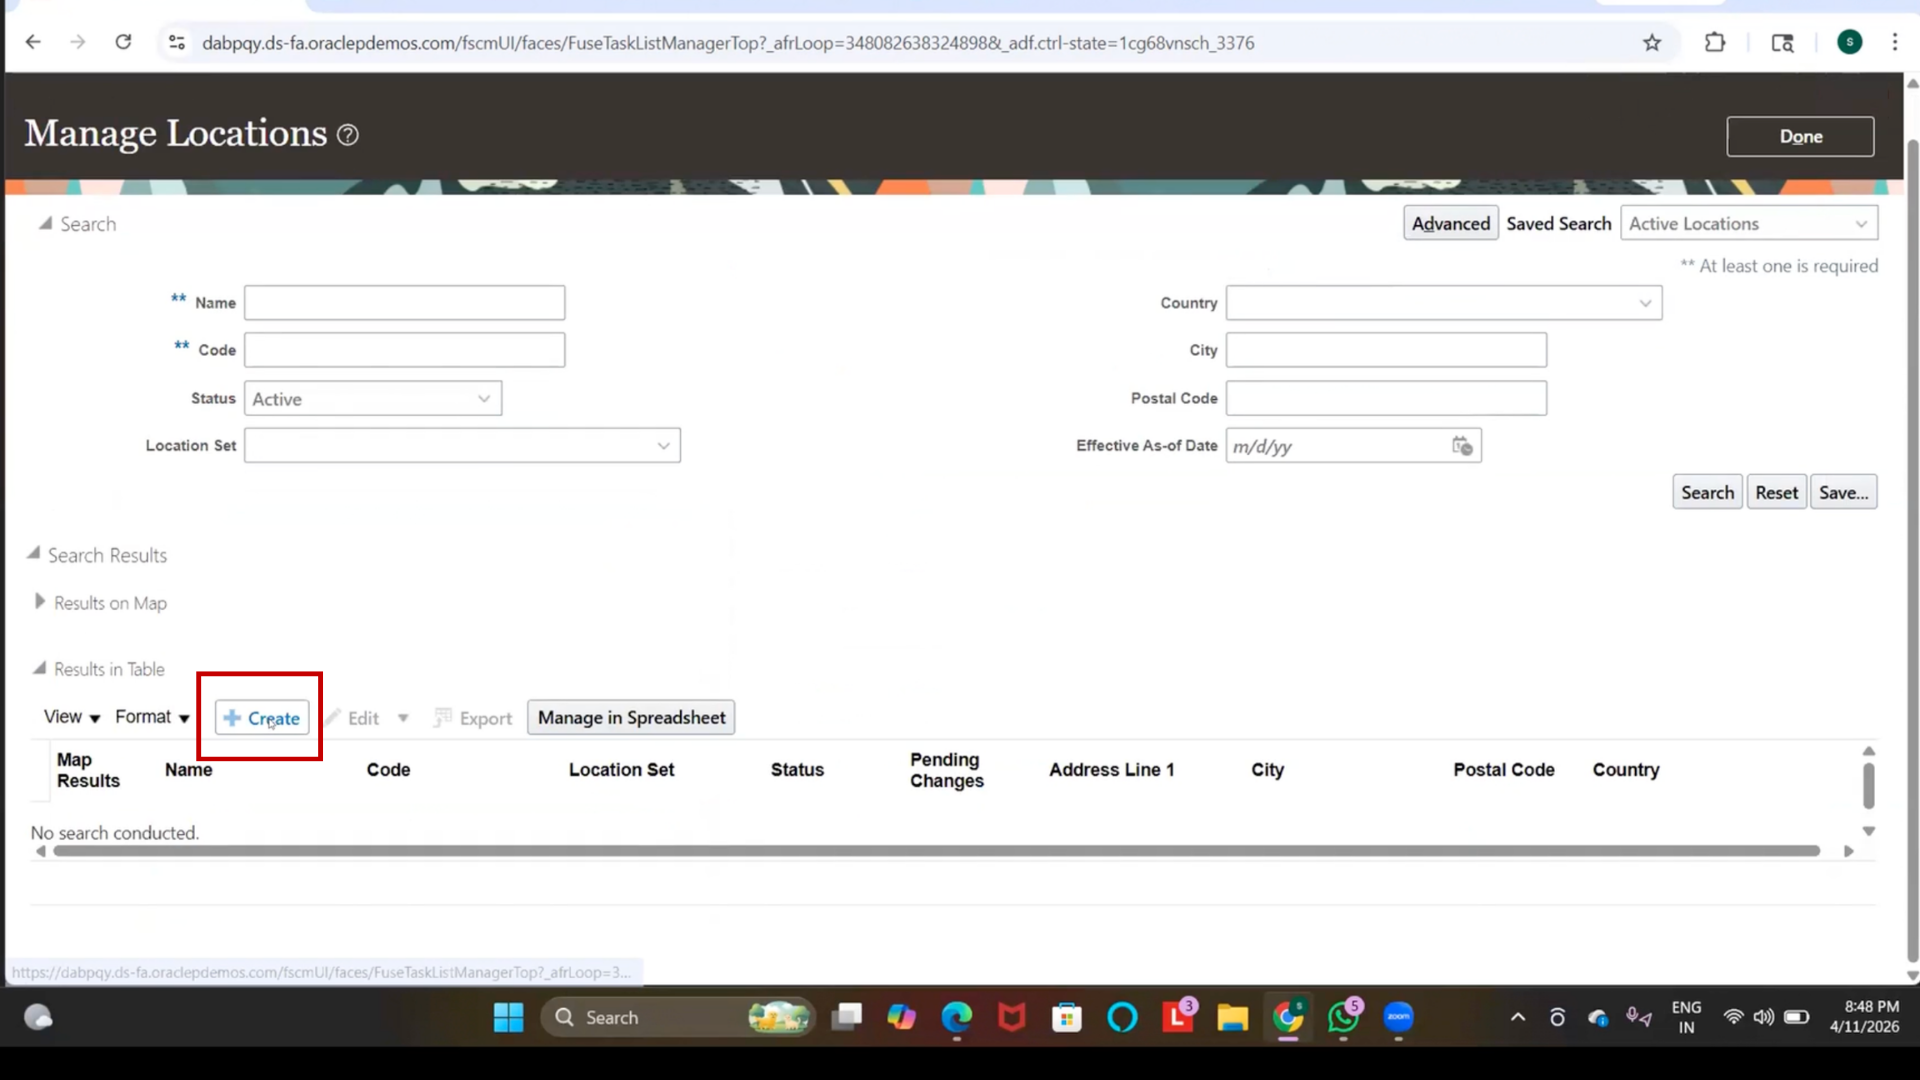
2. Wait for Create Location page to load
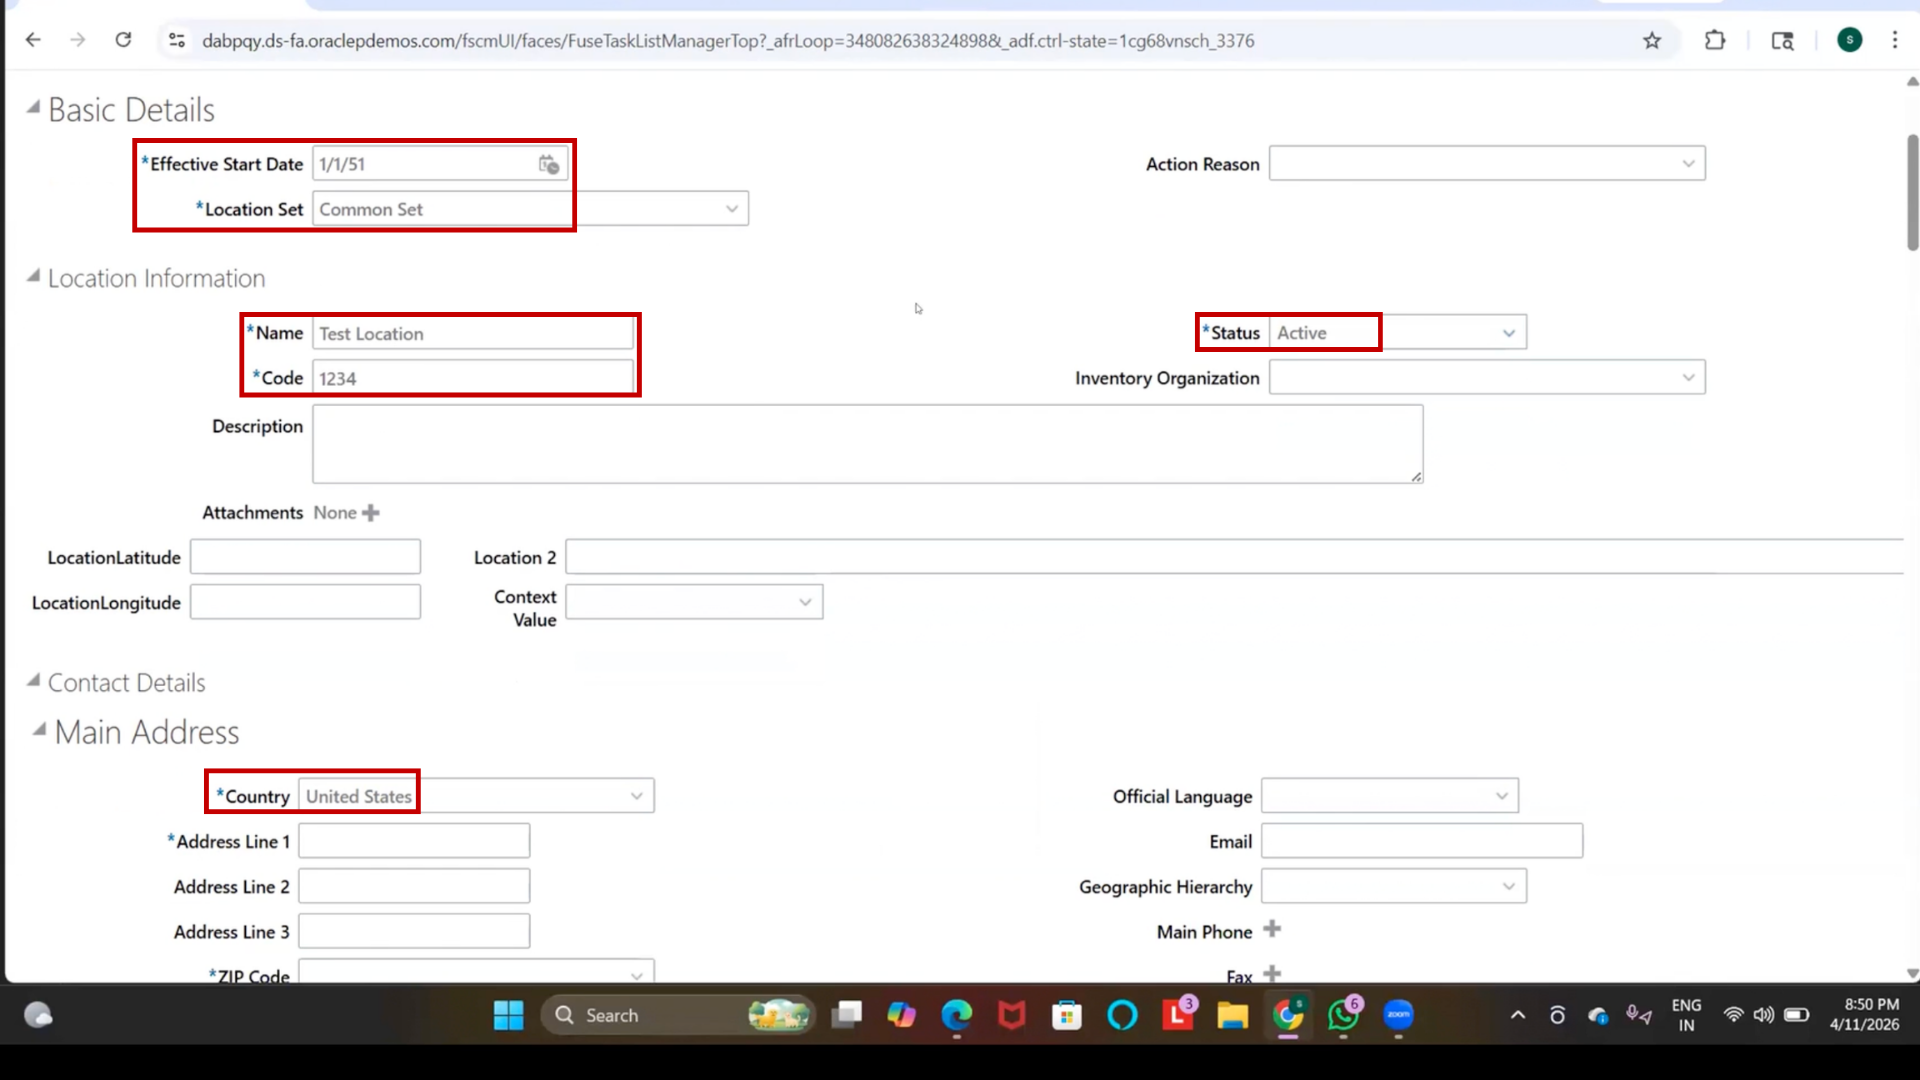
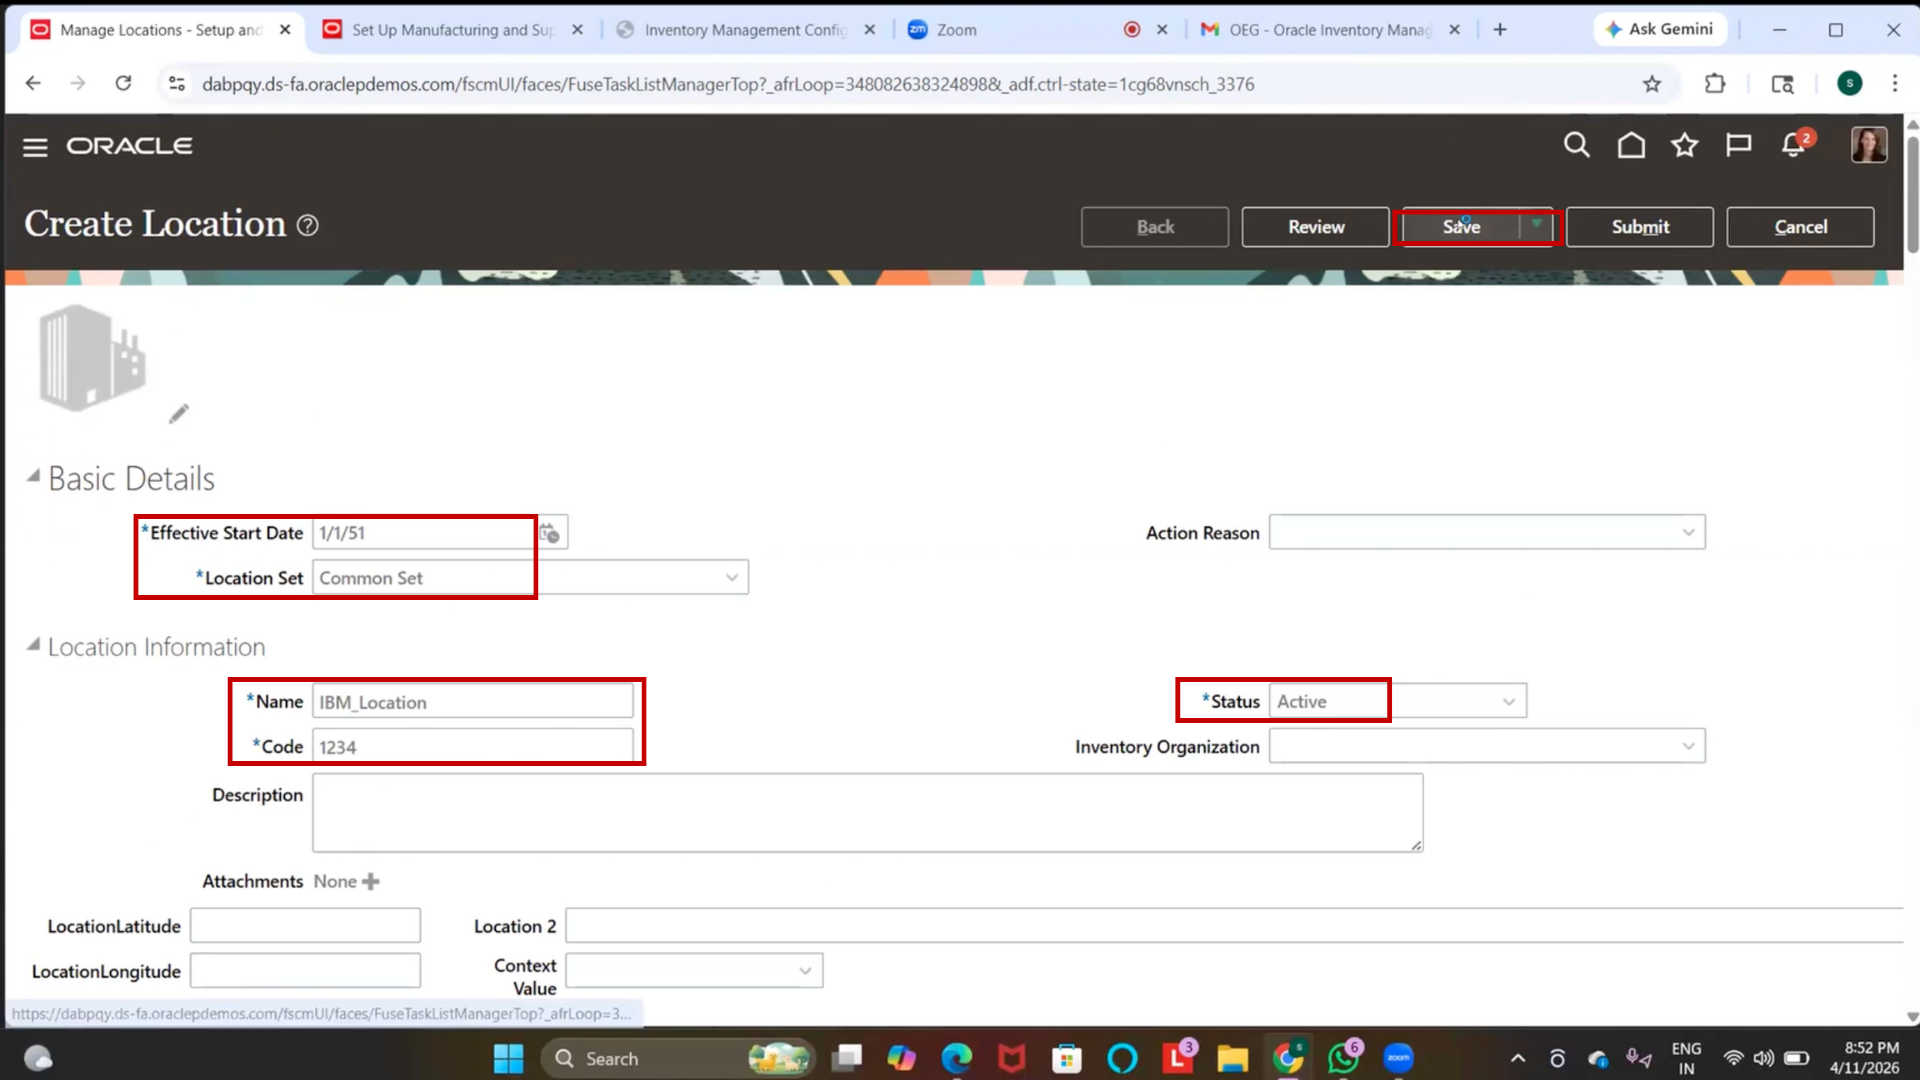
9. Enter Basic Details
1. Click on Effective Start Date
2. Enter Jan 1, 1951
3. Click on Set
4. Select Common Set
5. Click on Location Name
6. Enter “Test Location.”
7. Click on Location Code
8. Enter “1234.”
9. Verify Status is Active
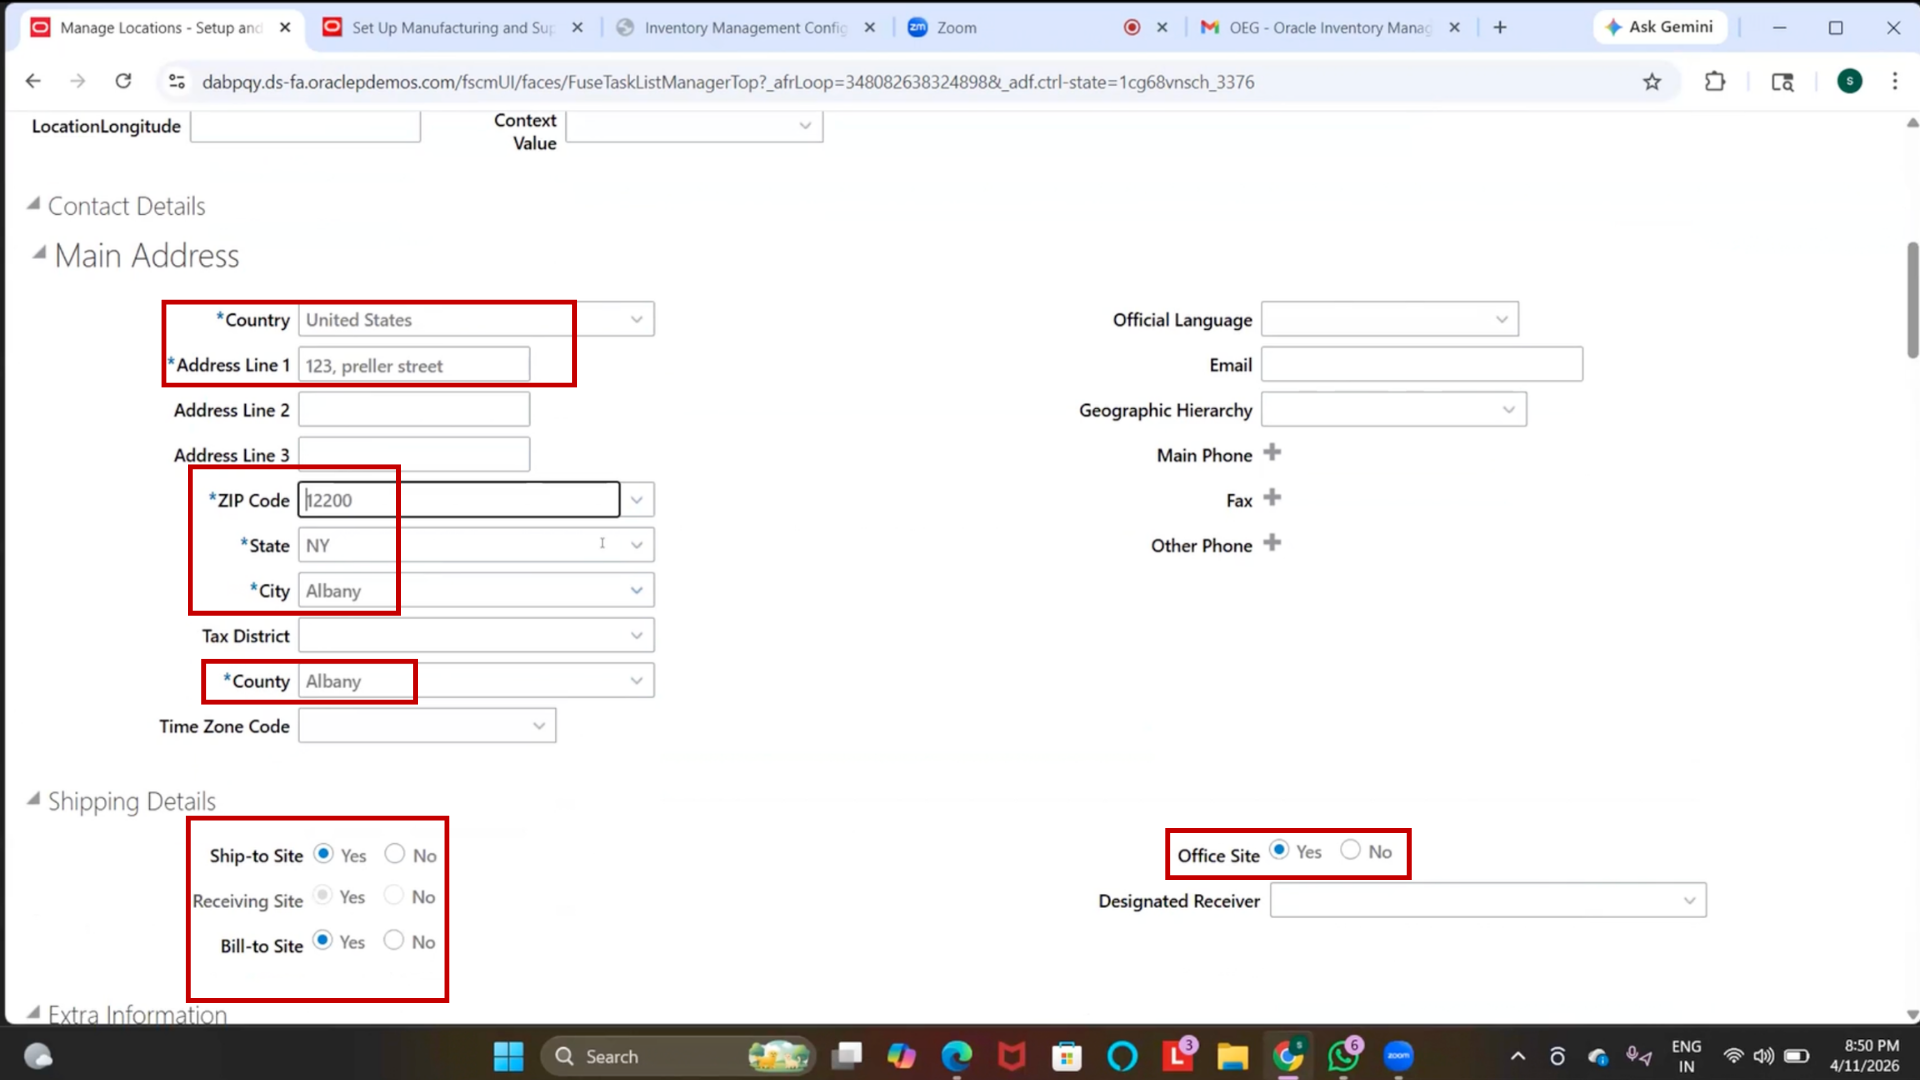
10. Enter Address Details
1. Click on Country
2. Select United States
3. Click on Address Line 1
4. Enter “123 Trailer Street.”
5. Click on ZIP Code
6. Enter ZIP Code
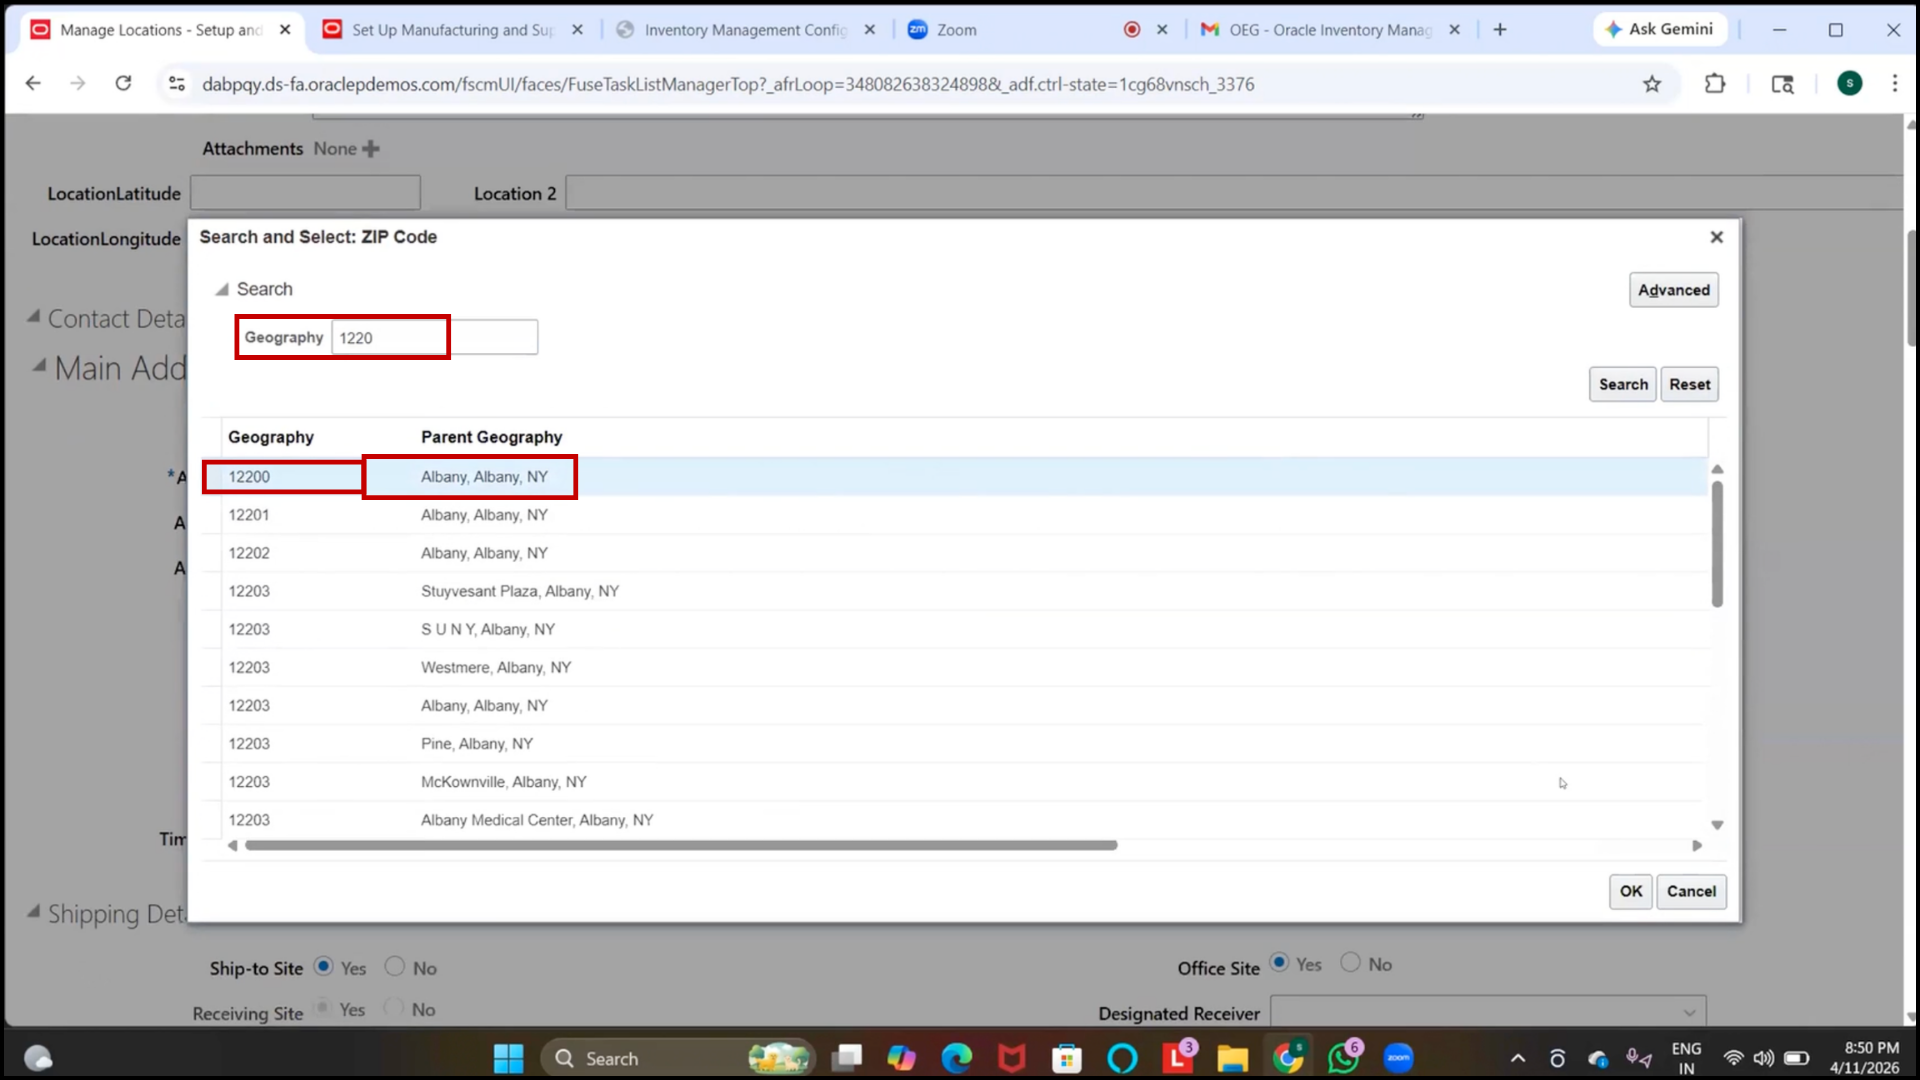
7. Wait for auto-population.
8. Verify City and State
11. Configure Location Usage
1. Locate Ship-to Site
1. Select Yes
3. Locate Receiving Site
4. Ensure enabled
5. Locate Bill-to Site
6. Select Yes
7. Locate Office Site
8. Select Yes
12. Finalize Location
1. Review all fields
2. Modify Location Name
3. Enter “IBM_Location.”
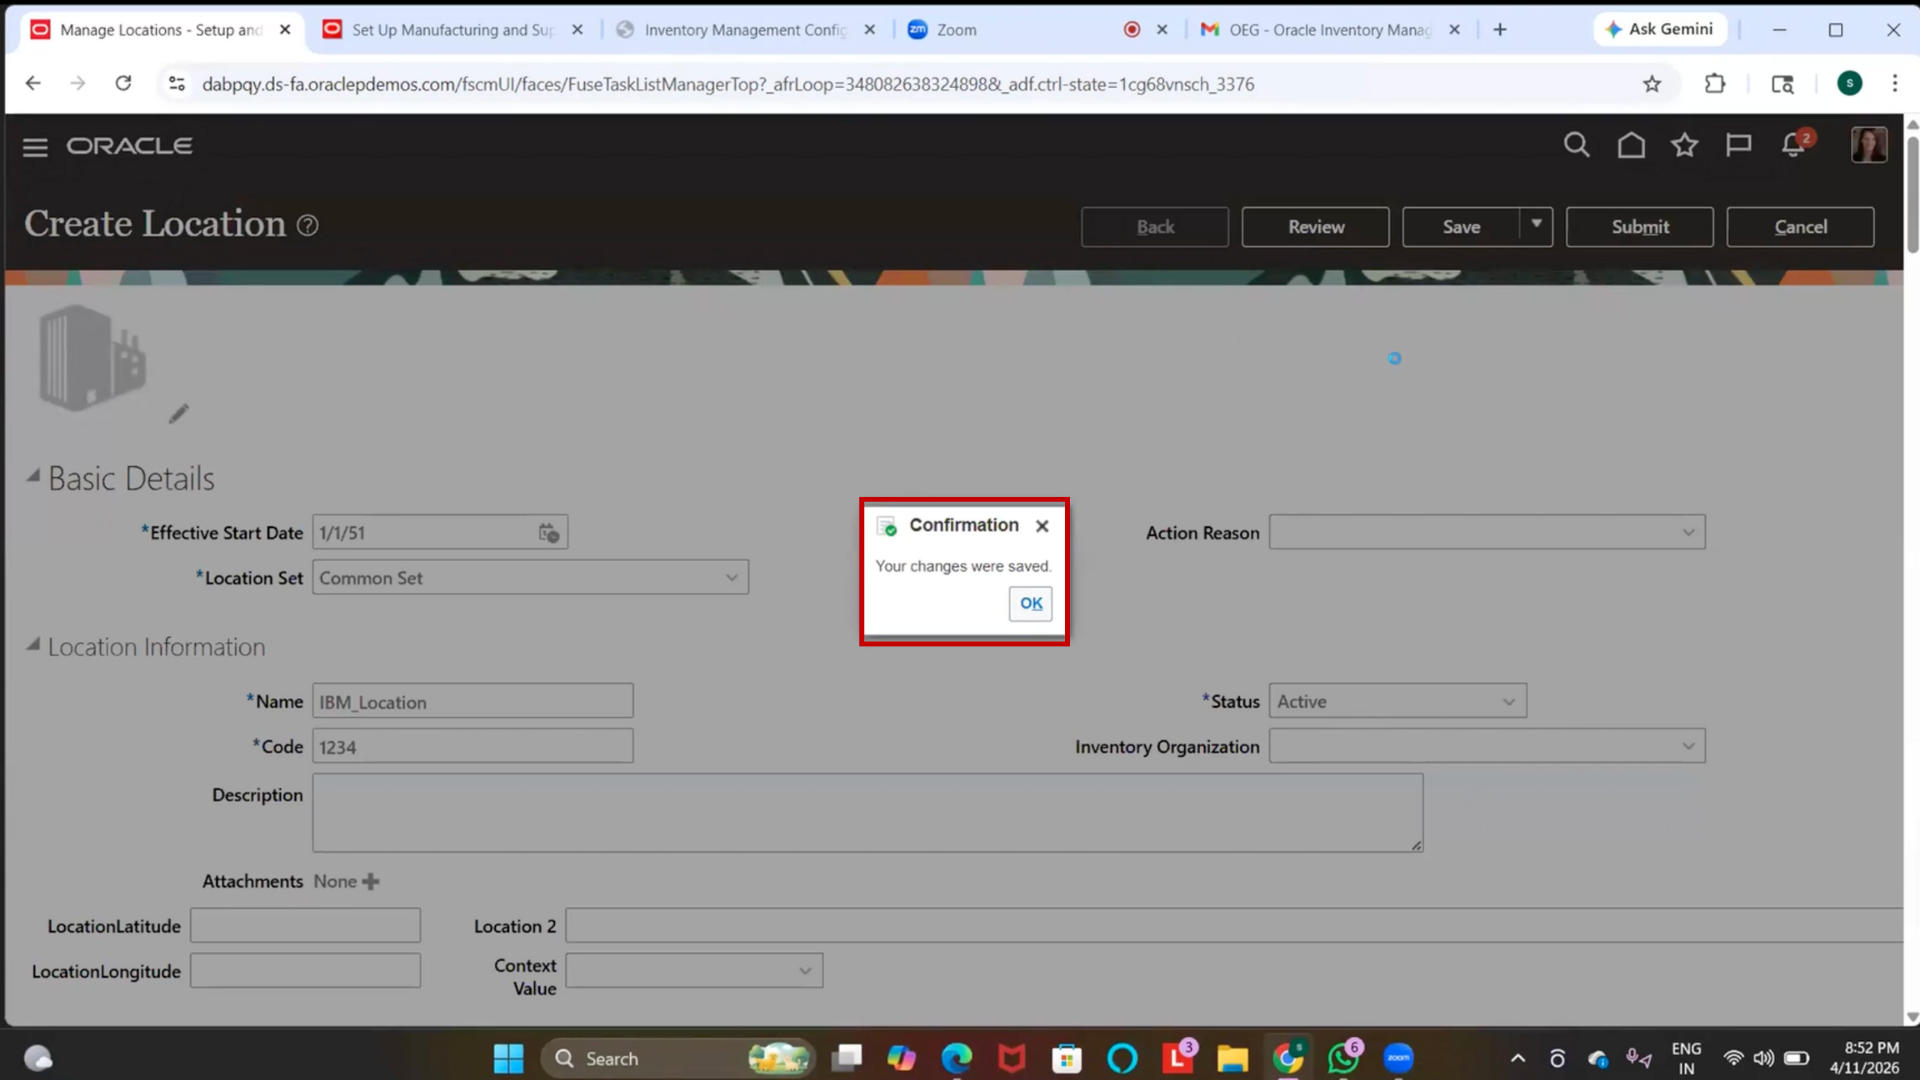
13. Save Location
1. Click Save
2. Wait for confirmation
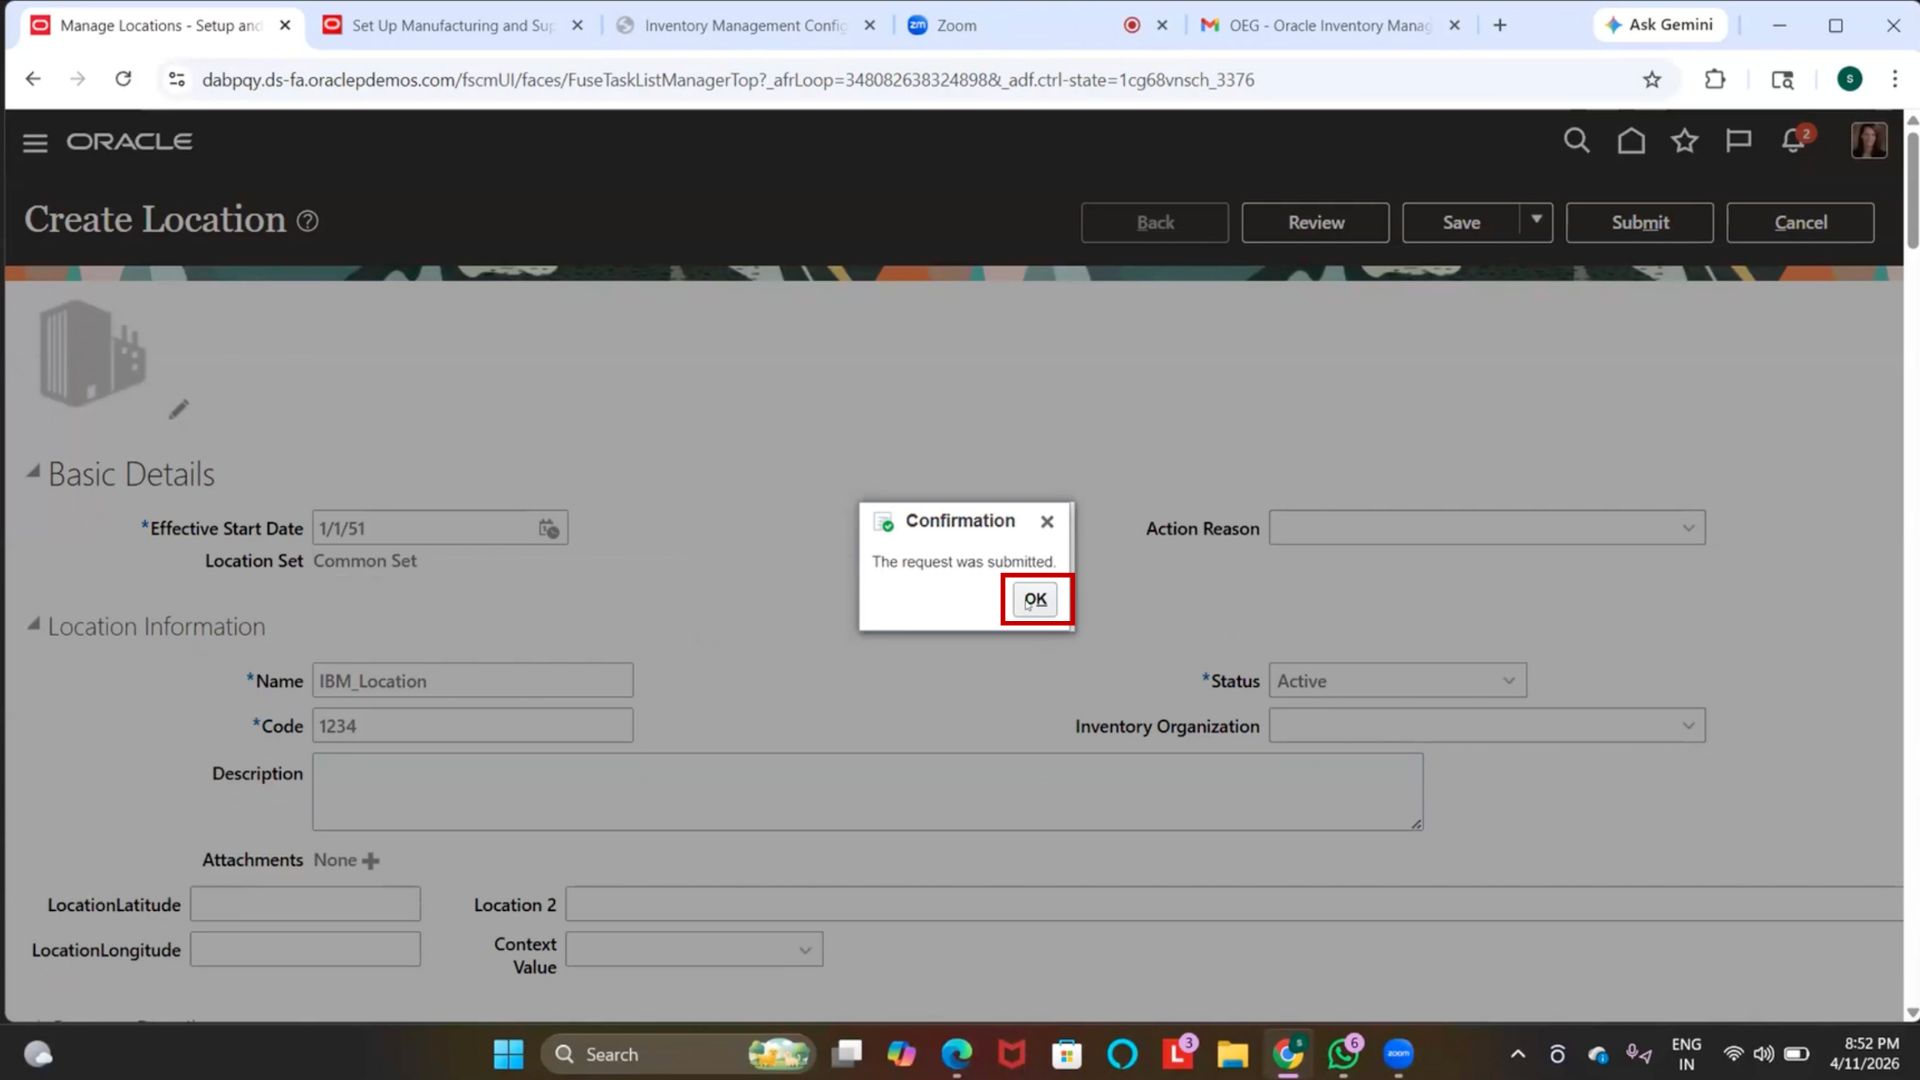
14. Submit Location
1. Click Submit
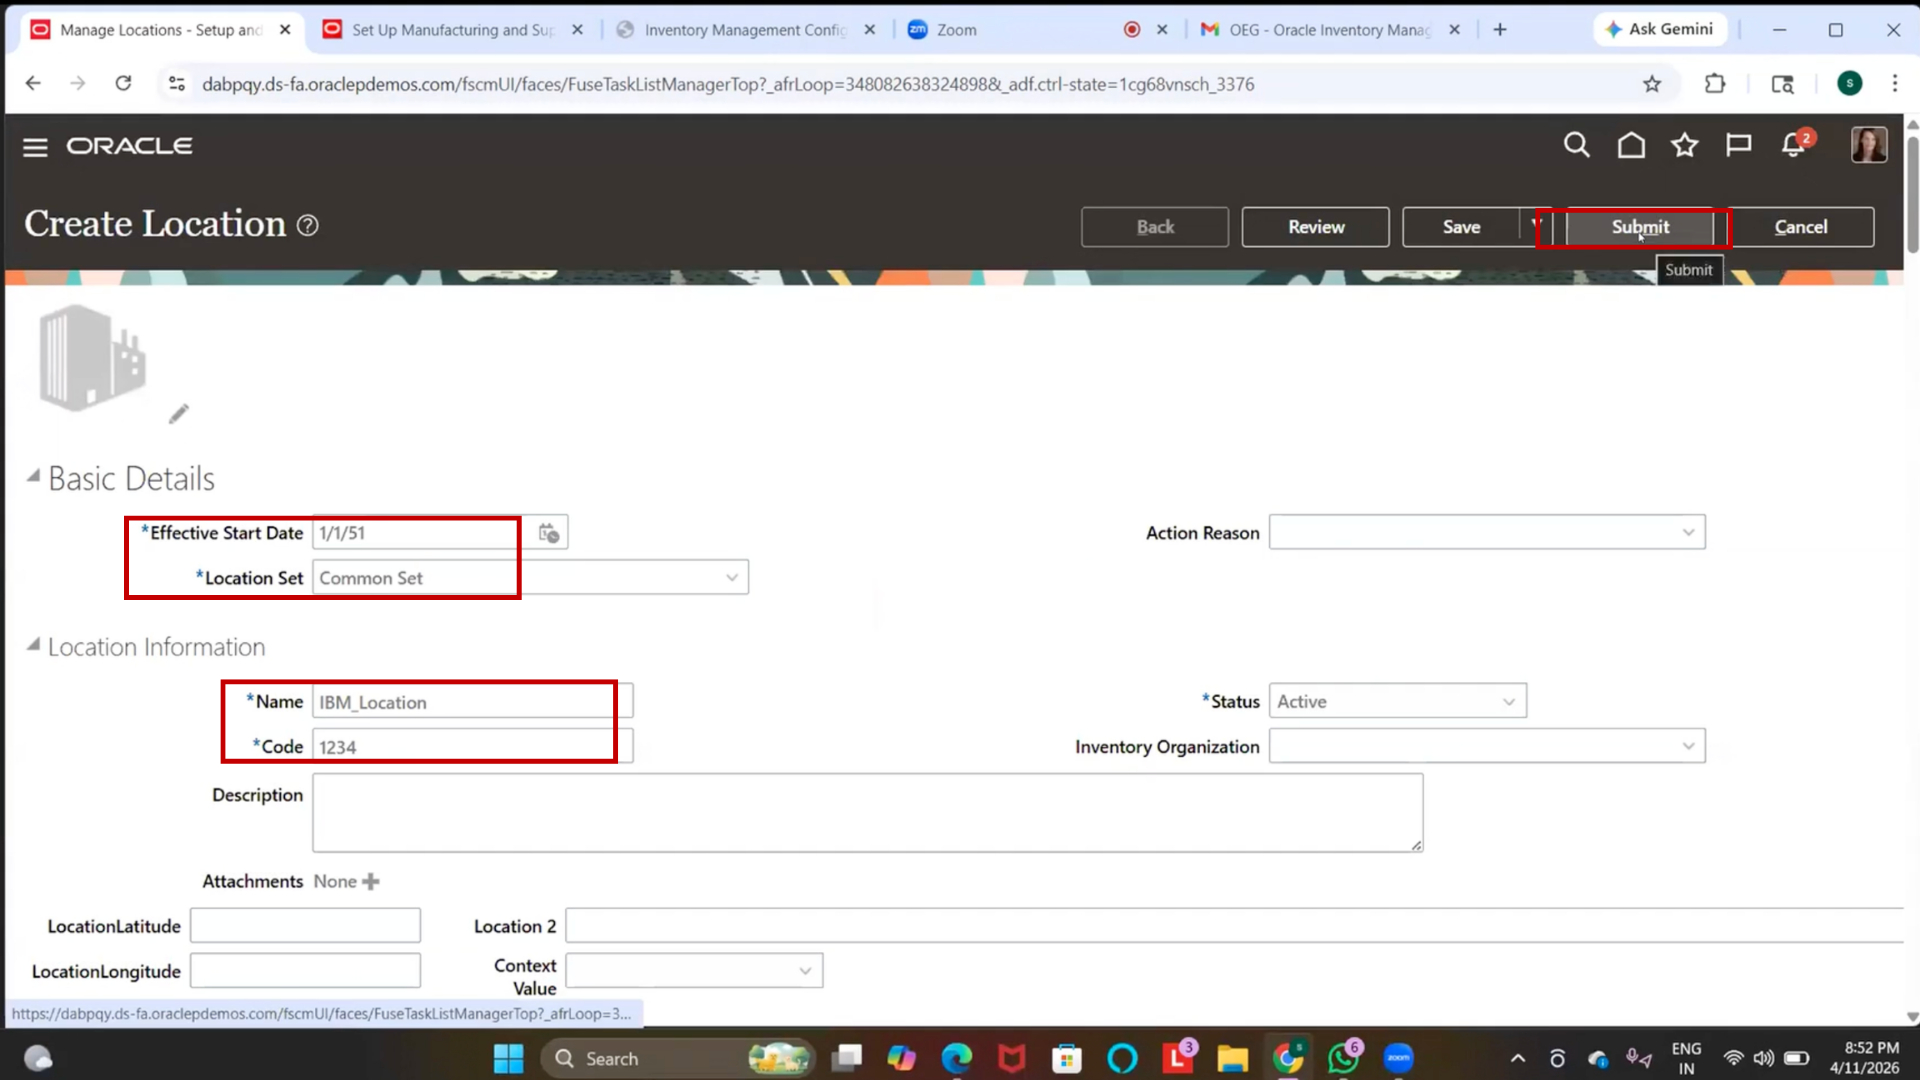
2. Wait for submission
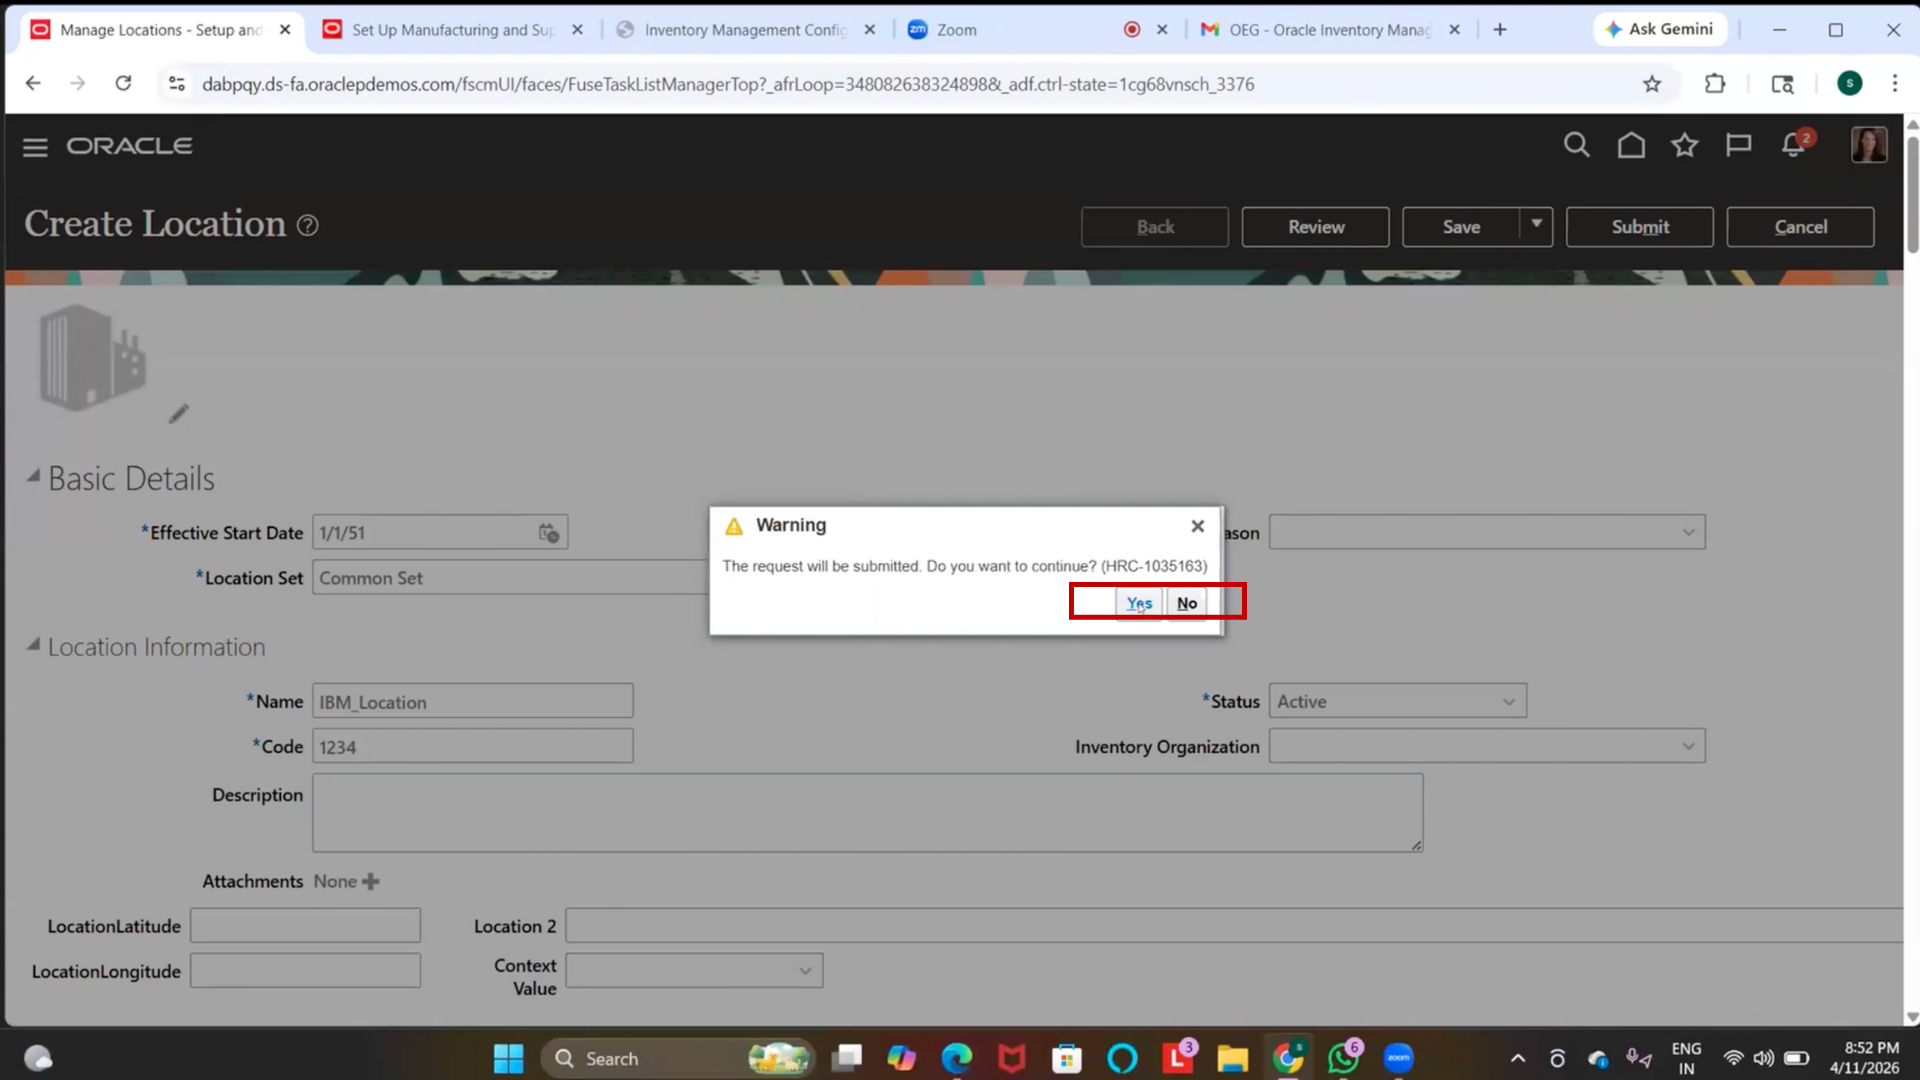
3. Wait for processing
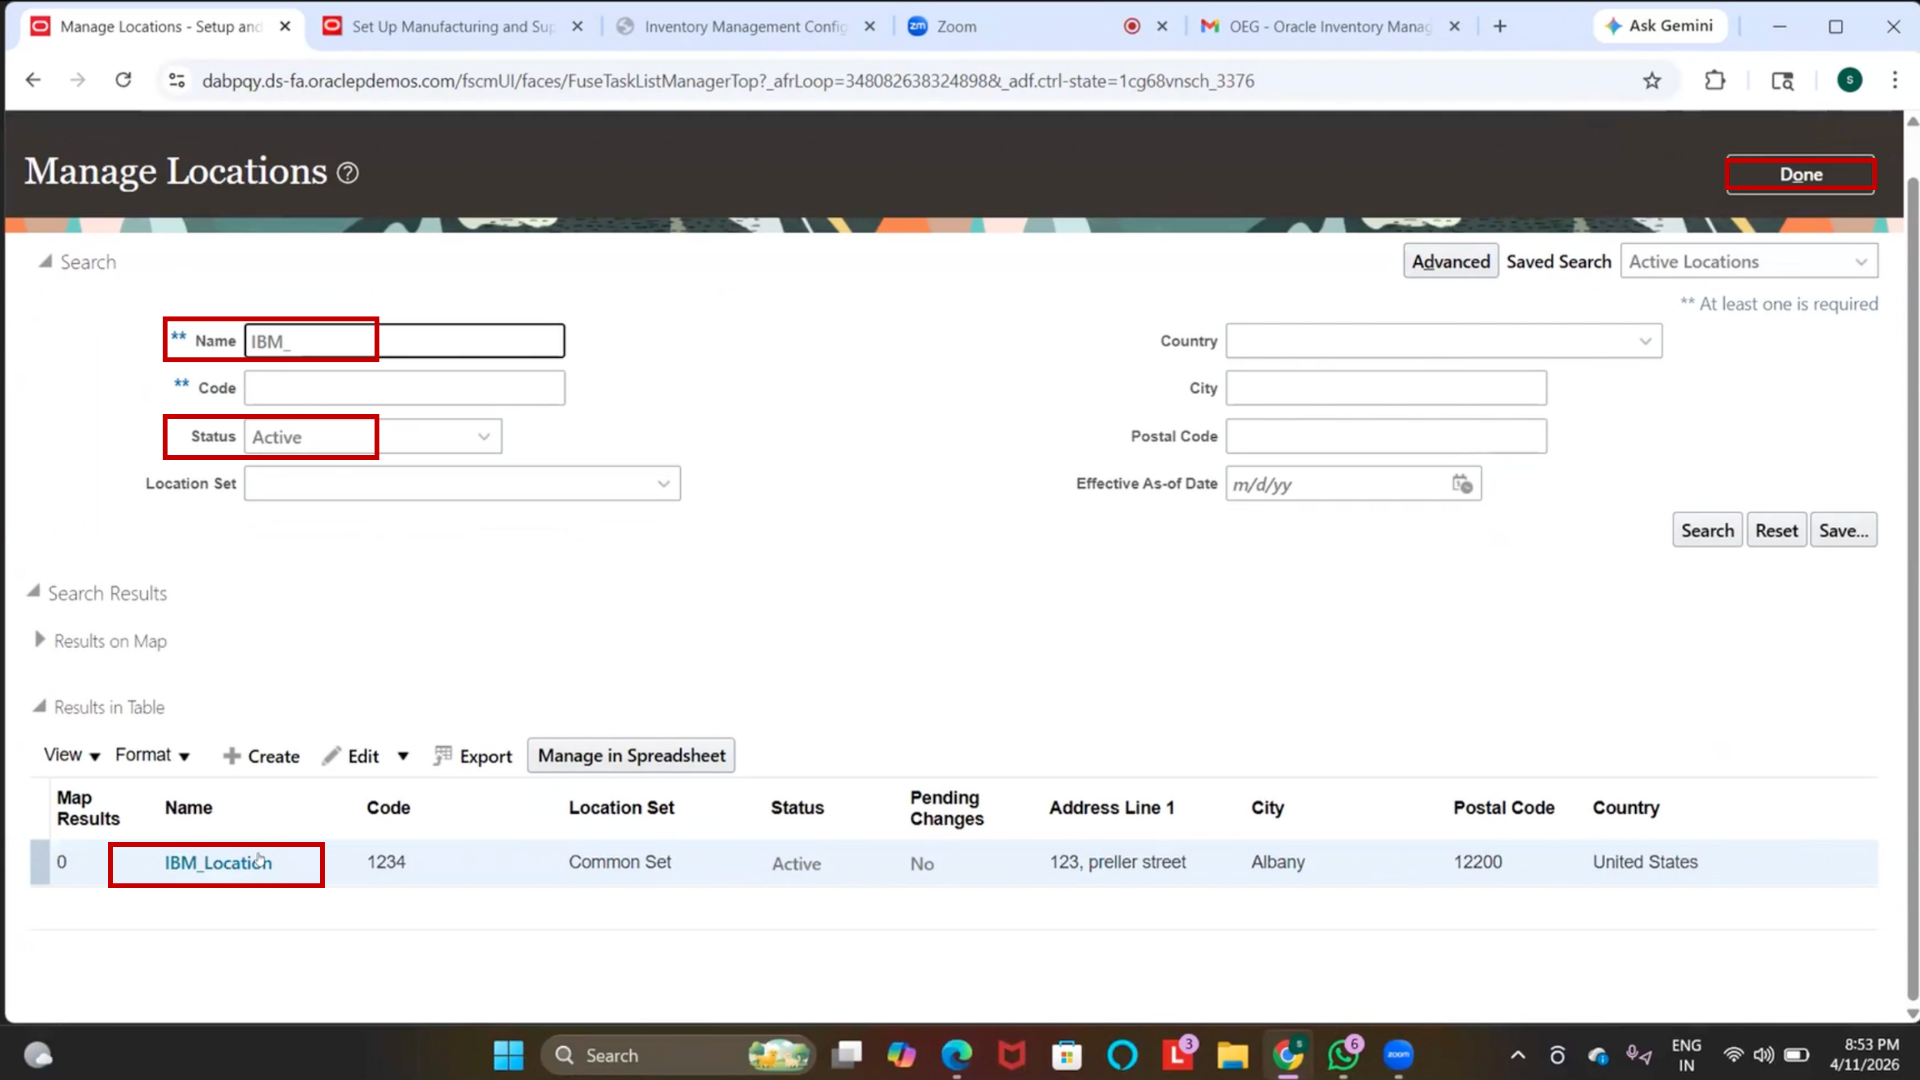
15. Verify Location
1. Click on Search
2. Enter “IBM_Location”
3. Click Search
4. Locate record
5. Verify status is active.
16. Close Setup
1. Click Done
17. Move to Next Setup
1. Navigate back to Setup and Maintenance
2. Prepare for Business Unit creation
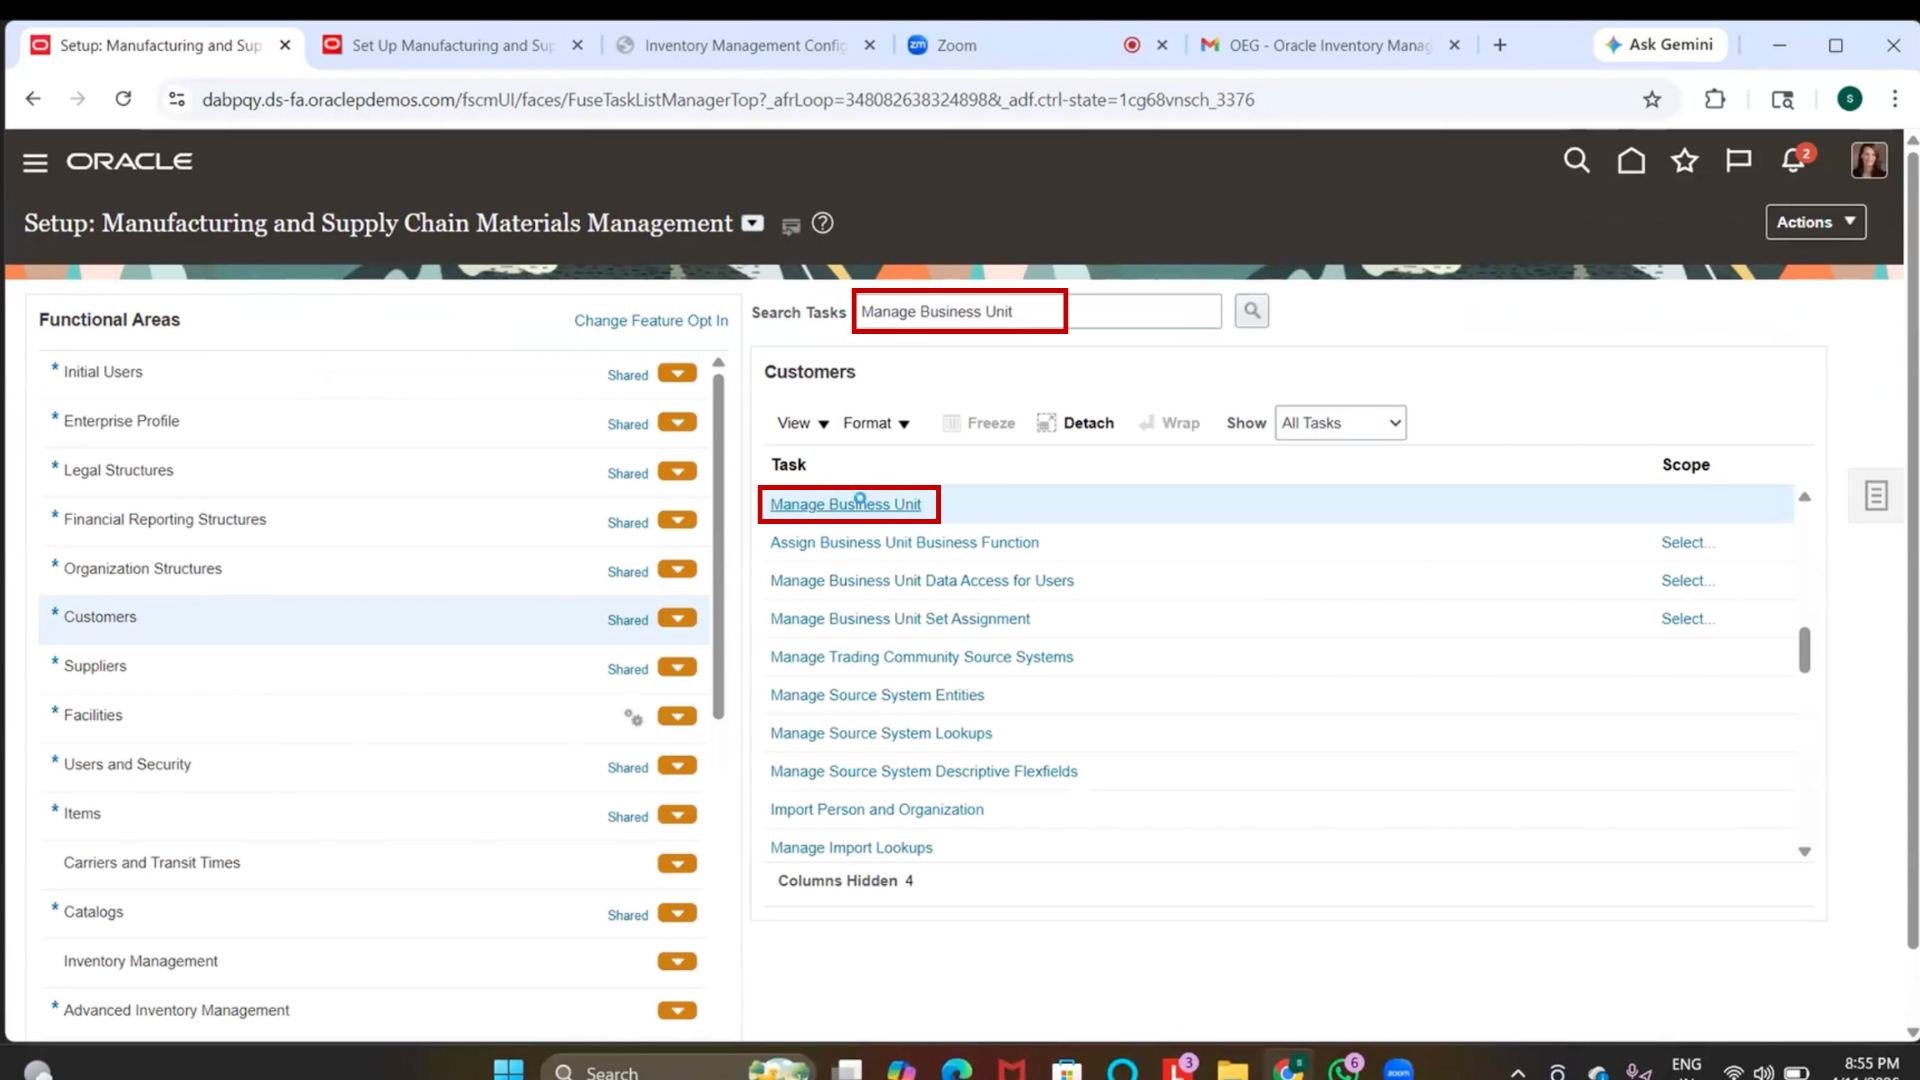
18. Create Business Unit
1. Click on Search in Setup and Maintenance
2. Type “Manage Business Unit”
3. Press Enter
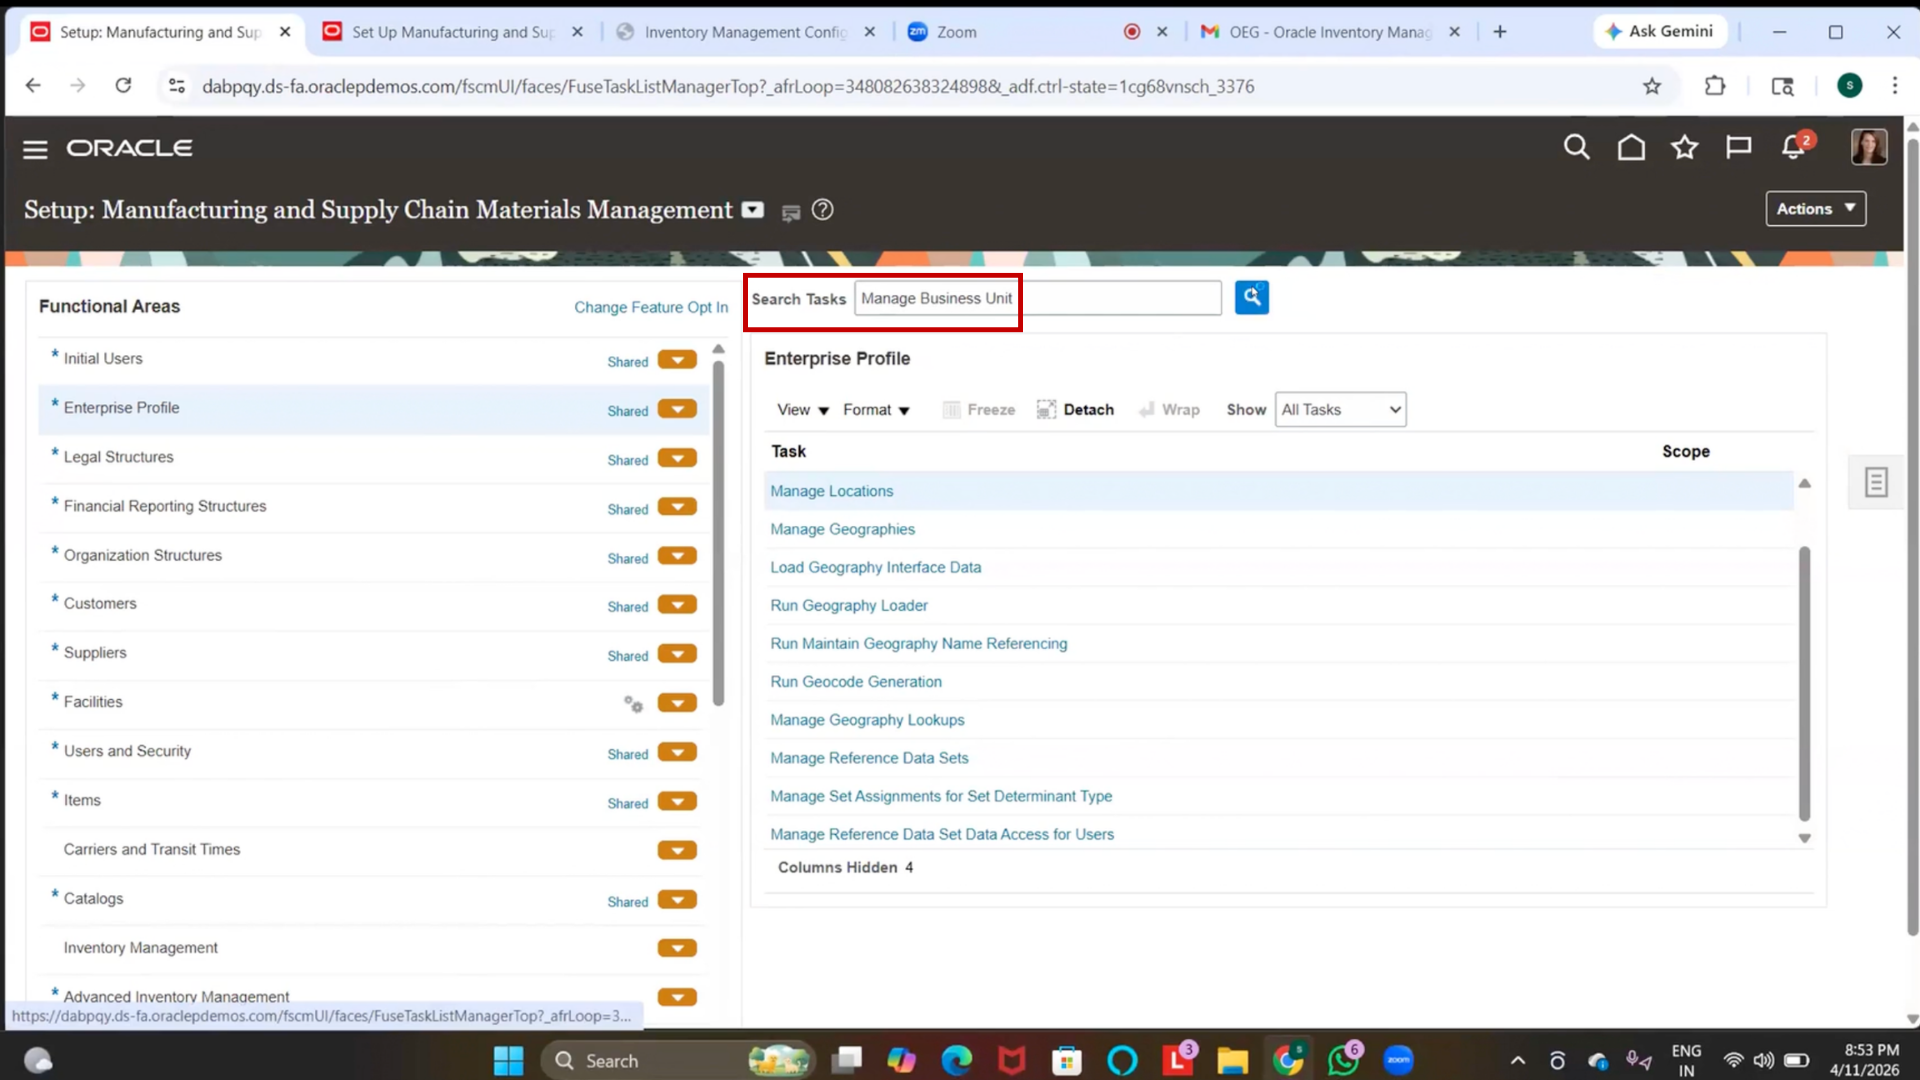
4. Click on Manage Business Unit
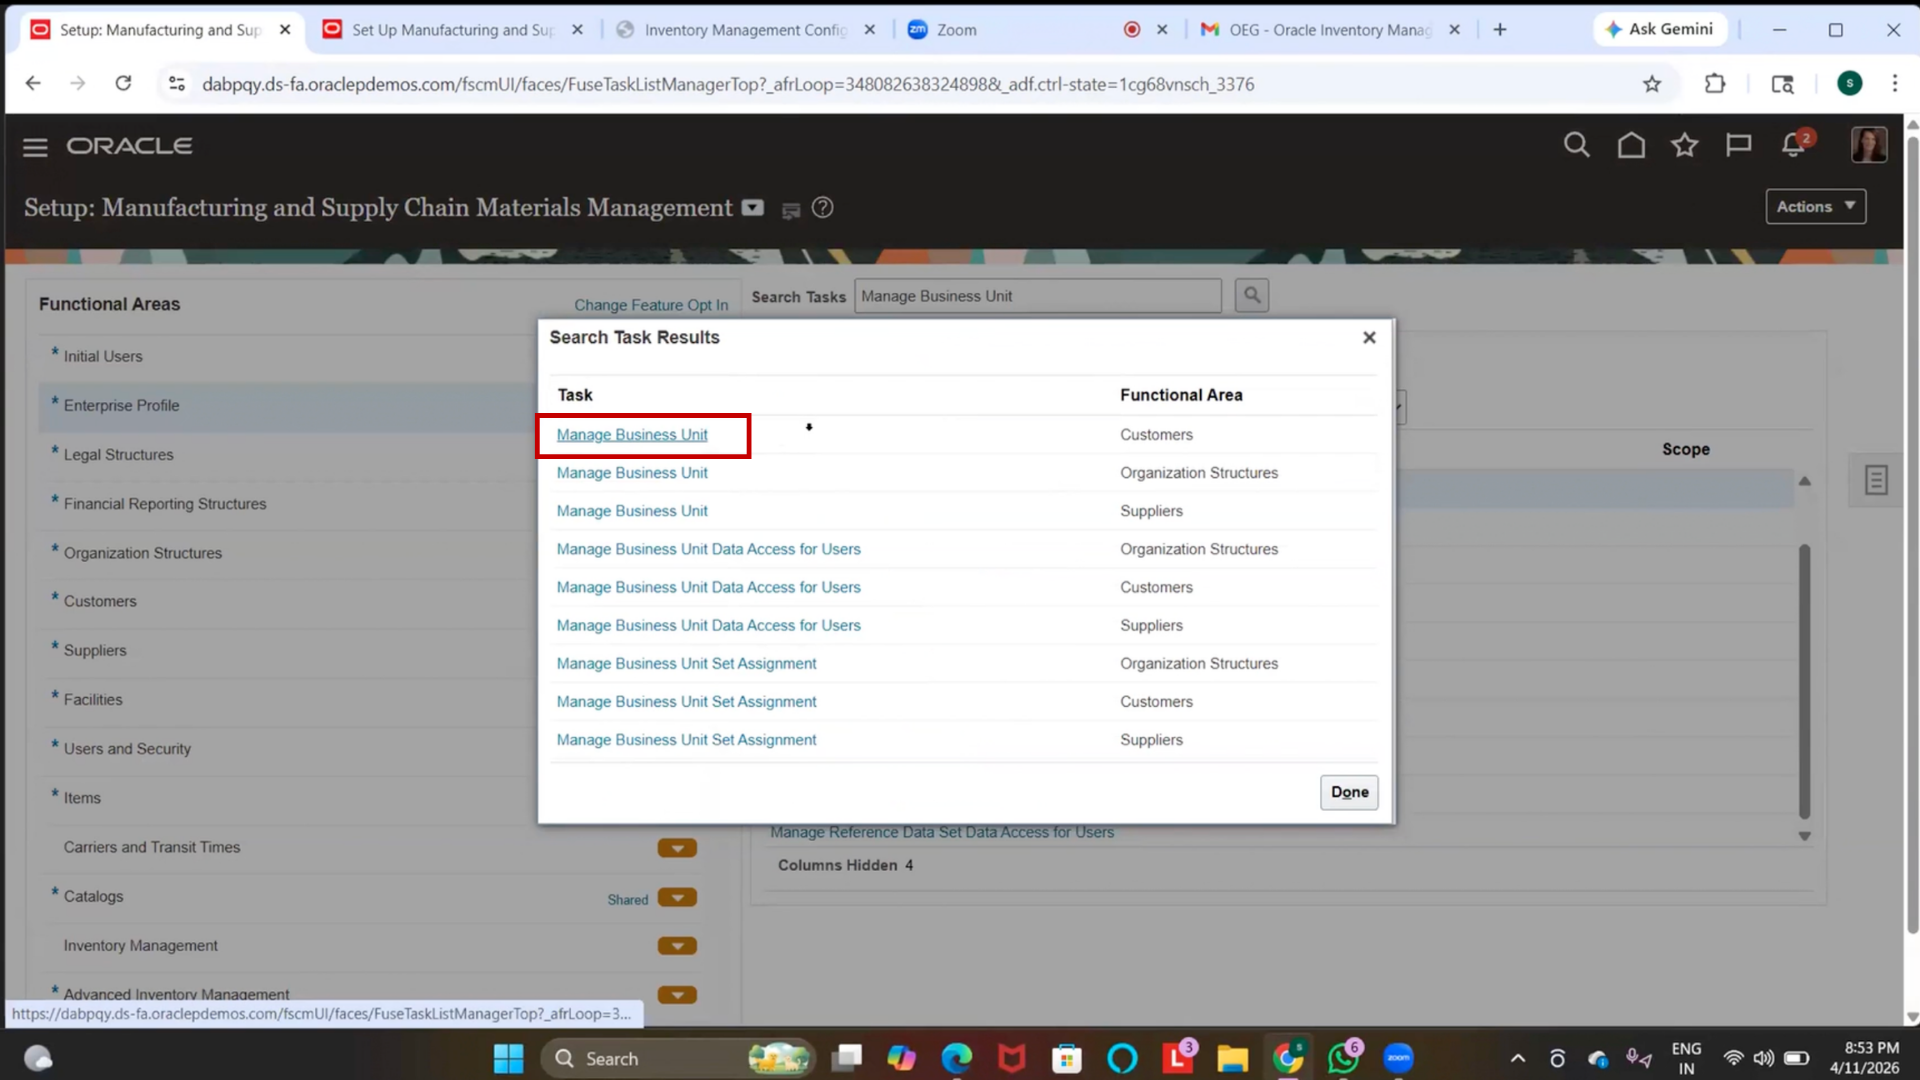
5. Wait for the page to load
6. Click on Create
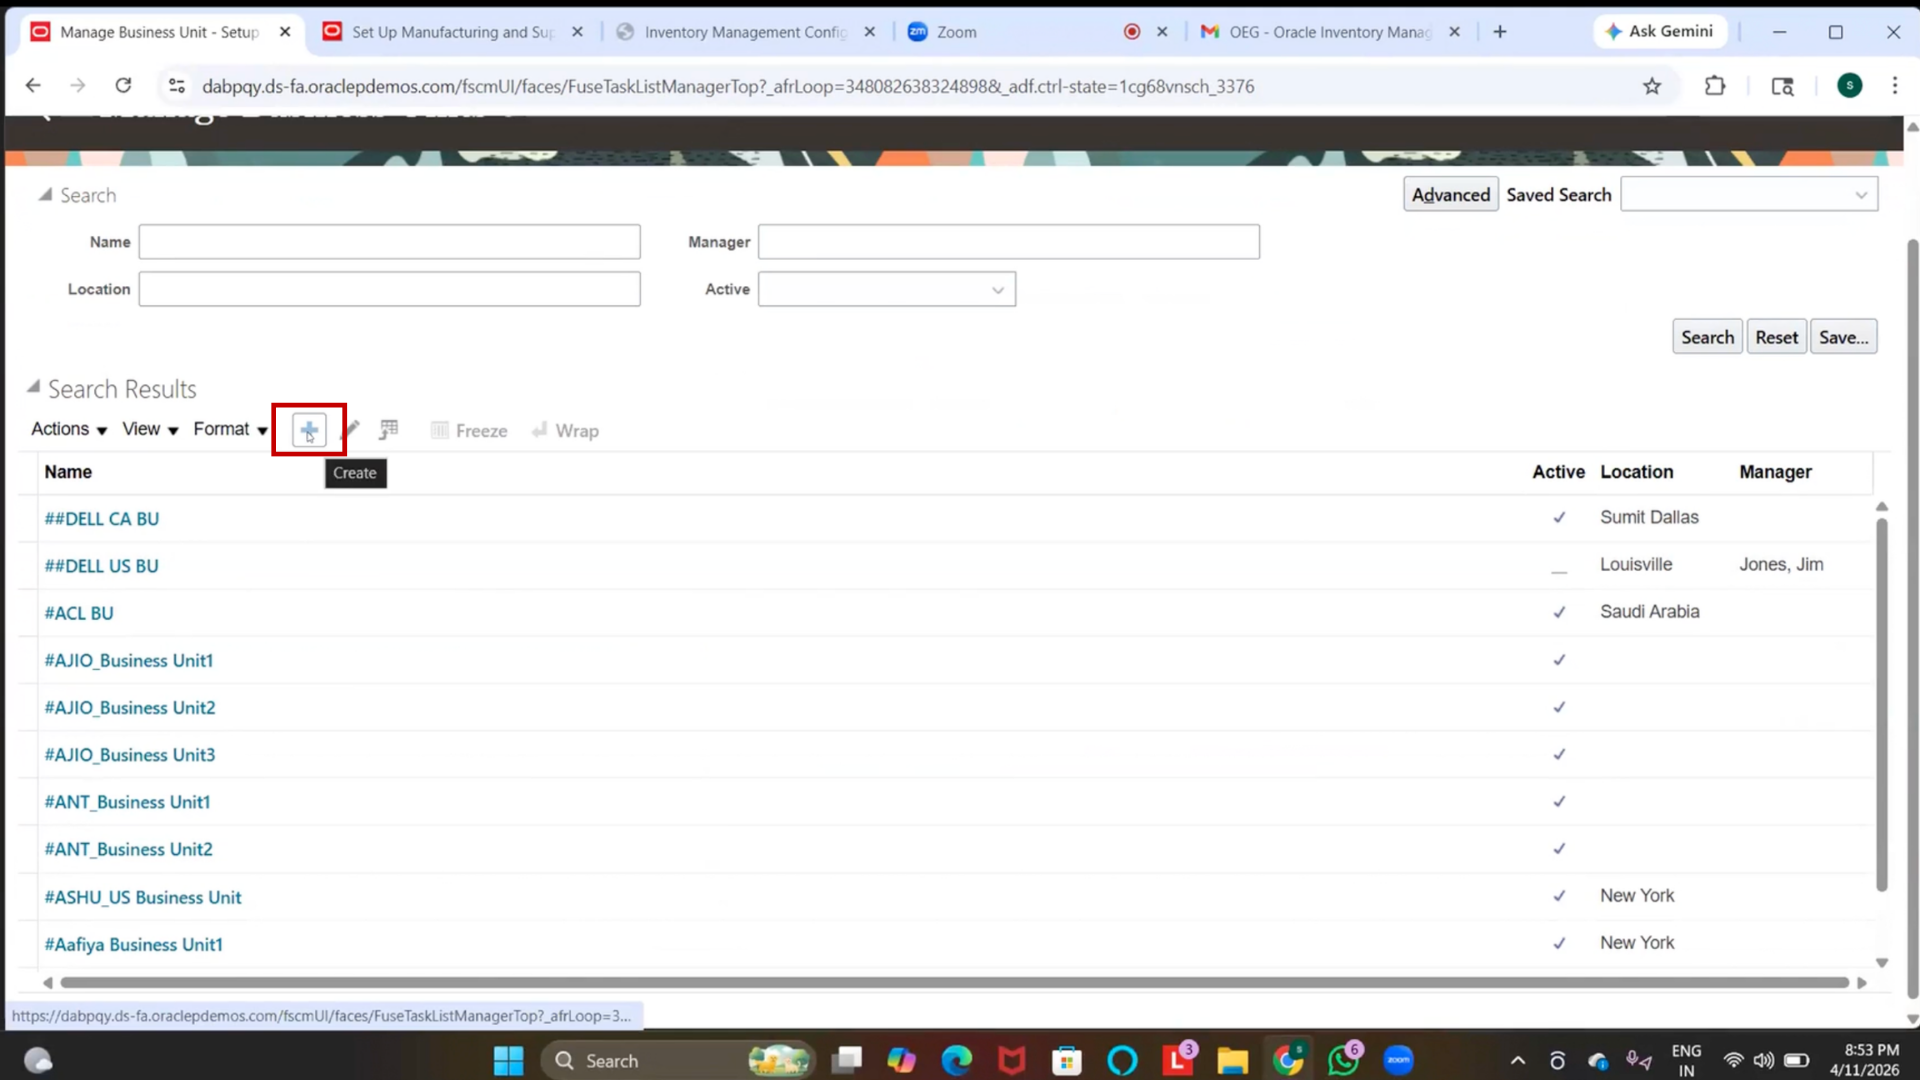
7. Wait for Create Business Unit page to load
19. Enter Business Unit Details
1. Click on Name field
2. Enter “US Business Unit.”
3. Locate Manager field
4. Skip (do not enter value)
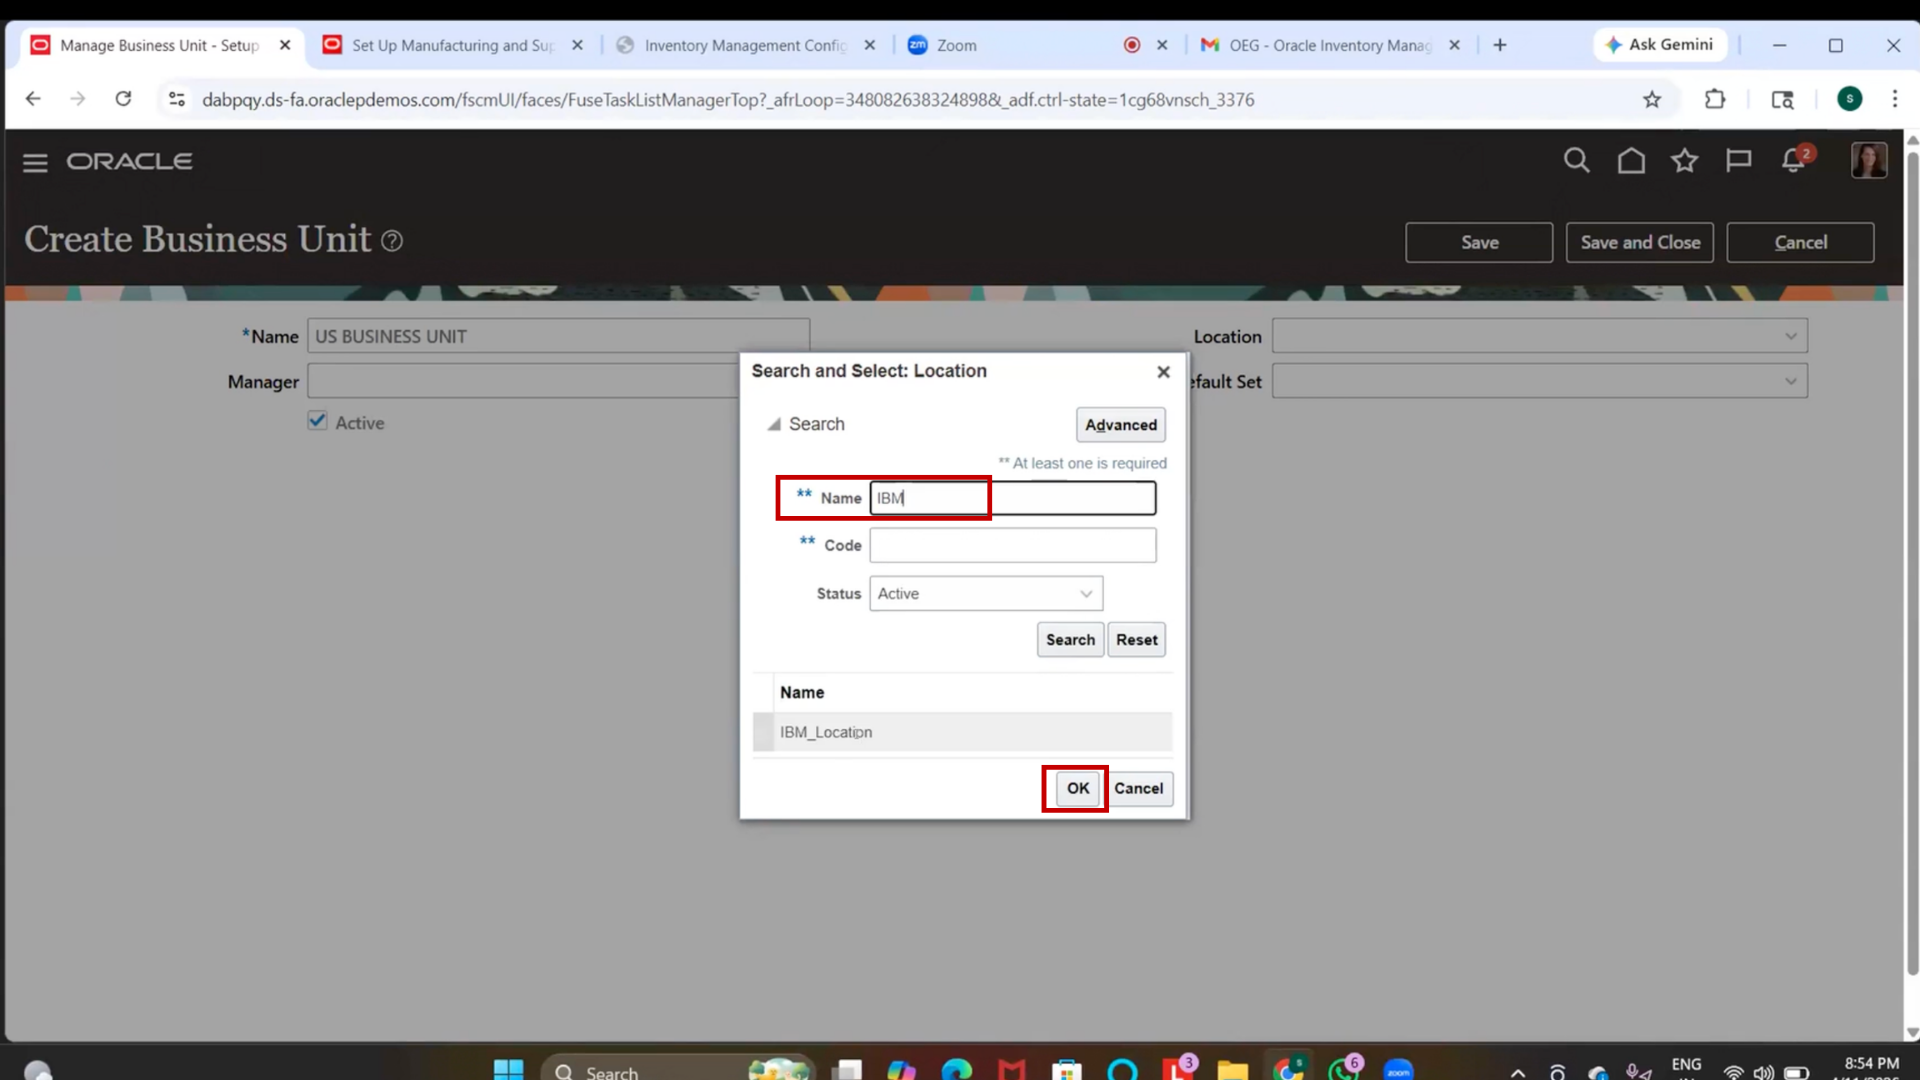
5. Click on Location field
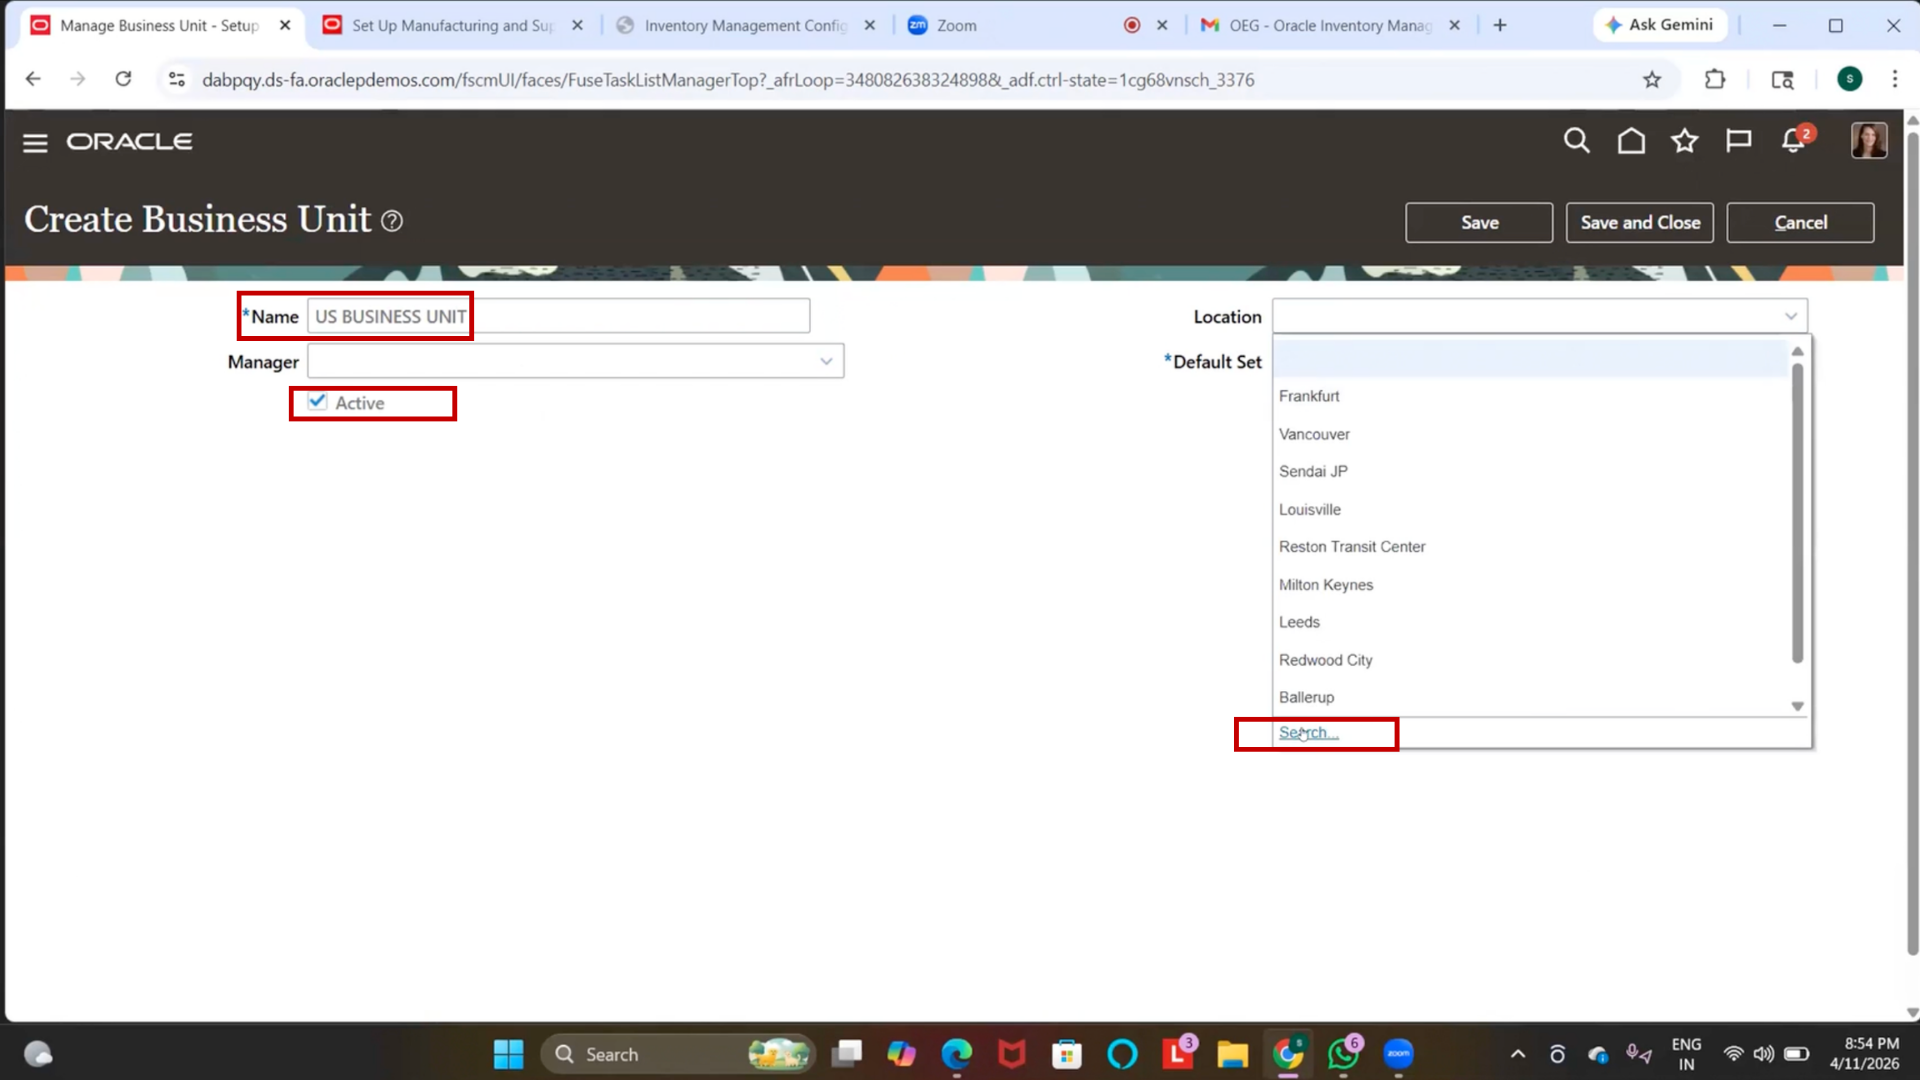
6. Search for previously created locations.
7. Select “IBM_Location.”
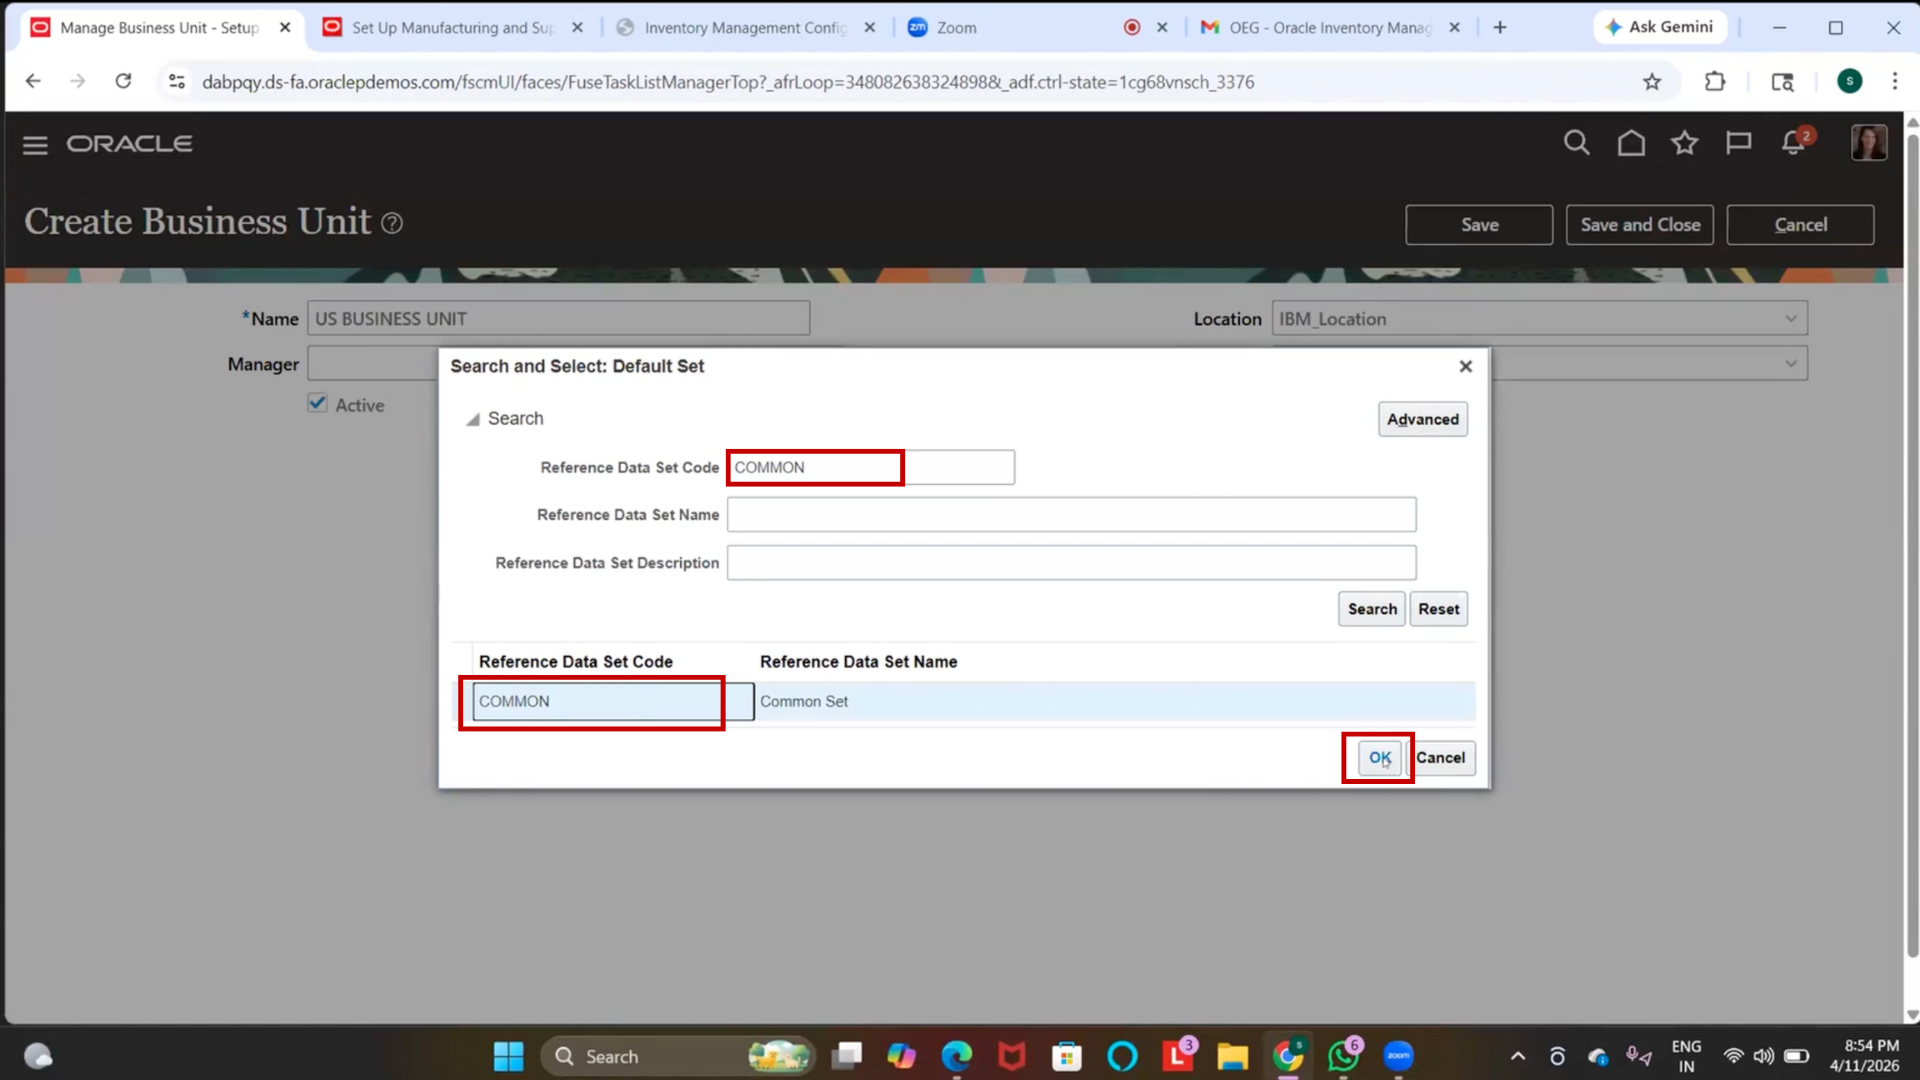
8. Click on Default Set field
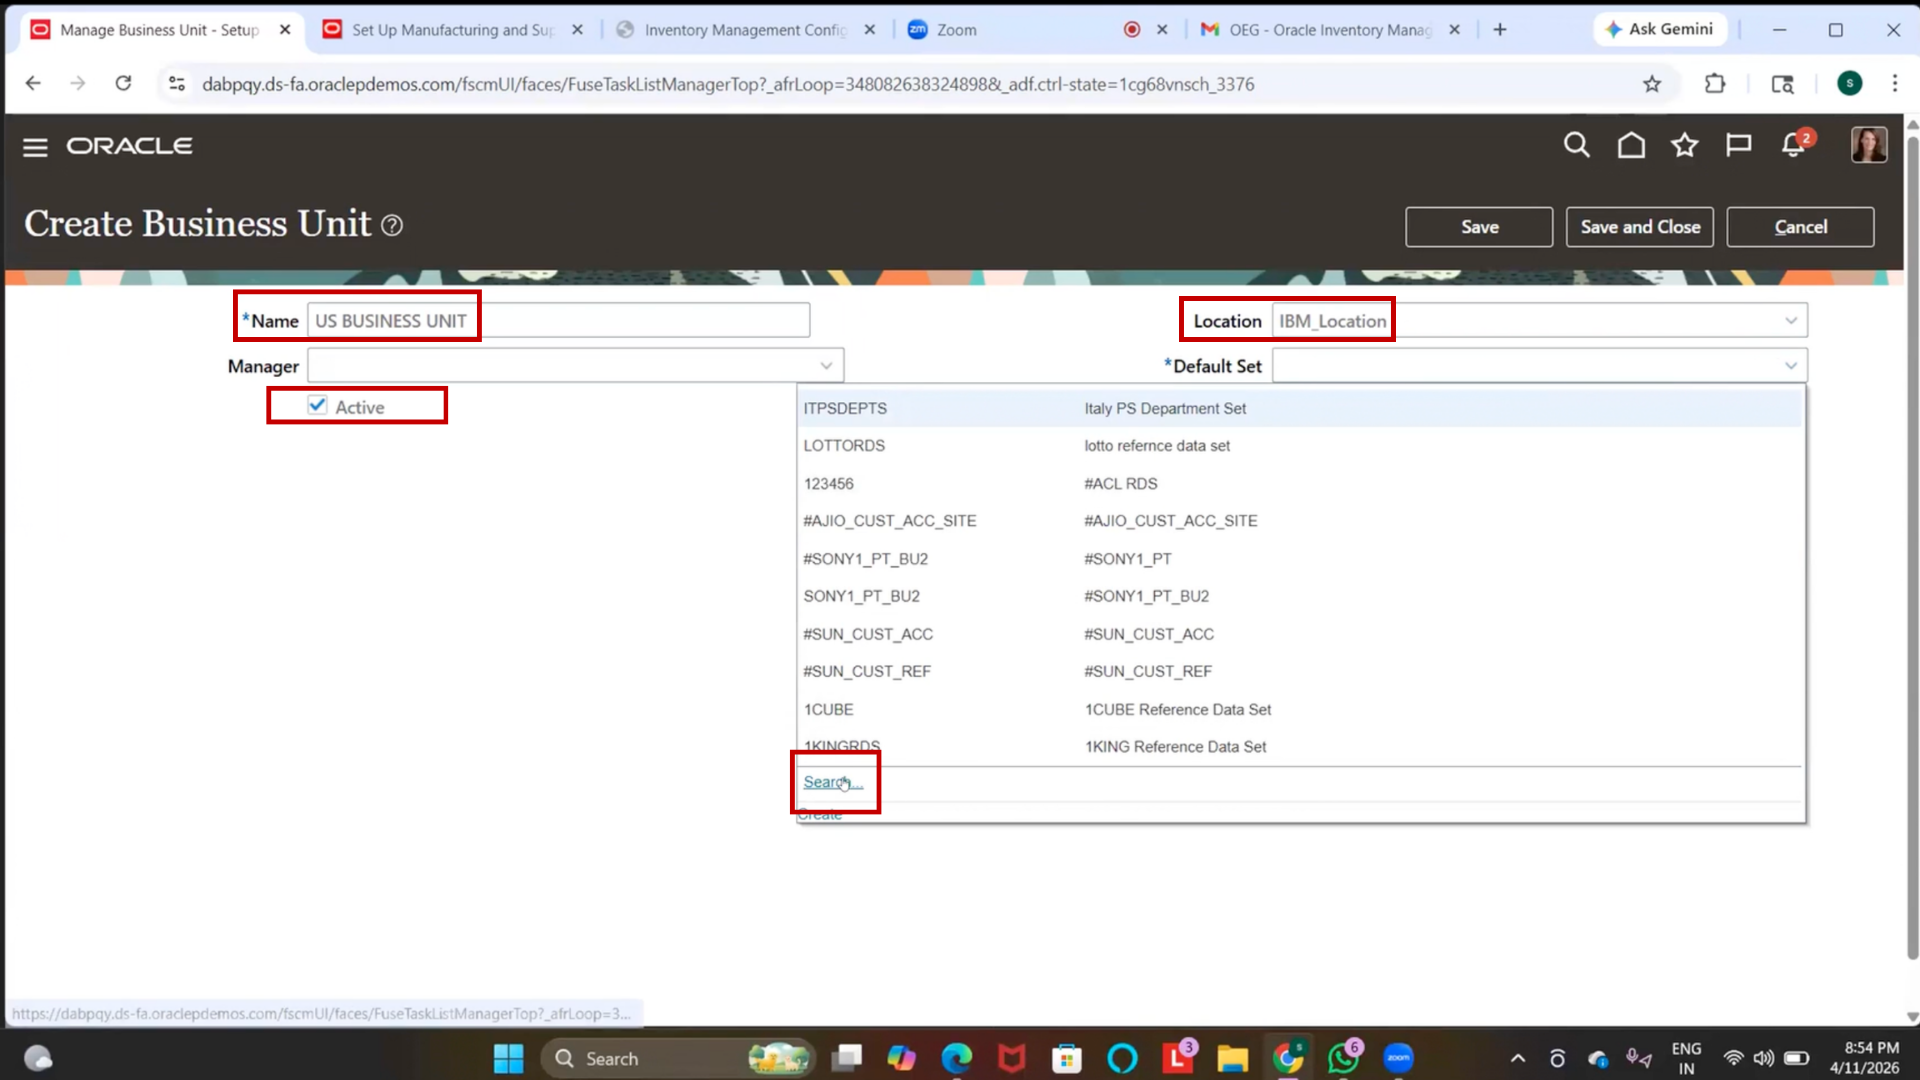
9. Select “Common Set.”
10. Modify Name field
11. Enter “IBM_US Business Unit.”
20. Save Business Unit
1. Click Save
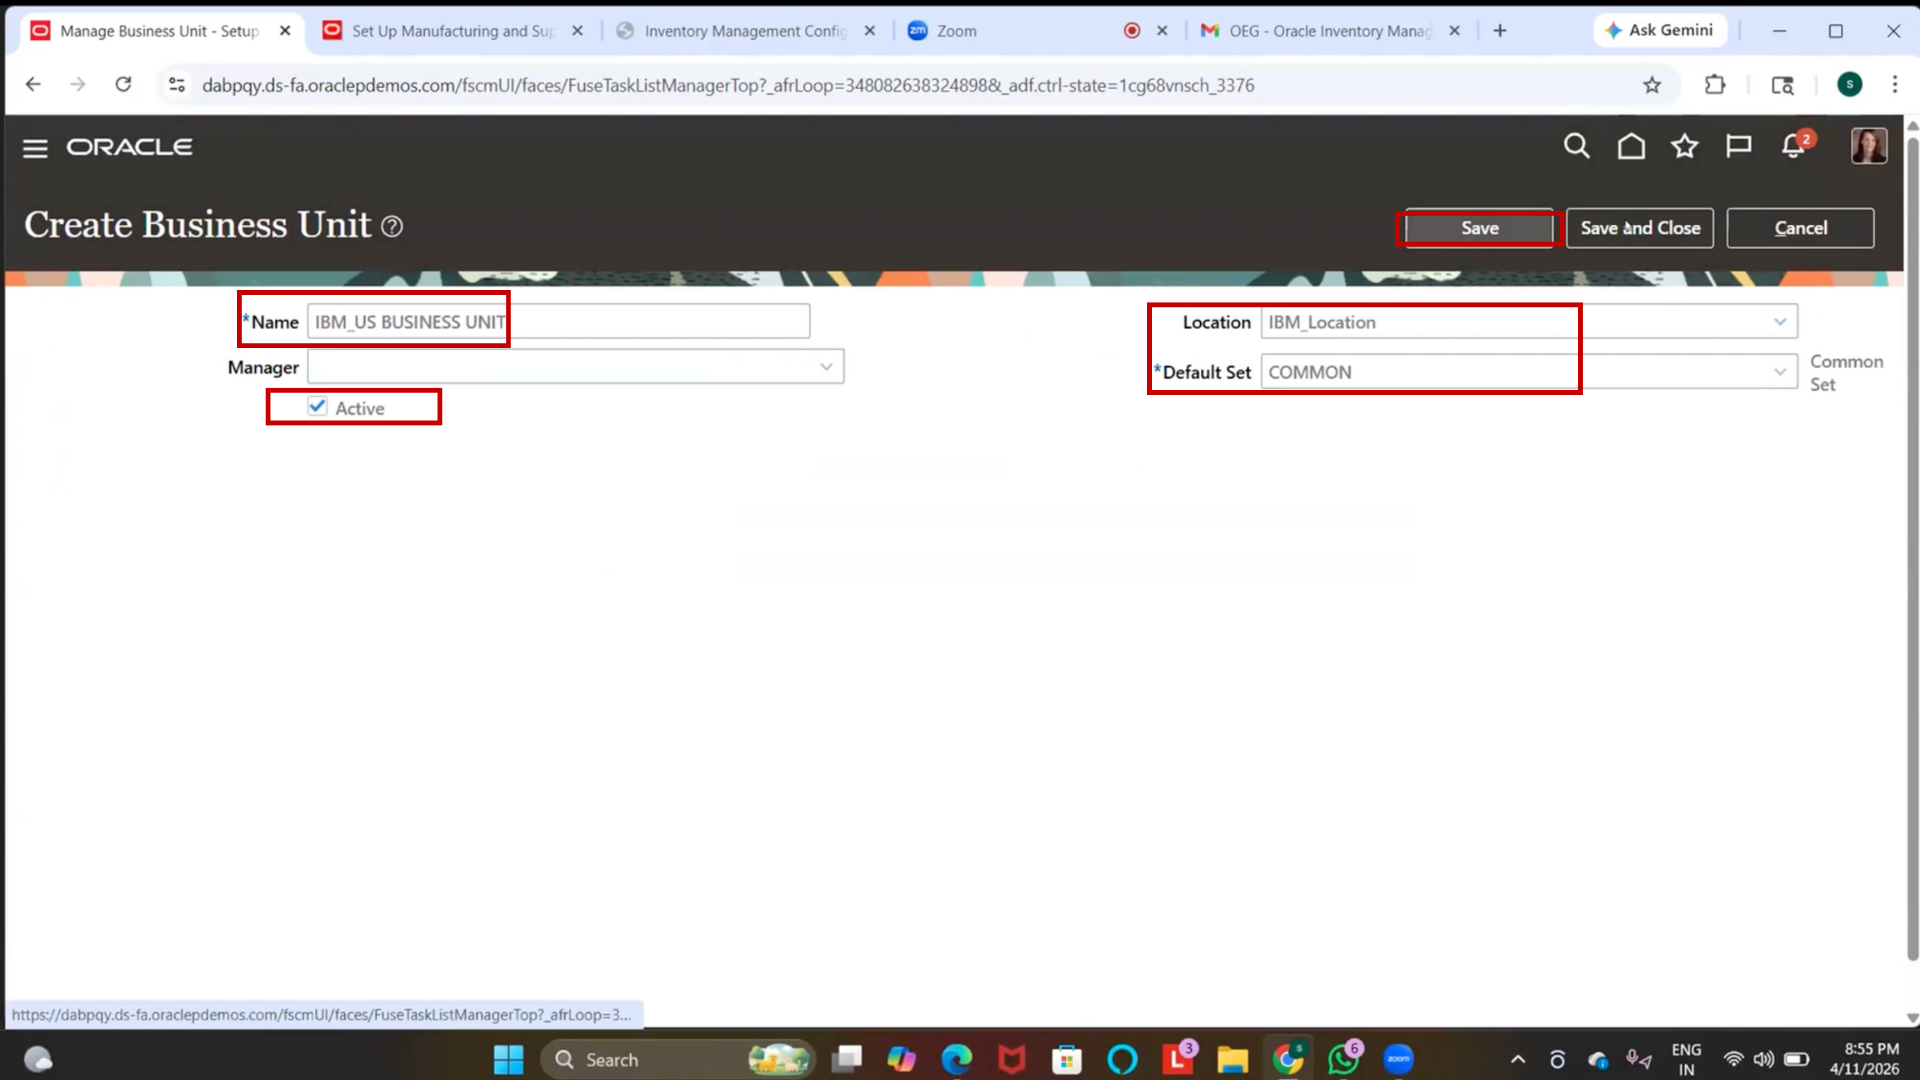
2. Click Save and Close
21. Verify Business Unit
1. Click on Search
2. Enter “IBM_US Business Unit.”
3. Click Search
4. Locate business unit in the results.

5. Verify status is active.
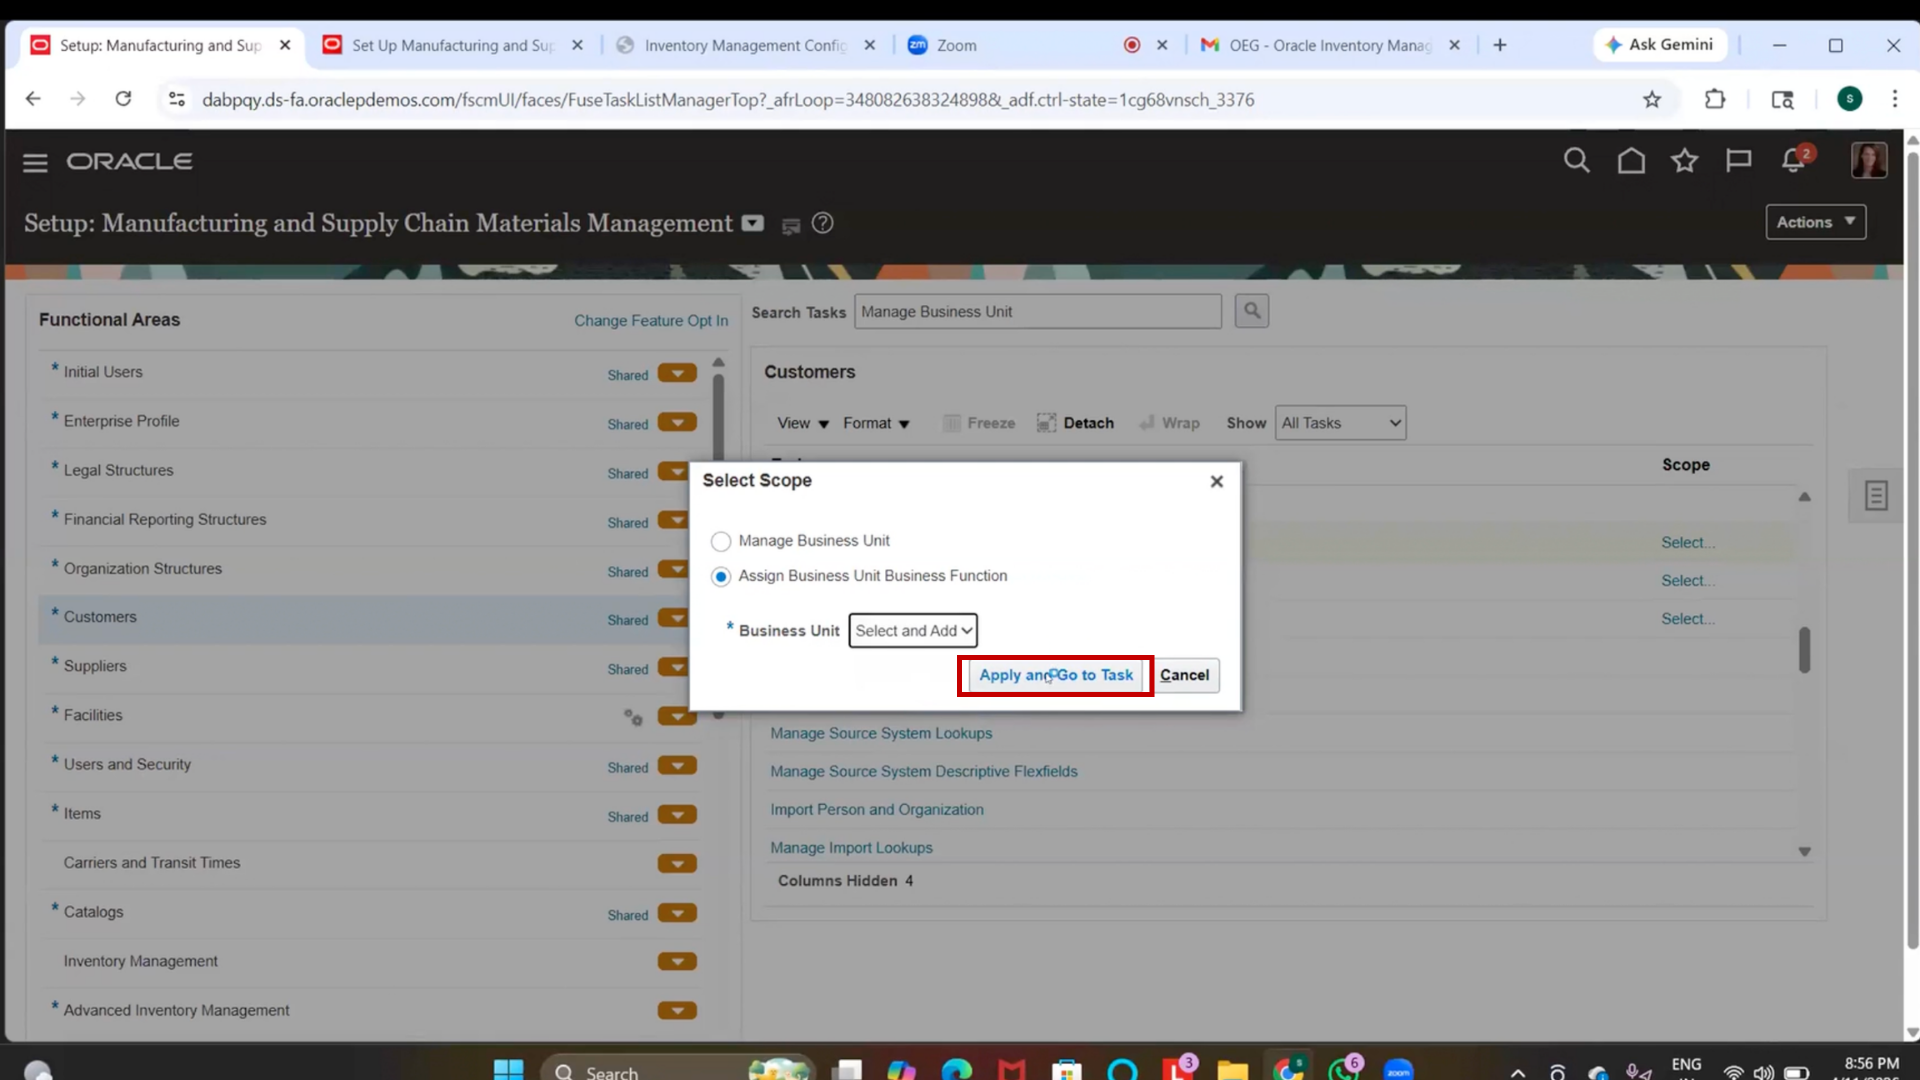
22. Assign Business Unit Business Function
1. Click on Search in Setup and Maintenance
2. Type “Assign Business Unit Business Function”
3. Press Enter
4. Click on Assign Business Unit Business Function
23. Select Business Unit
1. Click on Business Unit field
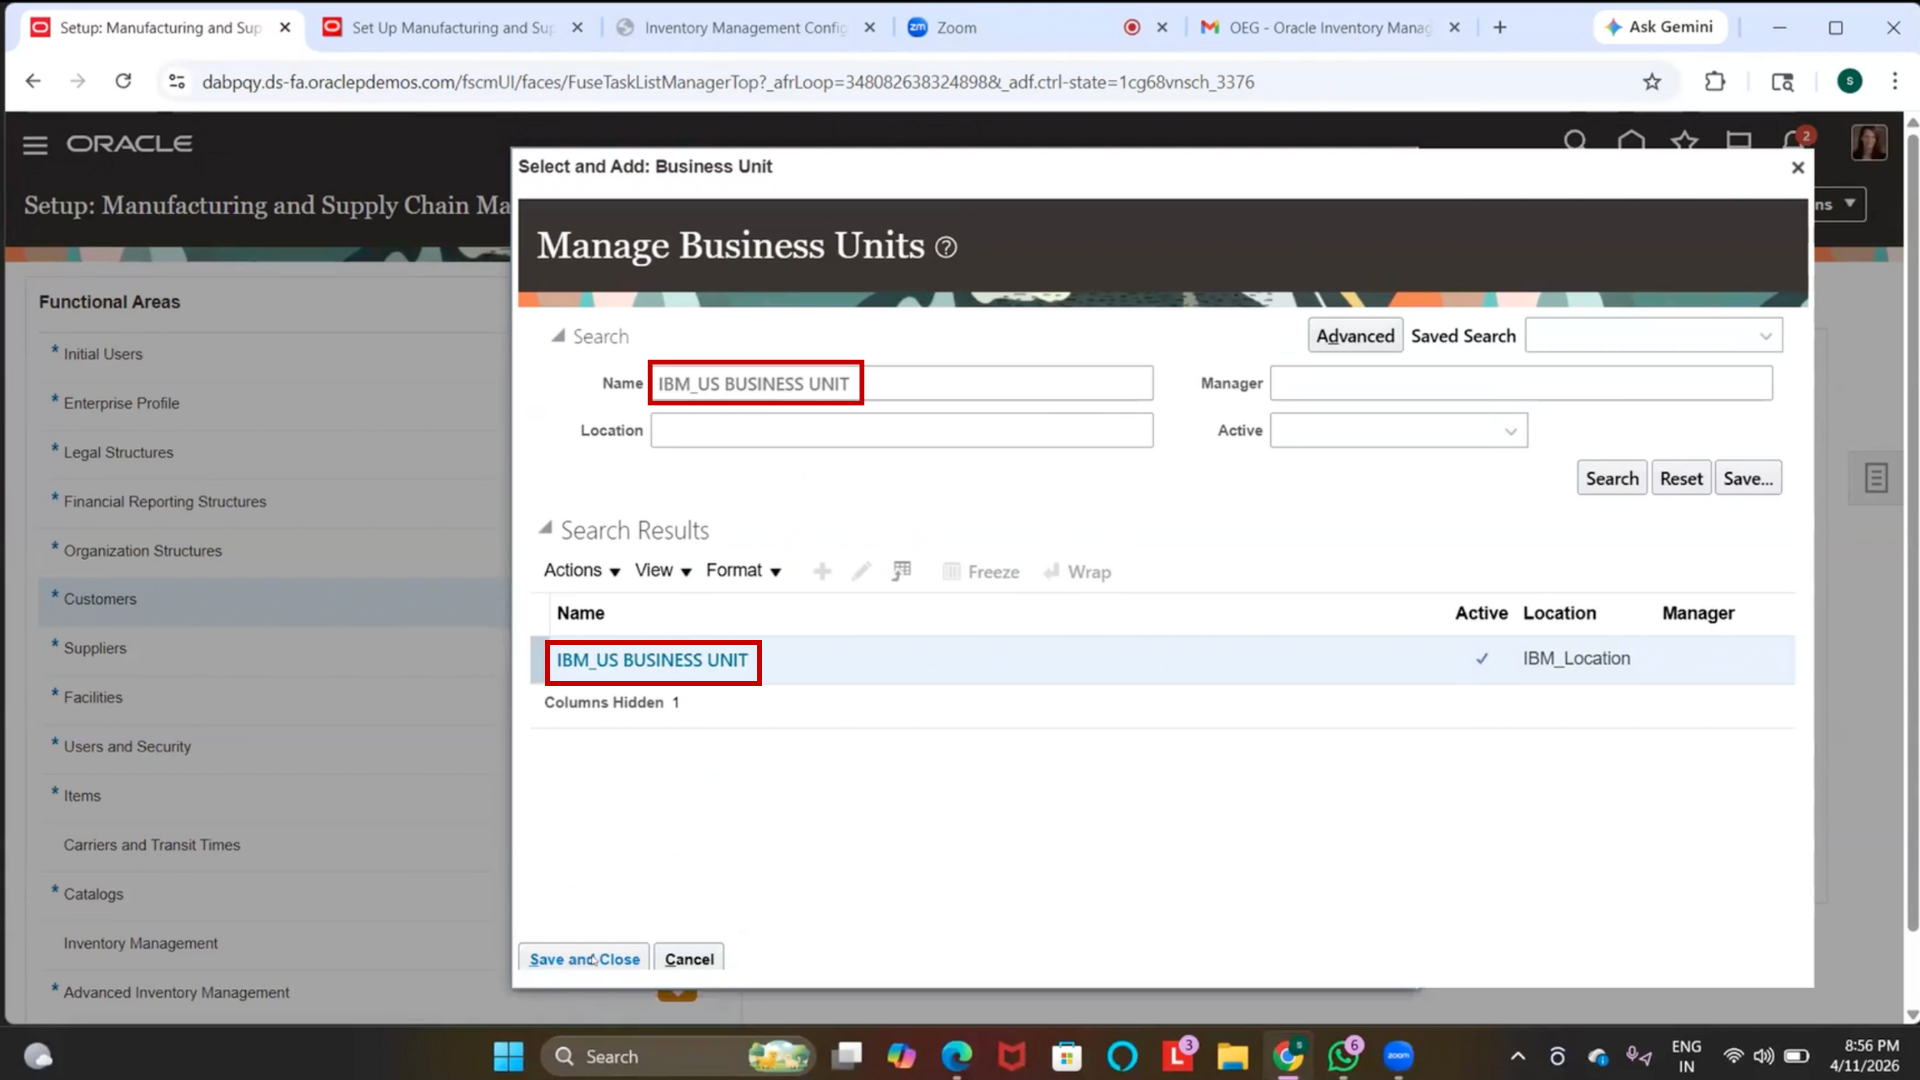
2. Search for “IBM_US Business Unit.”
3. Select the business unit
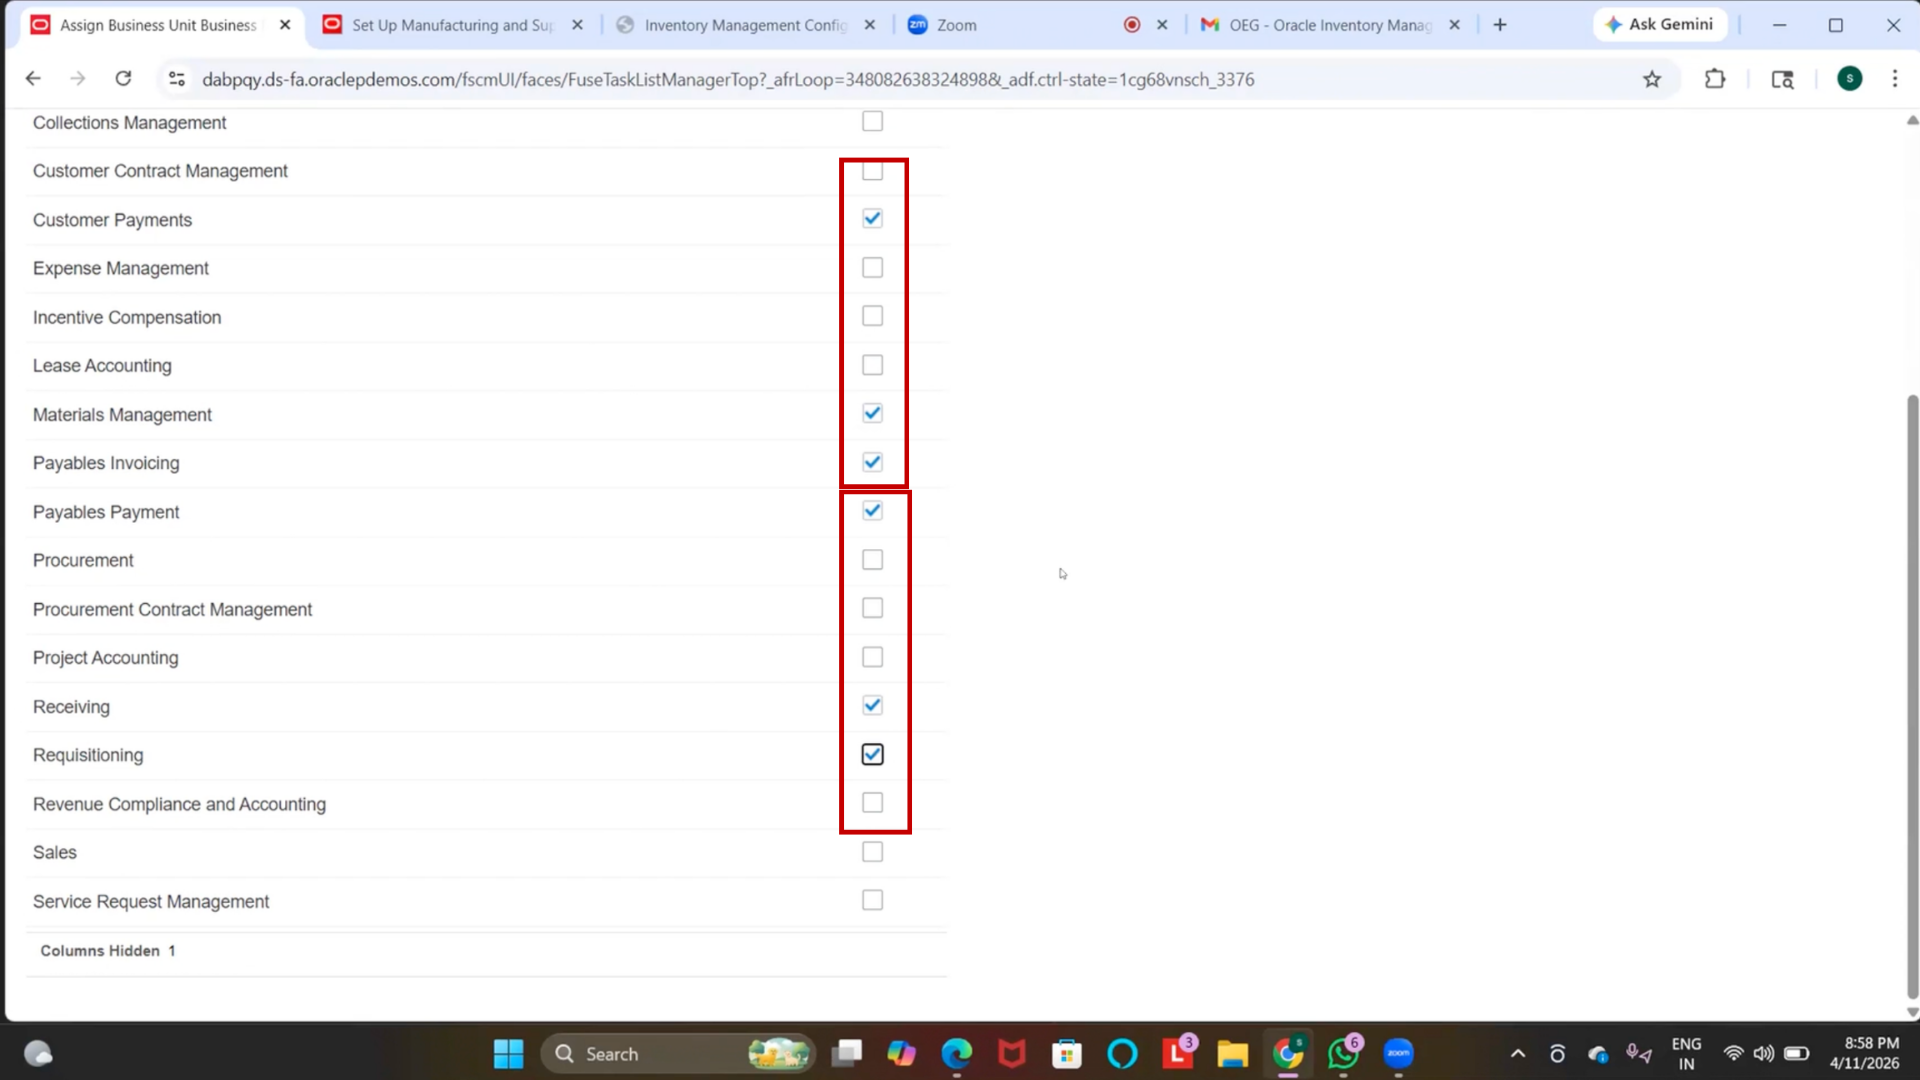
24. Enable Business Functions
1. Locate Material Management
2. Enable checkbox
3. Locate Billing and Revenue Management
4. Enable checkbox
5. Locate Payables
6. Enable checkbox
7. Locate Procurement
8. Enable checkbox
9. Locate Payable Invoicing
10. Enable checkbox
11. Locate Receiving
12. Enable checkbox
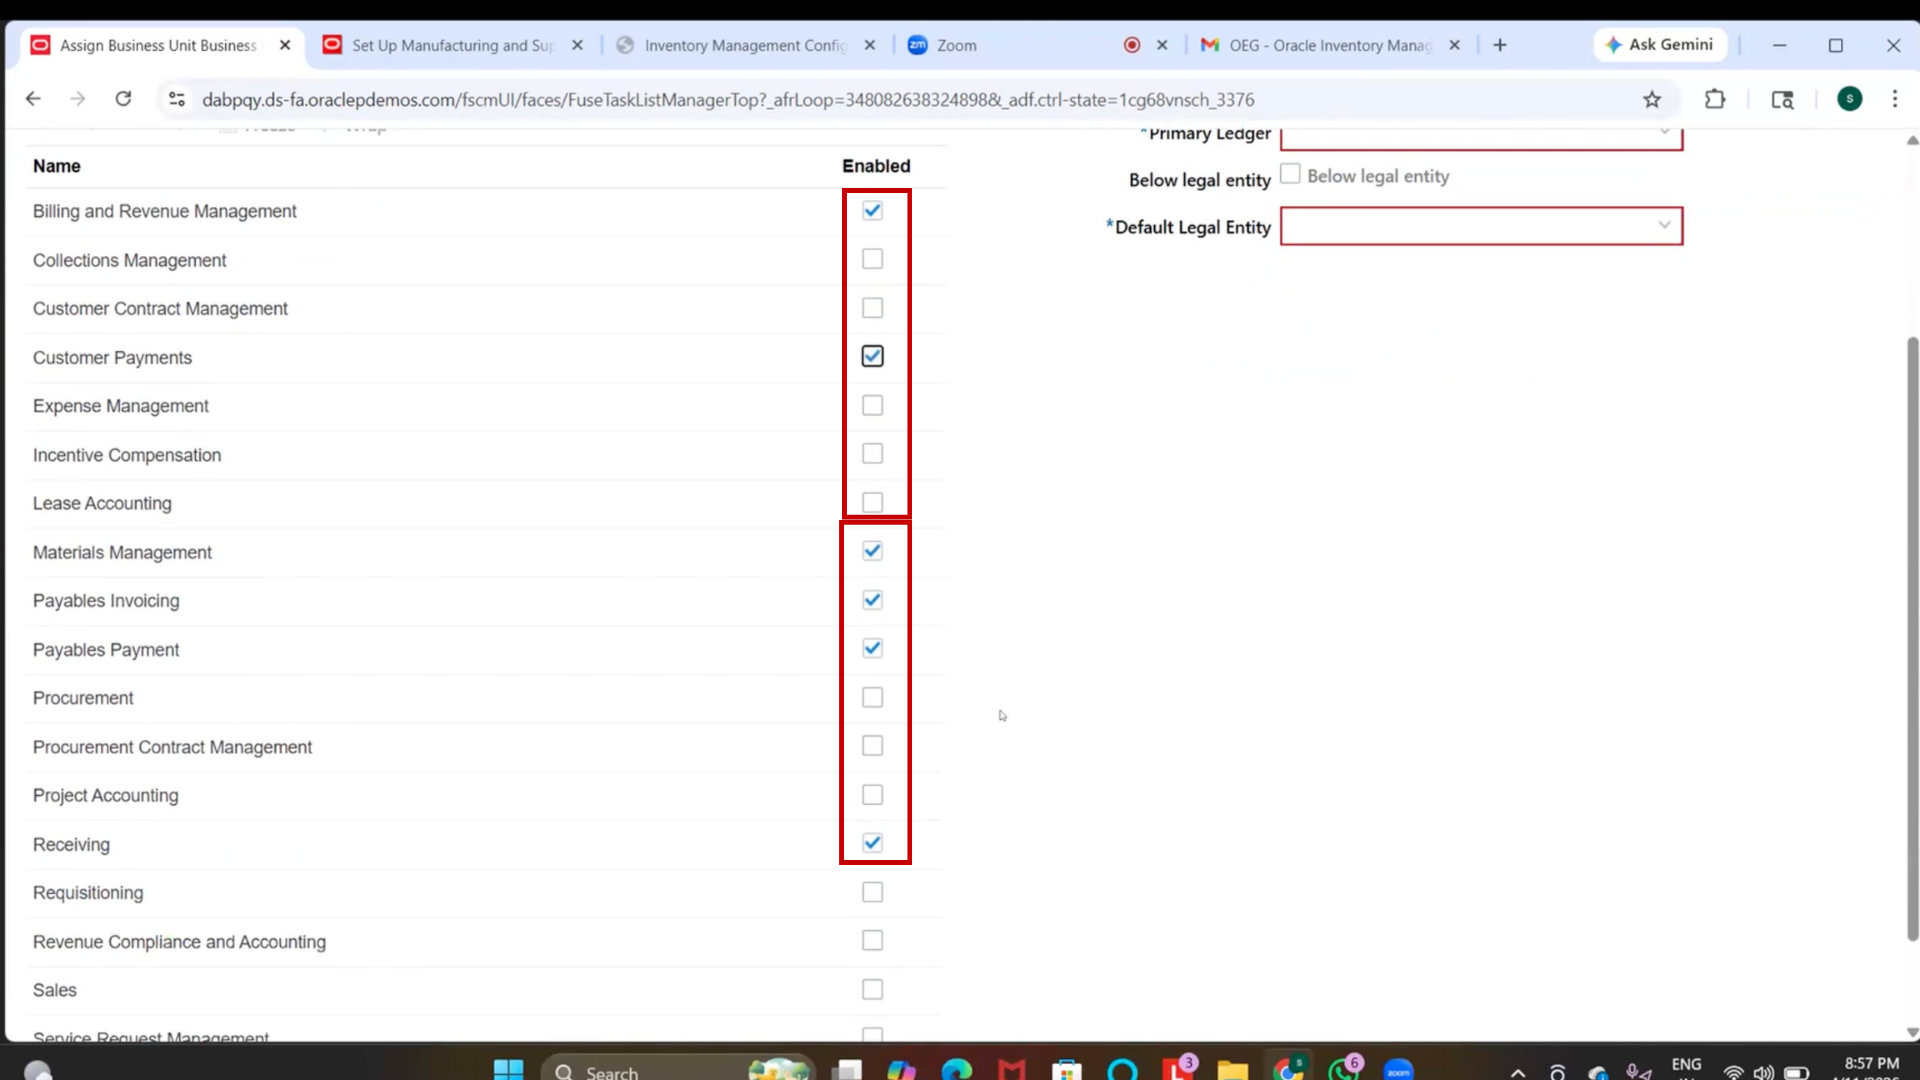
13. Locate Customer Payments
14. Enable checkbox
15. Locate Requisitioning
16. Enable checkbox
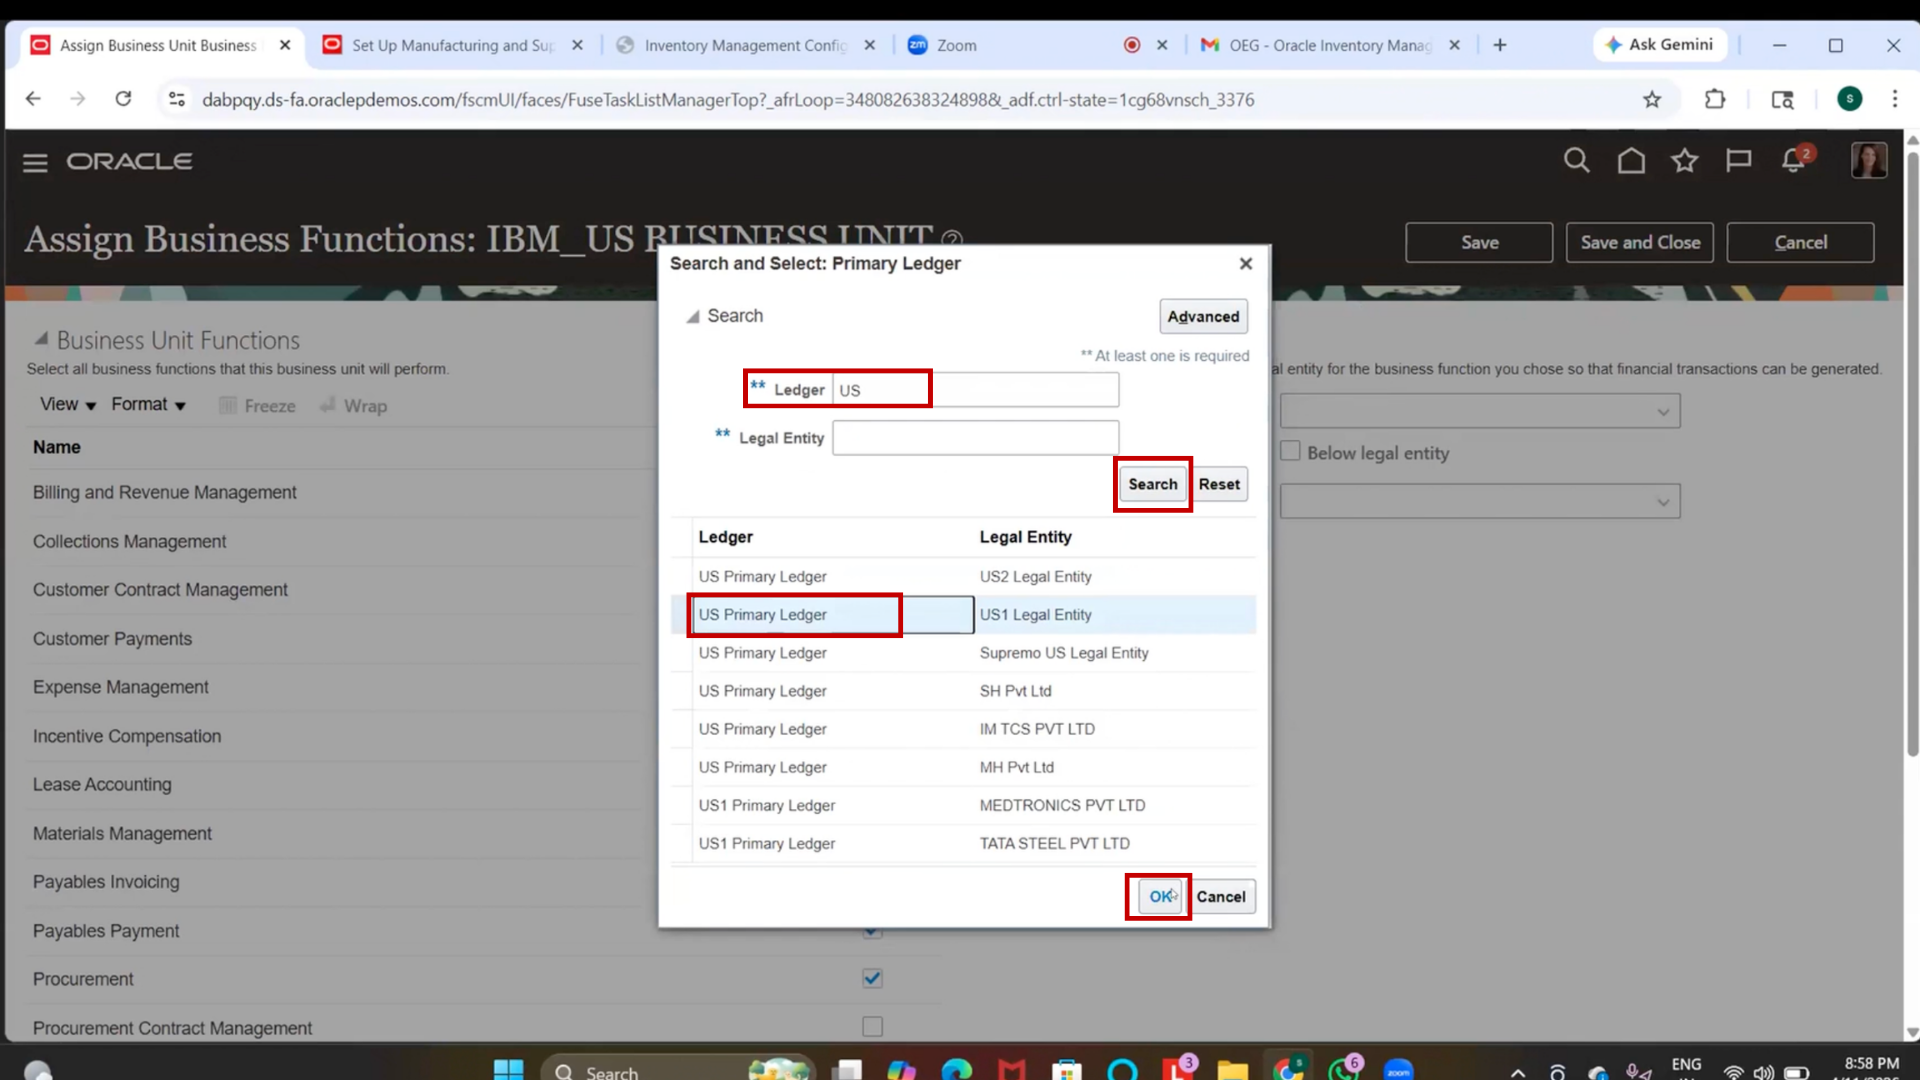
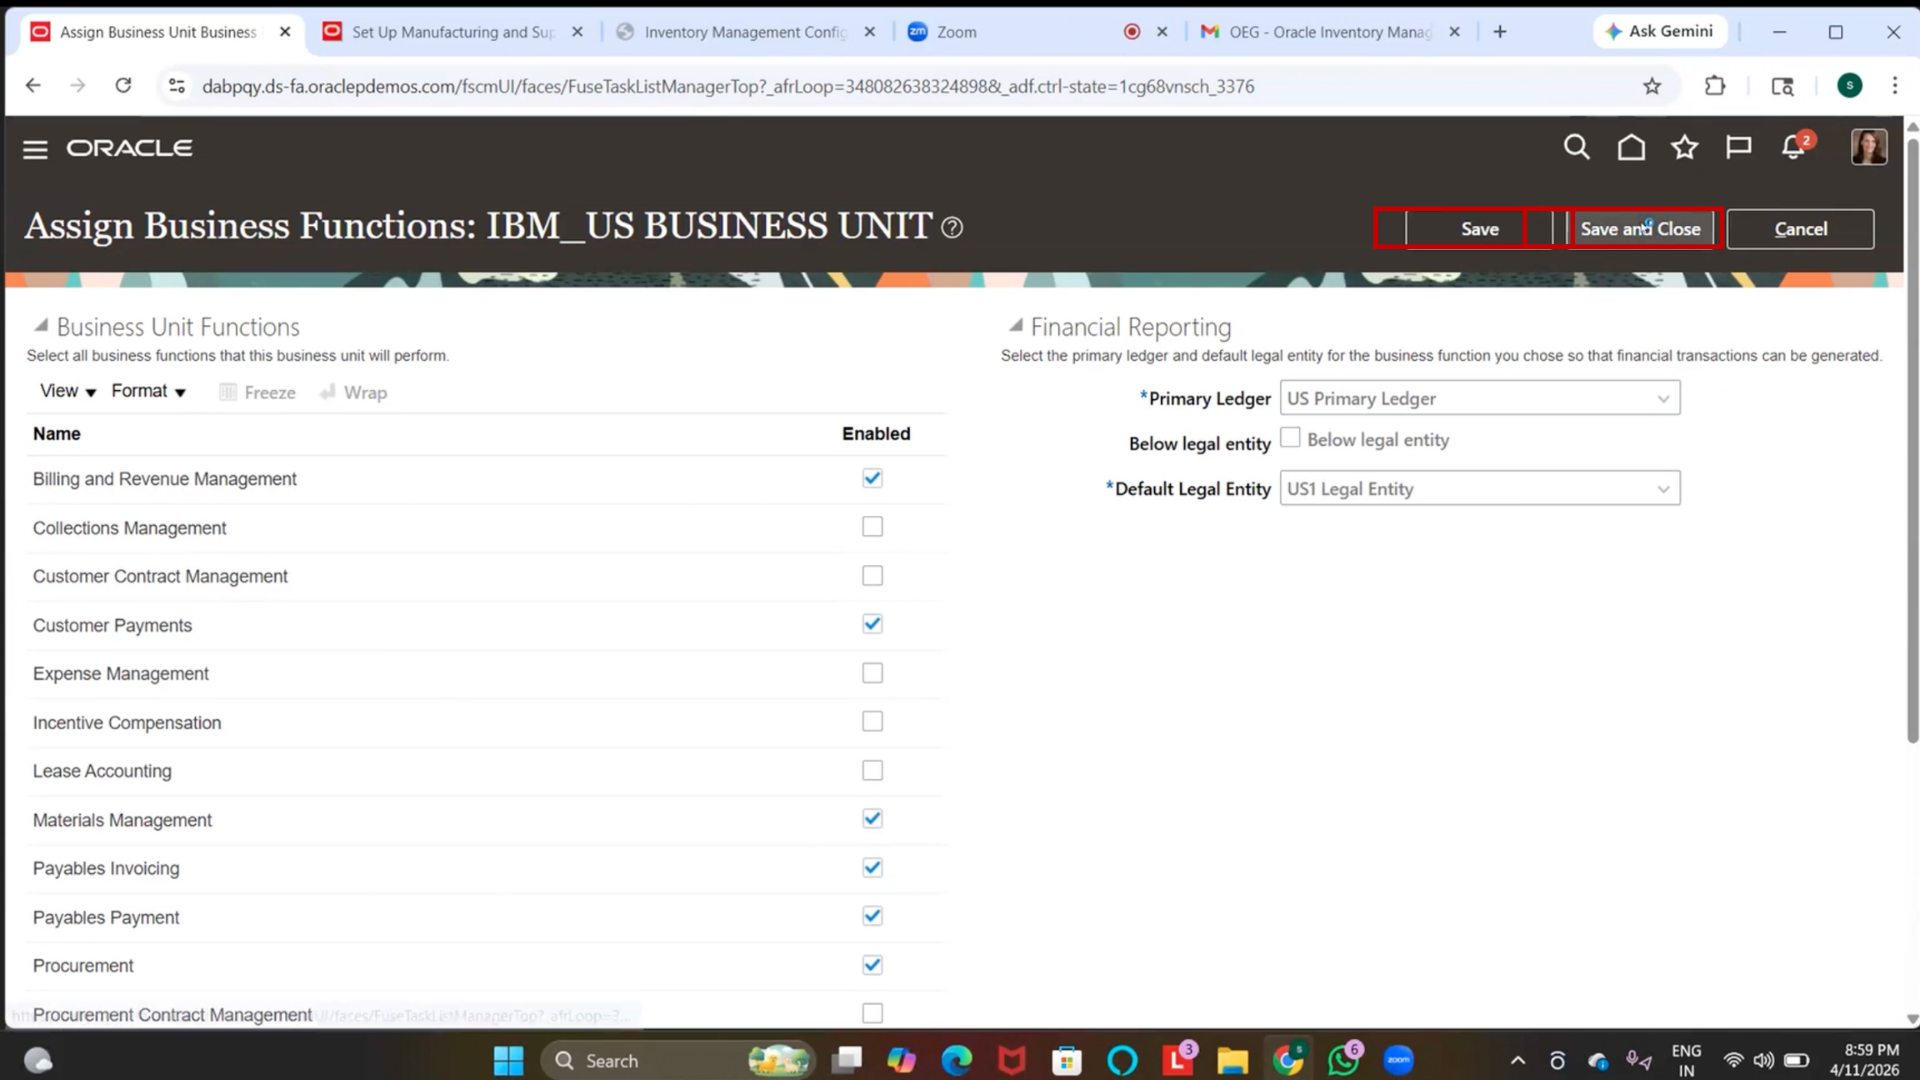
25. Assign Ledger
1. Click on Ledger field
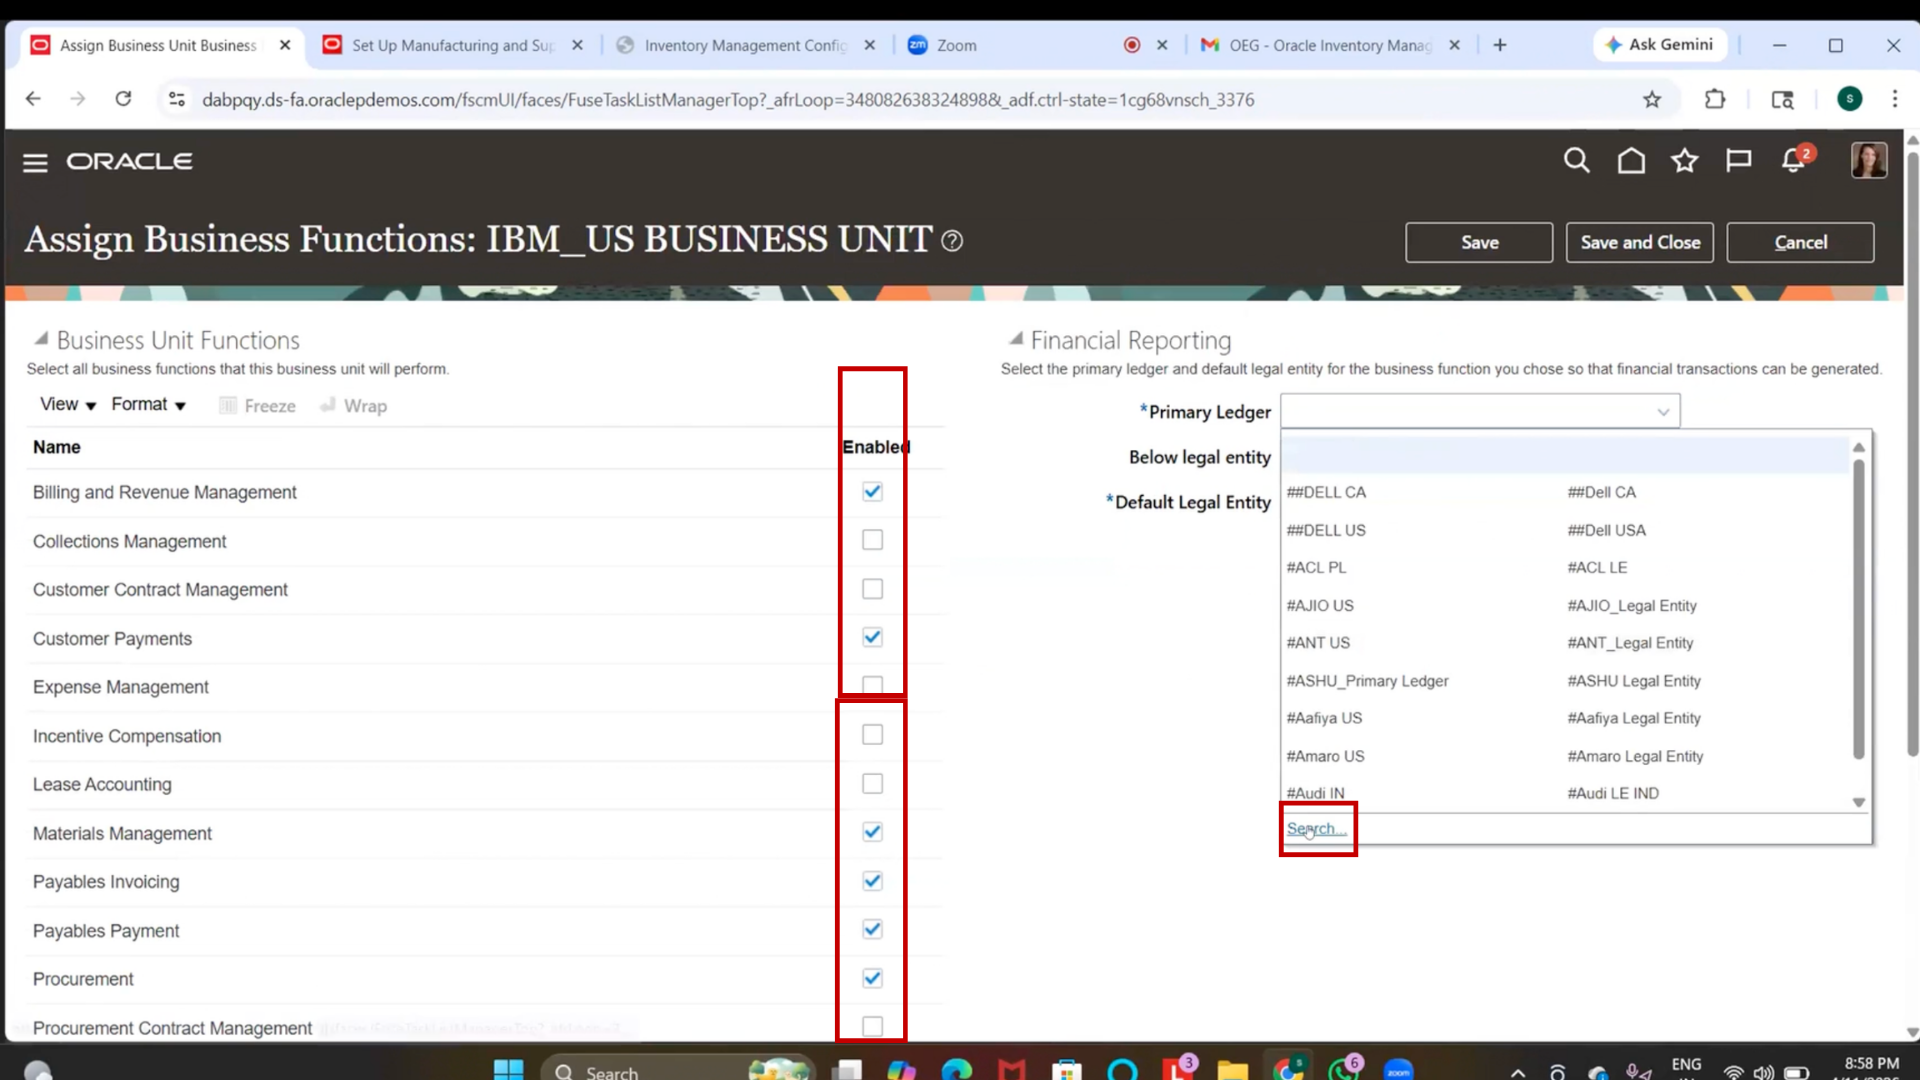
2. Search for “US Primary Ledger.”
3. Select “US Primary Ledger.”
26. Save Business Functions
1. Click Save
2. Click Save and Close
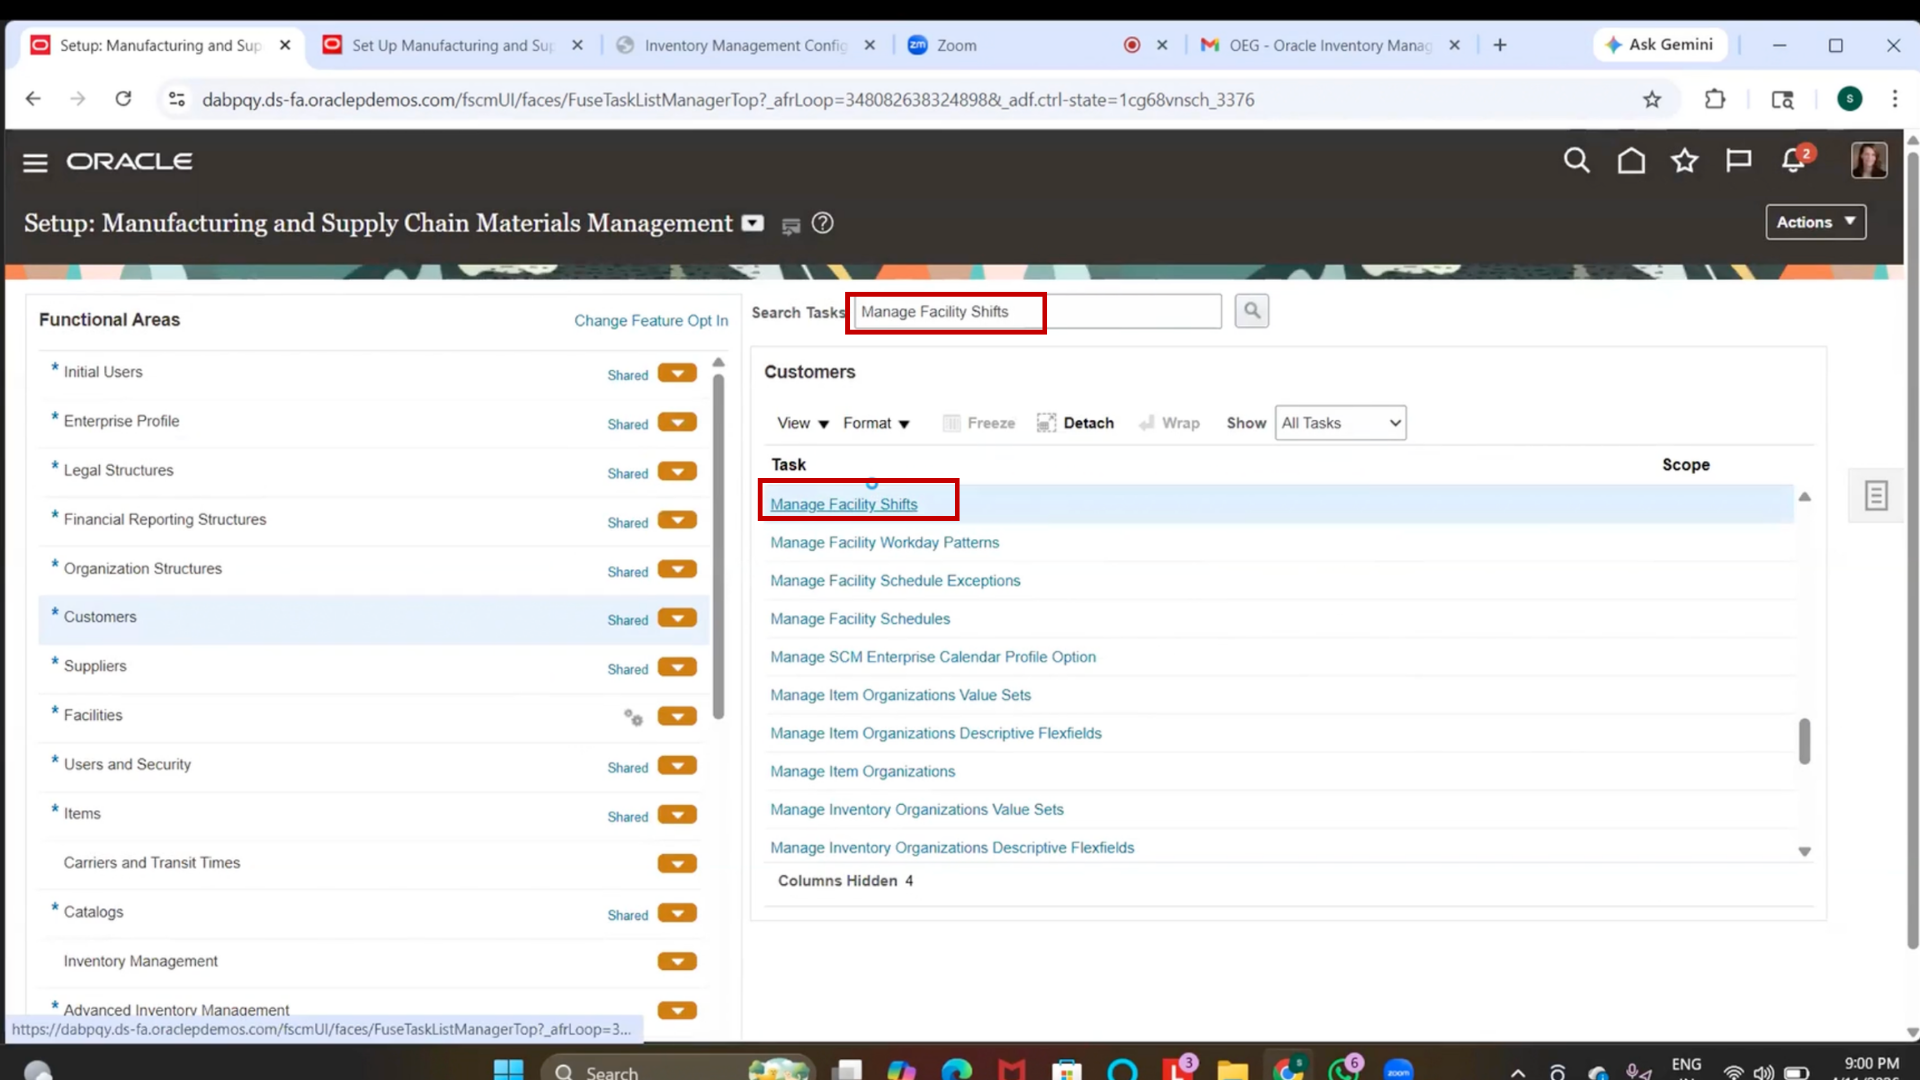
27. Navigate to Facility Shift
1. Click on Search in Setup and Maintenance
2. Type “Manage Facility Shift”
3. Press Enter
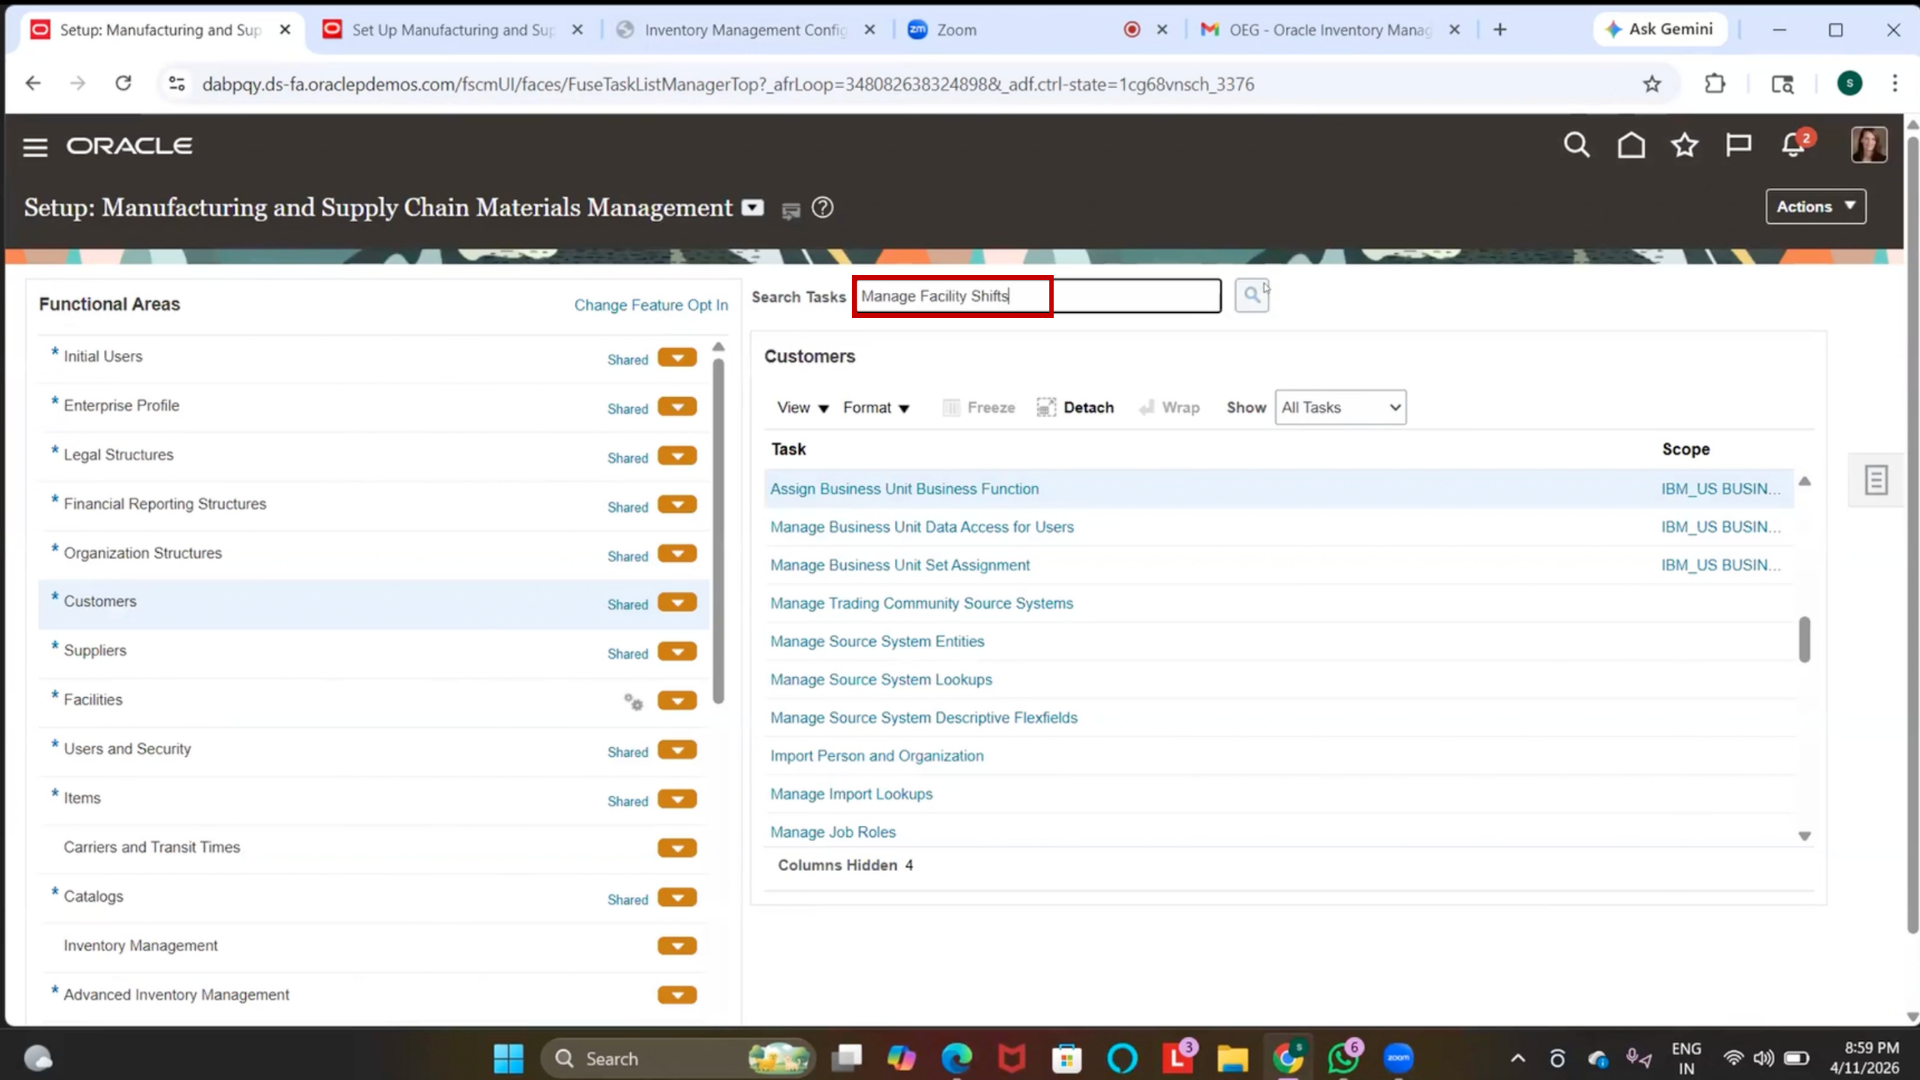
4. Click on “Manage Facility Shift.”
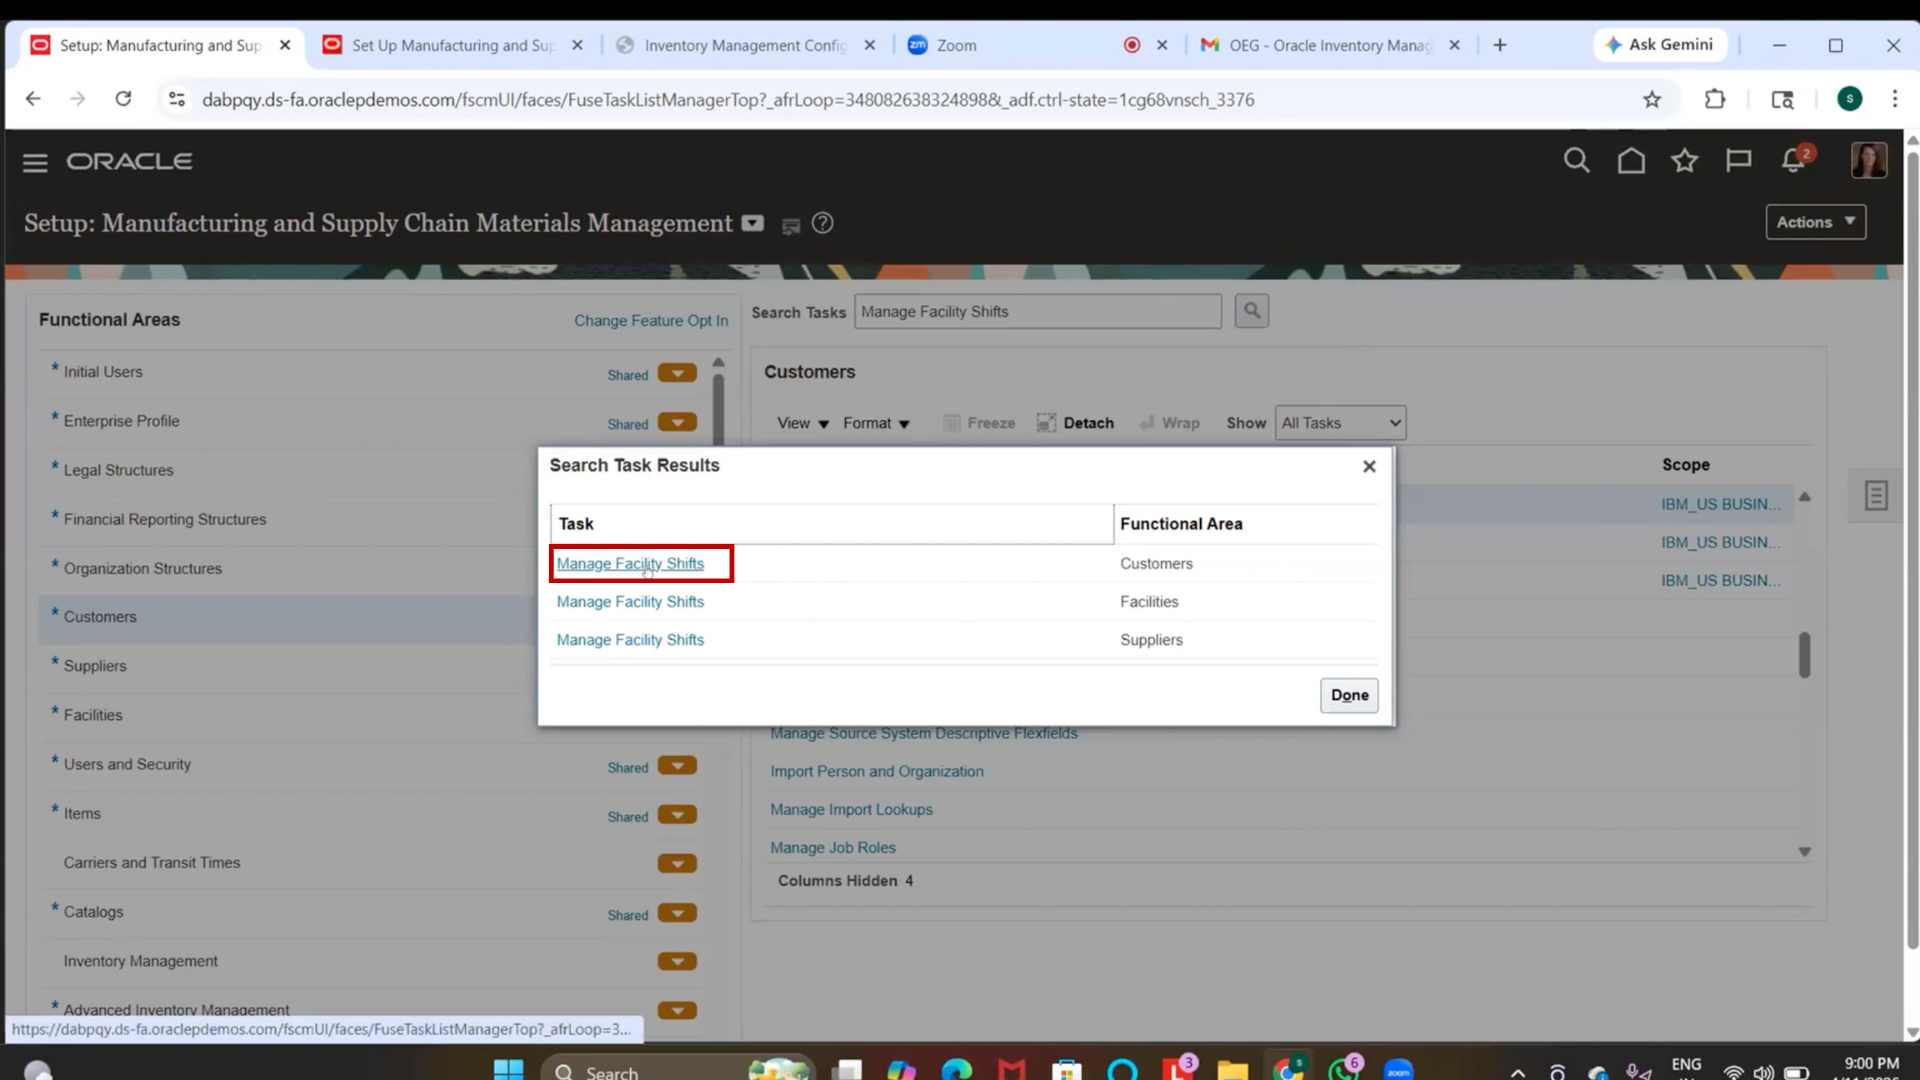
5. Wait for Redwood UI page to load
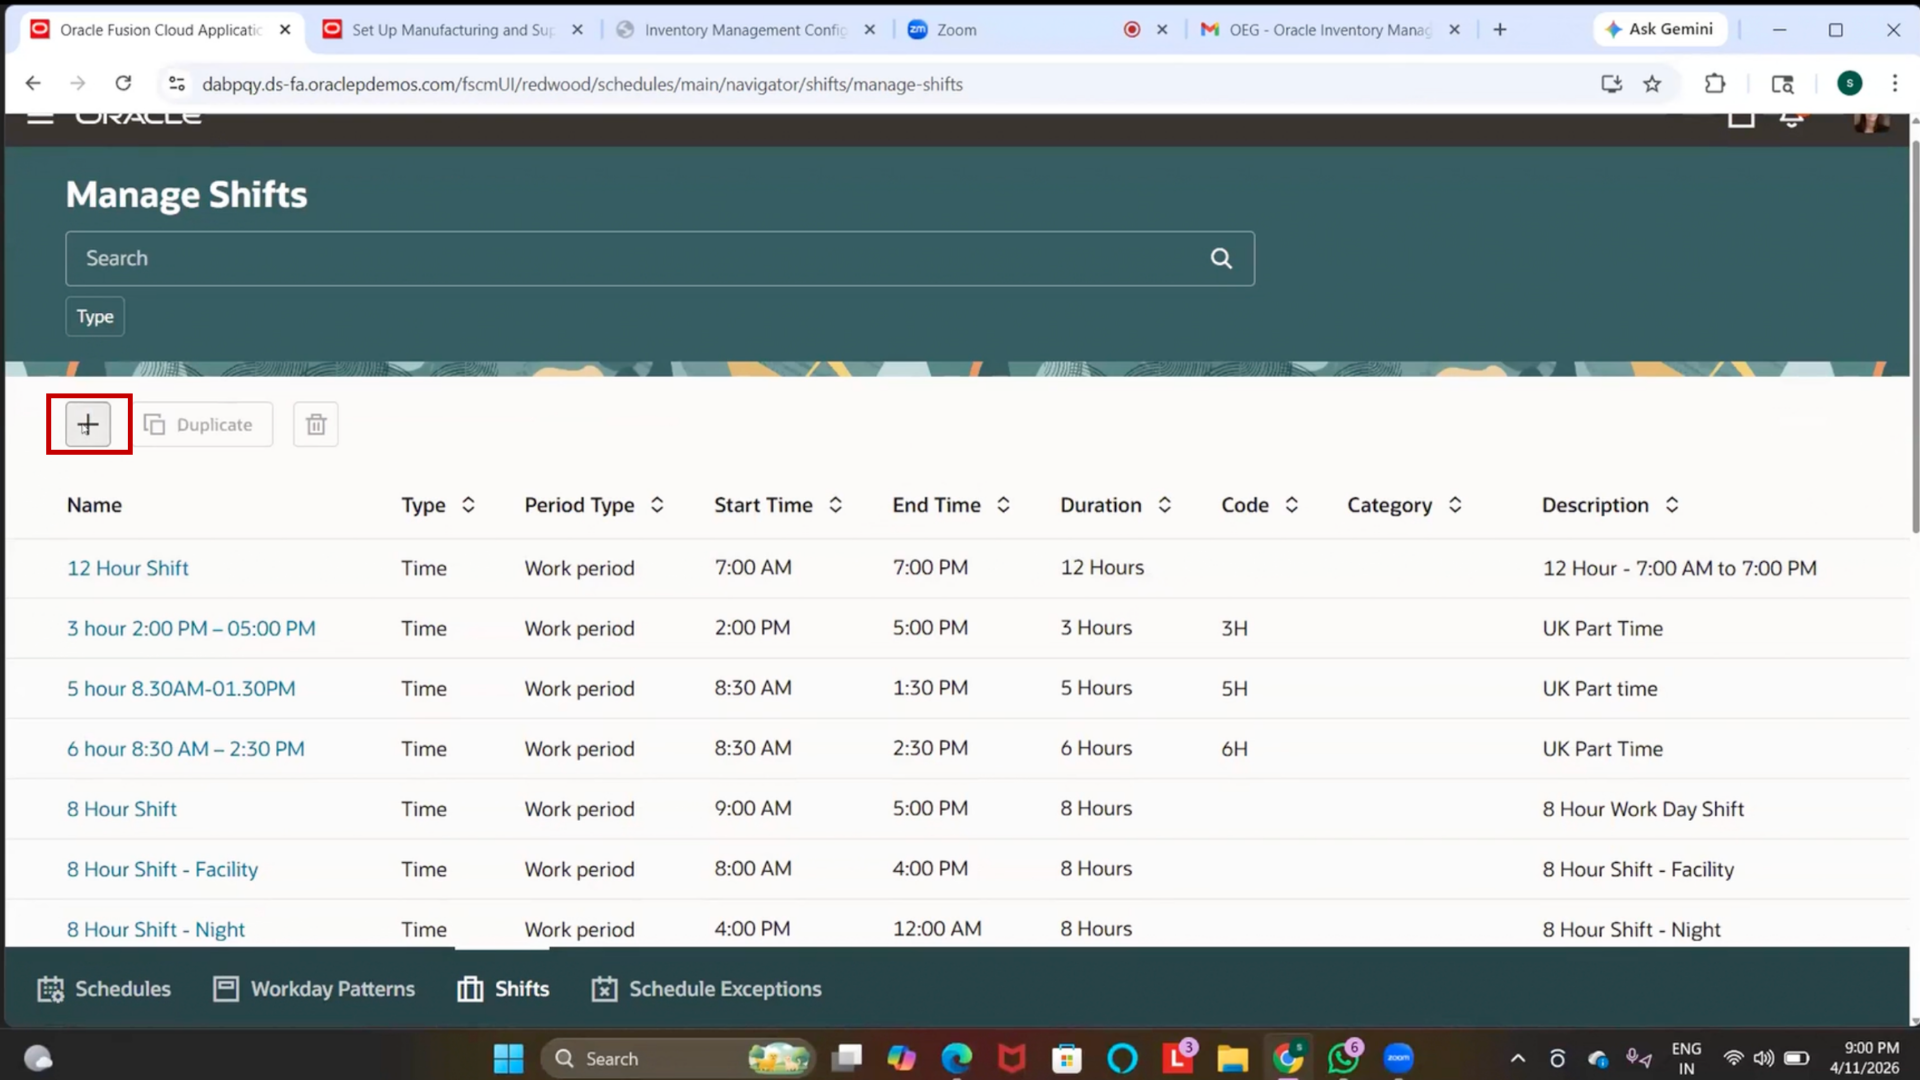
28. Create Facility Shift
1. Click on Create
2. Click on Name field
3. Enter “IBM Morning Shift.”
4. Click on Type field
5. Select “Time.”
6. Click on Description field
7. Enter same value
29. Enter Shift Timing
1. Click on Start Time field
2. Enter “09:00 AM.”
3. Click on Duration Unit
4. Select “Hours.”
5. Click on Duration field
6. Enter “8”
7. Click on Shift Time field
8. Select “None.”
30. Save Facility Shift
1. Click Submit
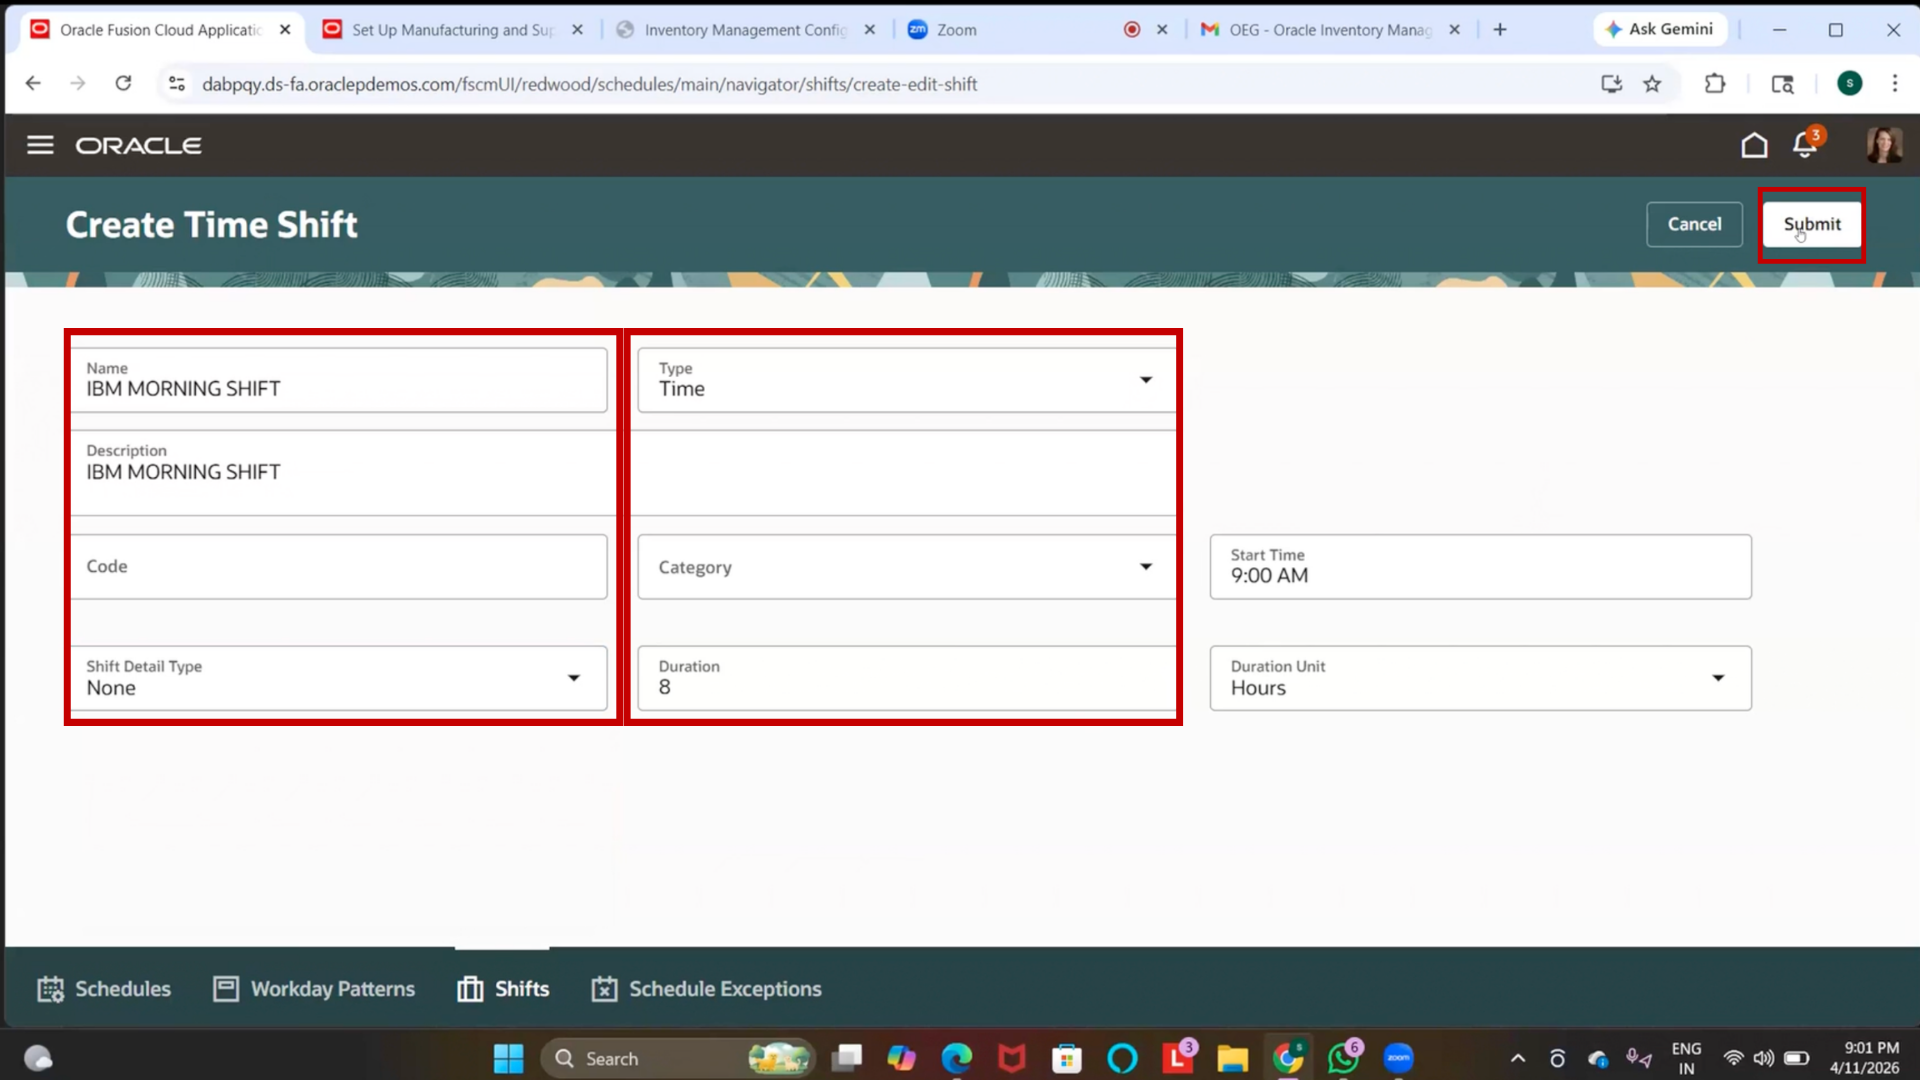
2. Wait for confirmation
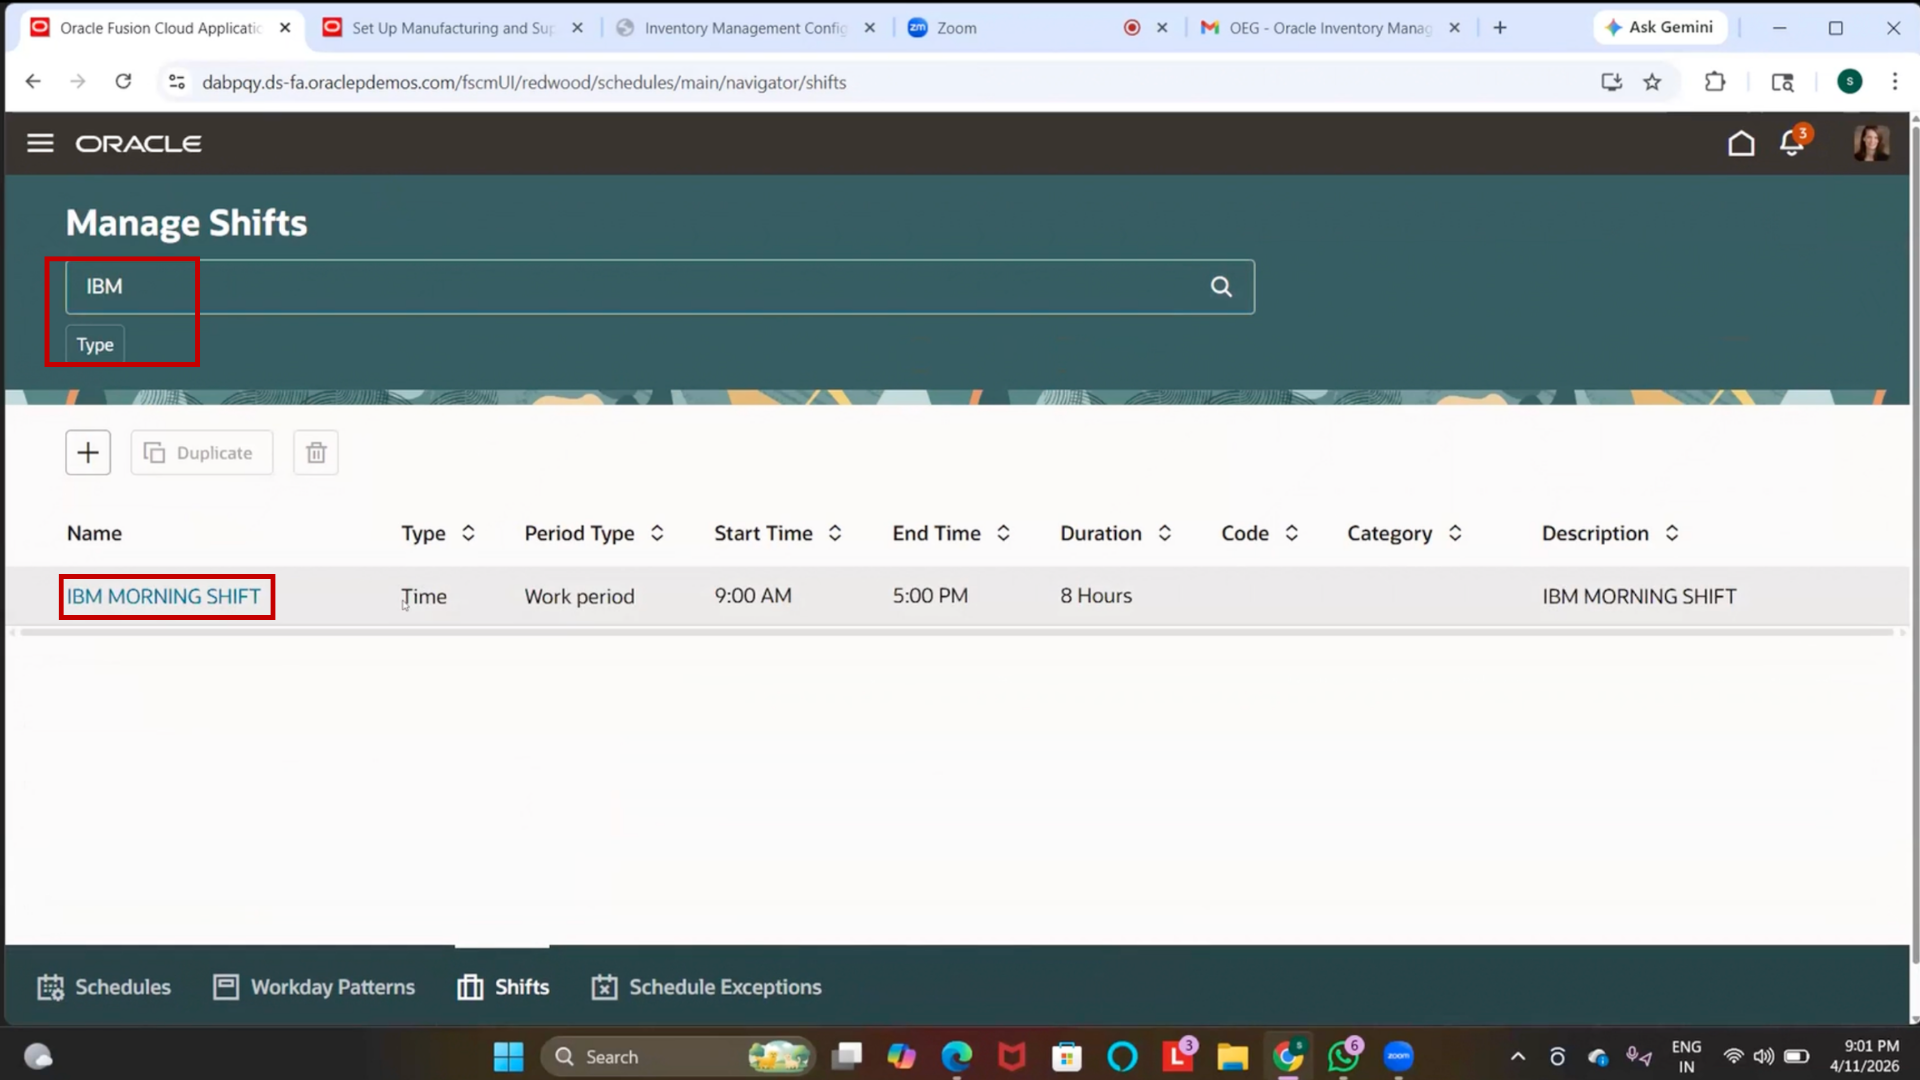
31. Verify Facility Shift
1. Click on Search
2. Enter “IBM Morning Shift.”
3. Click Search
4. Verify shift is created
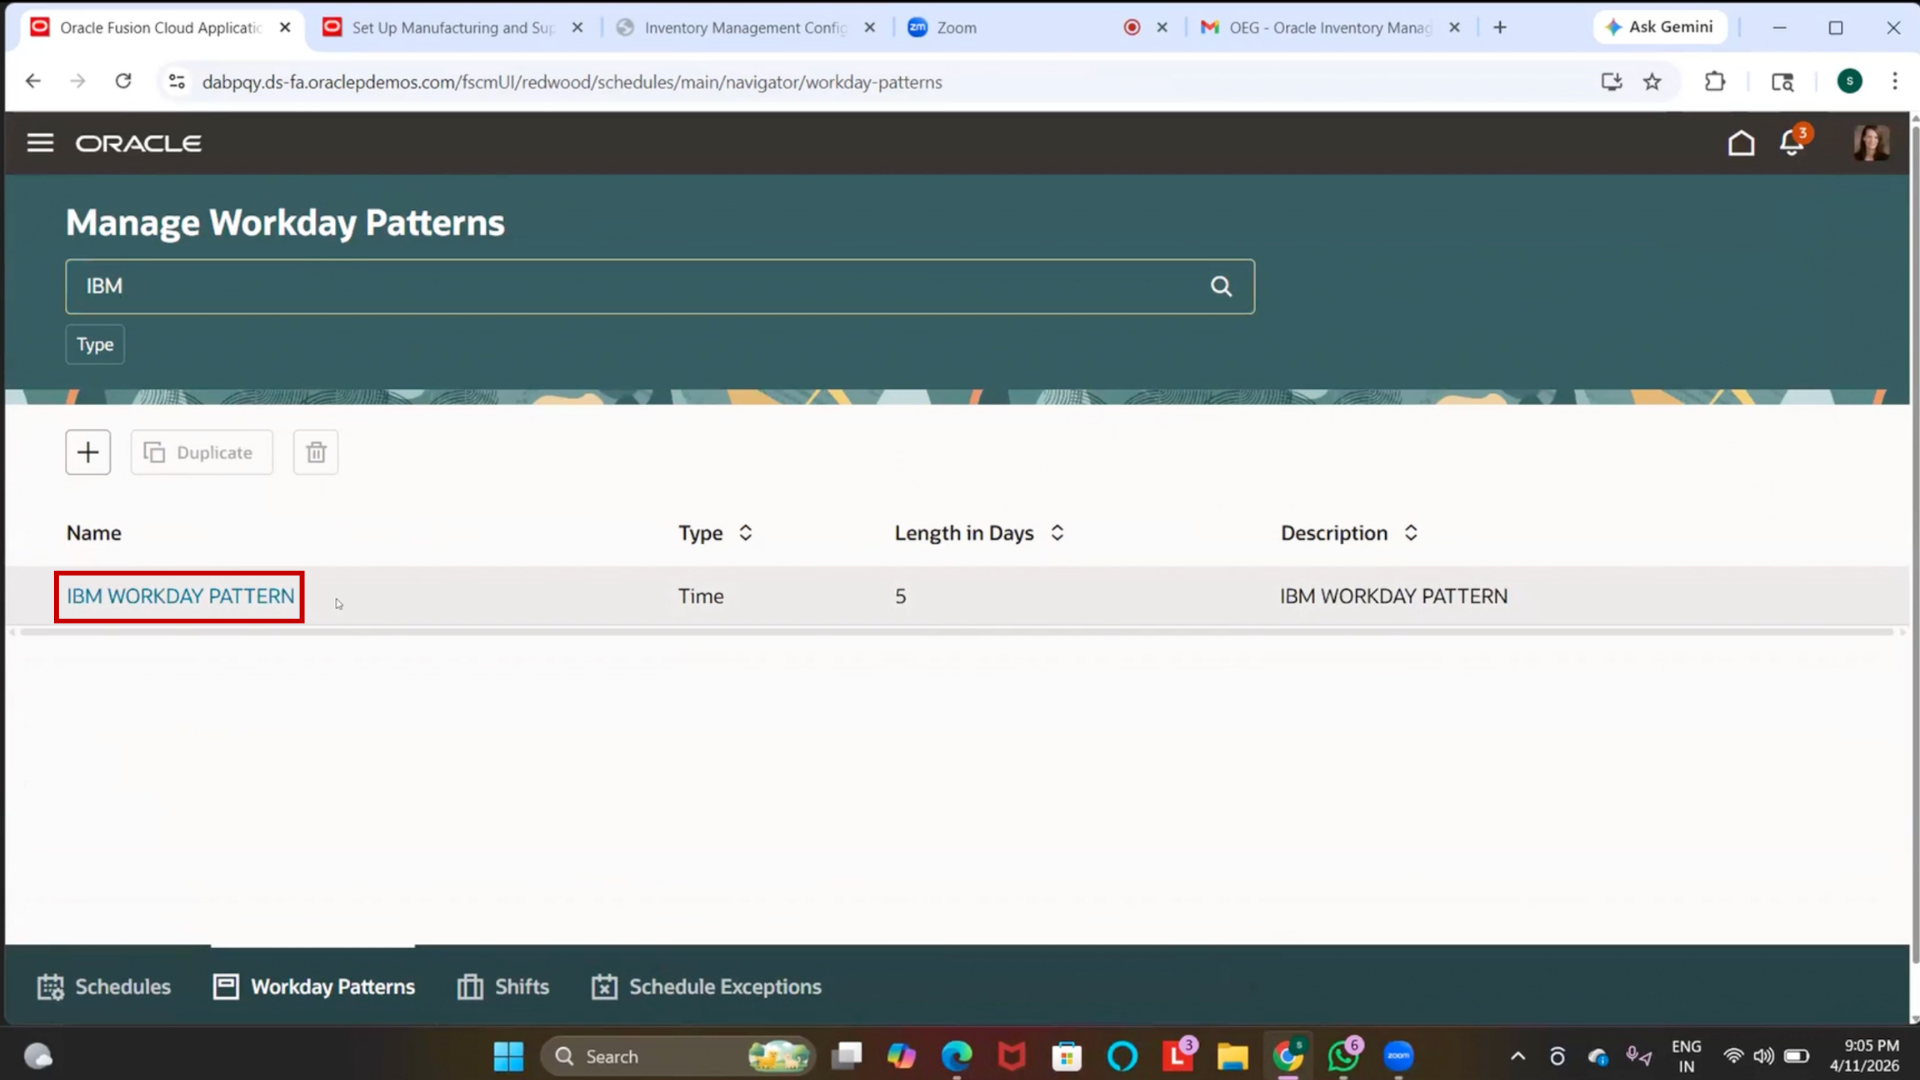
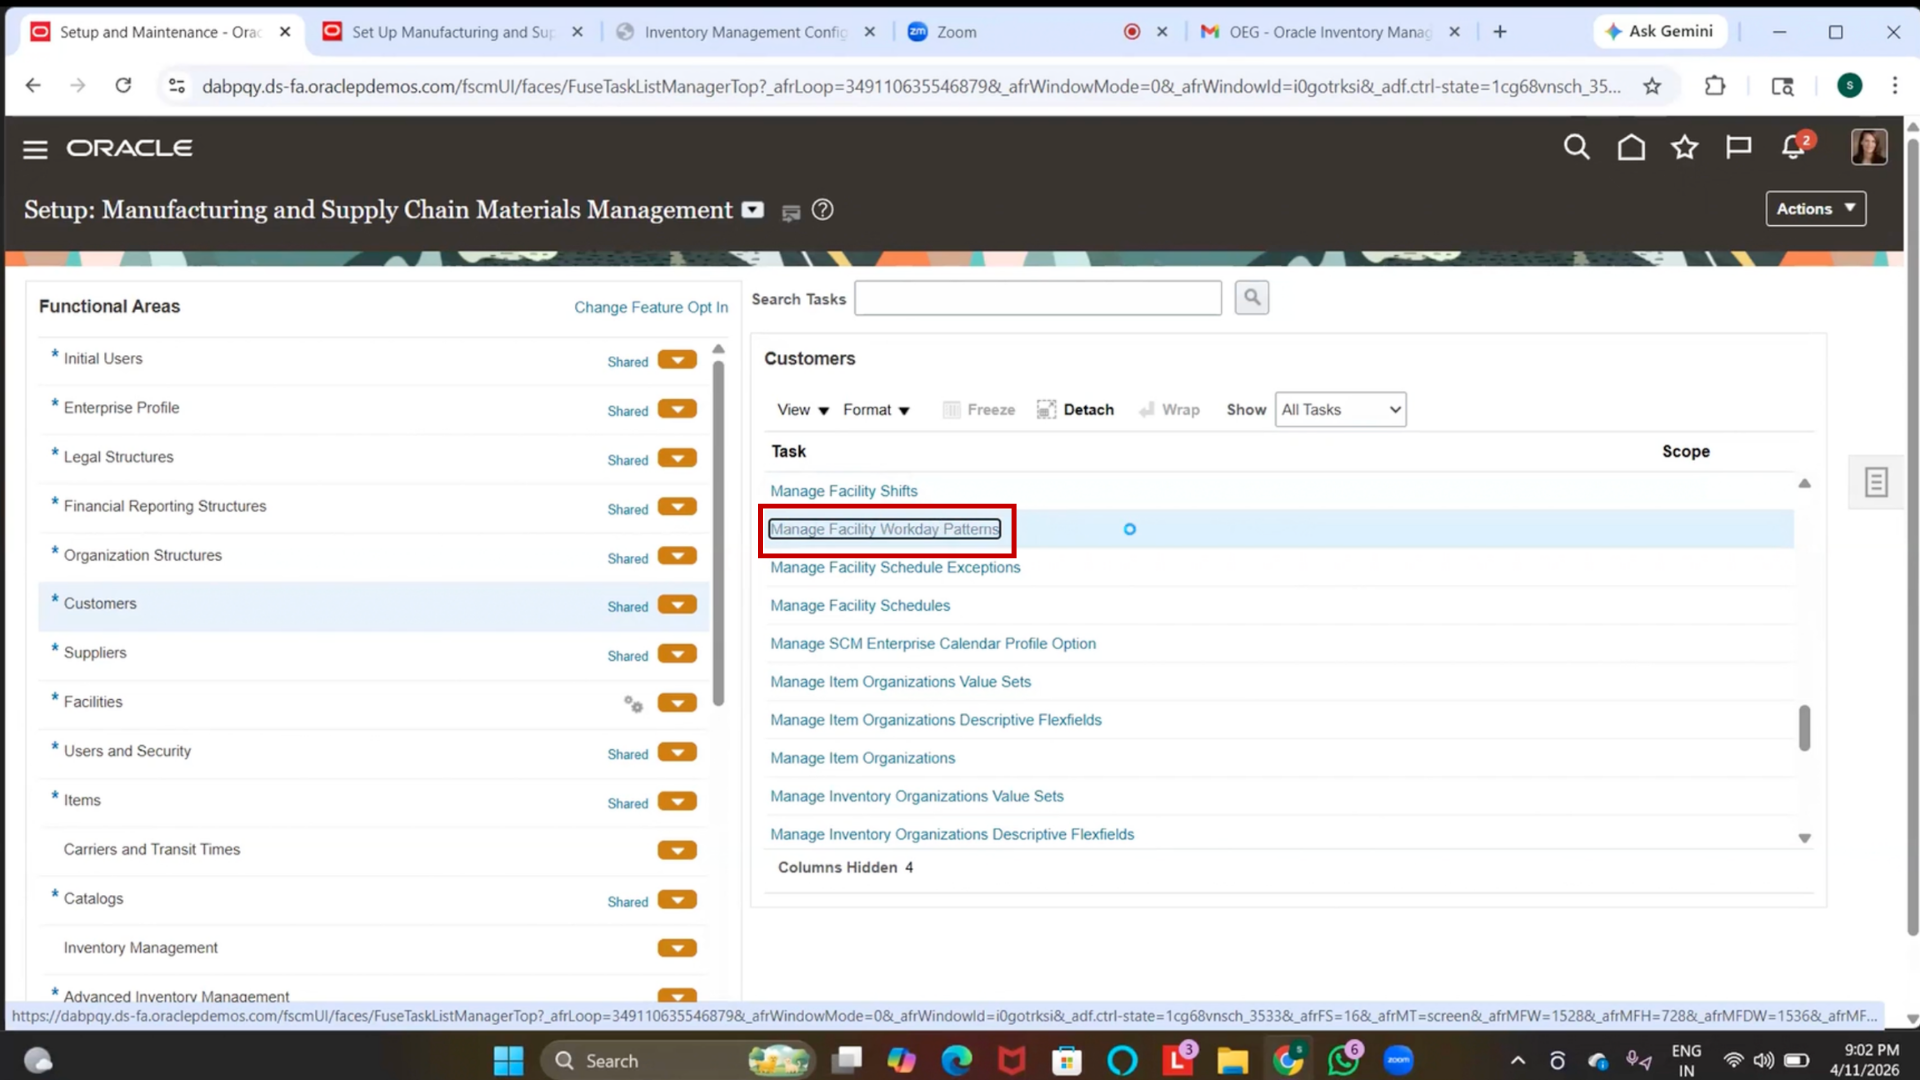
32. Navigate to Facility Workday Pattern
1. Click on Search in Setup and Maintenance
2. Type “Facility Workday Pattern”
3. Press Enter
4. Click on Facility Workday Pattern
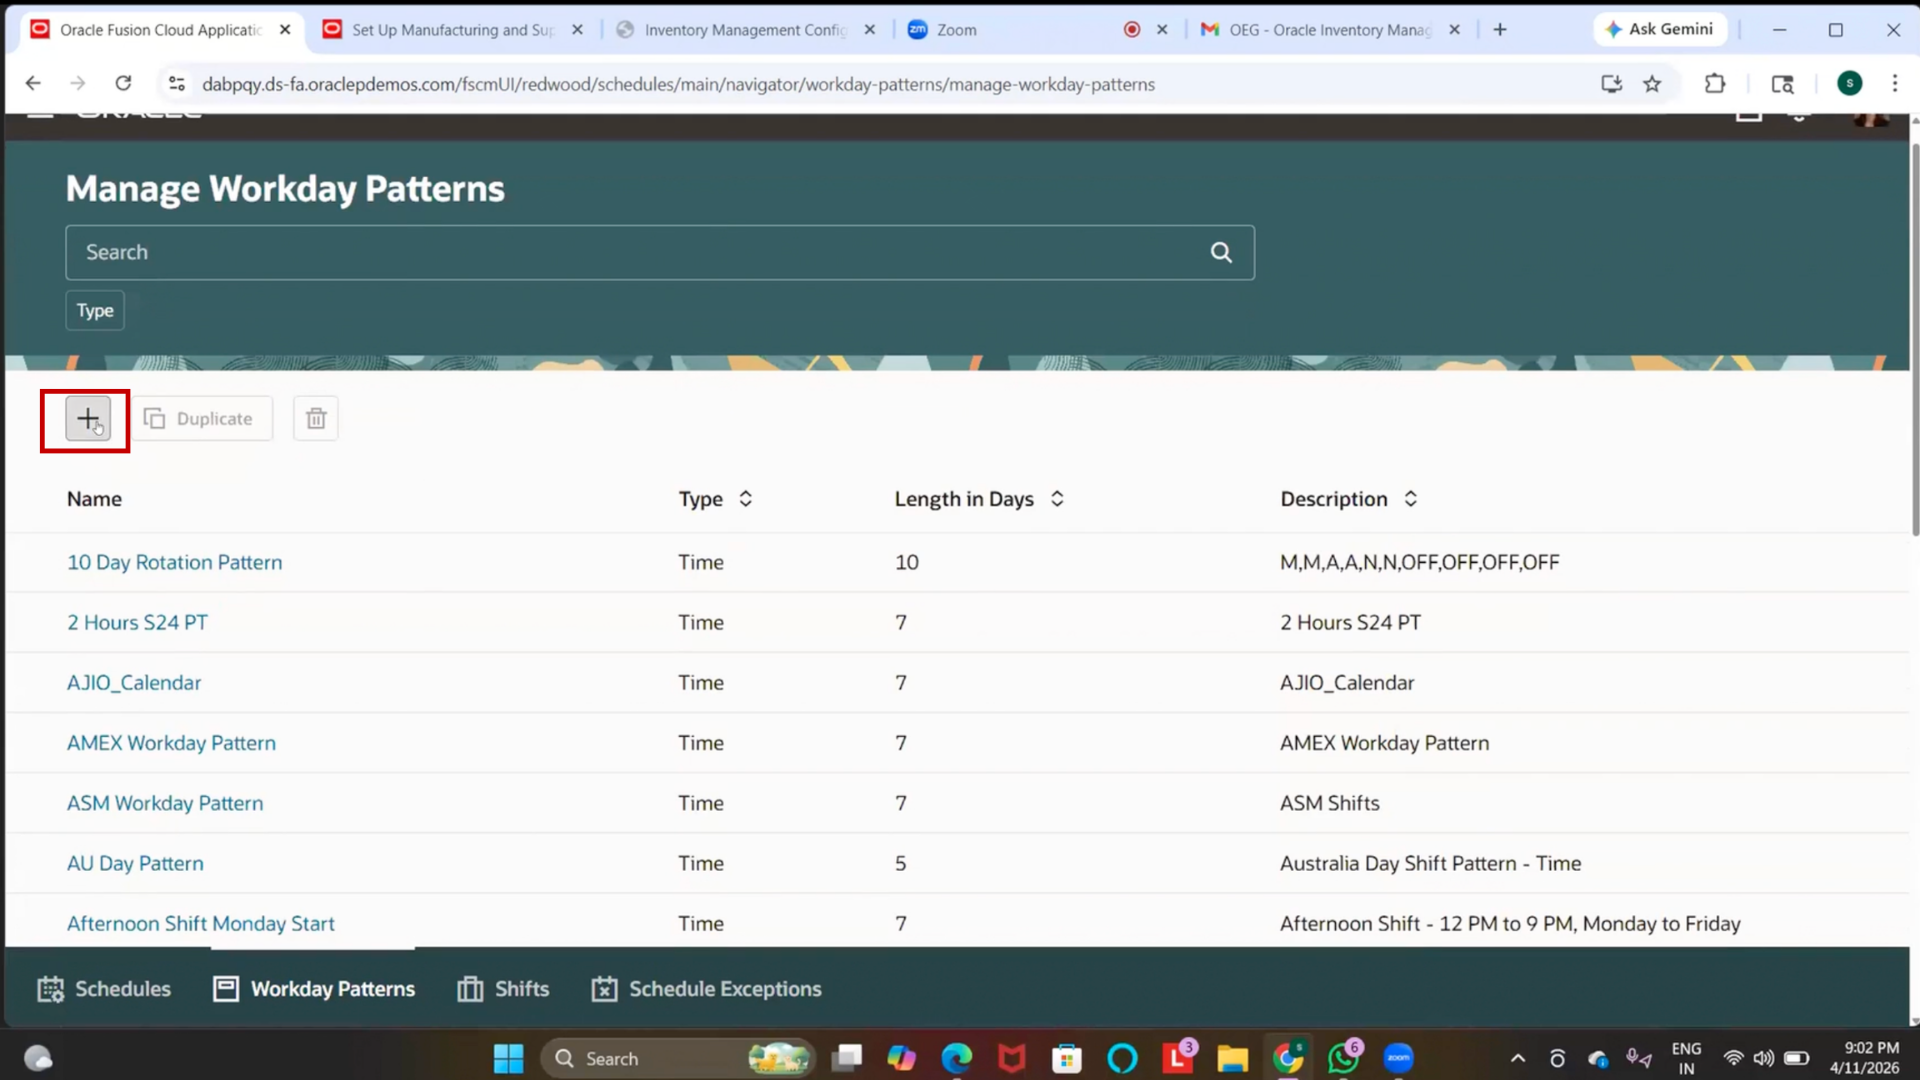
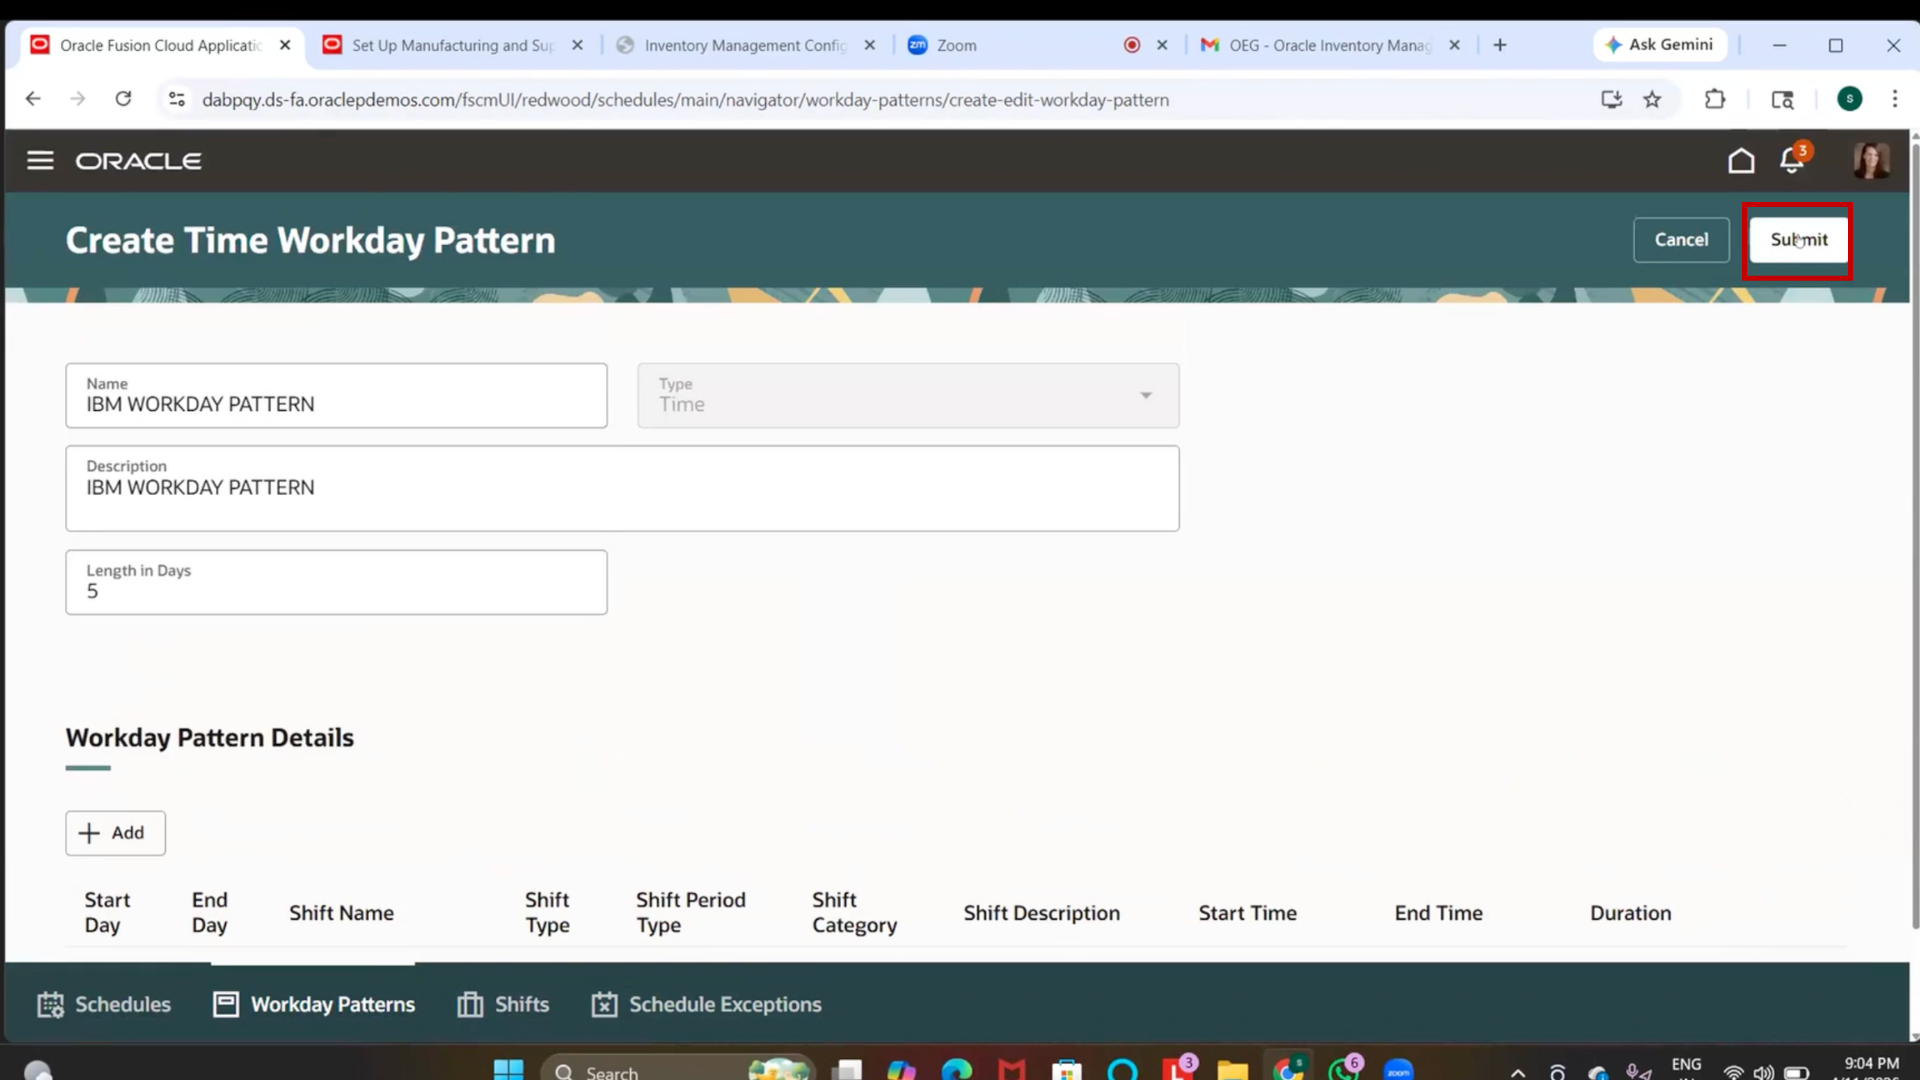
33. Create Workday Pattern
1. Click on Create
2. Click on Name field
3. Enter “IBM Workday Pattern.”
4. Click on Type field
5. Select “Time.”
6. Click on Description field
7. Enter same value
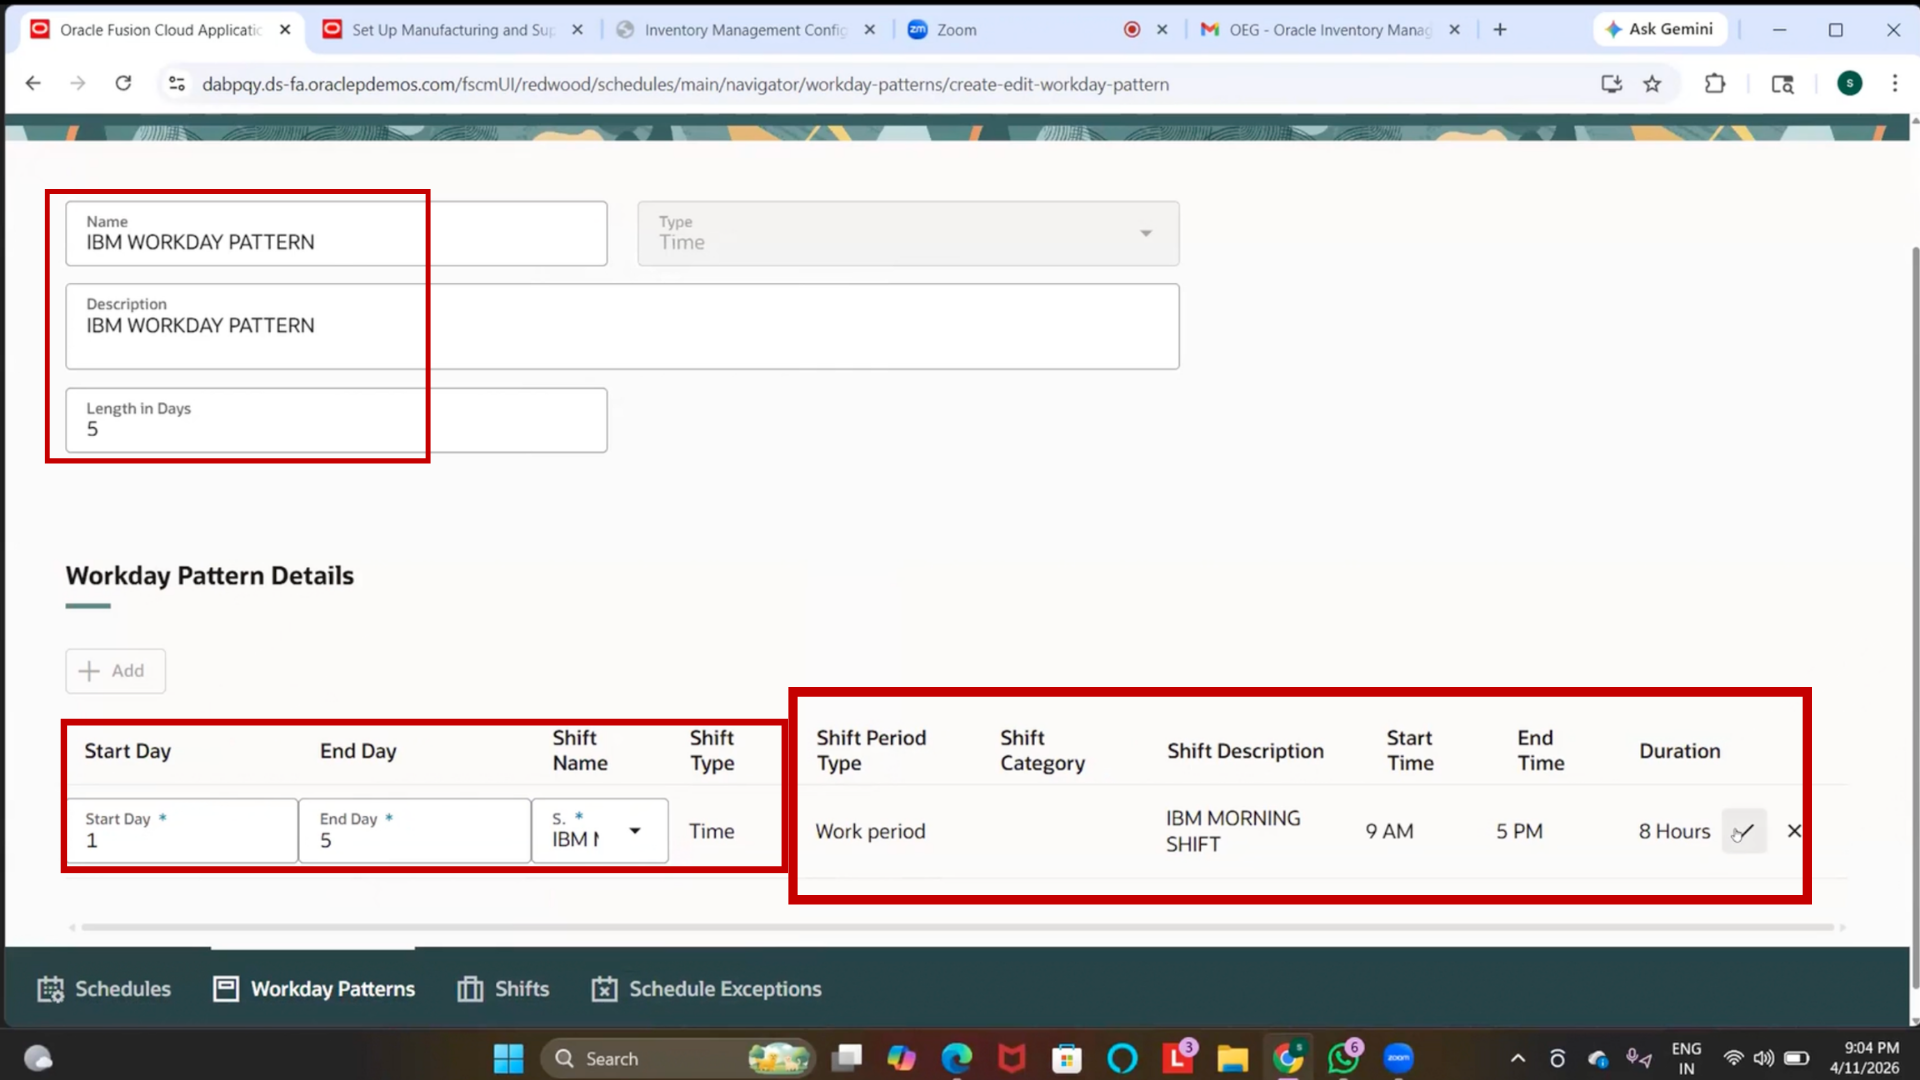
34. Enter Workday Details
1. Click on Length in Days field
2. Enter “5”
3. Click on Start Day field
4. Enter “01”
5. Click on End Day field
6. Enter “05”
35. Assign Shift to Workday Pattern
1. Click on Add Row (or Add Shift)
2. Click on Shift field
3. Search for “IBM Morning Shift.”
4. Select the shift
36. Assign Time Shift to Work Day Pattern
1. Click on Add Row
2. Click on Shift field
3. Search for “IBM Time Shift.”
4. Select the shift
37. Verify Shift Details
1. Check if details are auto-populated
2. Verify duration is 8 hours
3. Verify start time is 9:00 AM
4. Verify end time is 5:00 PM
38. Add Workday Days
1. Click on Add
2. Enter 01 as starting day
3. Enter 05 as ending day
39. Assign Shifts to Days
1. Click on Shift field
2. Search for “IBM Shift.”
3. Select the shift
40. Submit Workday Pattern
1. Click on Submit
41. Verify Workday Pattern
1. Search for Workday Pattern
2. Confirm it is created