Receiving Parameters Setup
Step 250: Open Receiving Parameters and Understand Receiving Parameters
1. Navigate to Setup and Maintenance.
2. Search for:
3. Receiving Parameters
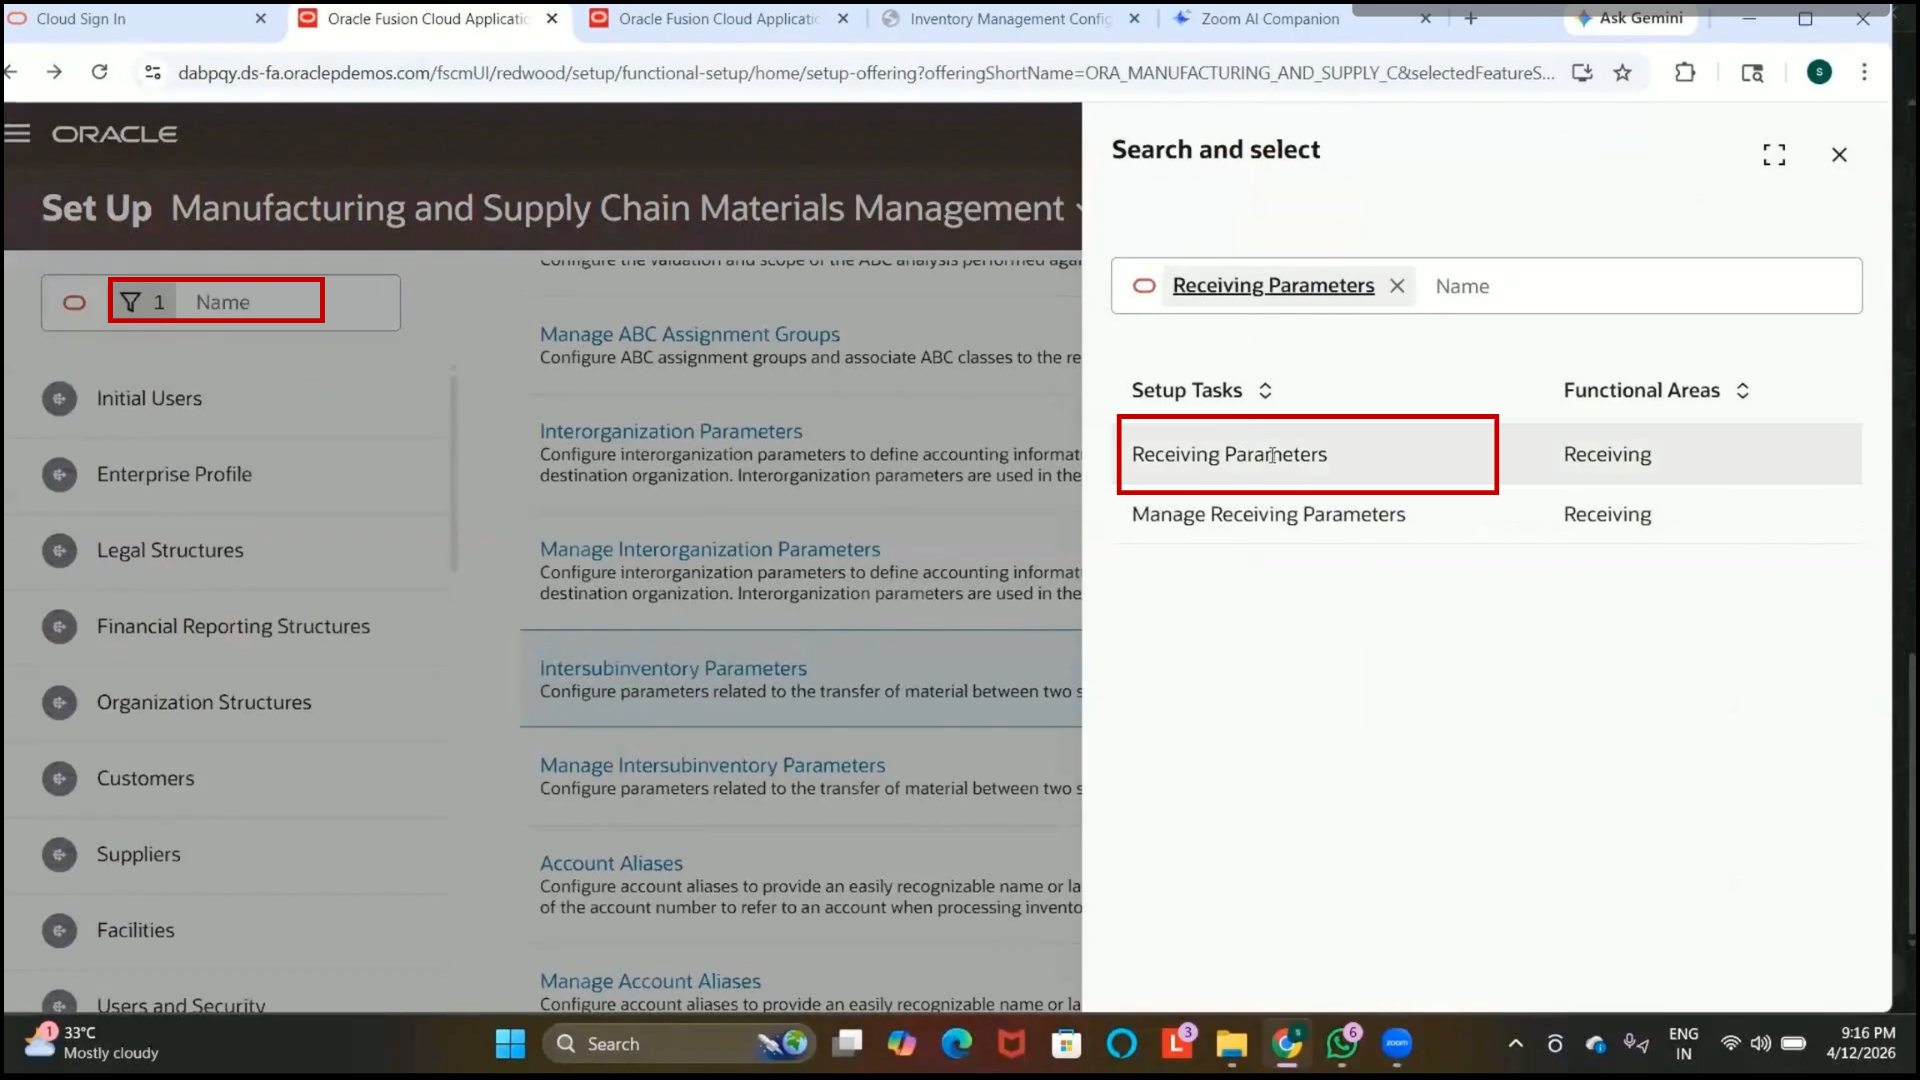
4. Open the setup page.
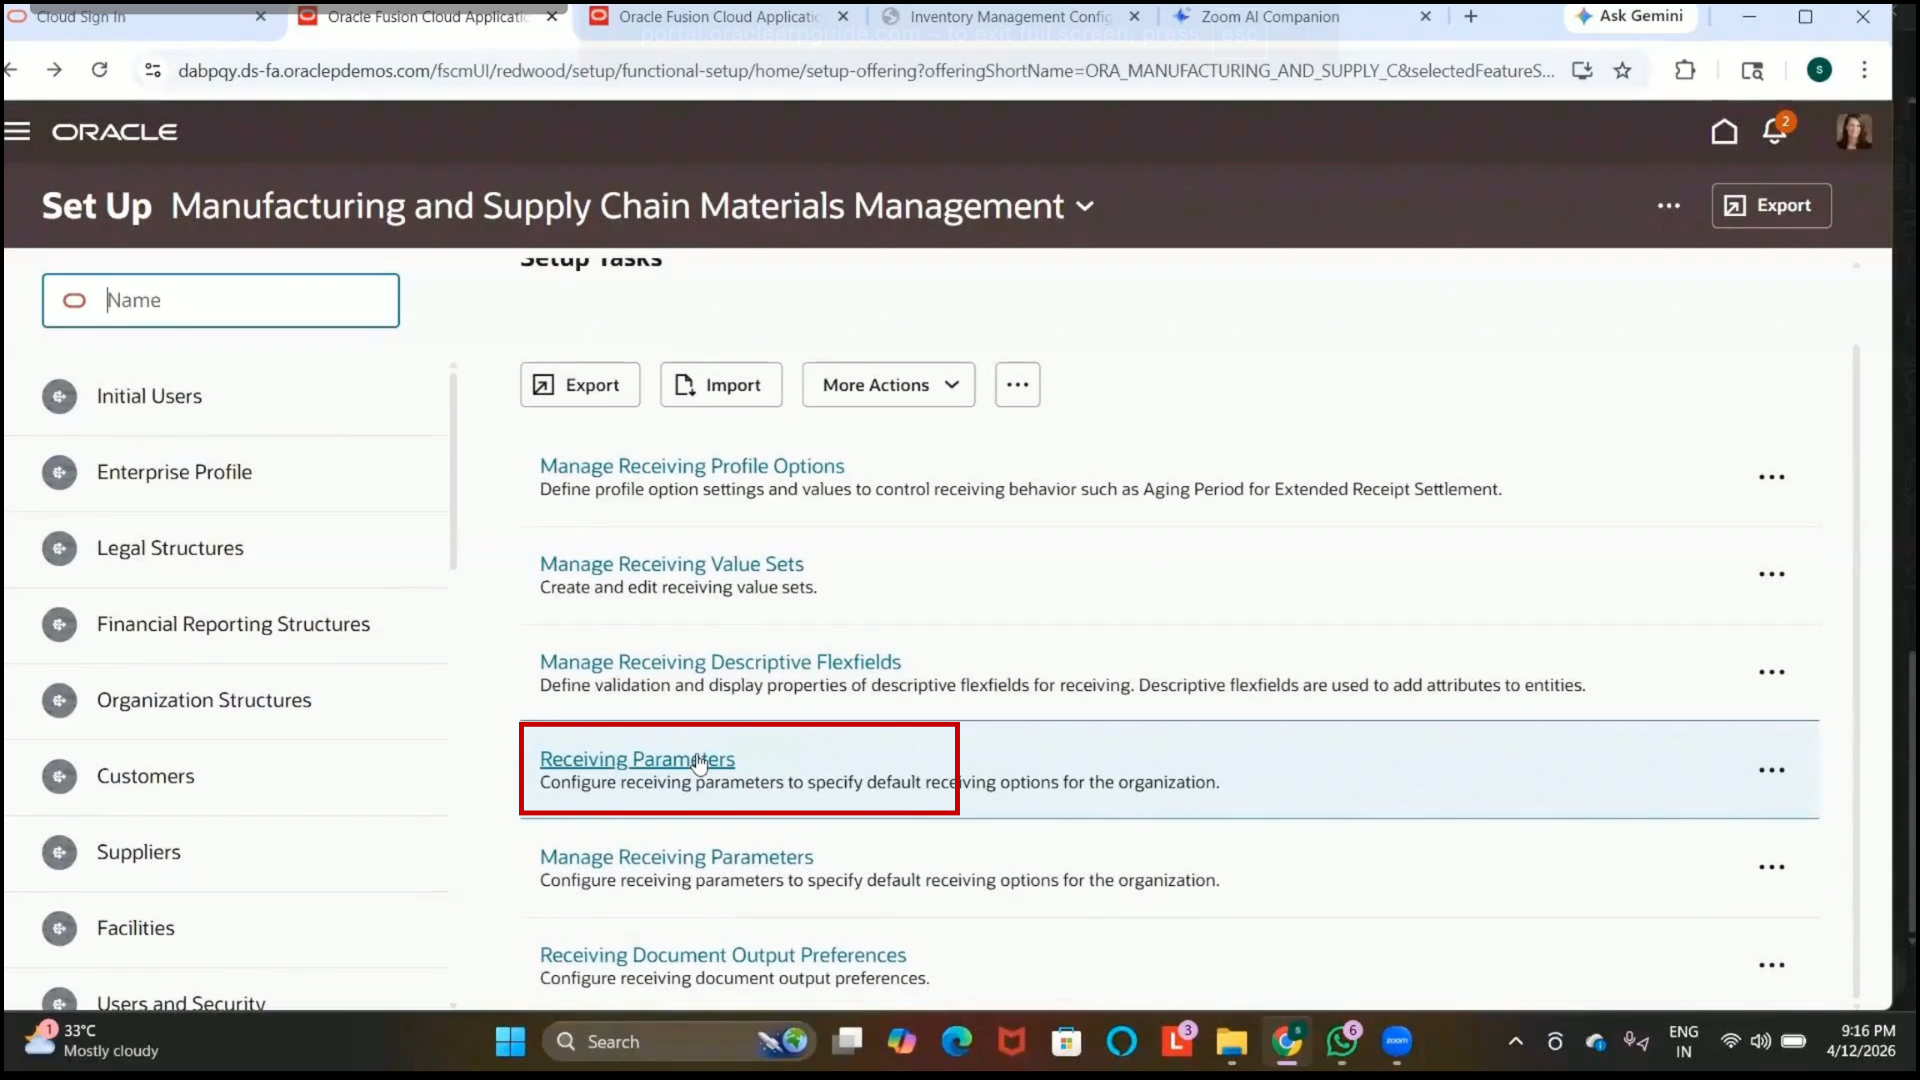
5. Receiving parameters define how items are received into an inventory organization.
6. These setups are required before receiving transferred or purchased items.
7. Received configurations include
8.Receipt numbering
9.Receipt tolerances
10.Receipt routing
11. Over-receipt handling
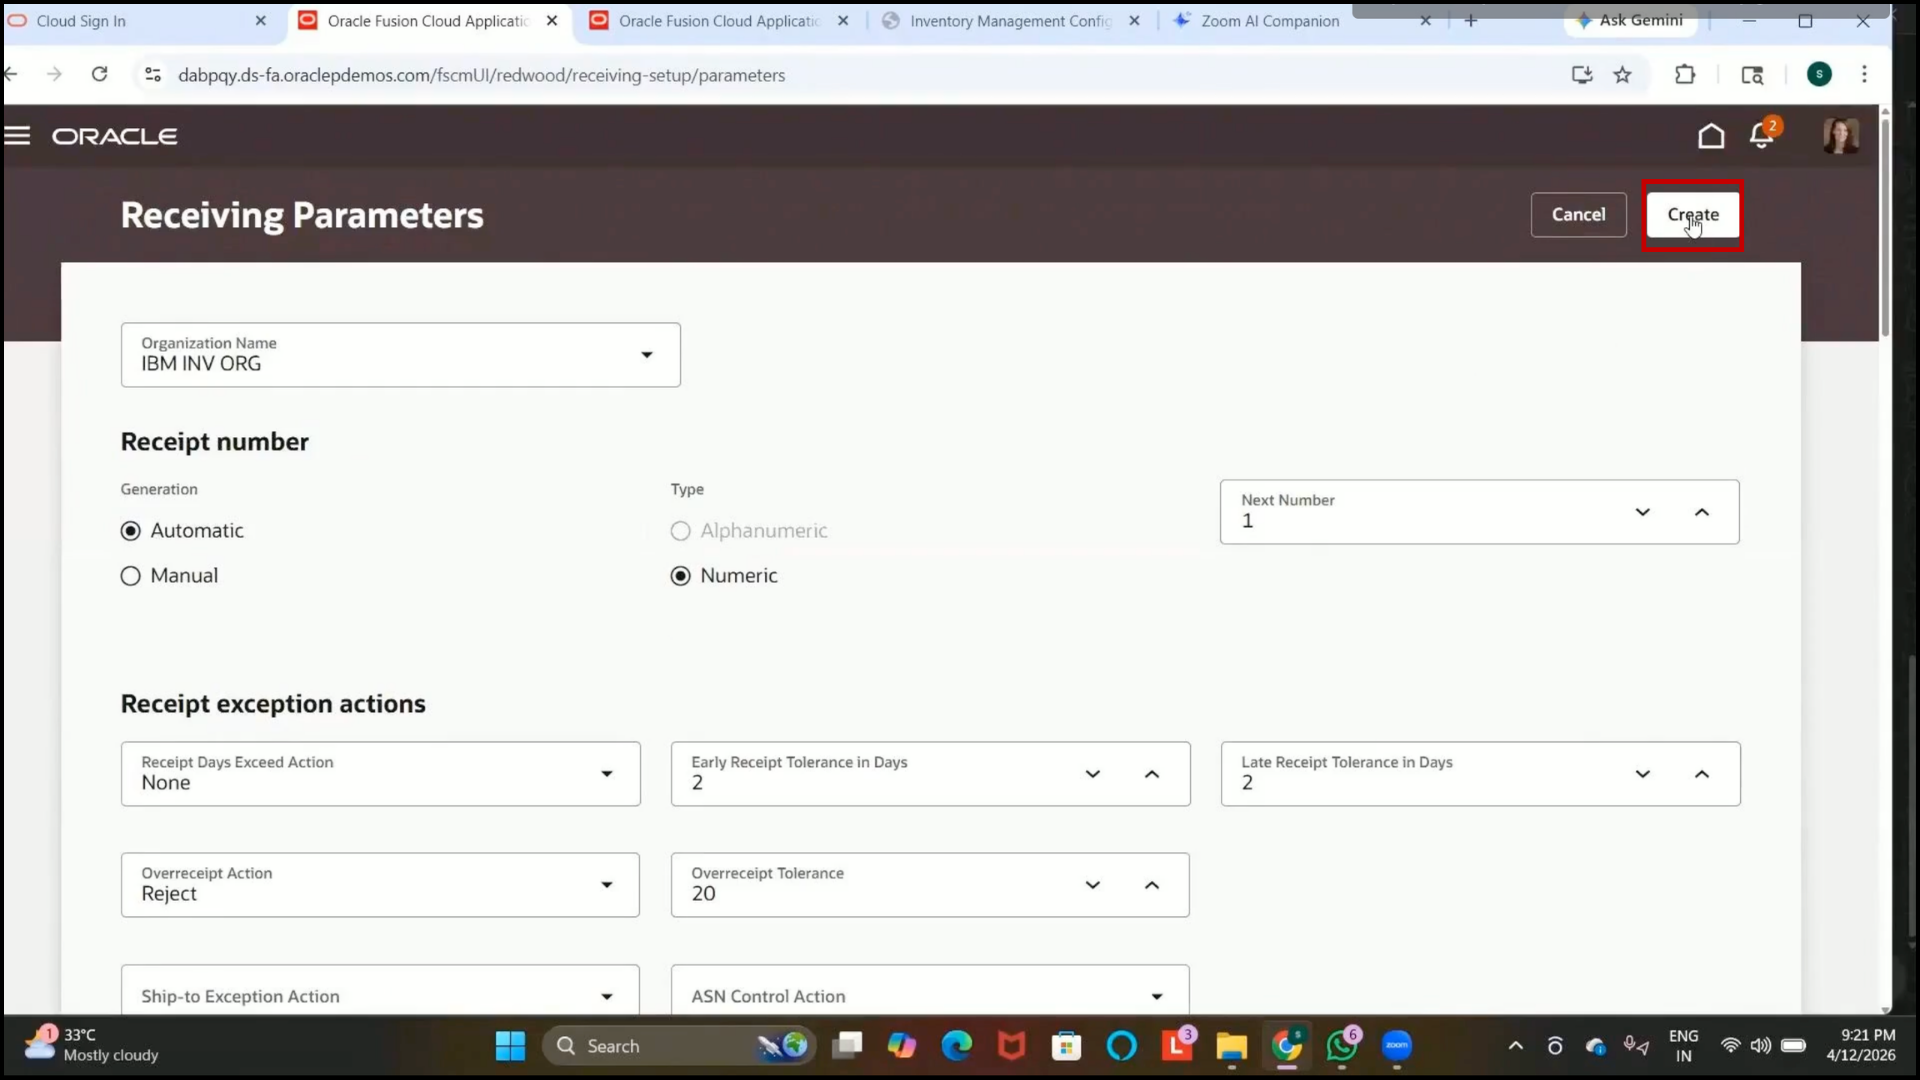
Step 251: Select Inventory Organization and Configure Receipt Numbering
1. Select the inventory organization:
2. IBM Inventory Organization
3. Set Receipt Number Generation:
4. Automatic
5. Select Number Type:
6. Numeric
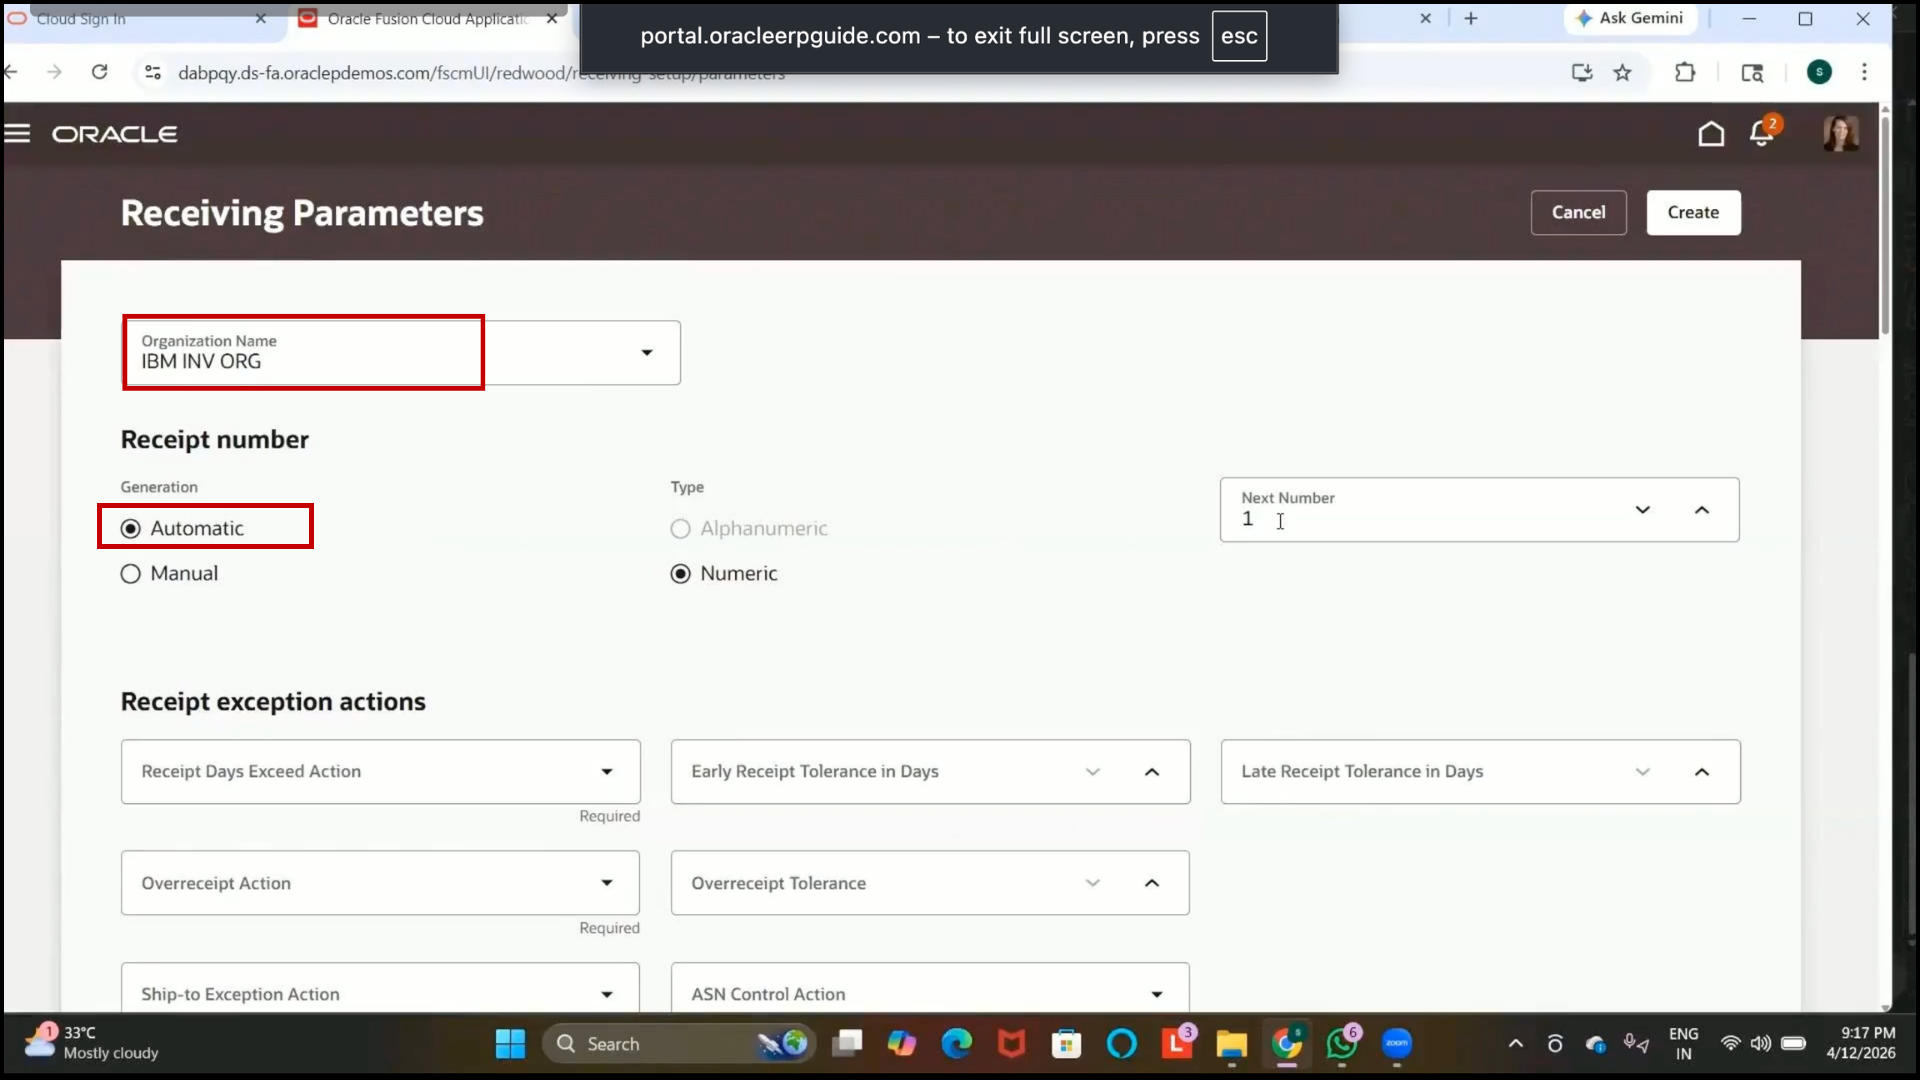
7. Enter Next Receipt Number:
8.1
Step 252: Configure Receipt Date Exceed Action and Early Receipt Tolerance
1. Set Receipt Date Exceed Action:
2. None
3. This controls system behavior when receipts are delayed beyond the expected receipt date.
4. Enter Early Receipt Tolerance:
5. 2 Days
6. This allows receipts to be accepted before the expected delivery date.
Step 253: Configure Late Receipt Tolerance and Over-Receipt Action
1. Enter Late Receipt Tolerance:
2. 2 Days
3. This allows receipts to be accepted after the expected delivery date.
4. Set Over-Receipt Action:
5. Reject
6. This prevents users from receiving quantities greater than the purchase order quantity.
Step 254: Configure Over-Receipt Tolerance and Receipt Routing
1. Enter Over-Receipt Tolerance:
2.20%
3. Example:
4. If ordered quantity is 100, the system can allow receipt up to 120 units.
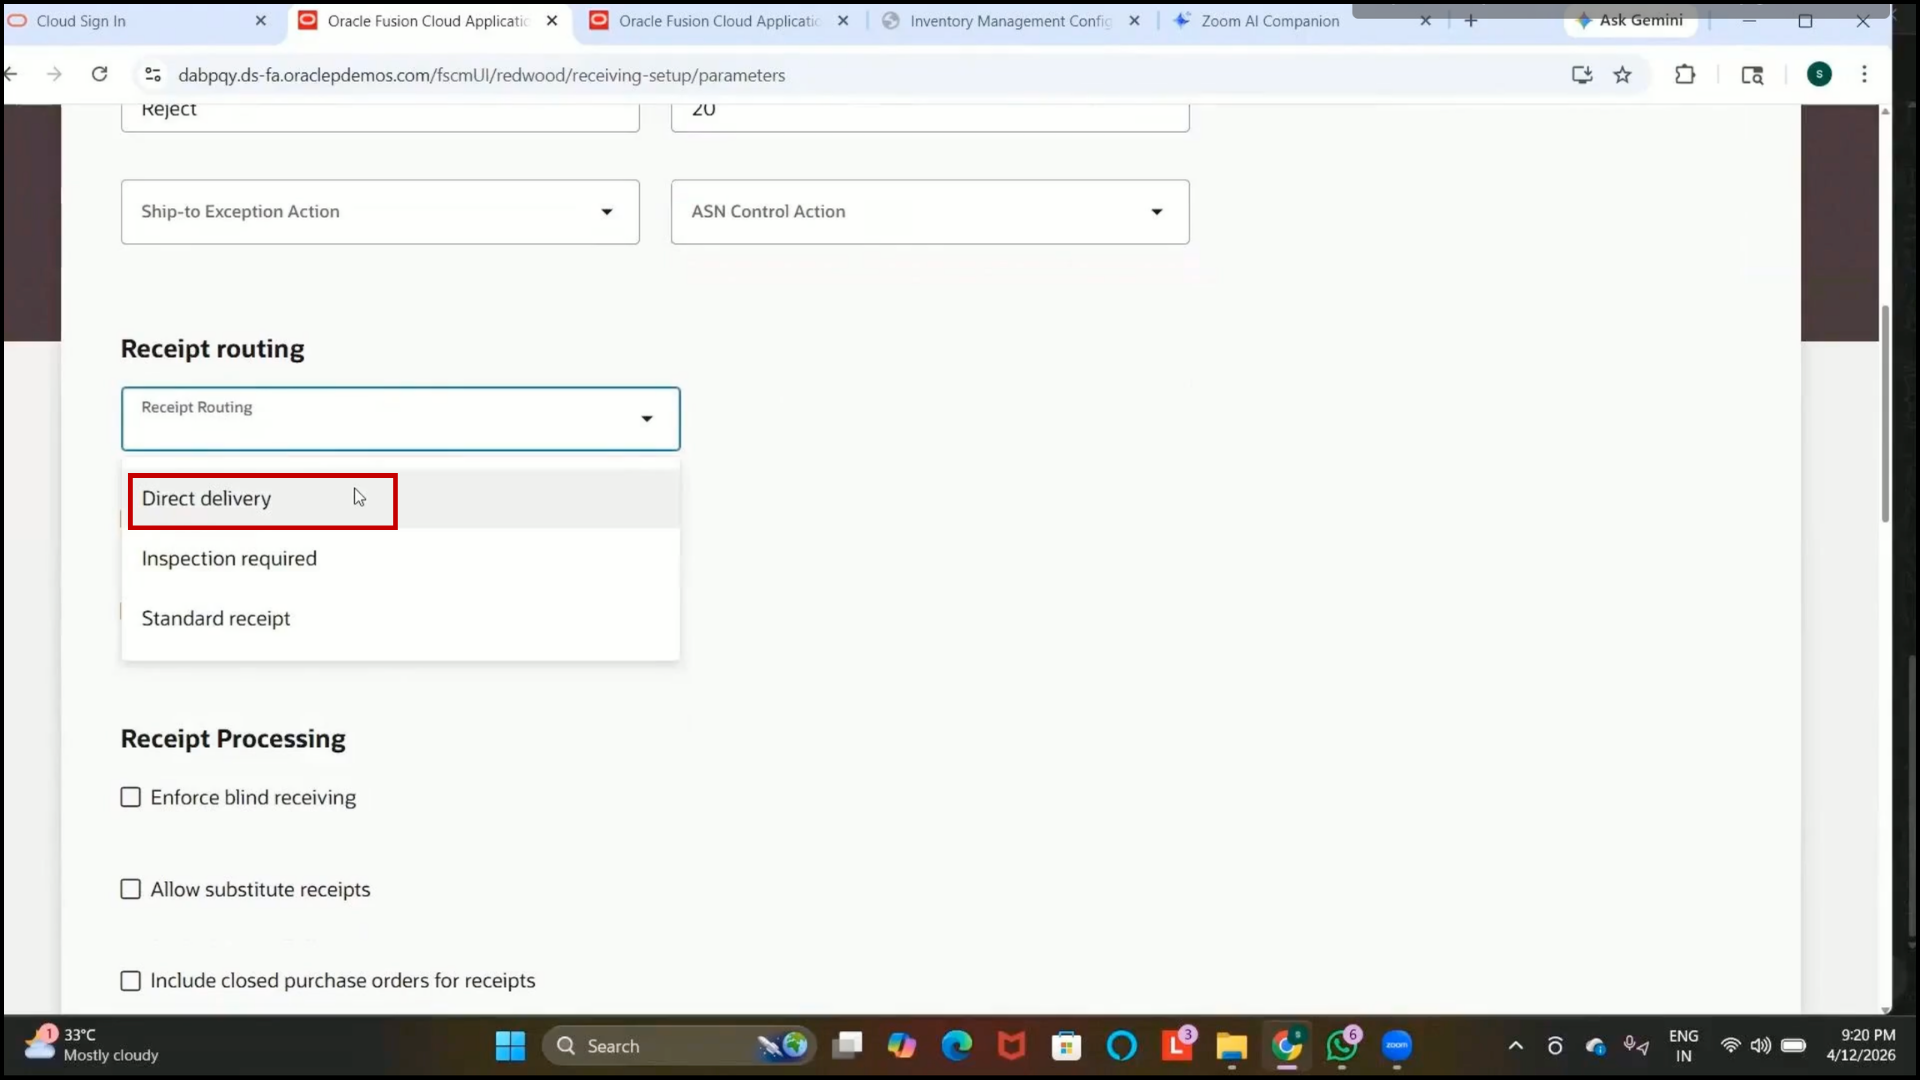
5. Select Receipt Routing:
6. Direct
7. Direct routing receives items directly into inventory without inspection.
Step 255: Configure RMA Receipt Routing and Create Receiving Parameters
1. Set RMA Receipt Routing:
2. Inspection
3. This is used for Return Material Authorization (customer return items).
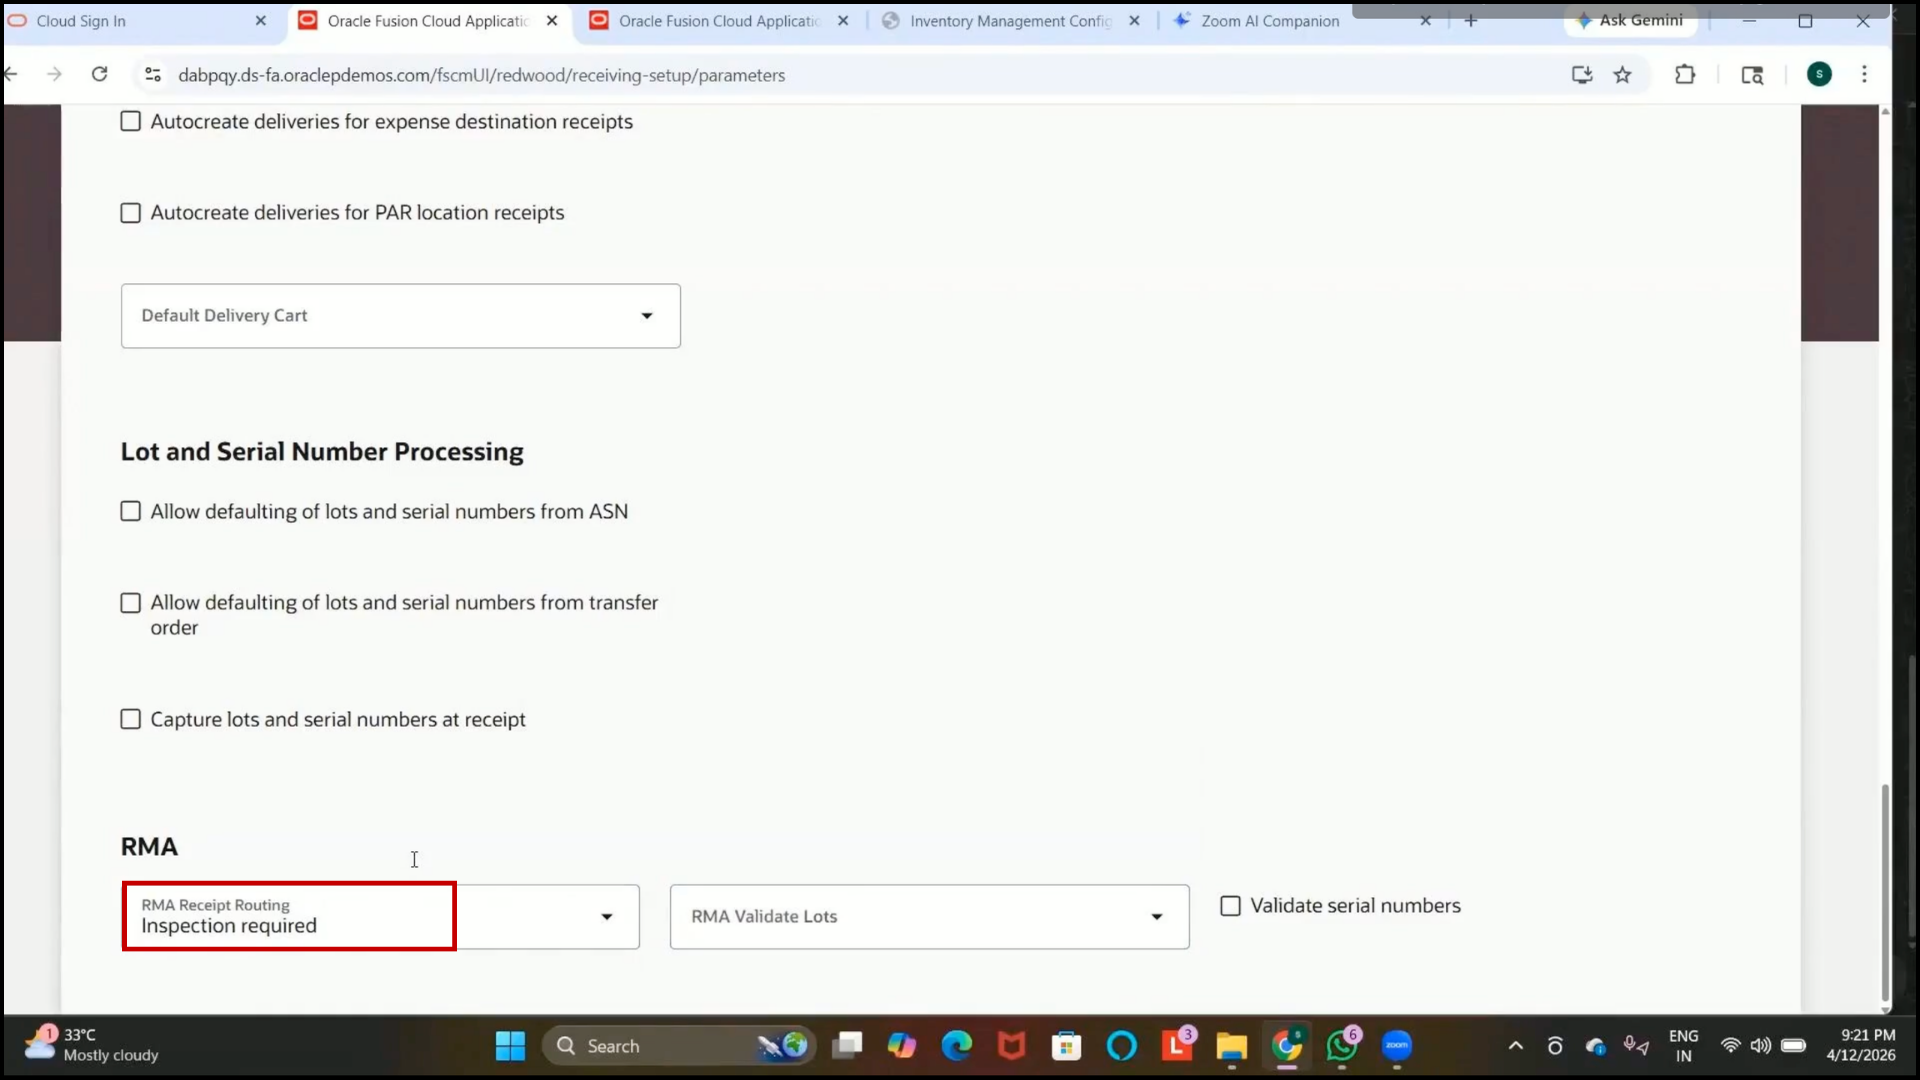
4.Click on Create.
5. Verify that receiving parameters are successfully created.
Shipping Parameters Setup
Step 256: Open Shipping Parameters and Understand Shipping Parameters
1. Navigate to Setup and Maintenance.
2. Search for:
3. Shipping Parameters
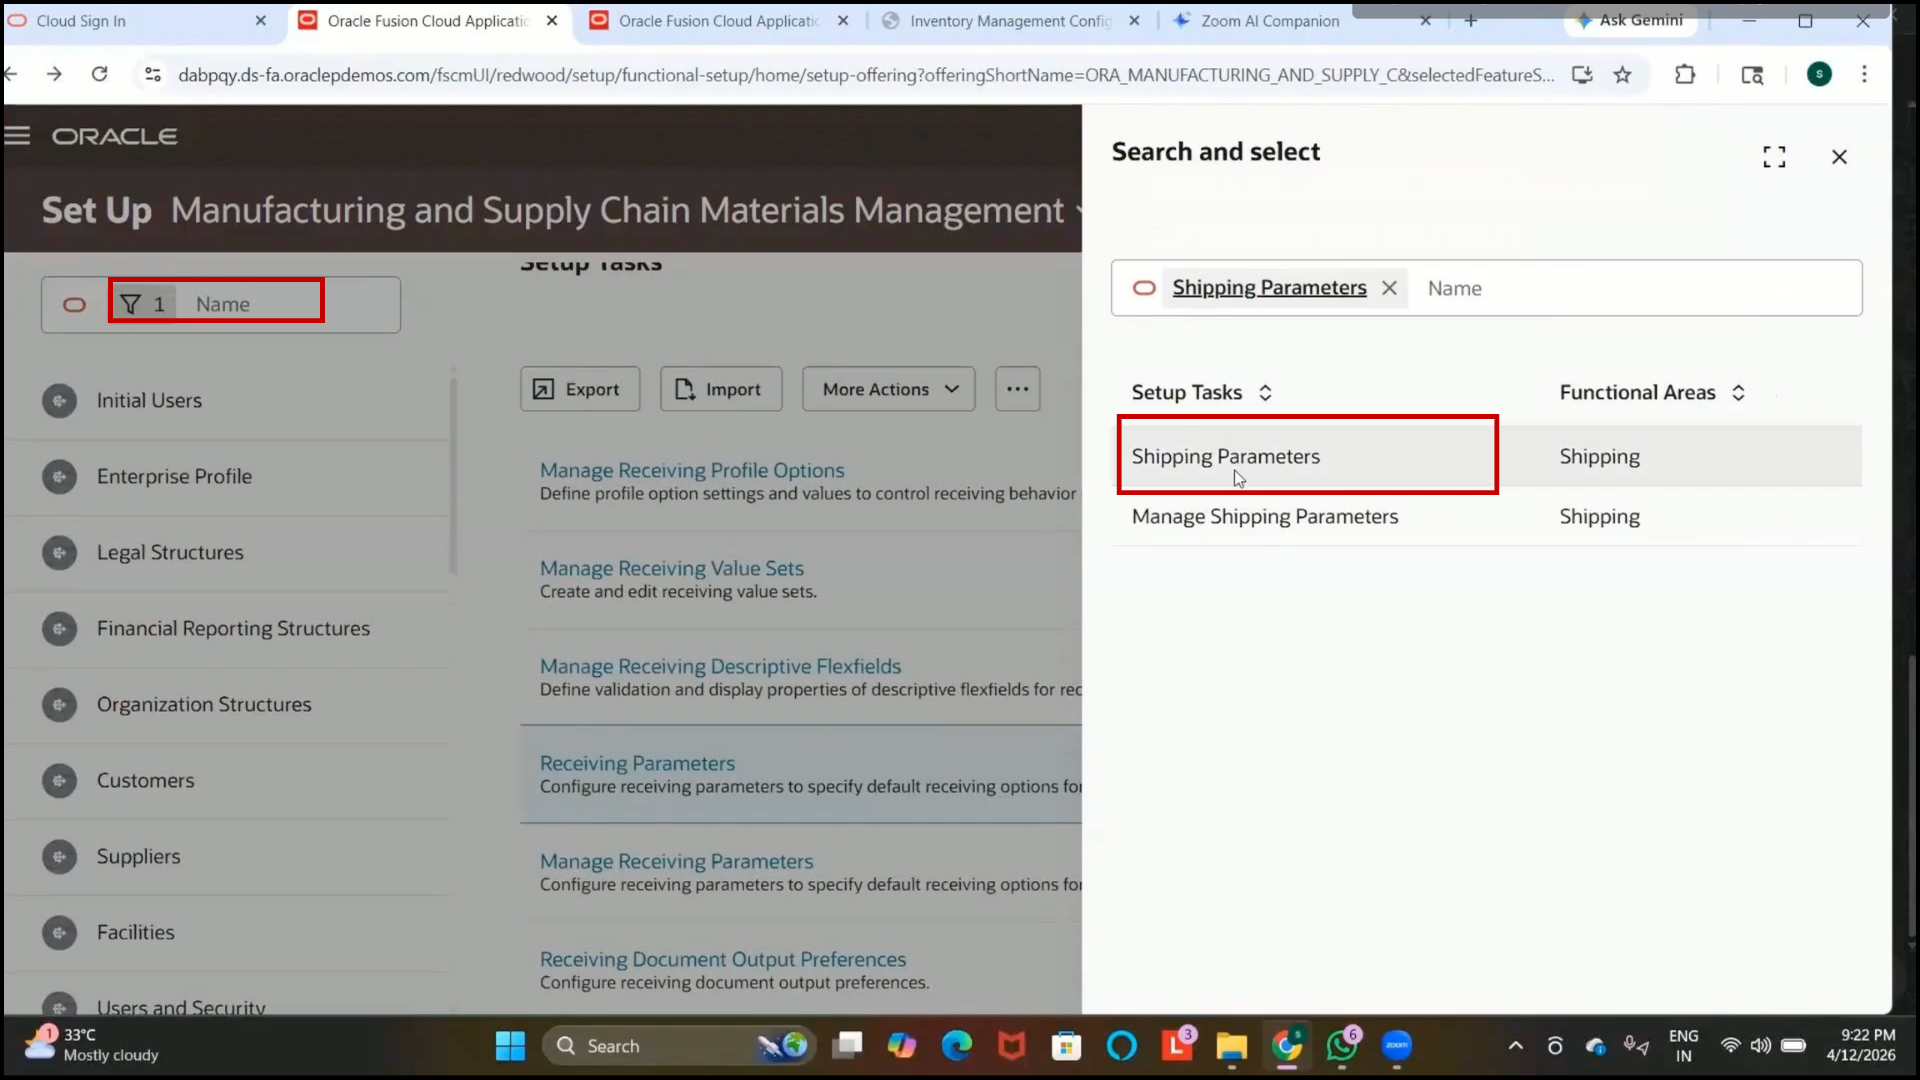
4. Open the setup page.
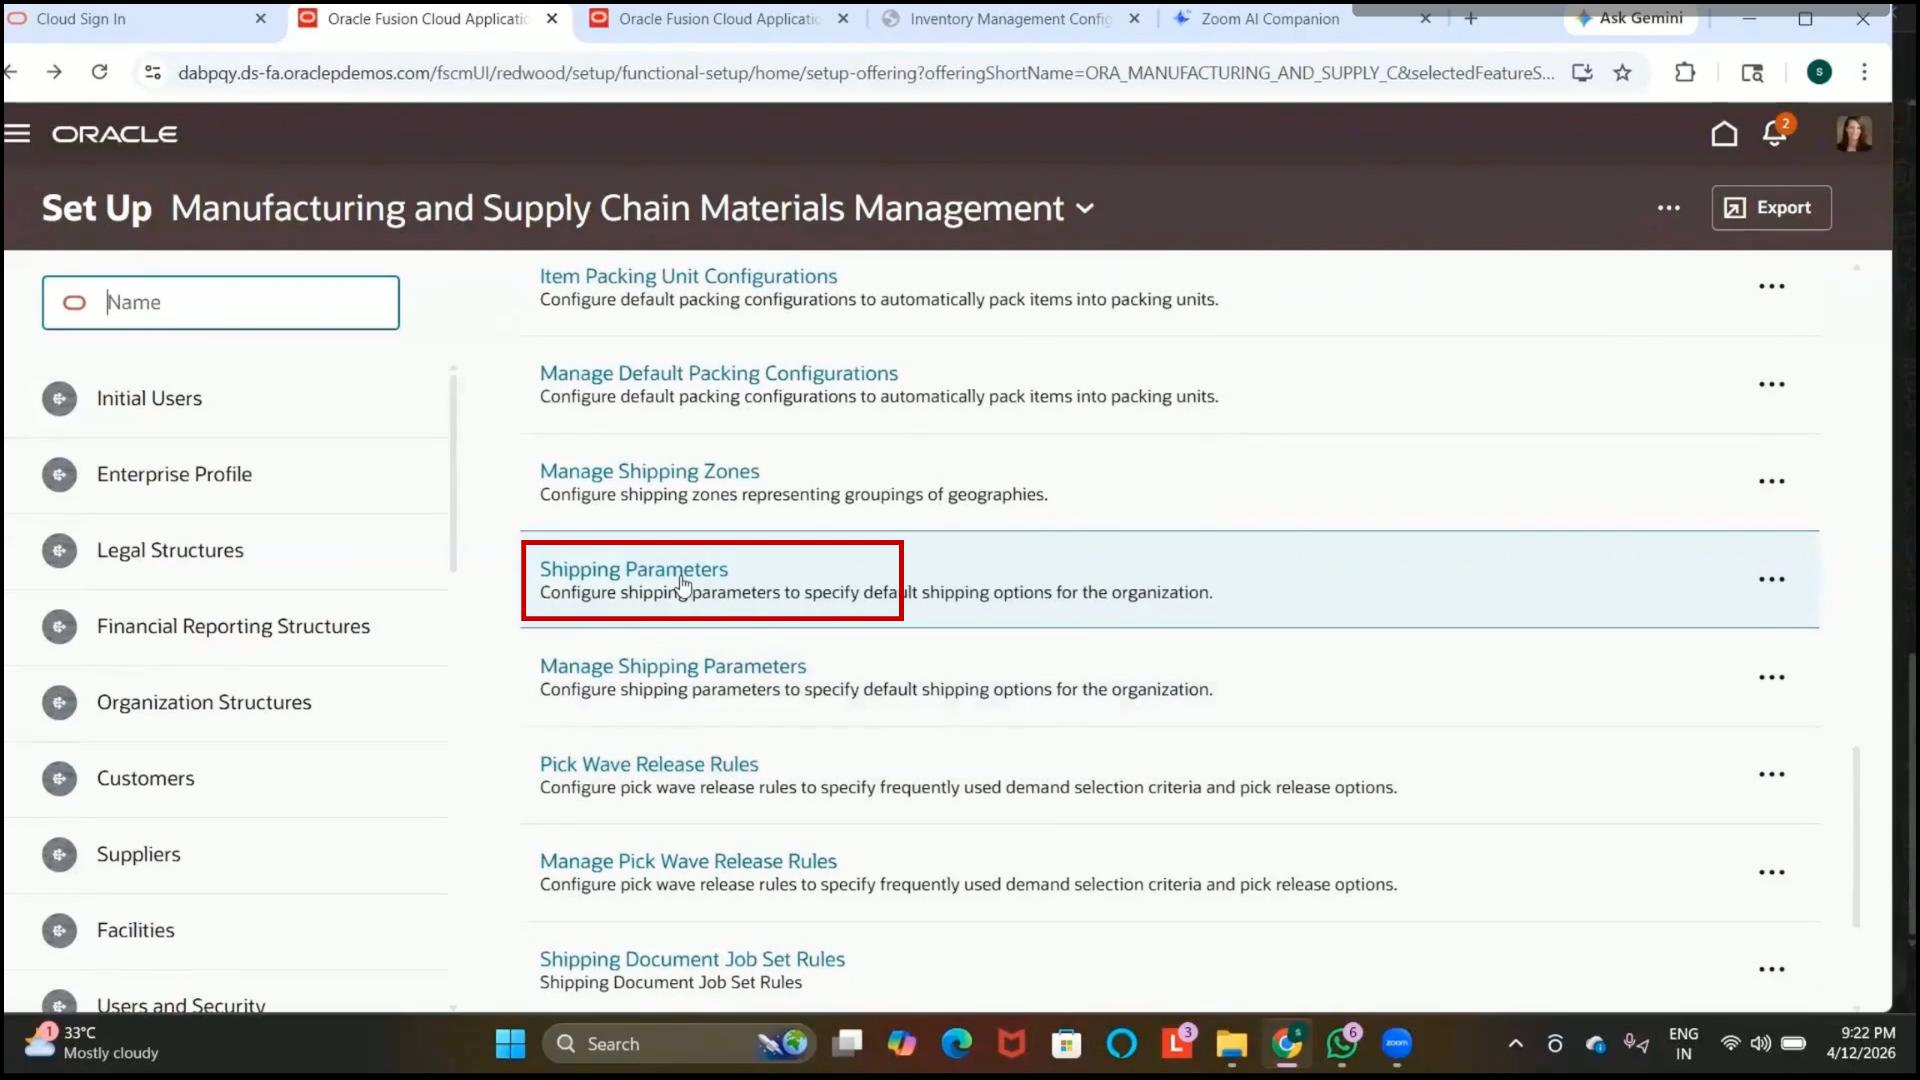
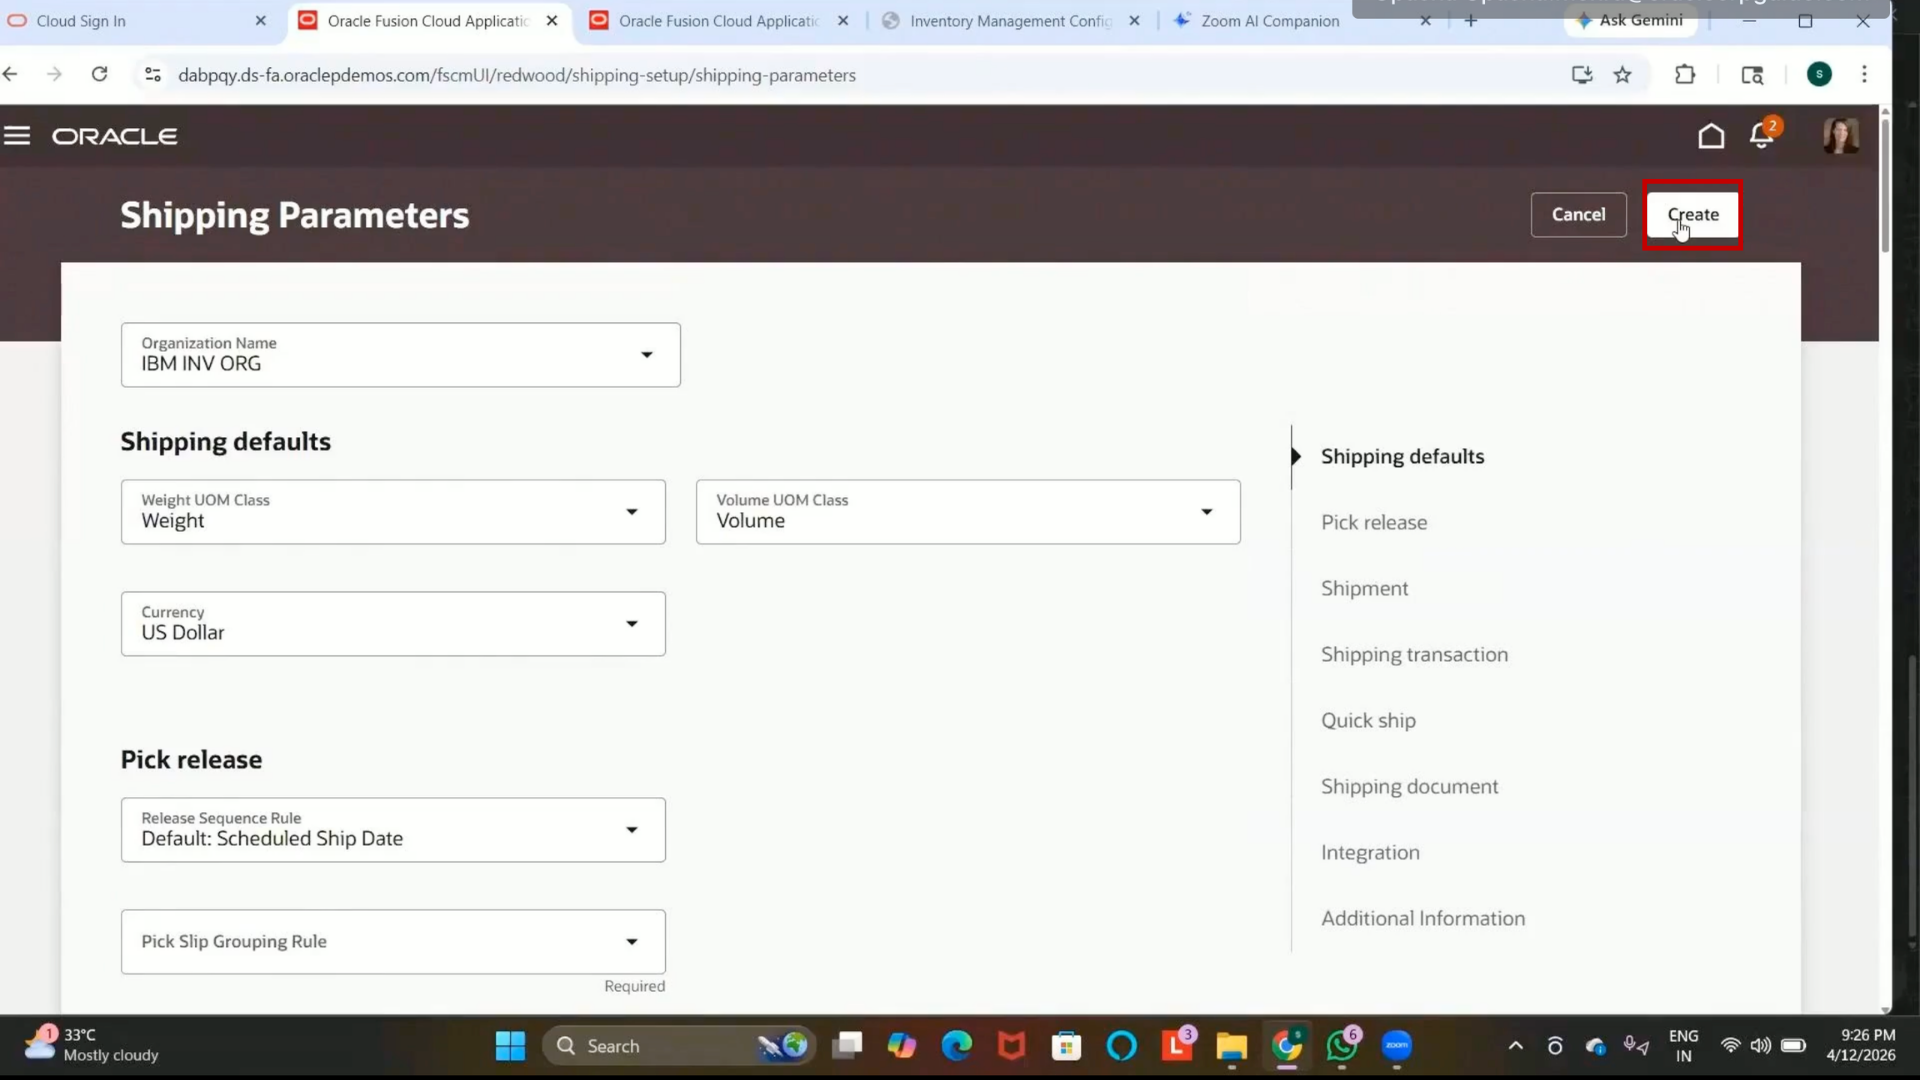
5. Shipping parameters define how items are shipped from the source organization.
6. These setups are mandatory for shipping and transfer order processing.
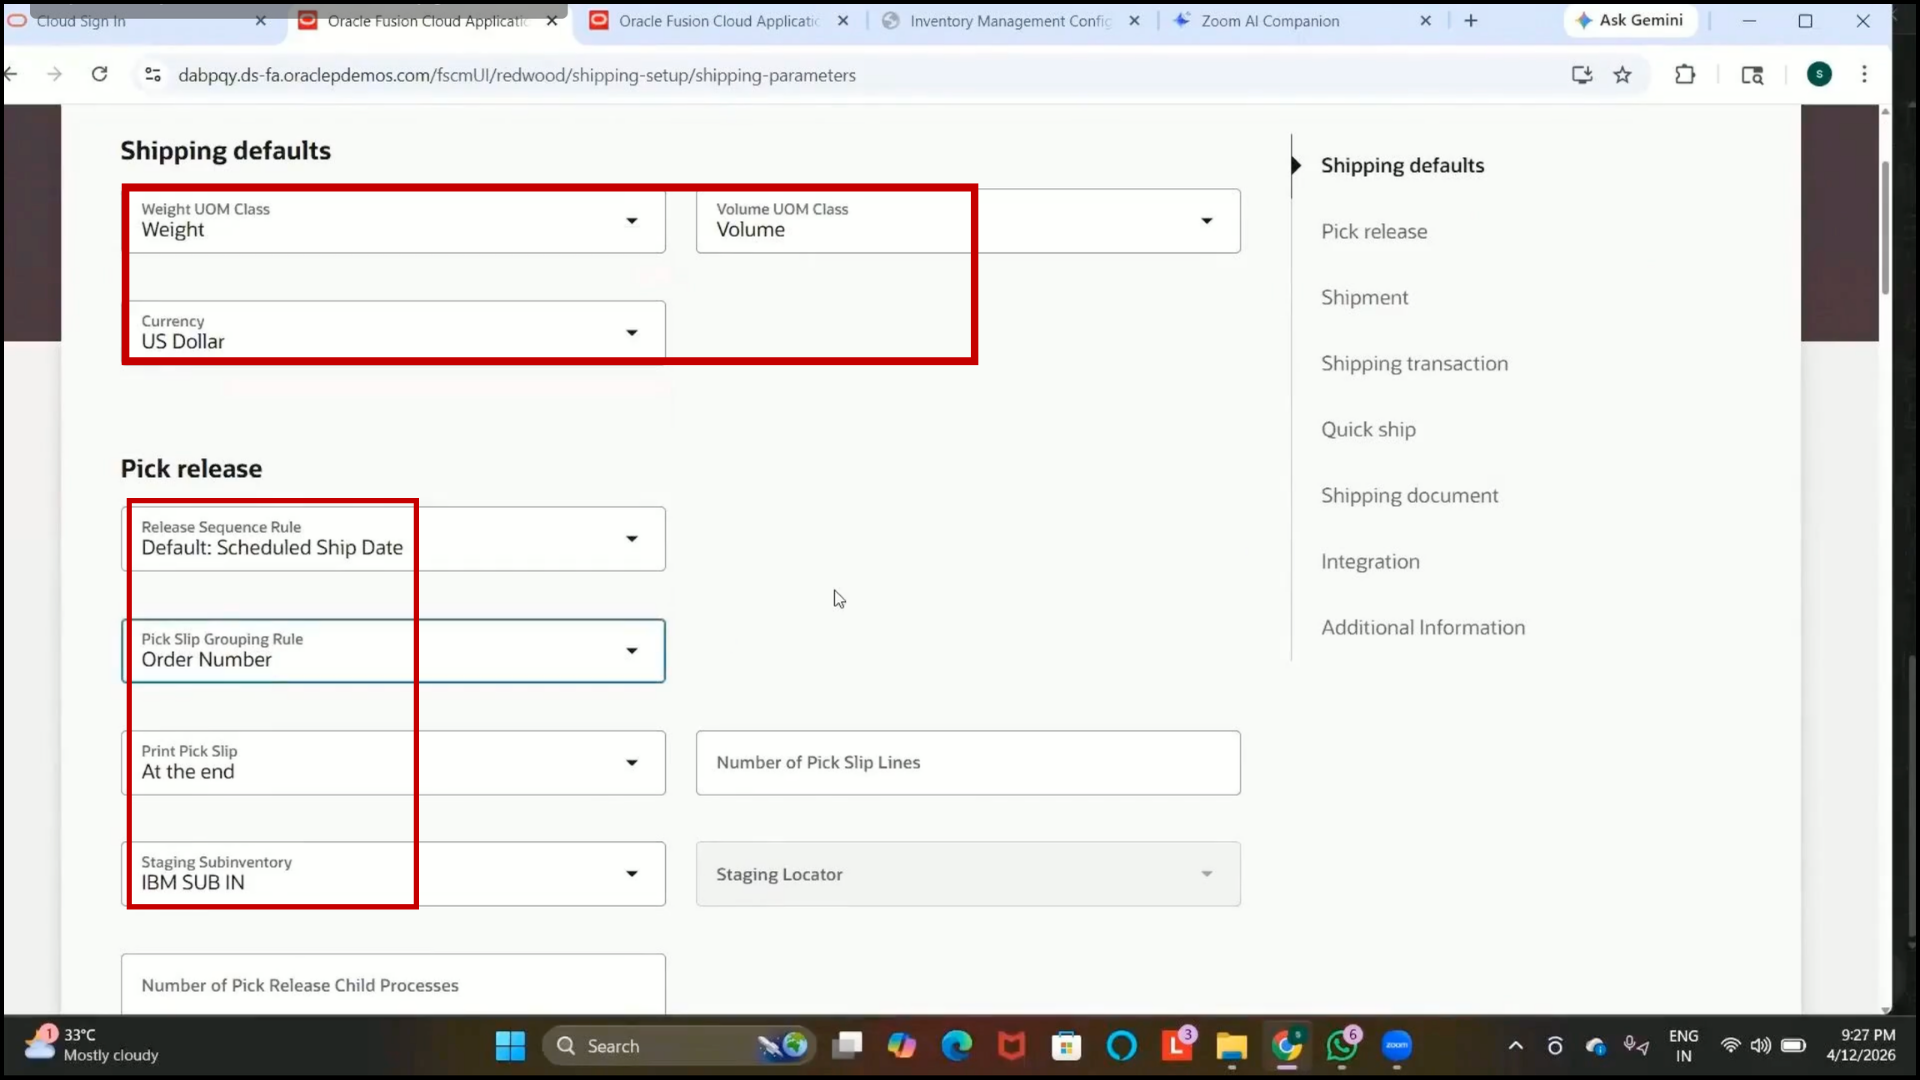
Step 257: Select Inventory Organization and Configure Weight and Volume UOM
1. Select the inventory organization:
2. IBM Inventory Organization
3. Set Weight UOM Class:
4. Weight
5. Set Volume UOM Class:
6. Volume
Step 258: Select Currency and Configure Pick Release Rule
1. Select Currency:
2. USD (US Dollar)
3. Select Pick Release Rule:
4. Scheduled Ship Date
5. Orders will be released for picking based on scheduled ship date.
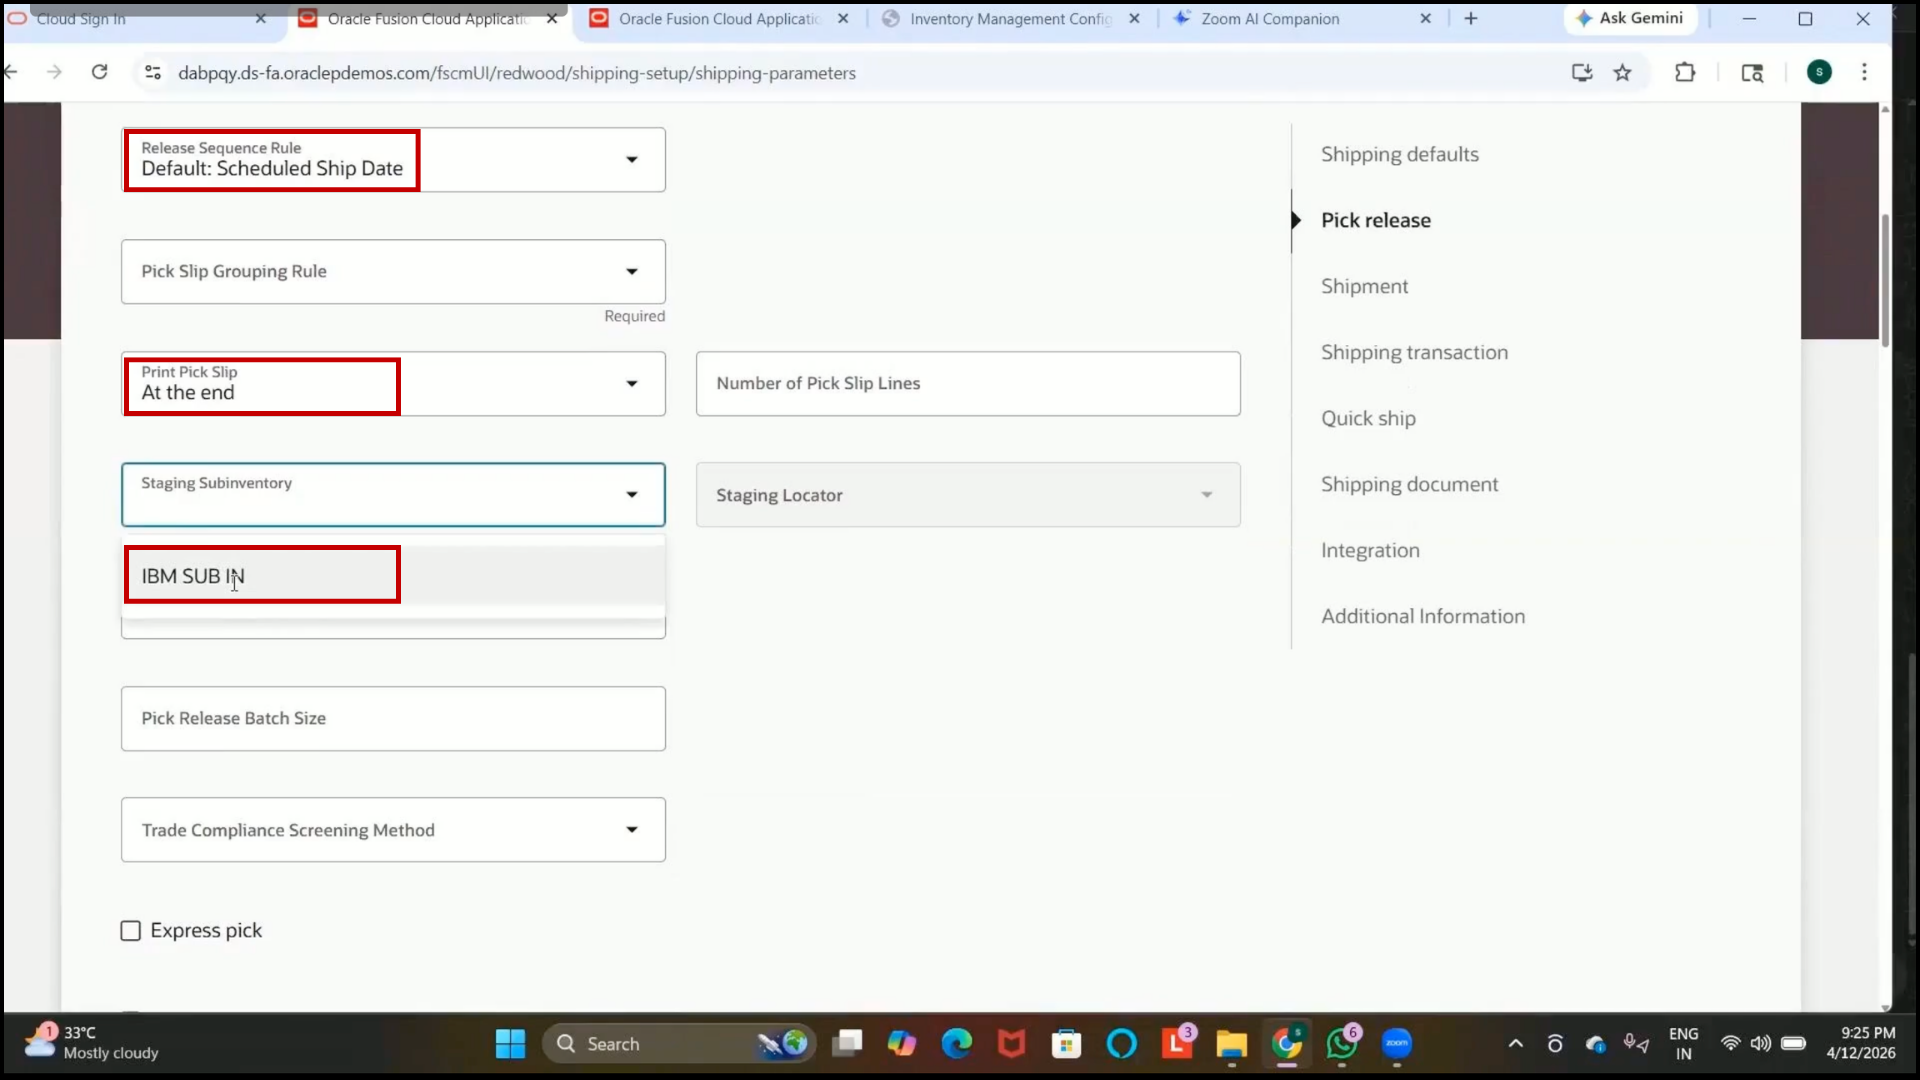
Step 259: Configure Pick Slip Print Timing and Staging Subinventory
1. Set Print Pick Slip:
2. End
3. Pick slip reports will be generated after transaction completion.
4. Select the staging subinventory.
5. IBM SUB IN
6. The staging subinventory is used for:
7. Packing
8. Labeling
9. Shipment preparation
10. Items move from the original subinventory to staging before shipment.
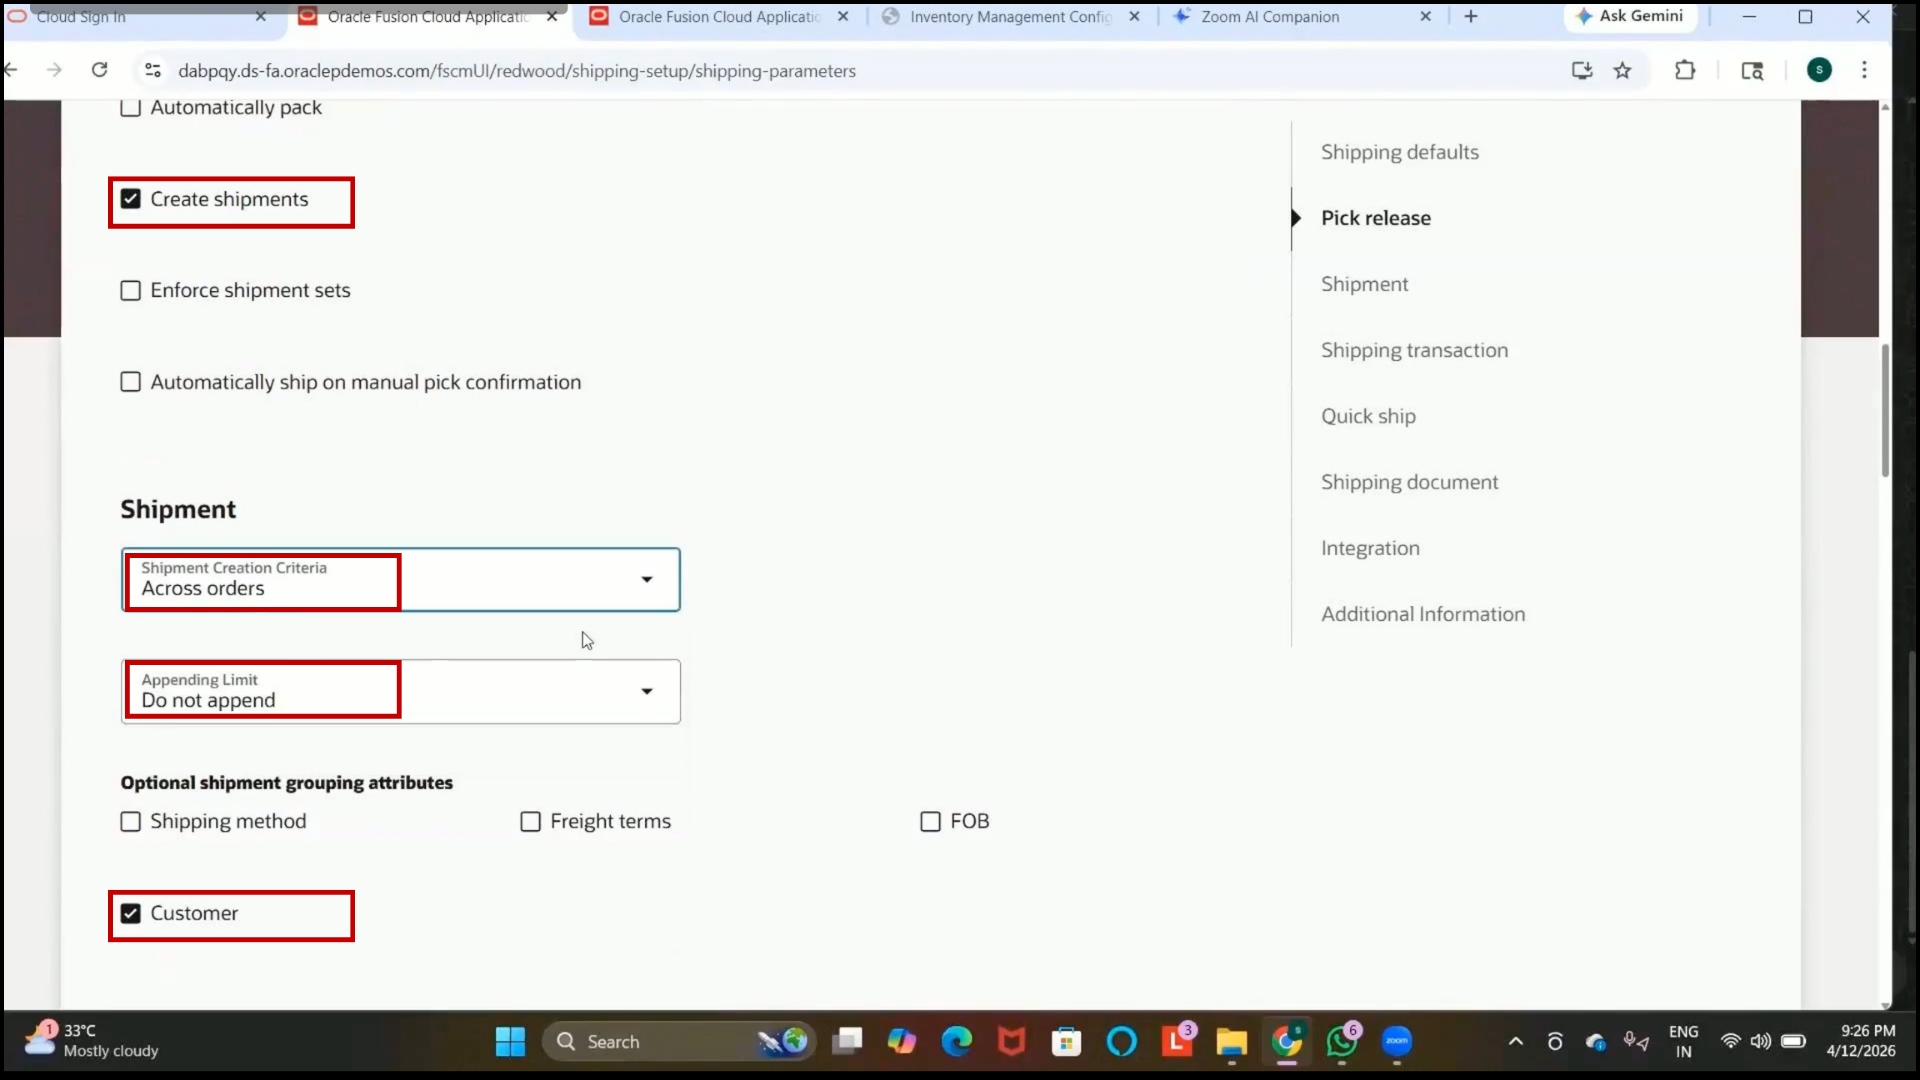
Step 260: Enable Shipment Creation and Configure Shipment Grouping
1. Enable:
2. Create Shipment
3. This allows shipment records to be generated during shipping transactions.
4. Select Shipment Grouping Option:
5. Across Orders
6. Multiple orders can be grouped into a single shipment when applicable.
Step 261: Review Advanced Shipping Setups and Create Shipping Parameters
1. Leave advanced shipping setups unchanged if not required by business requirements.
2.Click on Create.
3. The system may ask for the pick slip grouping rule before saving.
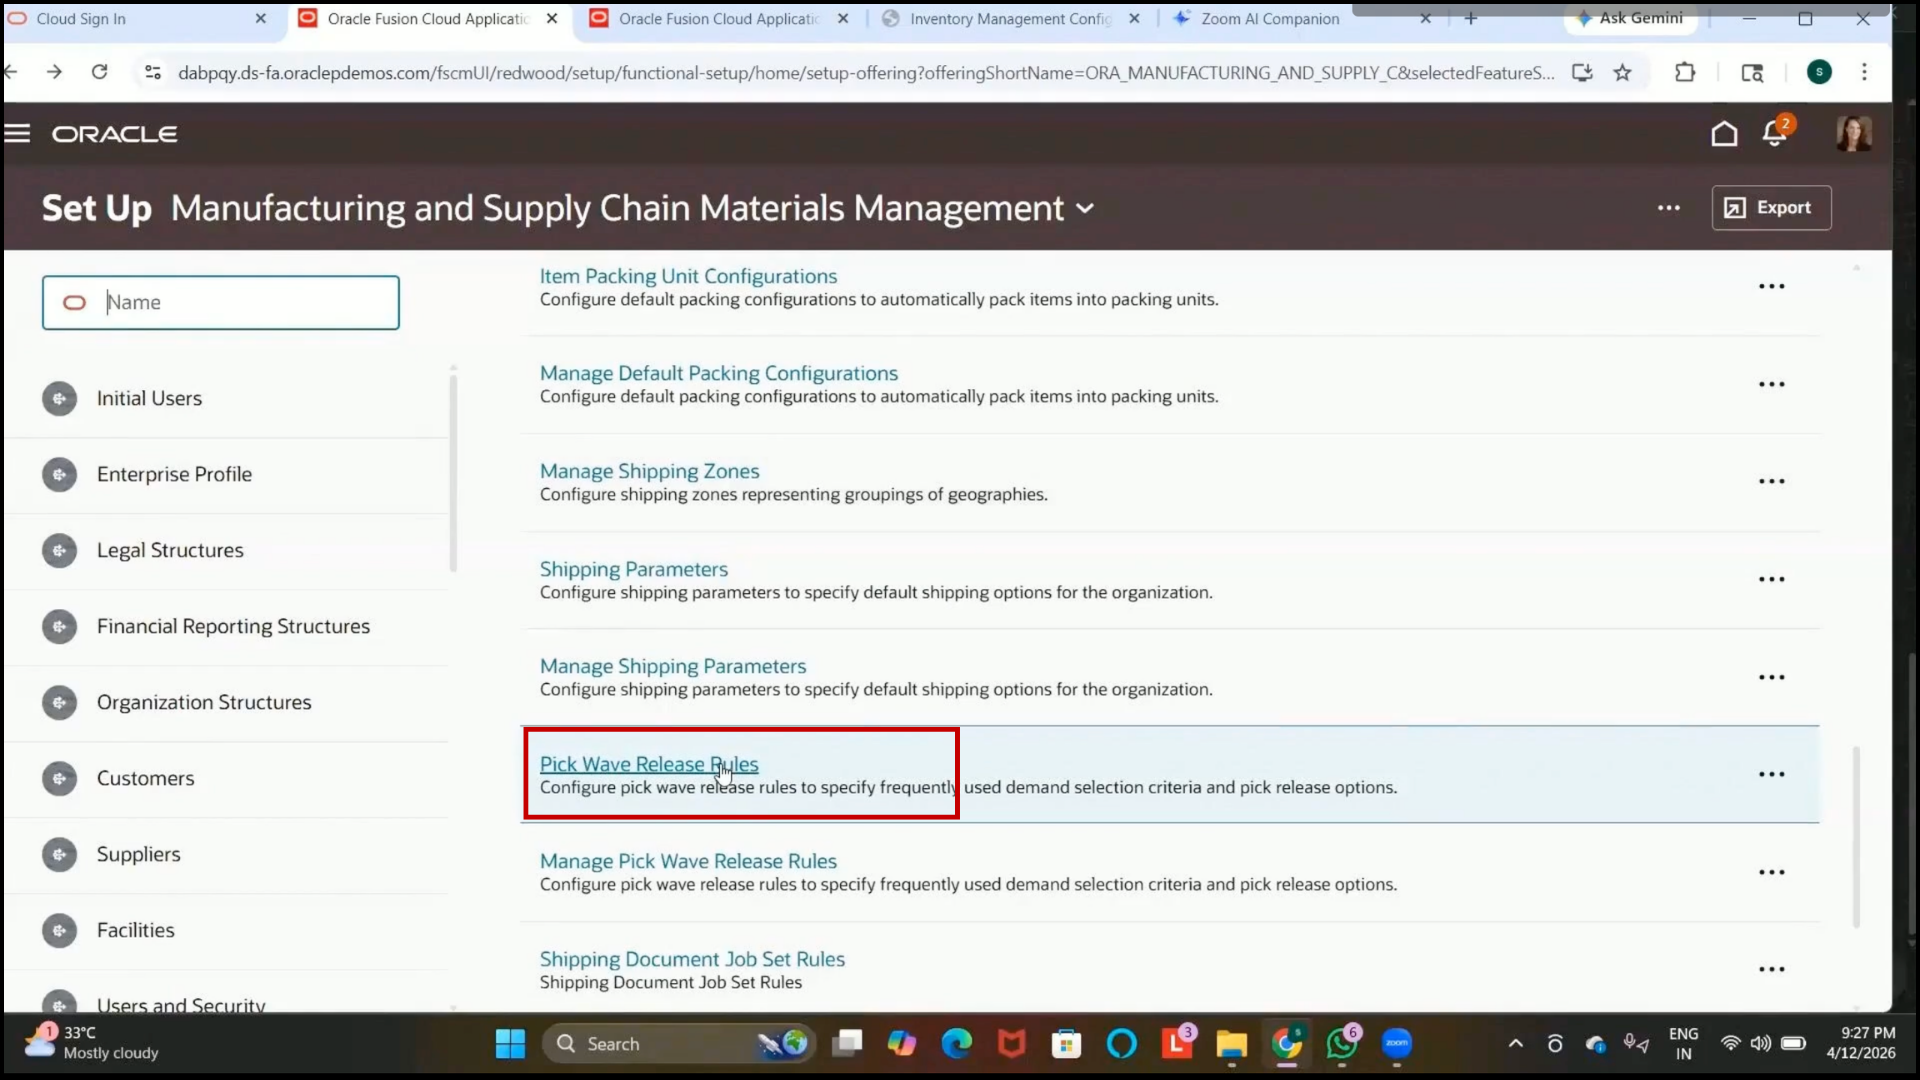
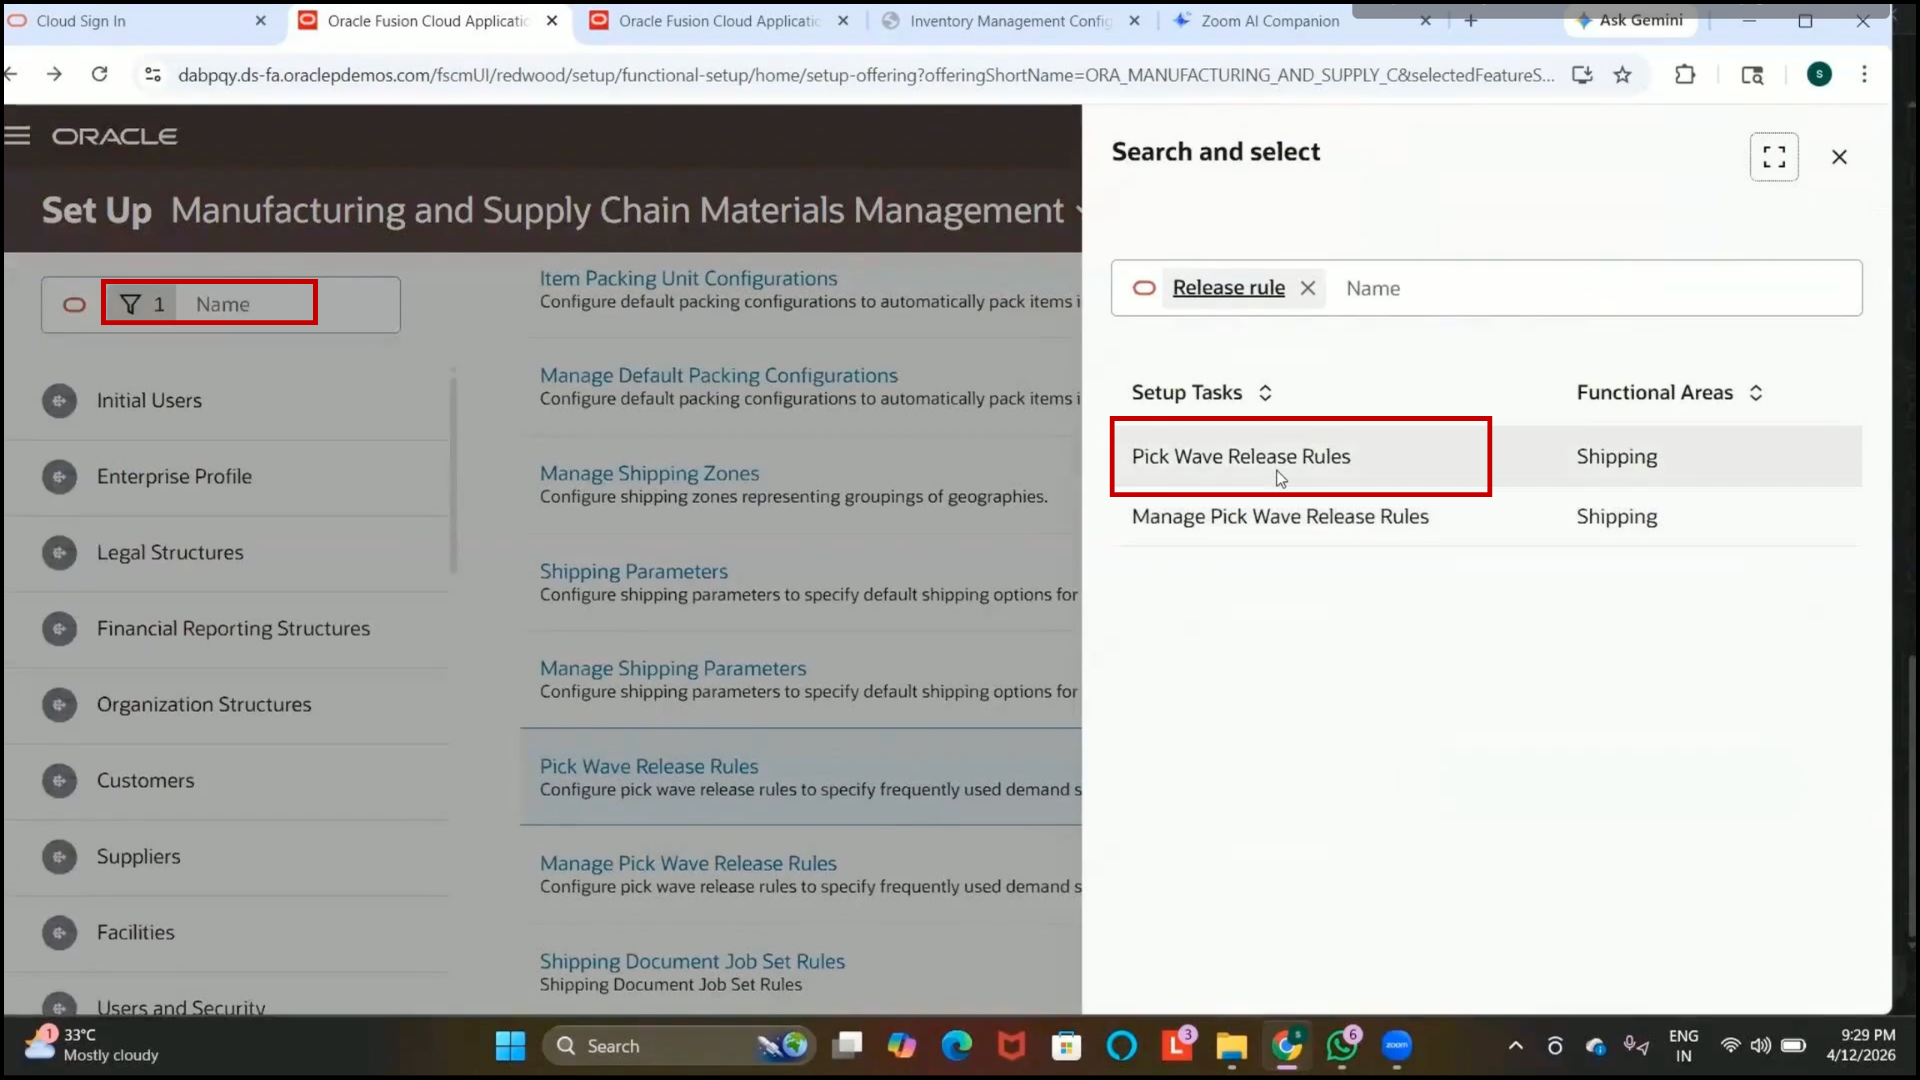
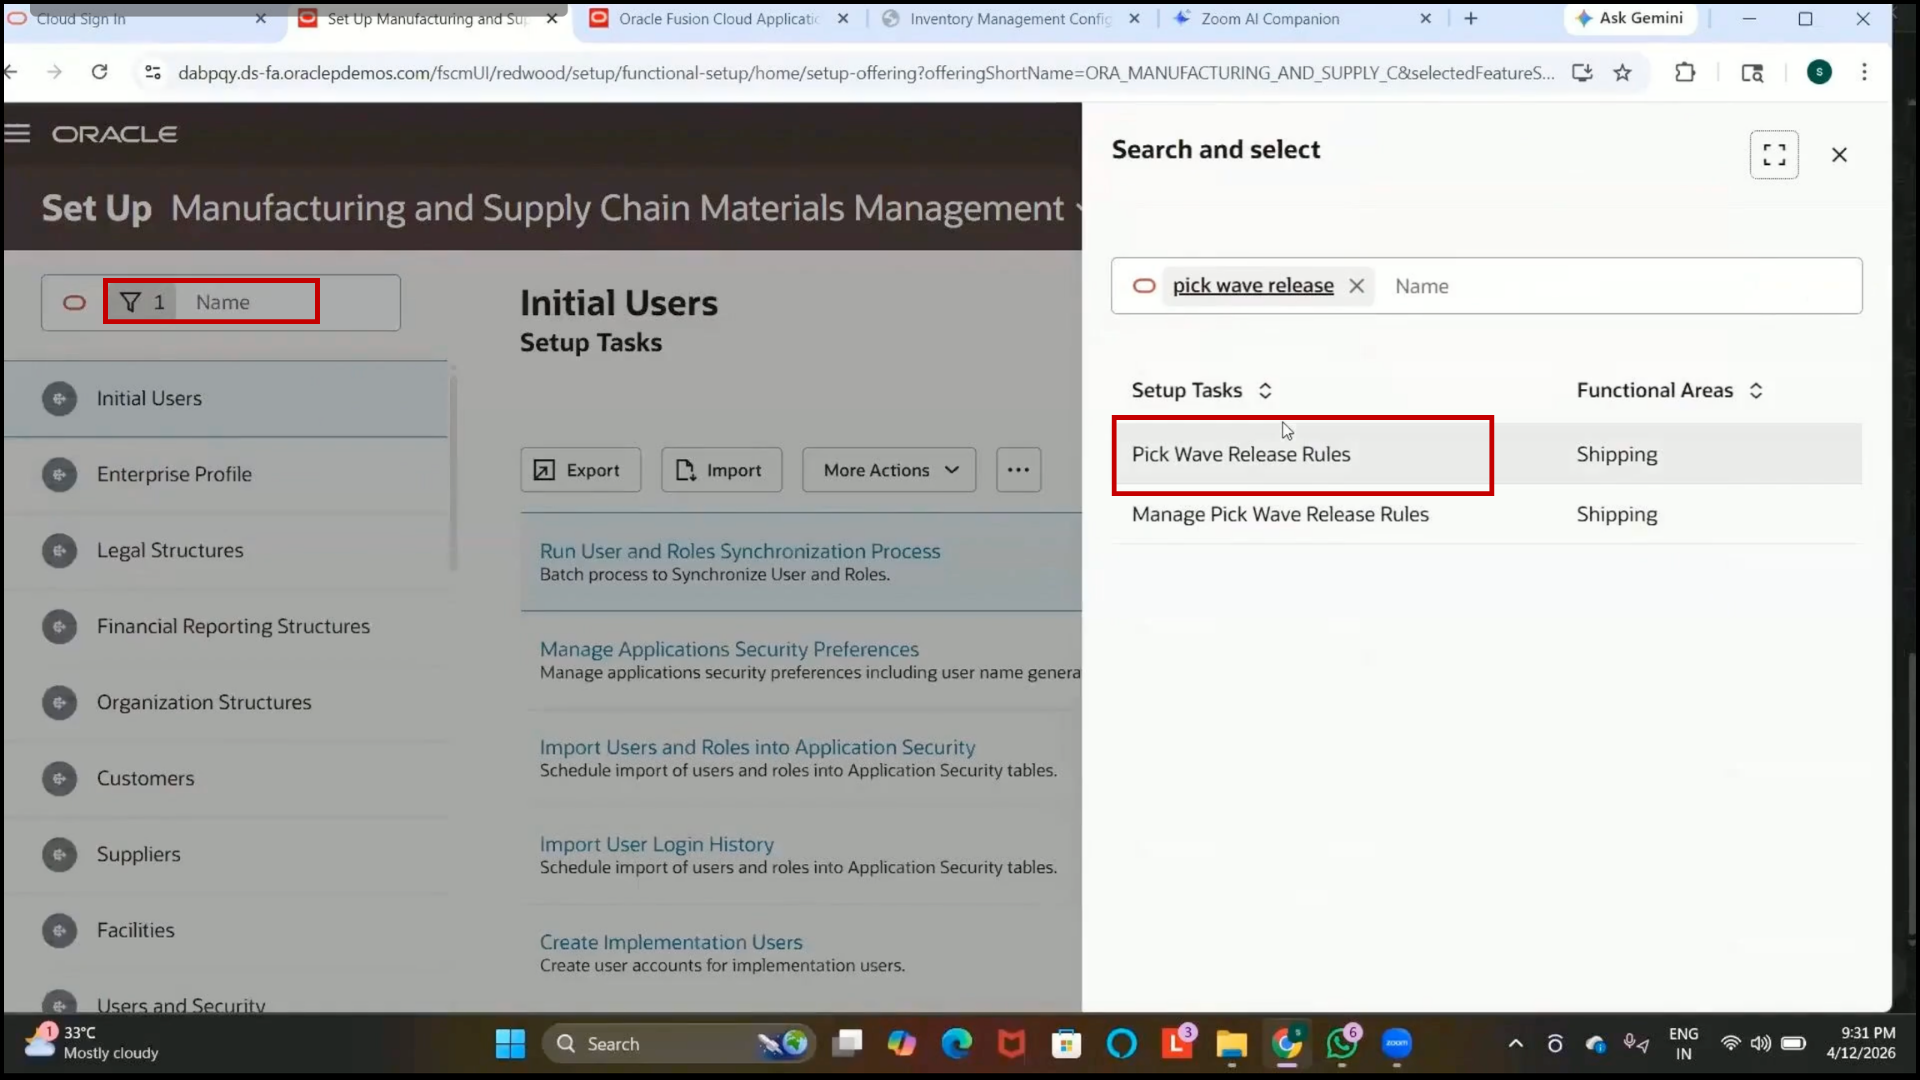
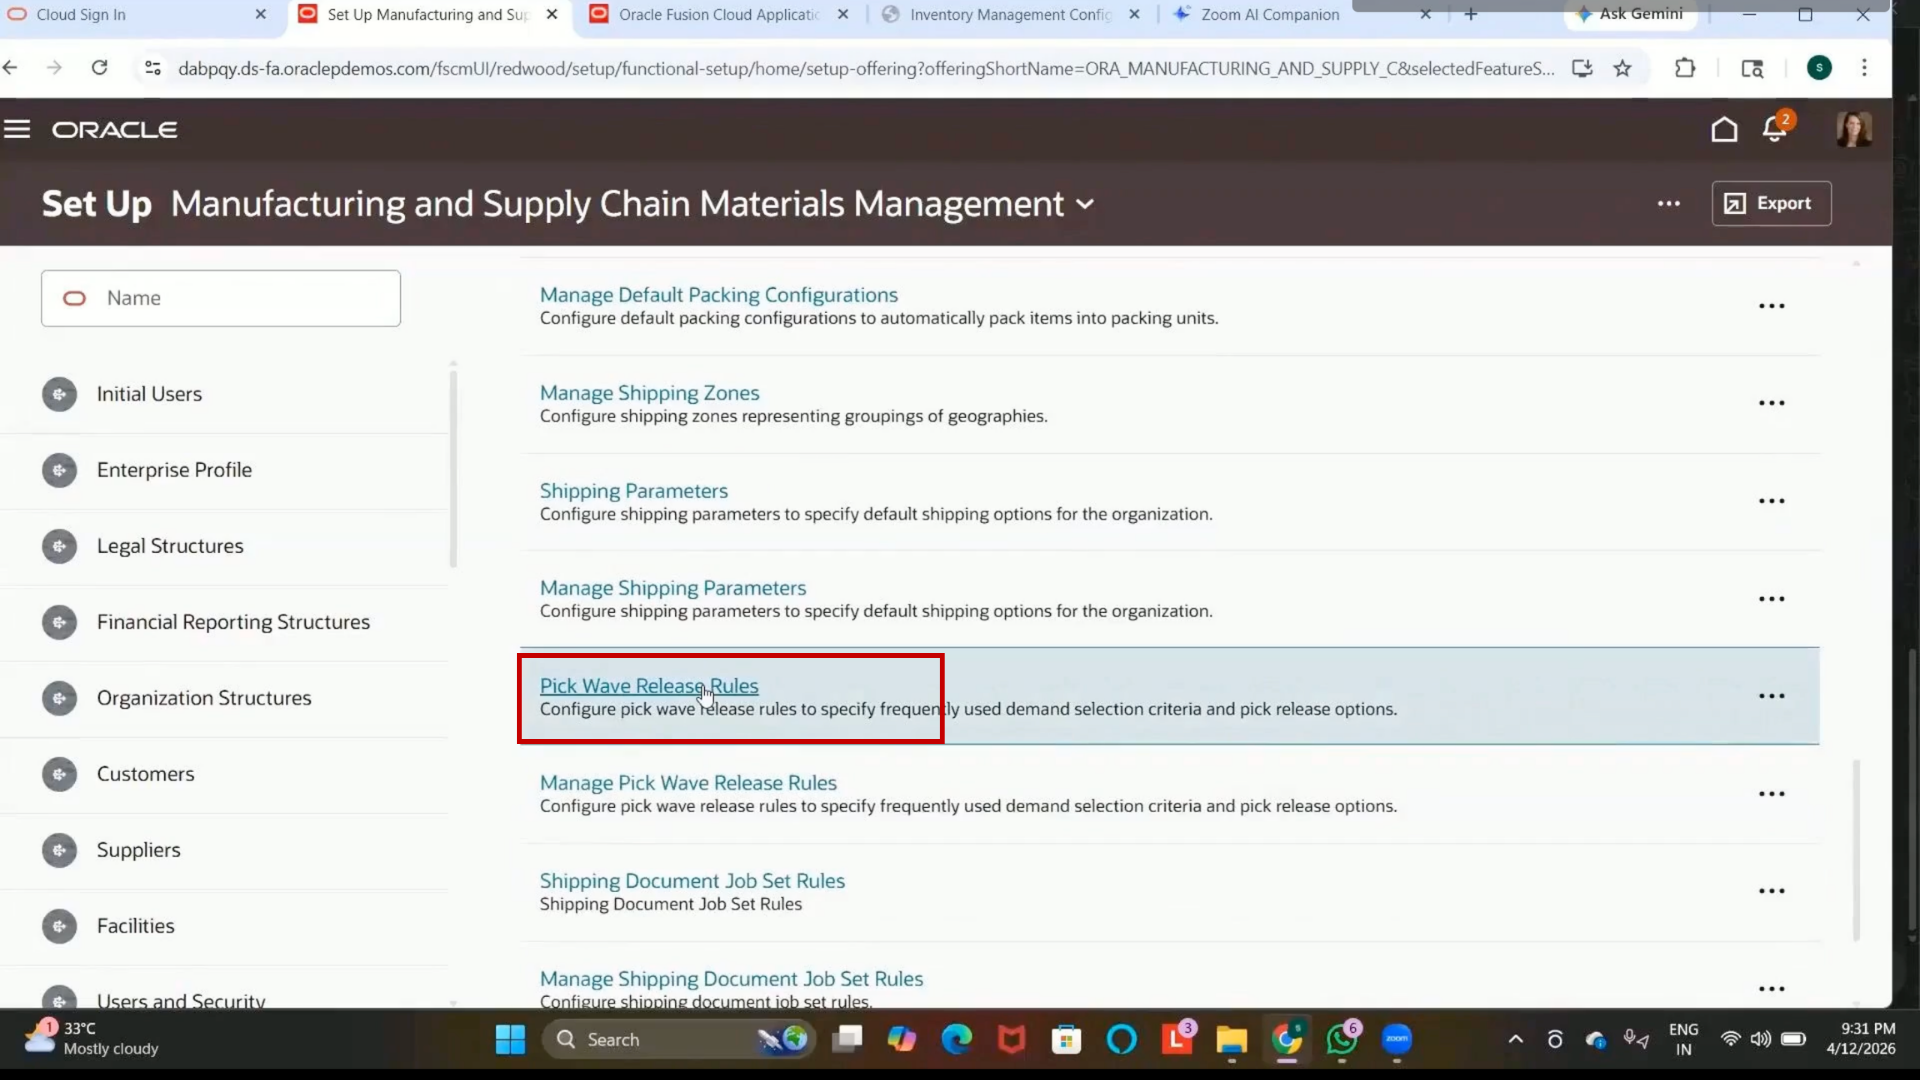
Step 262: Navigate to Pick Wave Release Rules
2. Search for Pick Wave Release Rules.
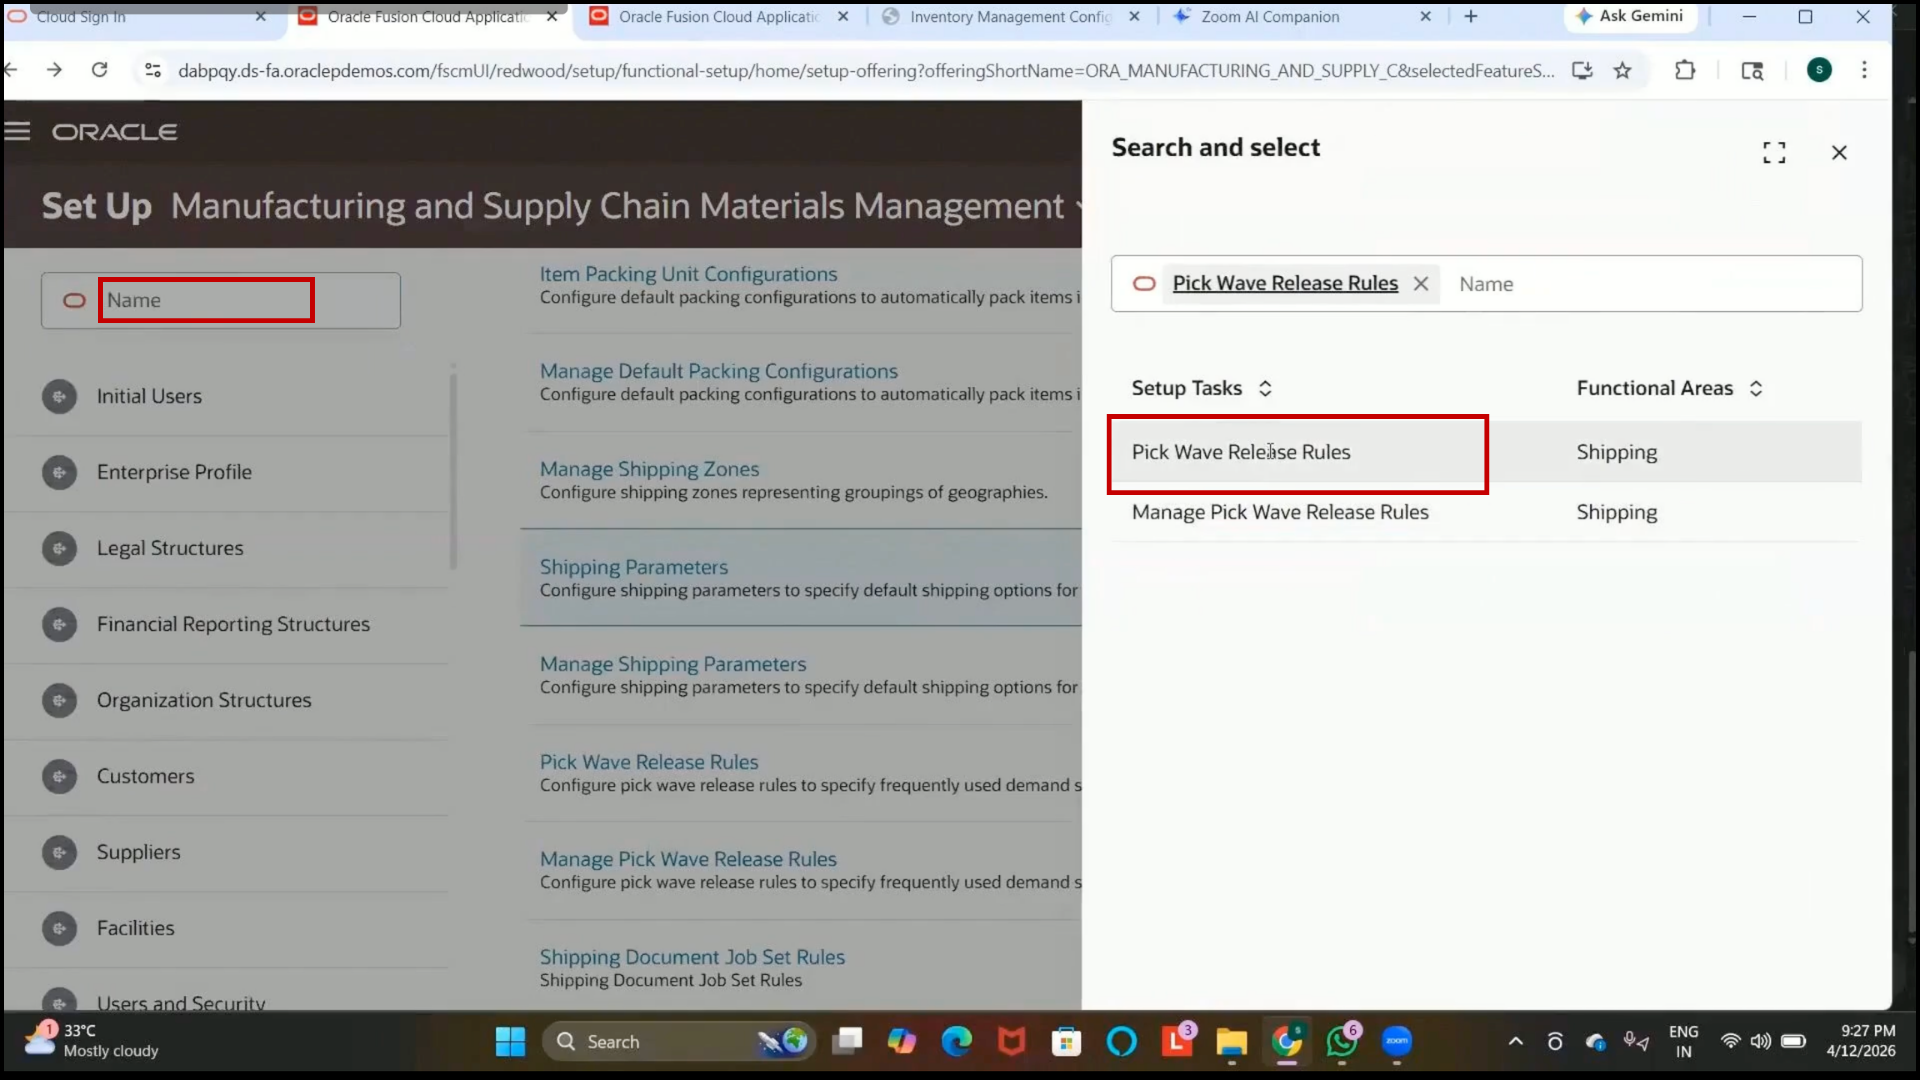
3. Open the task to manage Pick Wave release rules.
Step 263: Understand Pick Wave Release Rule
1. Review the purpose of the Pick Wave release rule:
2. Controls how orders are released for picking.
3. Defines the subinventory from which items are picked.
4. Determines whether shipment creation is enabled.
5. Controls pick release and pick confirm processing.
6. Understand the process types:
7. Pick Release: Allows items to be available for picking.
8. Pick Confirm: Confirms the item has been physically picked.
9. Click “Create.”
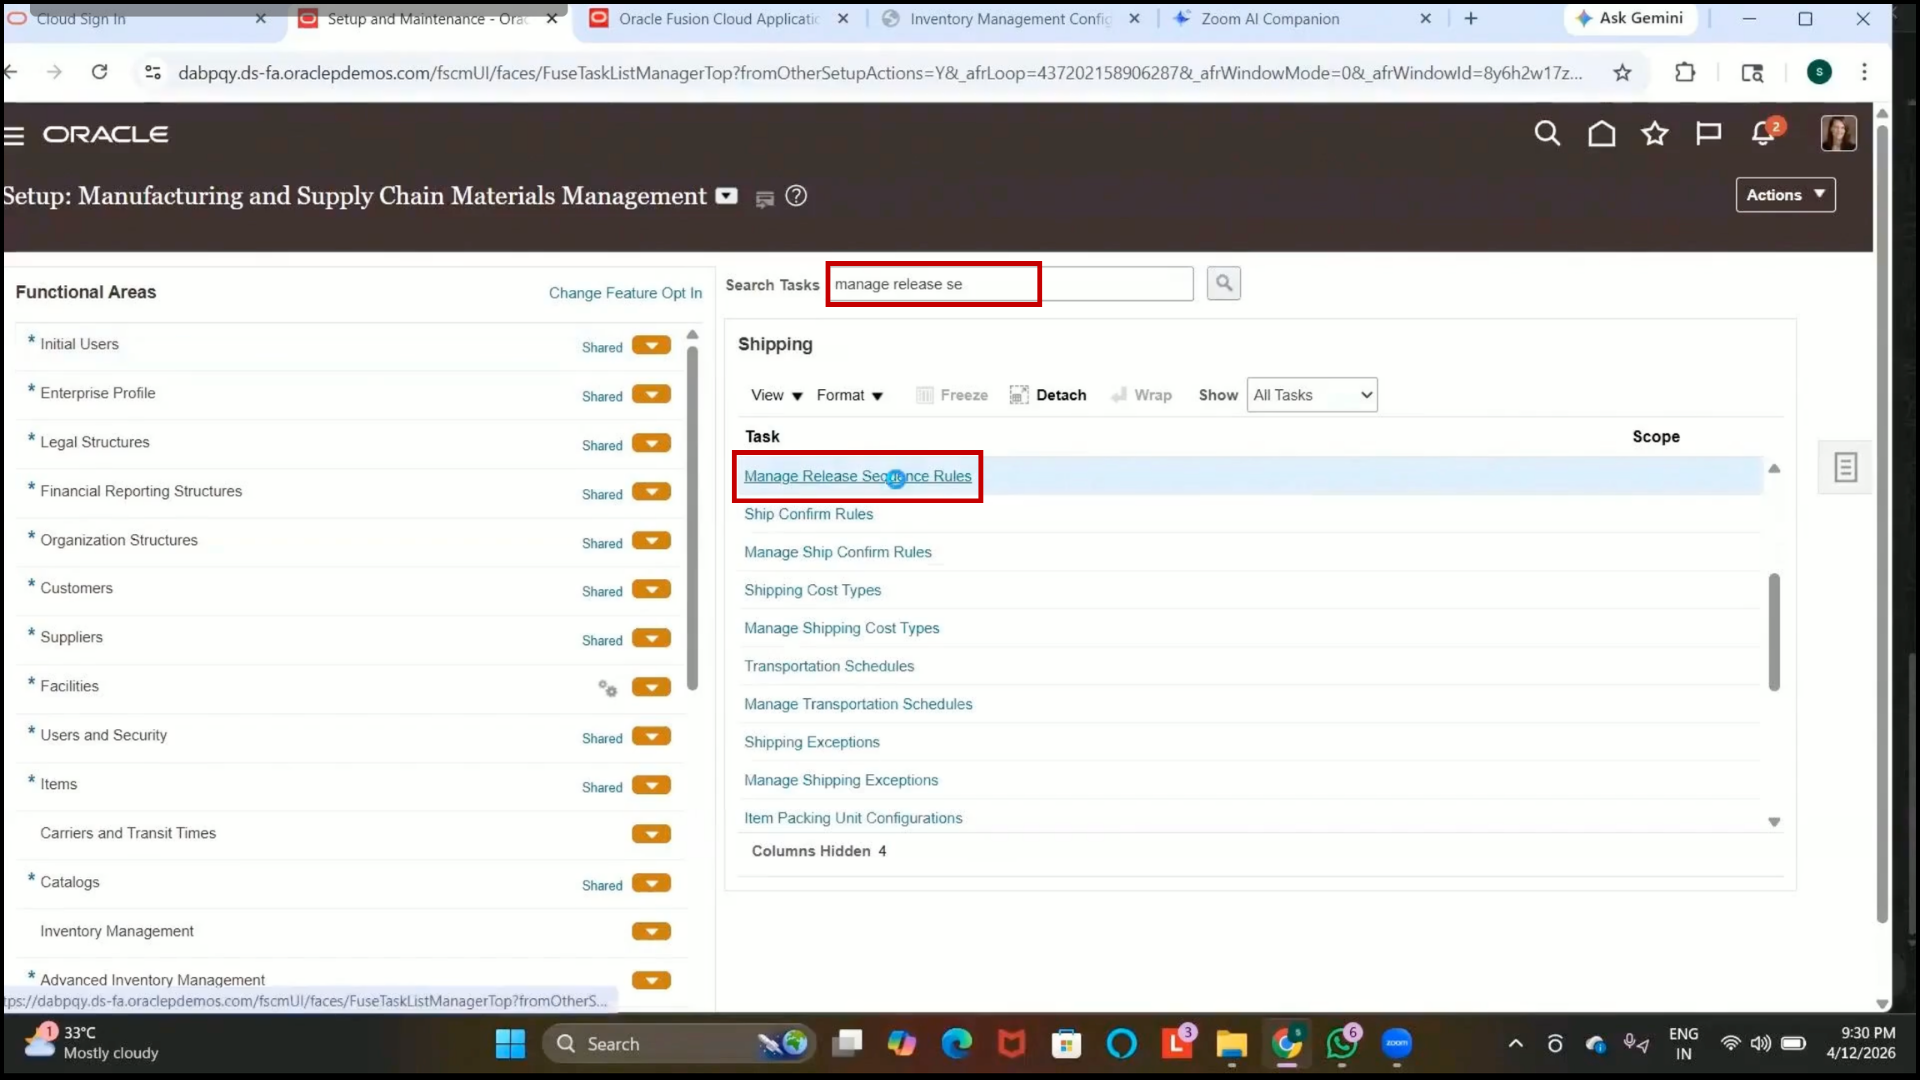
Step 264: Review Existing Release Sequence Rule
1. Navigate to Additional Setup Tasks.
2. Open Manage Release Sequence Rules.
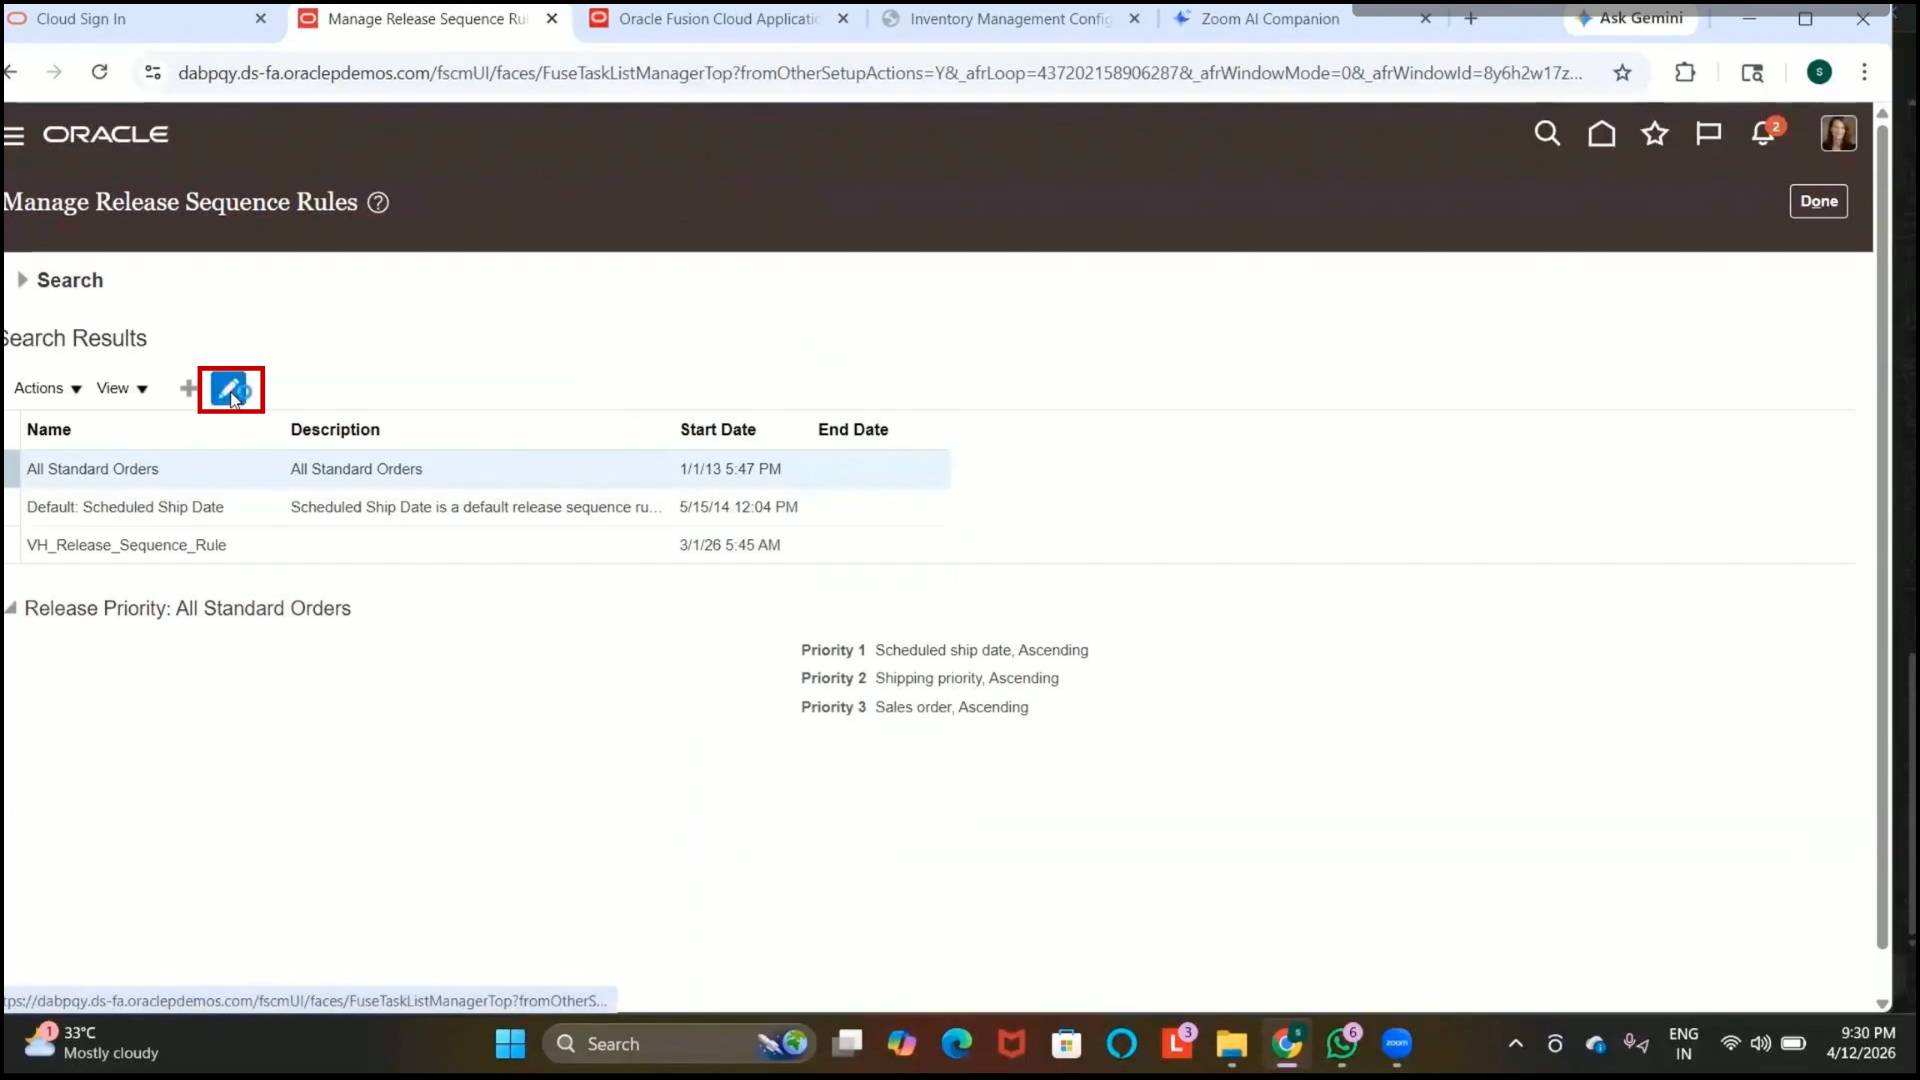
3. Review the available release sequence rules.
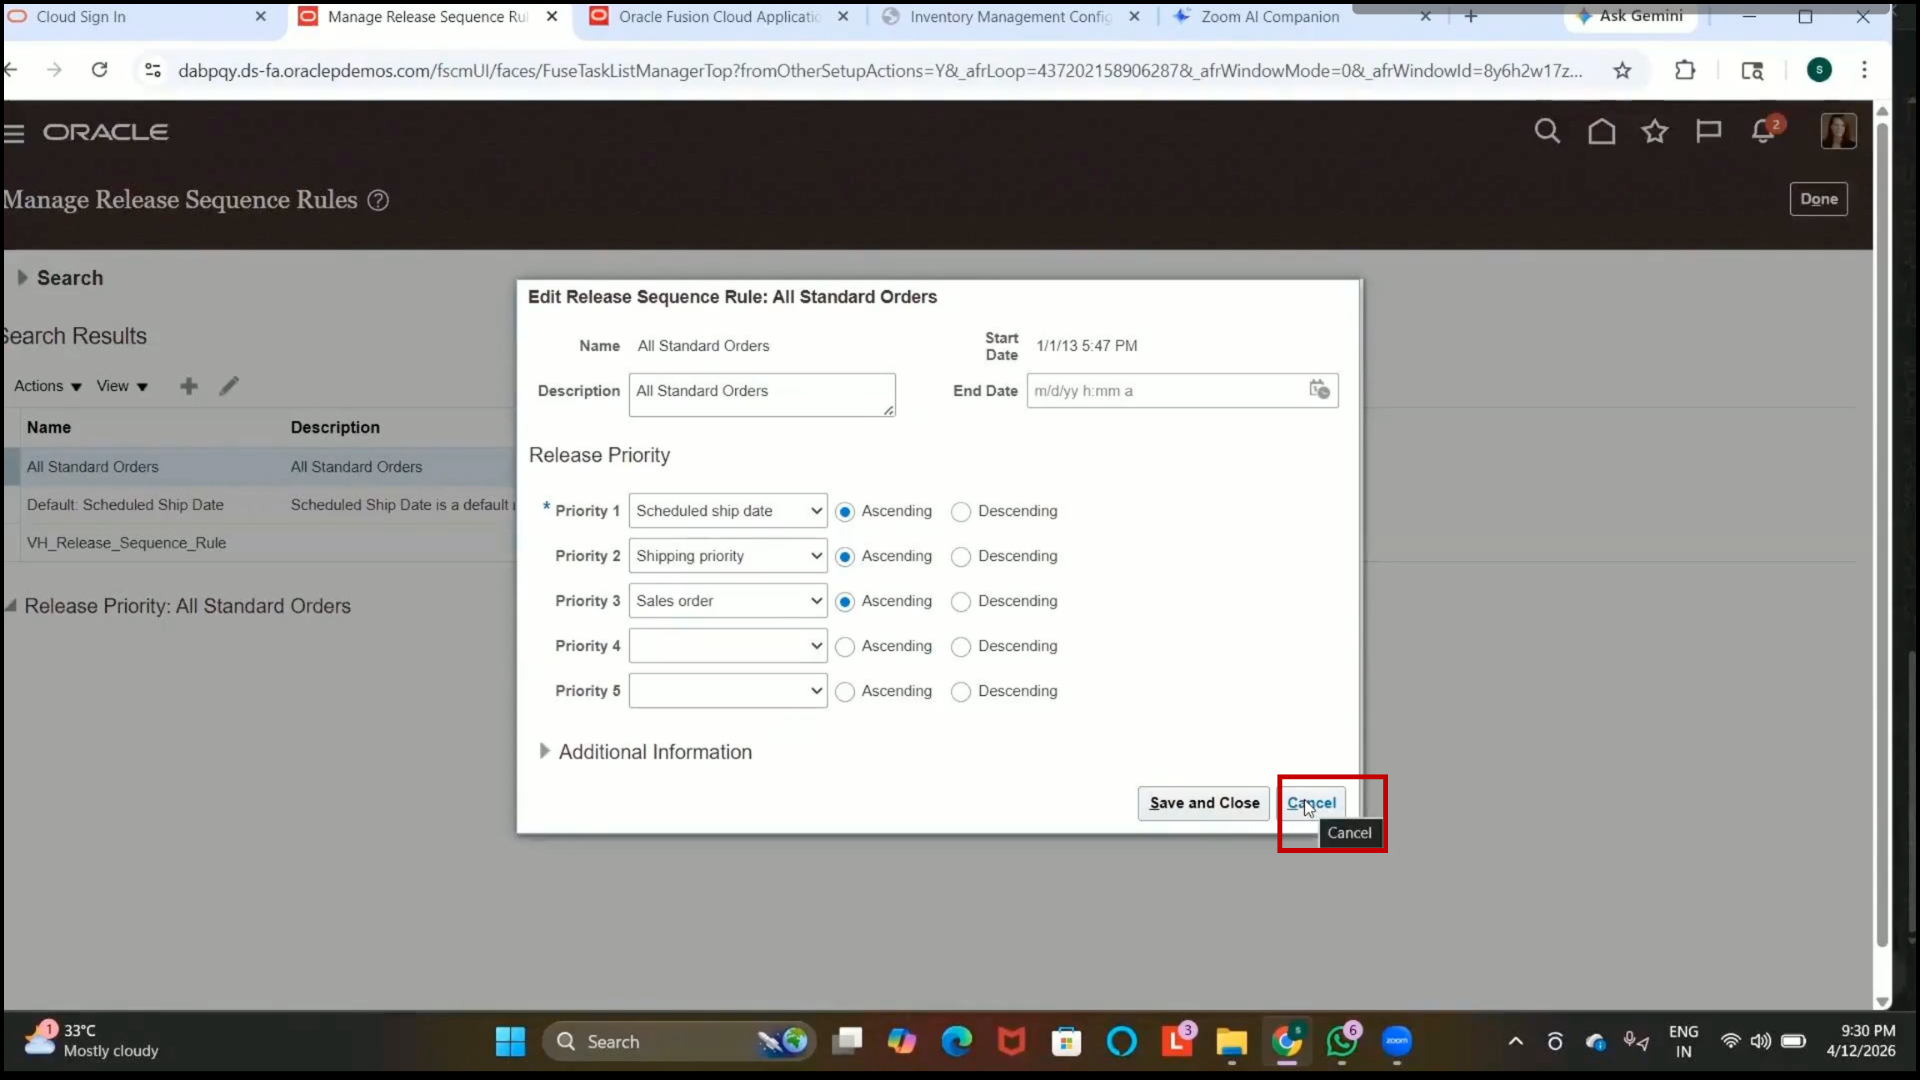
4. Verify the sequence criteria, such as
5. Scheduled Ship Date
6. Shipping Priority
7. Sales Order
8. Review ascending or descending release sequencing logic.
Step 265: Verify Existing Pick Wave Release Rule
1. Return to Setup and Maintenance.
2. Open Pick Wave Release Rules again.
3. Review the existing rule named “All Standard Orders.”
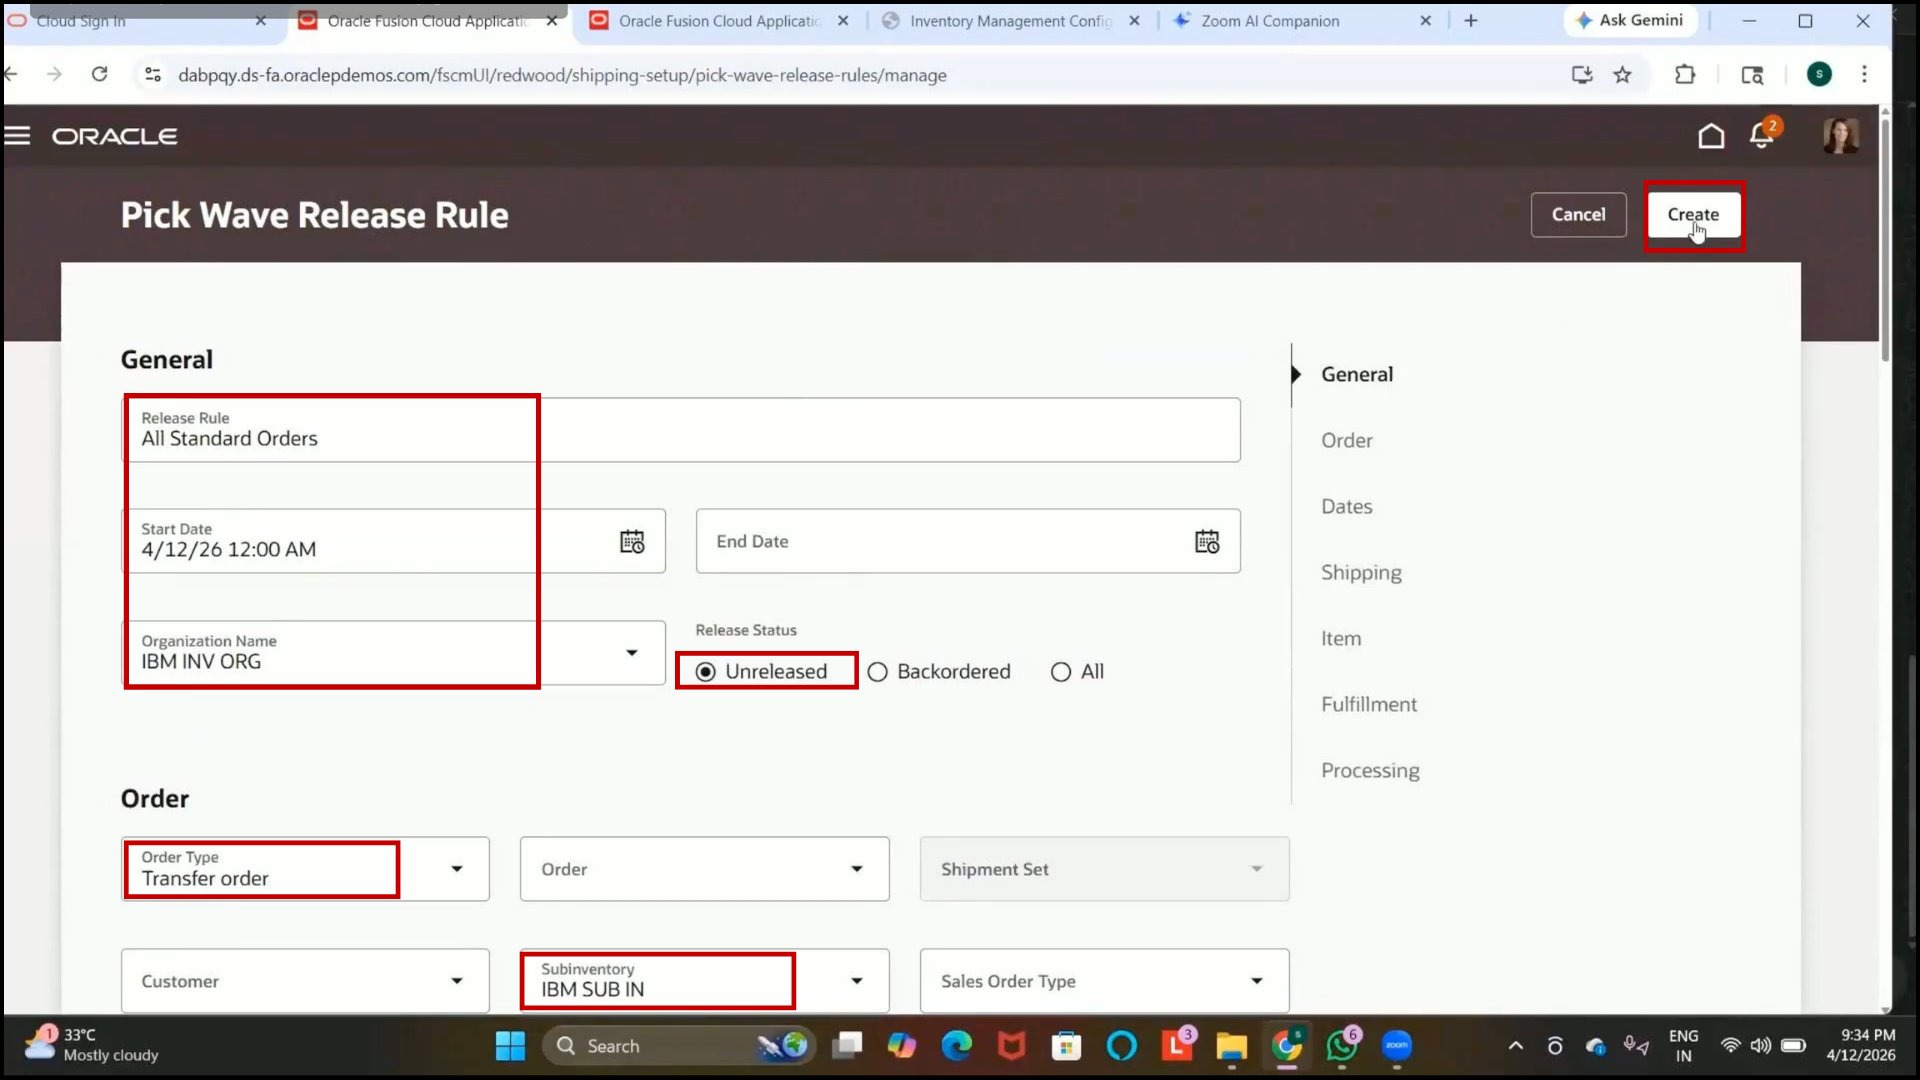
Step 266: Create Pick Wave Release Rule
1.Click on Create.
2. Select the release rule as all standard orders.
3. Click “Edit.”
4. Verify that the rule becomes enabled.
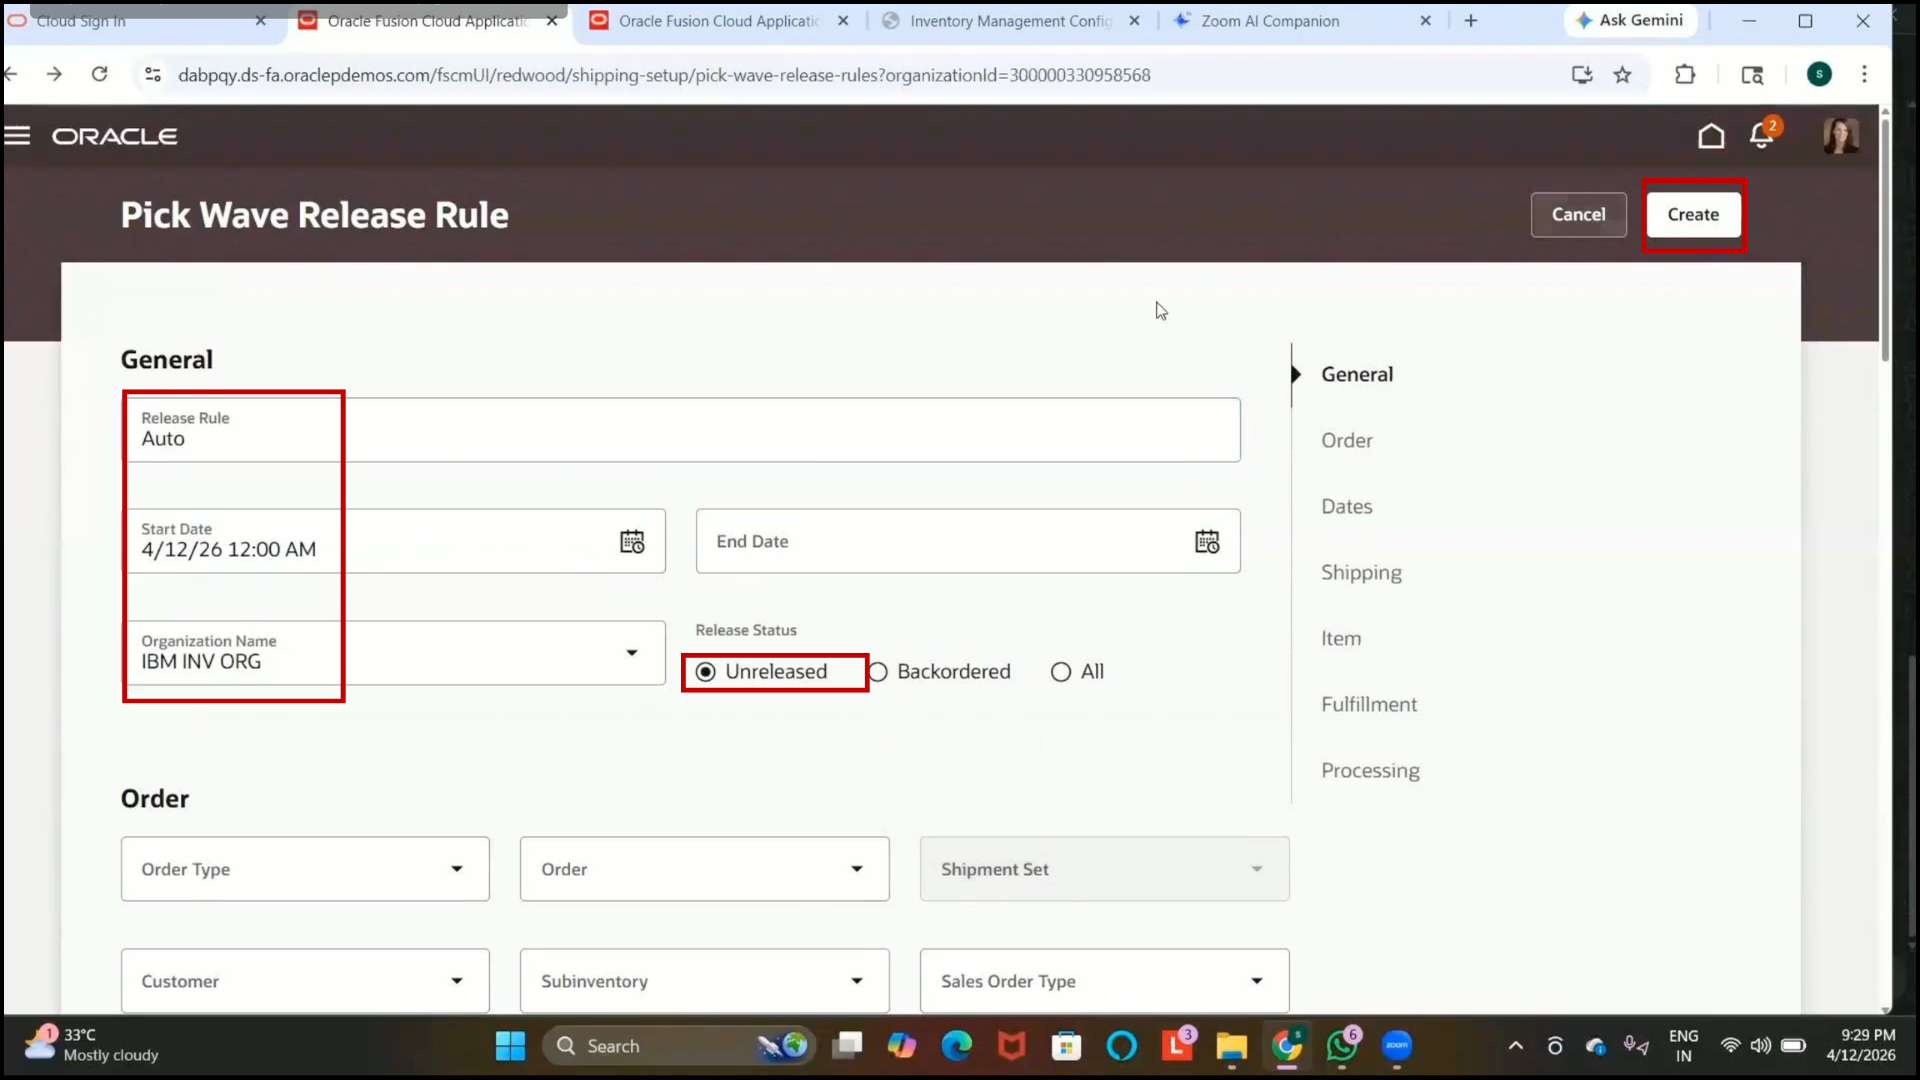
5. Confirm the start date is automatically populated with today’s date.
6. Select the required inventory organization.
Step 267: Configure Release Status
1. Search Pick Wave Release Rule
2. Open Pick Wave Release Rule
3. In the Release Status field, select Unreleased Orders.

4. Review other available options:
5. Back-ordered Orders
6. All Orders
7. Understand that back-ordered items occur when inventory quantity is unavailable during shipment.
Step 268: Configure Order Type
1. In the Order Type field, select Transfer Order.
2. Review other available order types, such as sales orders.
2. Leave the Order Number field blank if no specific order needs to be selected.
Step 269: Select Subinventory
1. In the Subinventory field, select the existing subinventory.
2. Verify that the selected subinventory will be used for item fulfillment.
Step 270: Configure Date Filters
1. Review available date options:
2. Scheduled Ship Date
3. Start On
4. Start Within
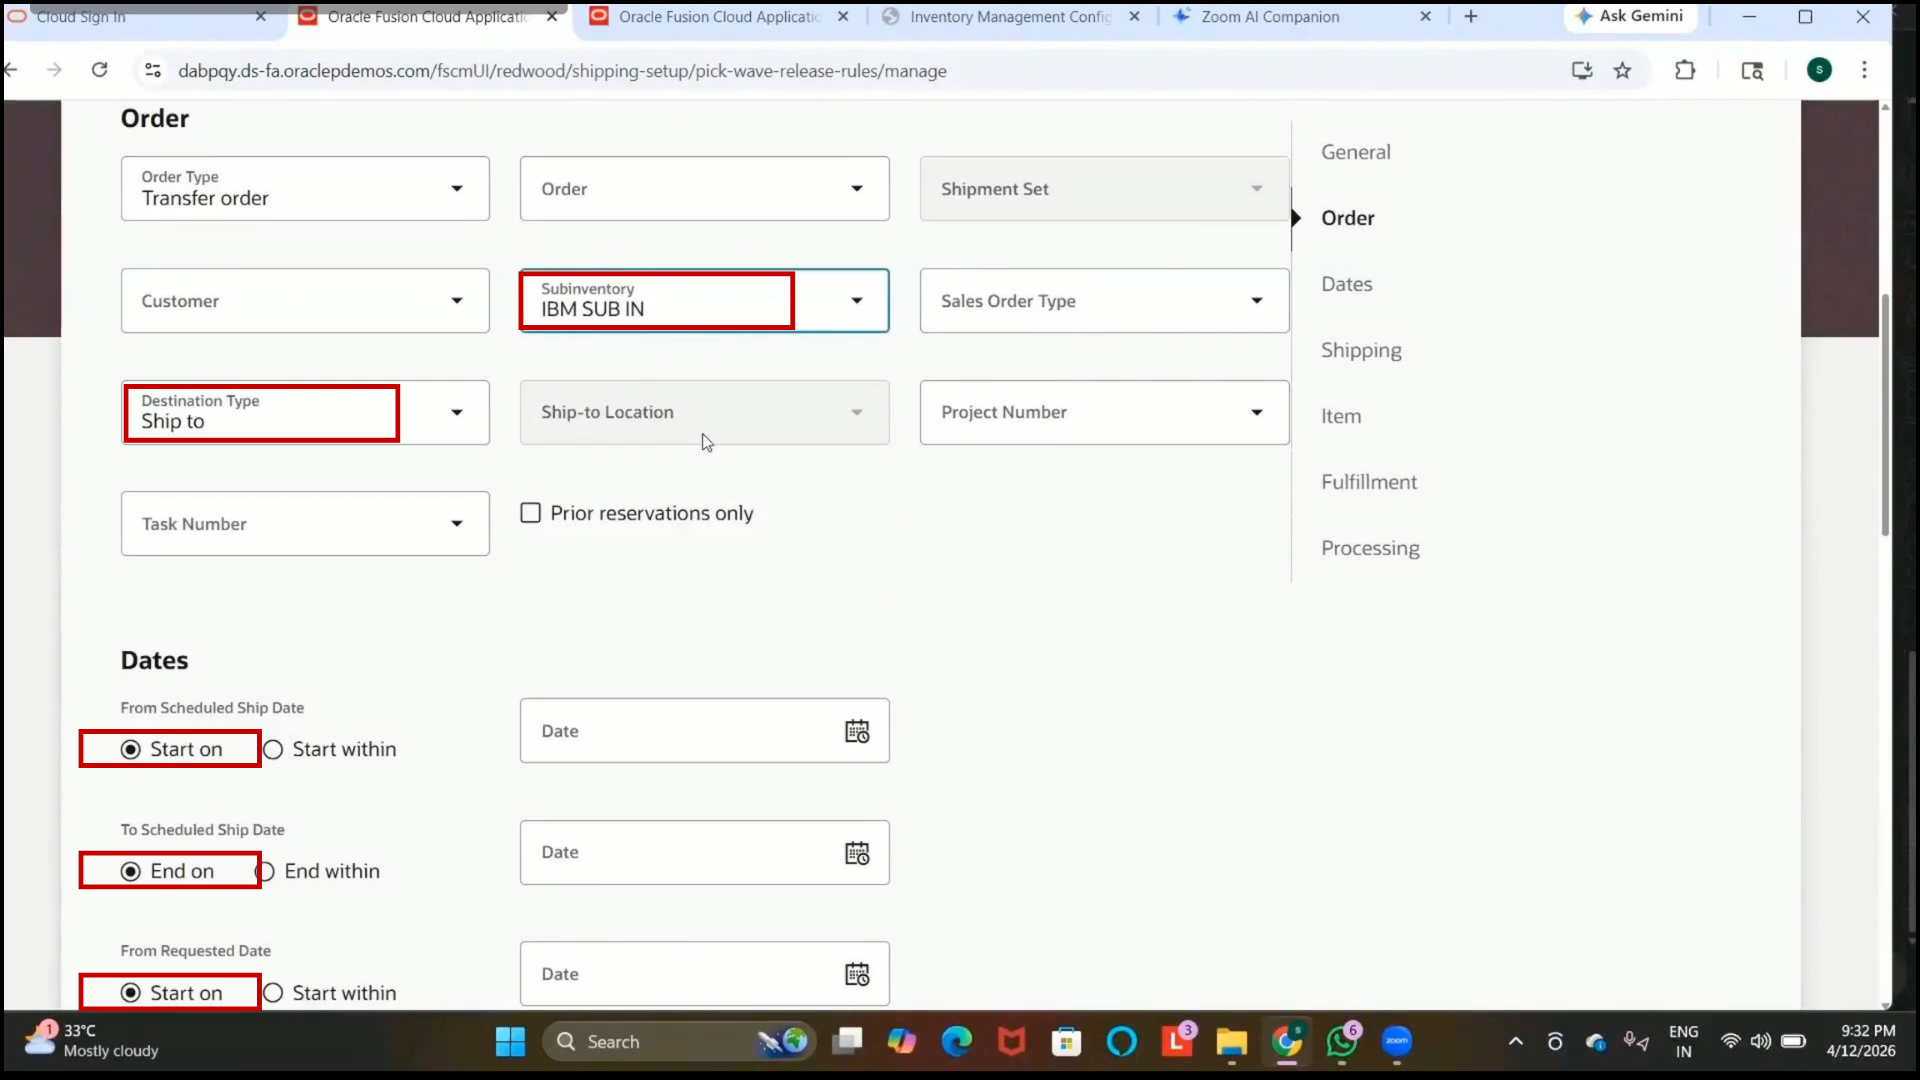
5. Configure the required date conditions if needed.
6. Leave the fields blank if no date restrictions are required.
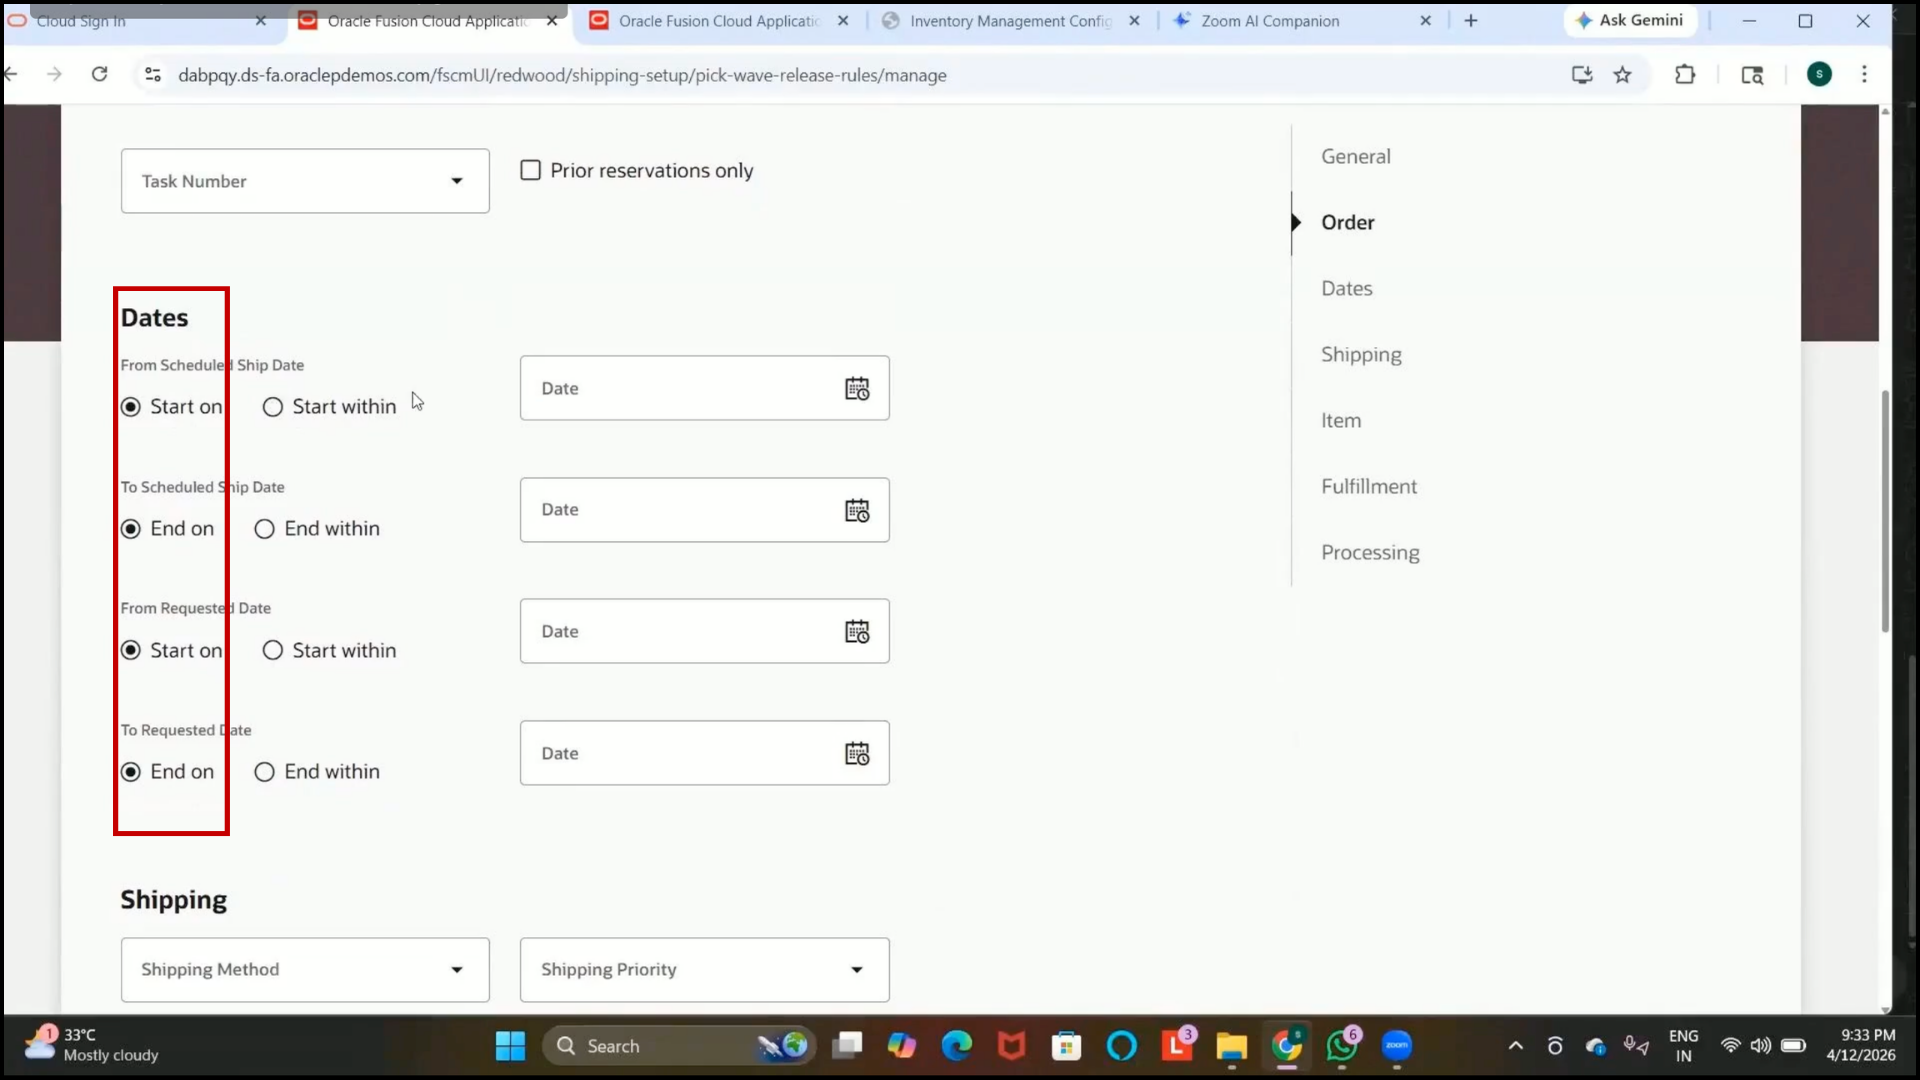
Step 271: Configure Shipping Method
1. Locate the Shipping Method field.
2. Select the shipping method created previously.
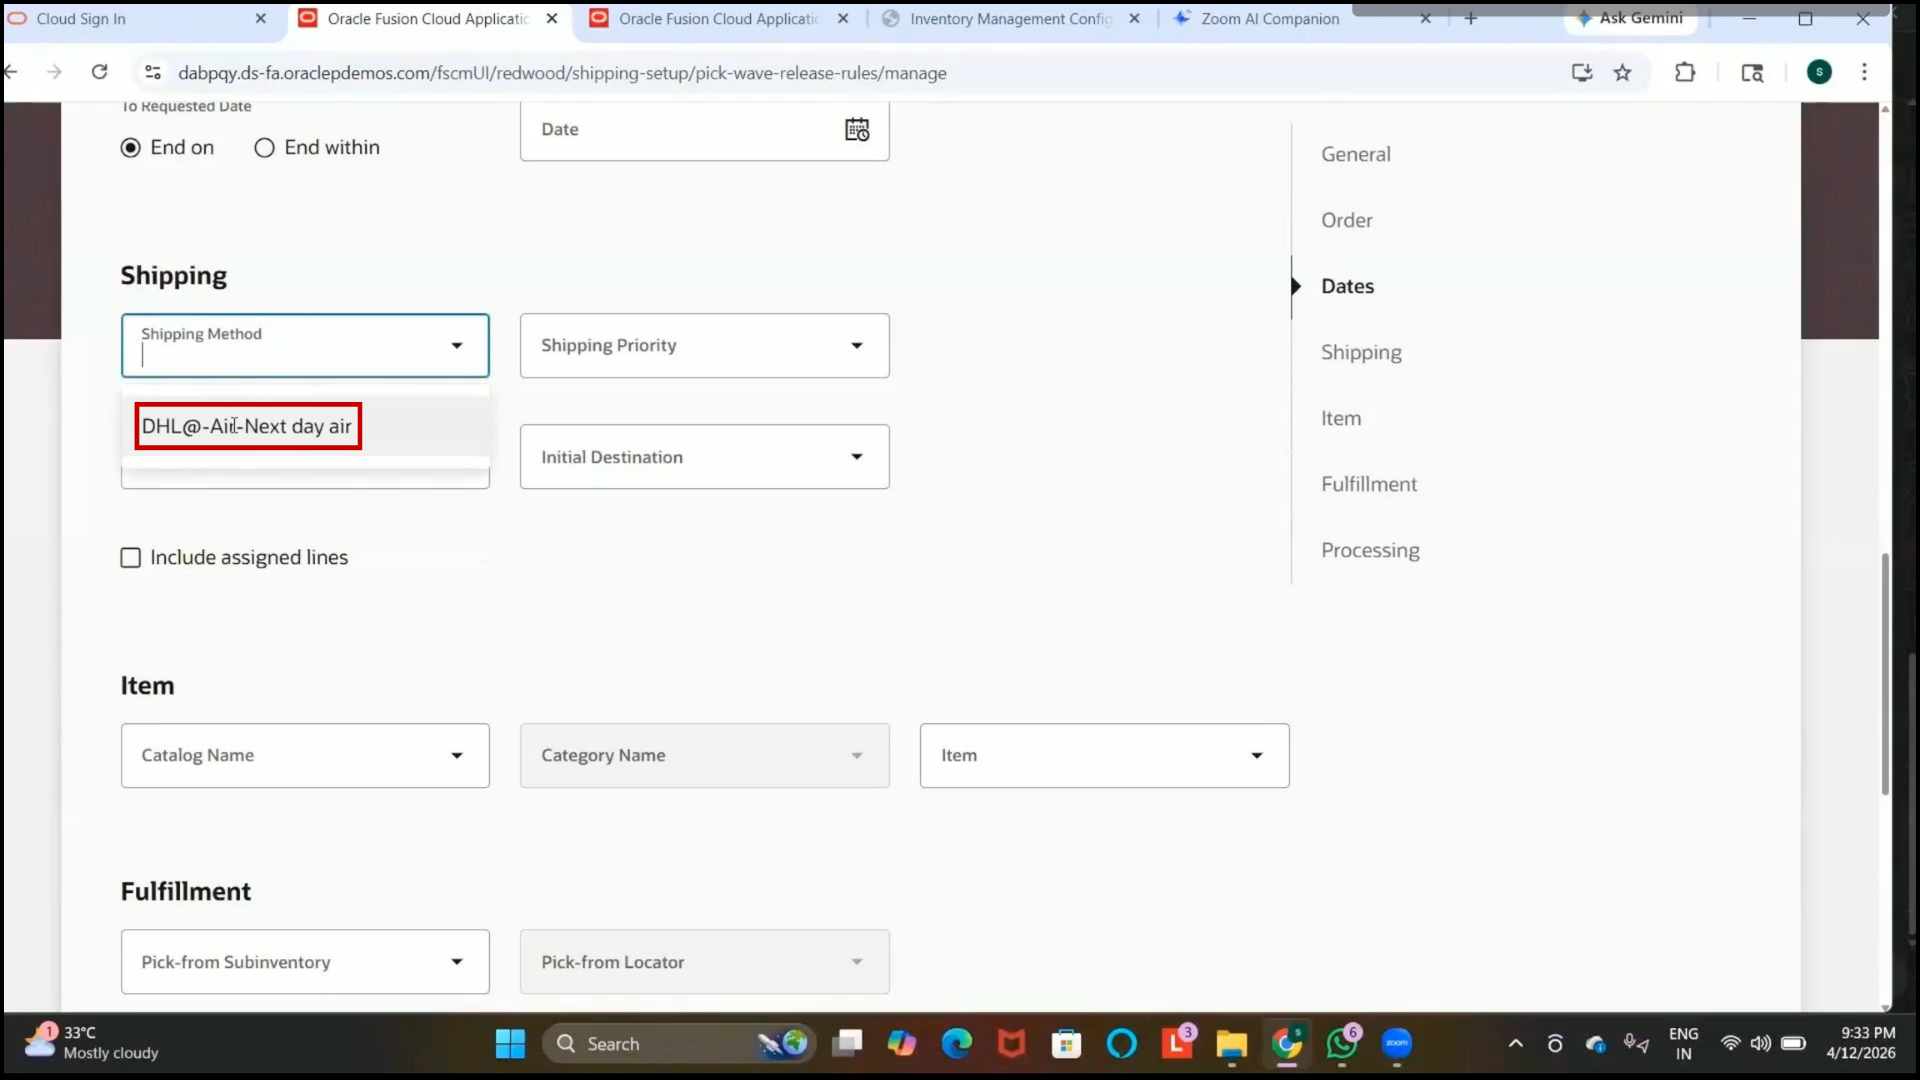
3. Verify that the selected shipping method is assigned successfully.
Step 272: Configure Item Restrictions
1. Review optional configurations such as
2. Item Catalog
3. Specific Item Selection
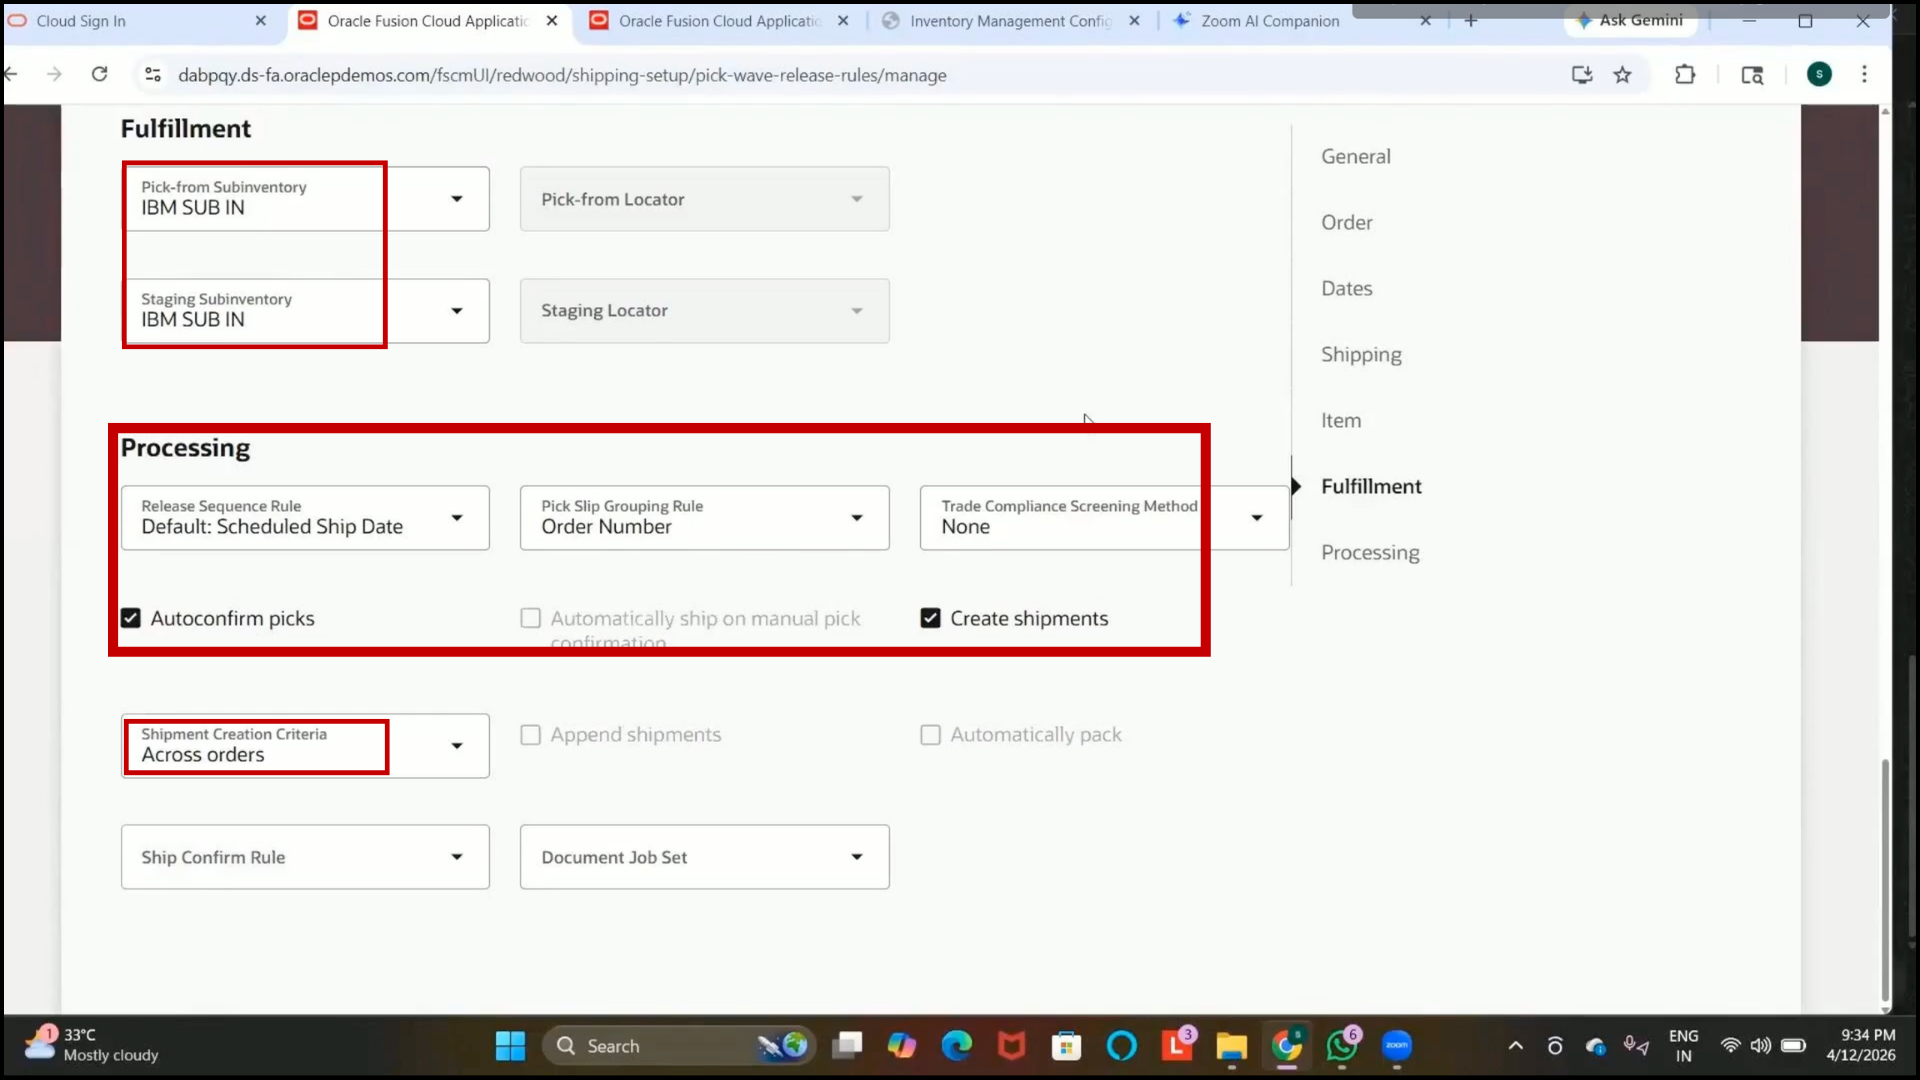
4. Pick From Subinventory
5. Configure these fields only if specific fulfillment restrictions are required.
Step 273: Review Advanced Pick Wave Options
1. Review advanced setup options available in the pickwave release rule.
2. Verify configurations related to:
3. Item-level fulfillment
4. Subinventory restrictions
5. Pick processing controls
6. Save the configuration after completing the setup.
Step 274: Enable Auto Pick Confirm
1. Locate the Auto Confirm Picks checkbox in the Pick Wave Release Rule setup.
2. Enable the checkbox to automatically confirm picks after pick release.
3. Understand the following:
4. Pick Release allows items to be available for picking.
5. Pick Confirm confirms the physical picking of items.
Note that enabling this option combines both processes into a single transaction.
Step 275: Configure Separate Pick-Confirm Process
1. Disable the Auto Confirm Picks checkbox if pick confirmation should be performed separately.
2. Use this option when the business requires manual confirmation after picking.
Step 276: Complete Pick Wave Release Rule Creation
1. Review all configured details in the Pick Wave Release Rule.
2.Click on Create.
3. Review the pop-up displaying the number of orders allowed for picking.
4. Close the confirmation message.
5. Verify that the rule is successfully created for the inventory organization.

Step 277: Navigate to Inventory Management
1. Open the Inventory Management work area.
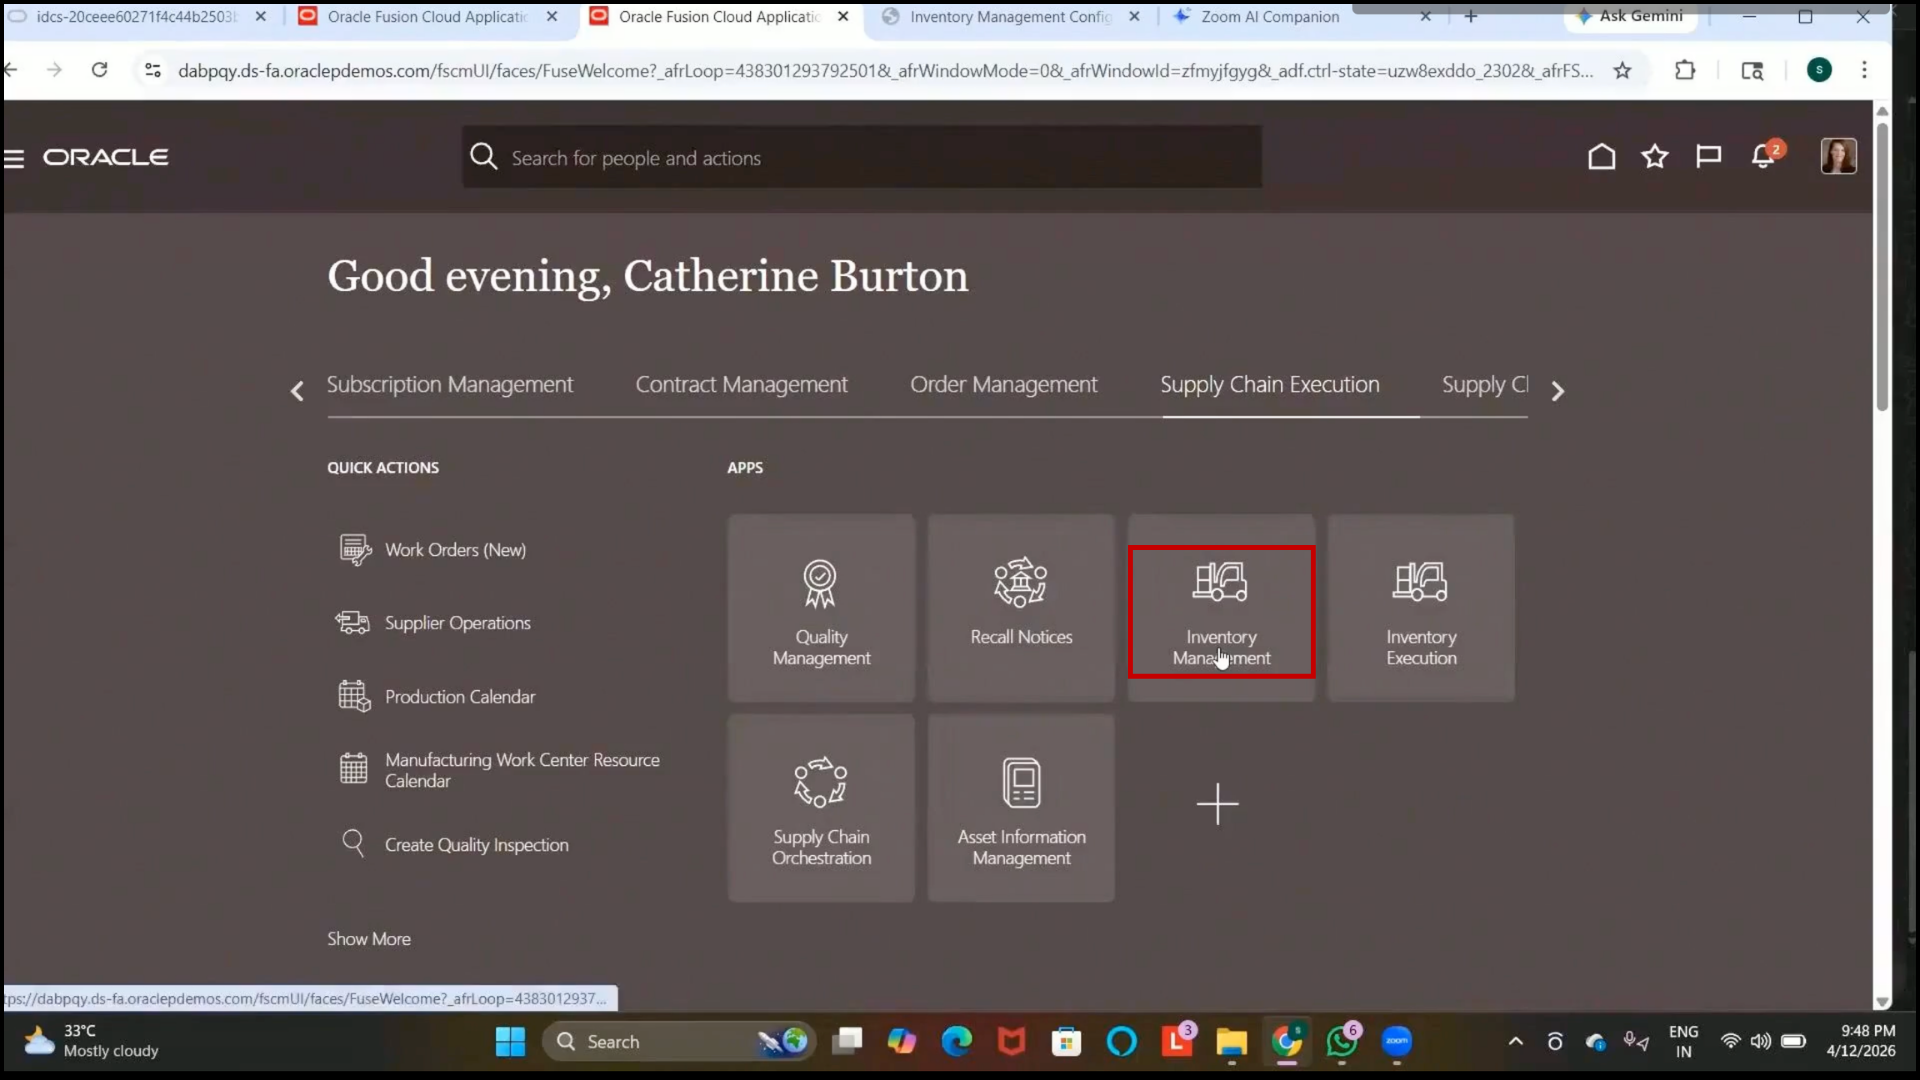
2. Select the required inventory organization.
3. Verify that the Redwood Inventory Infolet page is displayed.
Step 278: Open Item Quantities Page
1. Navigate to Item Quantities.
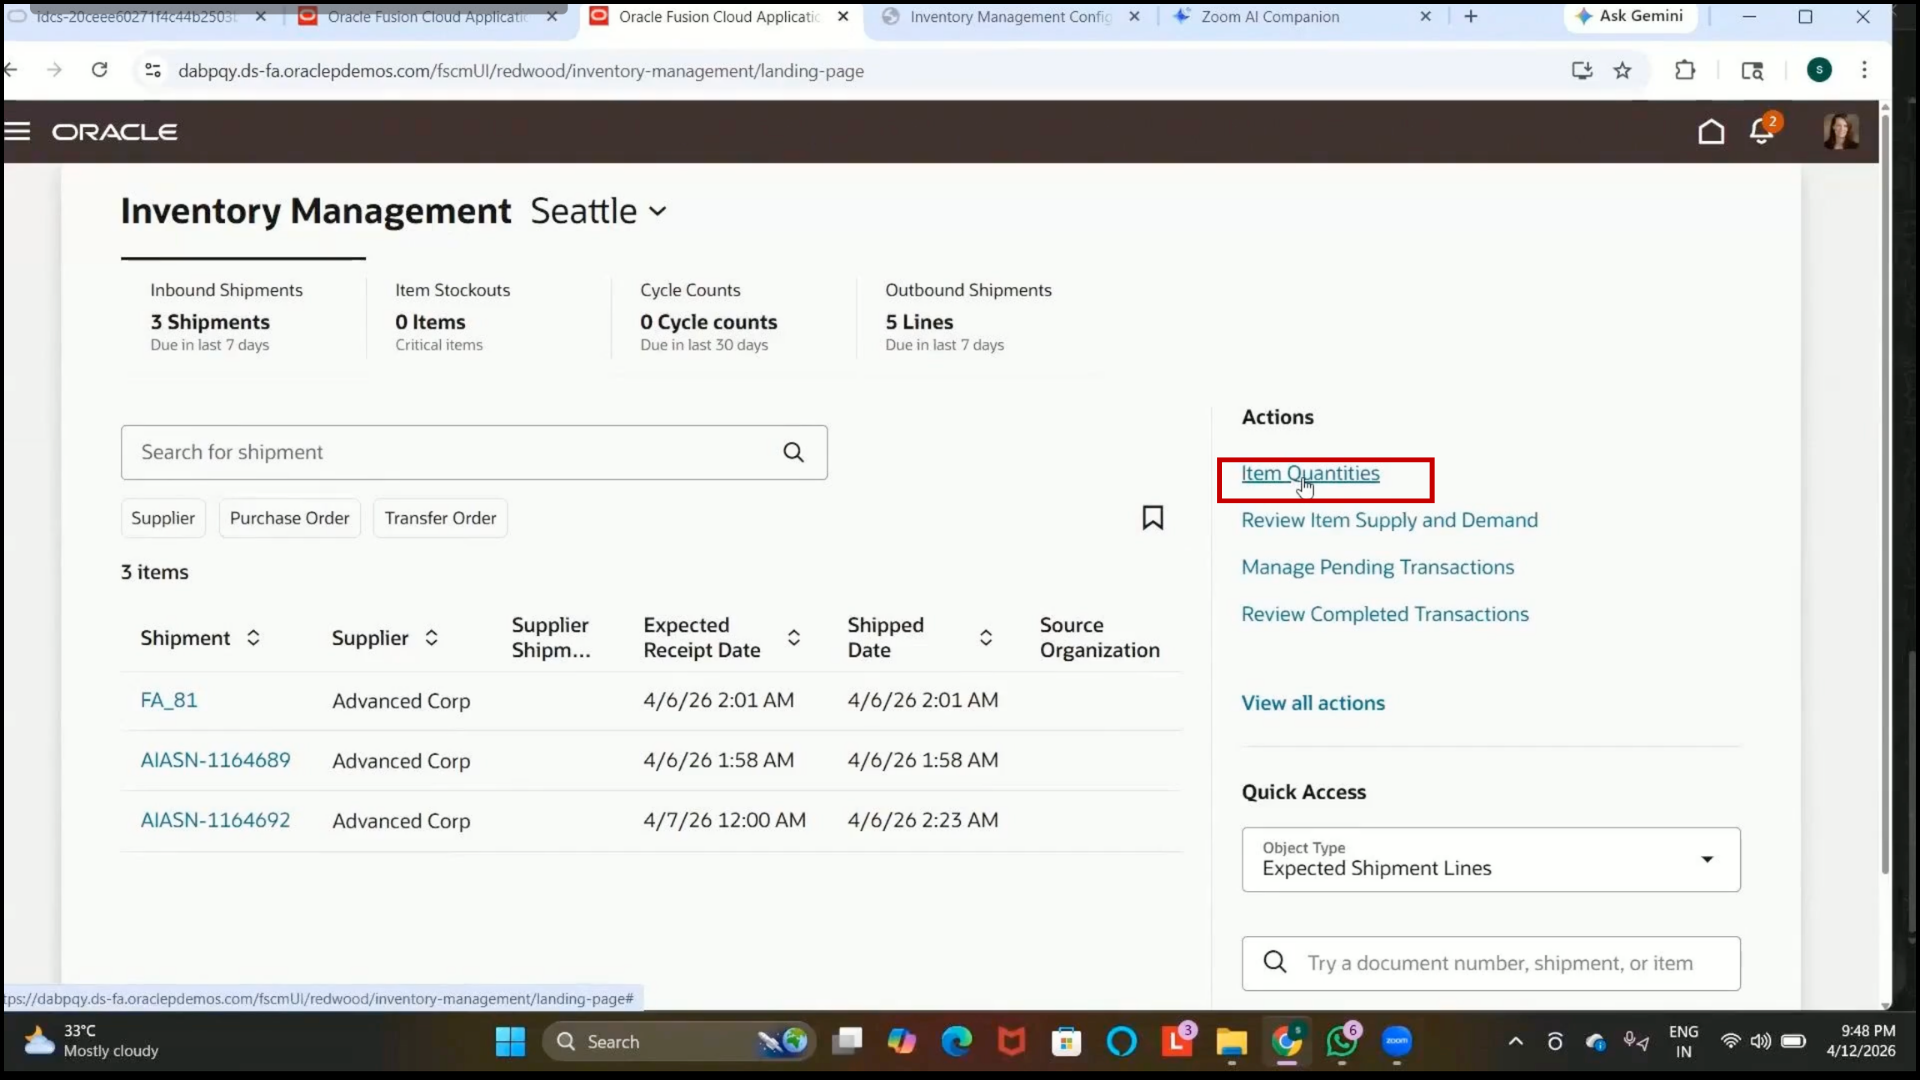
2. Review the inventory quantity details for items.
Step 279: Open Miscellaneous Transactions
1. Click on Create Miscellaneous Transaction.
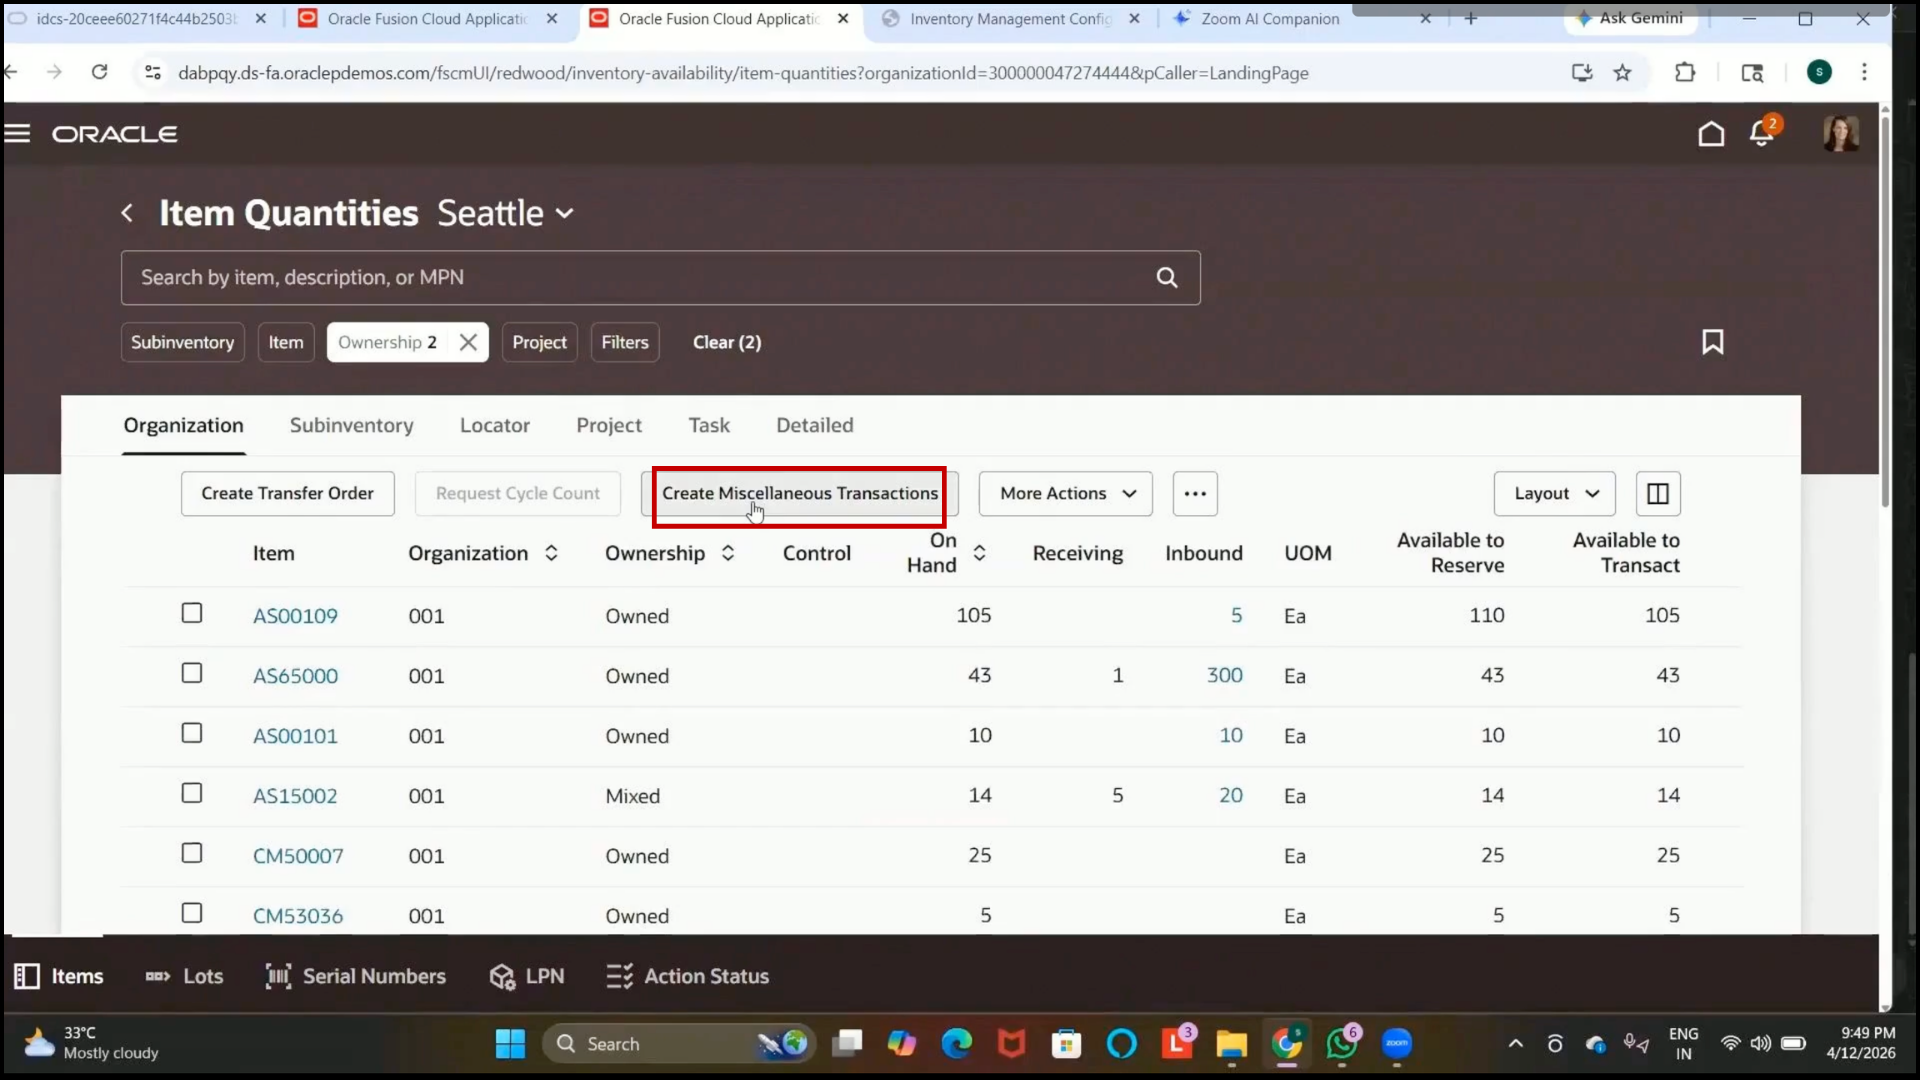
2. Review the available transaction types:
3. Miscellaneous Receipt
4. Miscellaneous Issue
Step 280: Understand Miscellaneous Transactions
1. Review the purpose of miscellaneous transactions:
2. Increase inventory quantity without formal purchasing documents.
3. Decrease inventory quantity without sales order transactions.
4. Understand common use cases:
5. Miscellaneous receipt for project or manual stock addition.
6. Miscellaneous Issue for damaged or unusable stock removal.
Step 281: Create Miscellaneous Receipt Transaction
1. Click the edit icon.
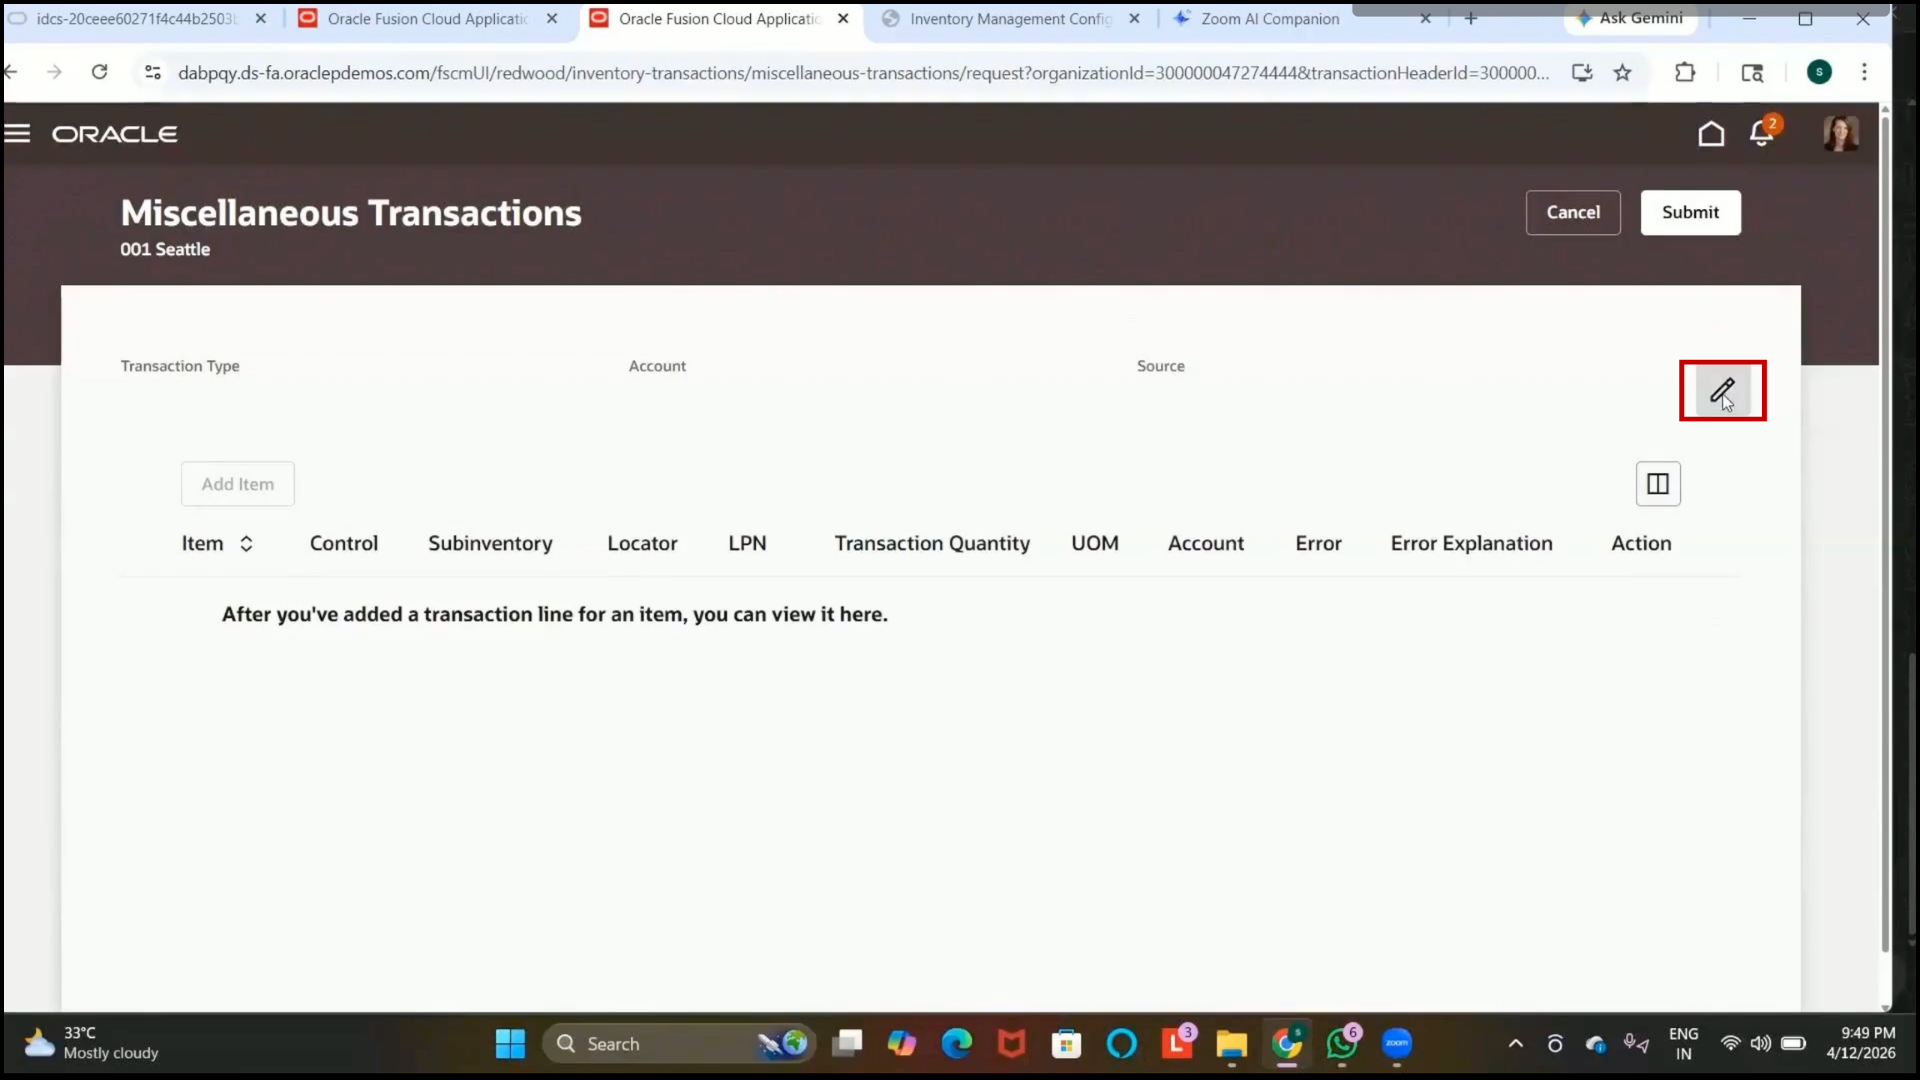
2. In the Transaction Type field, select IBM Receipt.
3. Review previously created inventory transaction types.
4. Select the required accounting combination.
5.Click on Save.

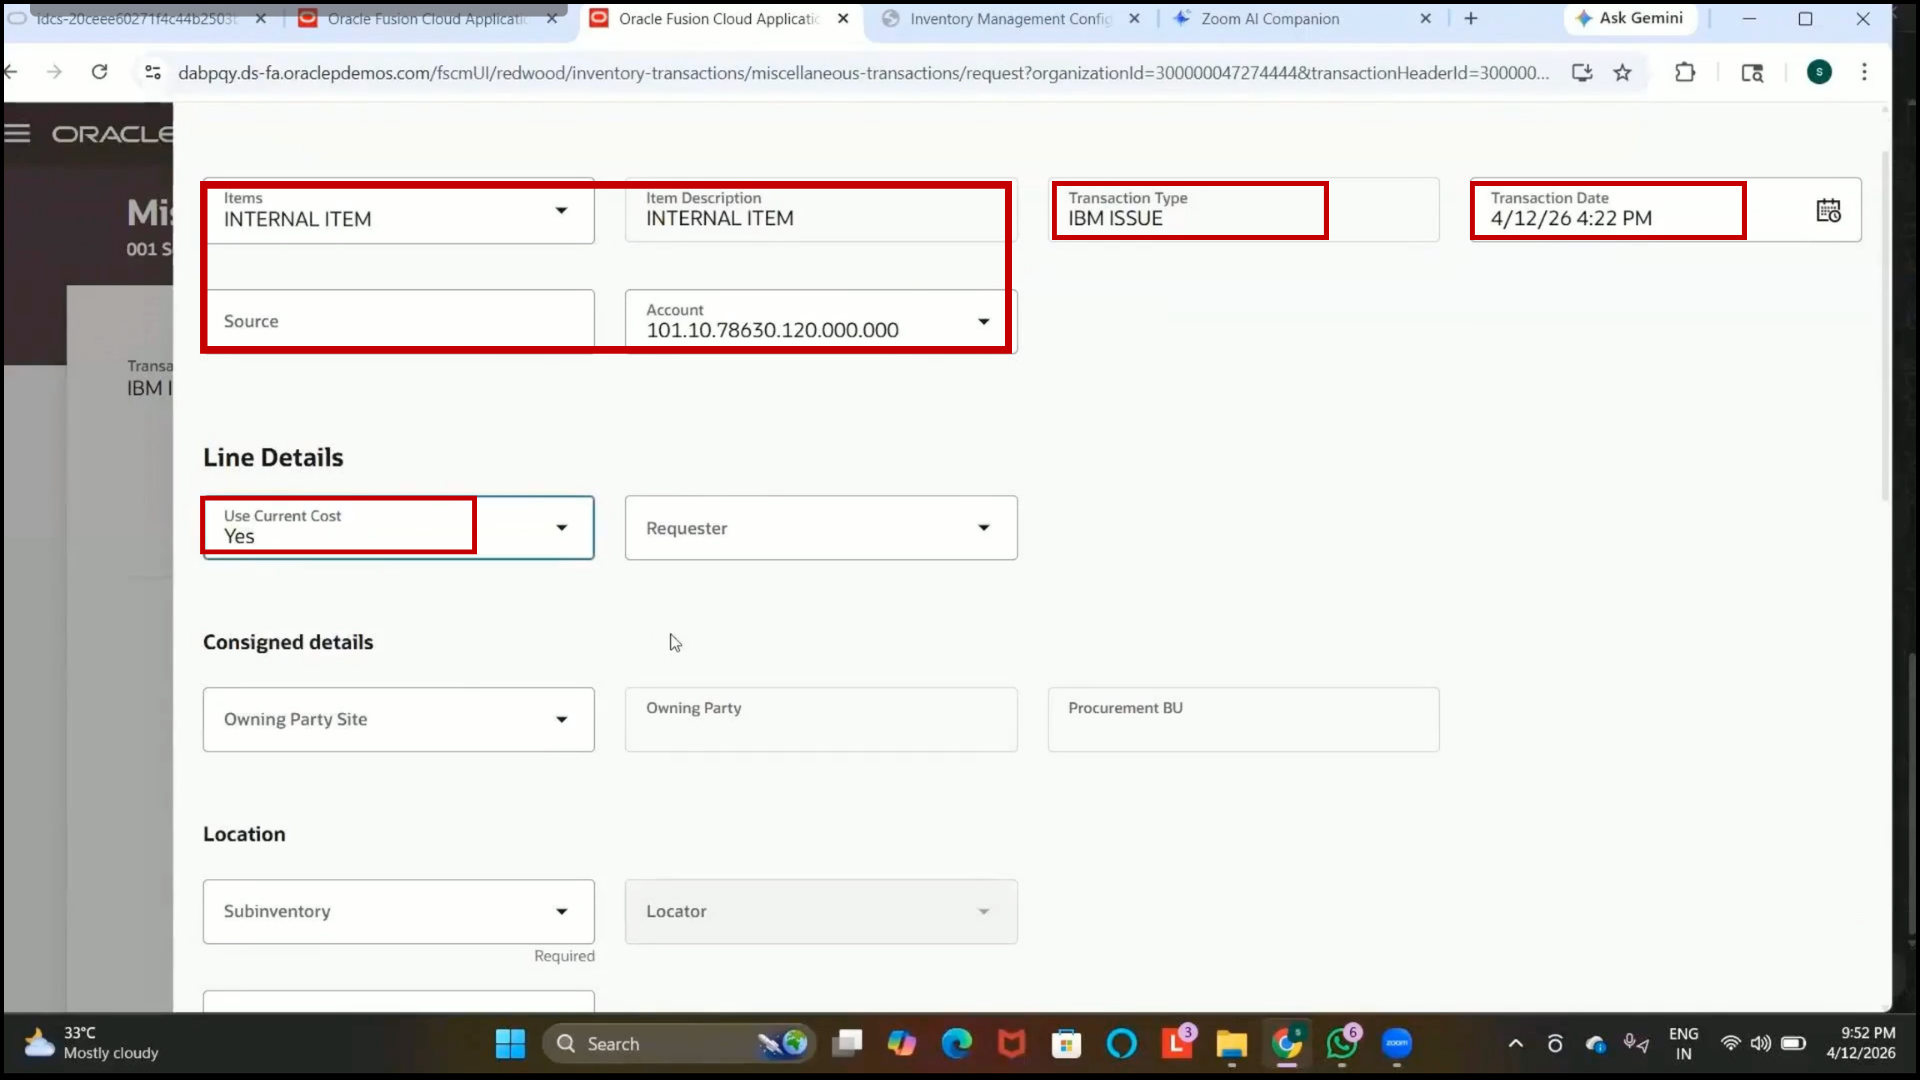
Step 282: Add Item for Miscellaneous Receipt
1. Click on Add Item.
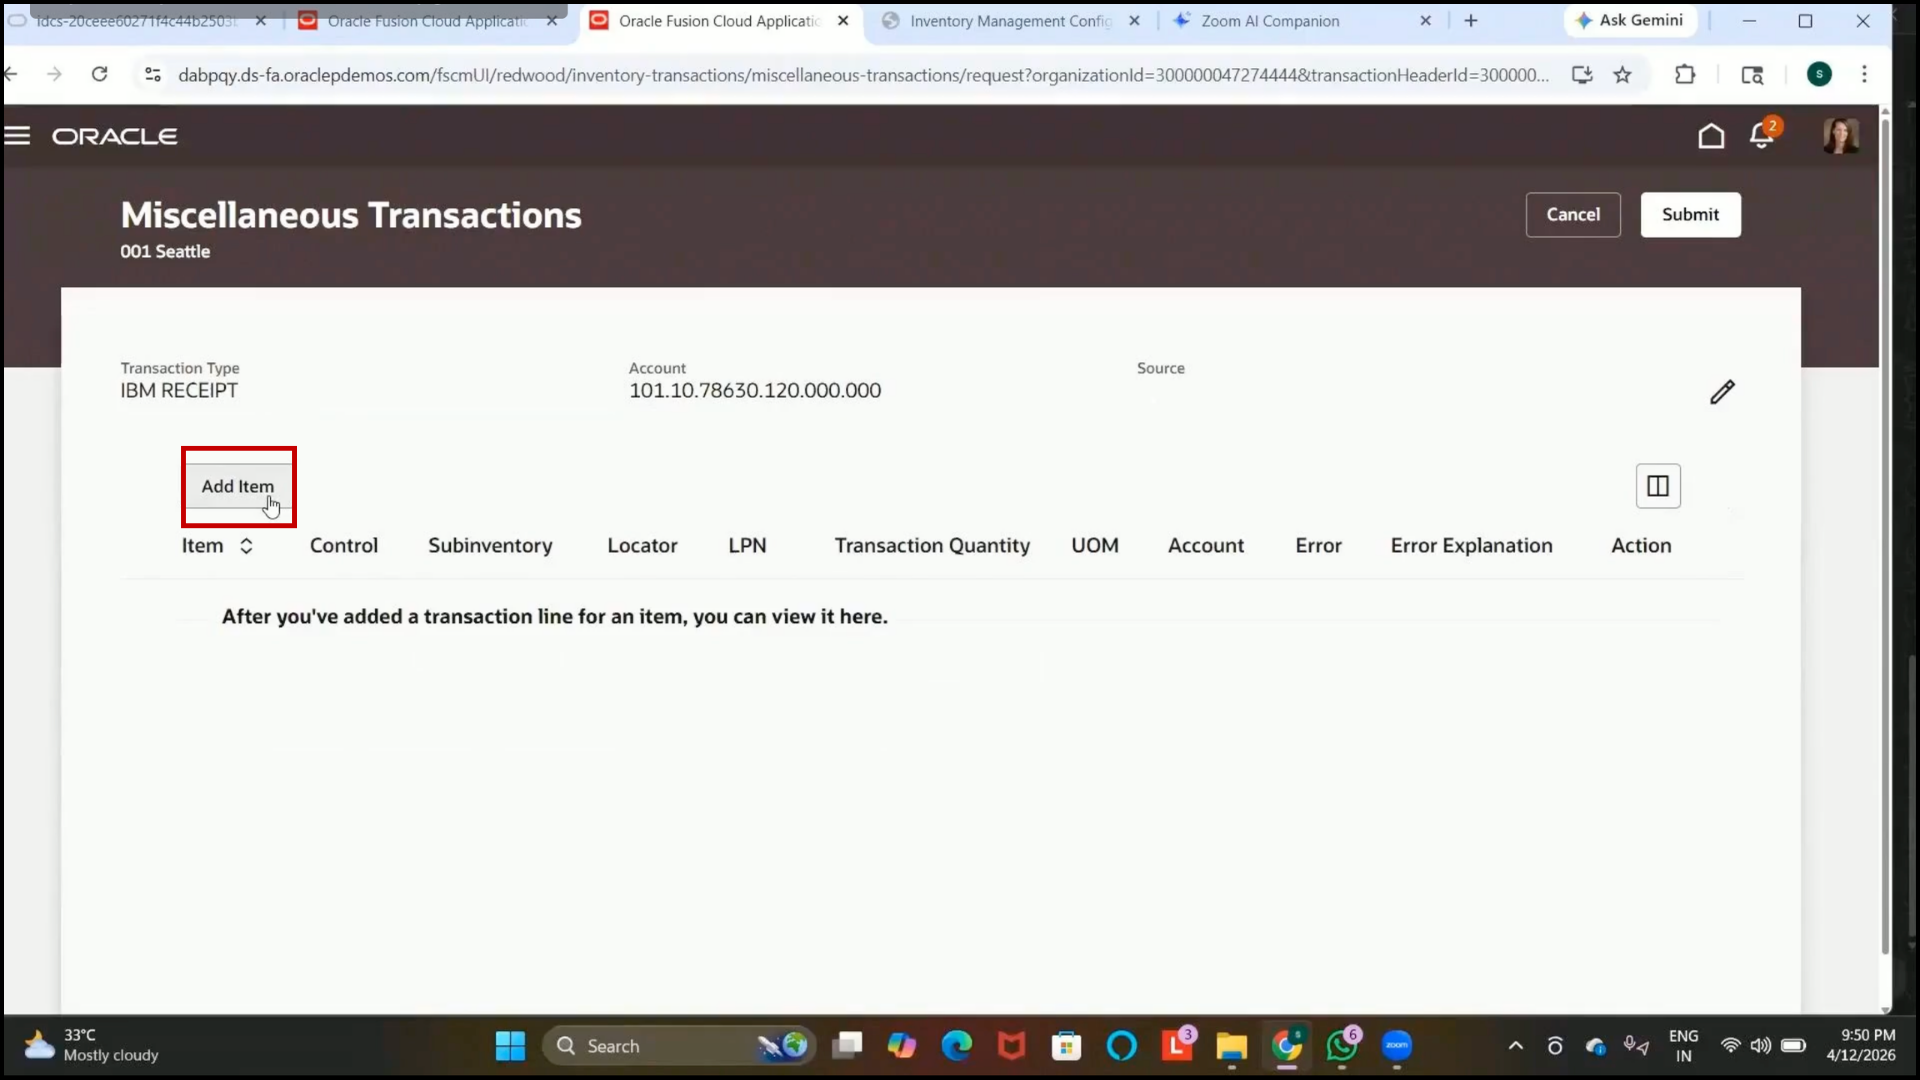
2. Select the required item, such as Internal Item.
3. Verify that item details are defaulted automatically:
4. Transaction Type
5. Item Description
6. Item Details
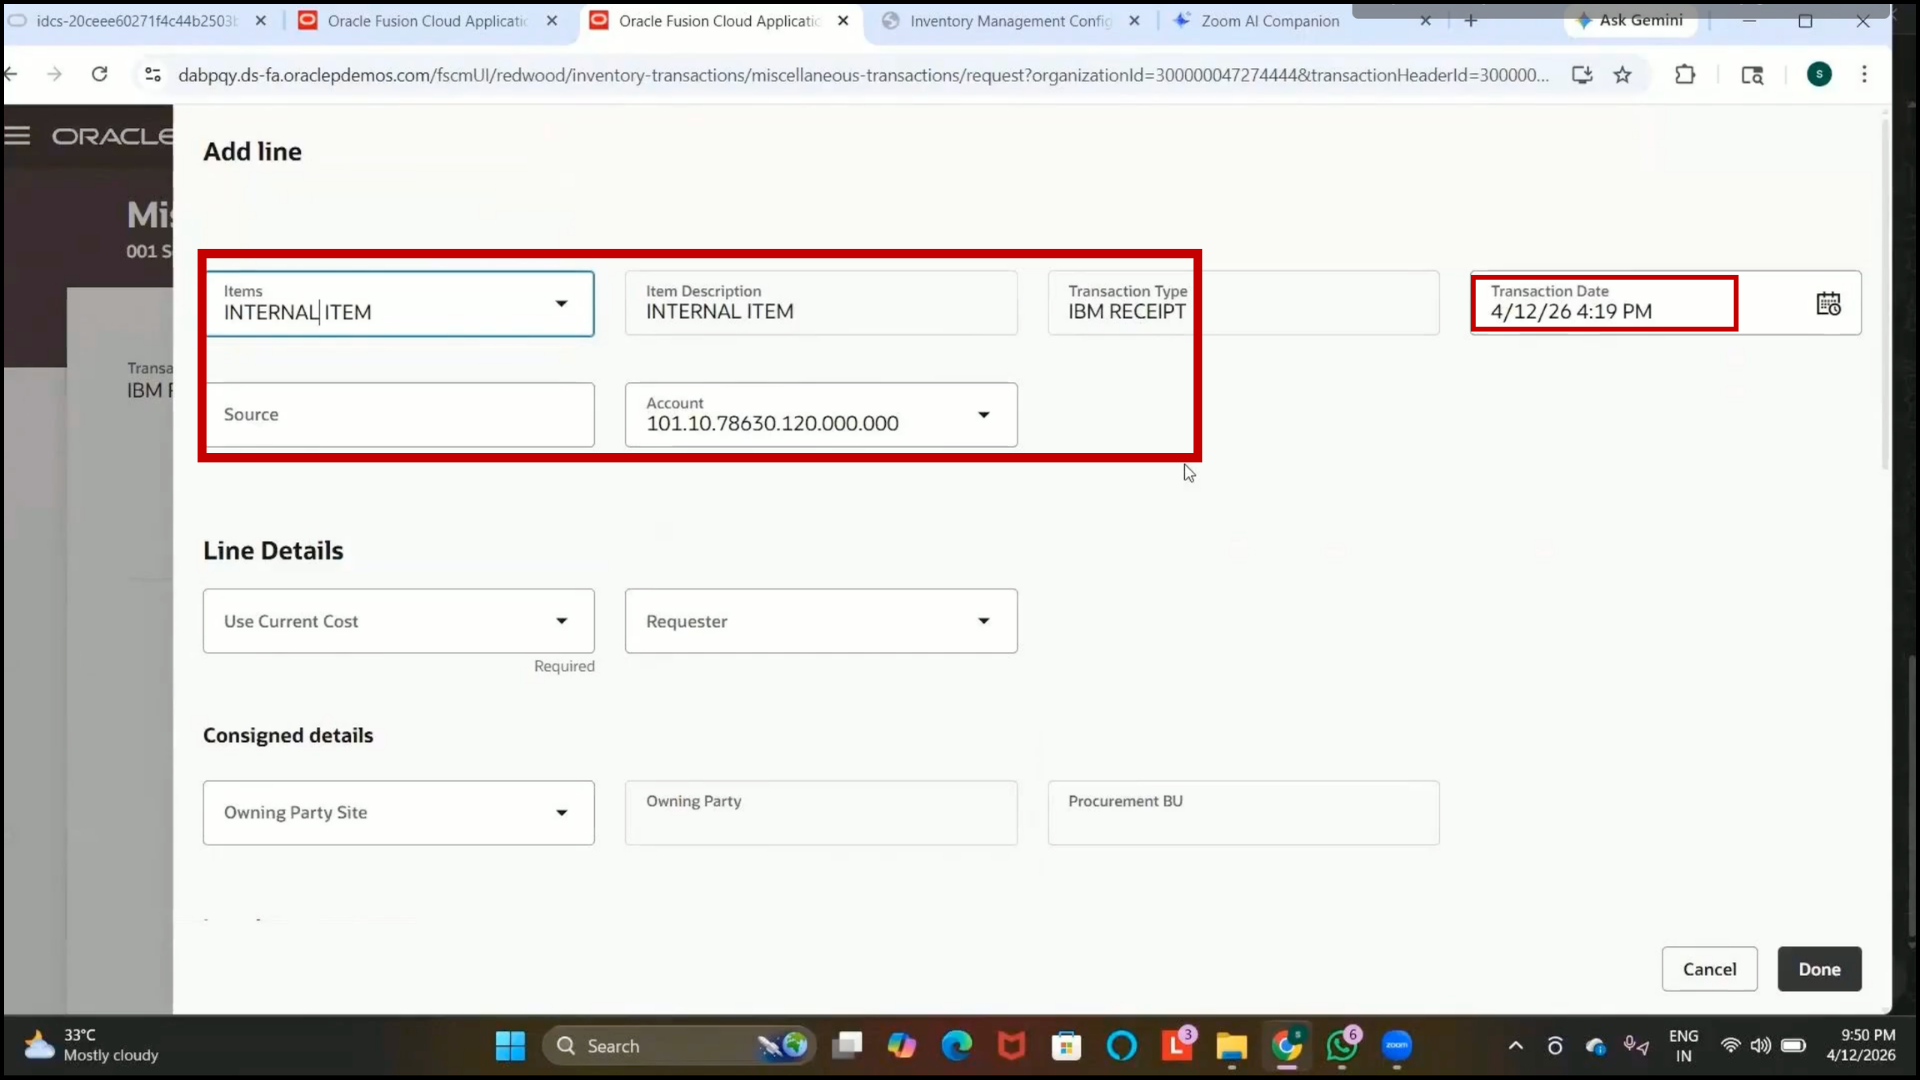
Step 283: Configure Item Cost
1. Review the Current Item Cost option.
2. Select “Yes” to use the existing system-defined item cost.
3. Select “No” if a different cost should be entered manually.
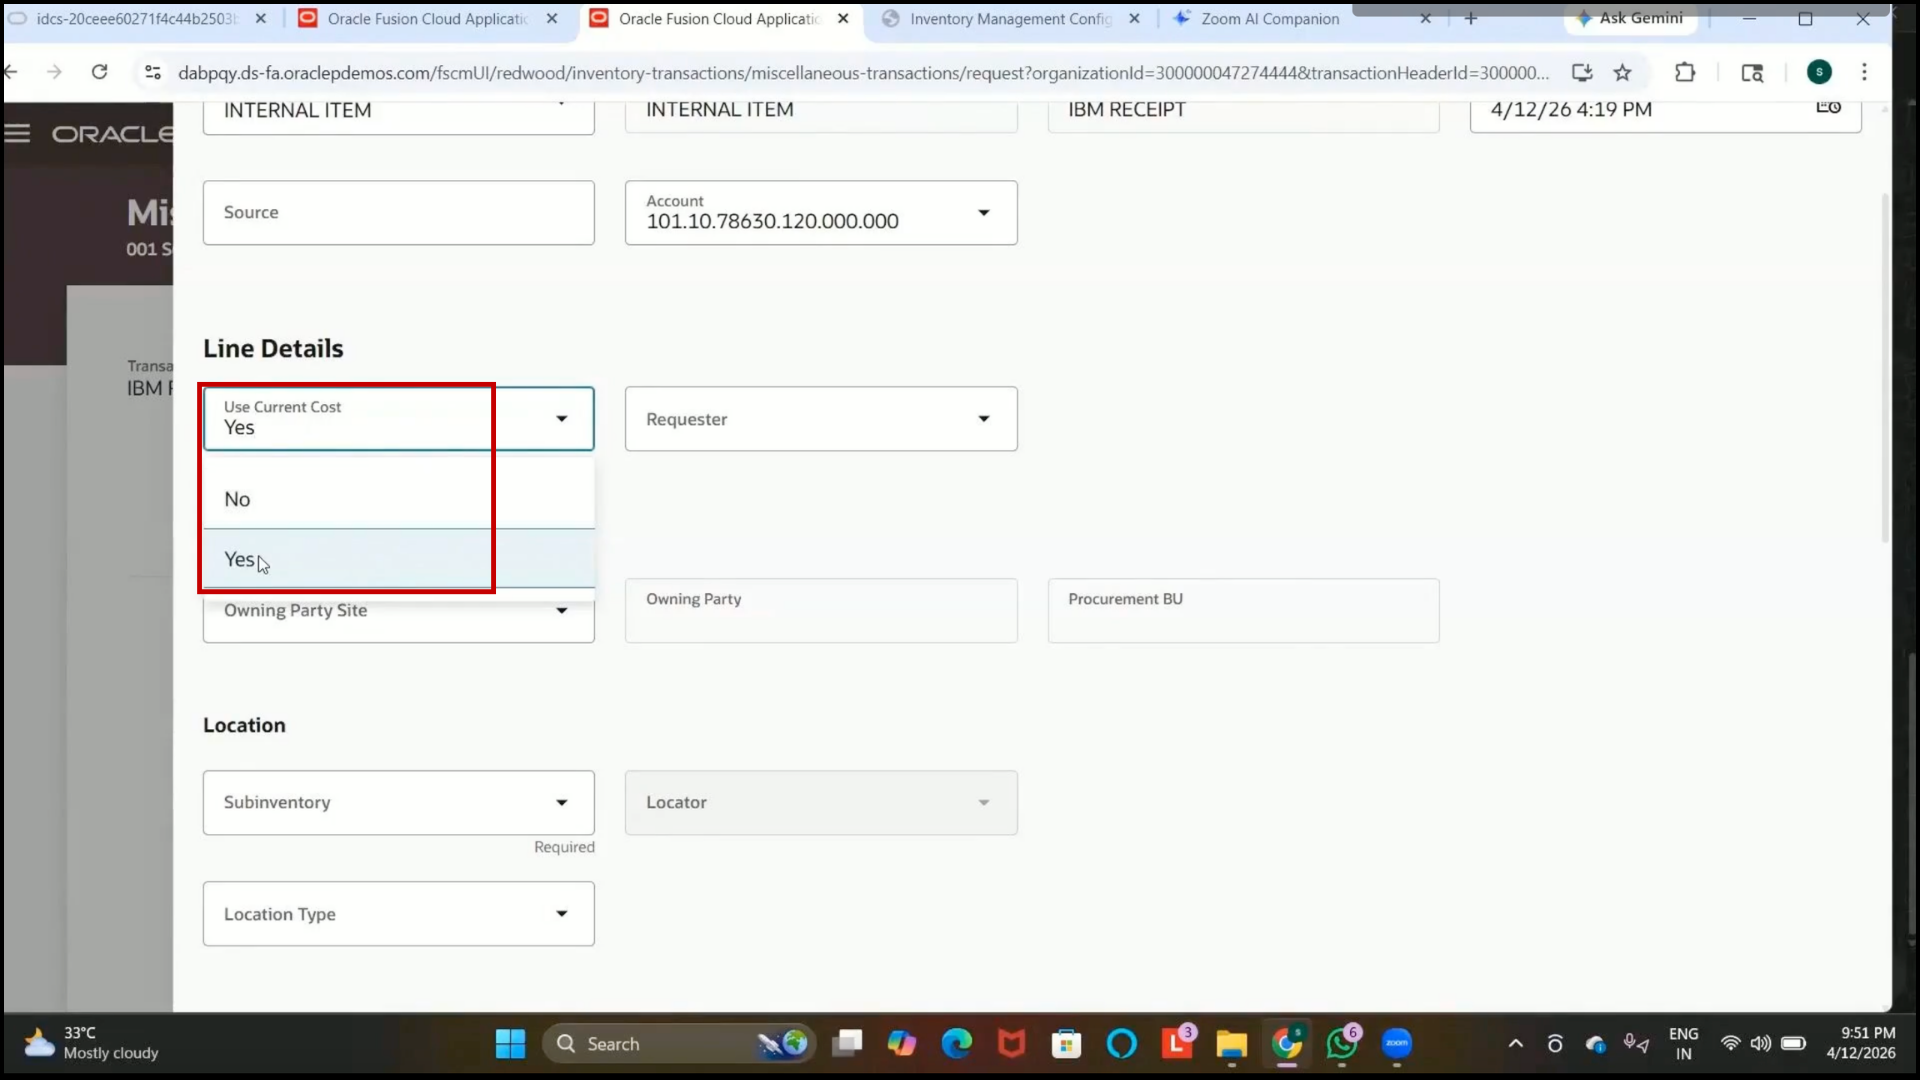
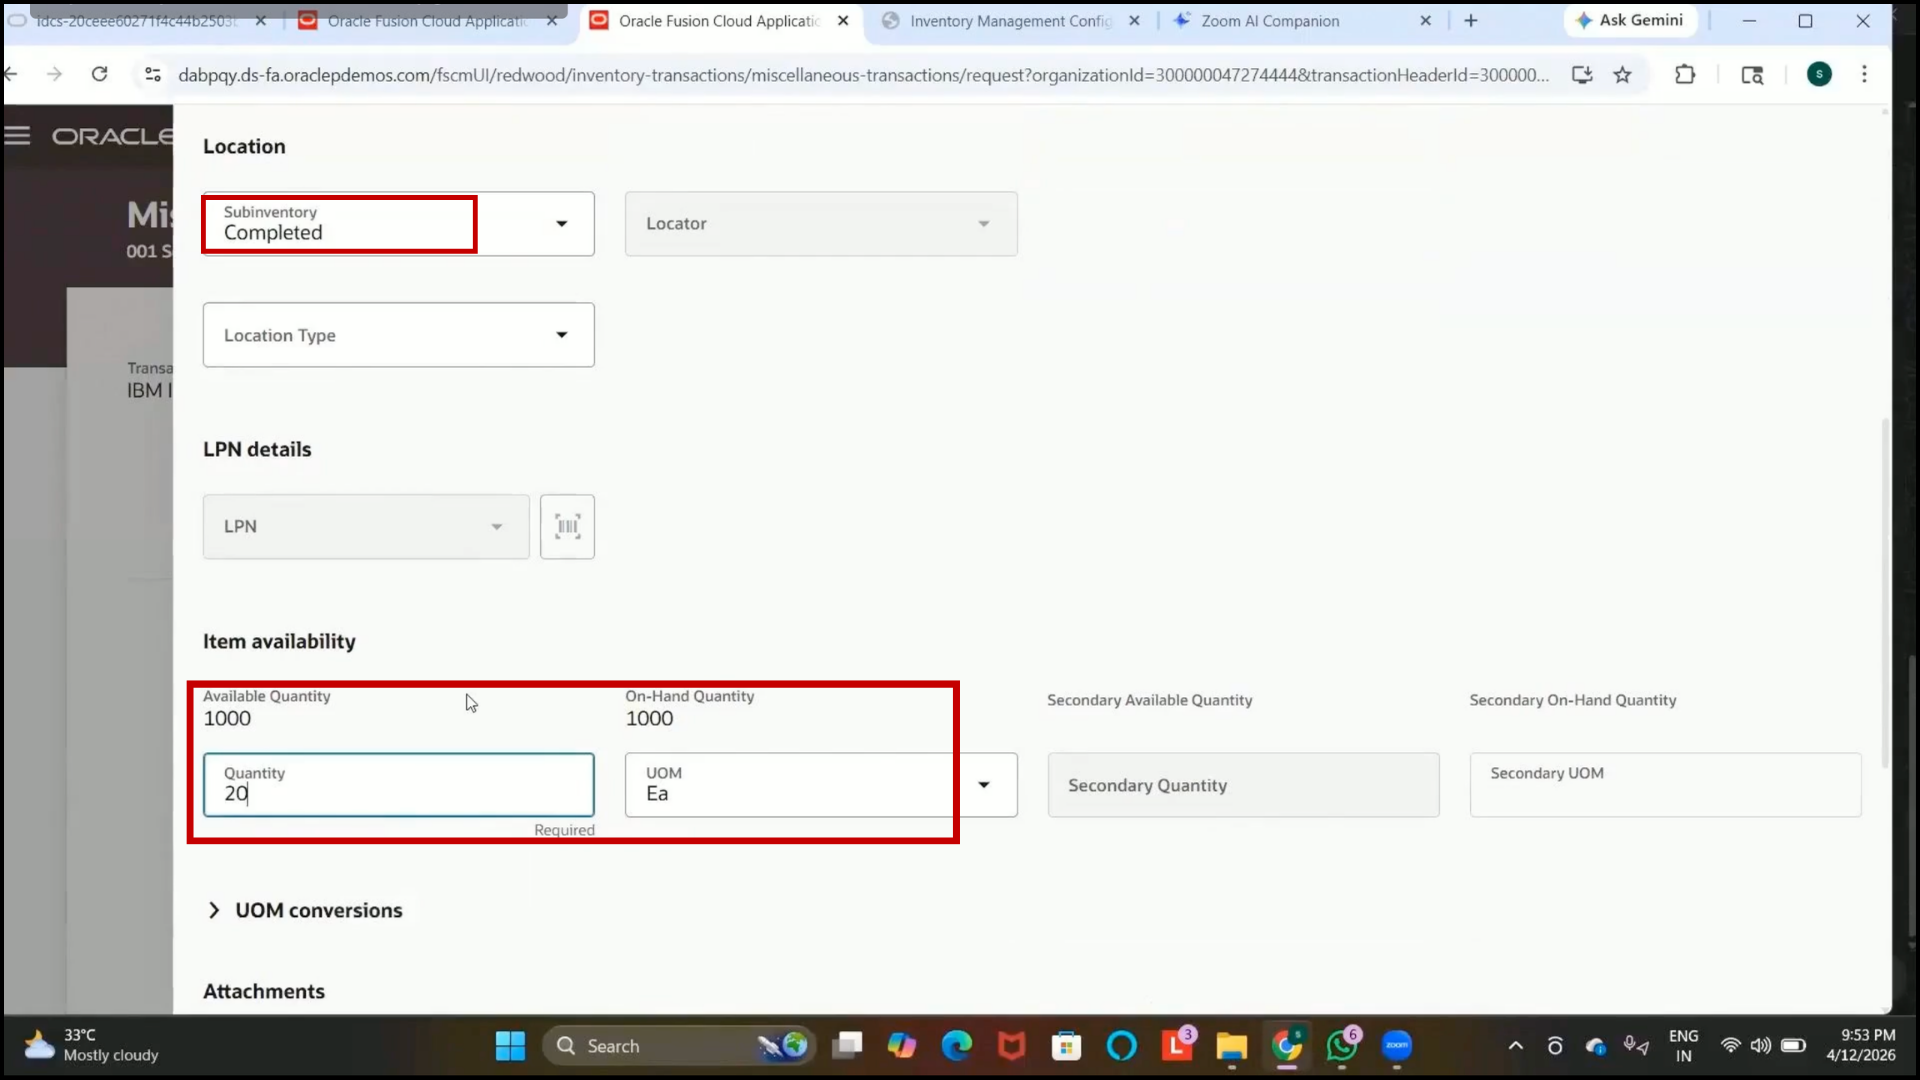
Step 284: Select Subinventory for Receipt
1. In the Subinventory field, select the required subinventory.
2. Select the “Completed” subinventory if applicable.
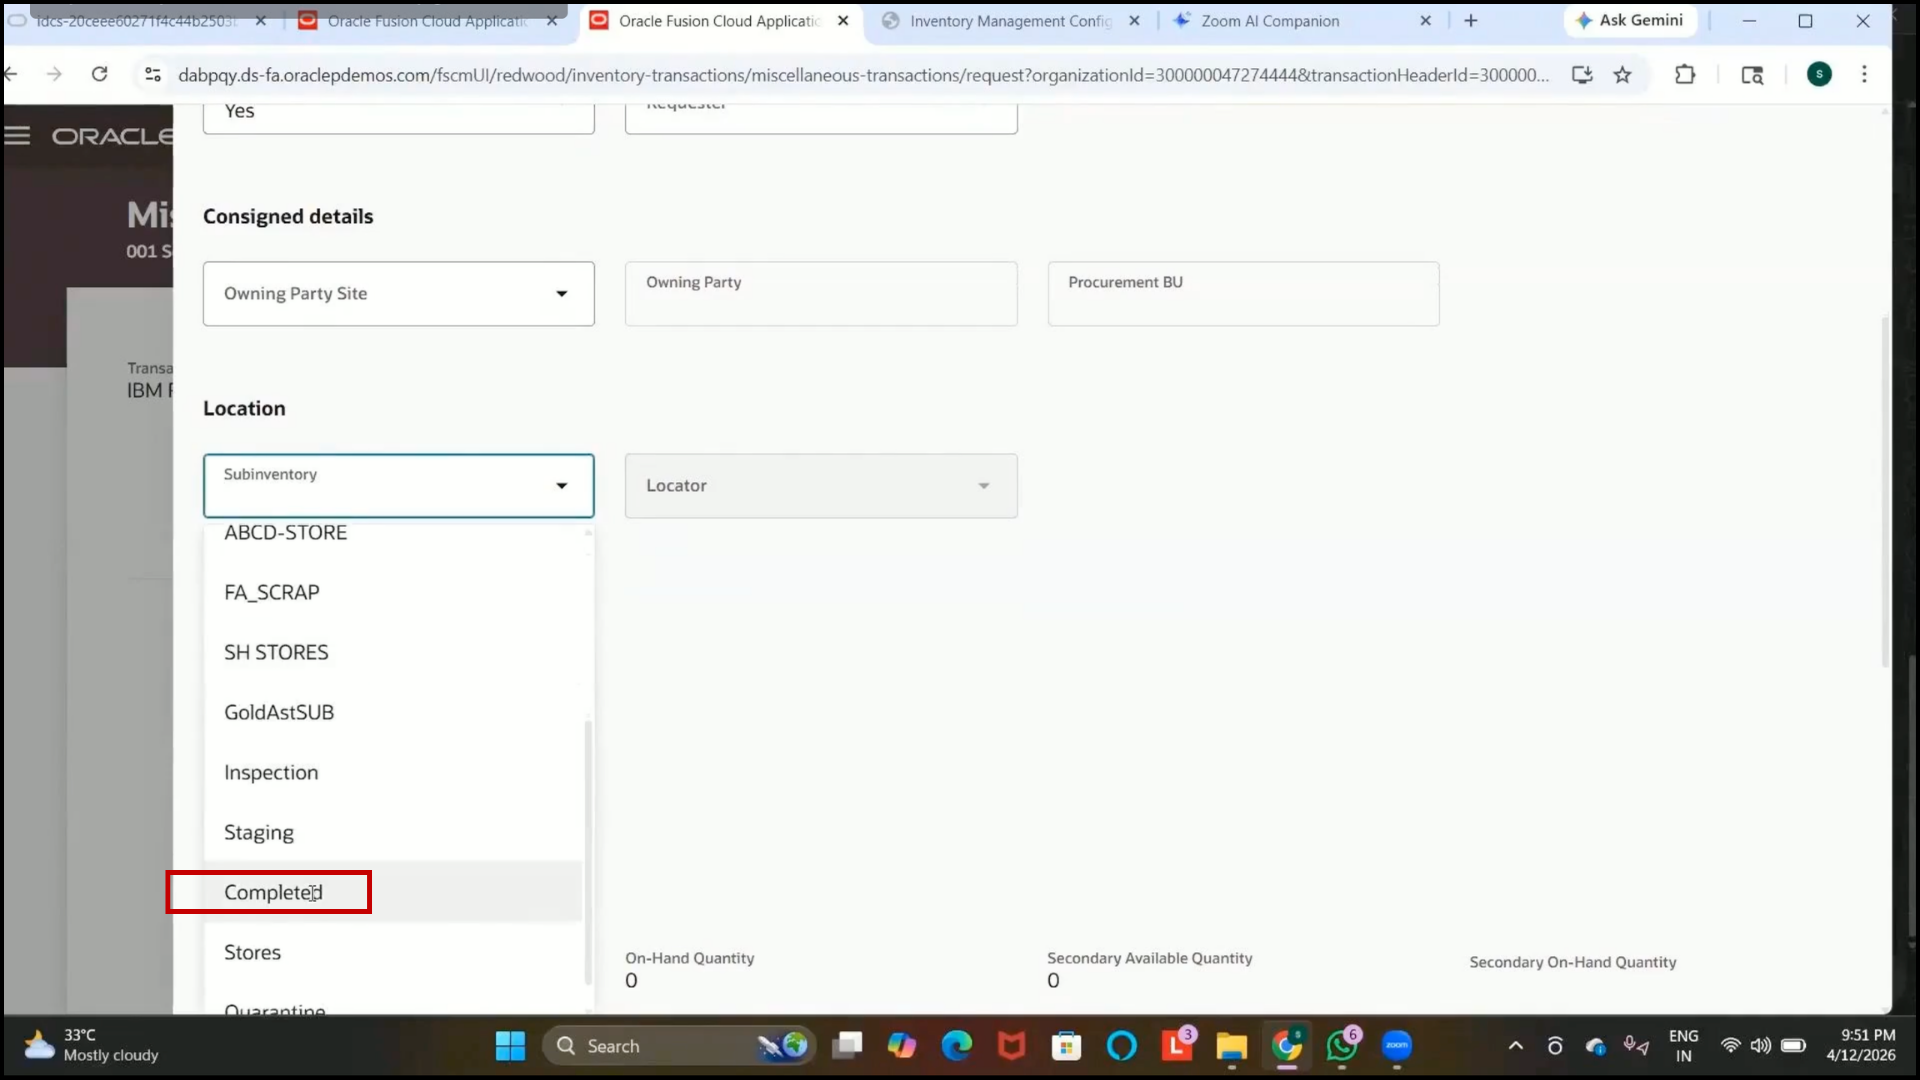
Step 285: Enter Receipt Quantity
1. Enter the required quantity for the receipt transaction.
2. Example:
3. Quantity: 1000
Step 286: Add Attachments and Complete Entry
1. Add supporting attachments if required.
2.Click on Done after entering all details.
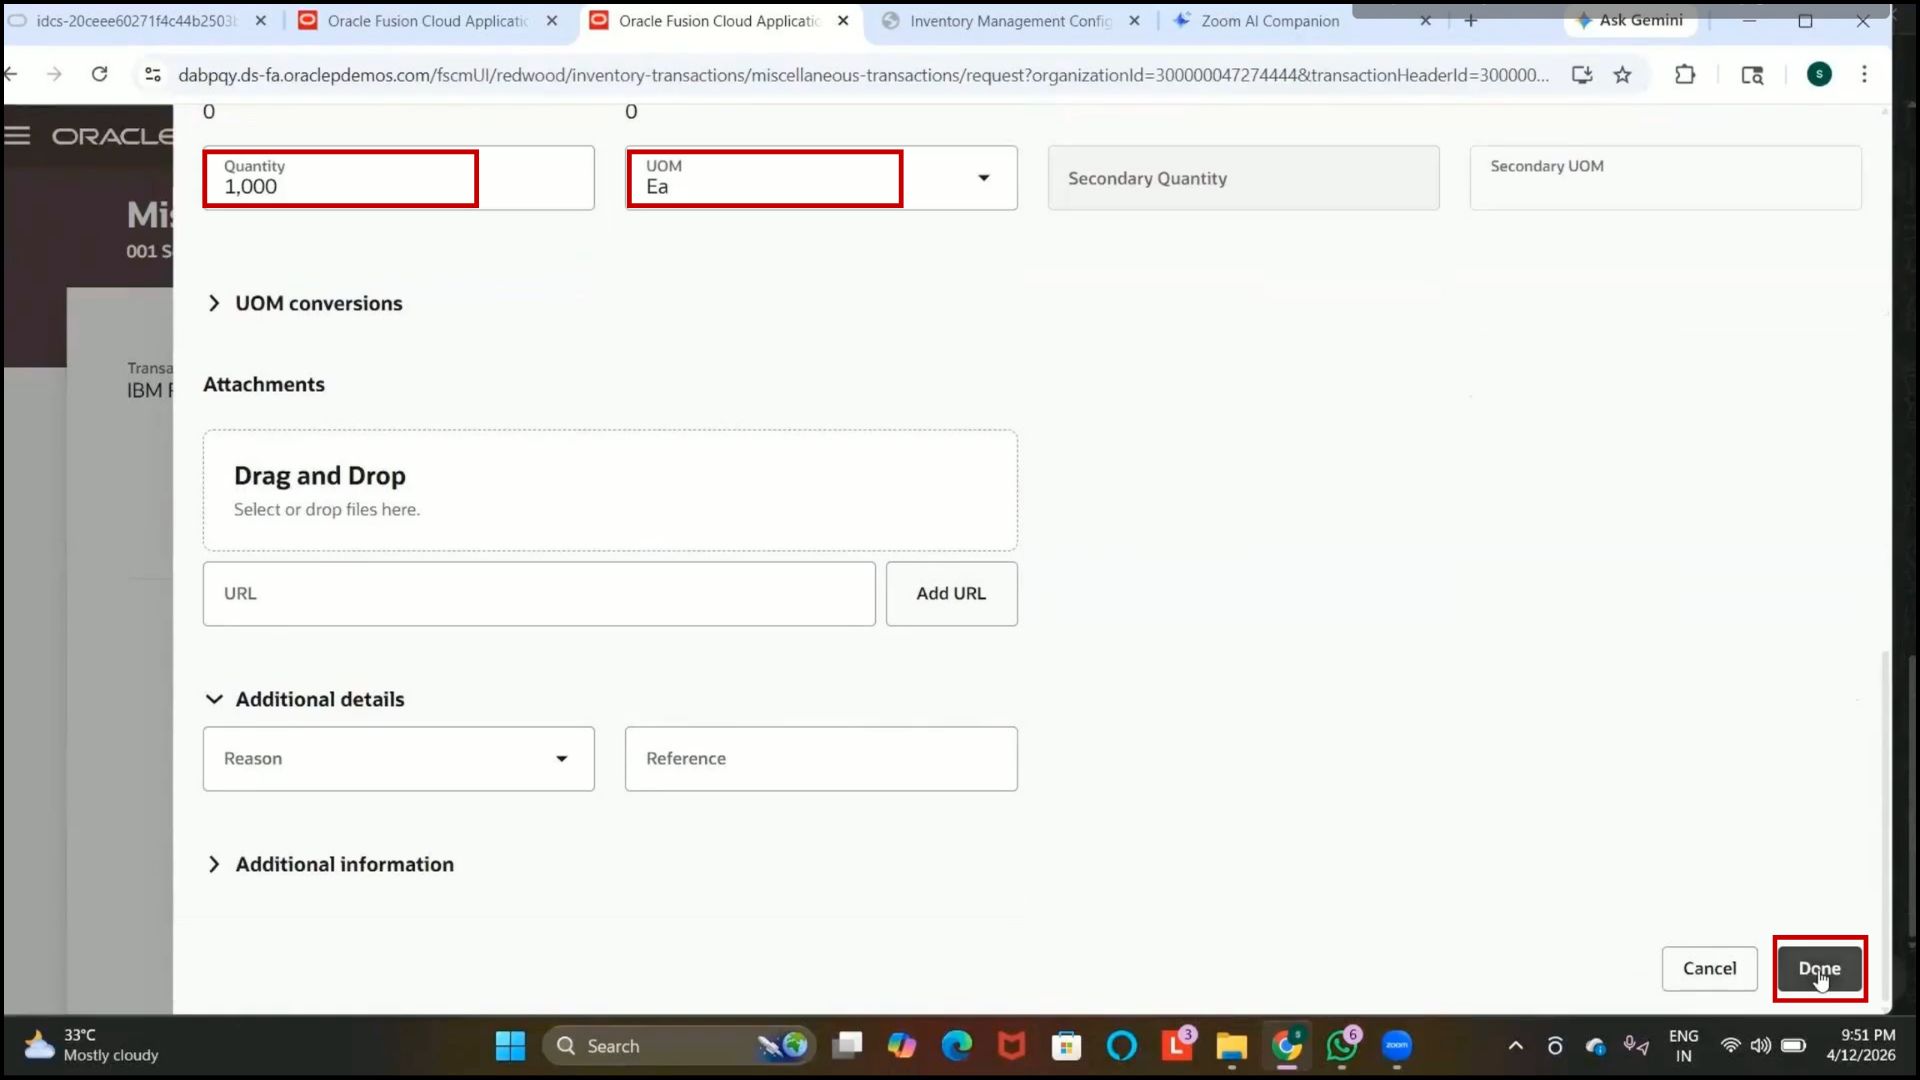
3. Review the transaction details displayed on the screen.
Step 287: Submit Miscellaneous Receipt Transaction
1. Click on Submit.
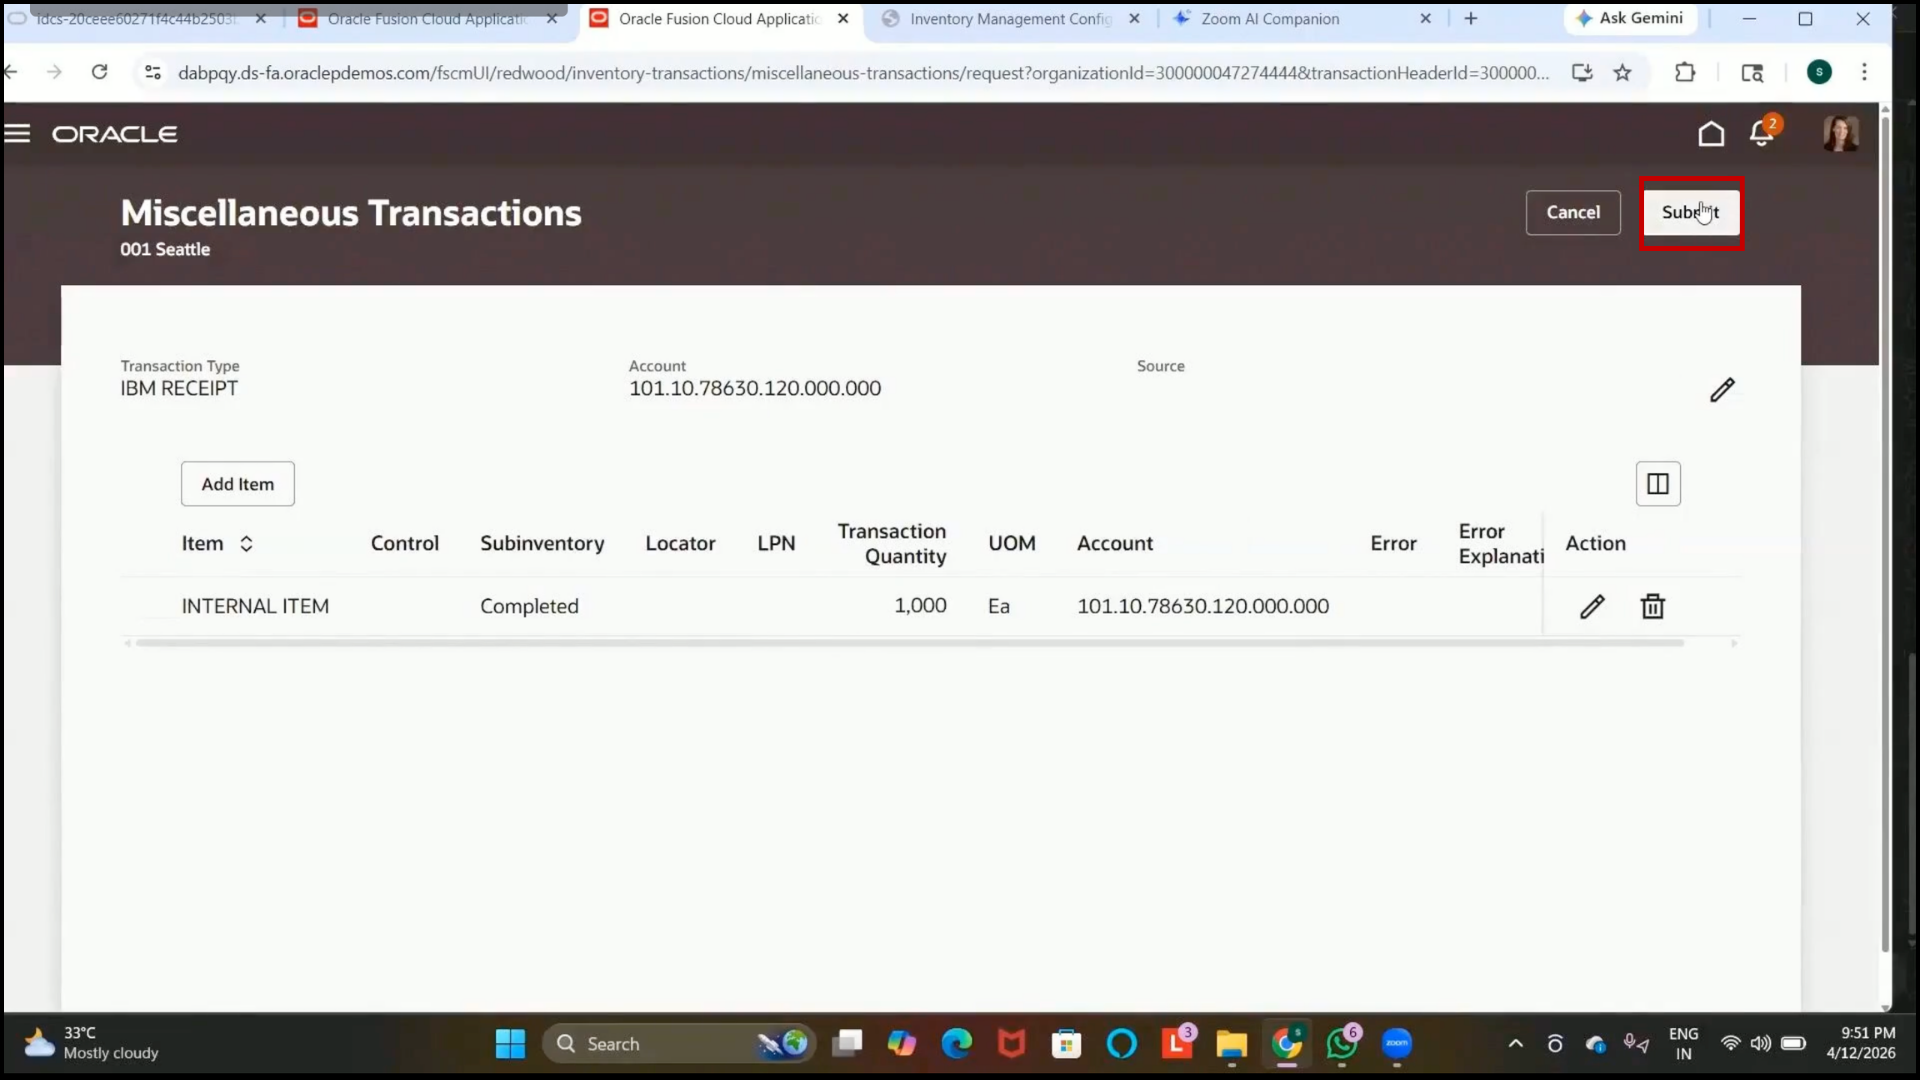
2. Verify that the miscellaneous receipt transaction is created successfully.
3. Confirm that the inventory quantity increases accordingly.

Step 288: Review Miscellaneous Receipt Purpose
1. Understand that miscellaneous receipt transactions are ad-hoc inventory transactions.
2. Use them to increase item quantity without
3. Purchase Orders
4. Sales Orders
Step 289: Create Miscellaneous Issue Transaction
1. Open Create Miscellaneous Transaction again.
2. Click Edit Icon
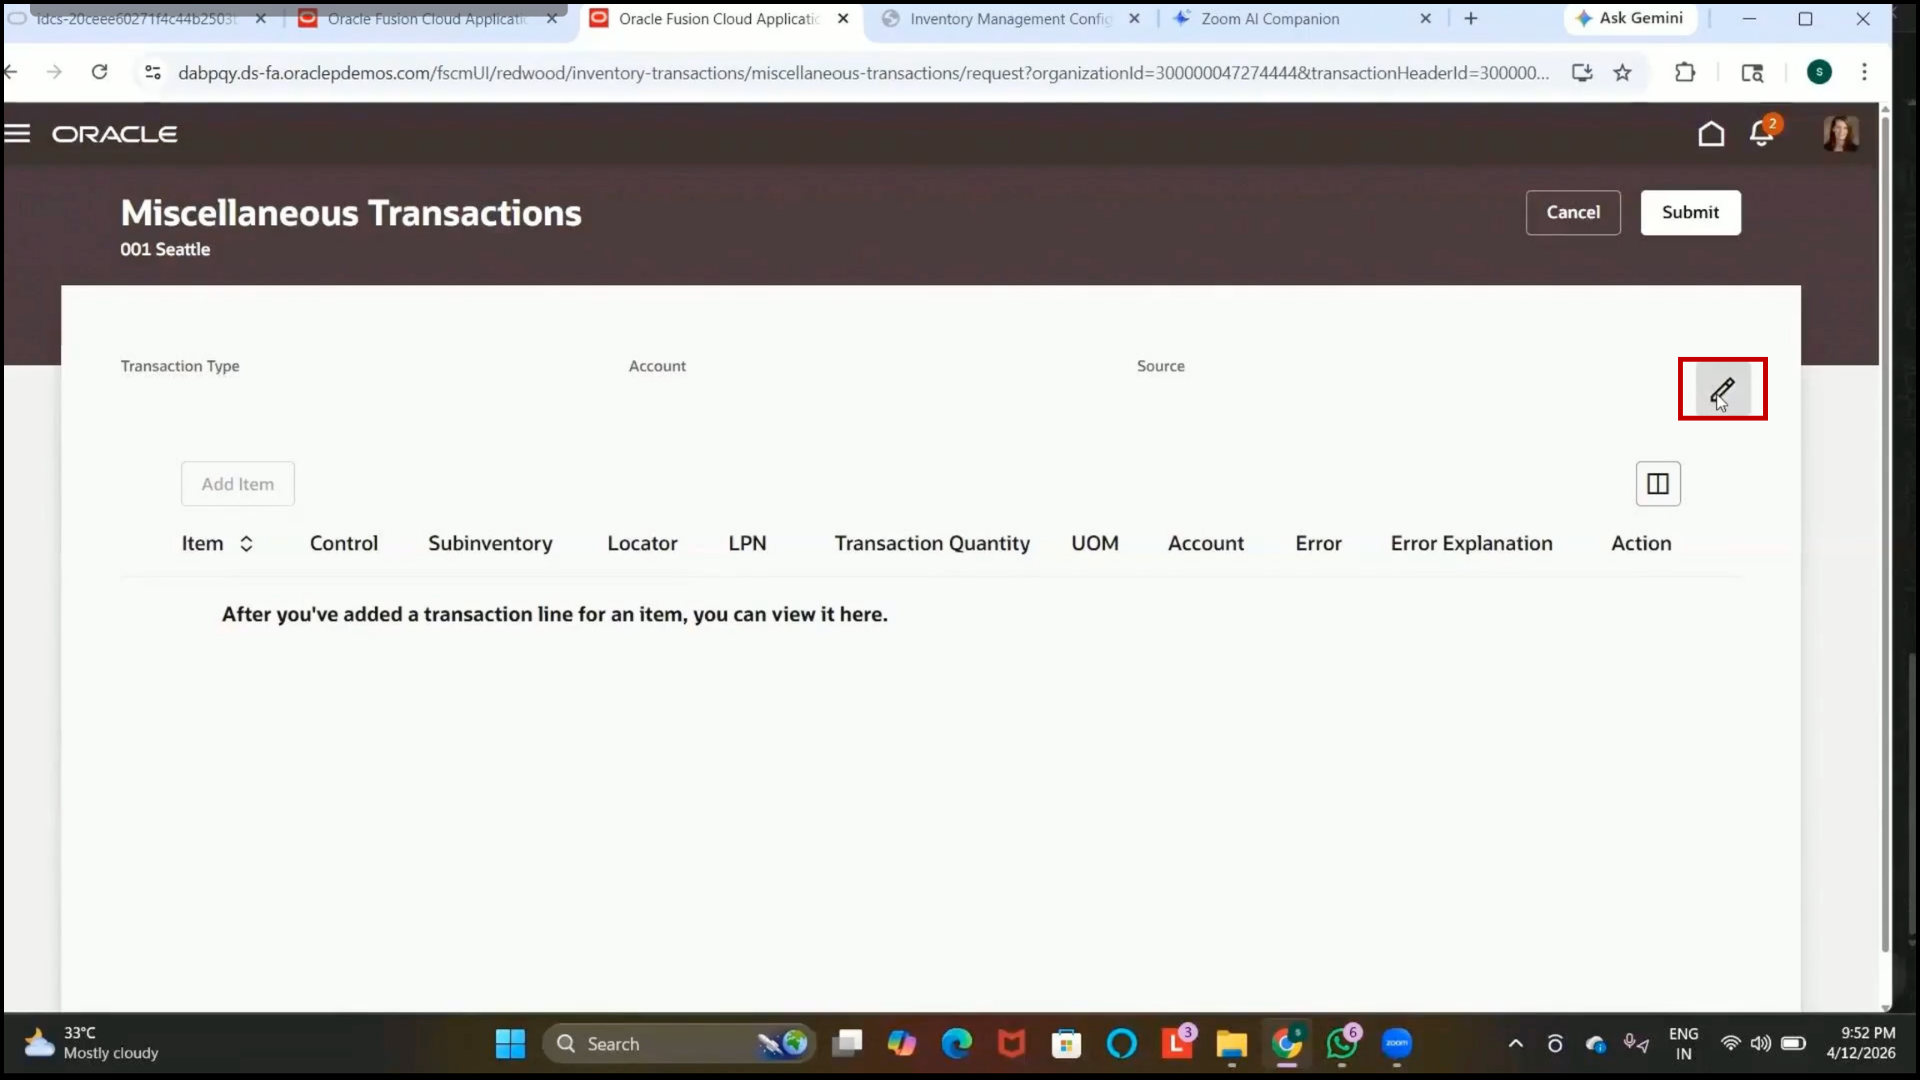
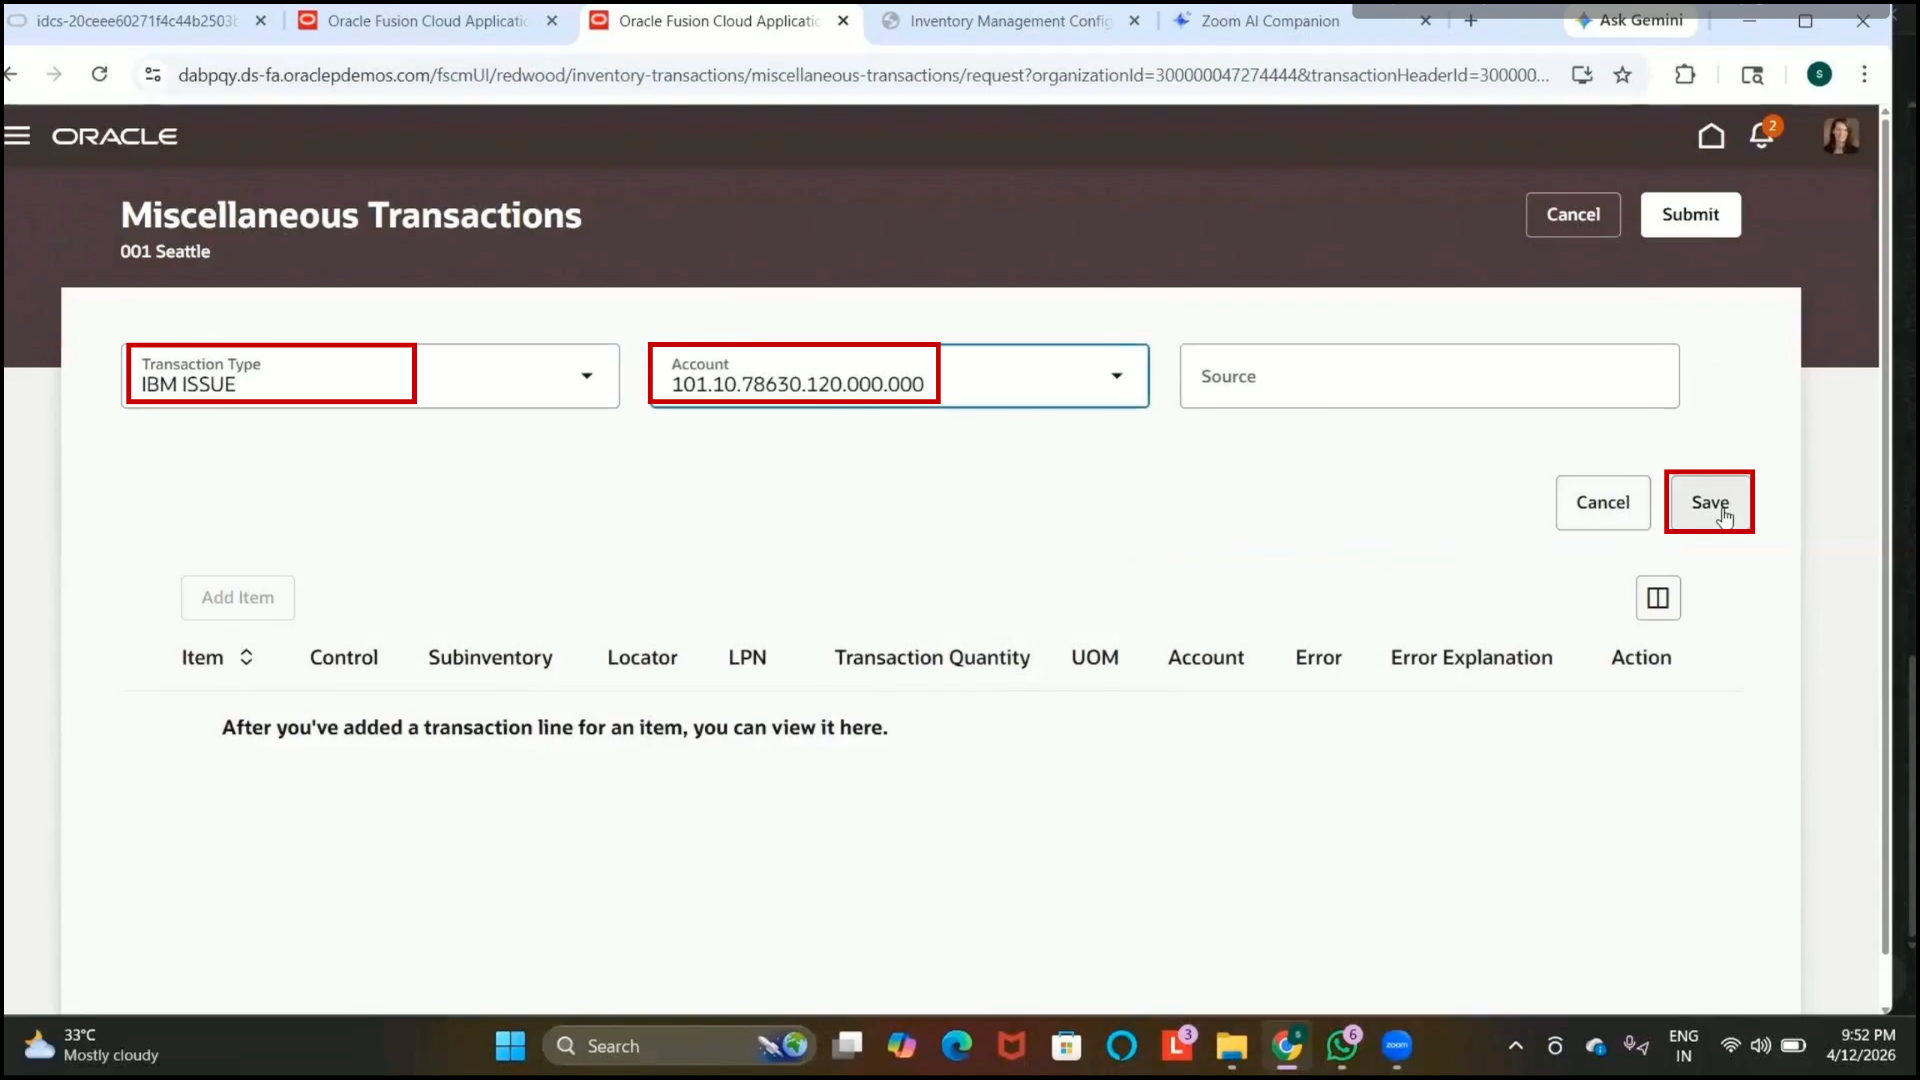
3. Select “IBM Issue” as the transaction type.
4. Select the required accounting combination.
5.Click on Save.
Step 290: Add Item for Miscellaneous Issue
1. Click on Add Item.
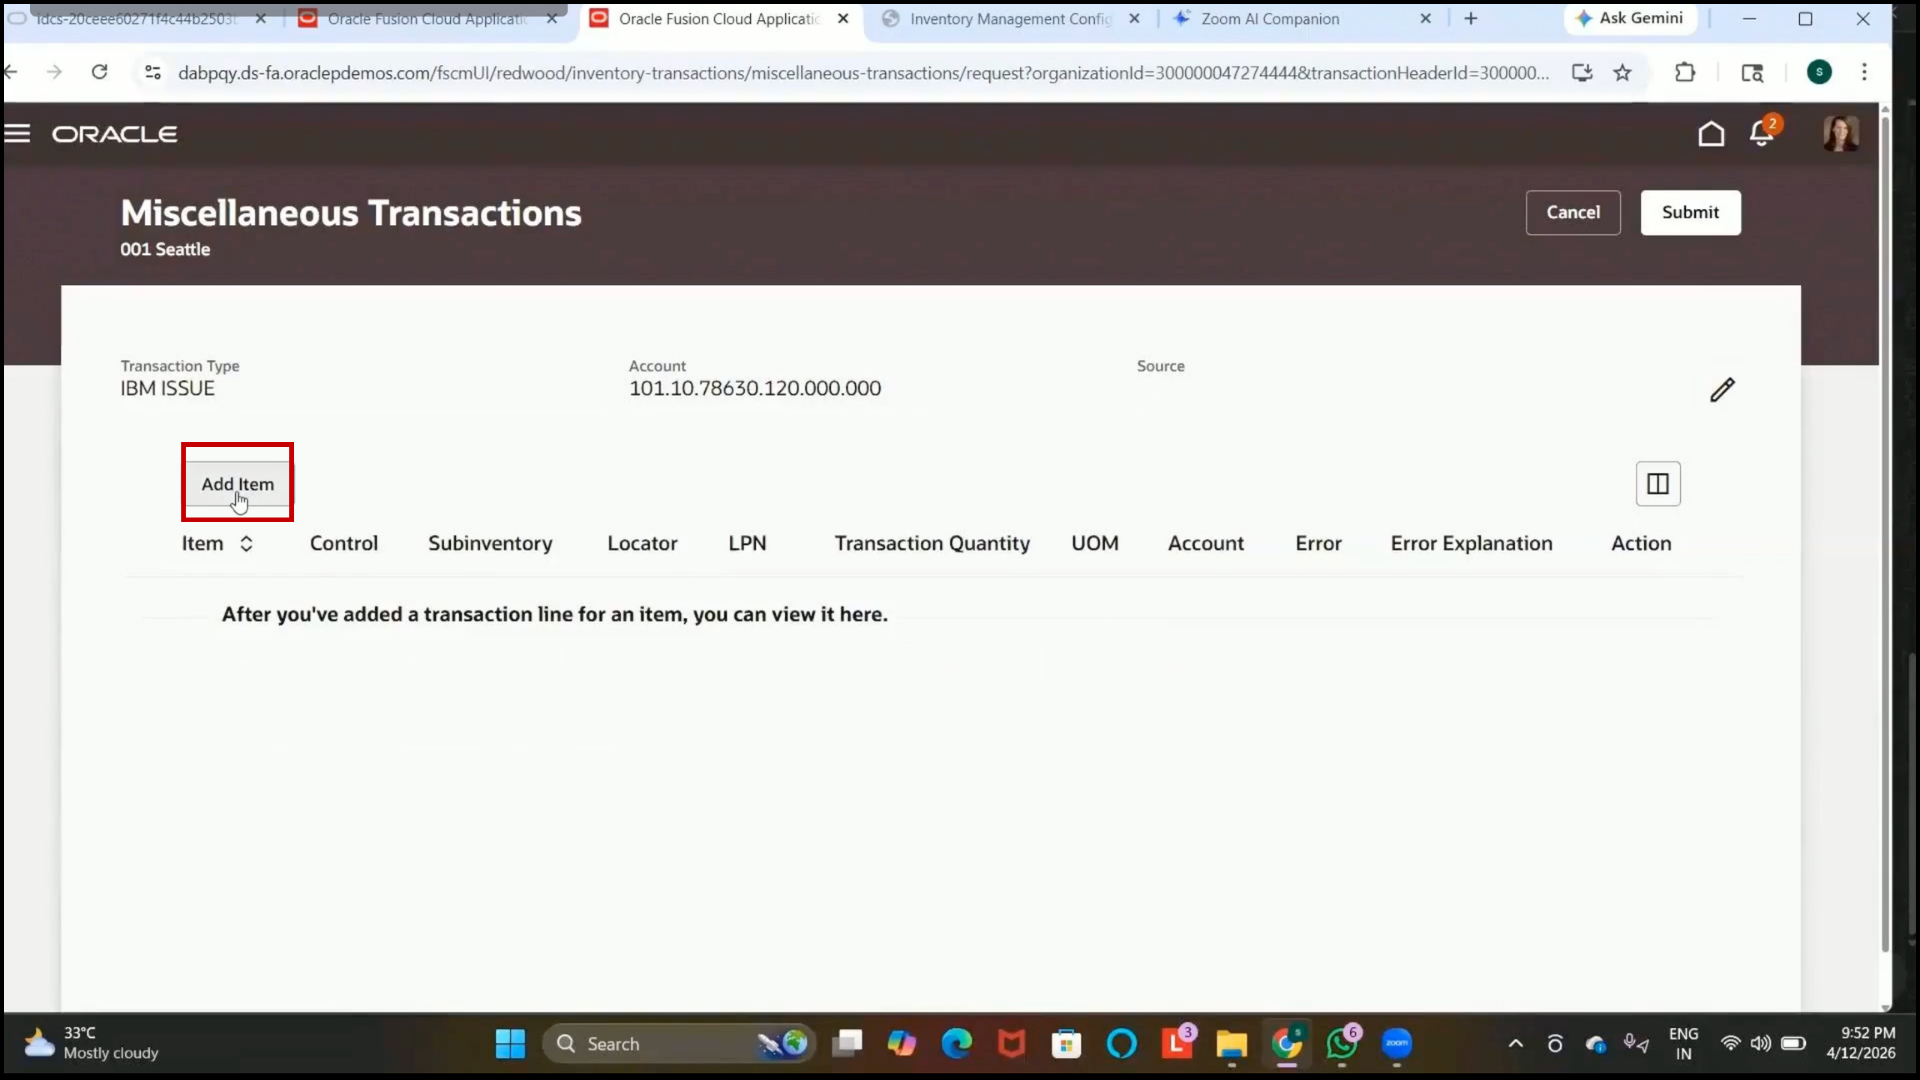
2. Select the internal item created previously.
3. Verify the current item cost details.
Step 291: Select Subinventory for Issue
1. In the Subinventory field, select the Completed subinventory.
2. Verify that the available quantity is displayed correctly.
3. Confirm that the available quantity reflects the previously created receipt transaction.
Step 292: Enter Quantity for Miscellaneous Issue
1. Enter the quantity to be issued from inventory.
2. Example:
3. Quantity: 20
4. Select the Unit of Measure (UOM) as Each.
Step 293: Complete Miscellaneous Issue Entry
1.Click on Done after entering all required details.
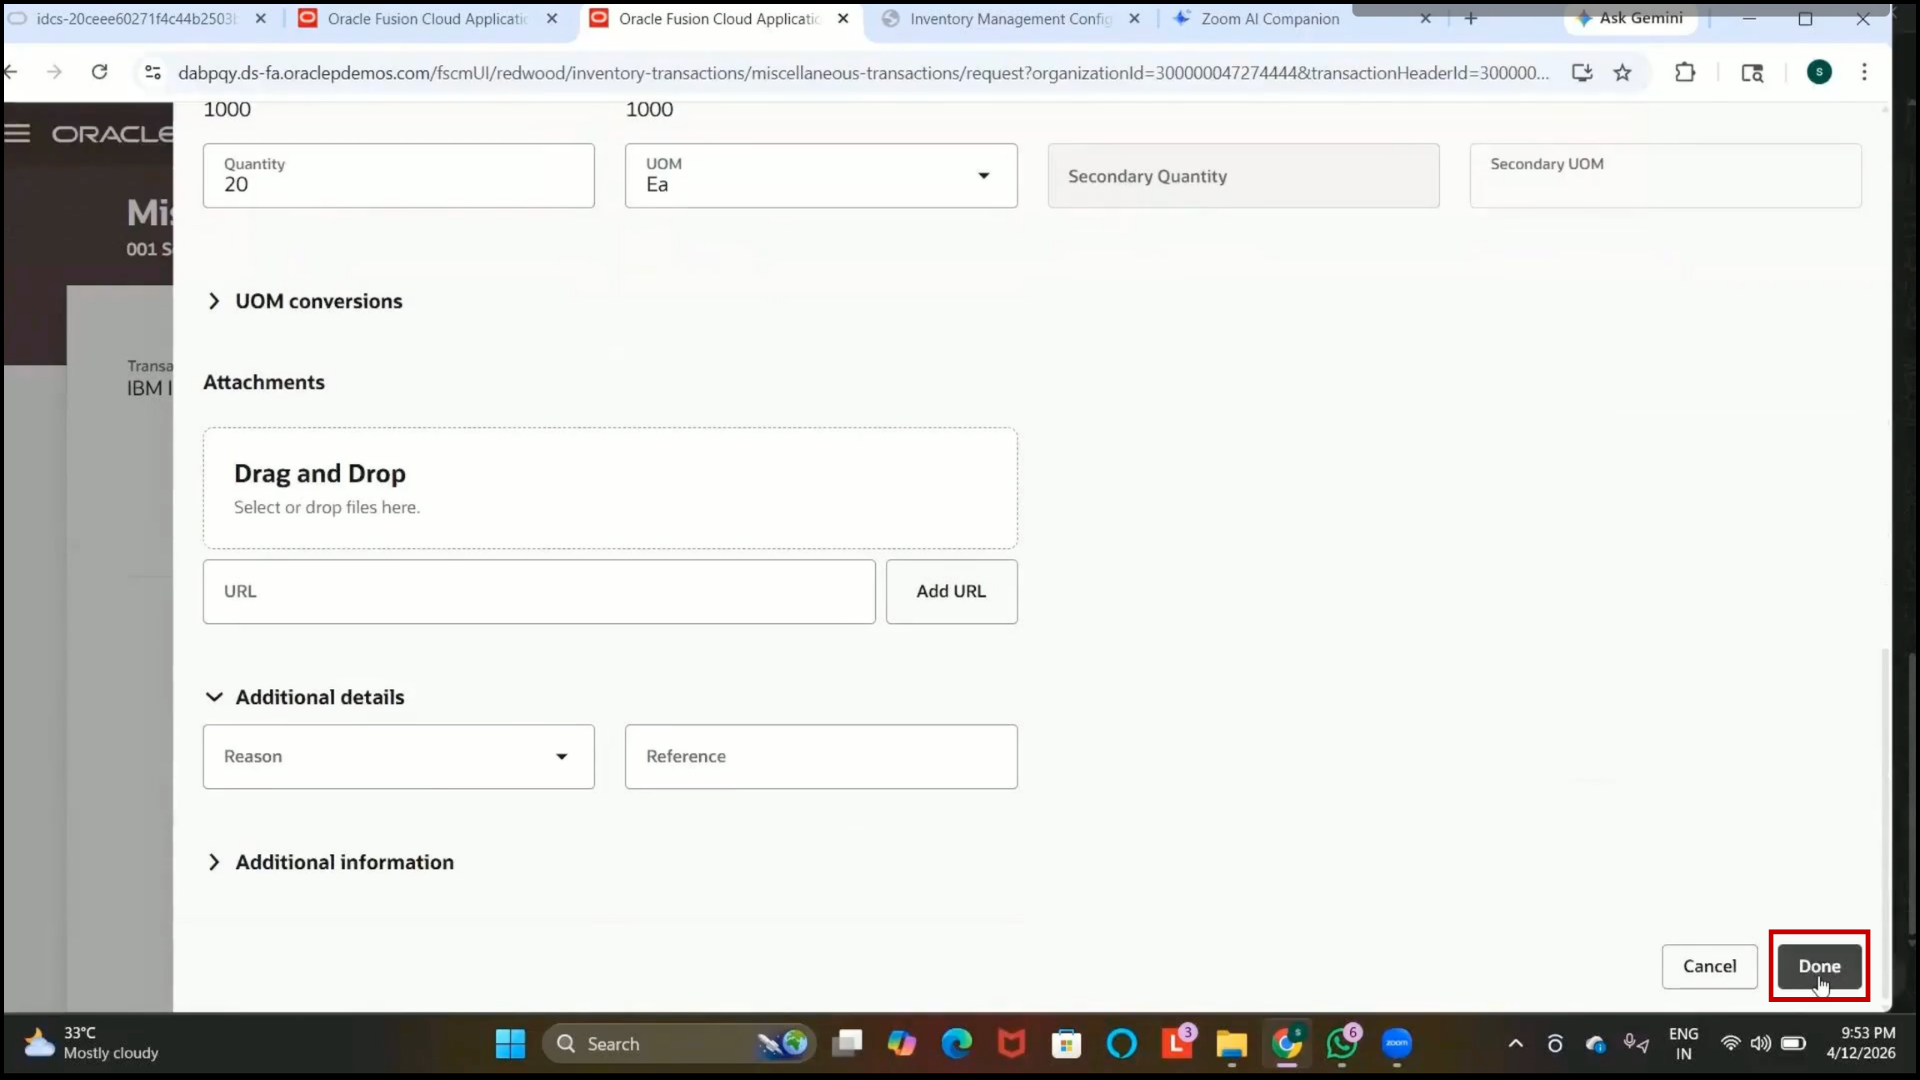
2. Review the transaction summary displayed on the screen.
Step 294: Submit Miscellaneous Issue Transaction
1. Click on Submit.

2. Verify that the miscellaneous issue transaction is completed successfully.
3. Confirm that the issued quantity is deducted from the inventory balance.
Step 295: Review Miscellaneous Issue Result
1. Verify that the issued quantity is removed from the available stock.
2. Example:
3. Original Quantity: 1000
4.Issued Quantity: 20
5. Remaining Quantity: 980
Step 296: Understand Subinventory Transfer
1. Review the purpose of subinventory transfer:
2. Moves items between subinventories within the same inventory organization.
3. Understand the following:
4. Source subinventory contains the current stock.
5. Destination Subinventory receives the transferred stock.
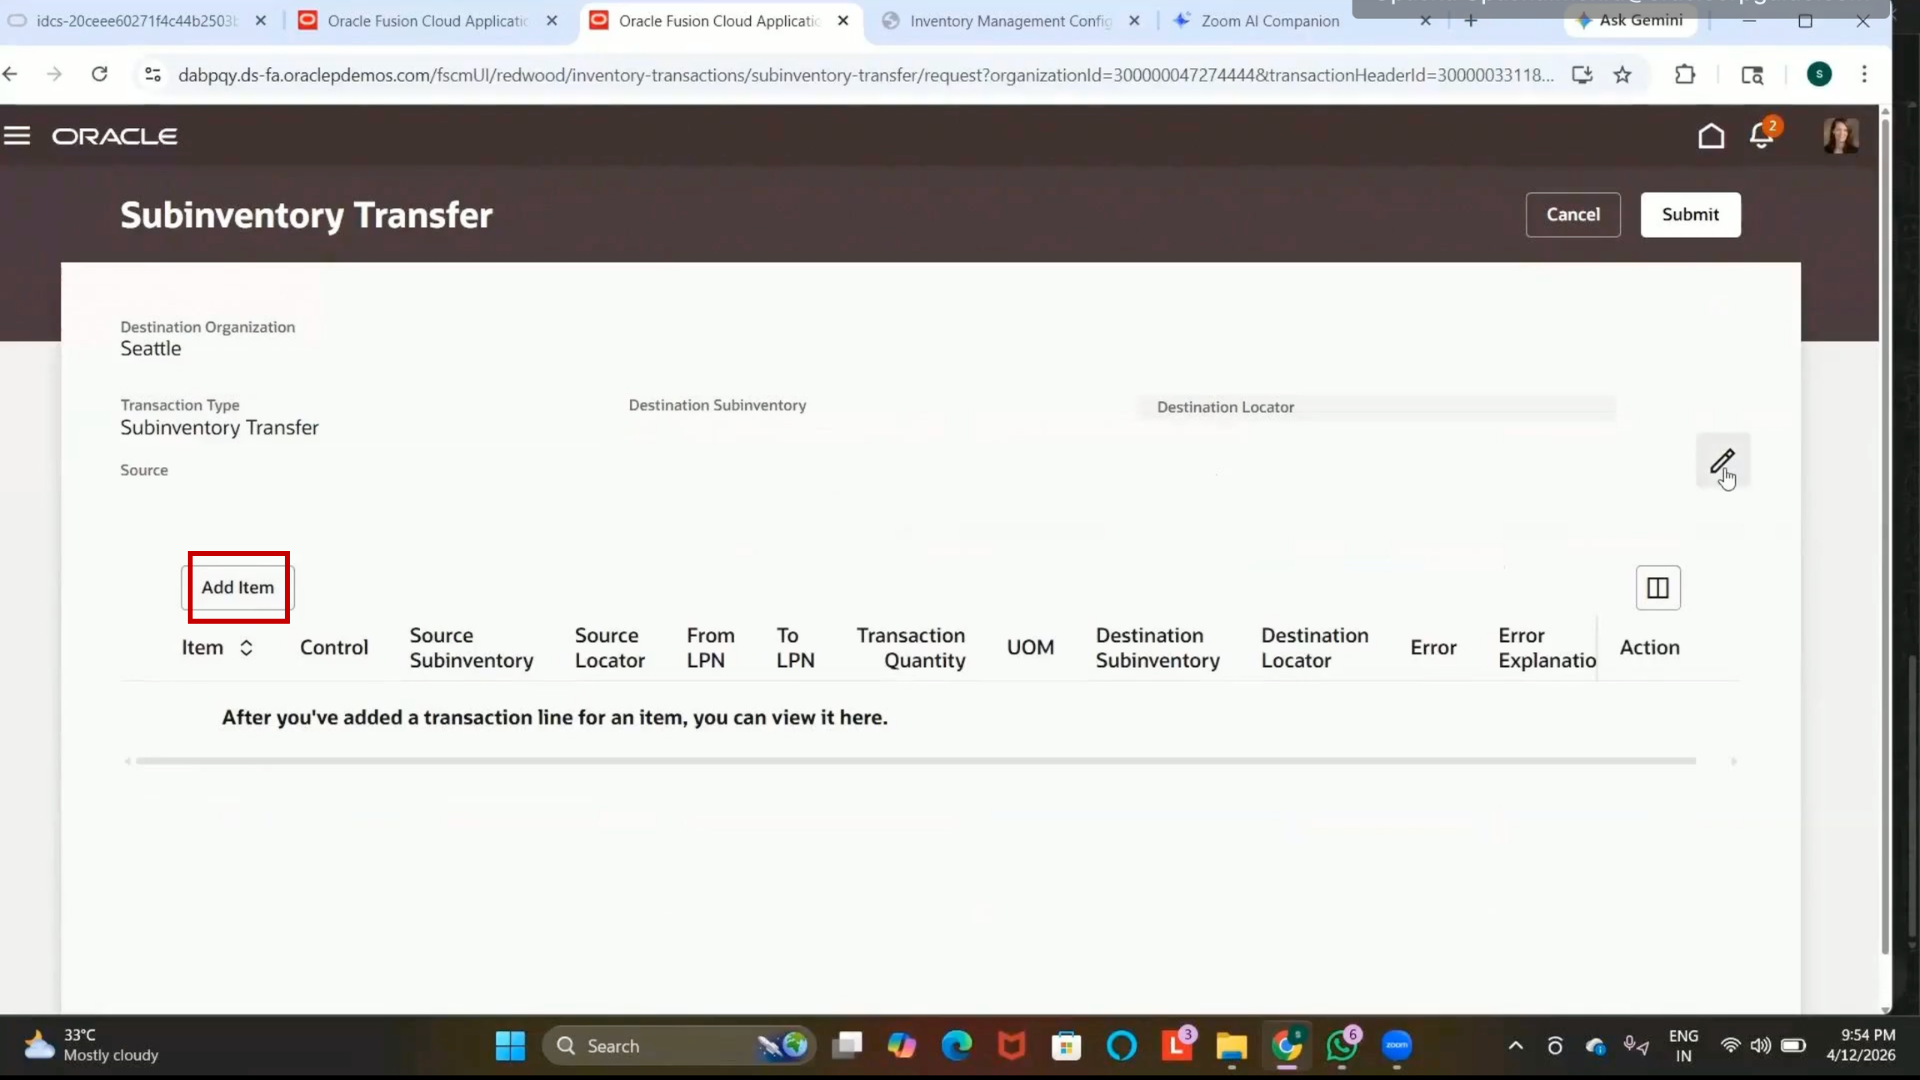
Step 297: Create Subinventory Transfer
1. Open the Subinventory Transfer page.
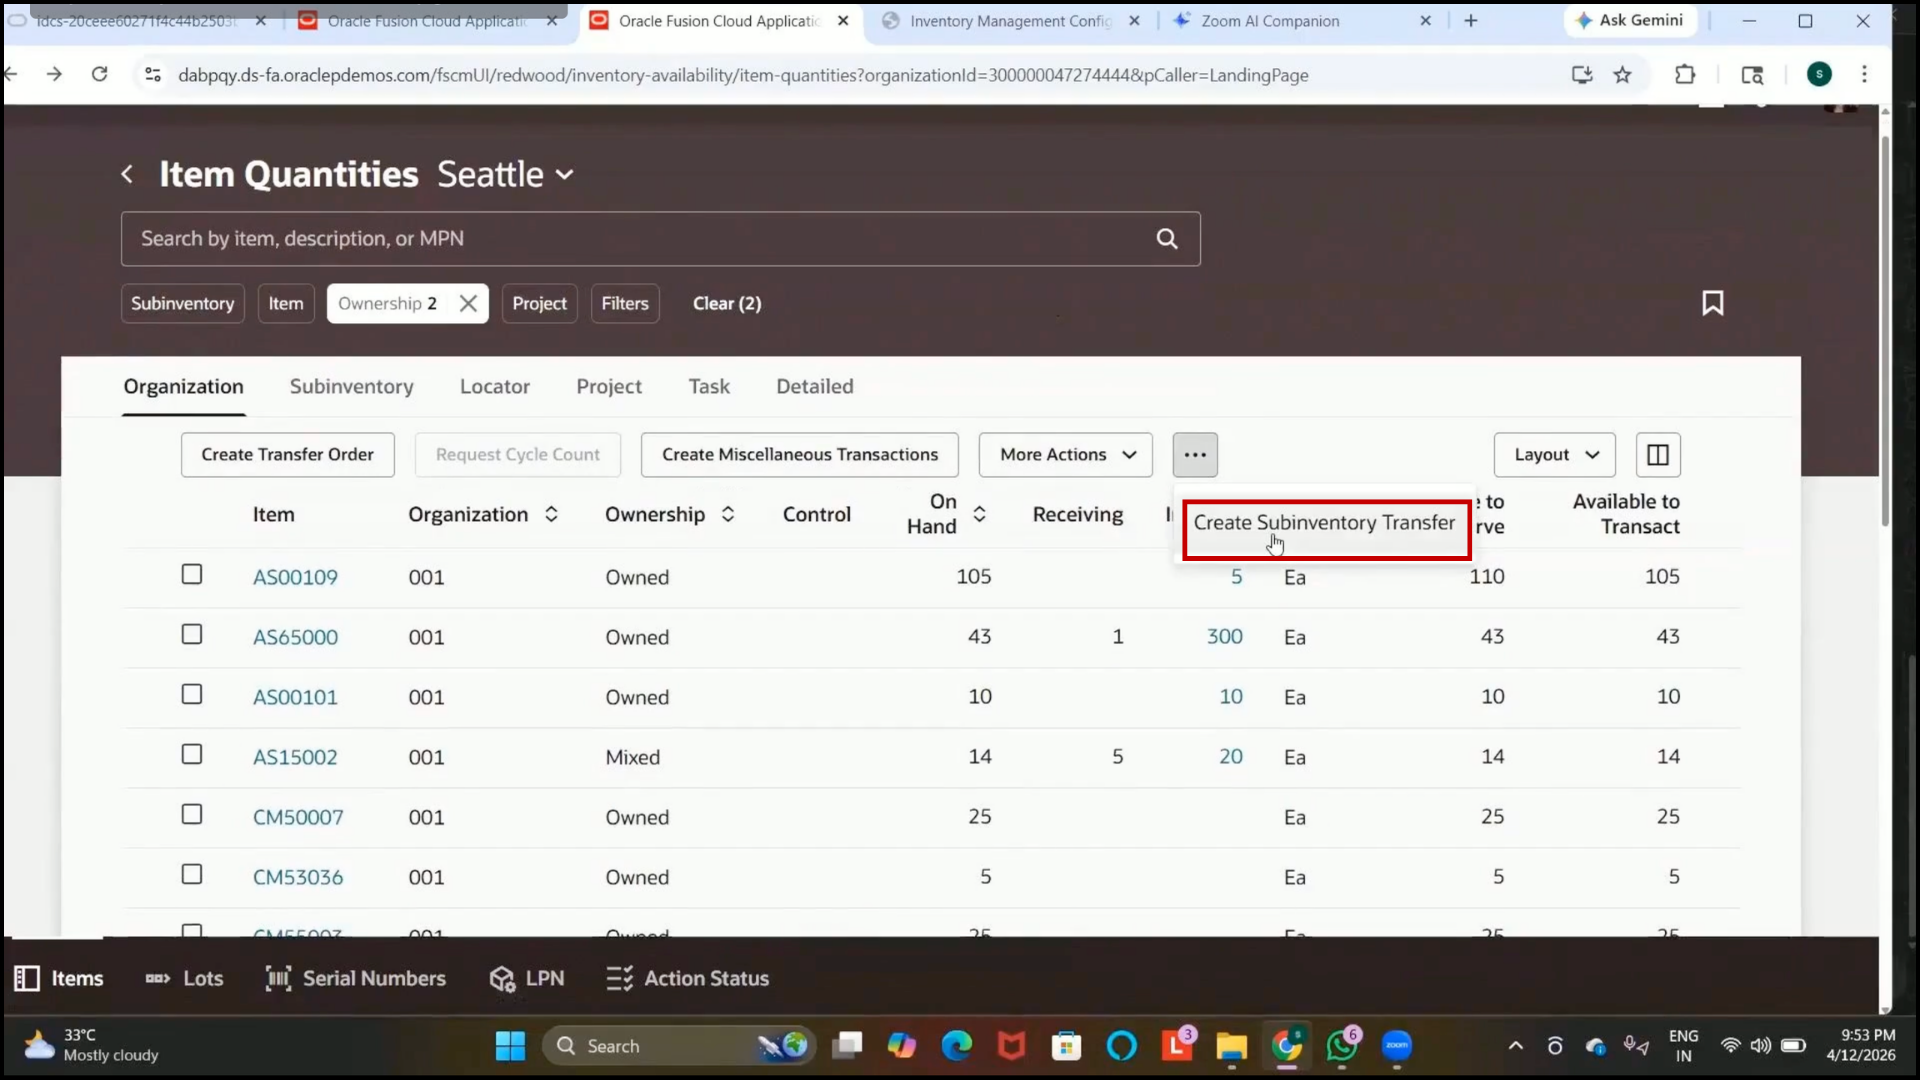
2.Click on Add Items.
Step 298: Select Transaction Type for Transfer
1. Select the Transaction Type as Subinventory Transfer.
2. Review any custom transaction types available.
3. Select the seeded transaction type if required.
4.Click on Save.
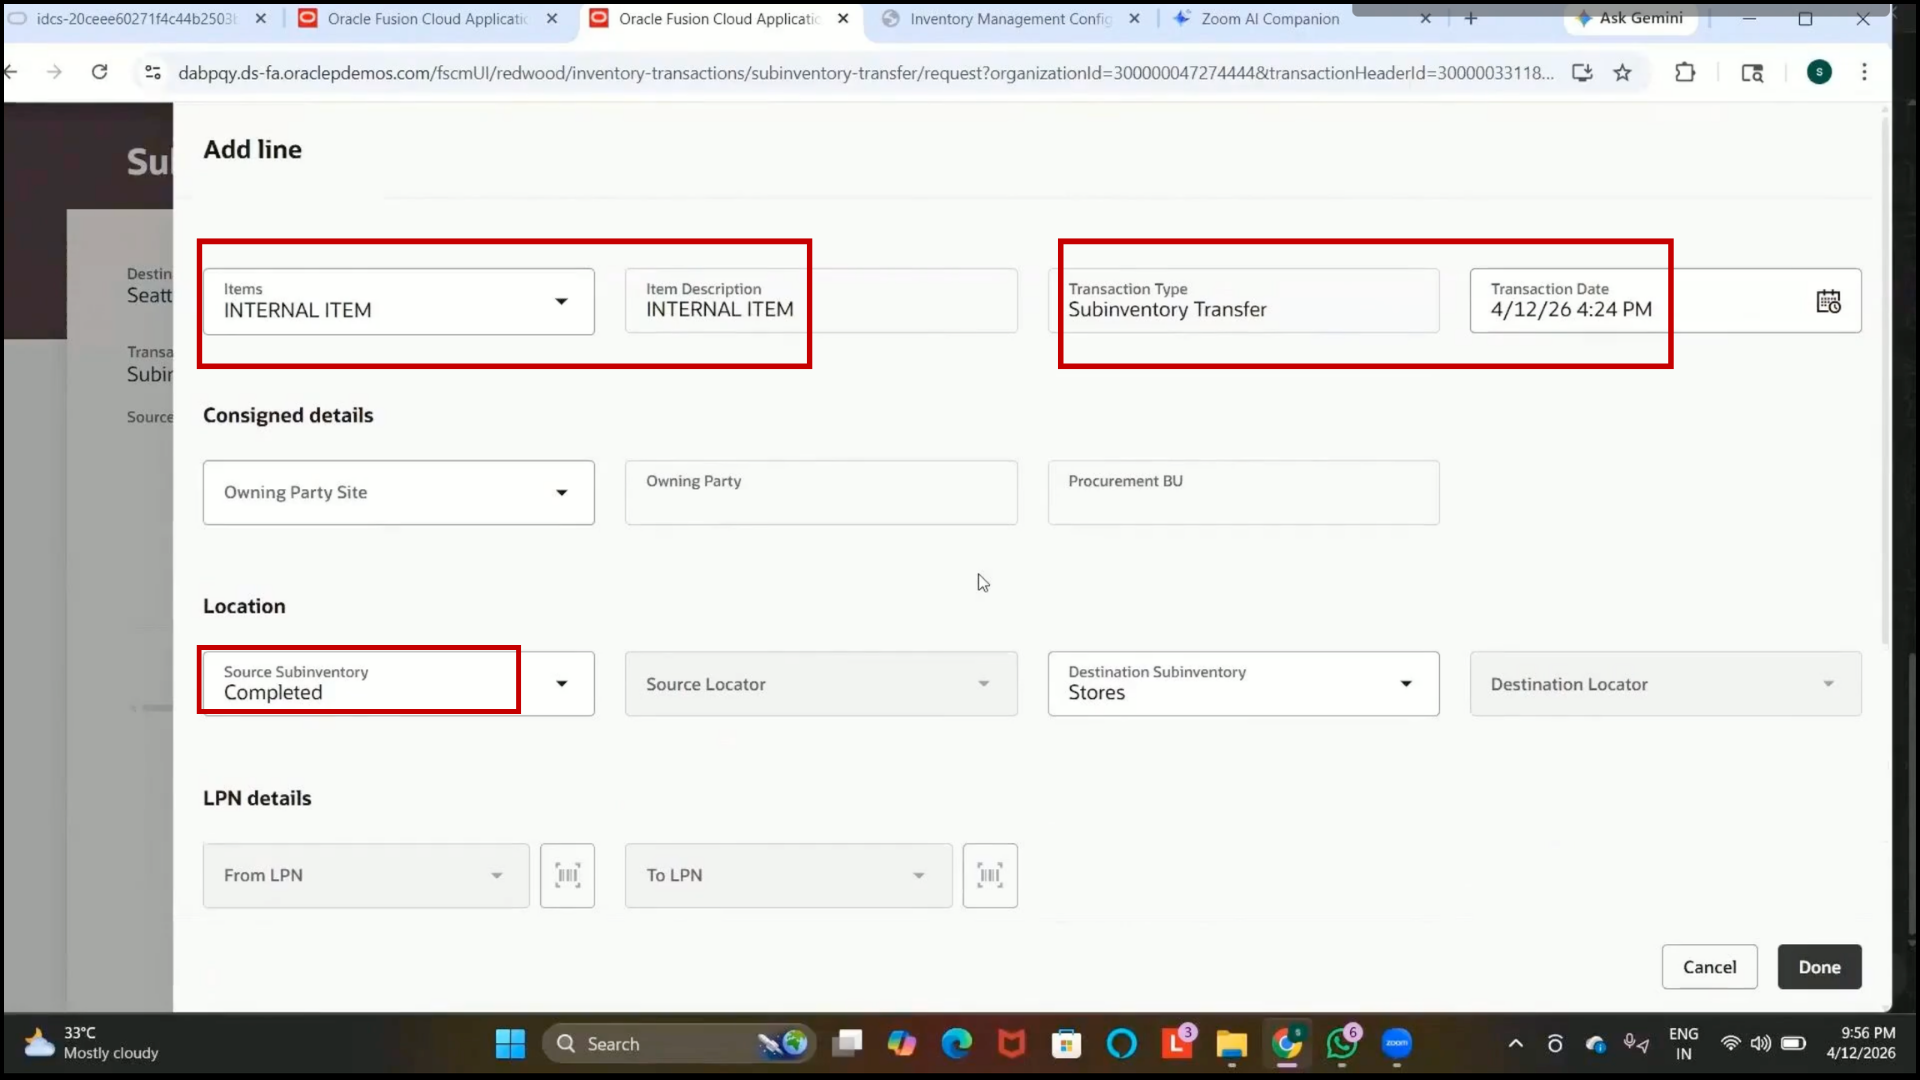
Step 299: Add Item for Transfer
1. Click on Add Item.
2. Select the item created previously, such as Internal Item.
Step 300: Select Source and Destination Subinventory
1. In the Source Subinventory field, select the subinventory containing stock.
2. Example:
3. Completed Subinventory
4. Verify the available quantity.
5. In the Destination Subinventory field, select the target subinventory.
6. Example:
7. Staging or Stores Subinventory
Step 301: Verify Available Quantity
1. Confirm that the available quantity reflects previous transactions.
2. Example:
3. Available Quantity: 980
4. Verify that the reduced quantity reflects the miscellaneous issue transaction completed earlier.
Step 302: Enter Transfer Quantity
1. Enter the quantity to be transferred.
2. Example:
3. Quantity: 100
Step 303: Select Transfer Reason
1. In the Reason field, select the required reason code.
2. Example:
3. Stock Adjustment
Step 304: Complete Subinventory Transfer
1.Click on Done after entering all required details.

2. Review the transfer details displayed on the screen.
Step 305: Submit Subinventory Transfer
1. Click on Submit.
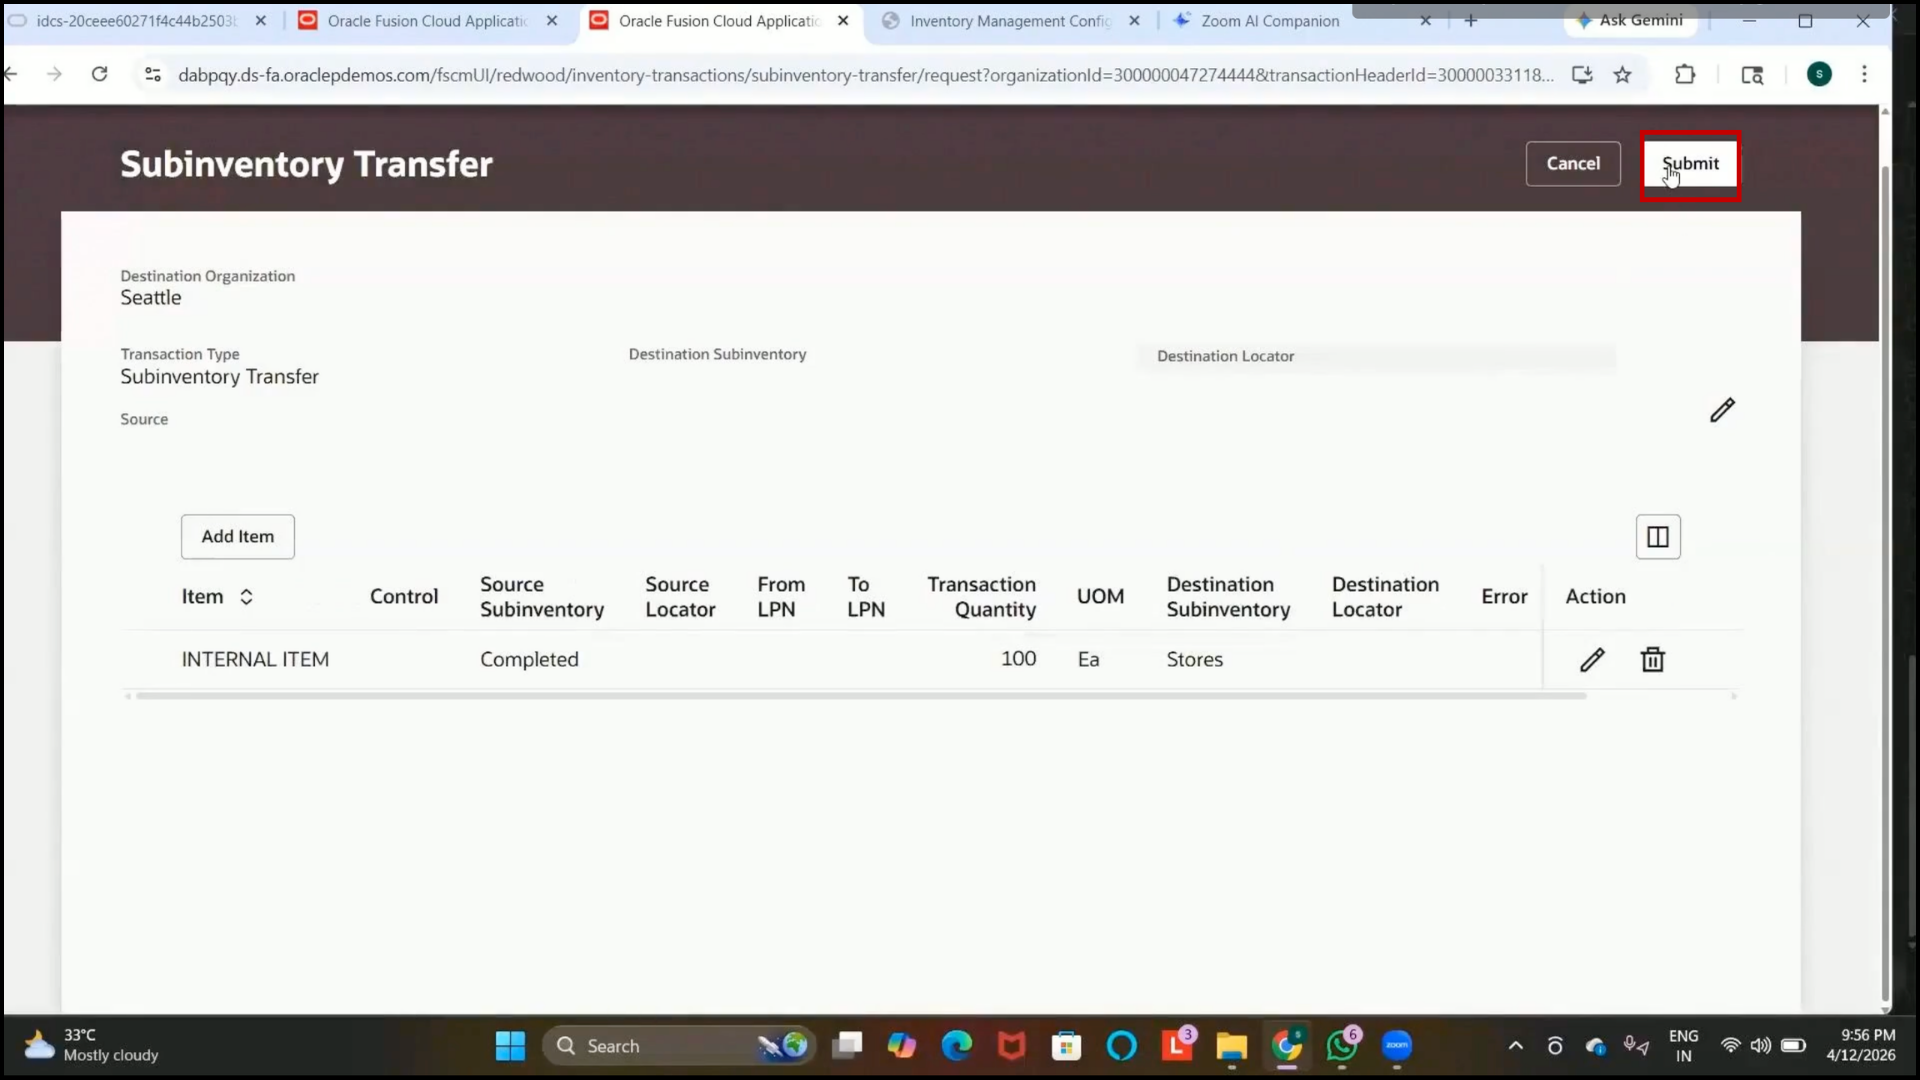
2. Verify that the item quantity is transferred successfully from the source subinventory to the destination subinventory.
Step 306: Review Subinventory Transfer Result
1. Confirm that the transferred quantity is deducted from the source subinventory.
2. Verify that the same quantity is added to the destination subinventory.
Step 307: Understand Transfer Order Concept
1. Review the purpose of transfer orders:
2. Transfer stock between inventory organizations.
3. Understand the business scenario:
4. One organization is out of stock.
5. Another organization supplies the required inventory internally.
6. Understand that this process is called an internal transfer order.
Step 308: Understand Demand Request Process
1. Review the transfer order flow:
2. The destination organization creates a demand request.
3. A supply request is generated.
4. Transfer order is created.
The destination: Material is transferred from the source to the destination organization.
Step 309: Open Destination Inventory Organization
1. Navigate to the destination inventory organization.
2. Example:
3. Atlanta
4. Atlanta Organization
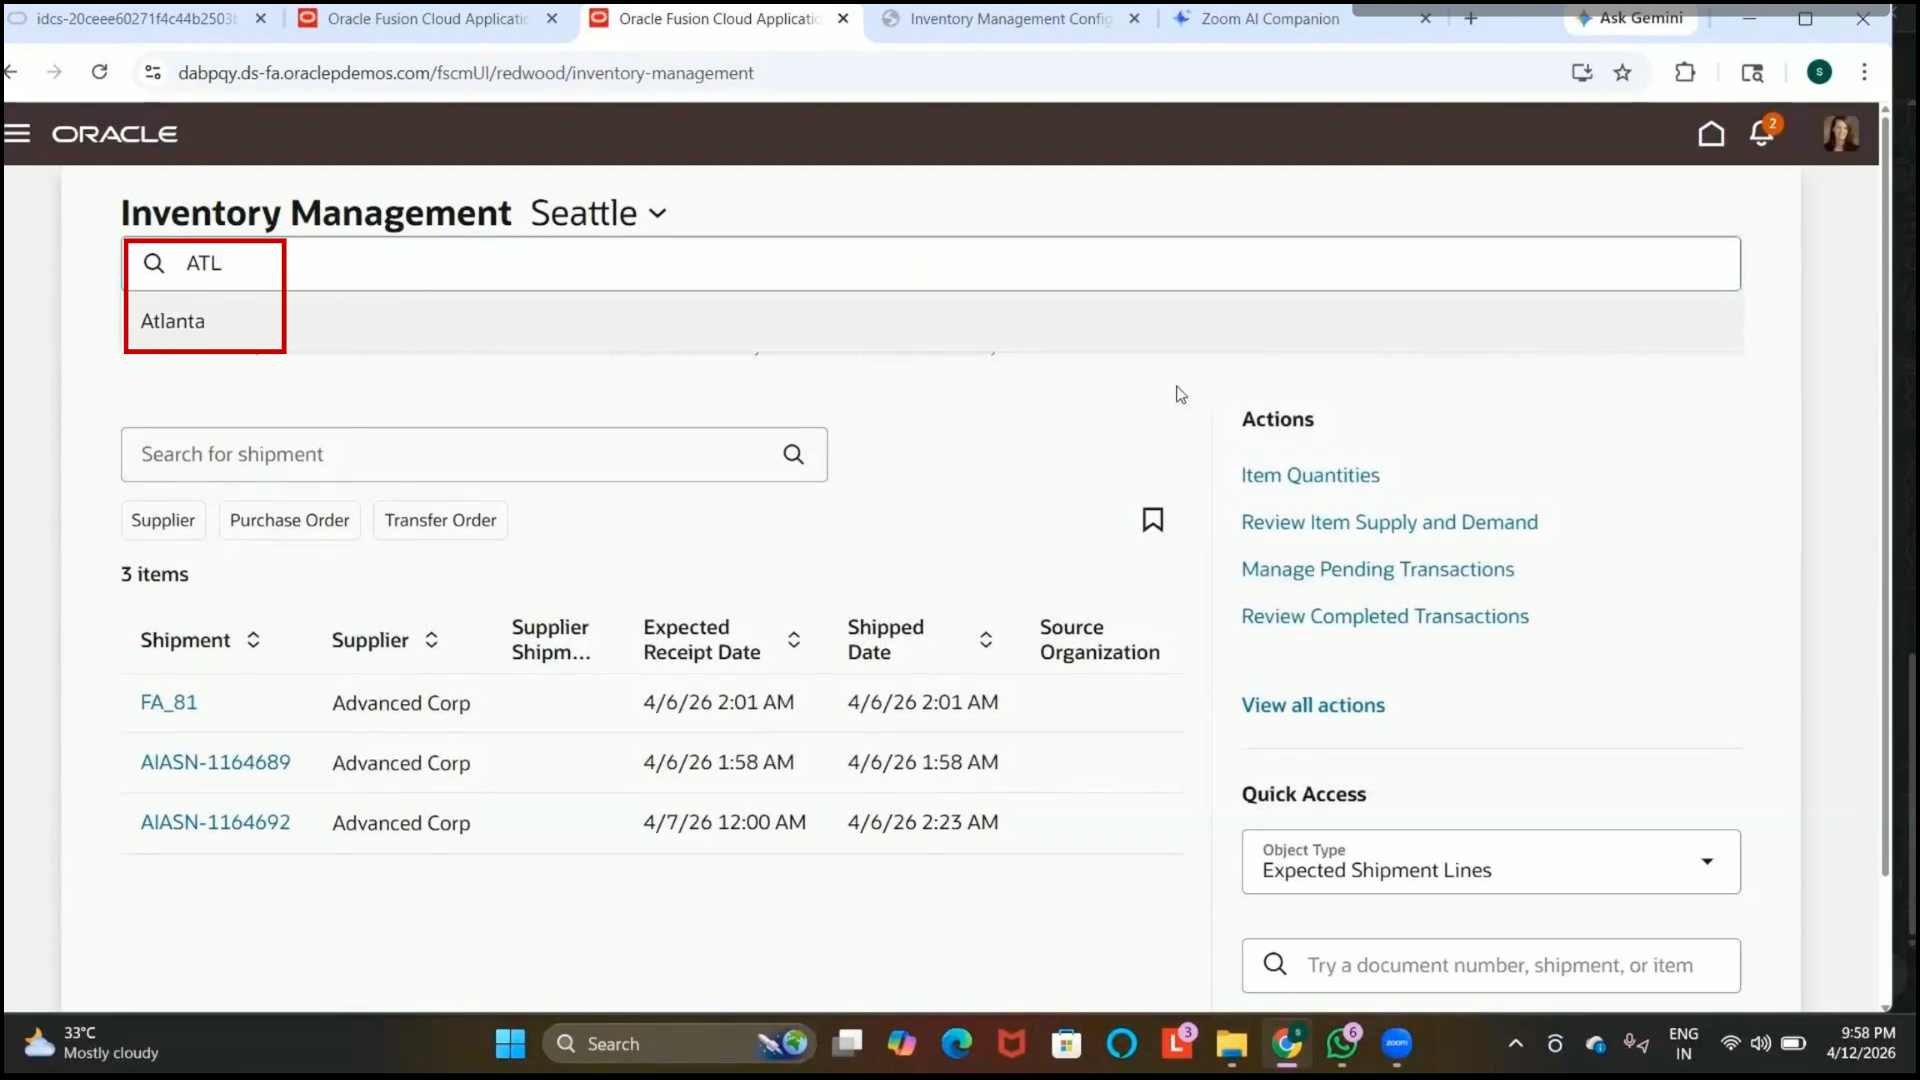
Step 310: Navigate to Transfer Order Creation
1. Open item quantities.
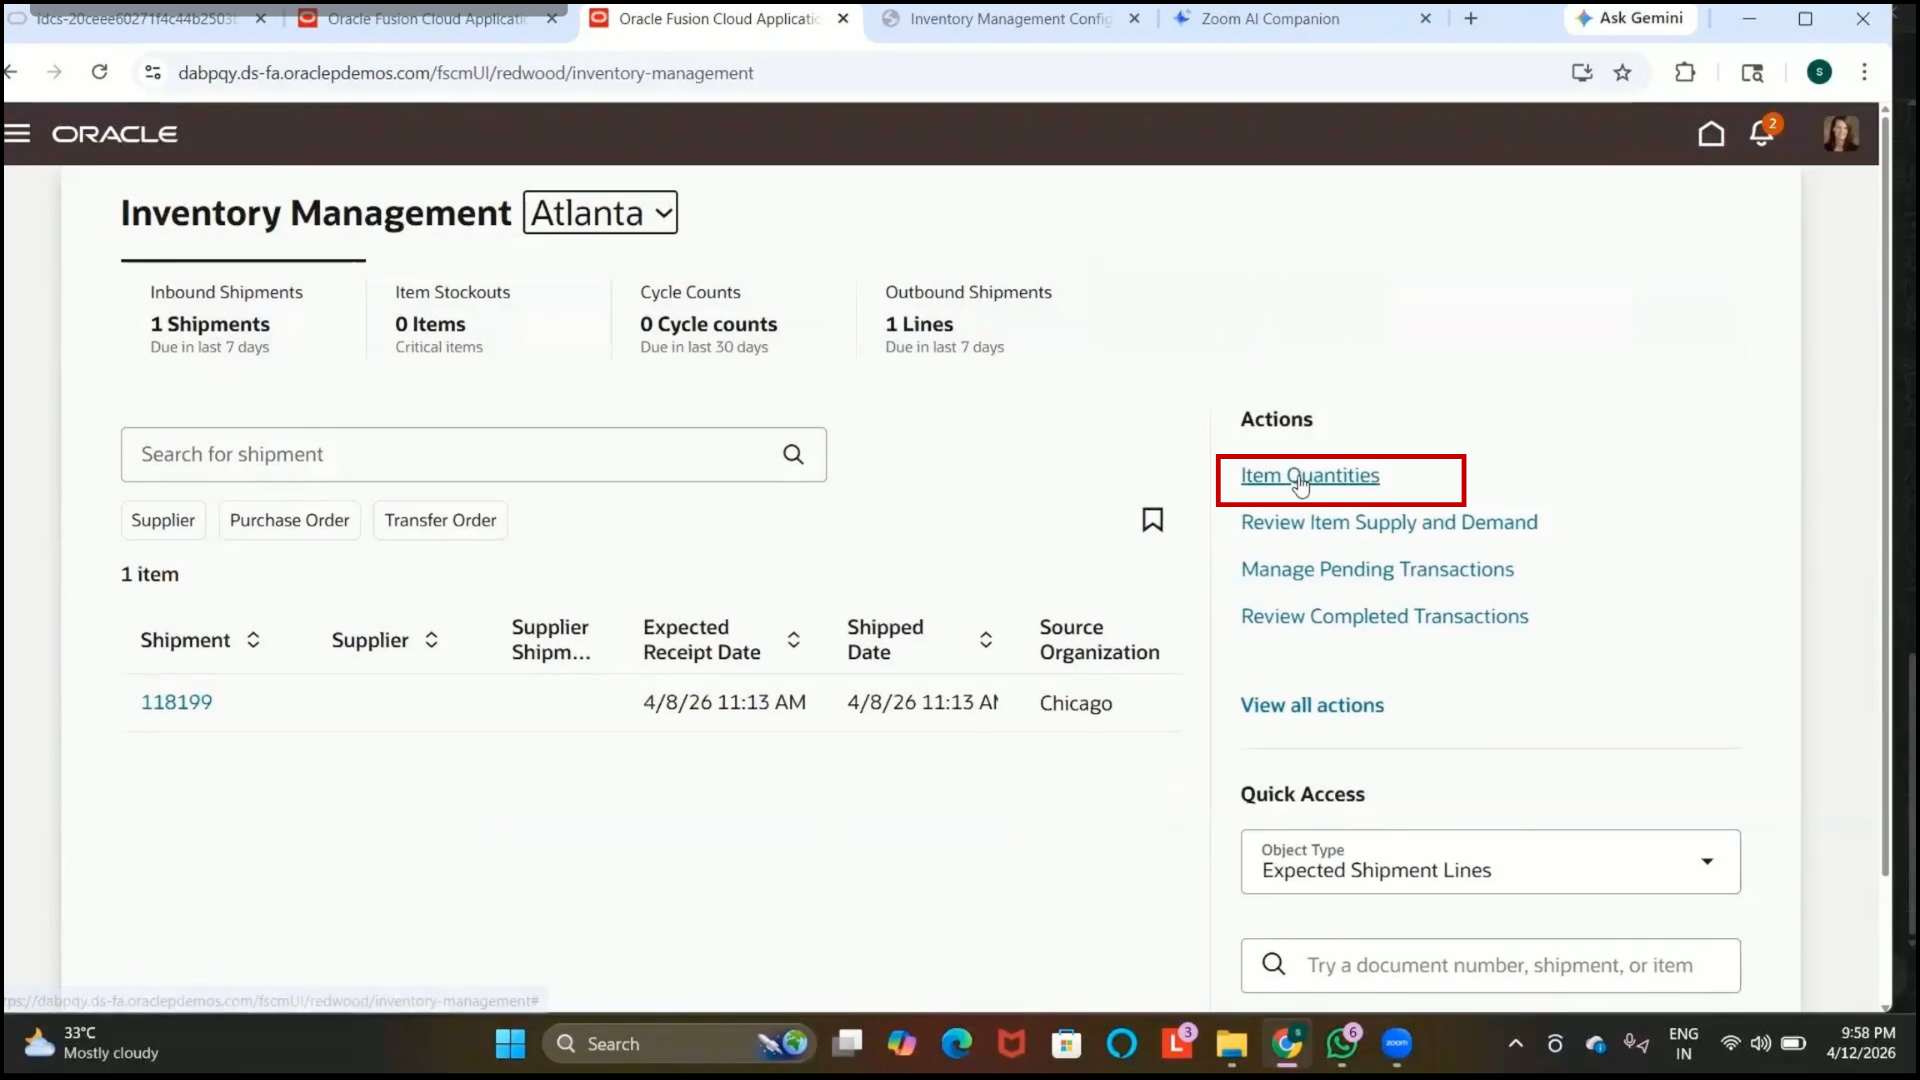
2. Click on Create Transfer Order.
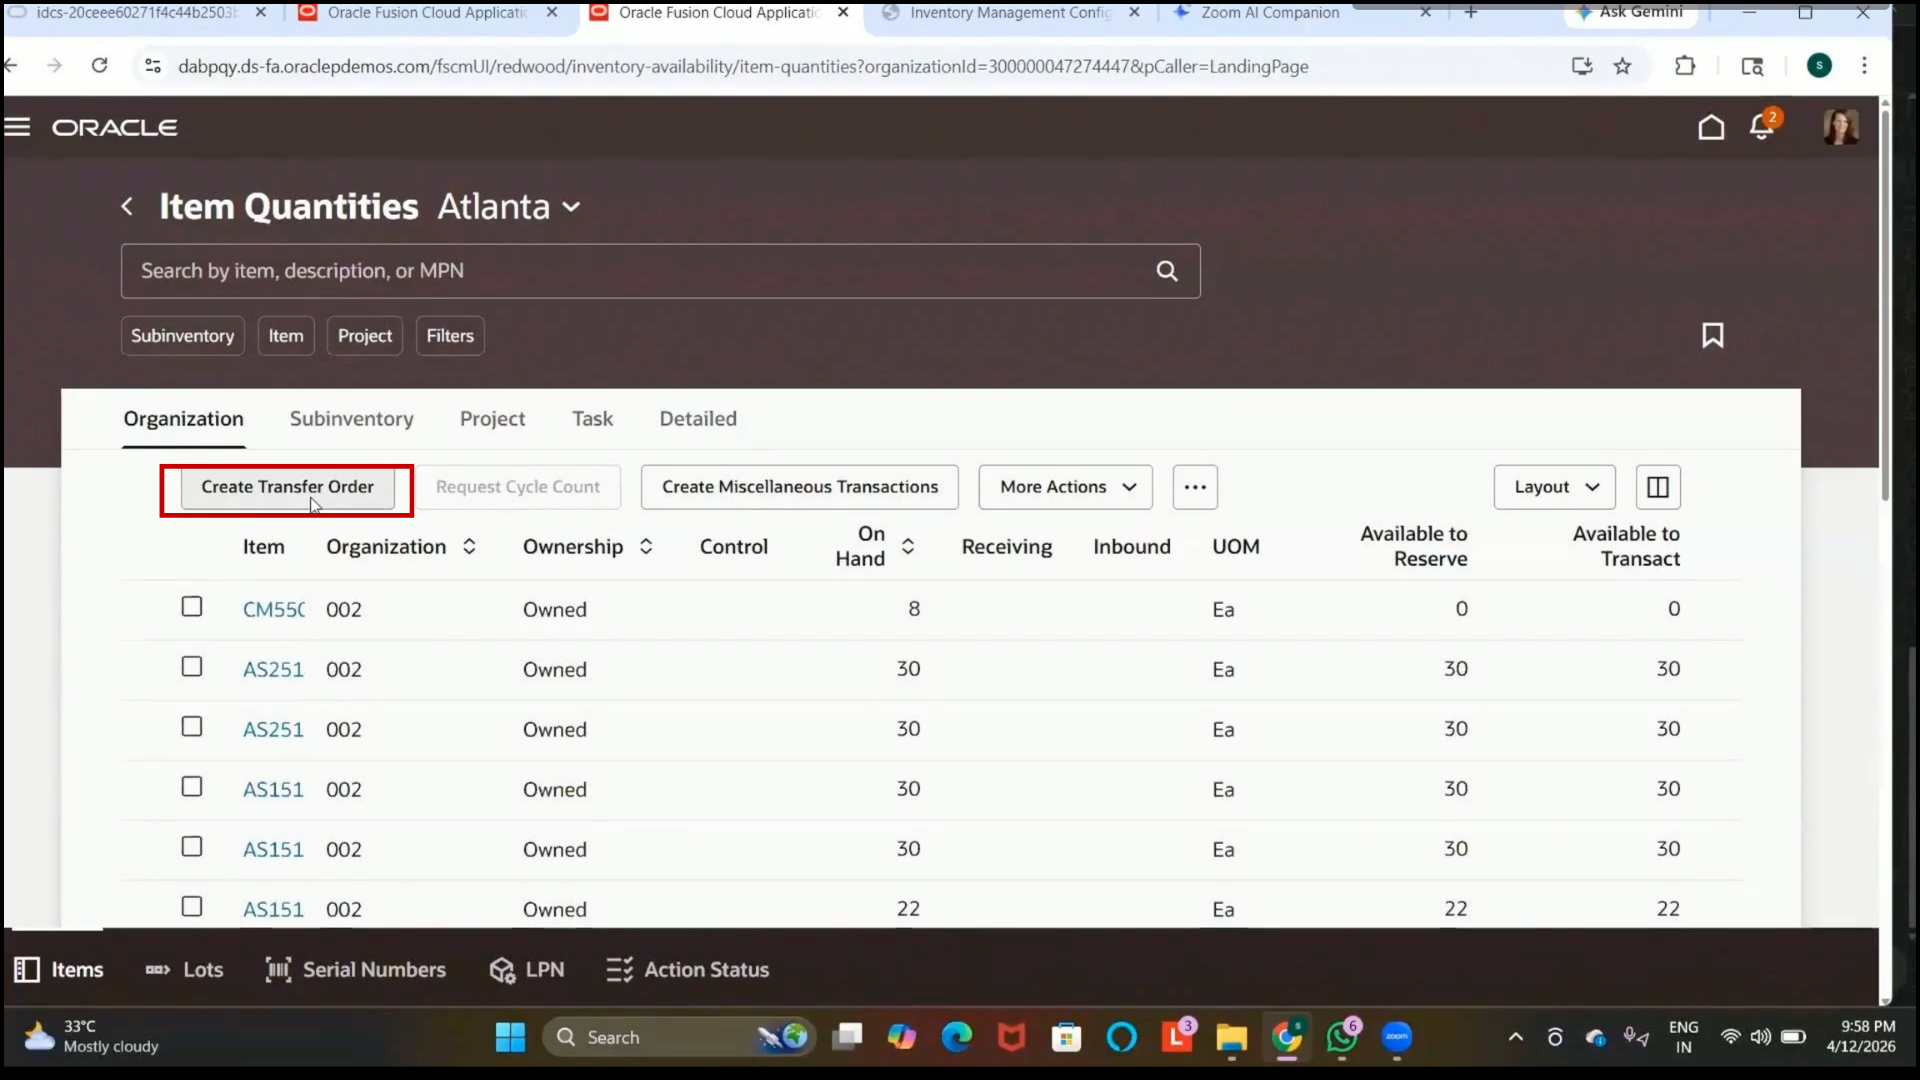
Step 311: Create Supply Request
1. Wait for the Supply Request page to load completely.
2. Verify that the destination organization is displayed correctly.
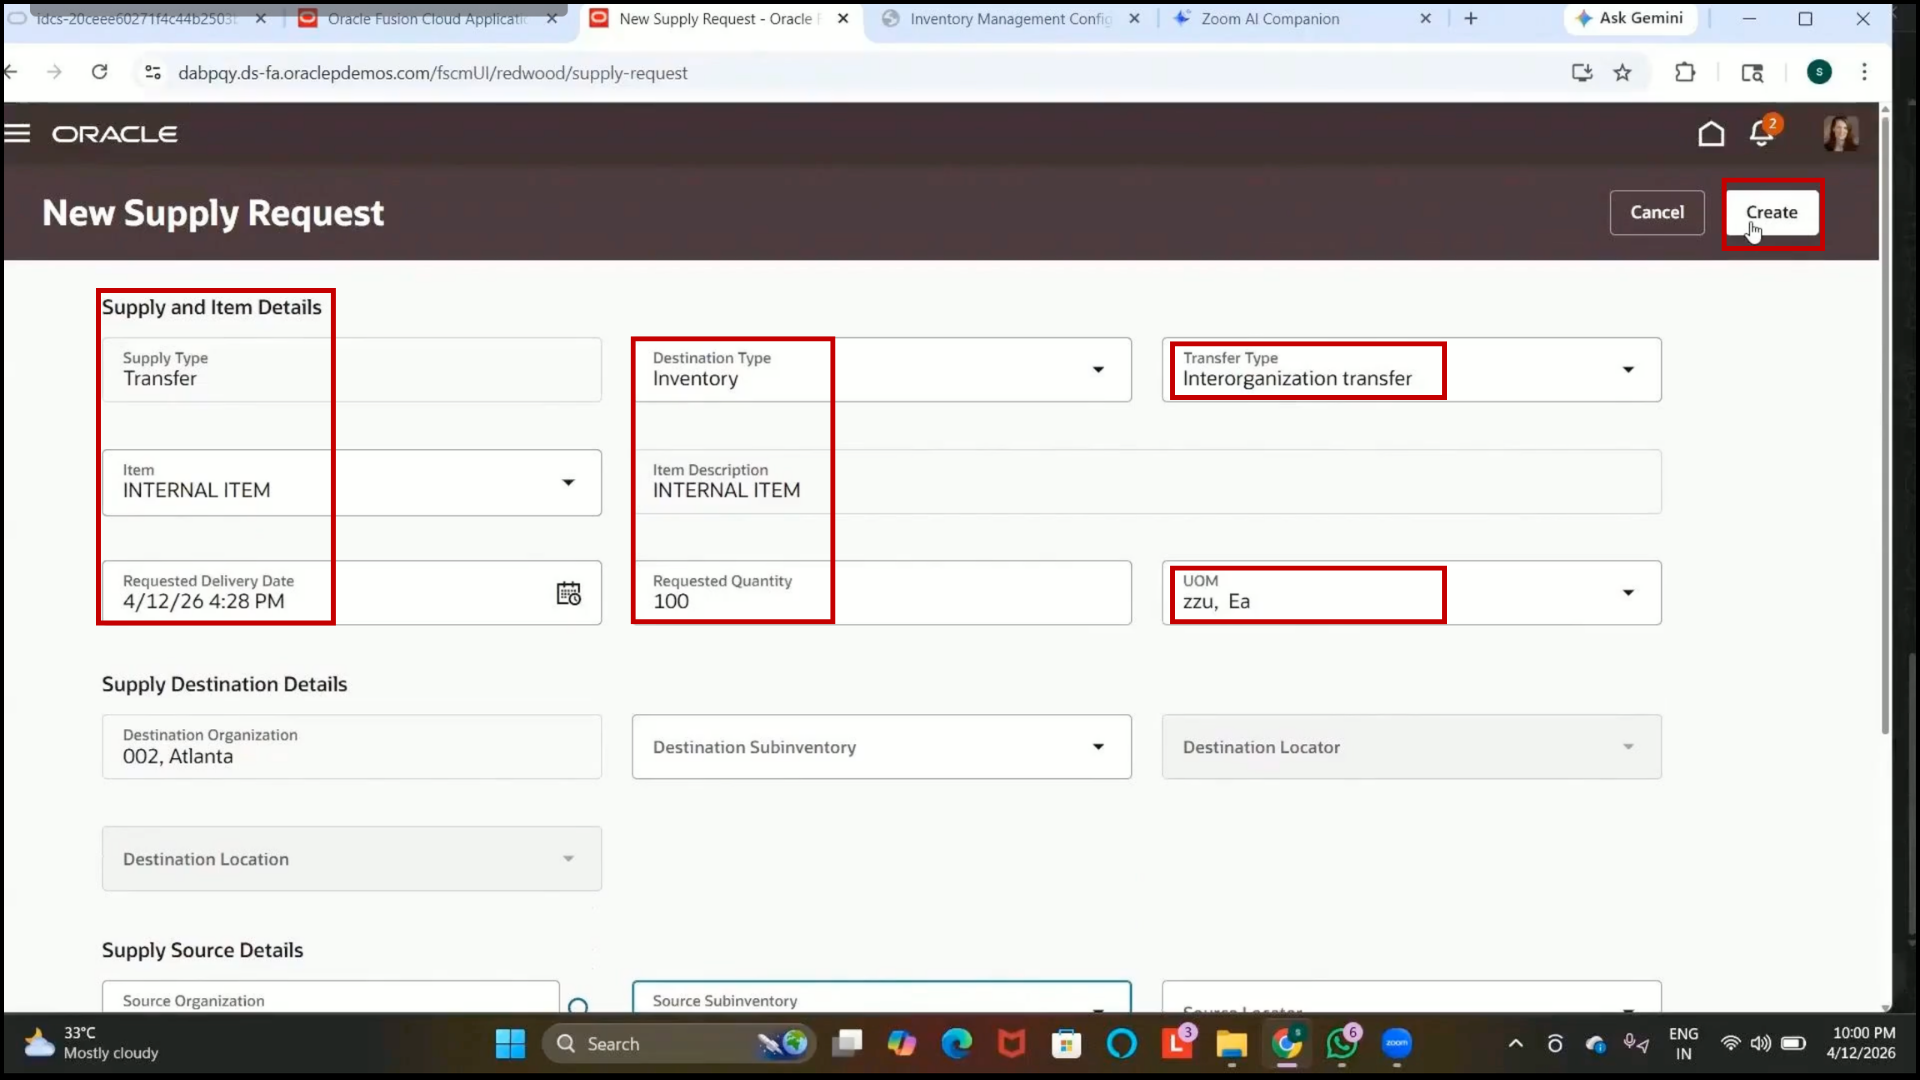
Step 312: Select Item for Transfer Order
1. Select the required item.
2. Example:
3. Internal 3. Internal Item
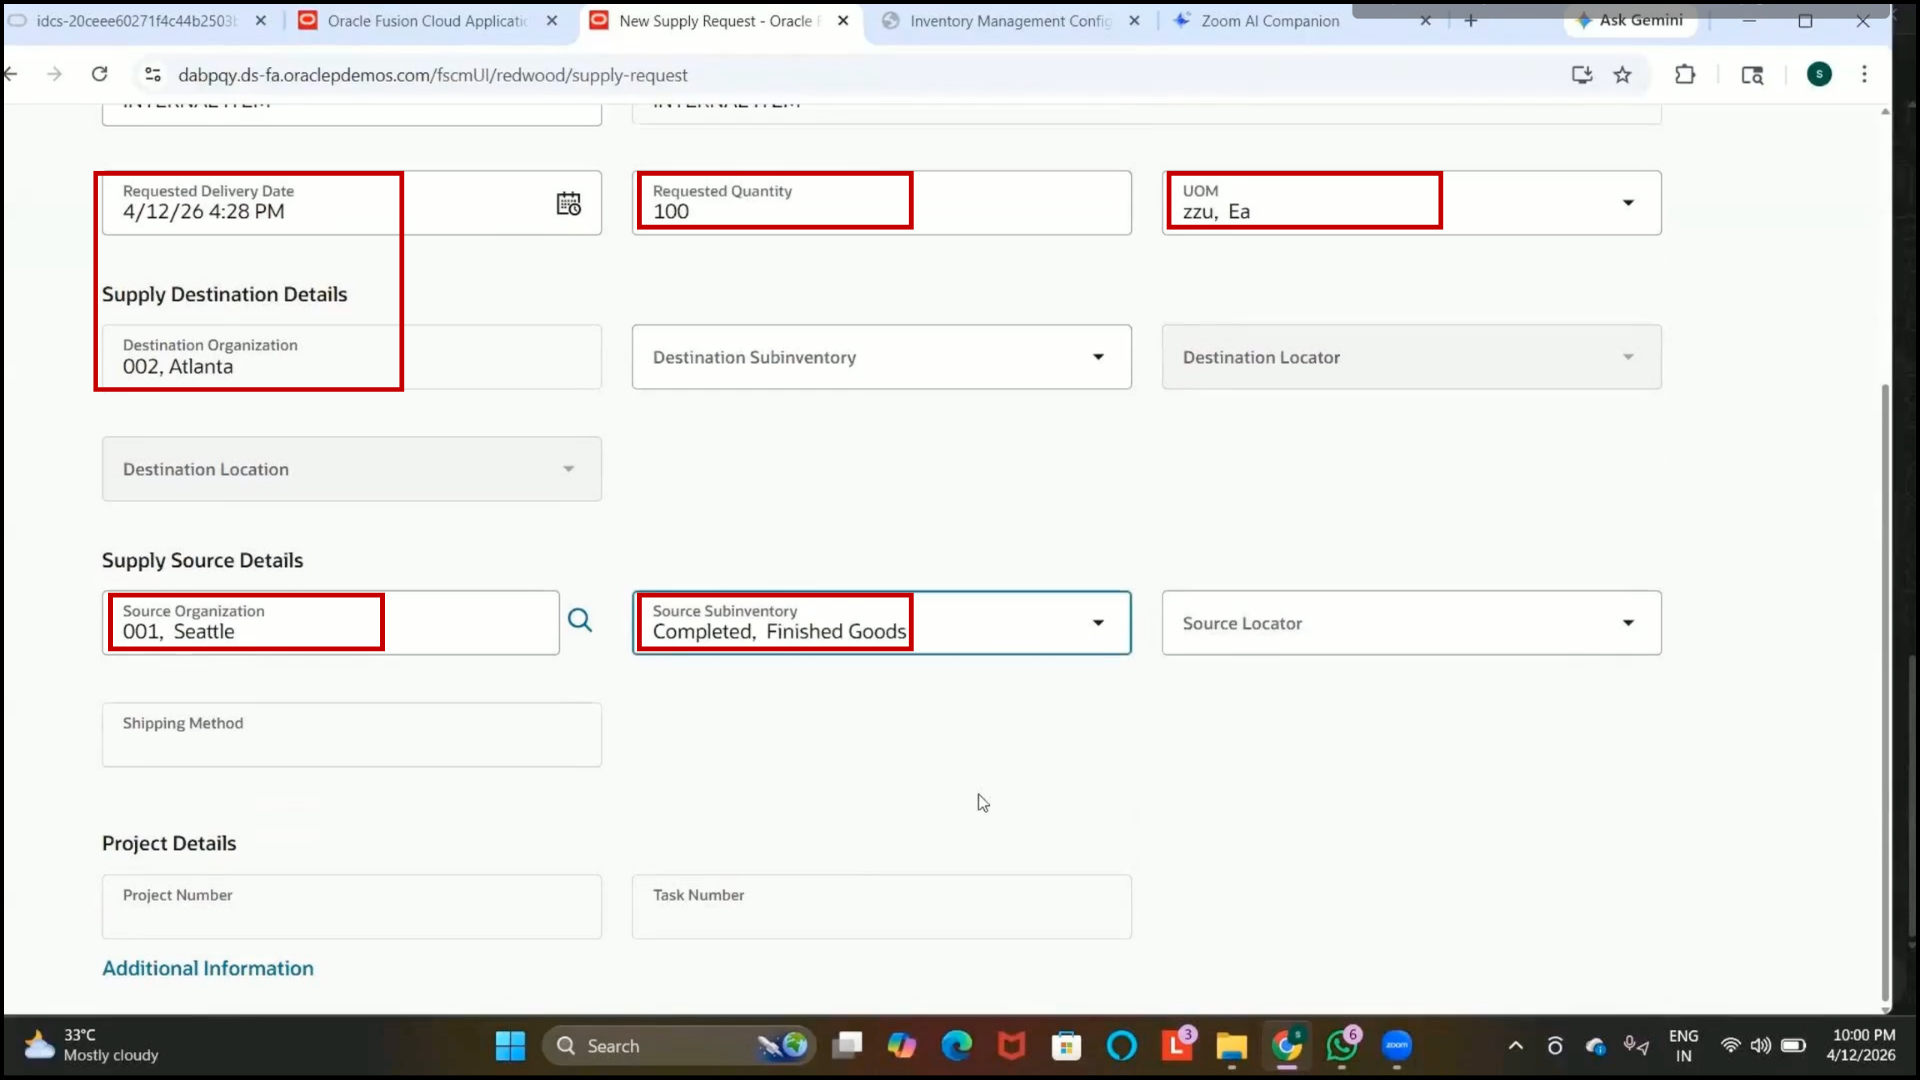
Step 313: Enter Requested Quantity
1. Enter the quantity required by the destination organization.
2. Example:
3. Quantity: 3. Quantity: 100
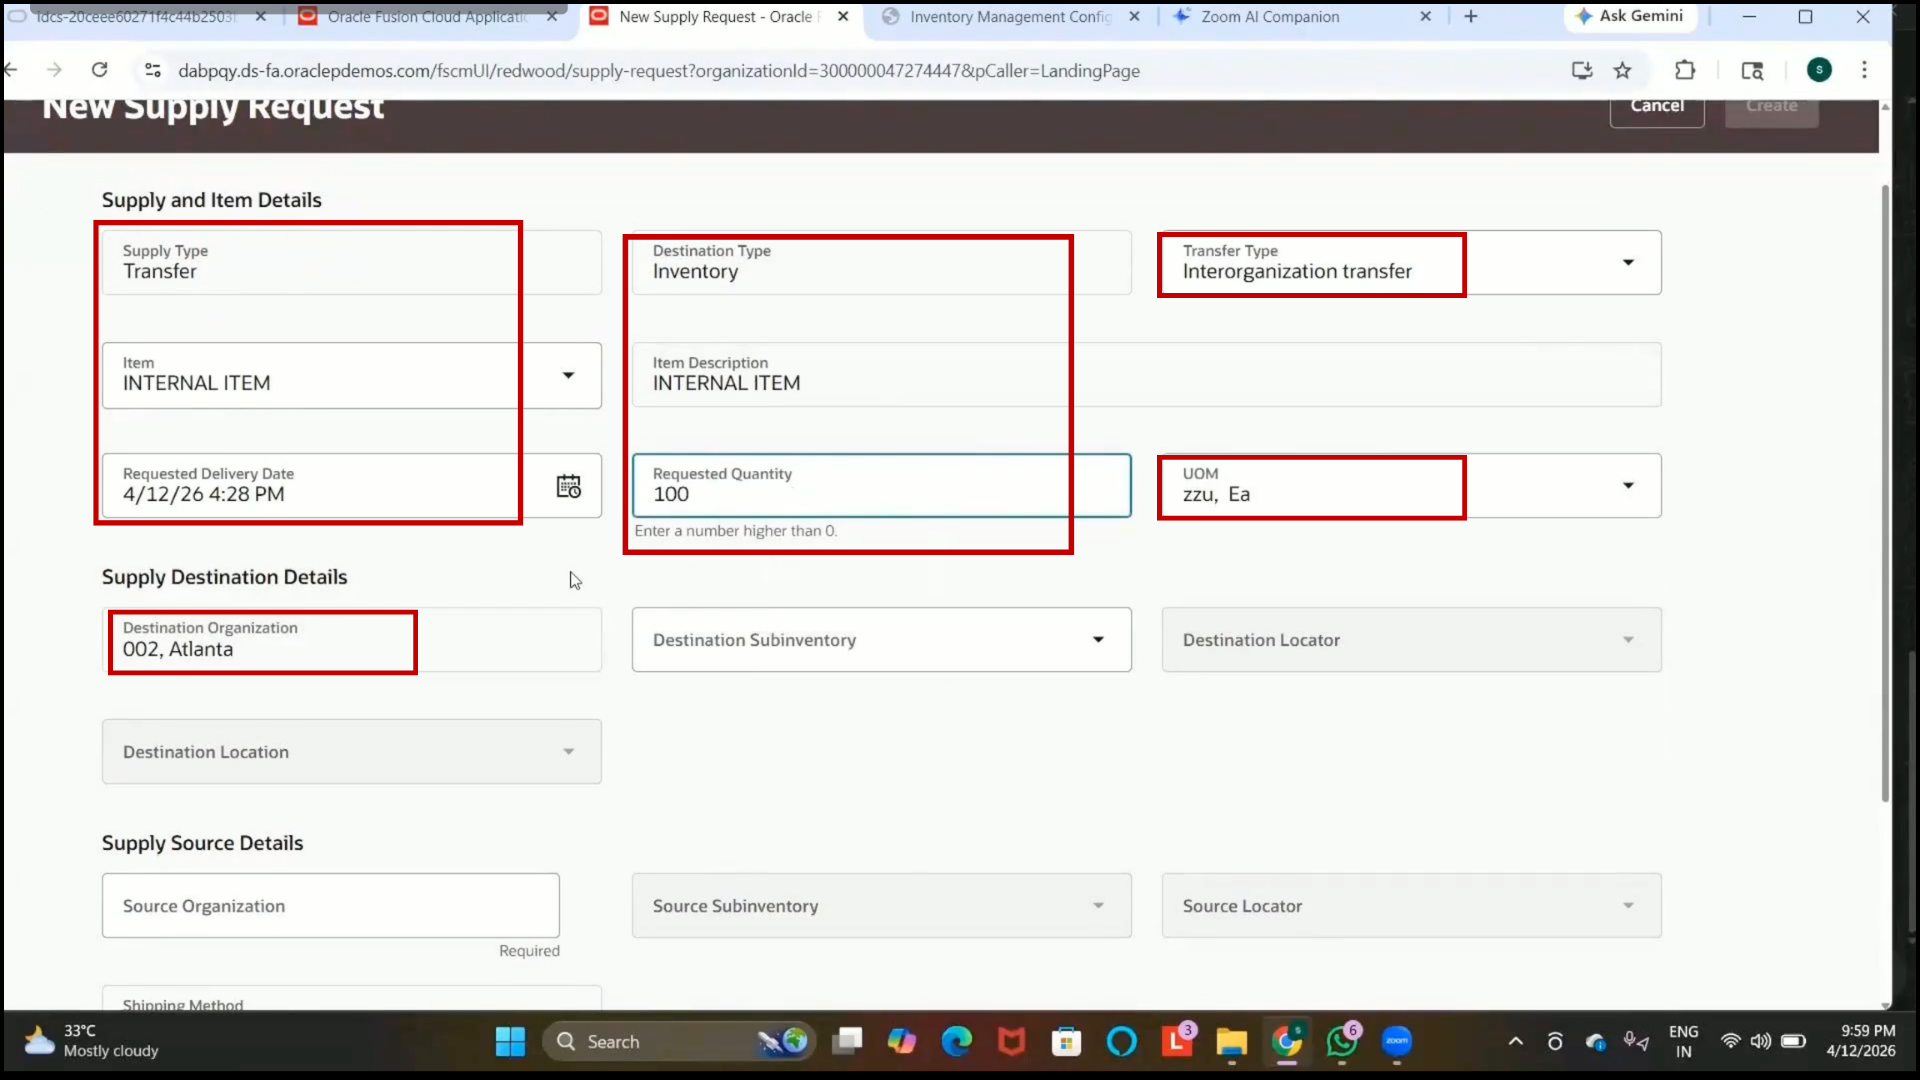
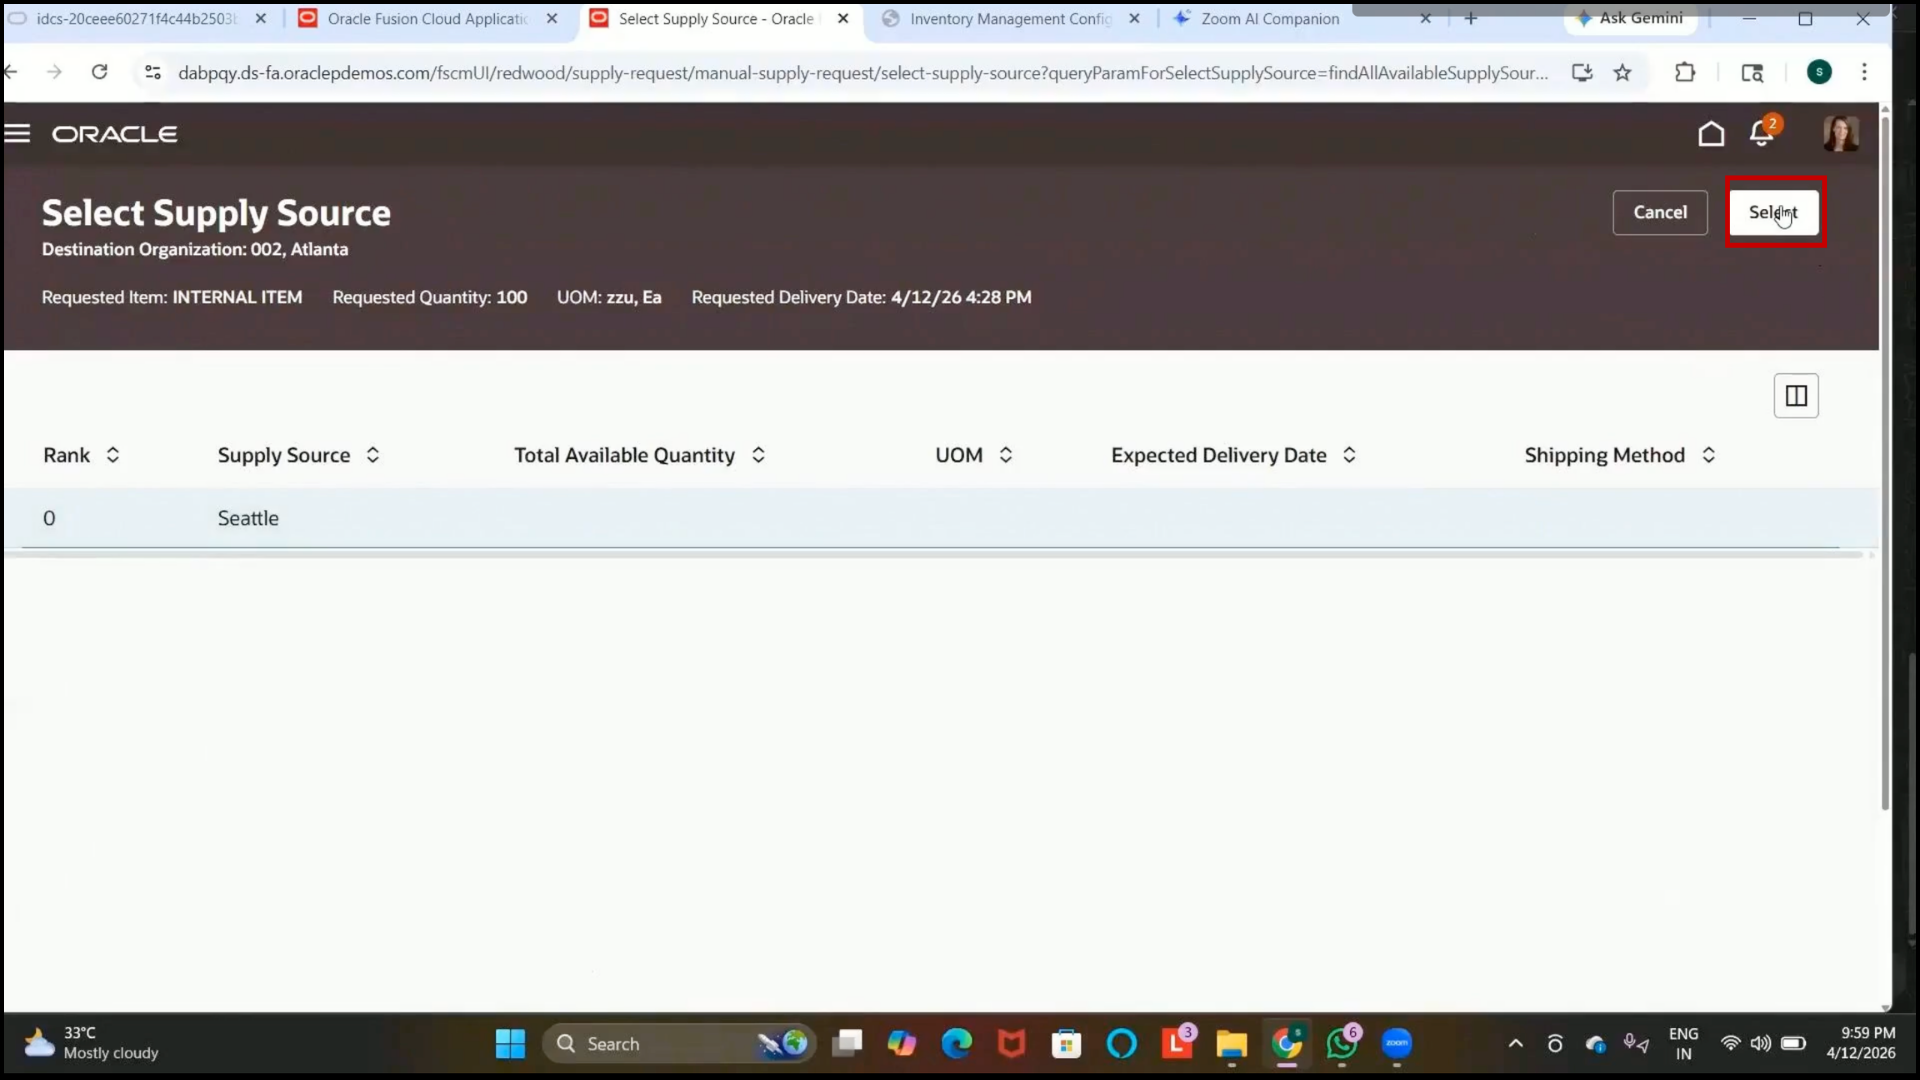
Step 314: Select Supply Source Organization
1.Click on Search in the Supply Source field.
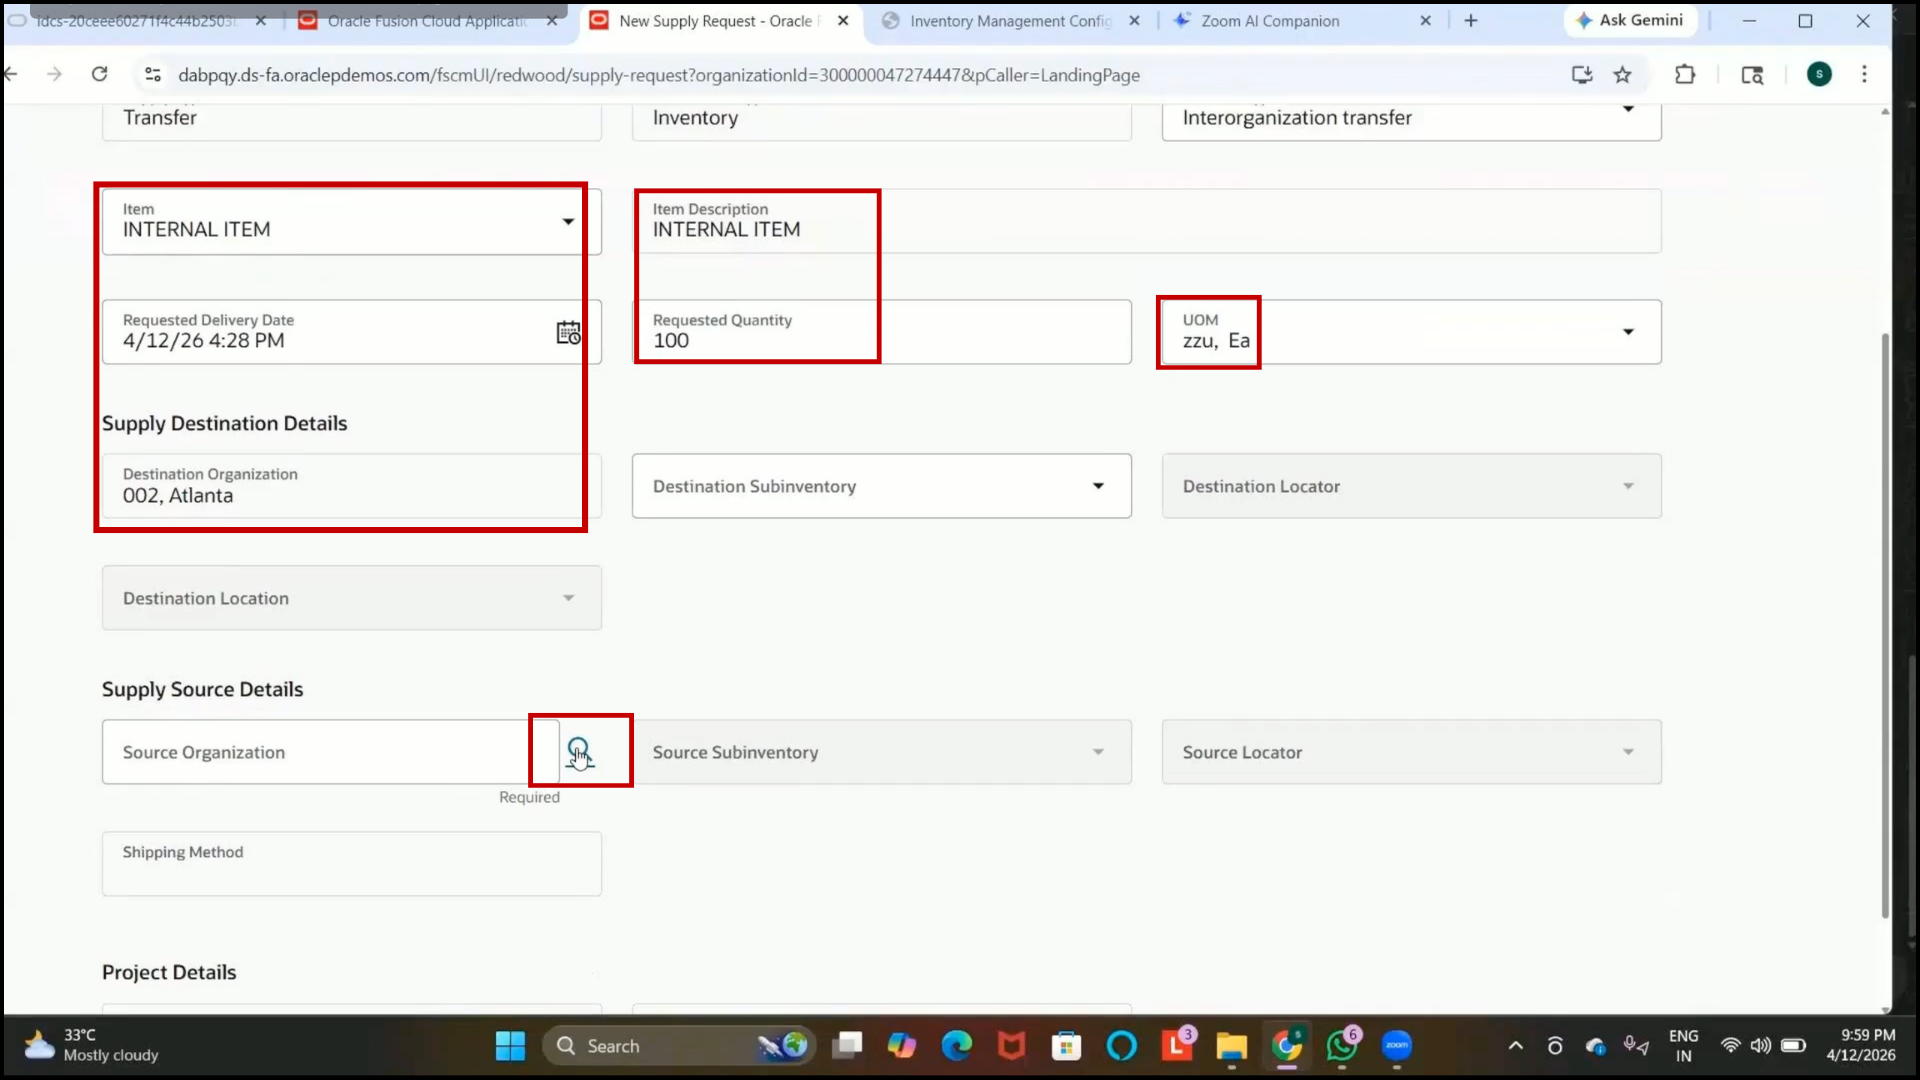
2. Review the source organizations available through the Interorganization Parameters setup.
3. Select the source organization.
4. Example:
5. Seatle Organization.
Step 315: Select Destination Subinventory
1. Select the required destination subinventory.
2. Example:
3. Completed: Completed Subinventory
Step 316: Create Supply Request
1. Review all entered details.
2.Click on Create.
3. Verify that the supply request status changes to In Process.
Step 317: Submit Supply Request
1. Click on Submit.
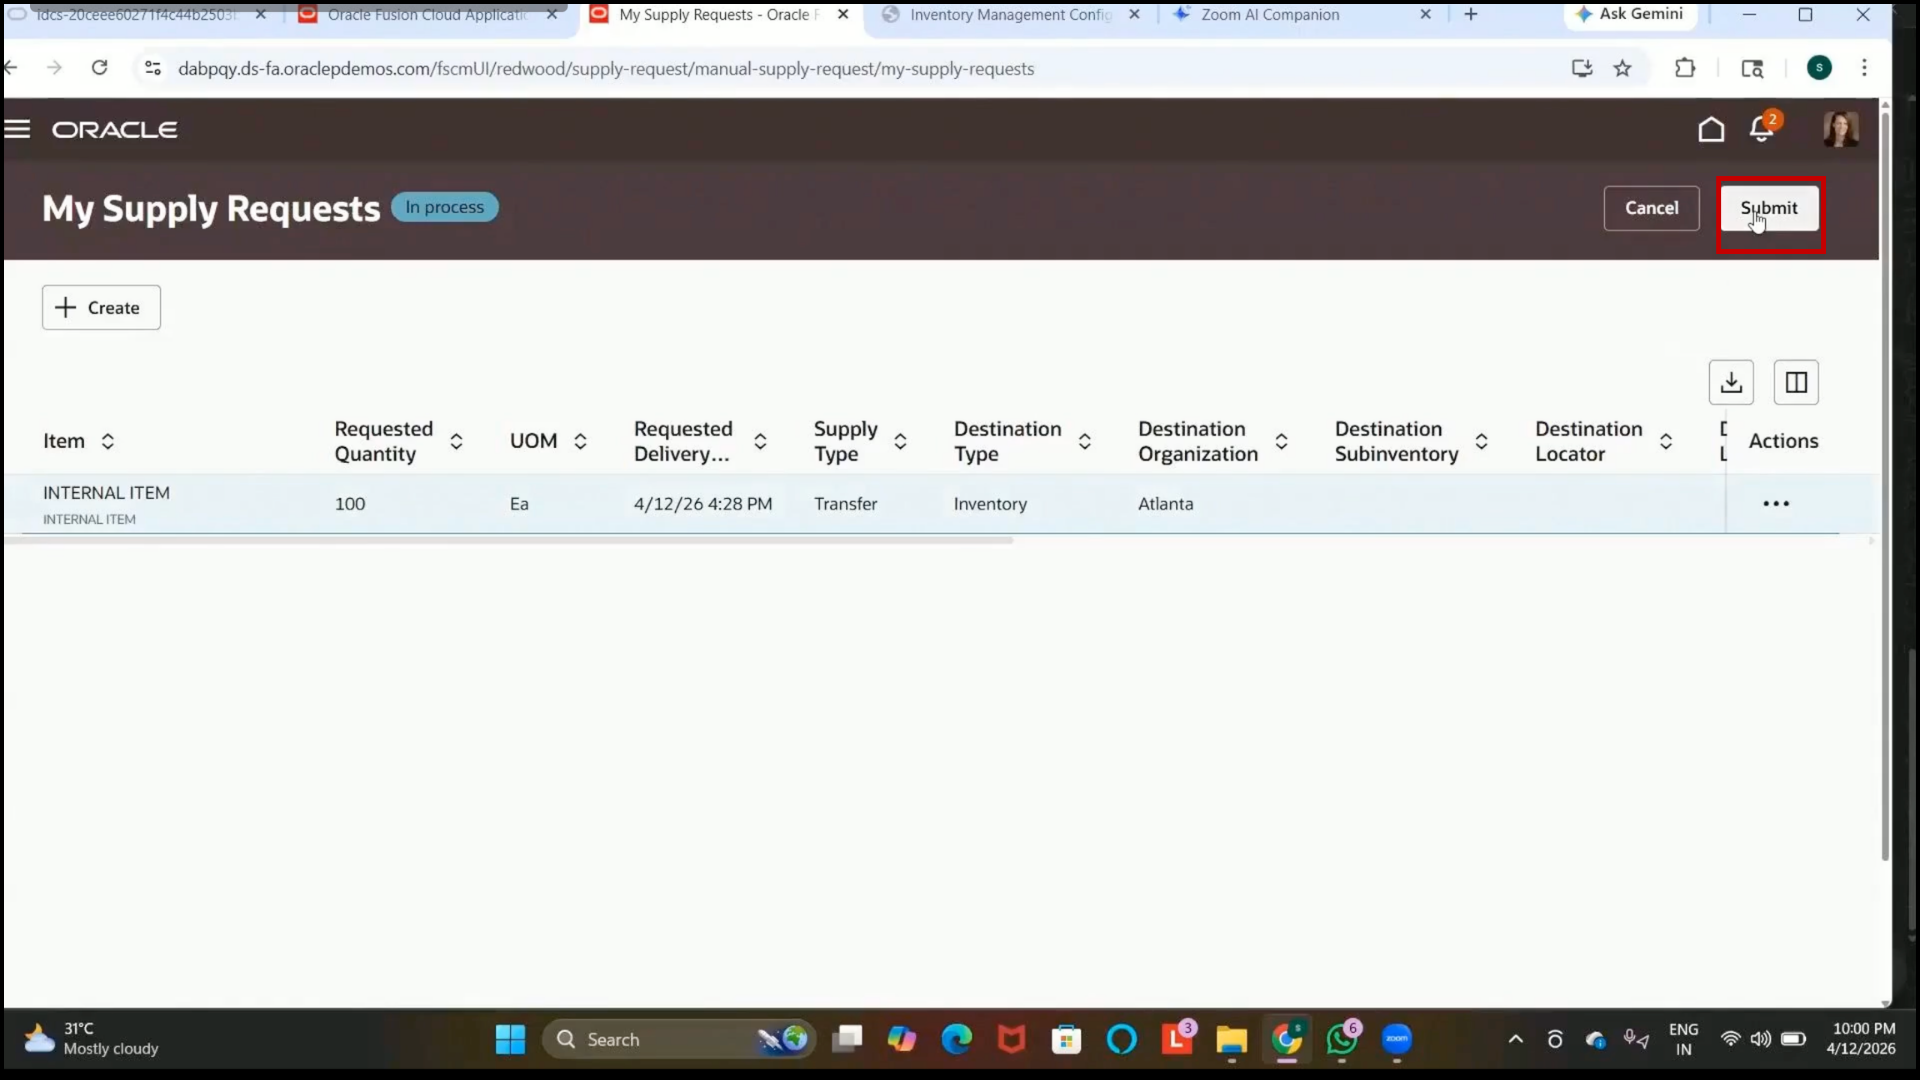
2. Copy the Supply Request Reference Number for tracking purposes.
Step 318: Understand Supply Request Processing
1. Review that the supply request is initially created as an interface record.
2. Understand that:
3. The supply request must be converted into a transfer order.
4. A4.A scheduled process is required for this conversion.
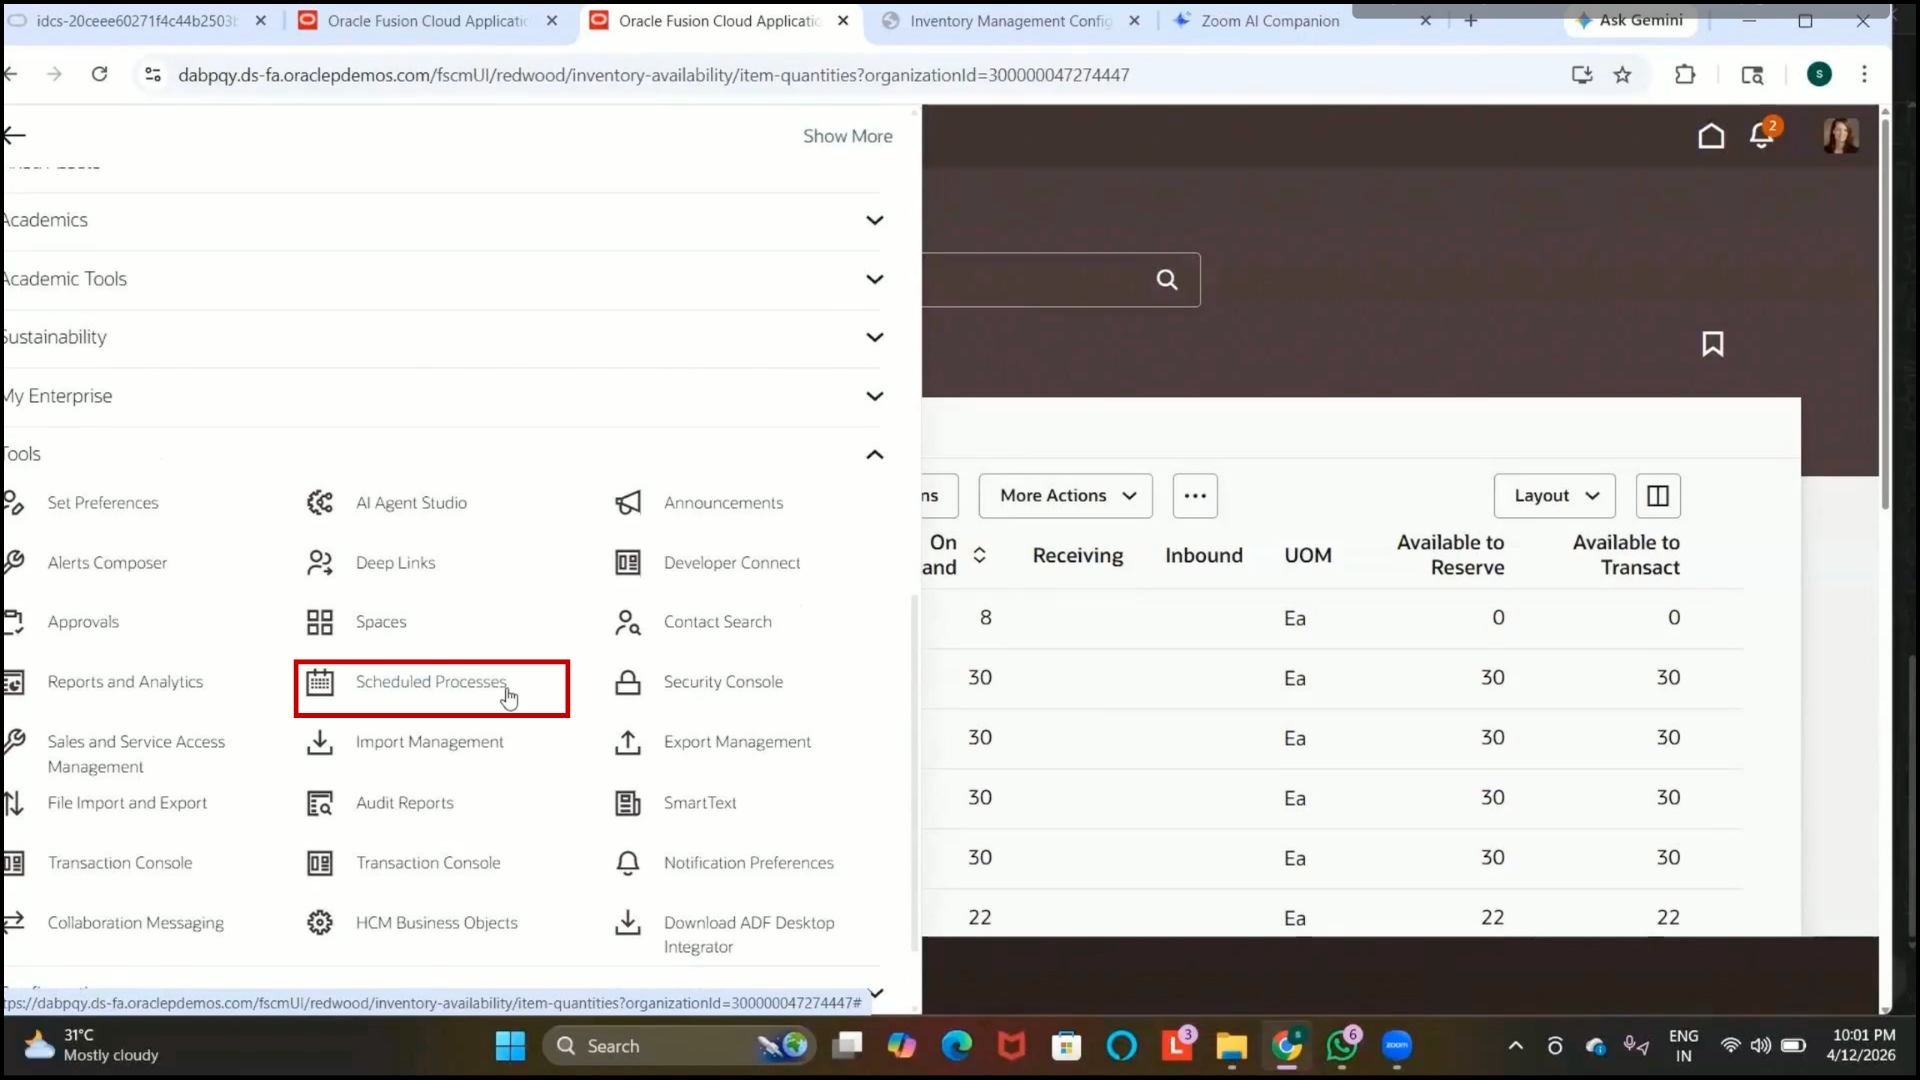
Step 319: Navigate to Scheduled Processes
1. Open the menu bar.
2. Navigate to Tools.
3. Select Scheduled Processes.
Step 320: Run Supply Chain Orchestration Program
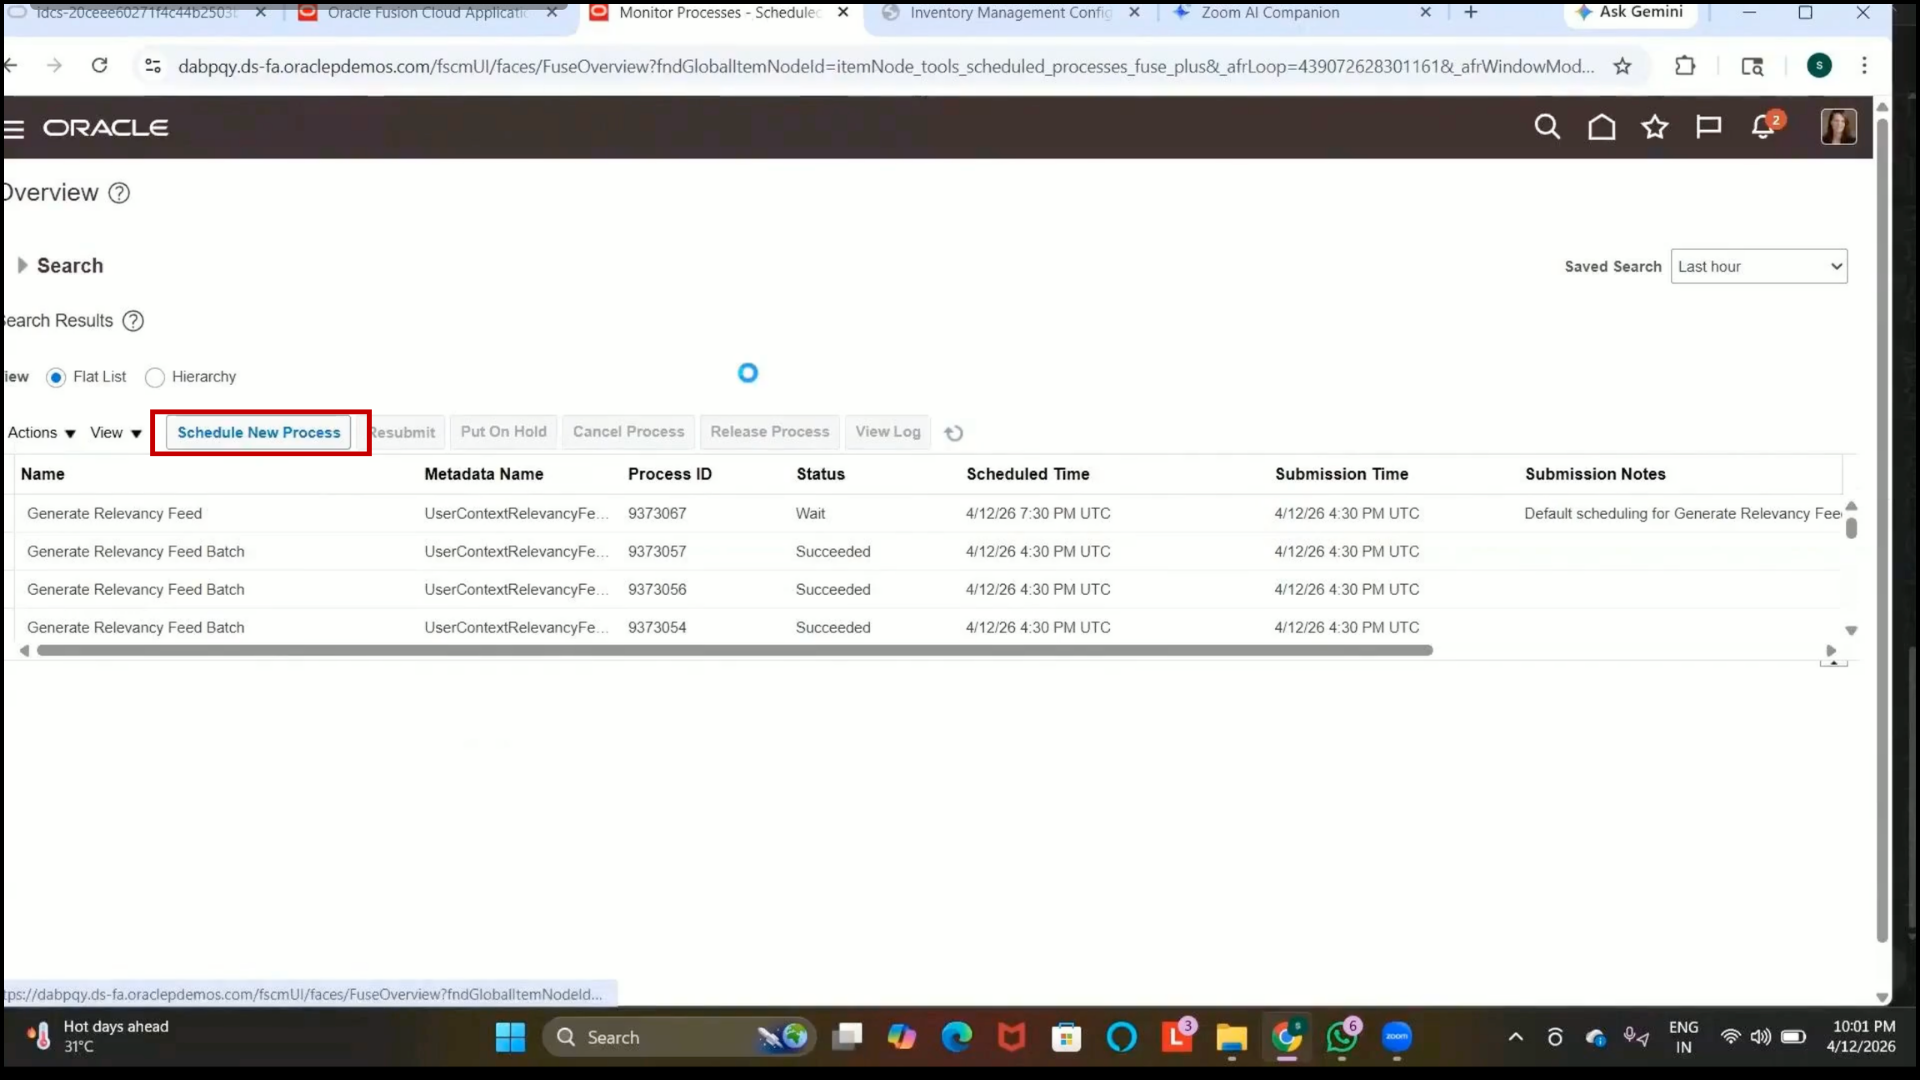
1. In Scheduled Processes, click on Schedule New Process.
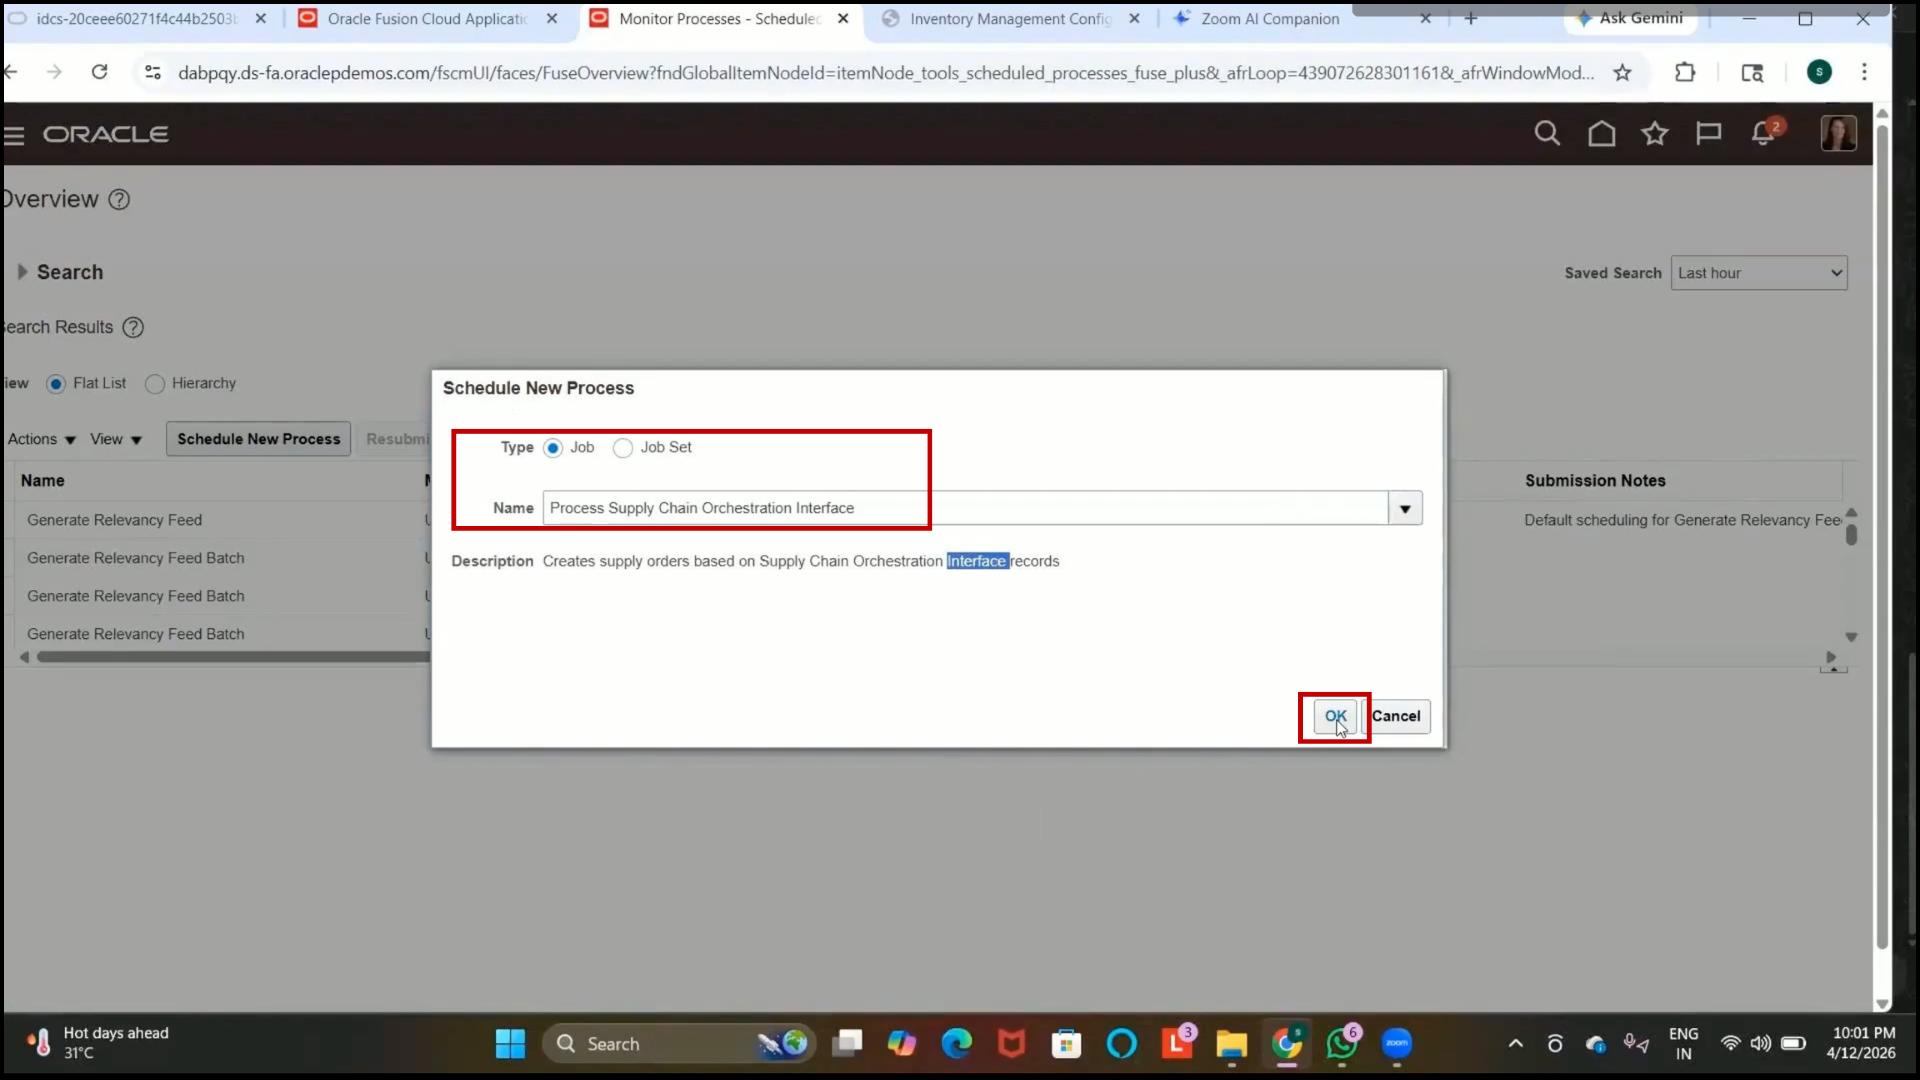
2. Search for the program:
3. Process Supply Chain Orchestration Interface Records
4. Select the program.
Step 321: Review Program Description
1. Verify the program description:
2. Creates supply orders based on supply chain orchestration interface records.
3. Understand the following:
4. Supply requests are initially stored in interface tables.
5. This program converts them into transfer orders.
Step 322: Configure Program Parameters
1.Click on OK.
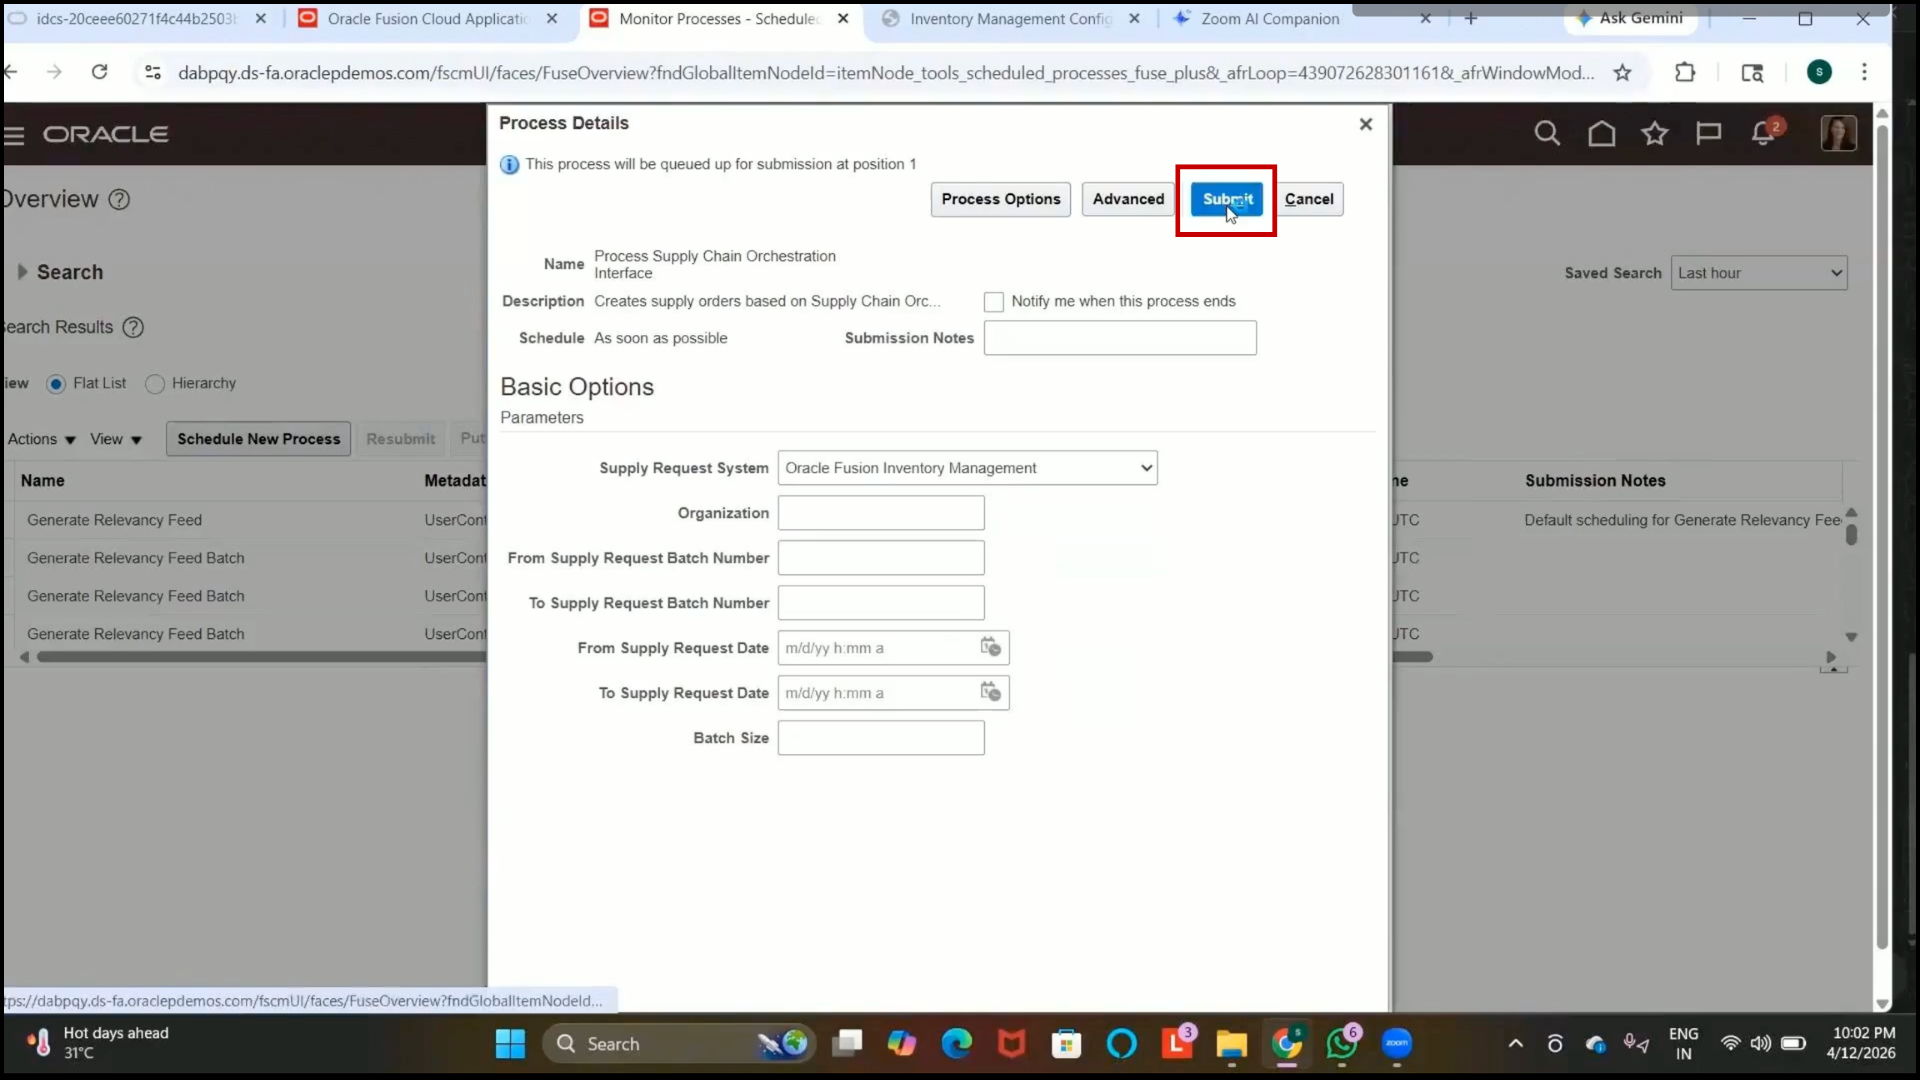
2. In the Source field, select:
3. Inventory Management
4. Review 4. Review other available sources if required.
Step 323: Submit the Scheduled Process
1. Click on Submit.
2. Wait for the scheduled process to complete.
3. Refresh the page periodically.
Step 324: Verify Program Completion
1. Confirm that the process status changes to Succeeded.
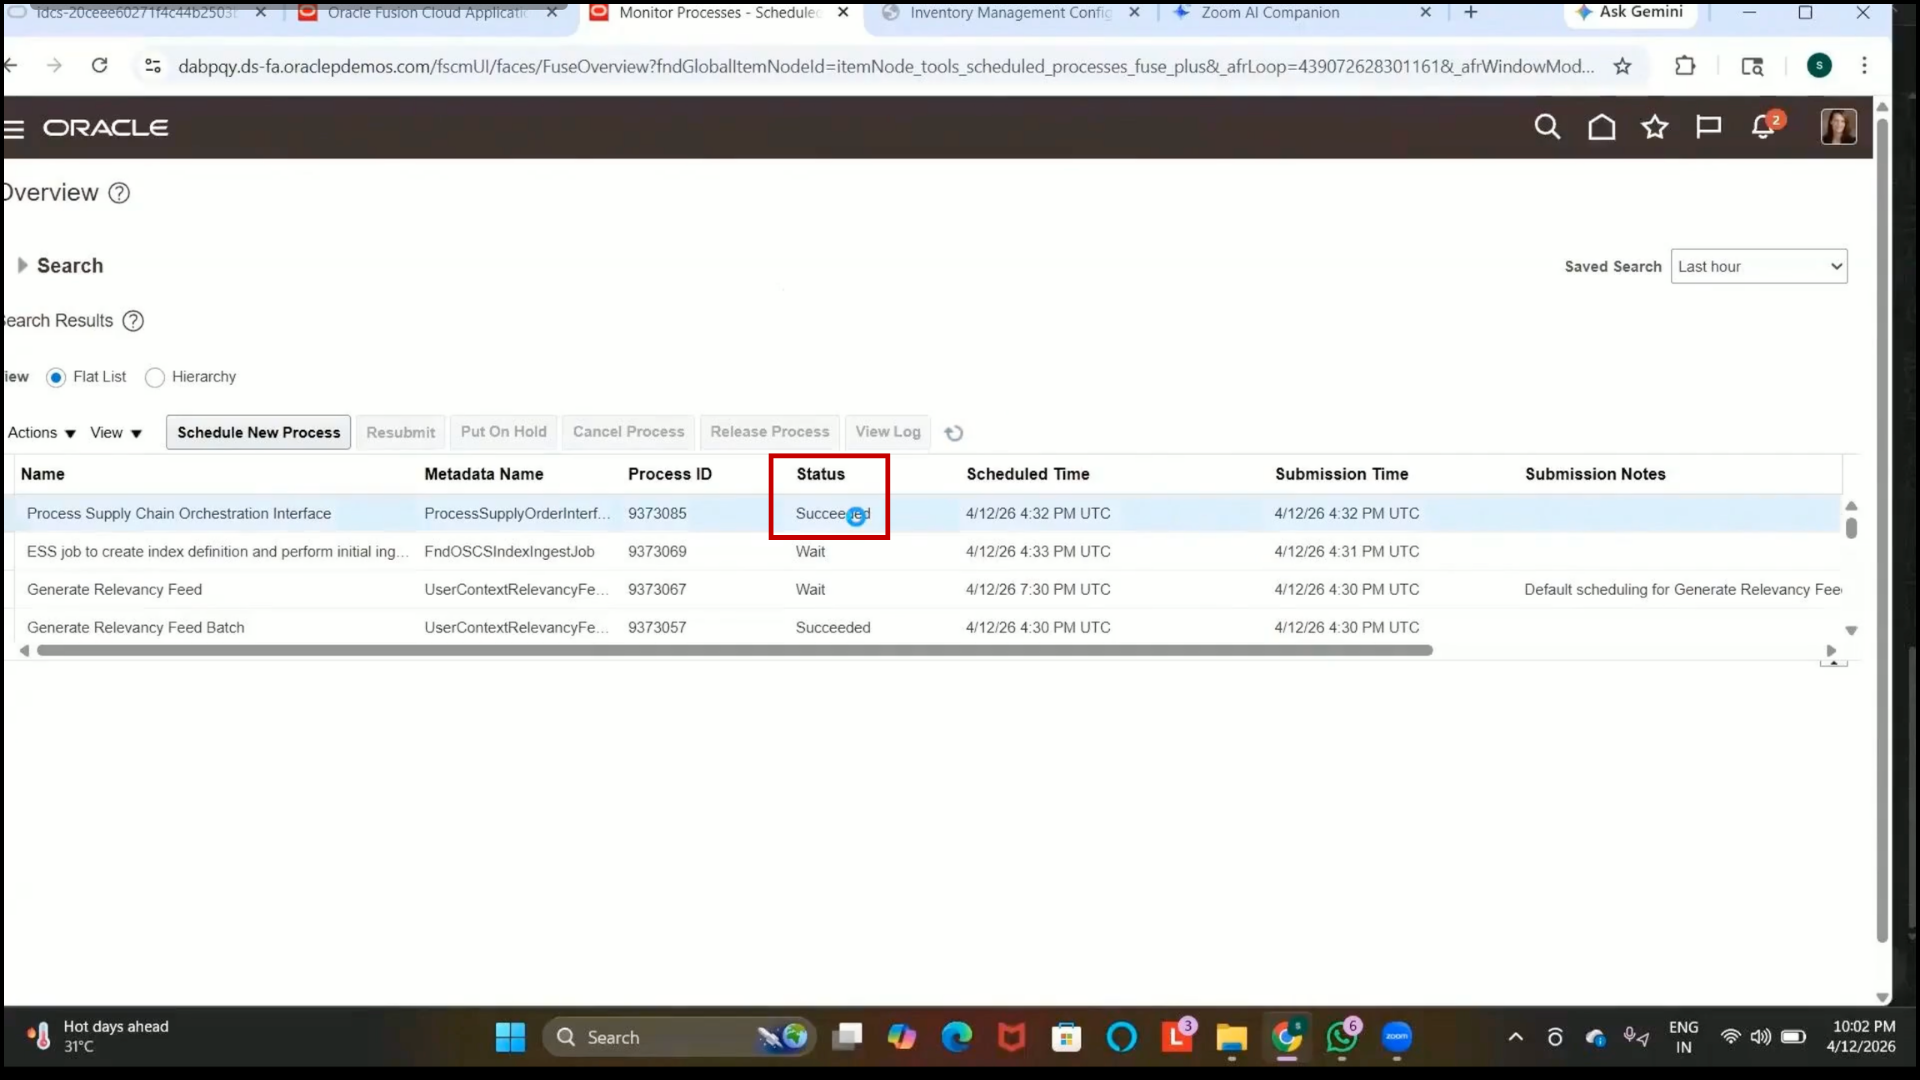
2. Verify that the transfer order is created successfully.
Step 325: Open Supply Chain Orchestration
1. Navigate to Supply Chain Orchestration.
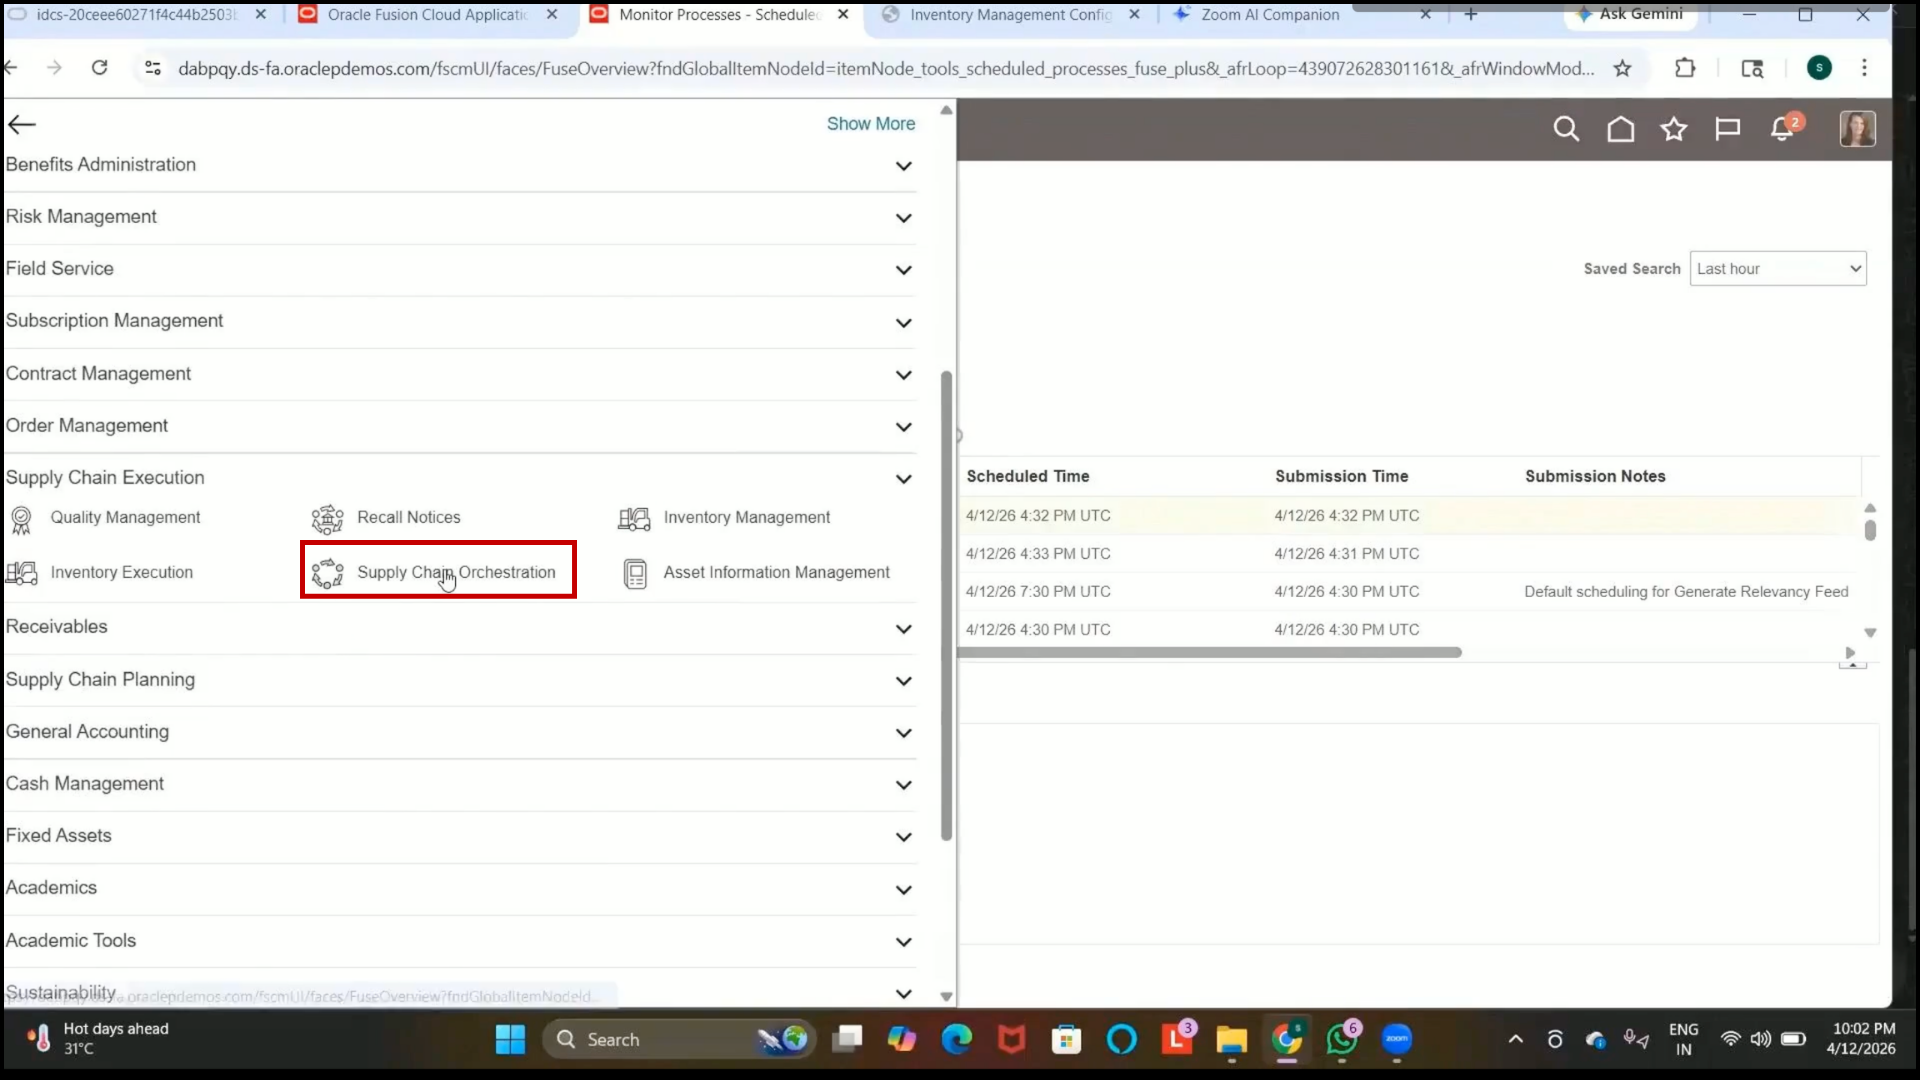
2. Review all supply requests available in the system.
Step 326: Search Supply Request
1. Search using the Supply Request Reference Number.
2. Verify that the request status is displayed as On Track.
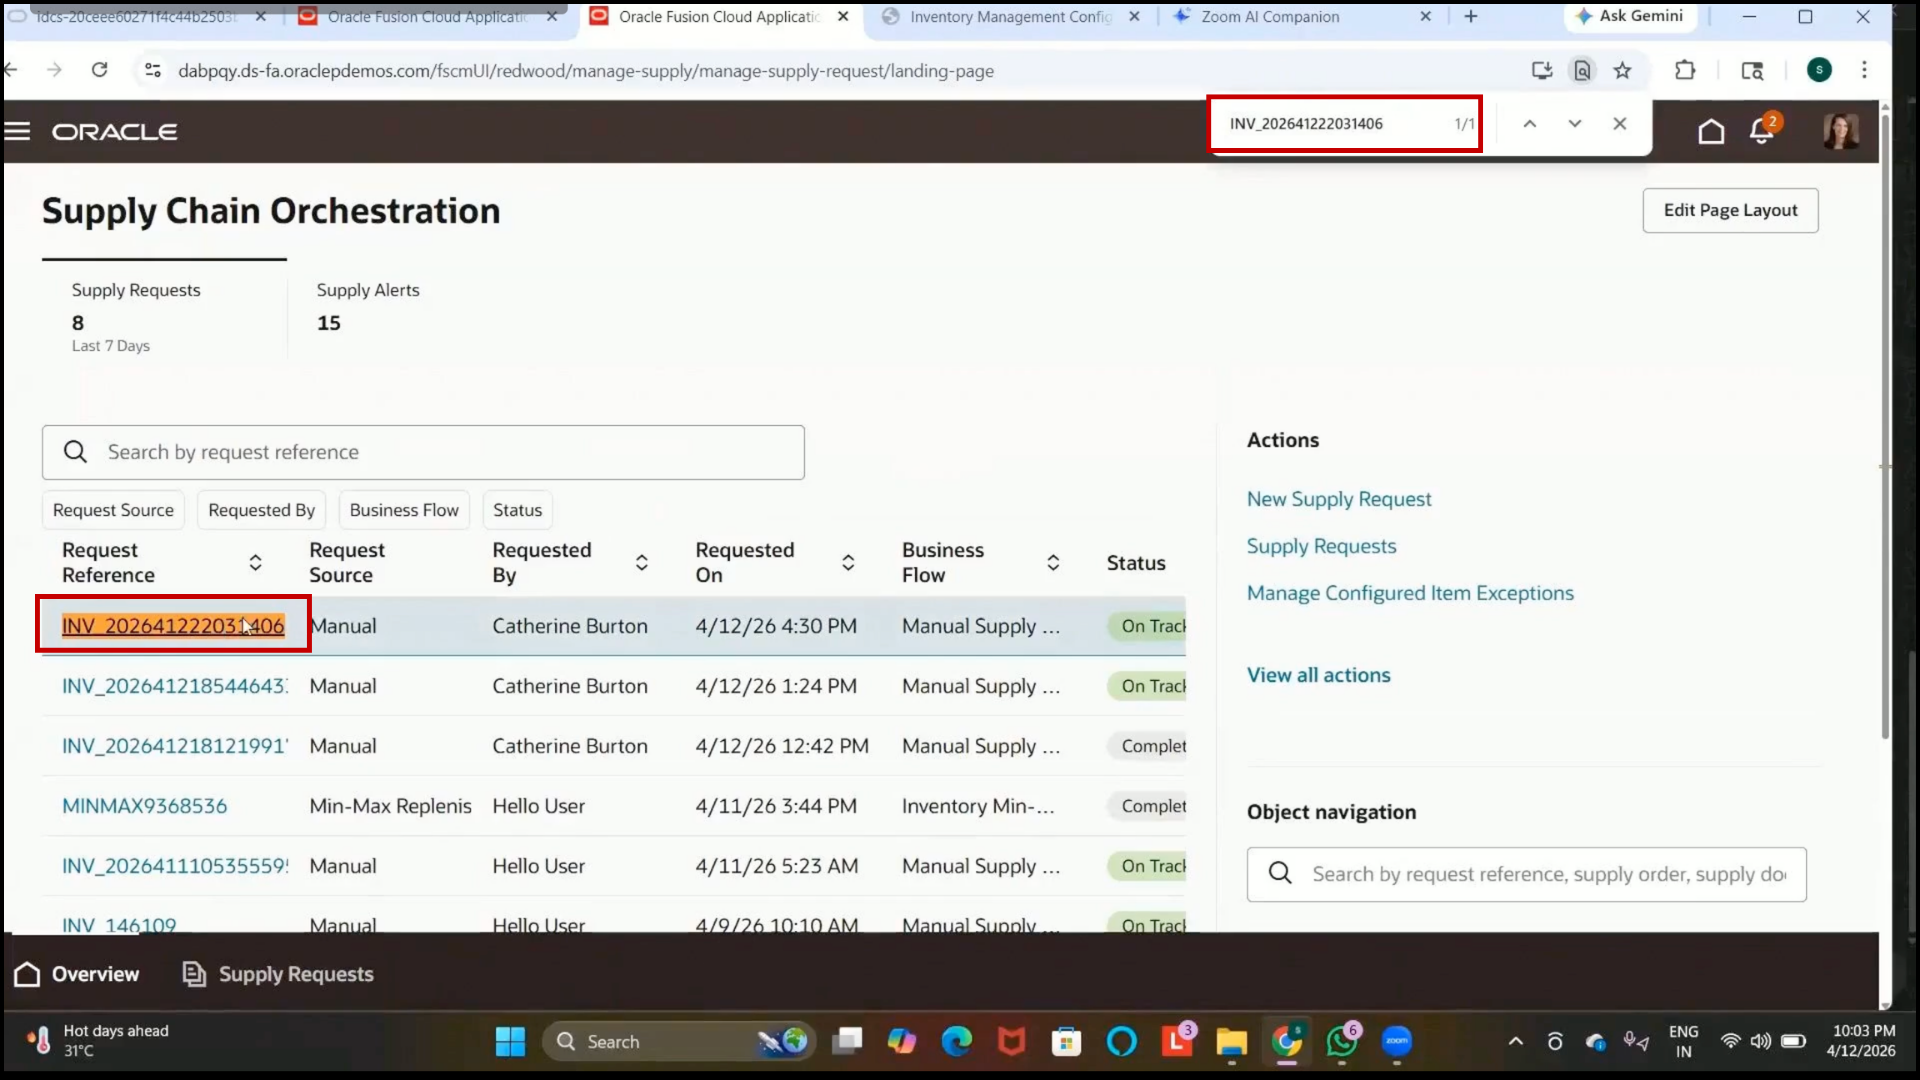
Step 327: View Supply Request Details
1.Click on the Supply Request hyperlink.
2. Review request details such as
3. Requested By
4. Item Details
5. Organization 5. Organization Details
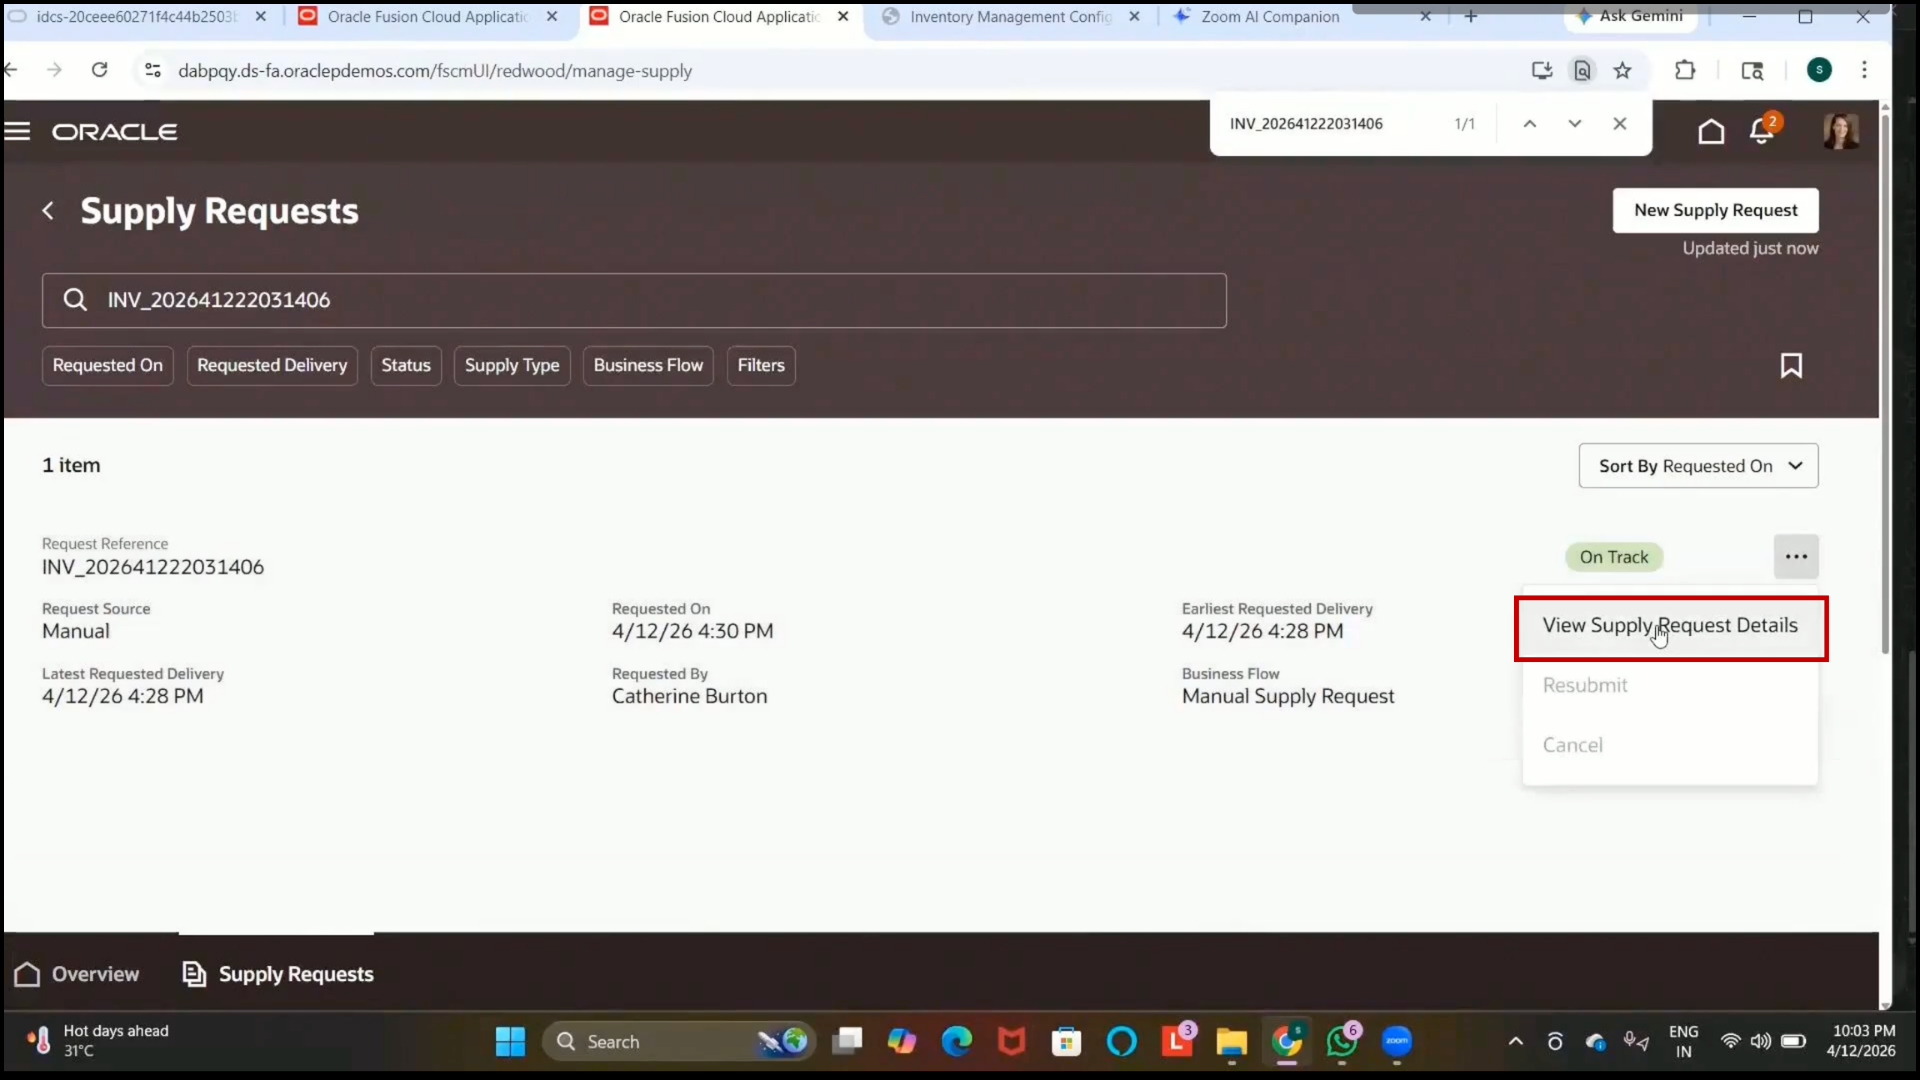
Step 328: Open Supply Request Actions
1. Click on the Menu icon.
2. Select View Supply Request Details.
Step 329: Verify Transfer Order Creation
1. Confirm that the Transfer Order Number is generated.
2. Example:
3. Transfer Order Number: 156051
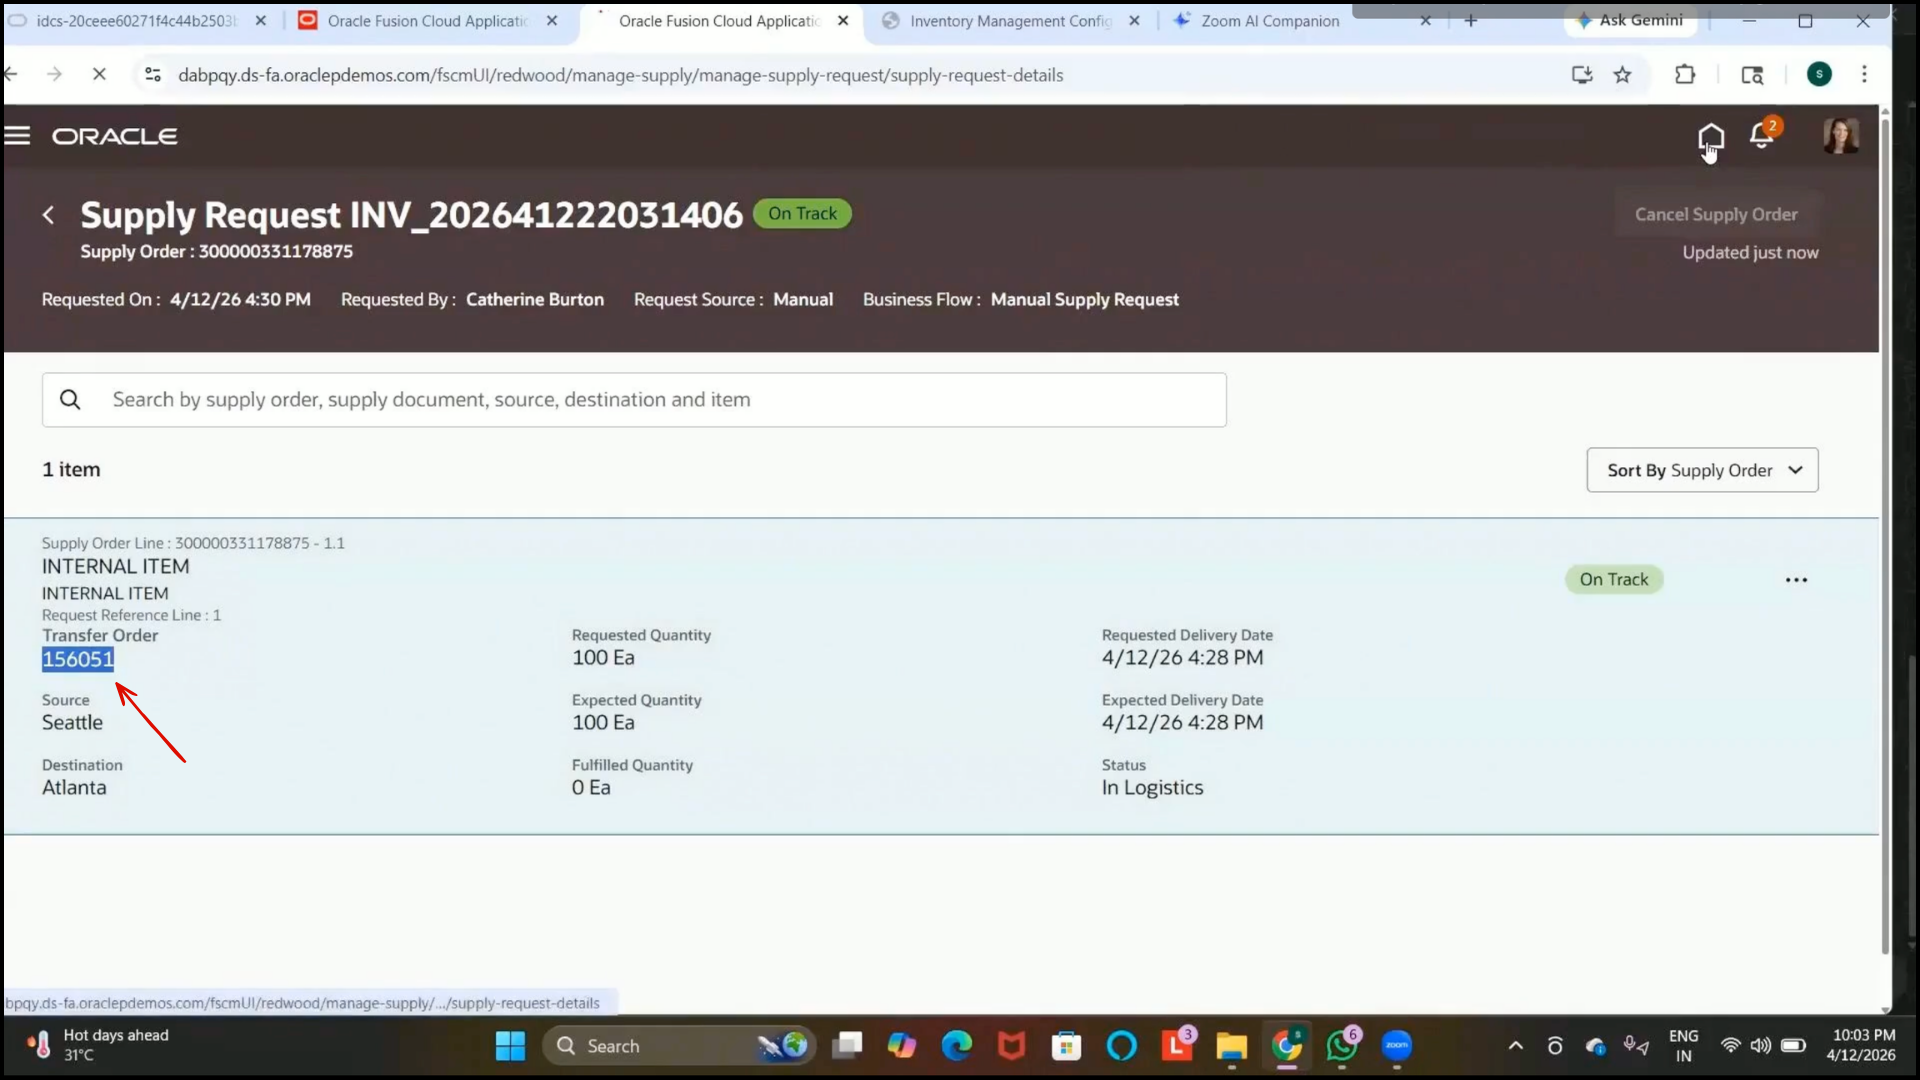
4. Verify that the supply request is successfully converted into a transfer order.