Create Facility Exception
Step 42: Create Facility Exception
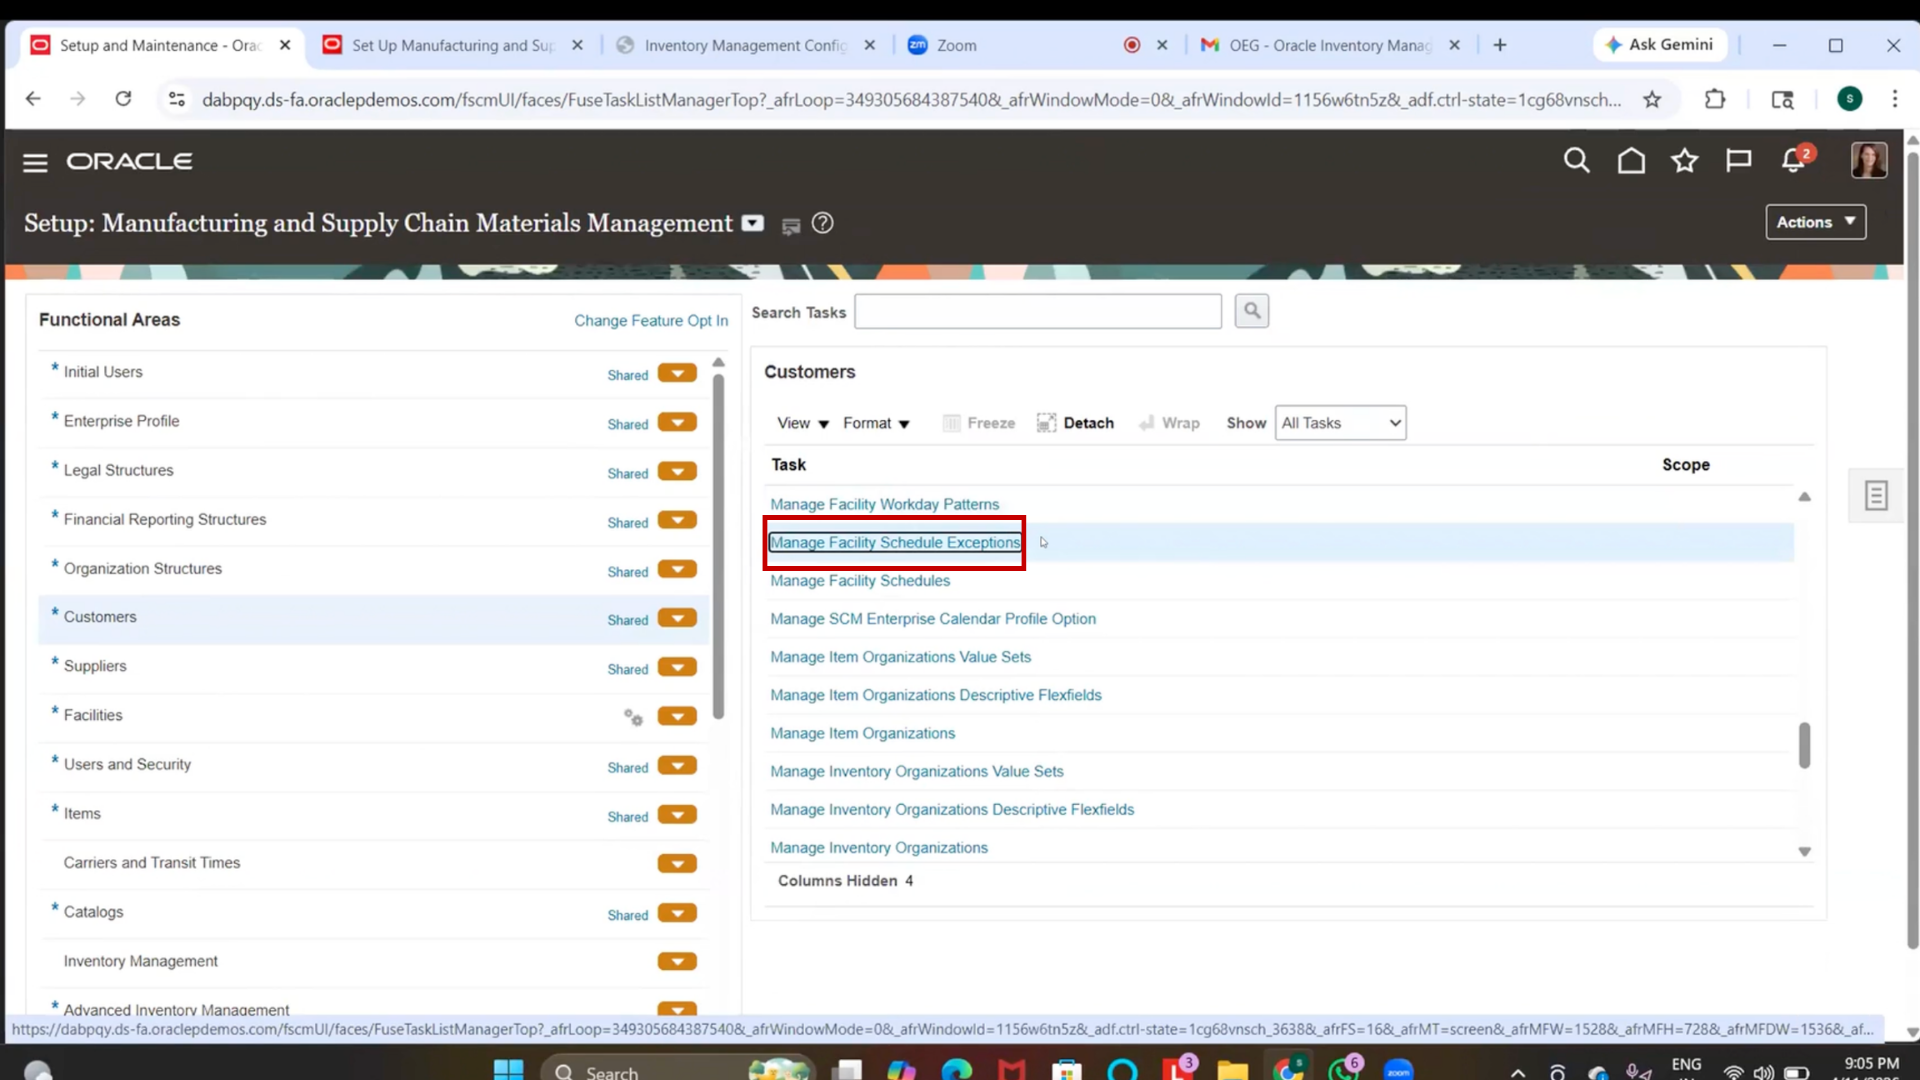
1. Navigate to setup and Management.
2. Search for “Manage Facility Schedule.”
3. Click on Add (+ icon). Exception
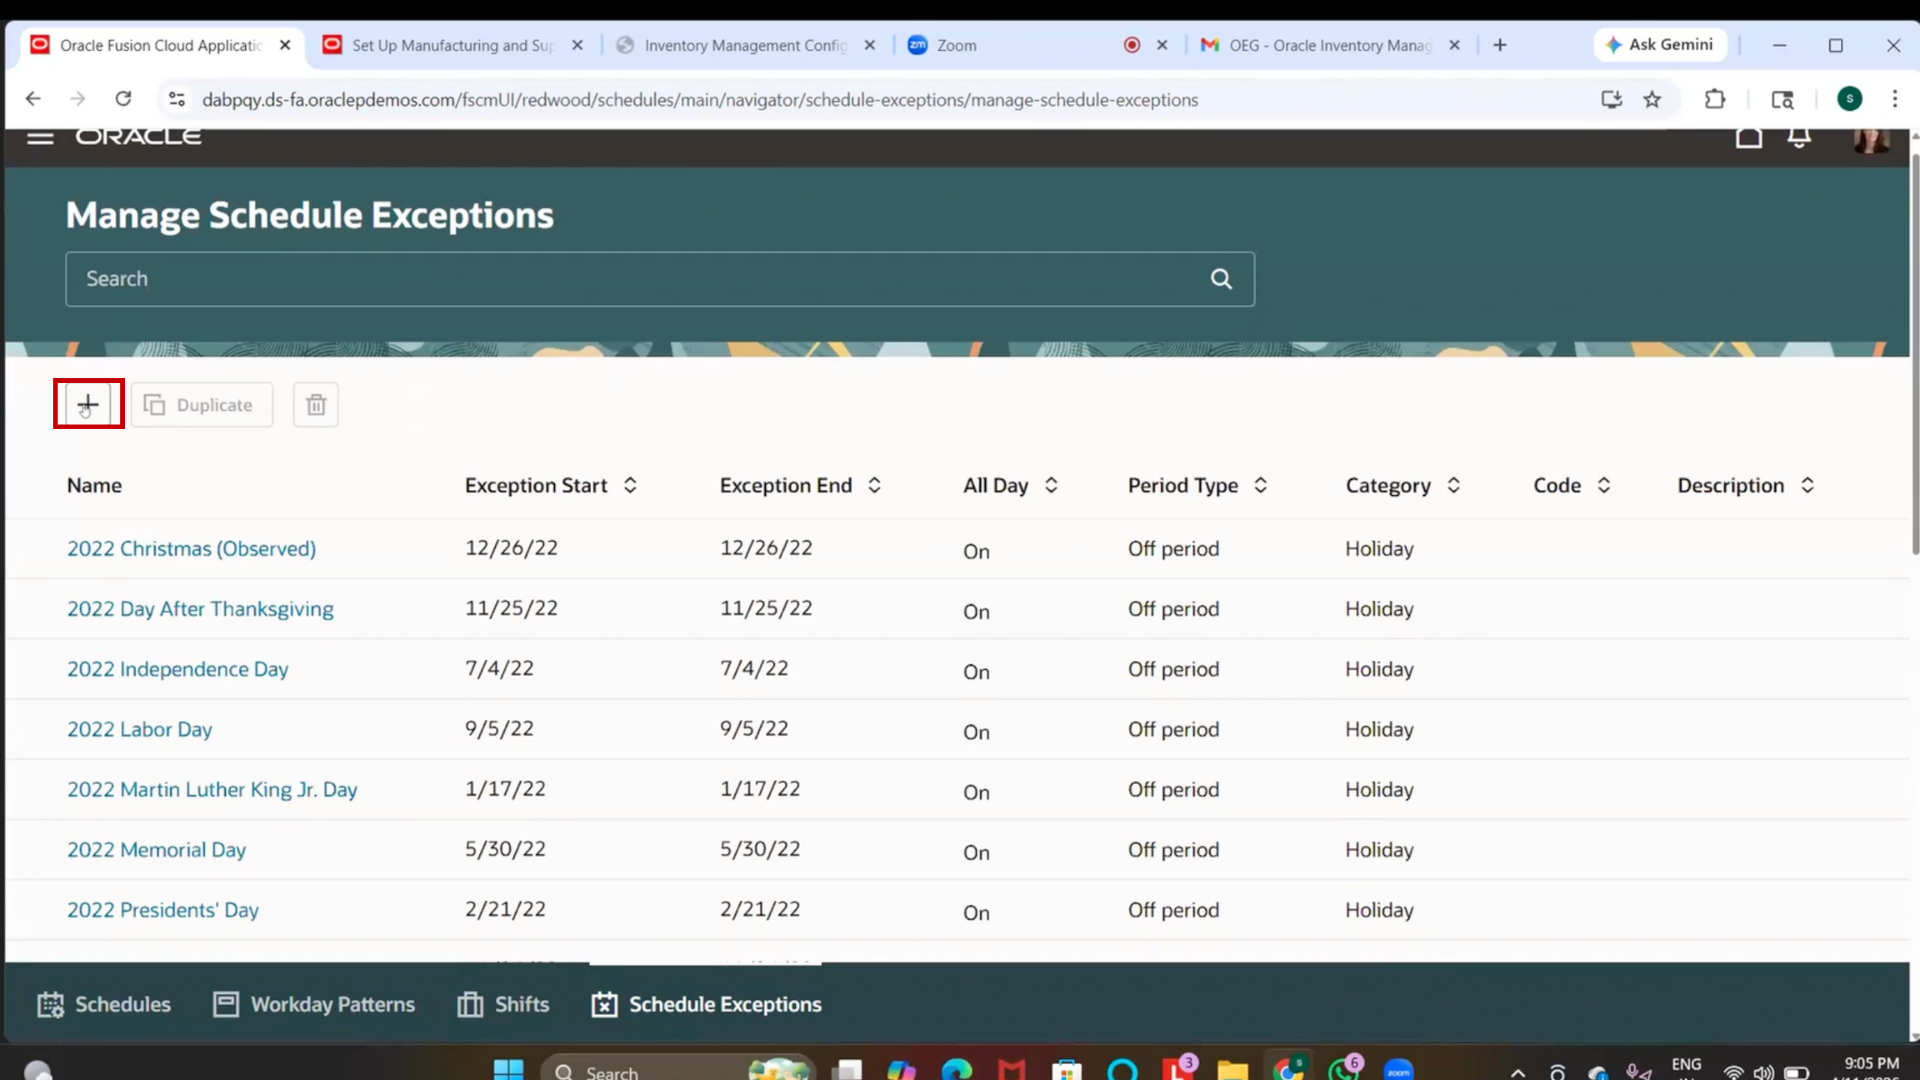
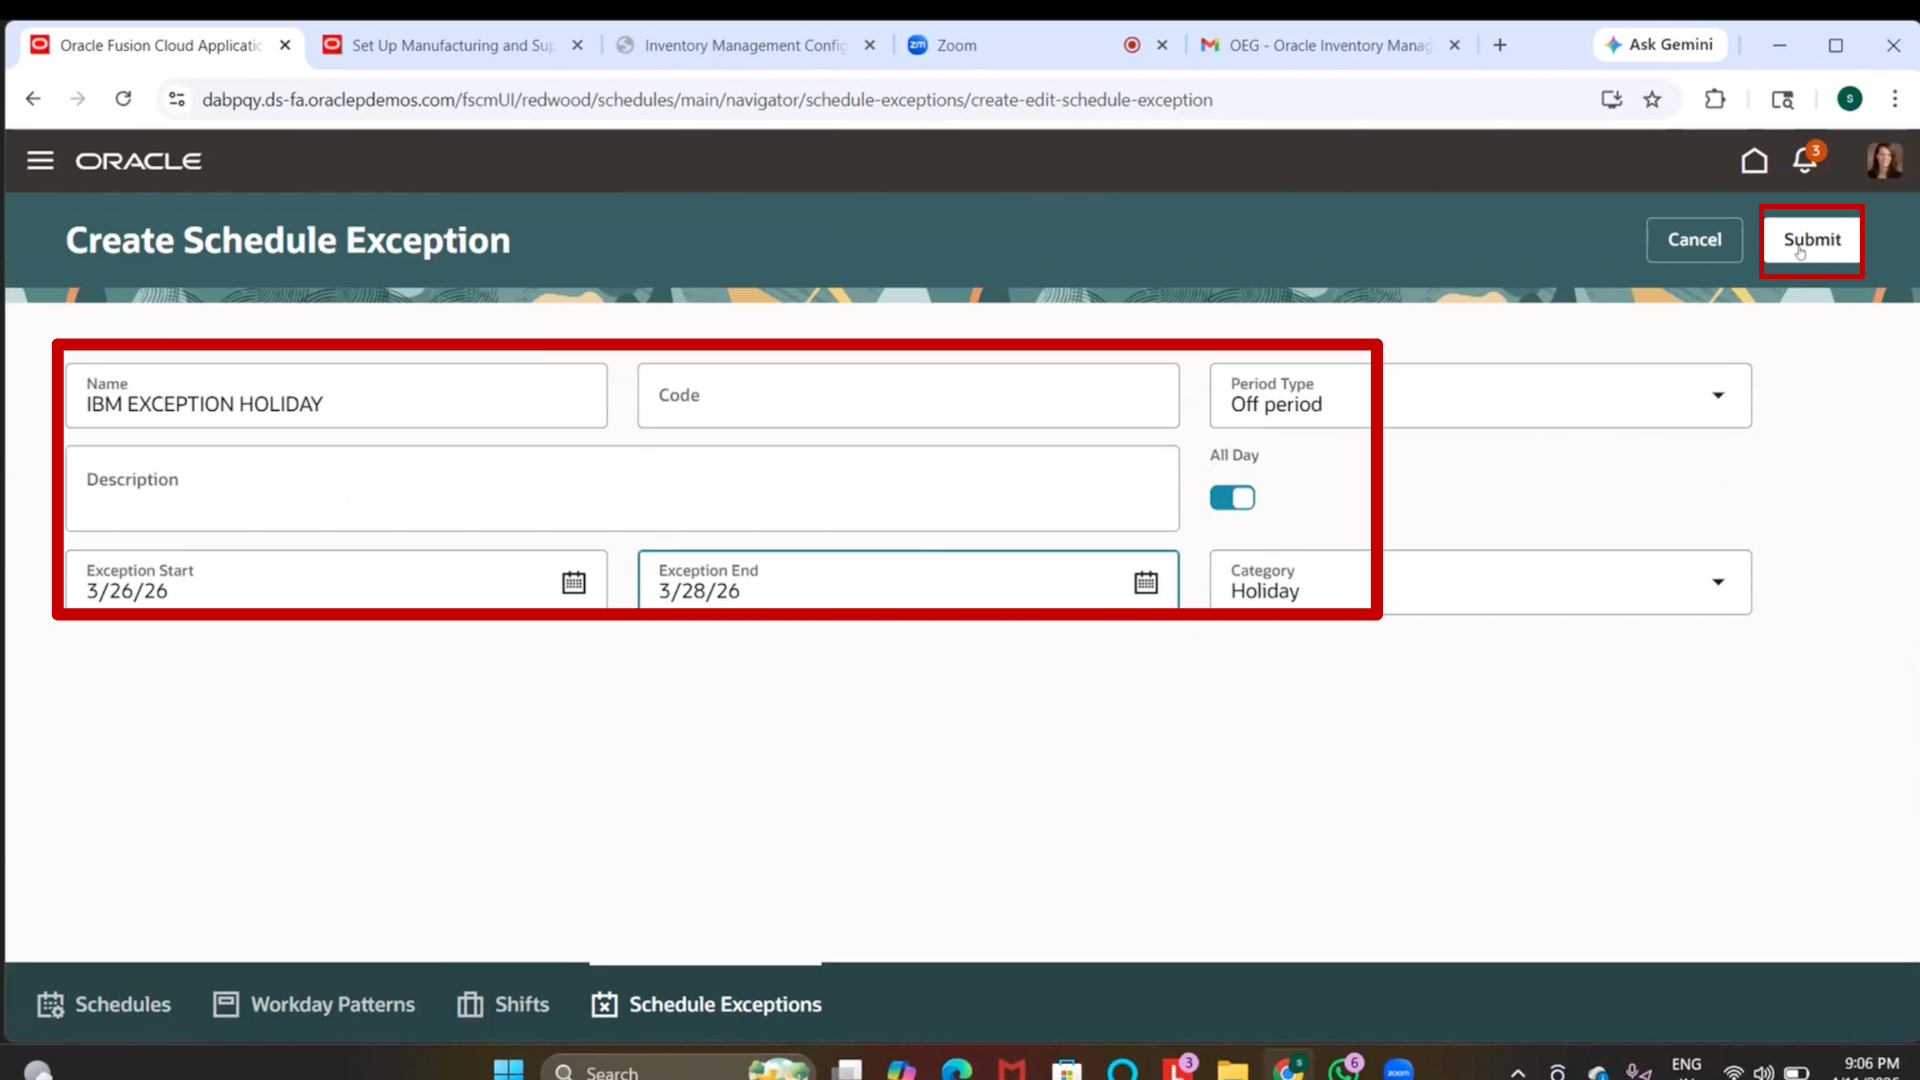
4. Enter Name as “IBM Exception Holiday”
Step 43: Define Exception Dates
1. Select Start Date (March 26)
2. Select End Date (March 28)
Step 44: Configure Exception Type
1. Select Type as Holiday
2. Mark it as All Day
Step 45: Set Period Type
1. Select Period Type as Off Period
Step 46: Submit Exception
1. Click on “Submit.”
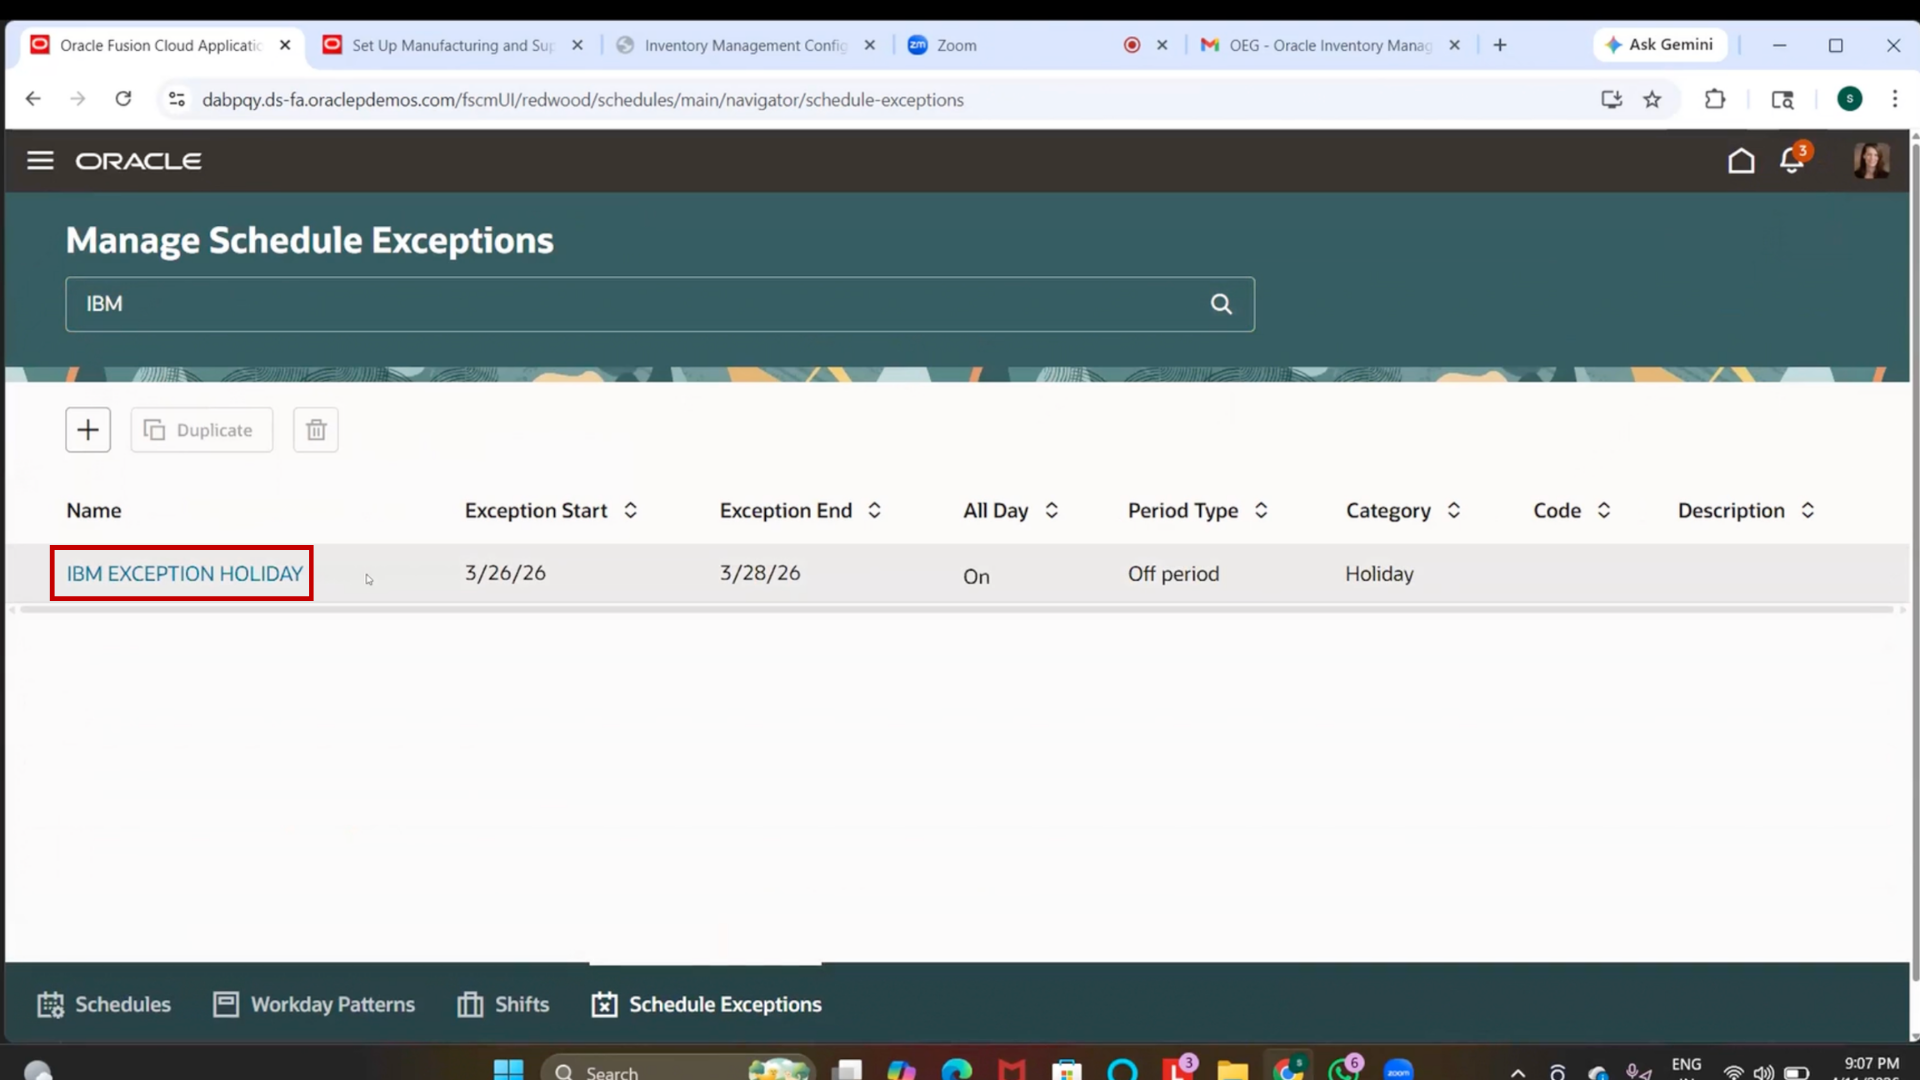
Step 47: Verify Exception Creation
1. Search for Exception
2. Confirm it is created
Step 48: Create Facility Schedule
1. Navigate to setup and Management.
2. Search for “Manage Facility Schedule.”
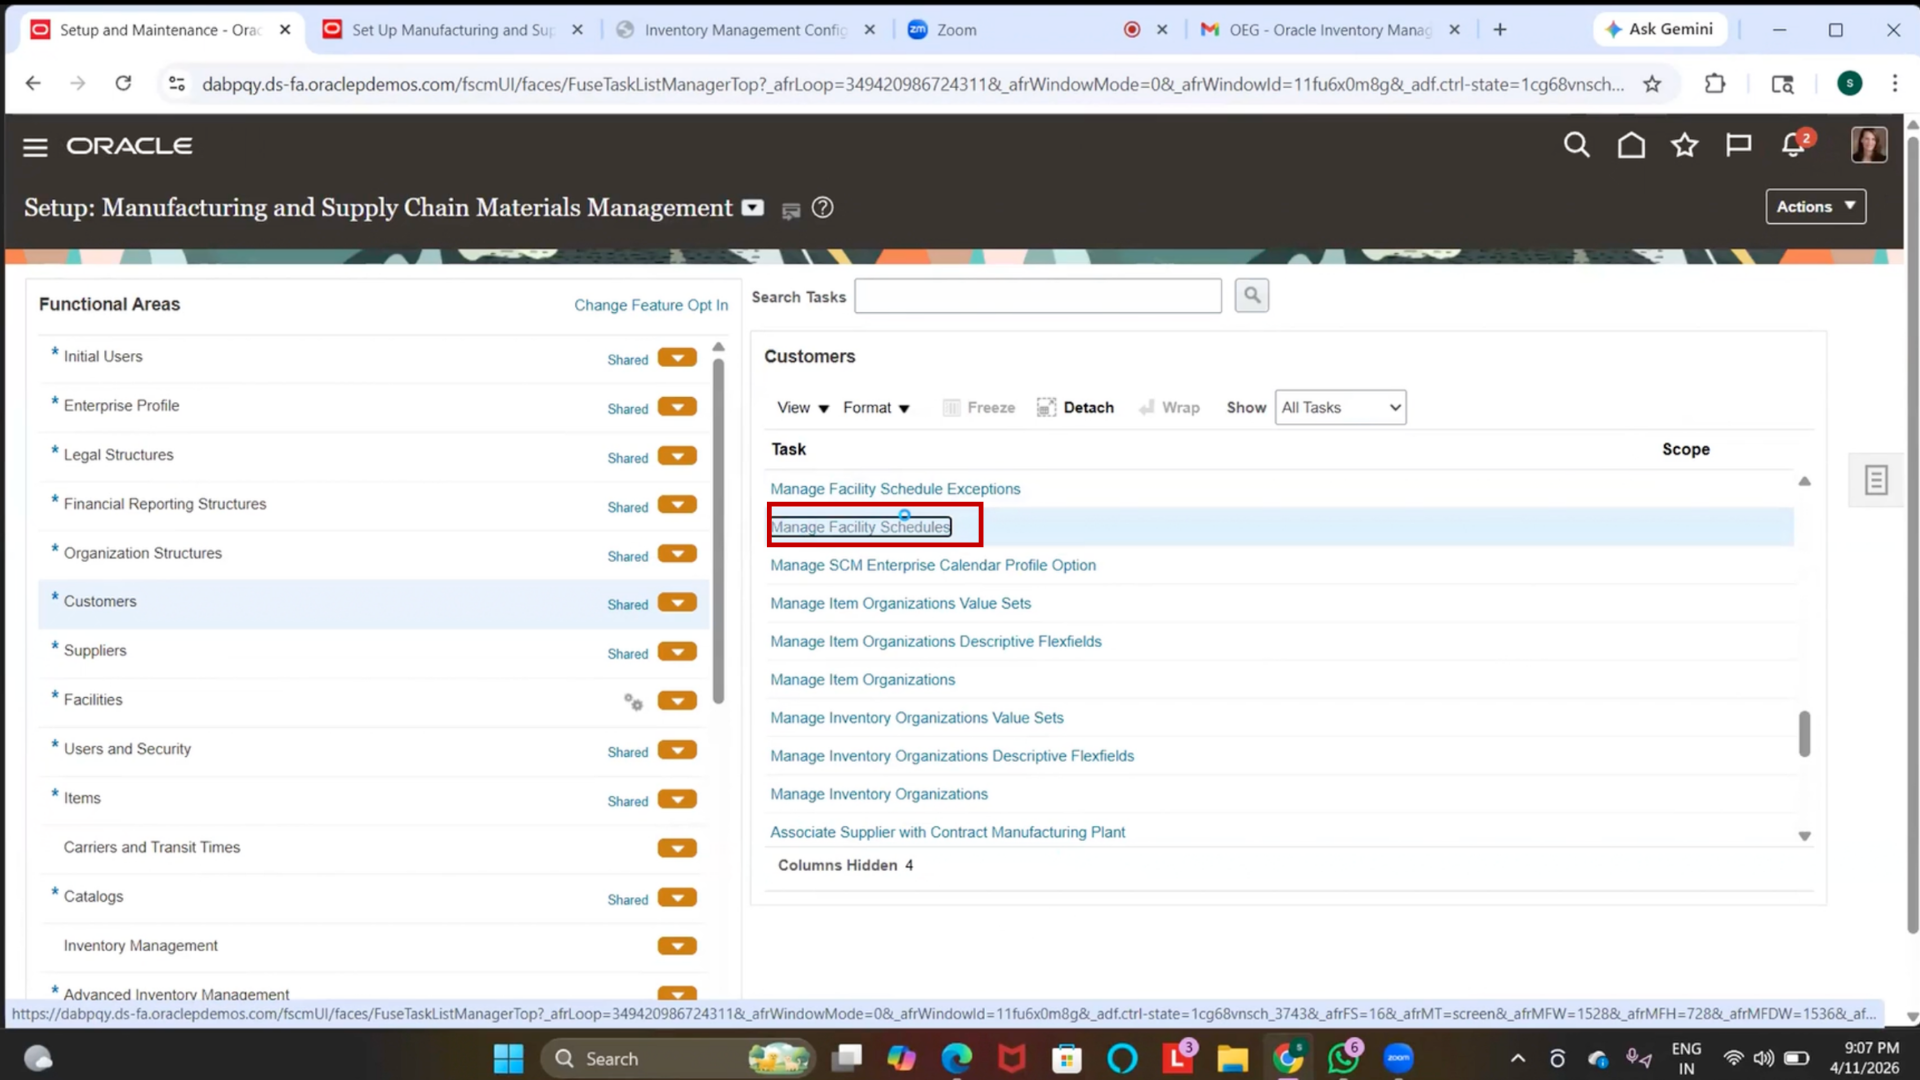
3. Click on Add (+ icon)
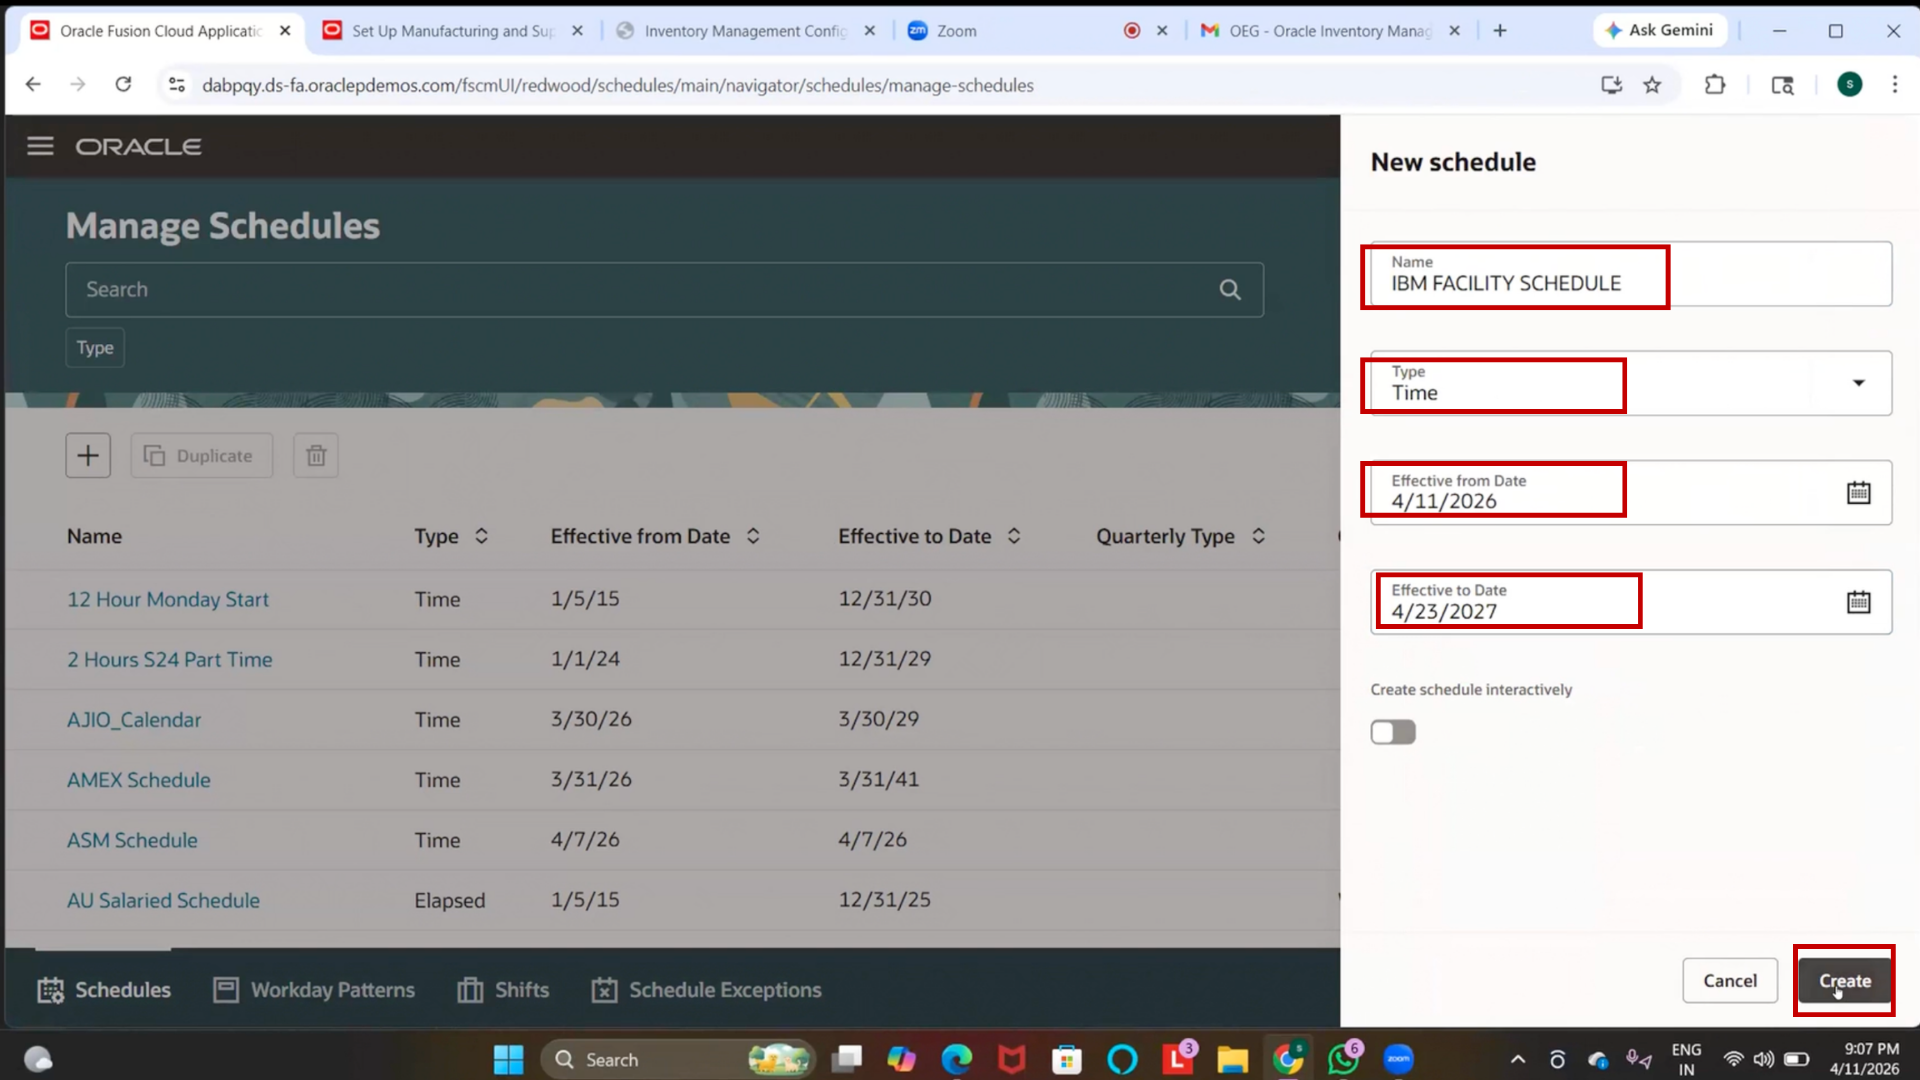
4. Enter Name as “IBM Facility Schedule”
Step 49: Define Schedule Details
1. Select Type as Time
2. Select Effective Start Date
3. Enter End Date (2027)
Step 50: Create Schedule
1. Click on “Create.”
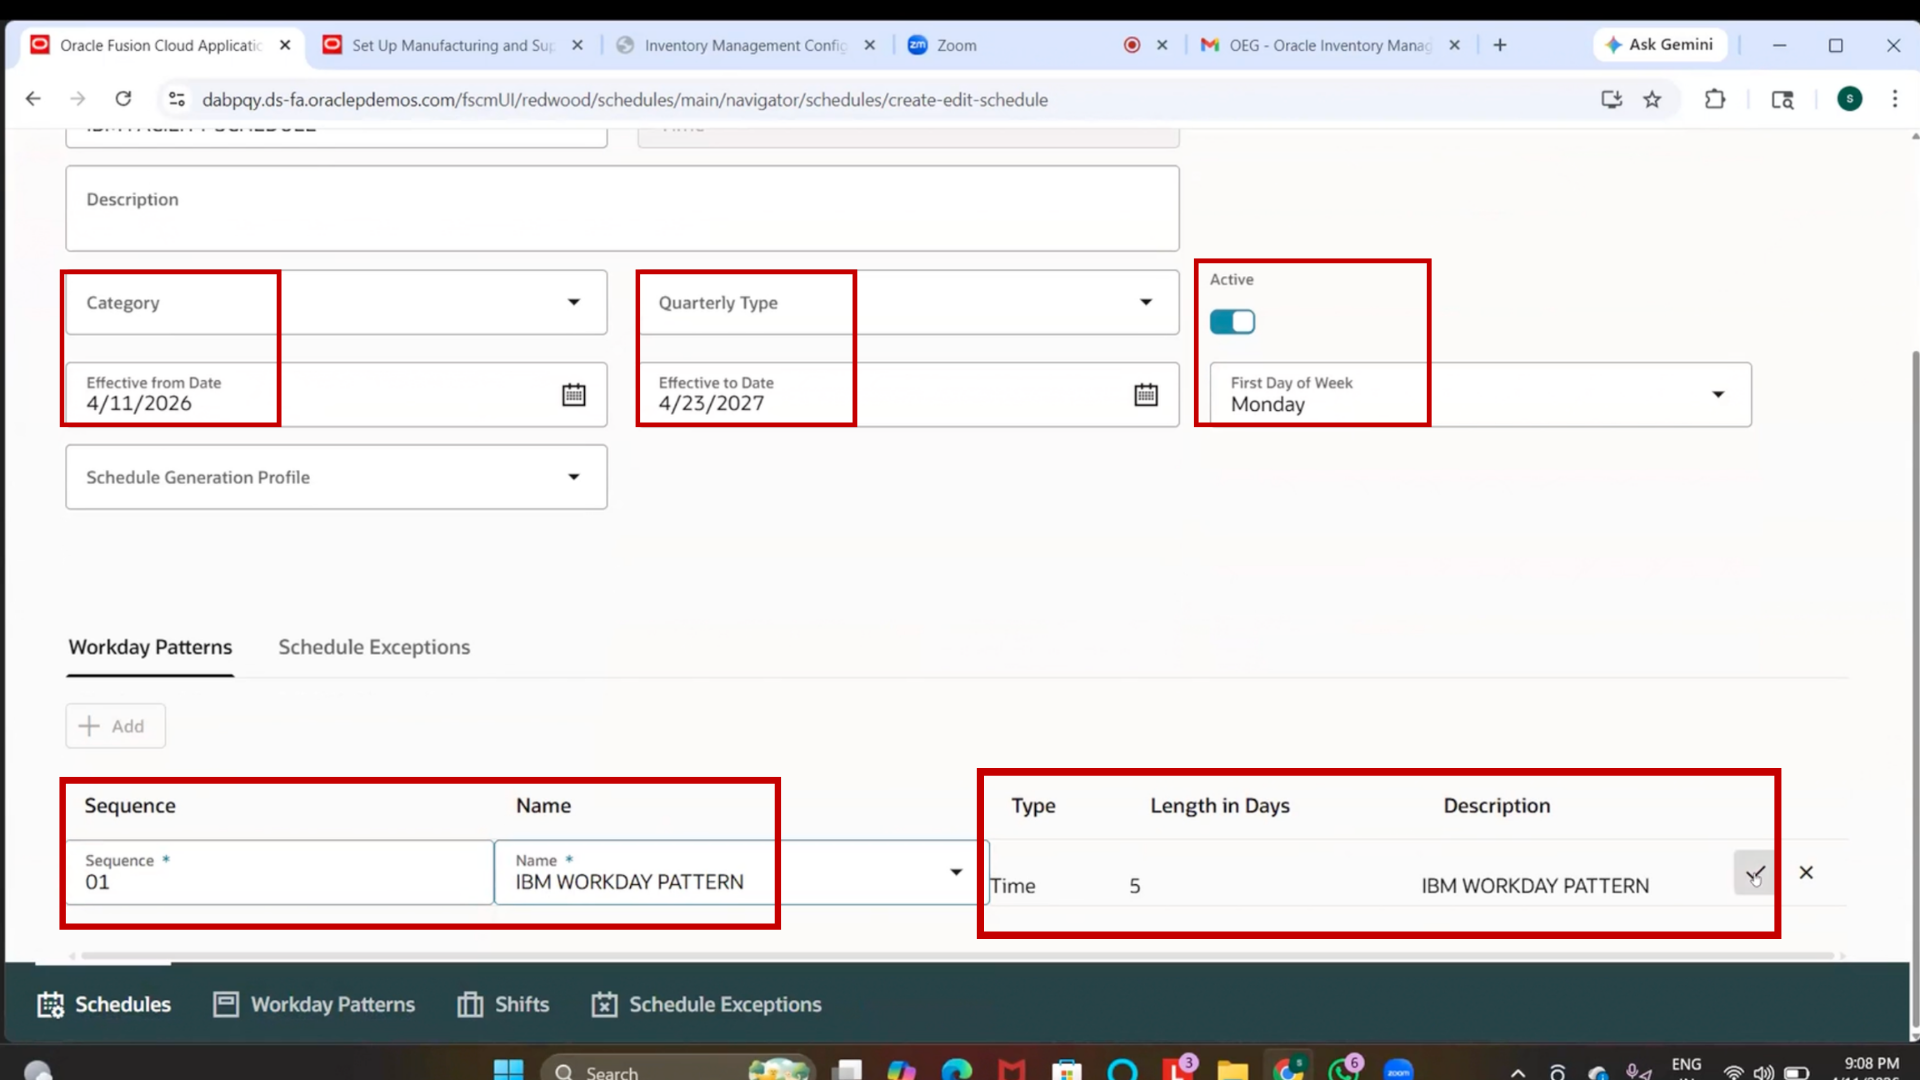
Step 51: Assign Workday Pattern
1. Click on Add
2. Enter sequence as 1
3. Select “IBM Workday Pattern.”
4. Enable the checkbox
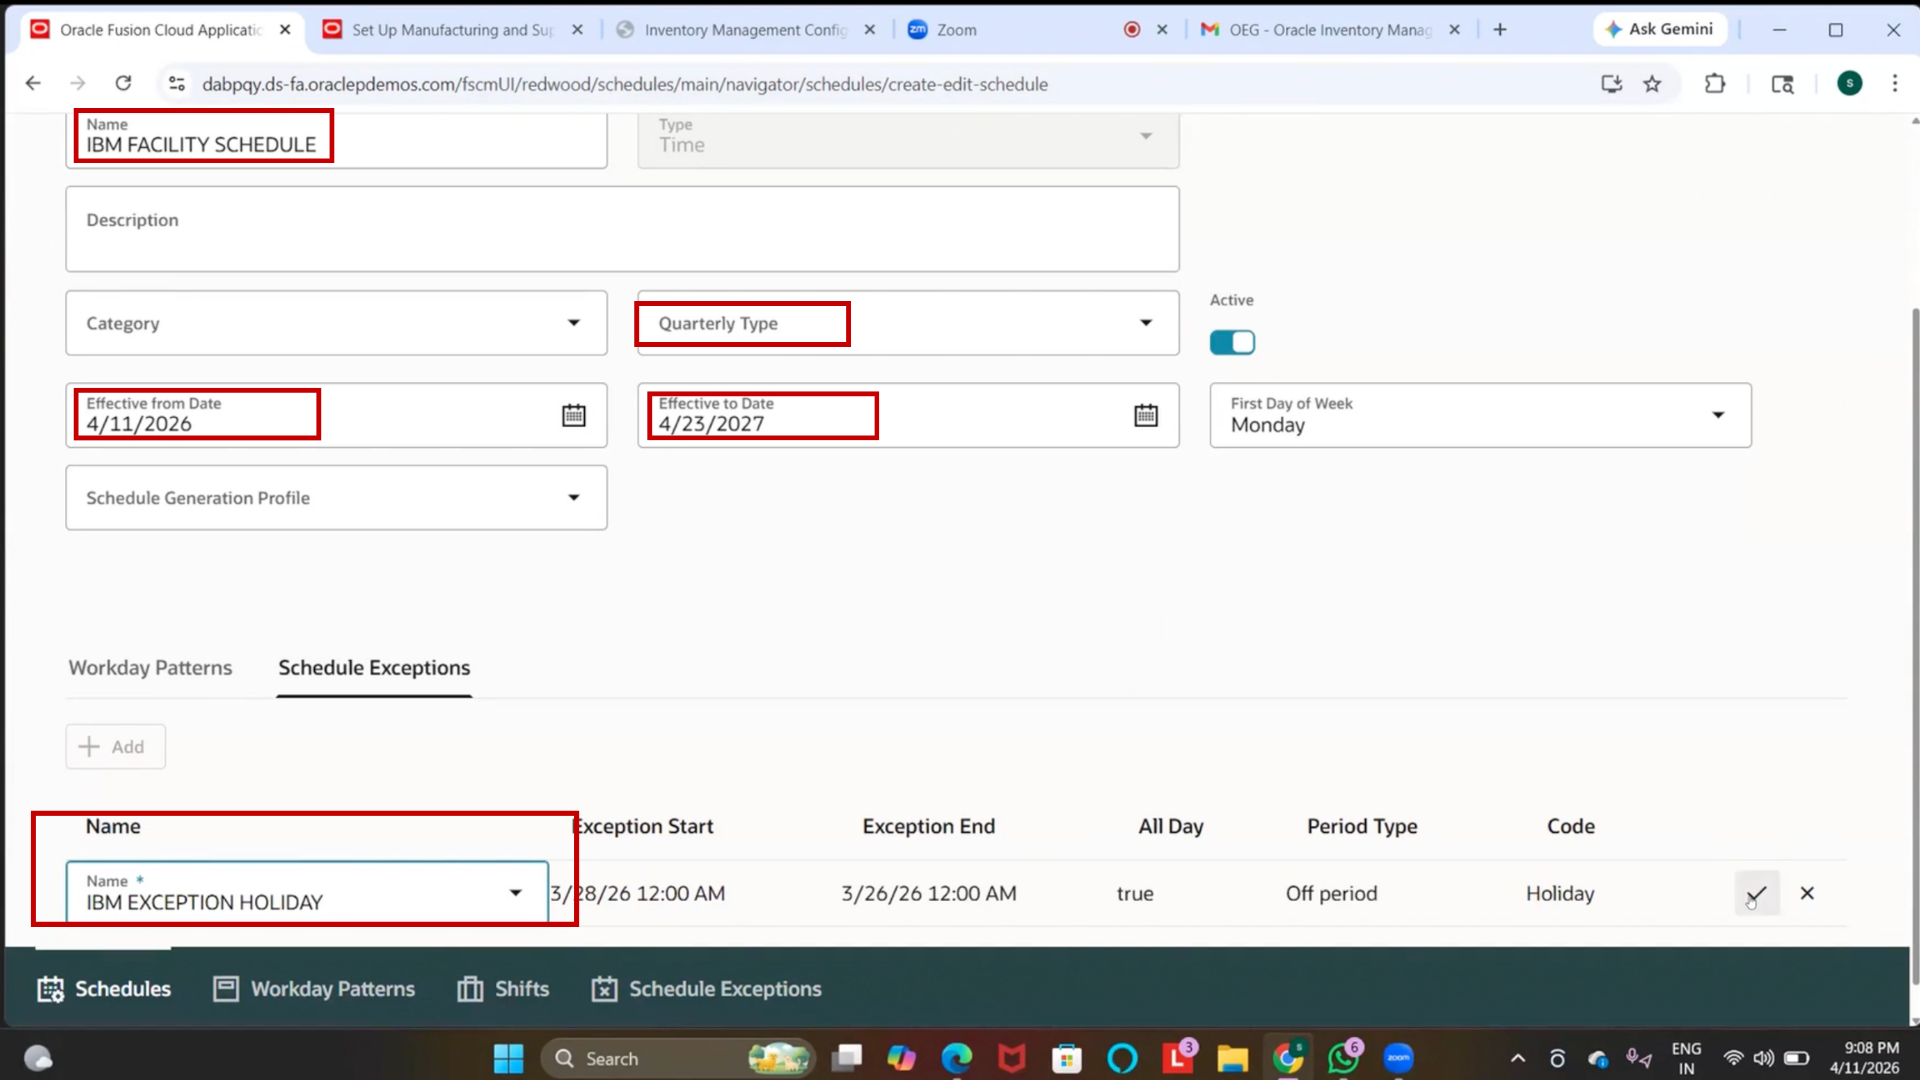
Step 52: Assign Schedule Exception
1. Go to Schedule Exceptions
2. Click on “Add.”
3. Select “IBM Exception Holiday.”
4. Enable the checkbox
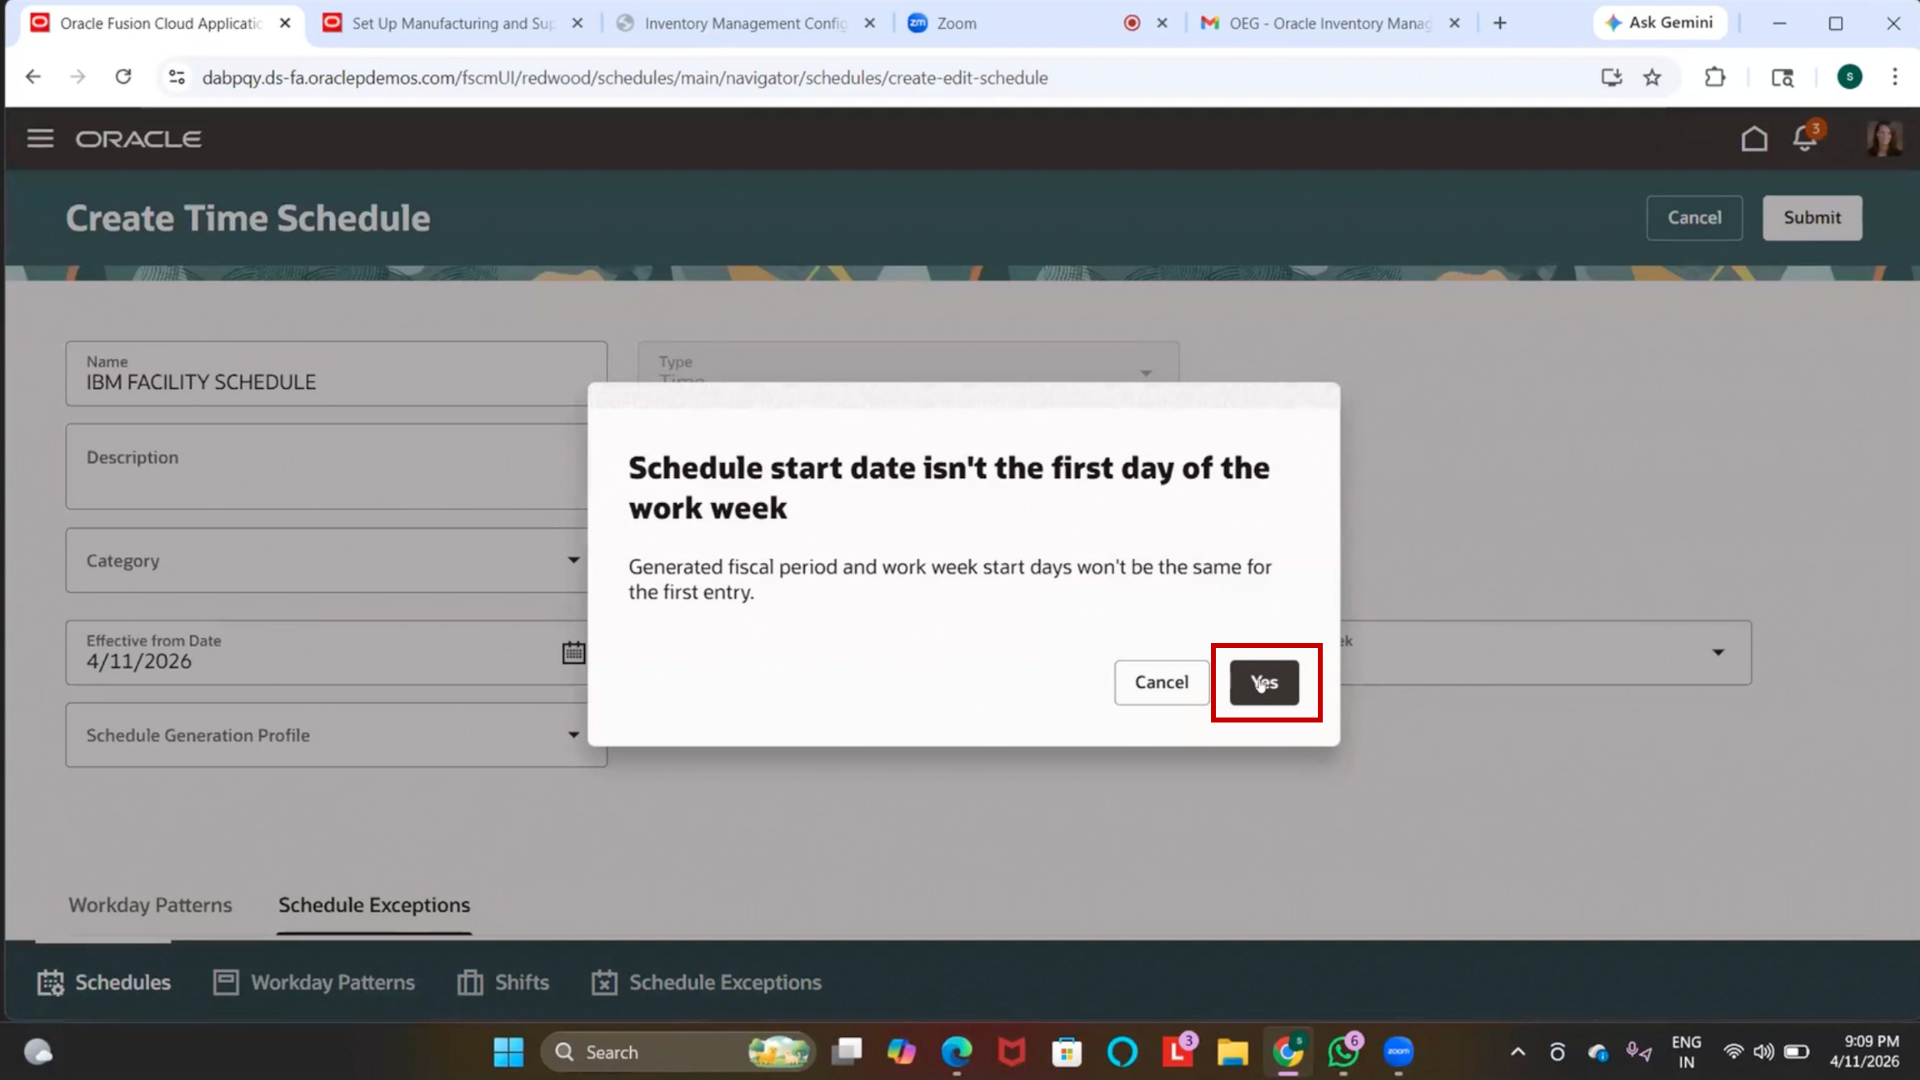
Step 53: Submit Facility Schedule
1. Click on “Submit.”
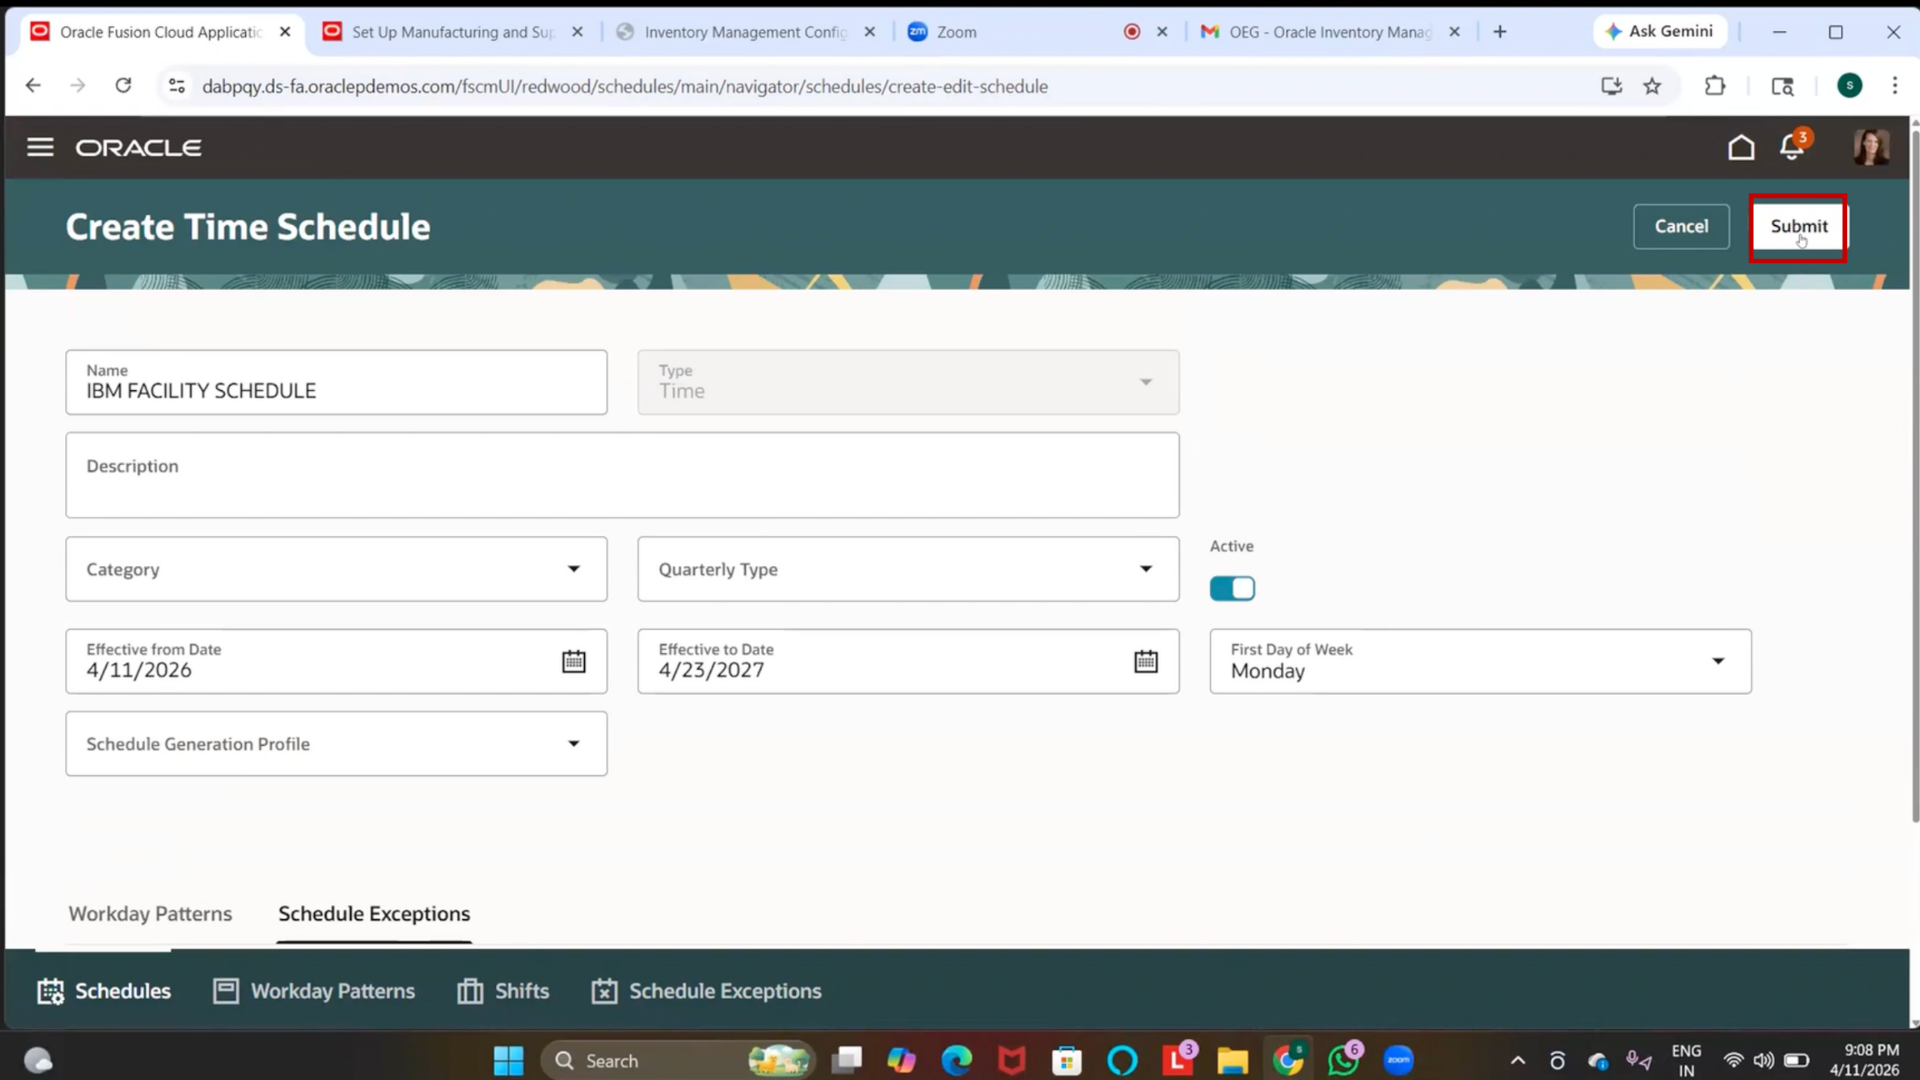
2. IBM has been created
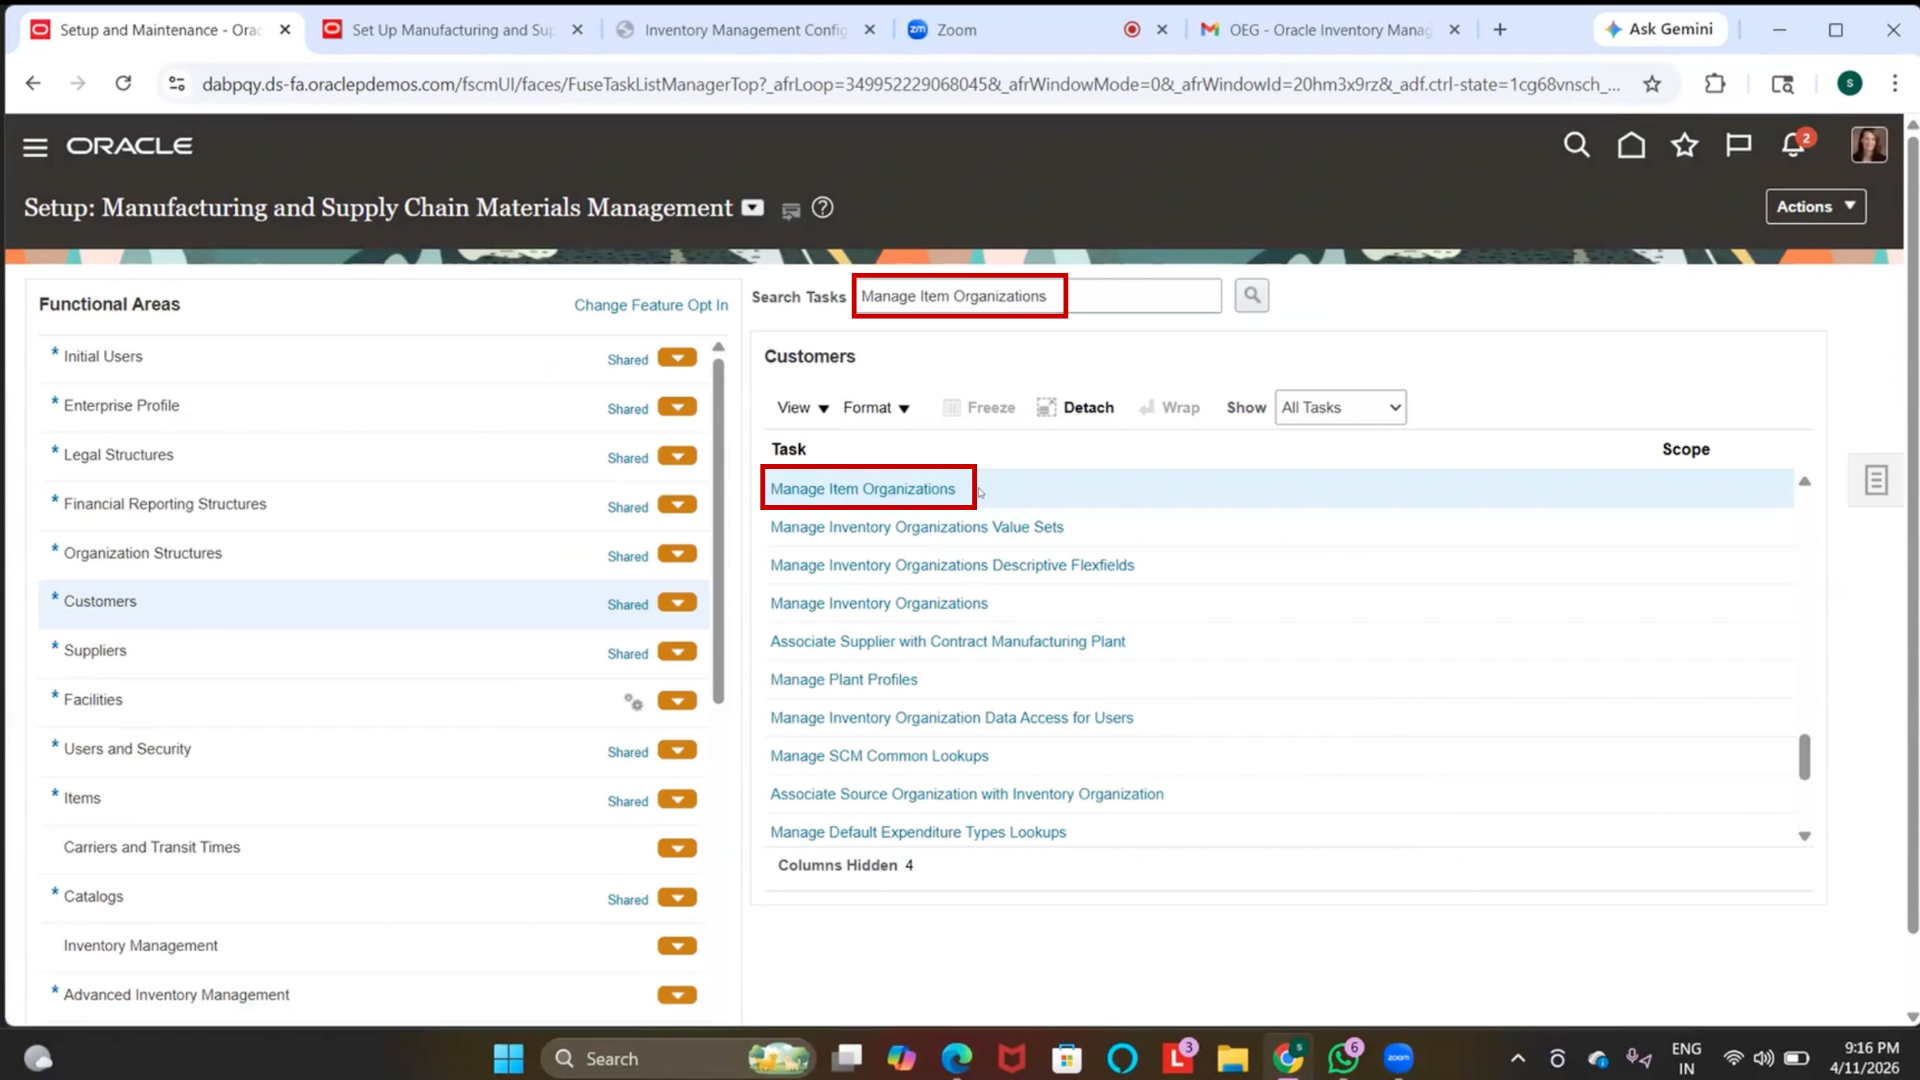
Step 54: Navigate to Manage Item Organization
1. Go back to the main menu
2. Click on Manage Item Organization
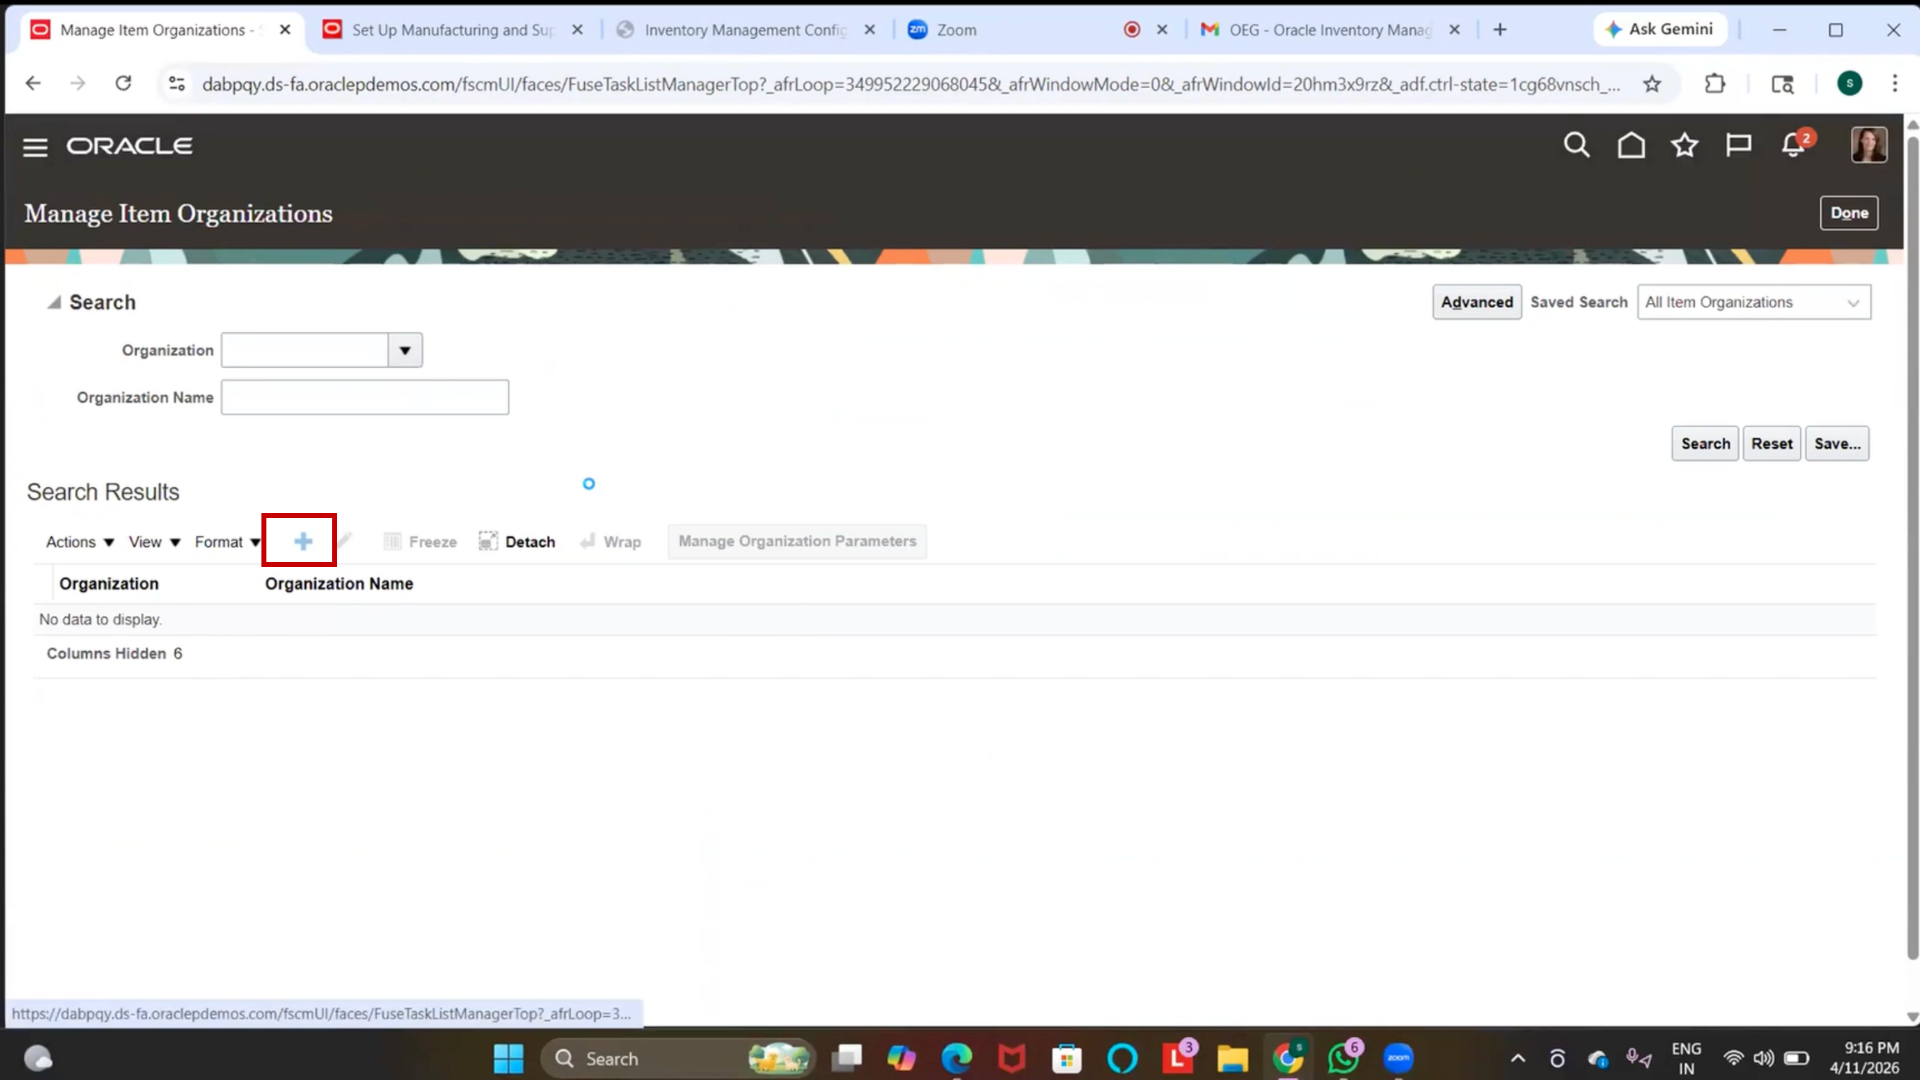
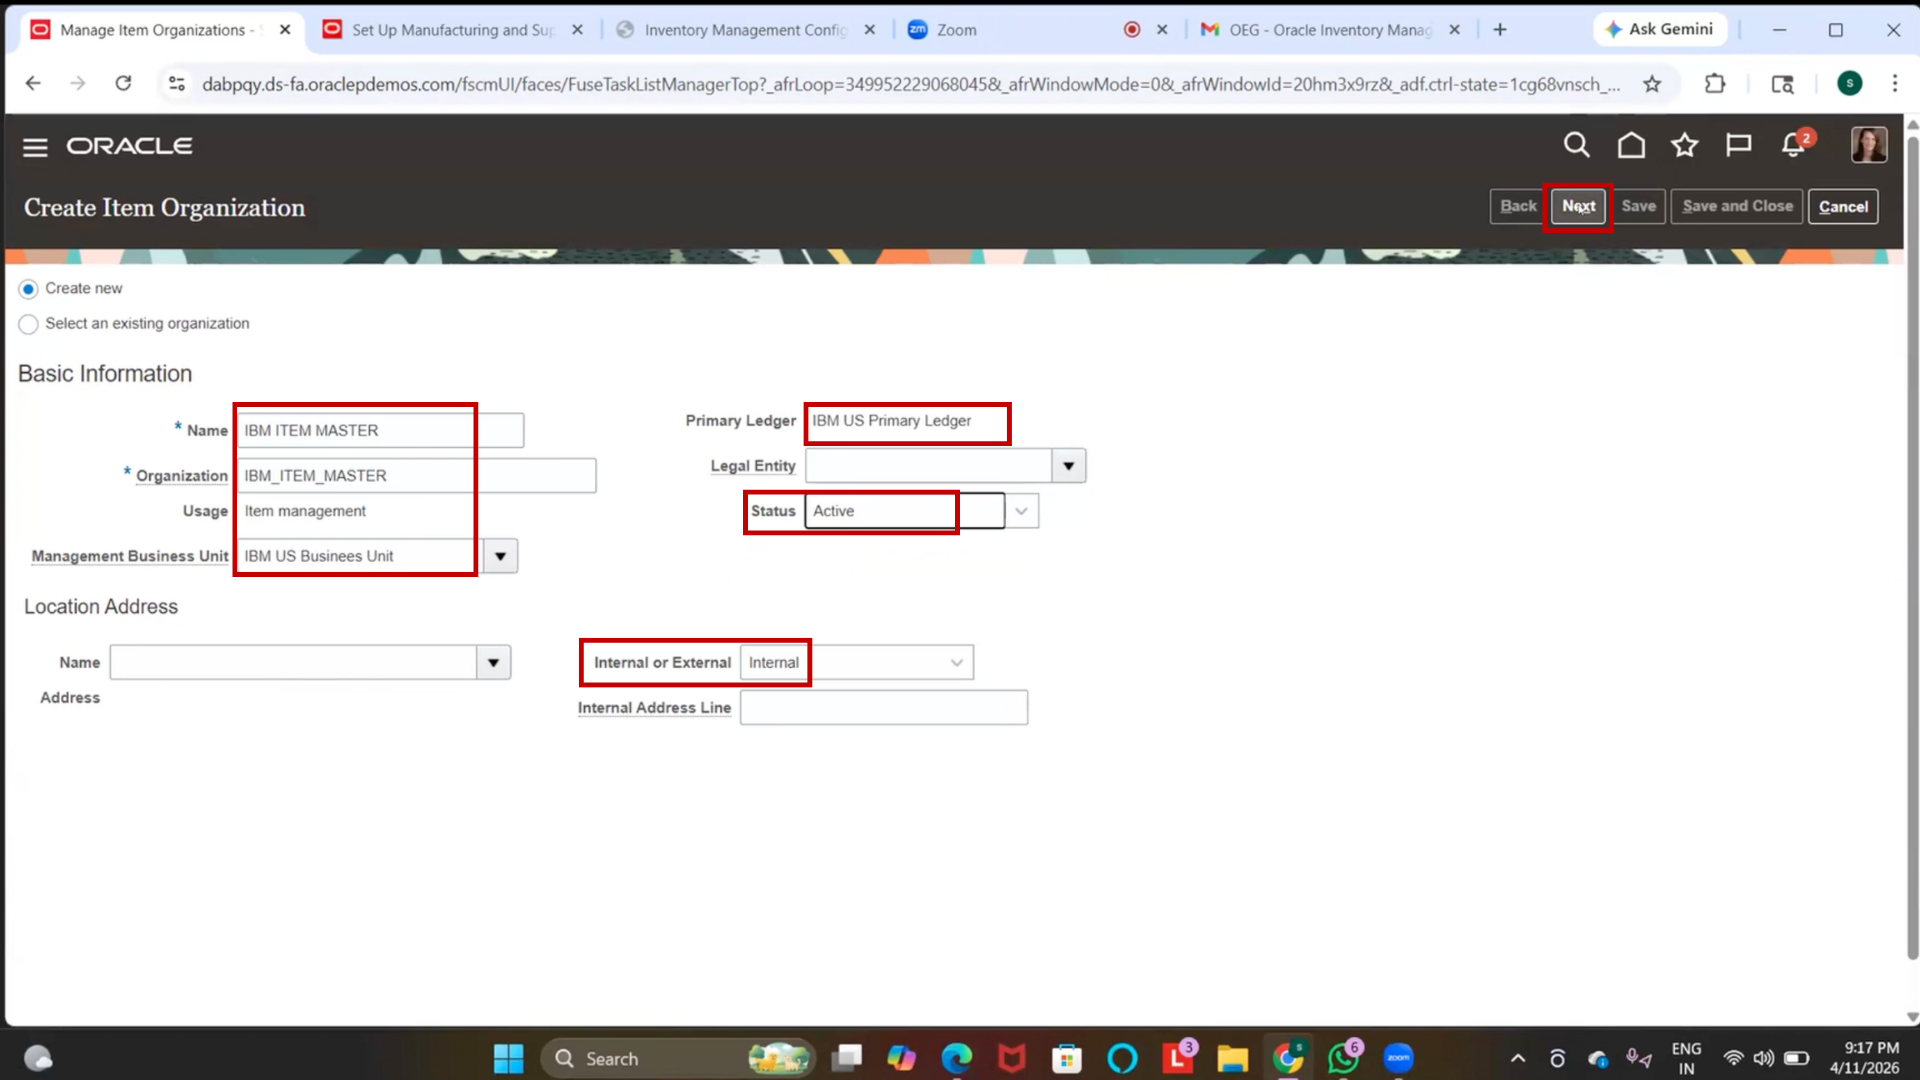
Step 55: Create Item Organization (Item Master)
1. Click on “Create.”
2. Enter Item Master Name = IBM Item Master
(If required) Add underscore (_) for uniqueness
3. Select Business Unit = IBM US Business Unit
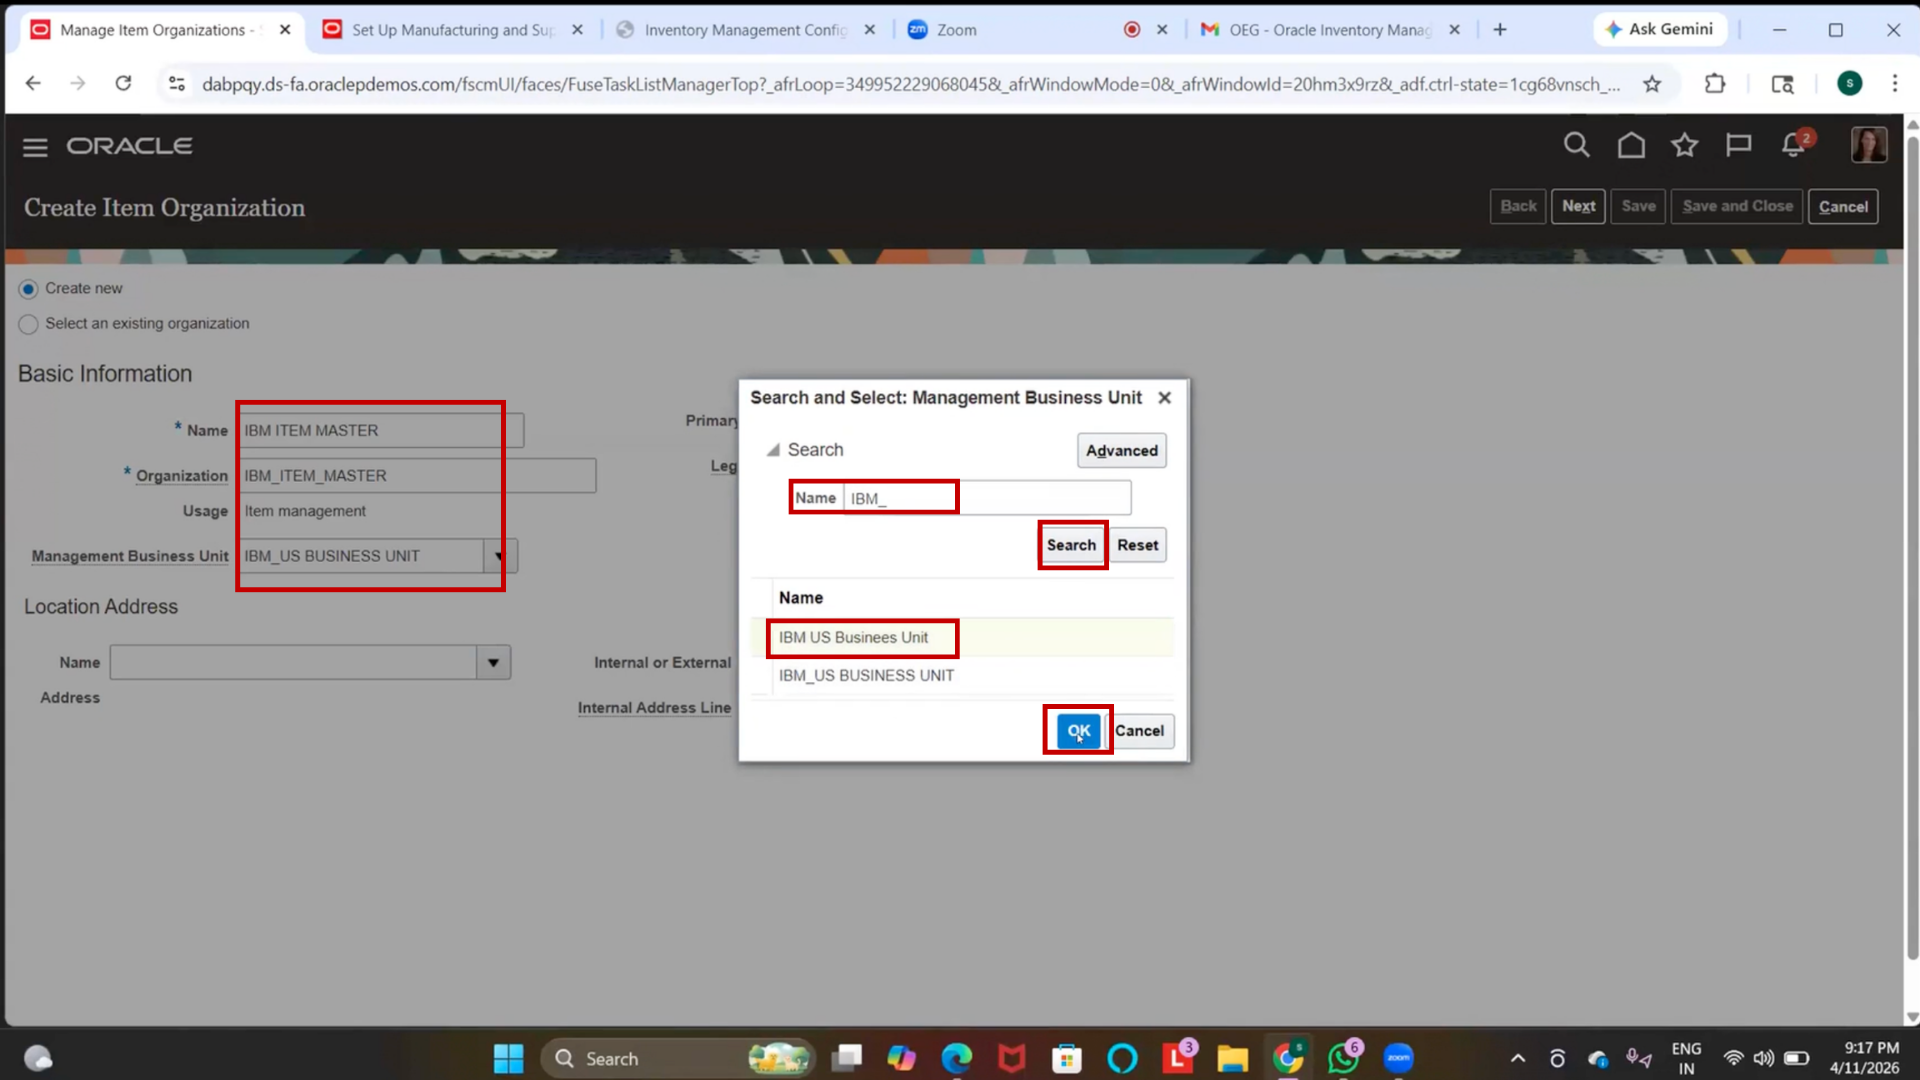
4. Ensure Status = Active
5. Click on Next
Step 56: Configure Definition Organization
1. Select the created item master (IBM item master).
2. Verify it is set as “Definition Organization” (default).
(Optional) Skip Reference Organization setup
3. Use Additional Information (DFF) if required
4. Click on “Save.”
5. Click on Save and Close

Step 57: Verify Item Master Creation
1. Search for IBM Item Master
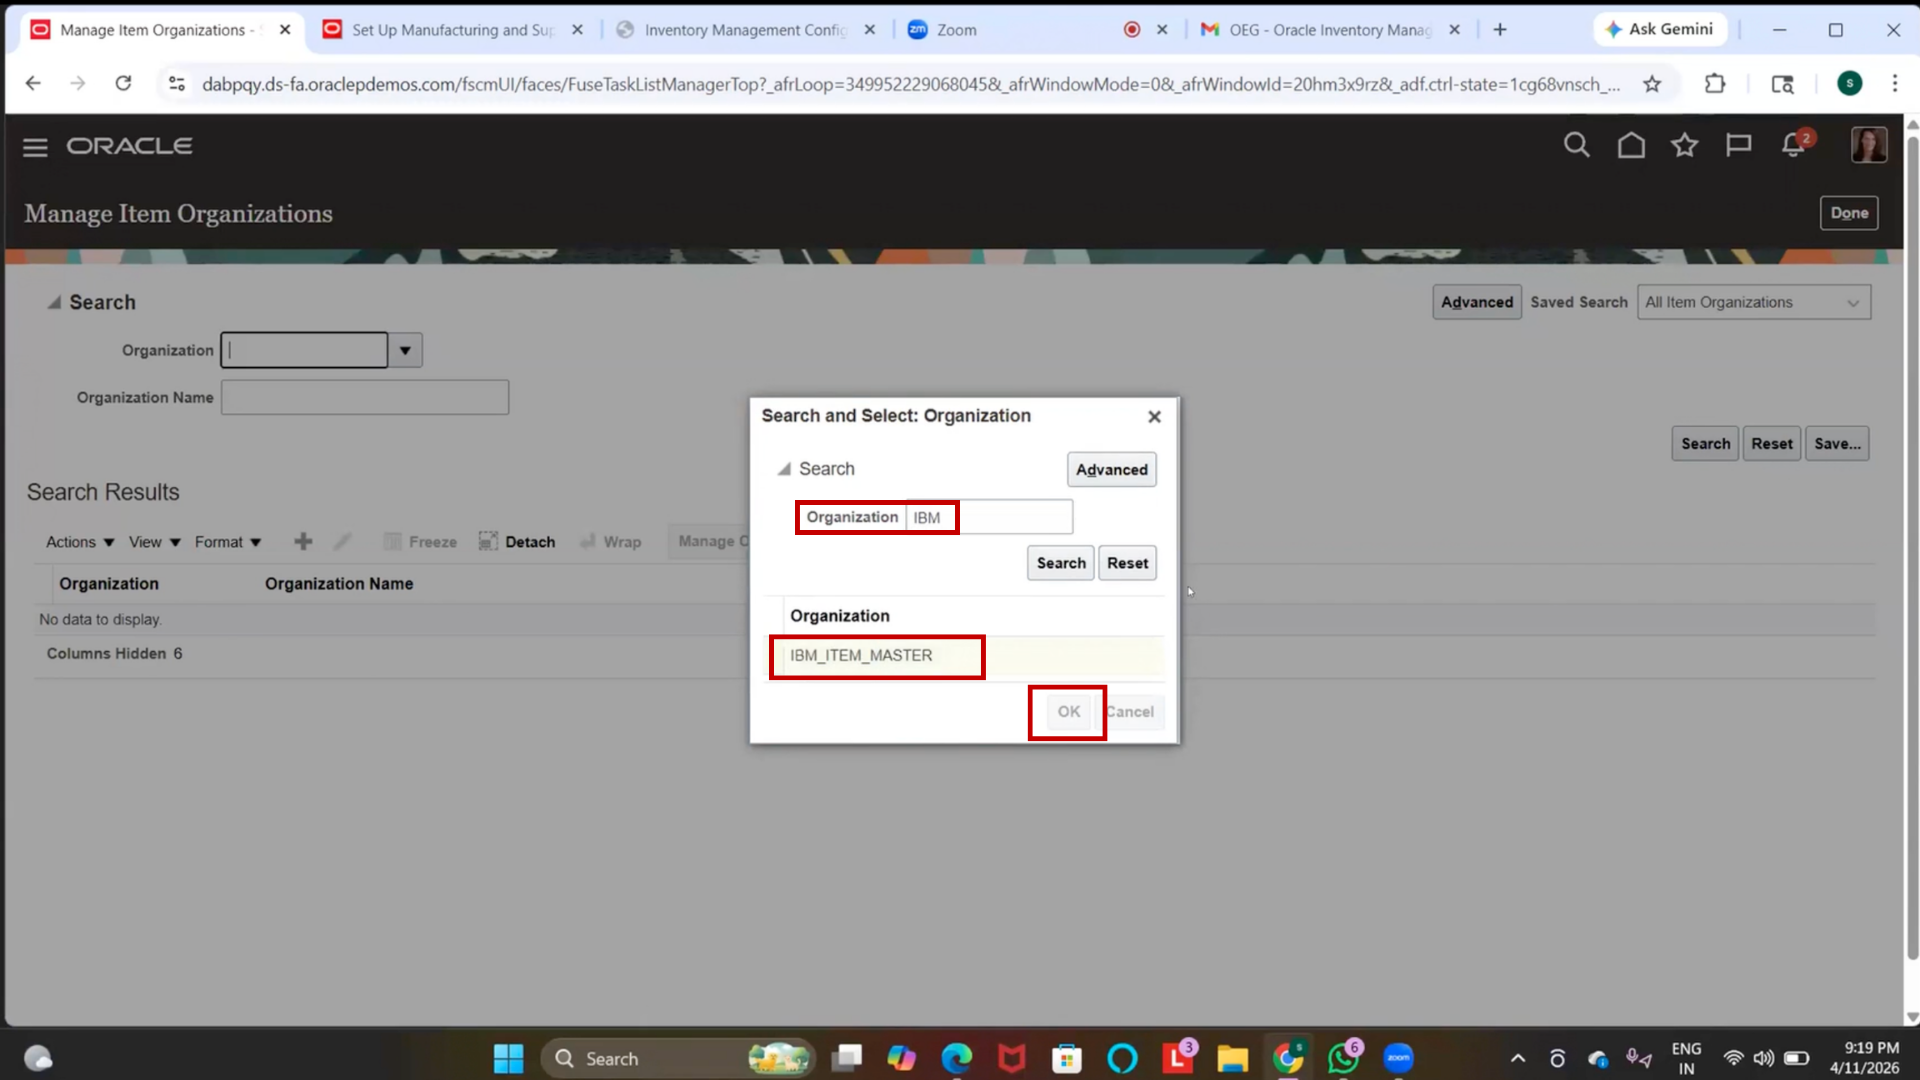
2. Confirm that the item master is created successfully
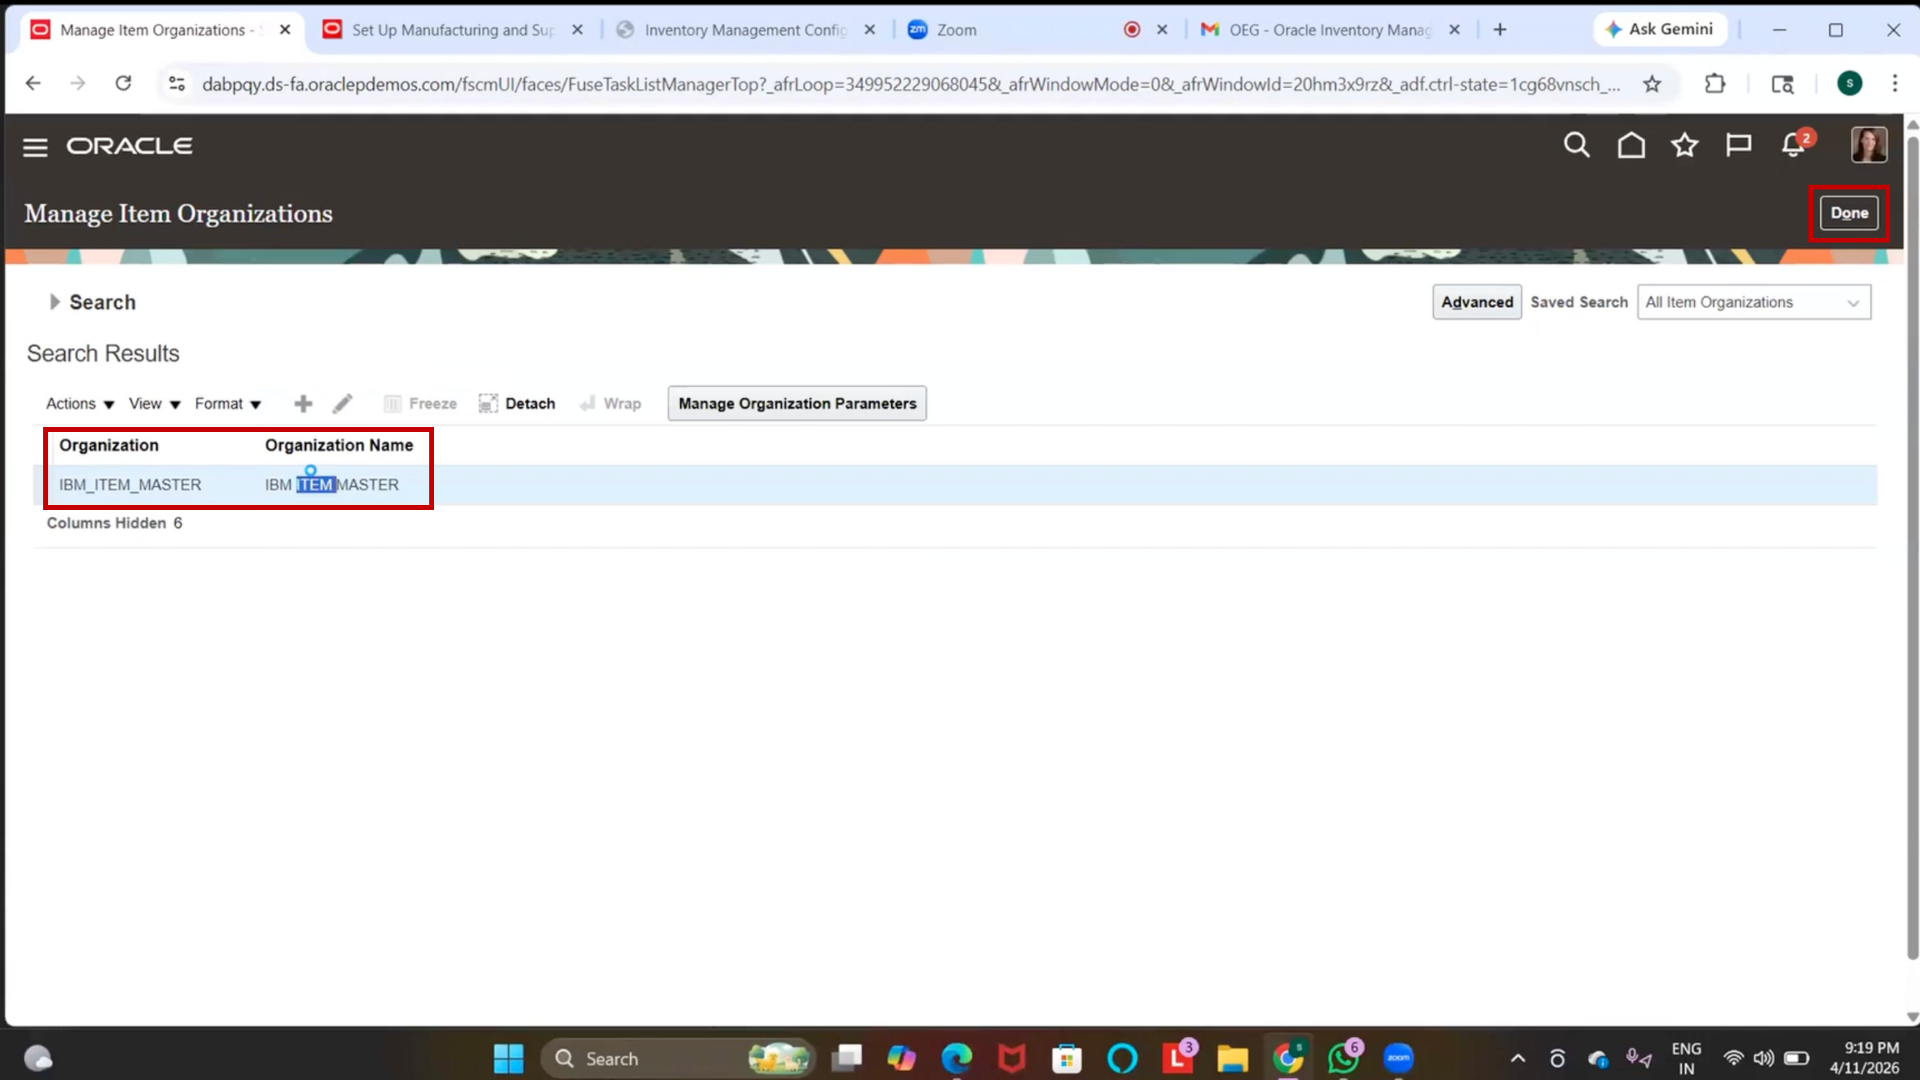
3. Review the details displayed
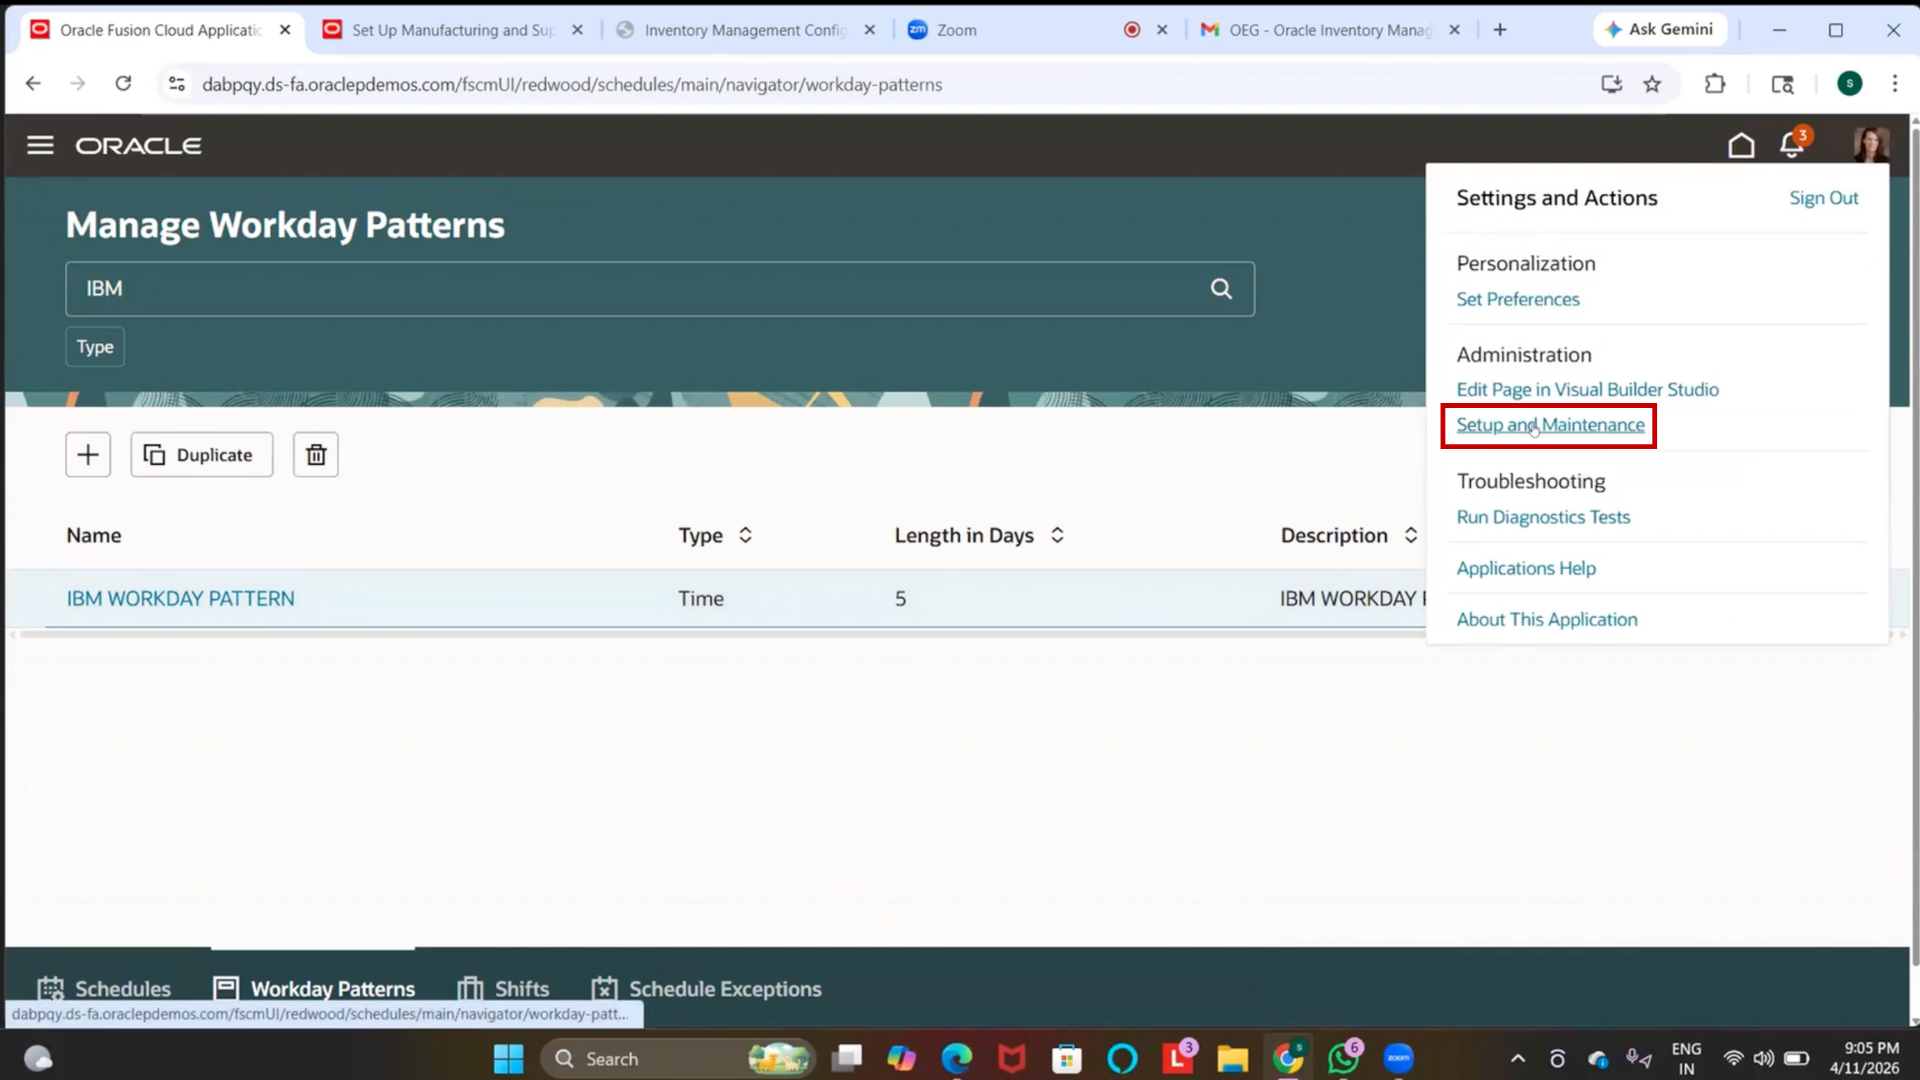
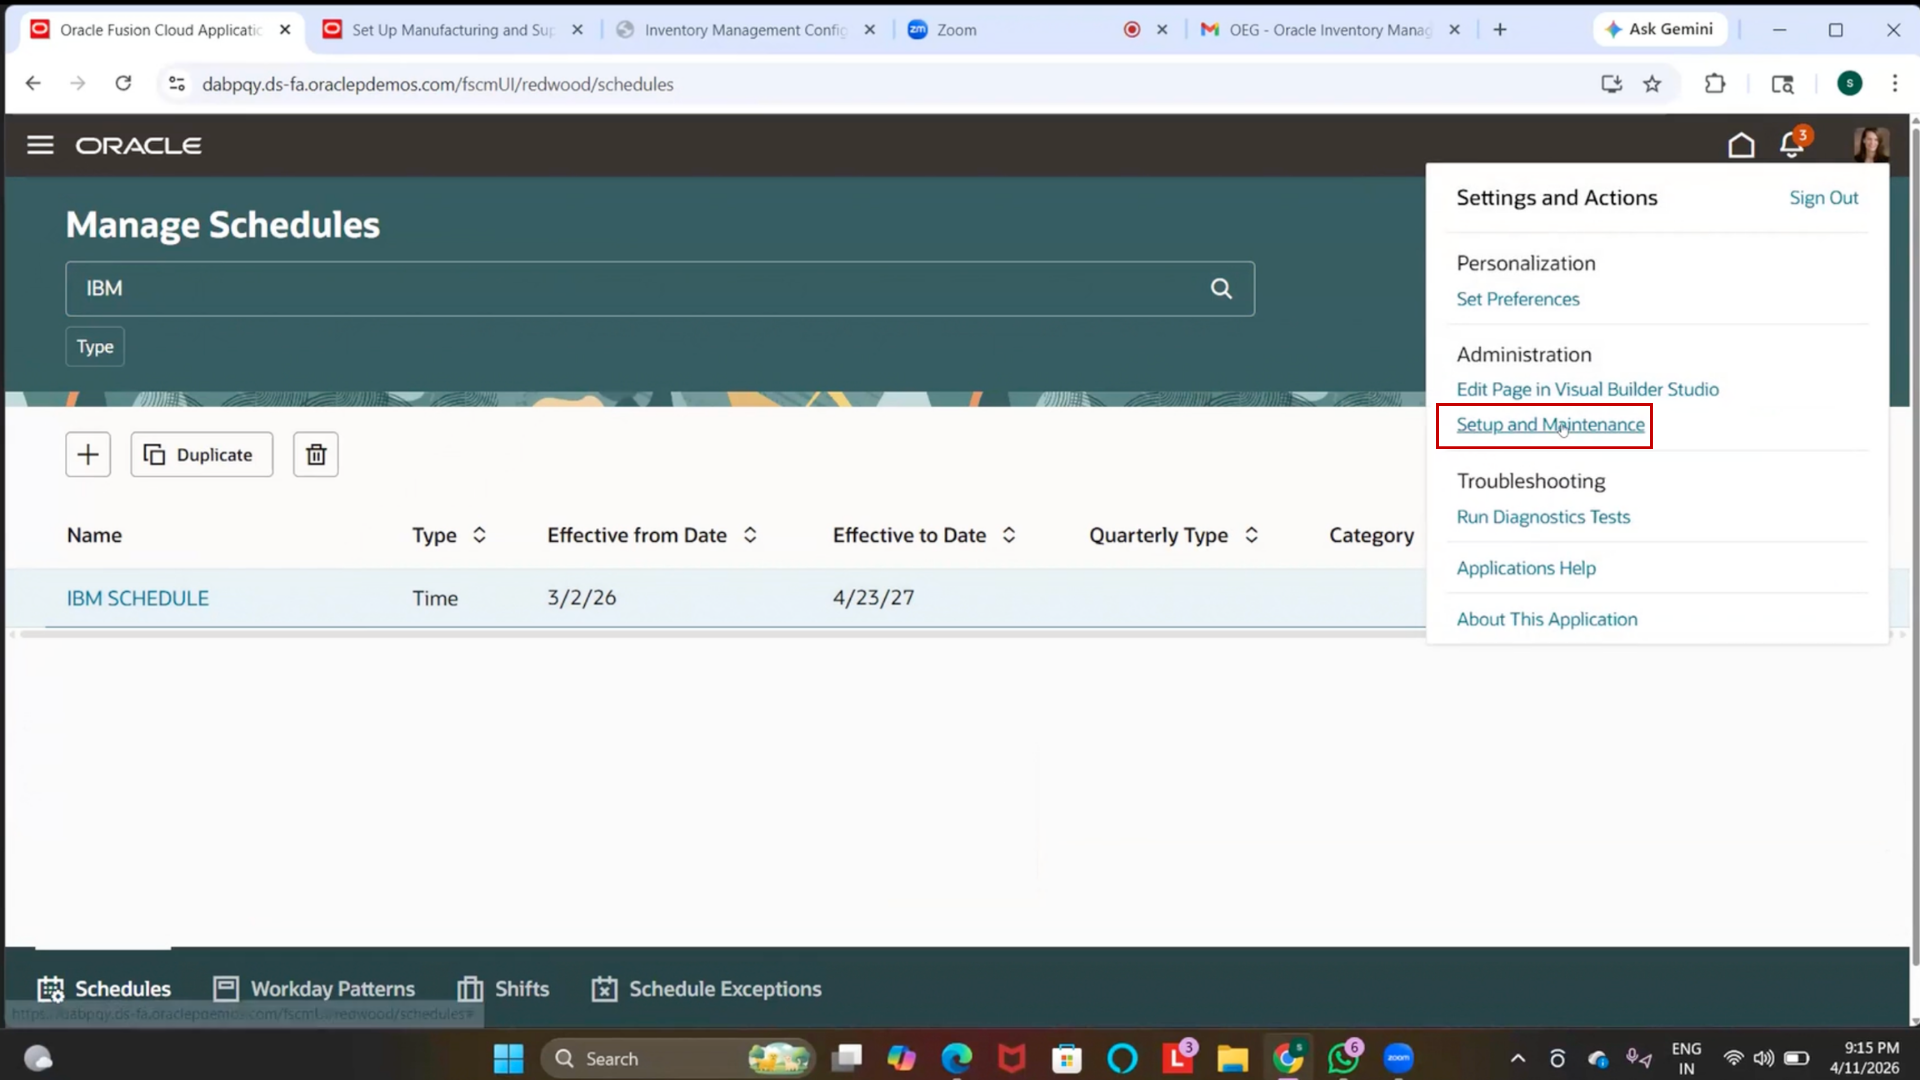
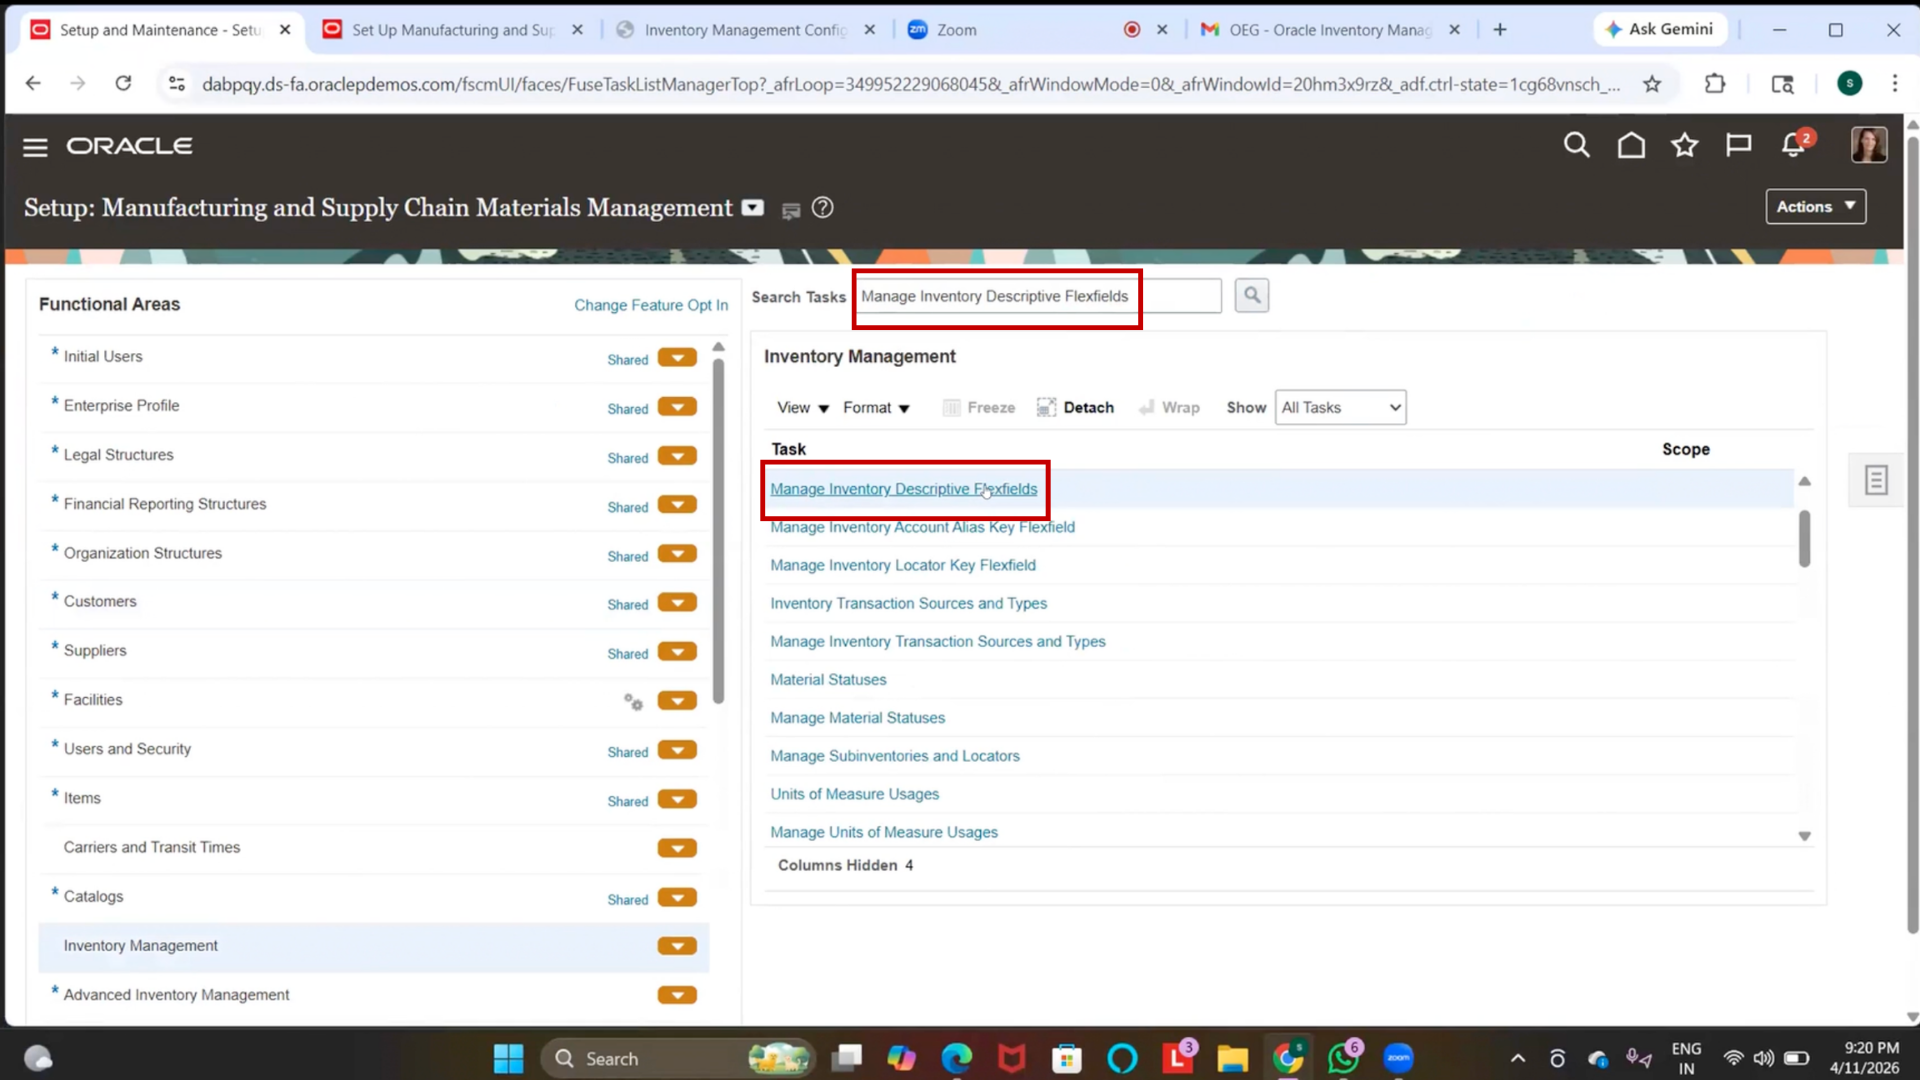
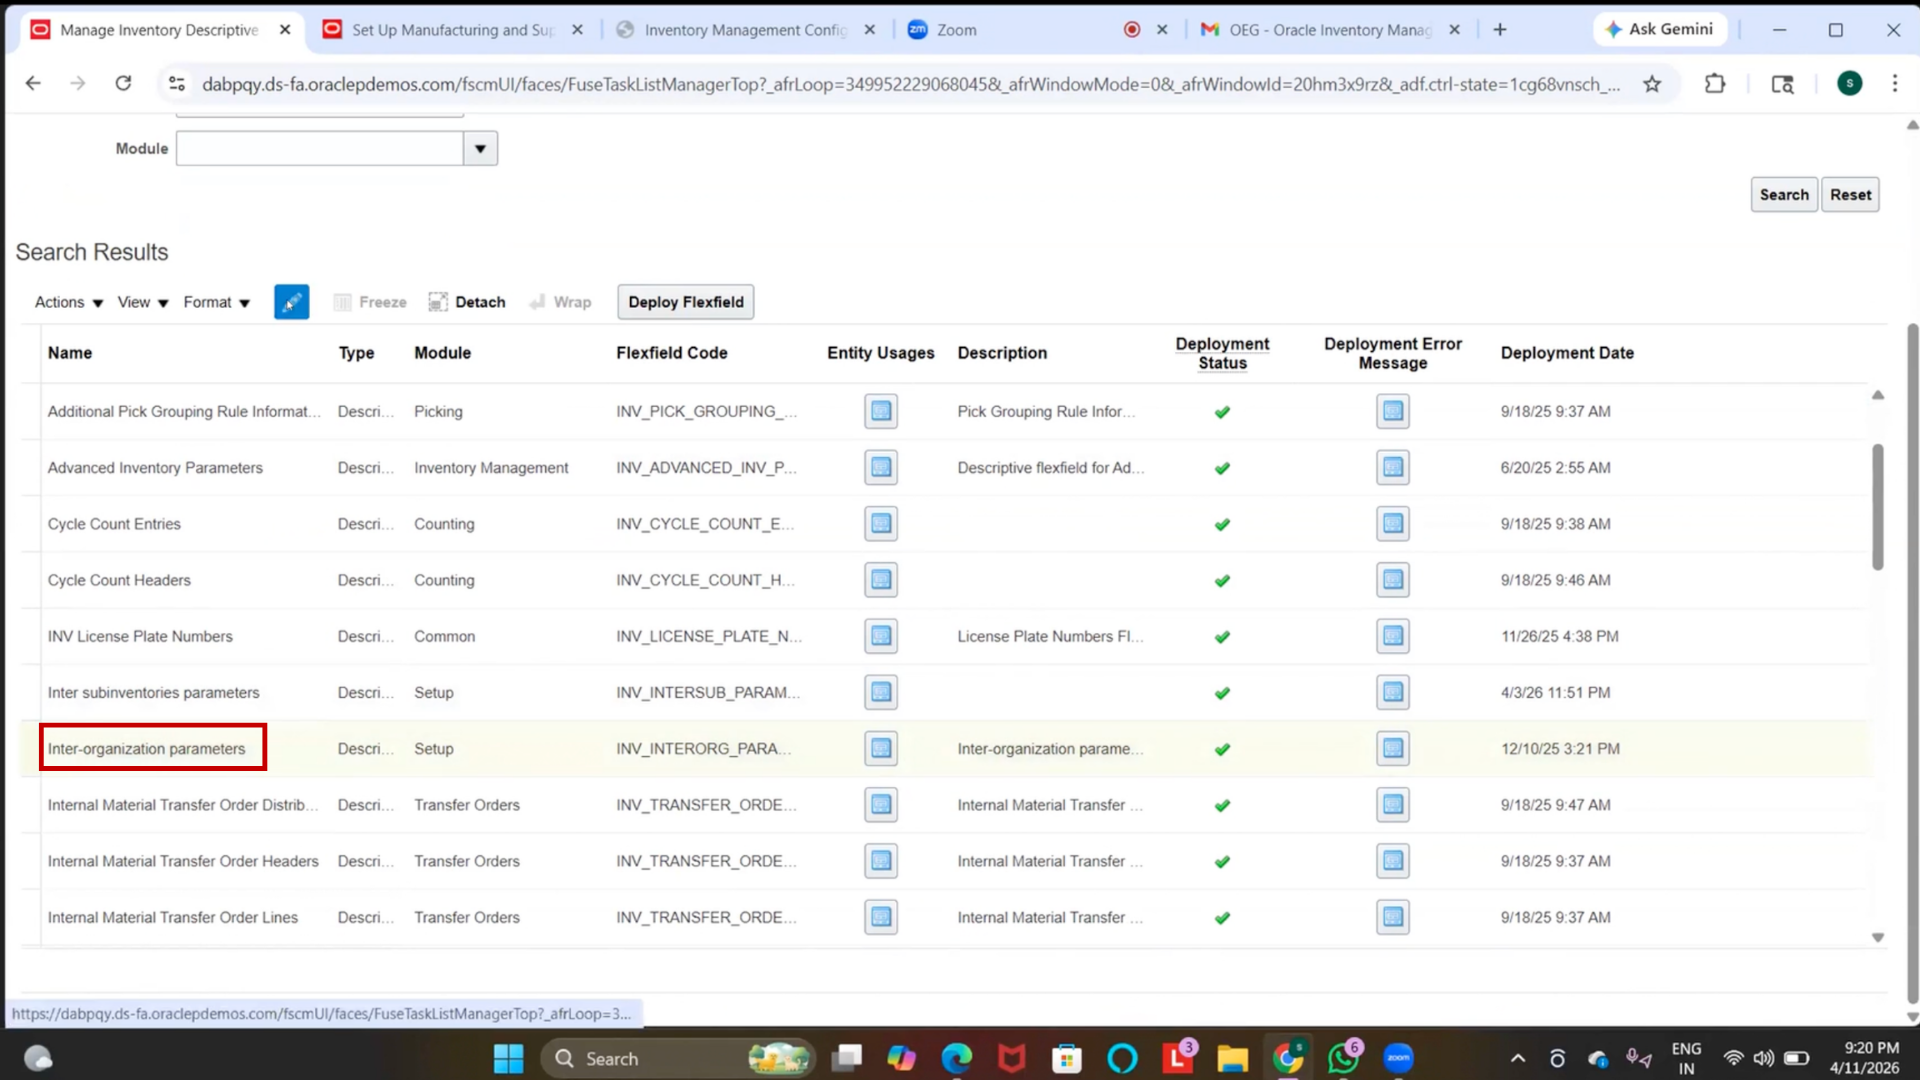
Step 58: Navigate to Inventory Descriptive Flex Fields (DFF)
1. Go to the Setup and Maintenance menu
2. Click on Inventory Descriptive Flex Fields
Step 59: Select DFF Setup
1. Review the list of available parameters
2. Select Inventory Organization Parameters
3. Click on “Edit.”
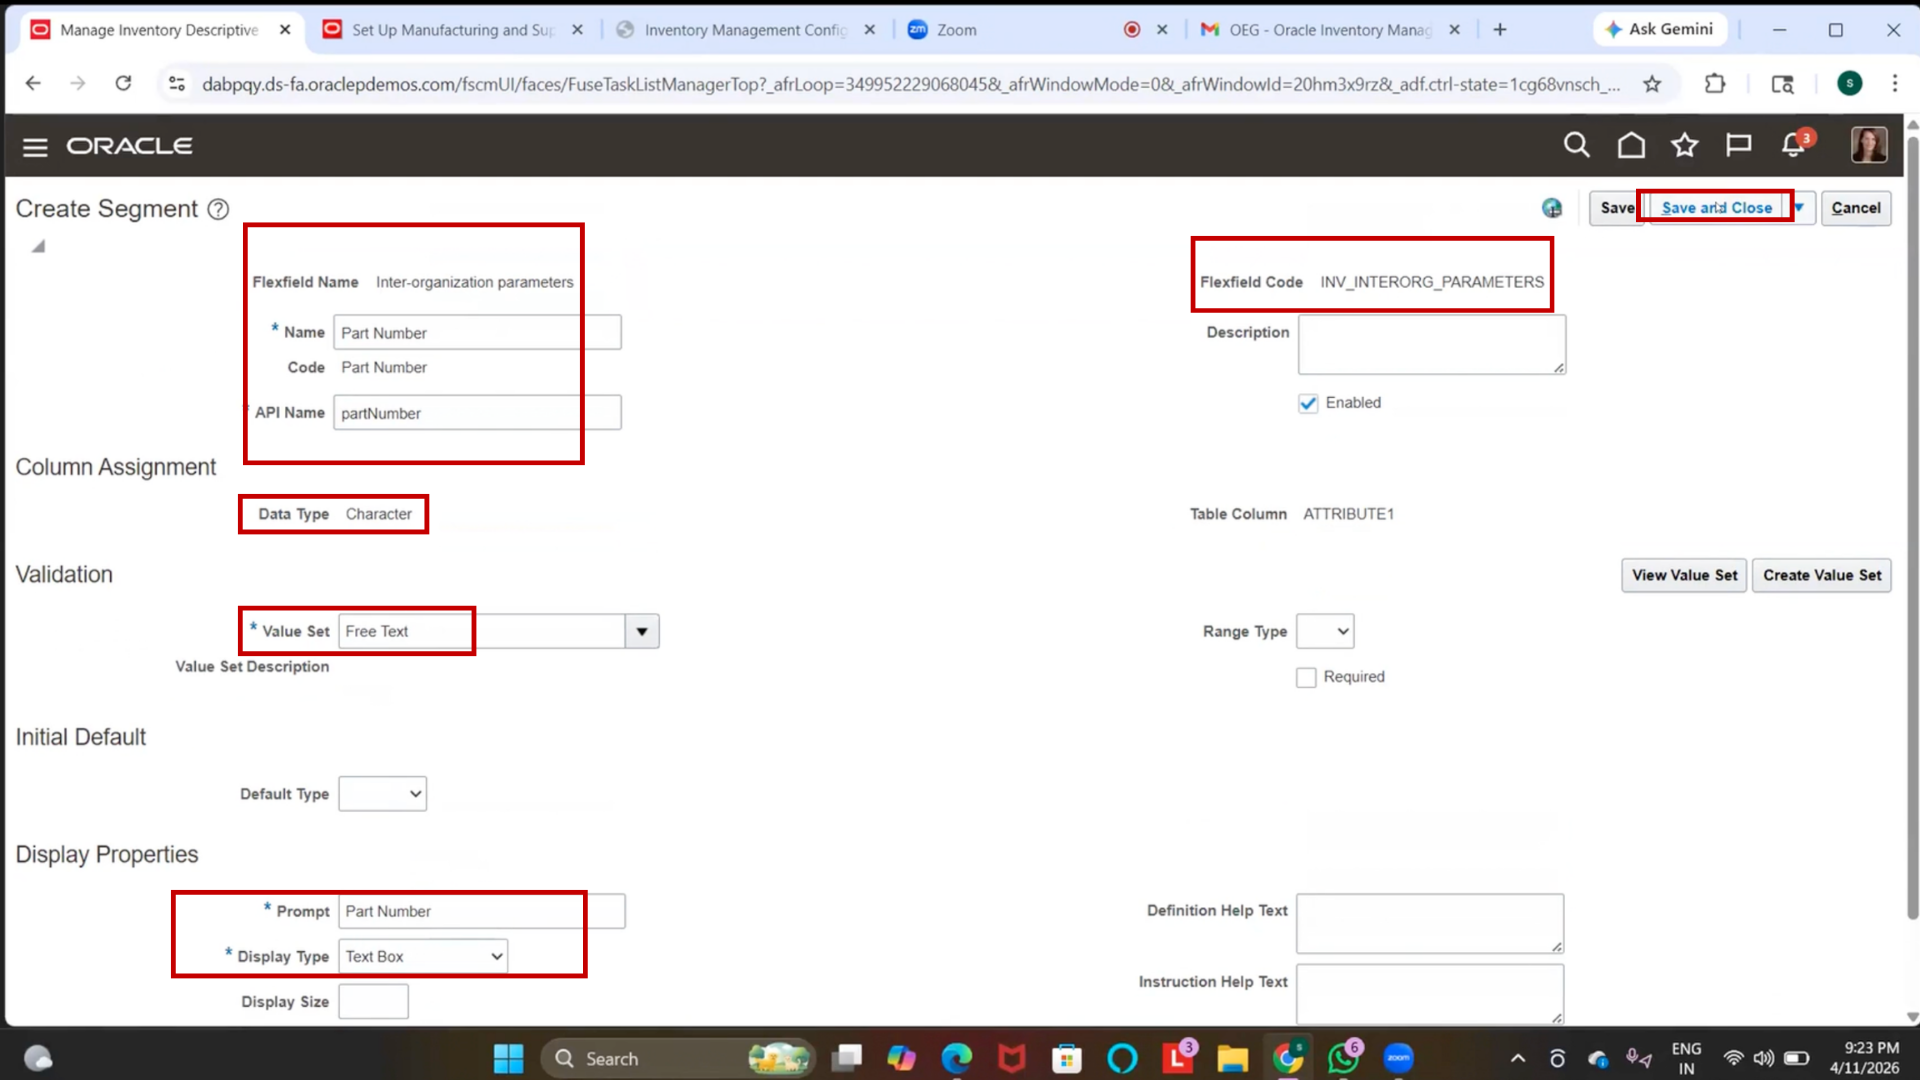
Step 60: Create New DFF Segment
1. Click on the (+) Plus icon
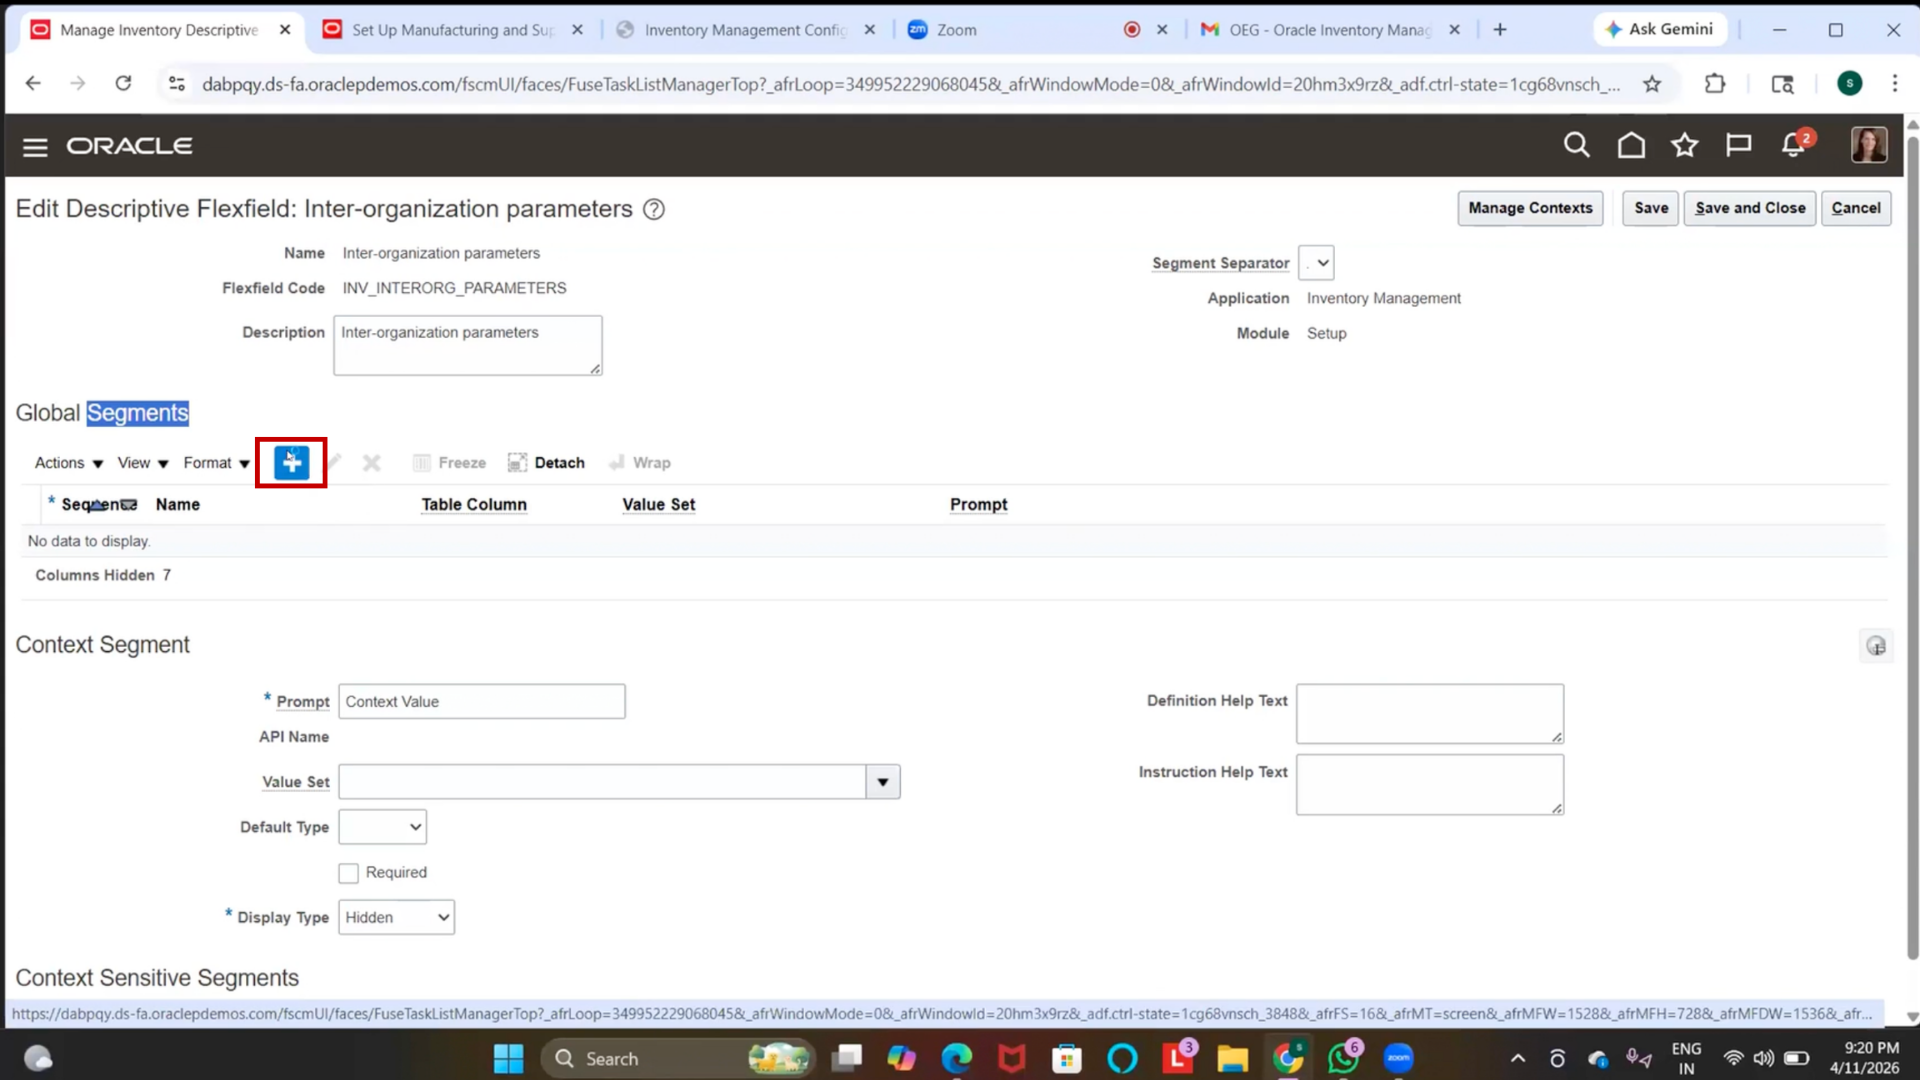
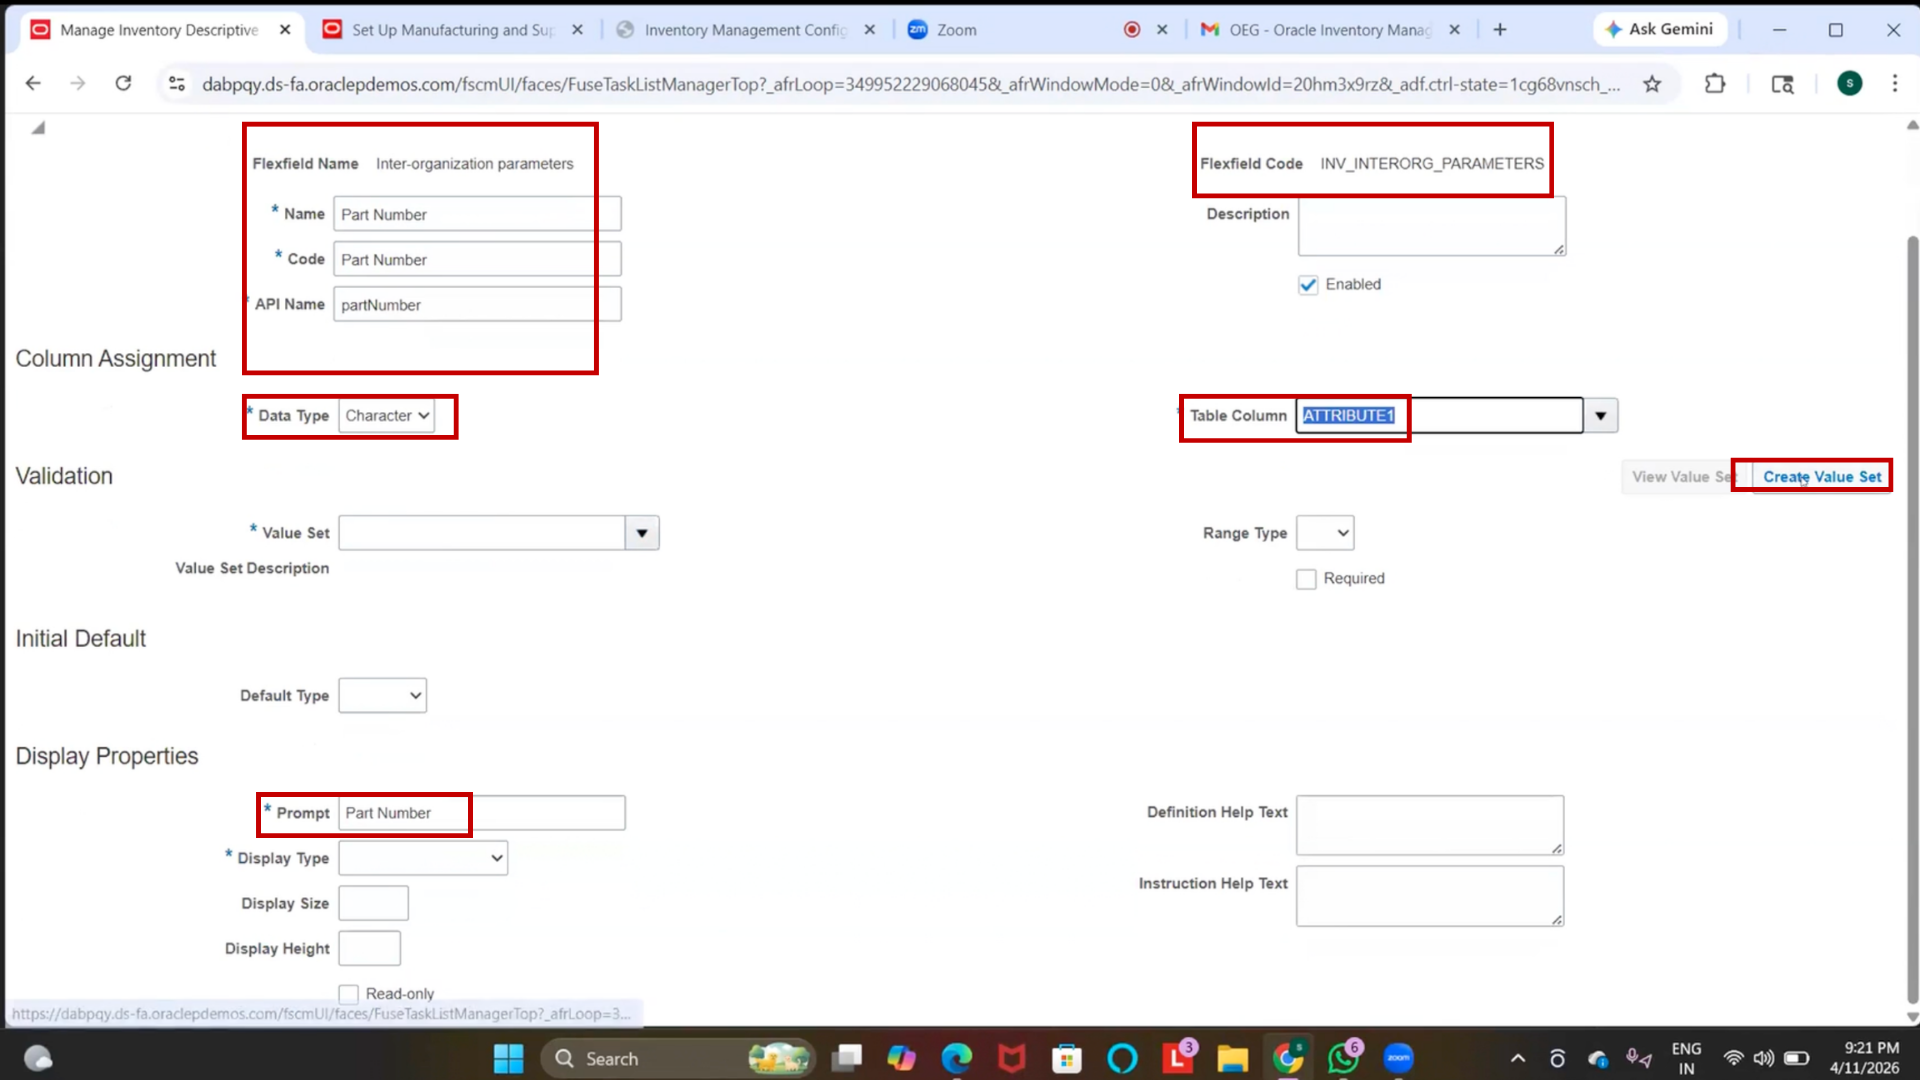
2. Select Global Segment
3. Enter Name = Part Number
4. Select Data Type = Character
5. Verify that the Column is auto-defaulted
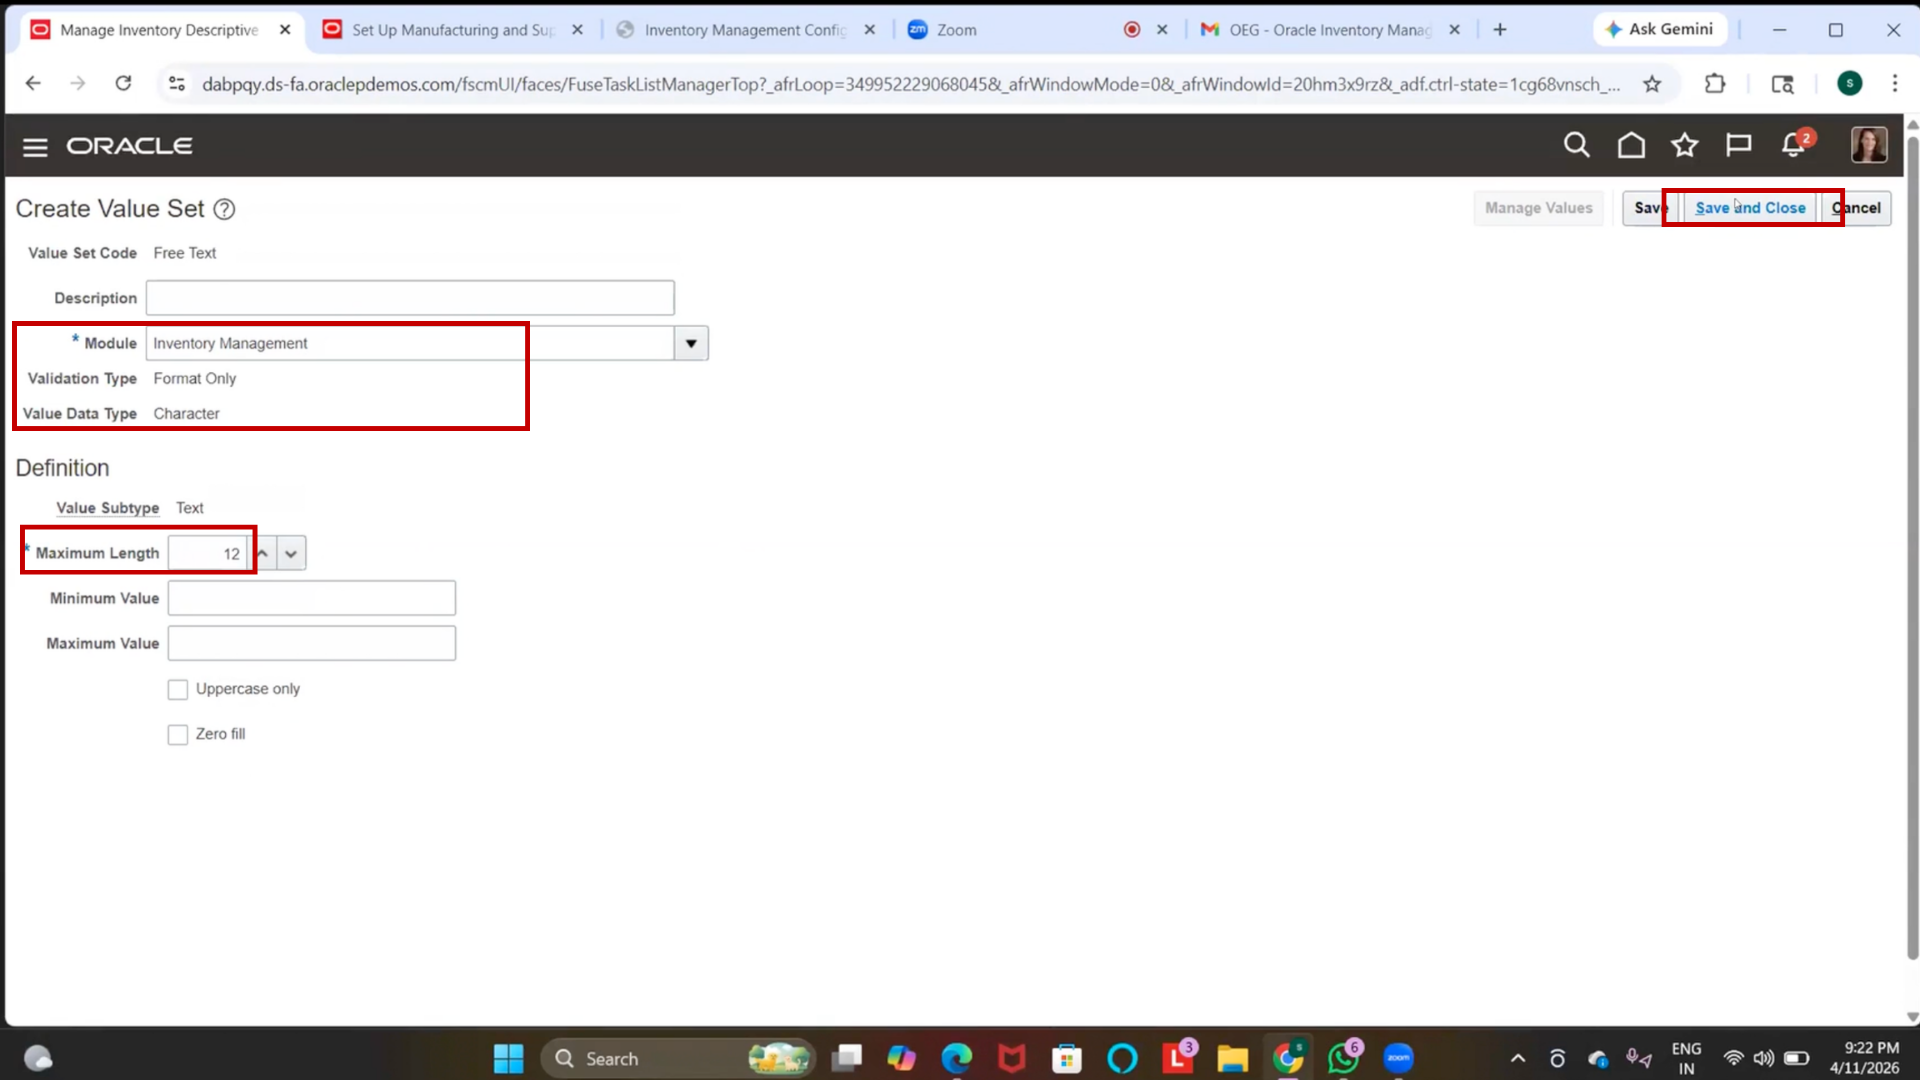
Step 61: Create Value Set
1. Click on Value Set
2. Enter Value Set Name (Free Text Value Set)
3. Select Module = Inventory Management
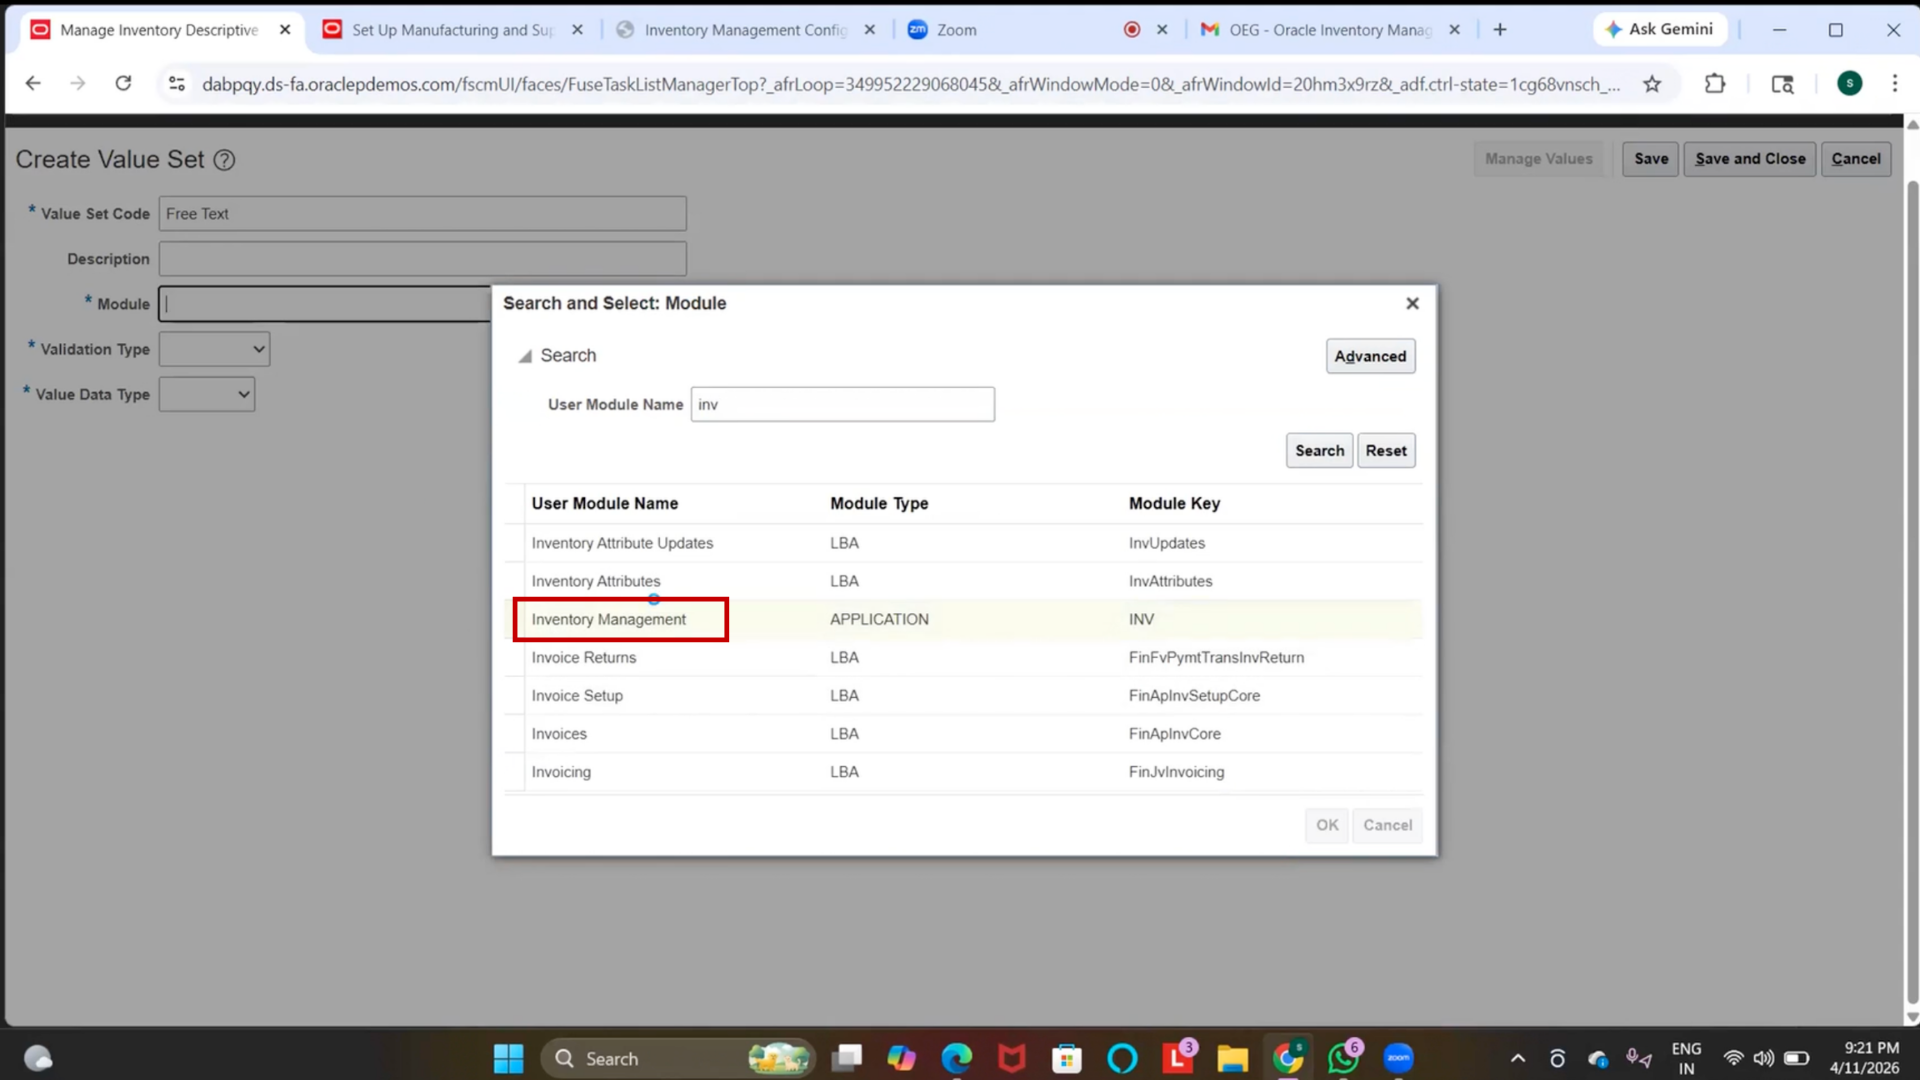
4. Set Validation Type = Format Only
5. Select Value Data Type = Character
6. Select Value Subtype = Text
7. Enter Maximum Length = 12
8. Click on Save
Step 62: Configure Segment Display Properties
1. Enter Prompt = Part Number
2. Select Display Type = Text Box
(Optional) Set Display Size and Height
3. Ensure Read-Only is Disabled
Step 63: Save DFF Configuration
1. Click on “Save.”
2. Click on Save and Close
3. Click on Save again (if prompted)
4. Click on Save and Close
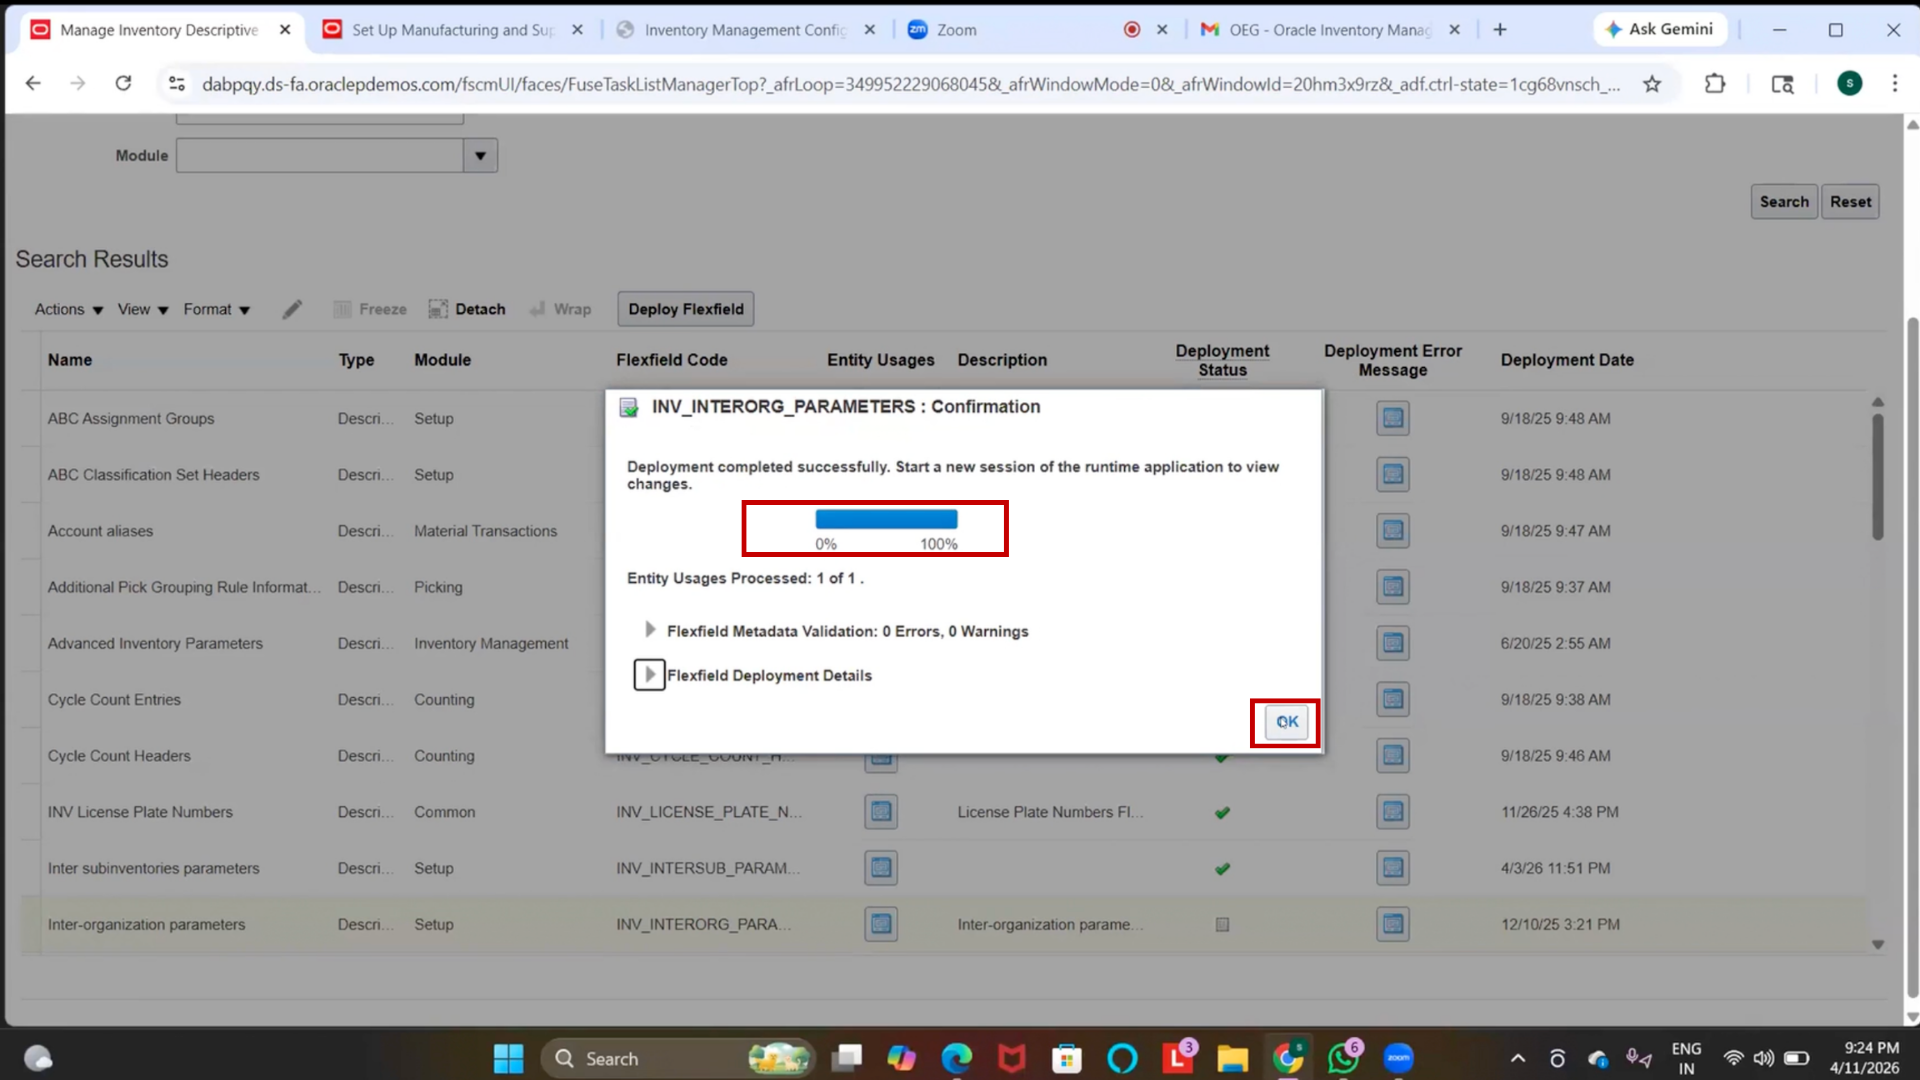
Step 64: Deploy DFF
1. Click on “Deploy.”
2. Wait for the deployment process to complete
3. Review status (ignore warnings if any)
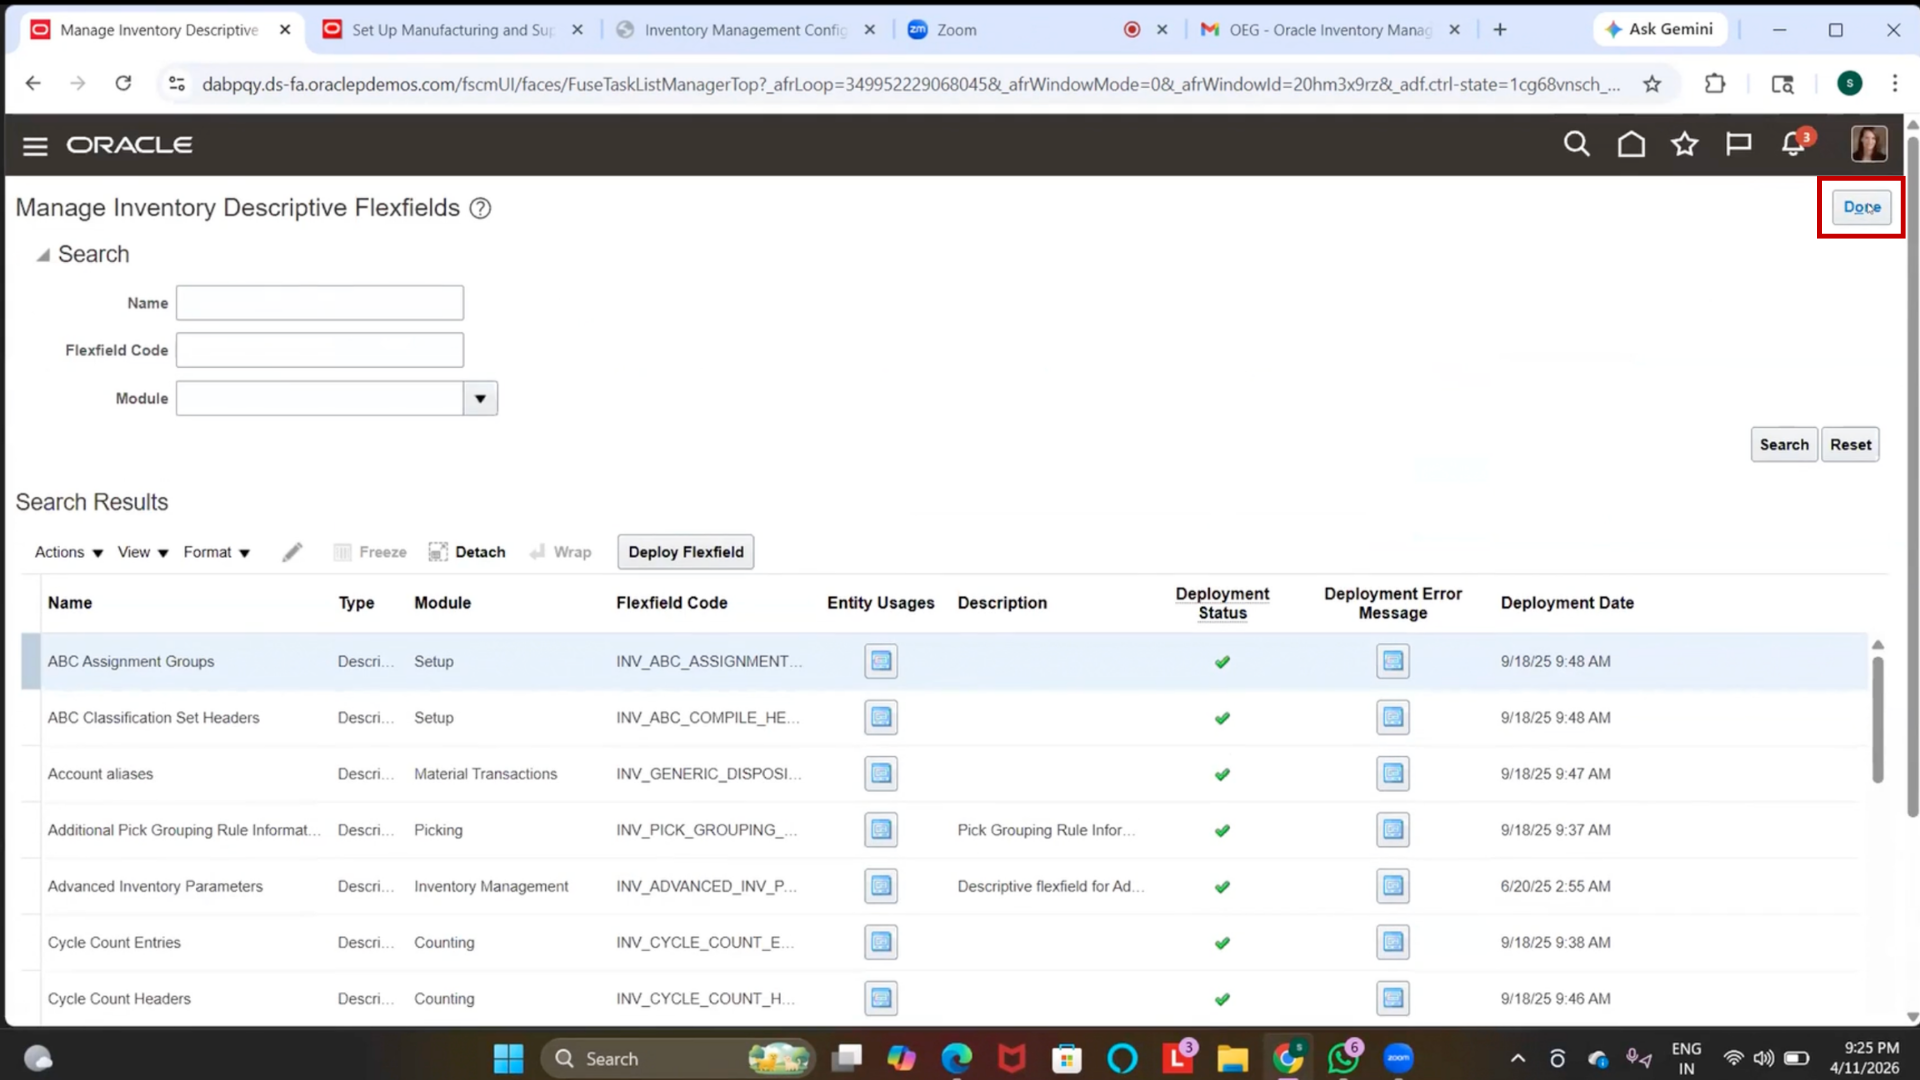
4. Once completed, click on OK
5. Click on “Done.”
Step 65: Navigate to Inventory Organization
1. Go to the Inventory Organization setup
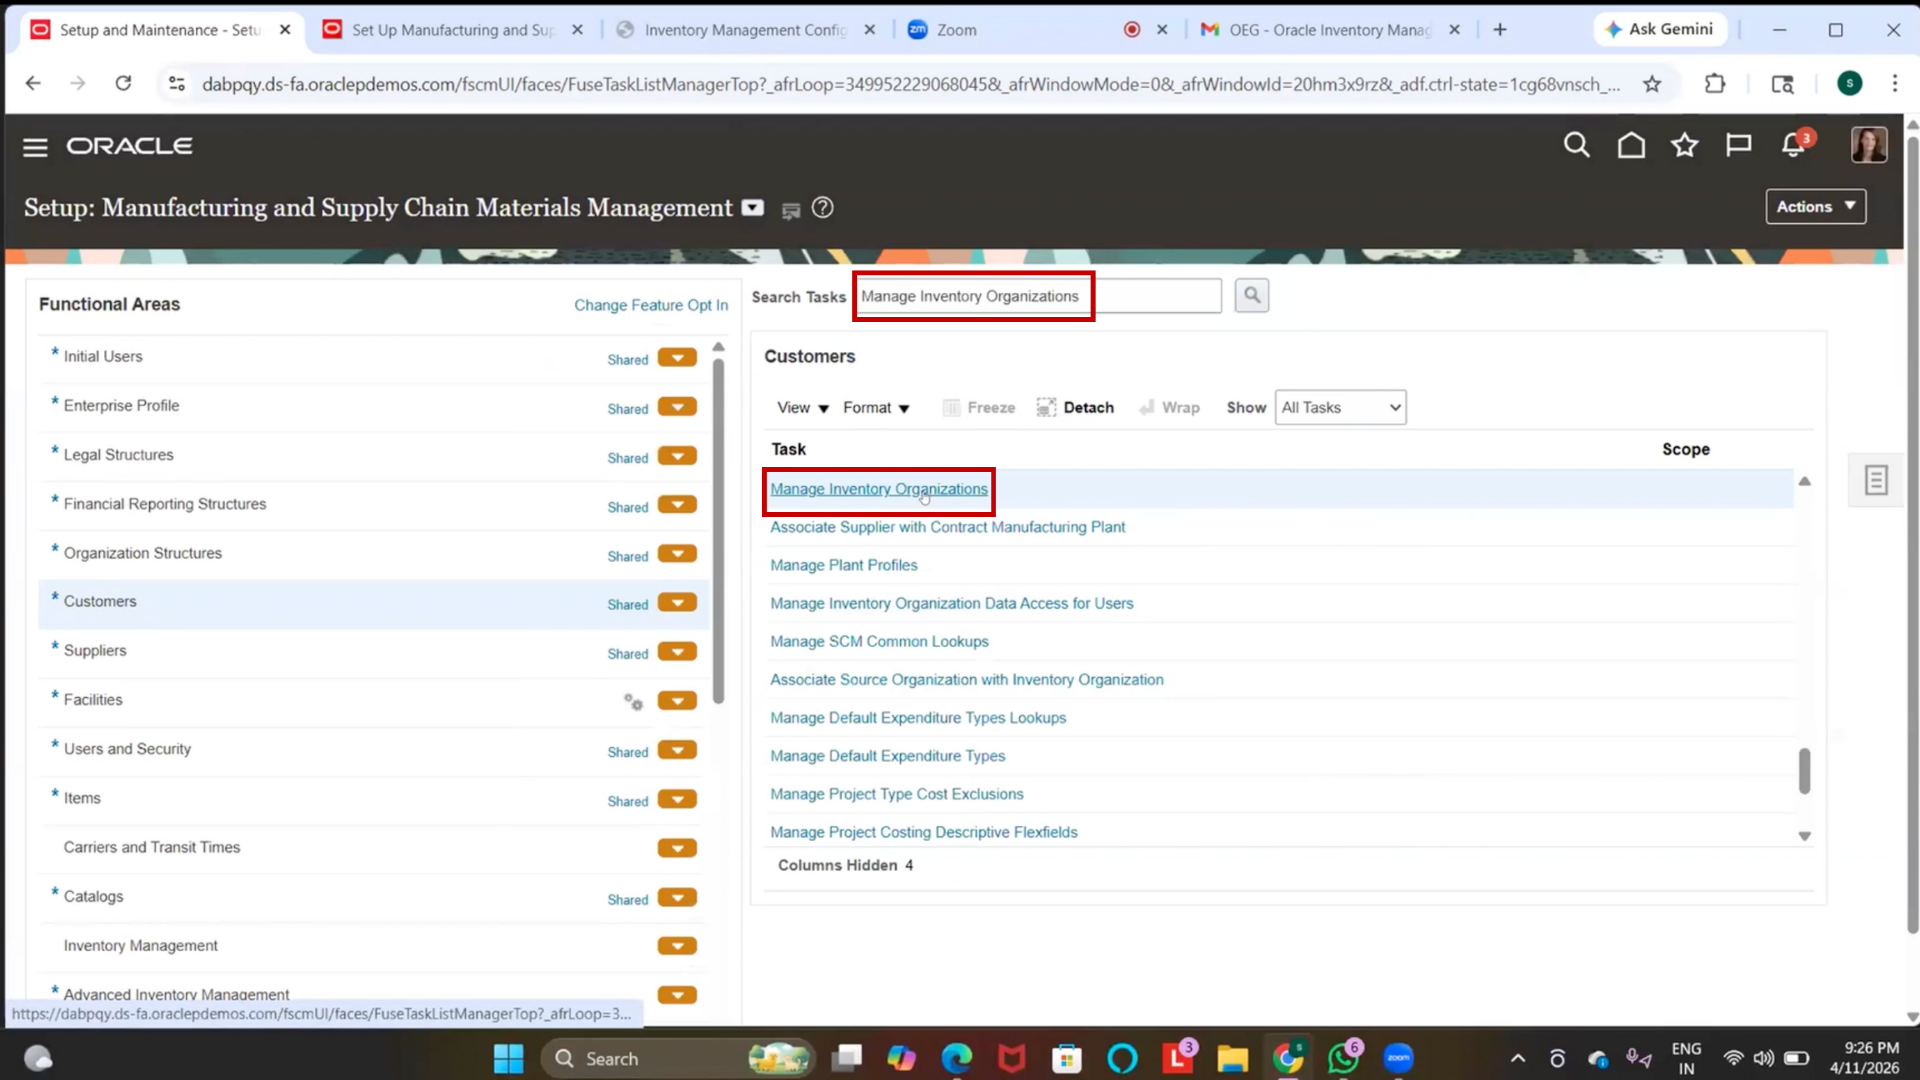
2. Click on the Inventory Organization hyperlink
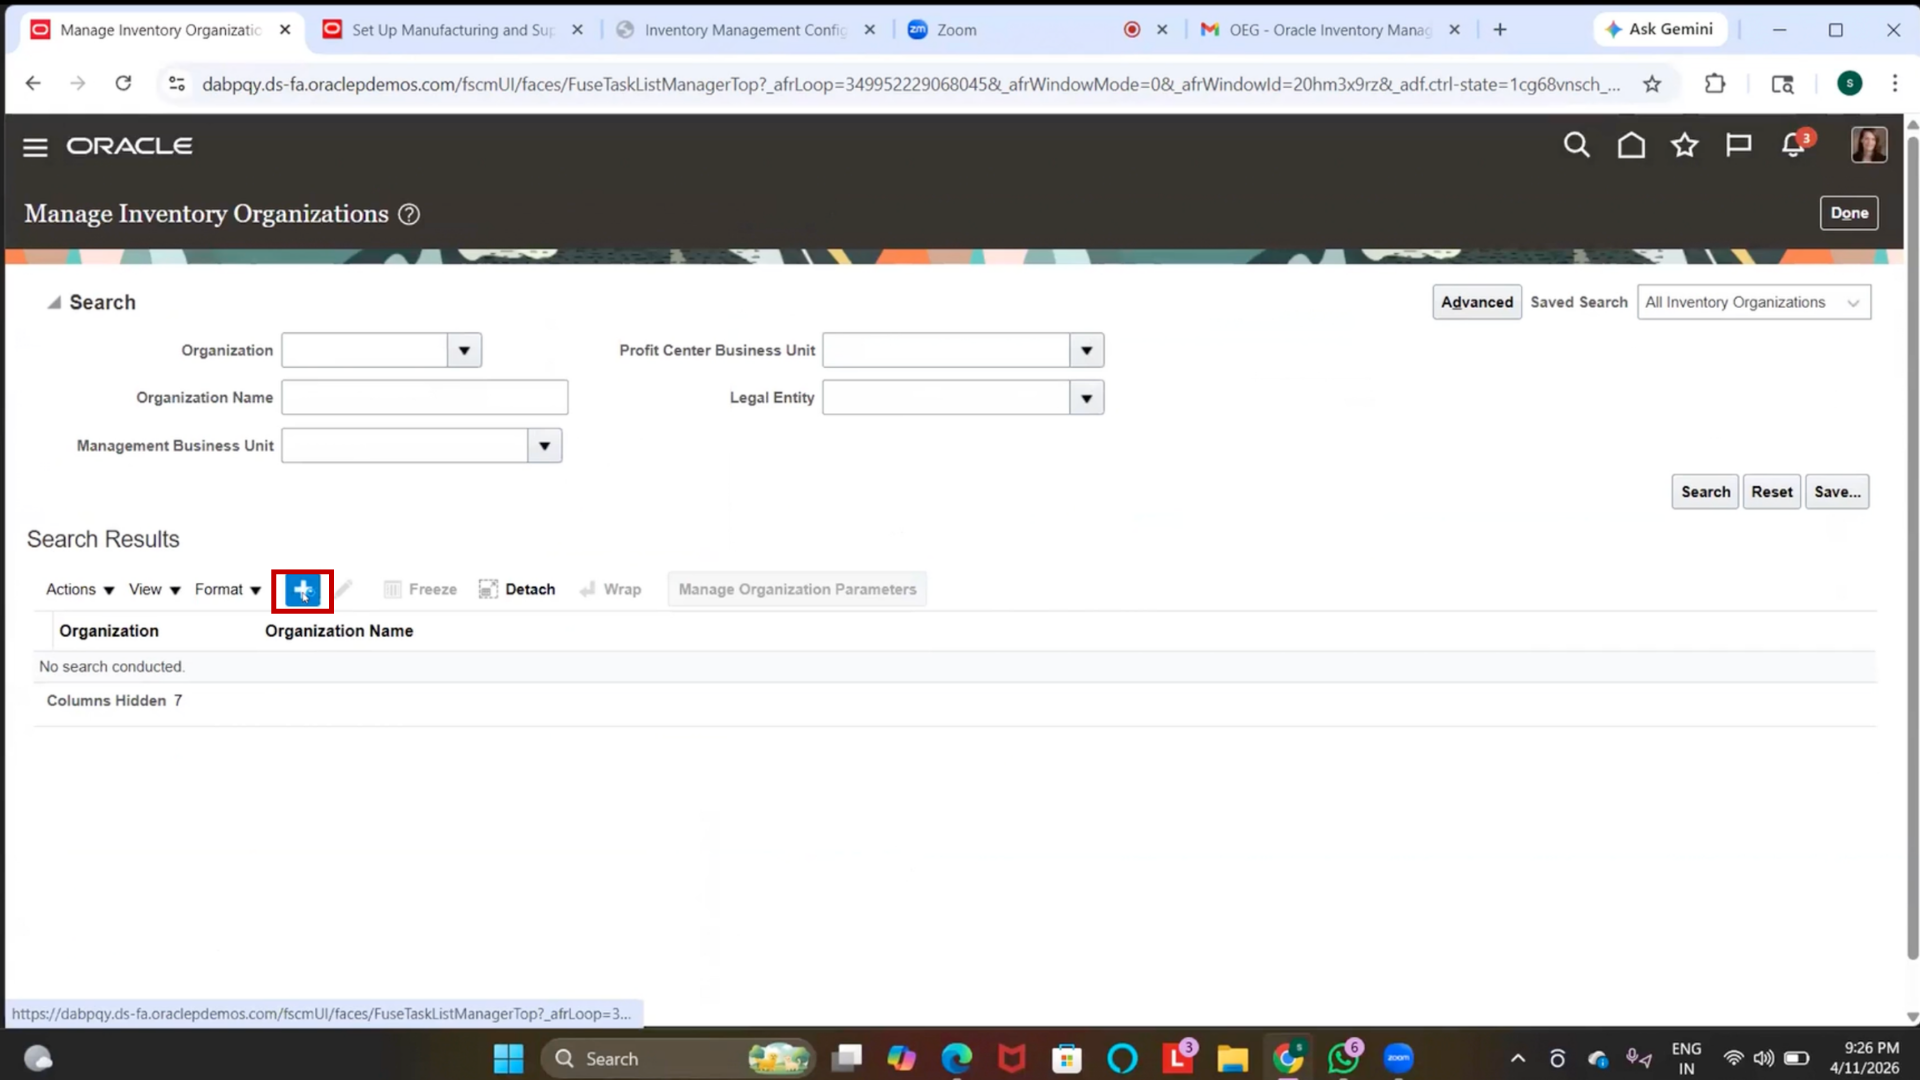
Step 66: Create Inventory Organization
1. Click on “Create.”
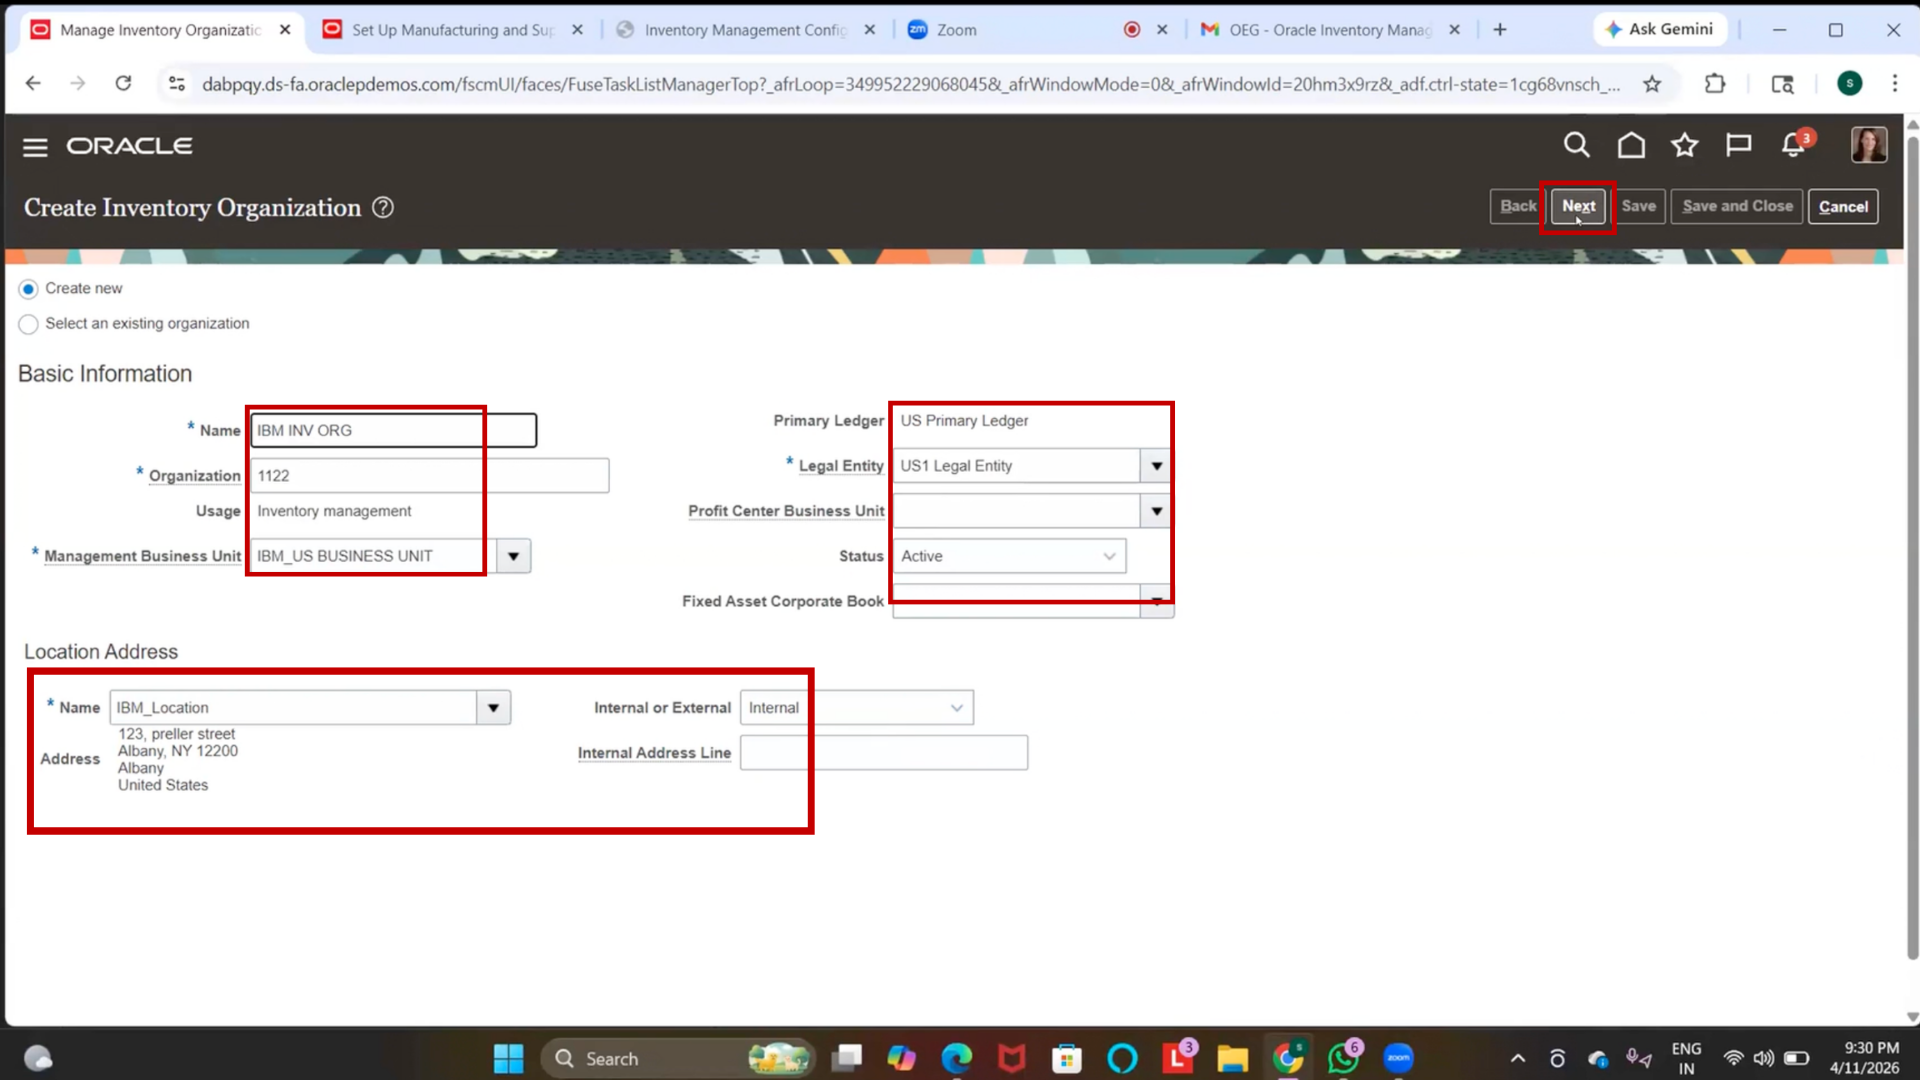
2. Enter Name = IBM Inventory Org
3. Enter Code = 1122 (or as required)
4. Select Business Unit
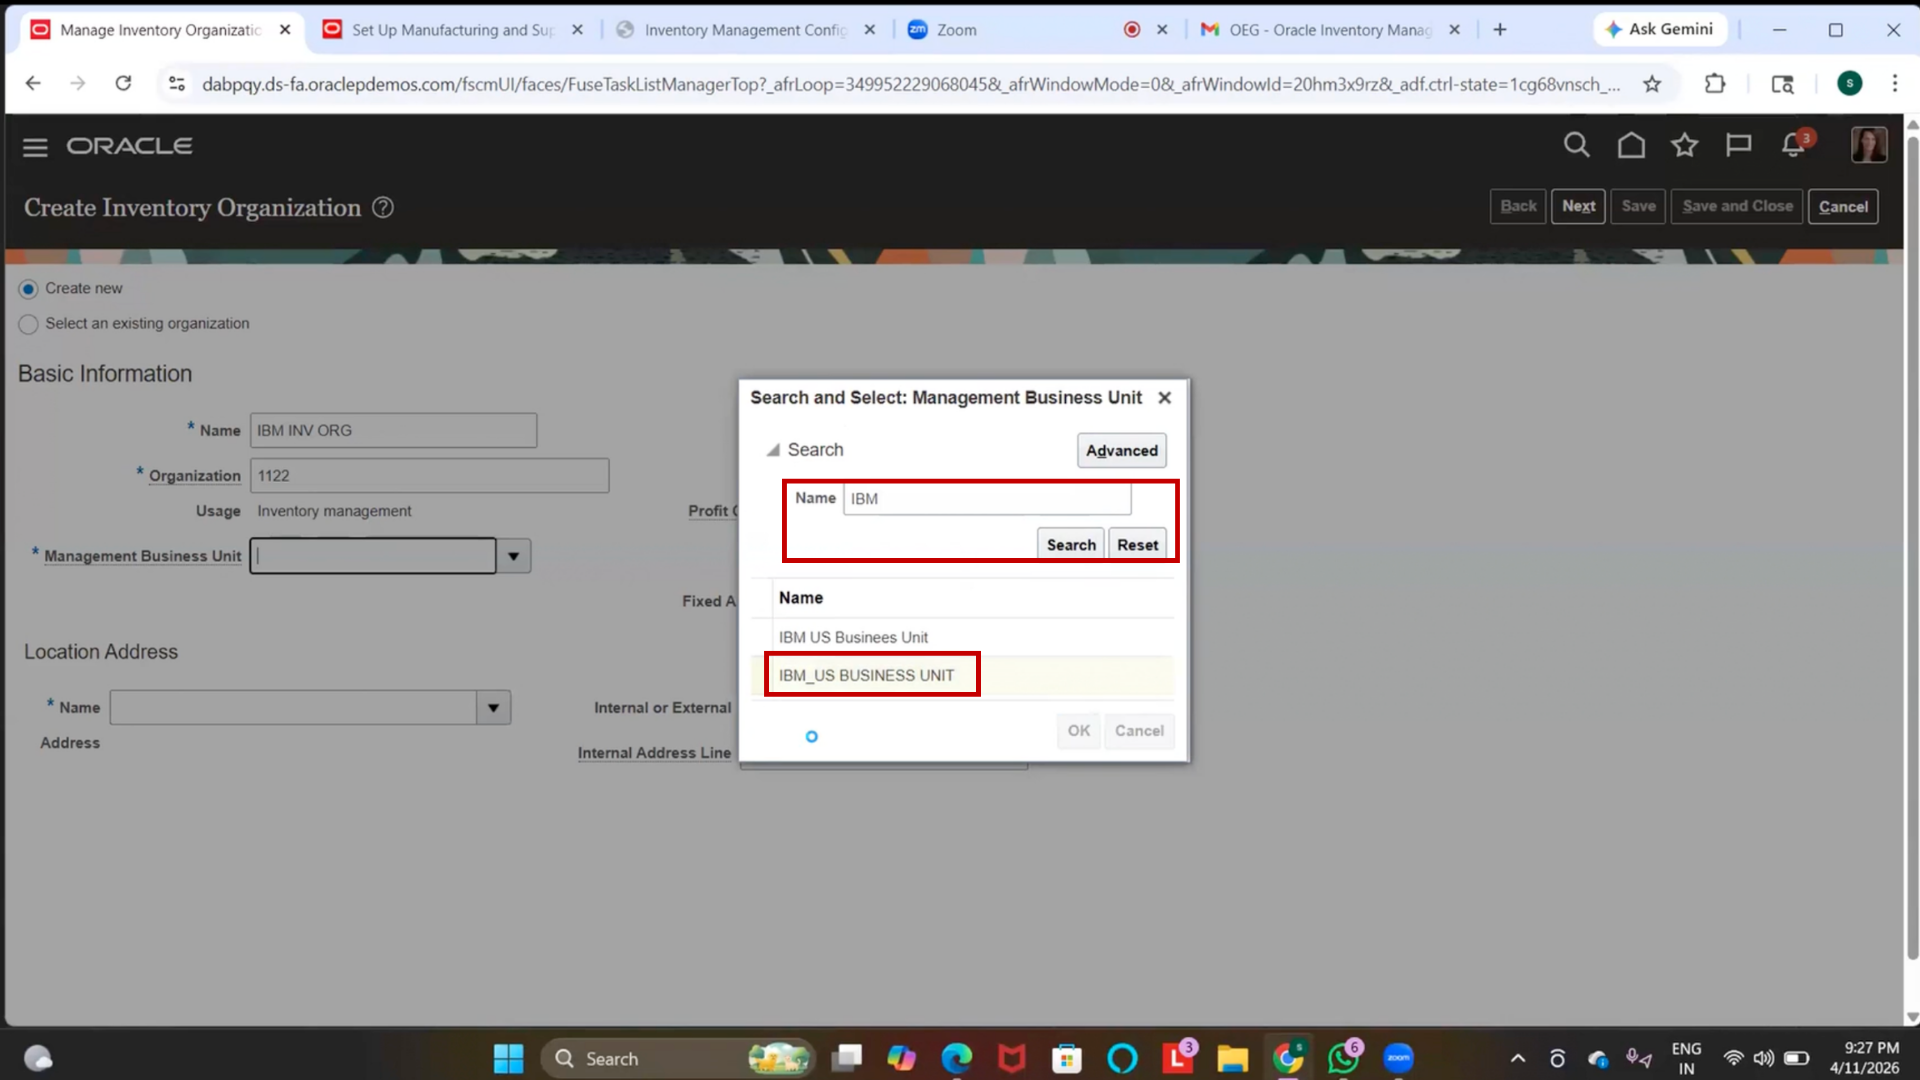
5. Verify location is auto-defaulted
6. Select Legal Entity
7. Click Next
Step 67: Assign Item Master
1. Select the Item Master Organization created earlier
(Example: IBM Item Master)
2. Ensure this step is completed (mandatory)
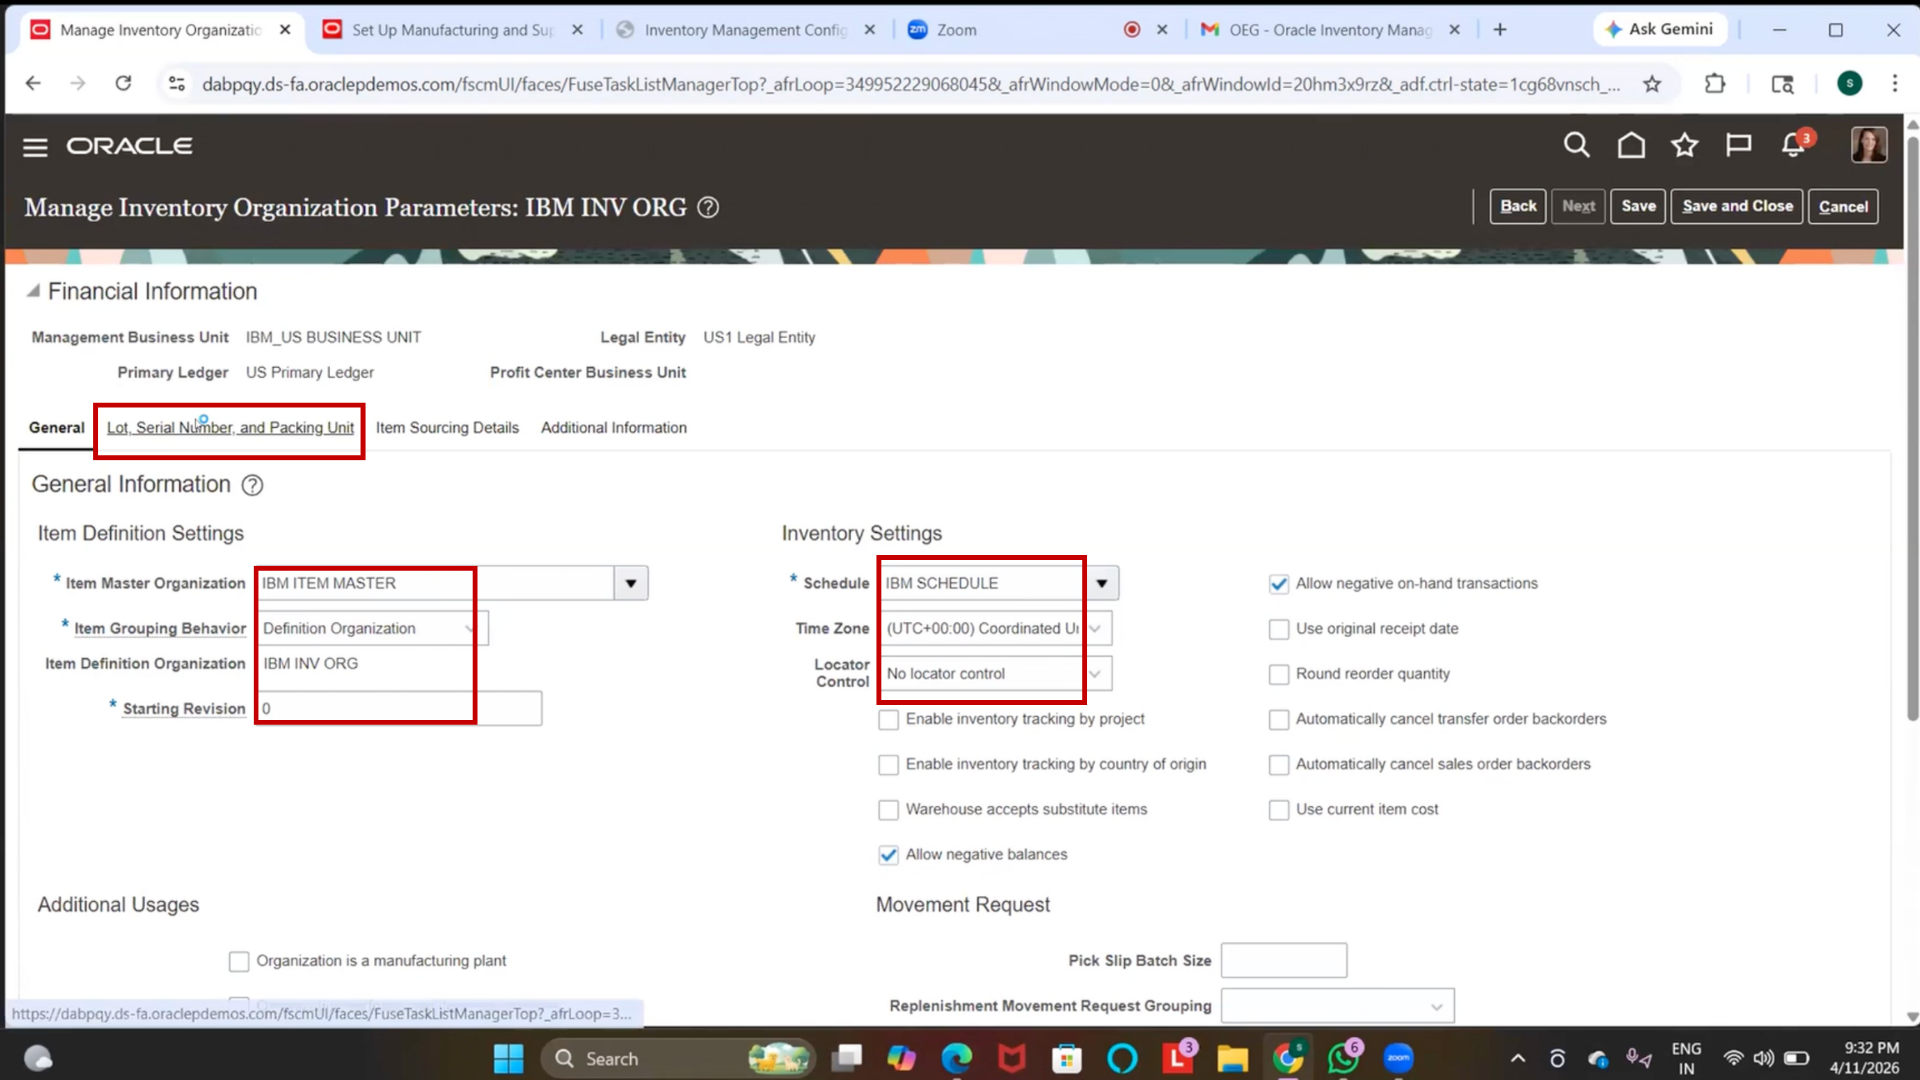
Step 68: Assign Item Master to Inventory Organization
1. Select Item Master Organization = IBM Item Master
2. Ensure Item Grouping Behavior = Definition Organization (default)
Step 69: Assign Facility Schedule
1. Navigate to the Schedule field
2. Select IBM Schedule (created earlier)
Step 70: Configure Basic Inventory Parameters
1. Review available advanced options
2. Enable Allow Negative On-Hand Balances (if required)
3. Keep Locator Control = None (as per setup)
4. Leave other advanced options as default (optional)
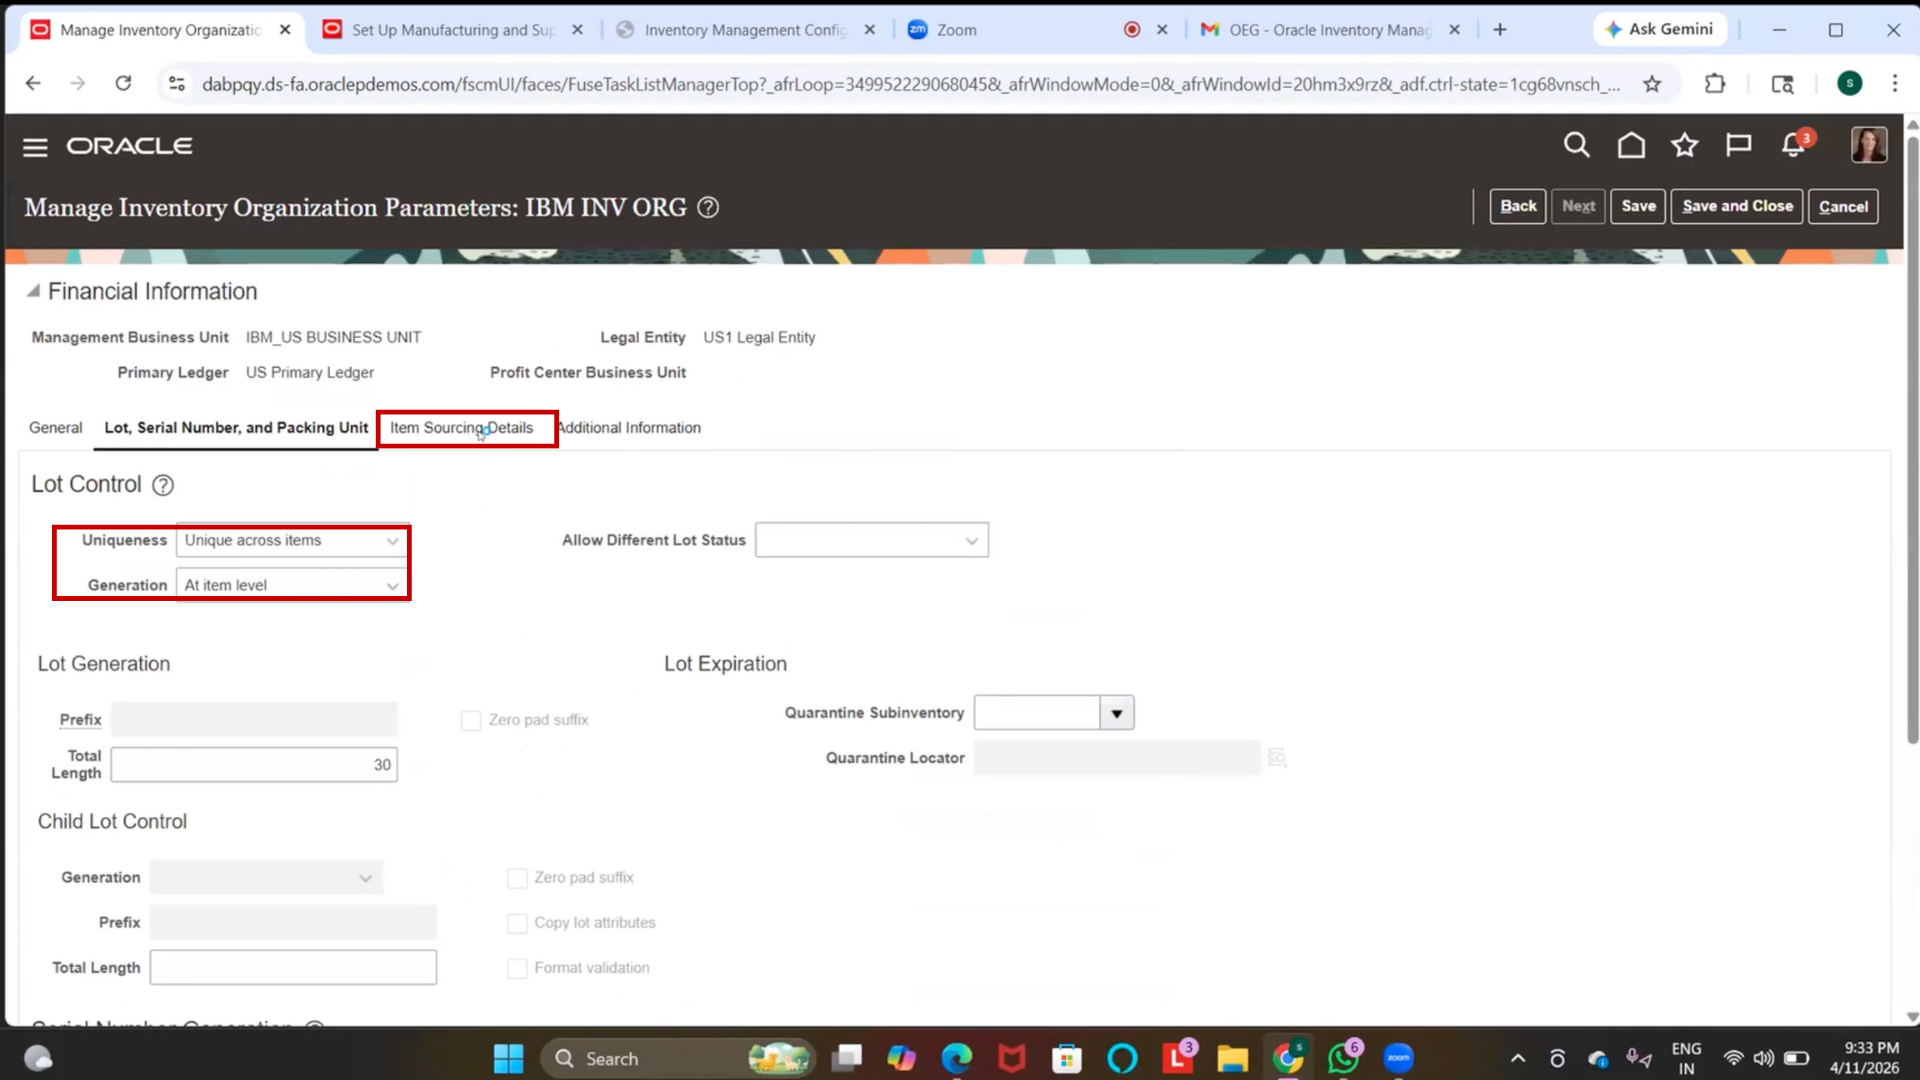
Step 71: Review Lot and Serial Controls
1. Navigate to Lot and Serial Number and Packing Unit section
2. Keep default settings (no changes required for basic setup)
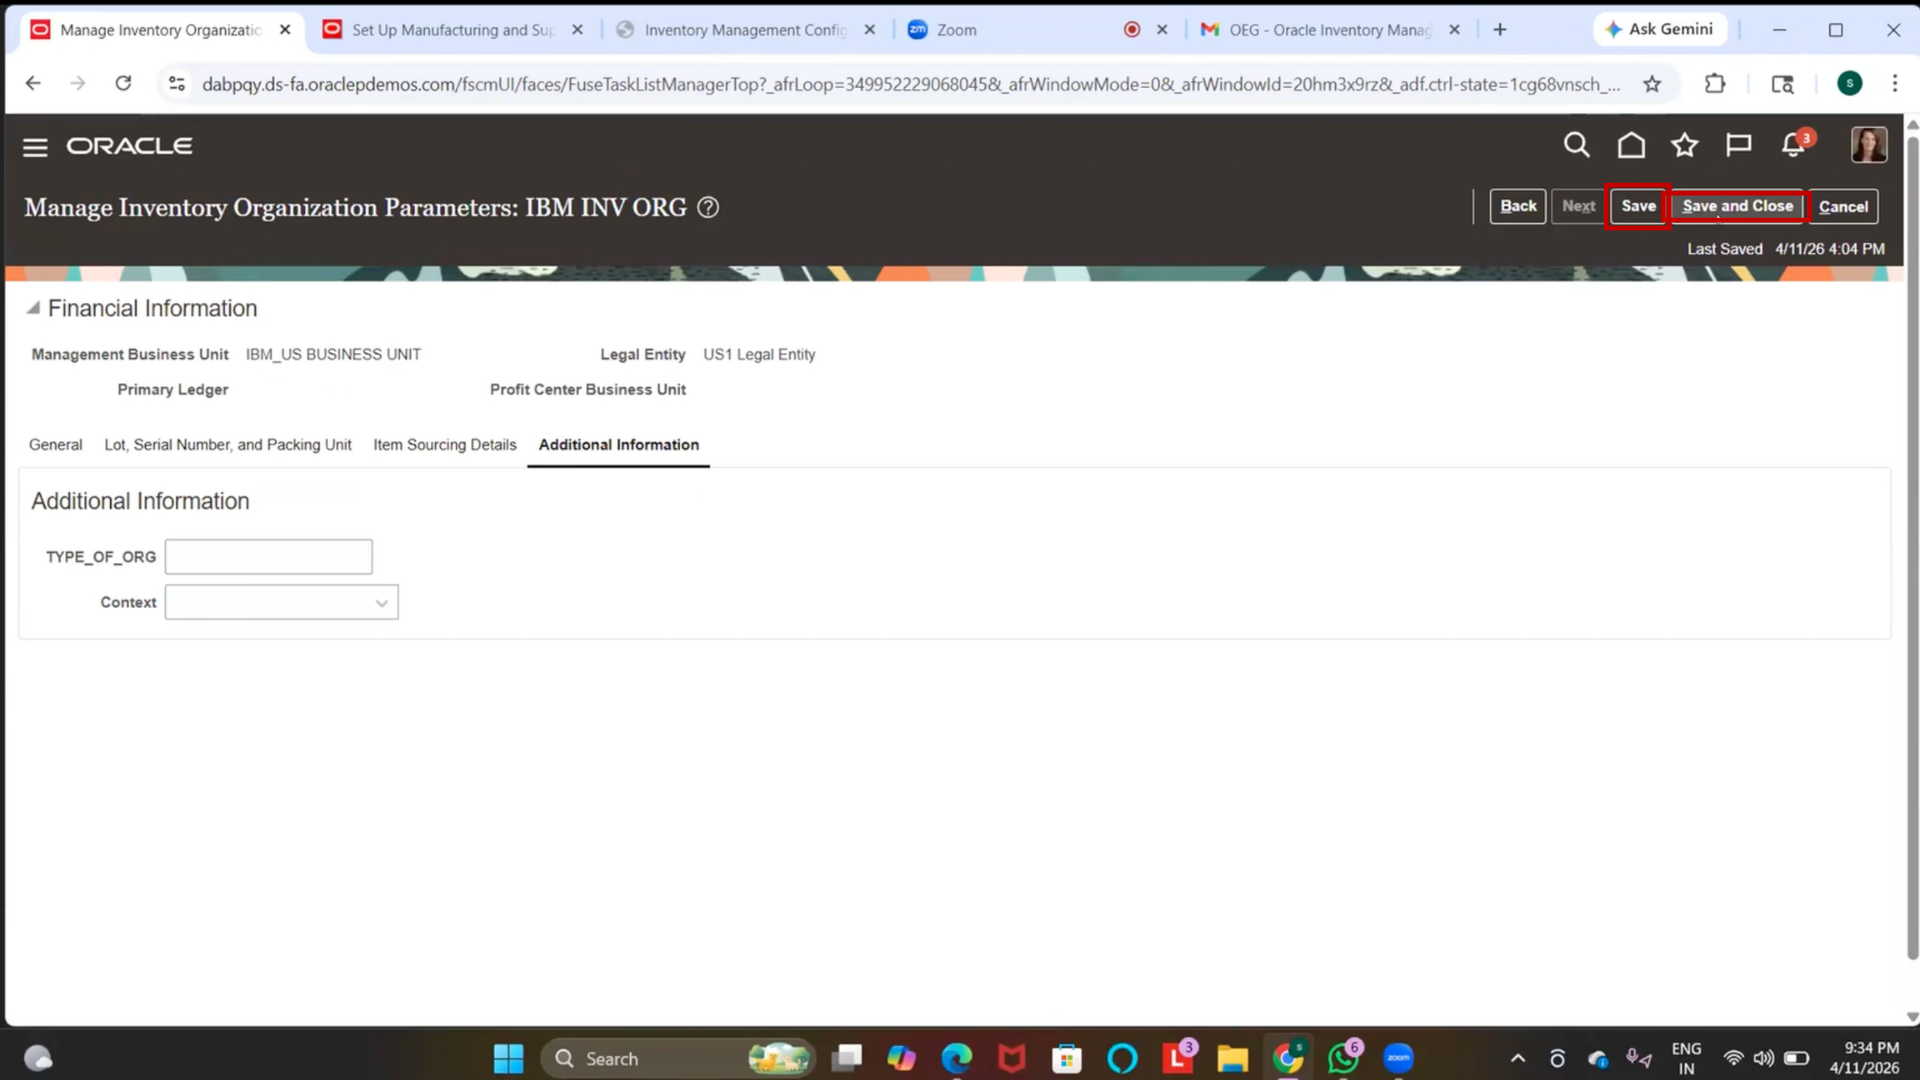
Step 72: Save Inventory Organization
1. Click on “Save.”
2. Click on Save and Close
Step 73: Verify Inventory Organization Creation
1. Search using Organization Code (1122)
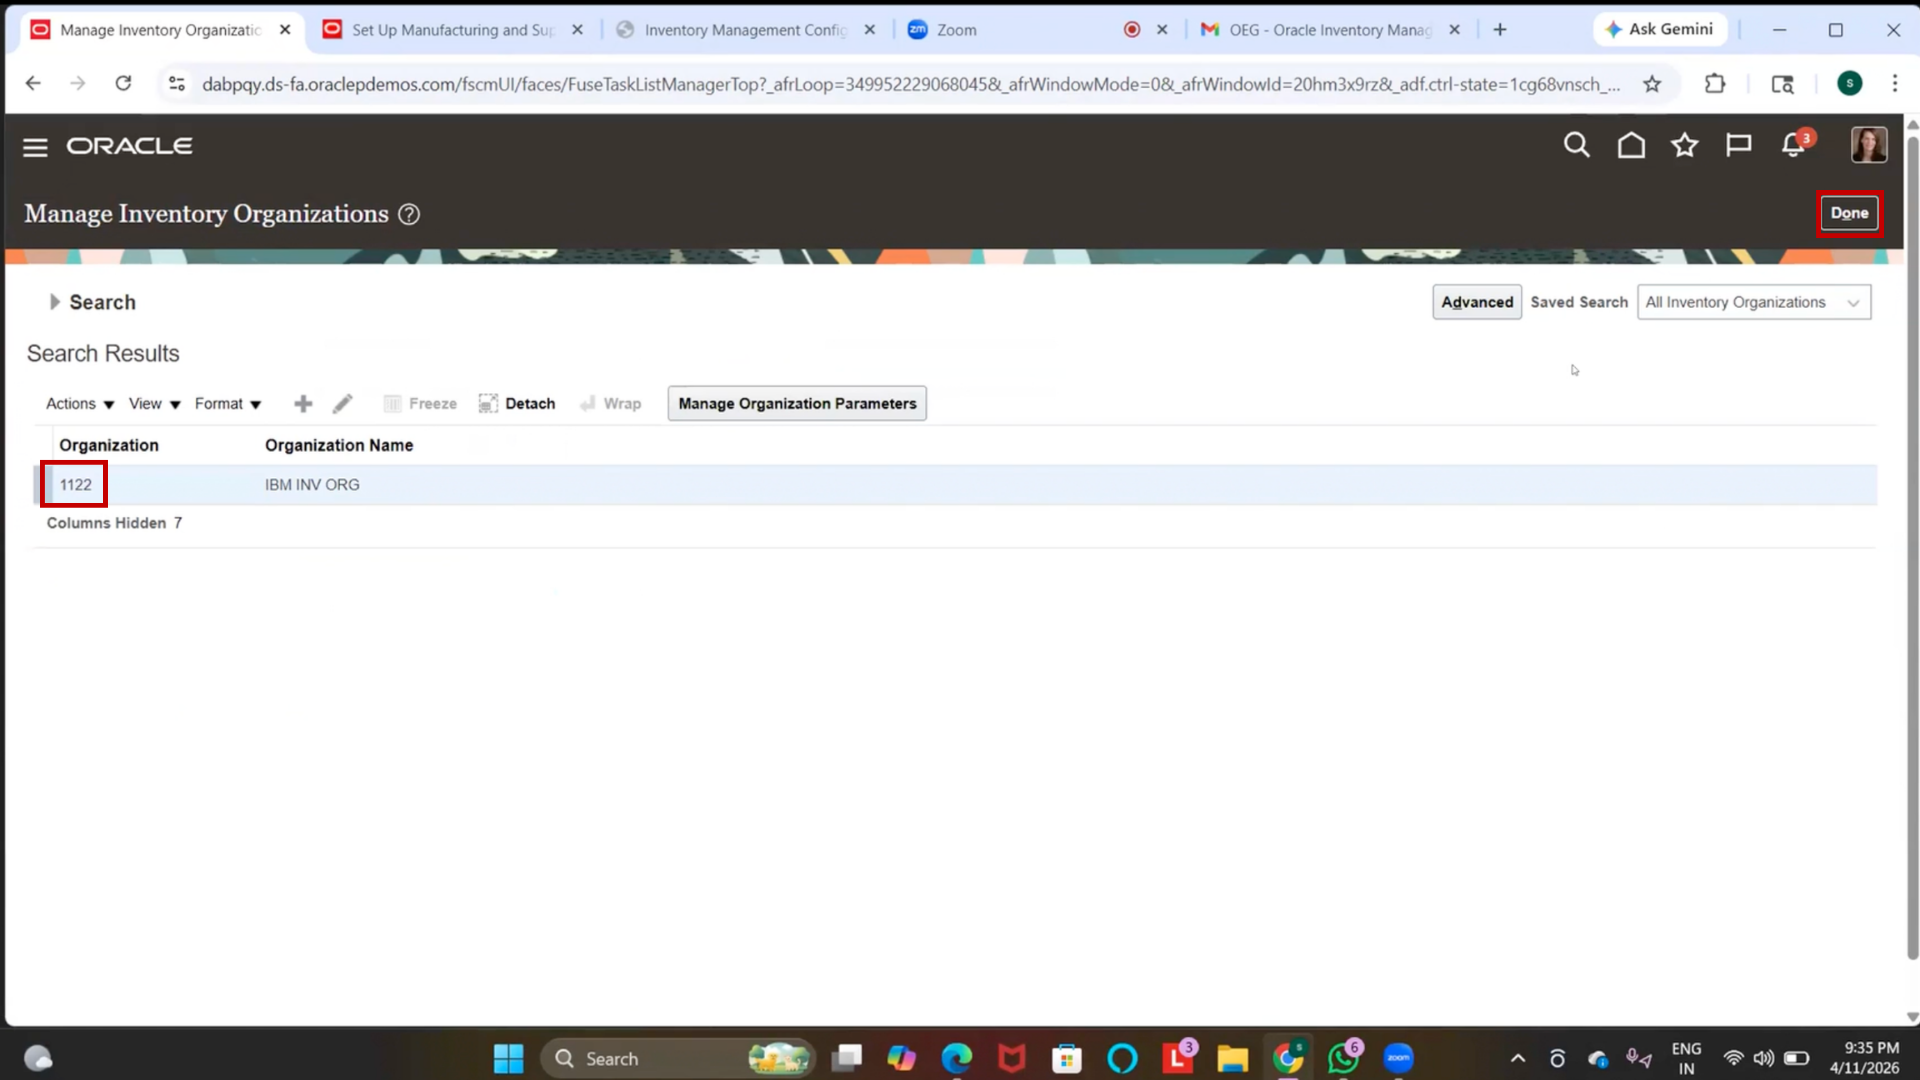
2. Verify IBM Inventory Org is created

3. Click on “Done.”

Step 74: Navigate to Manage Subinventory
1. Go to Manage Subinventory
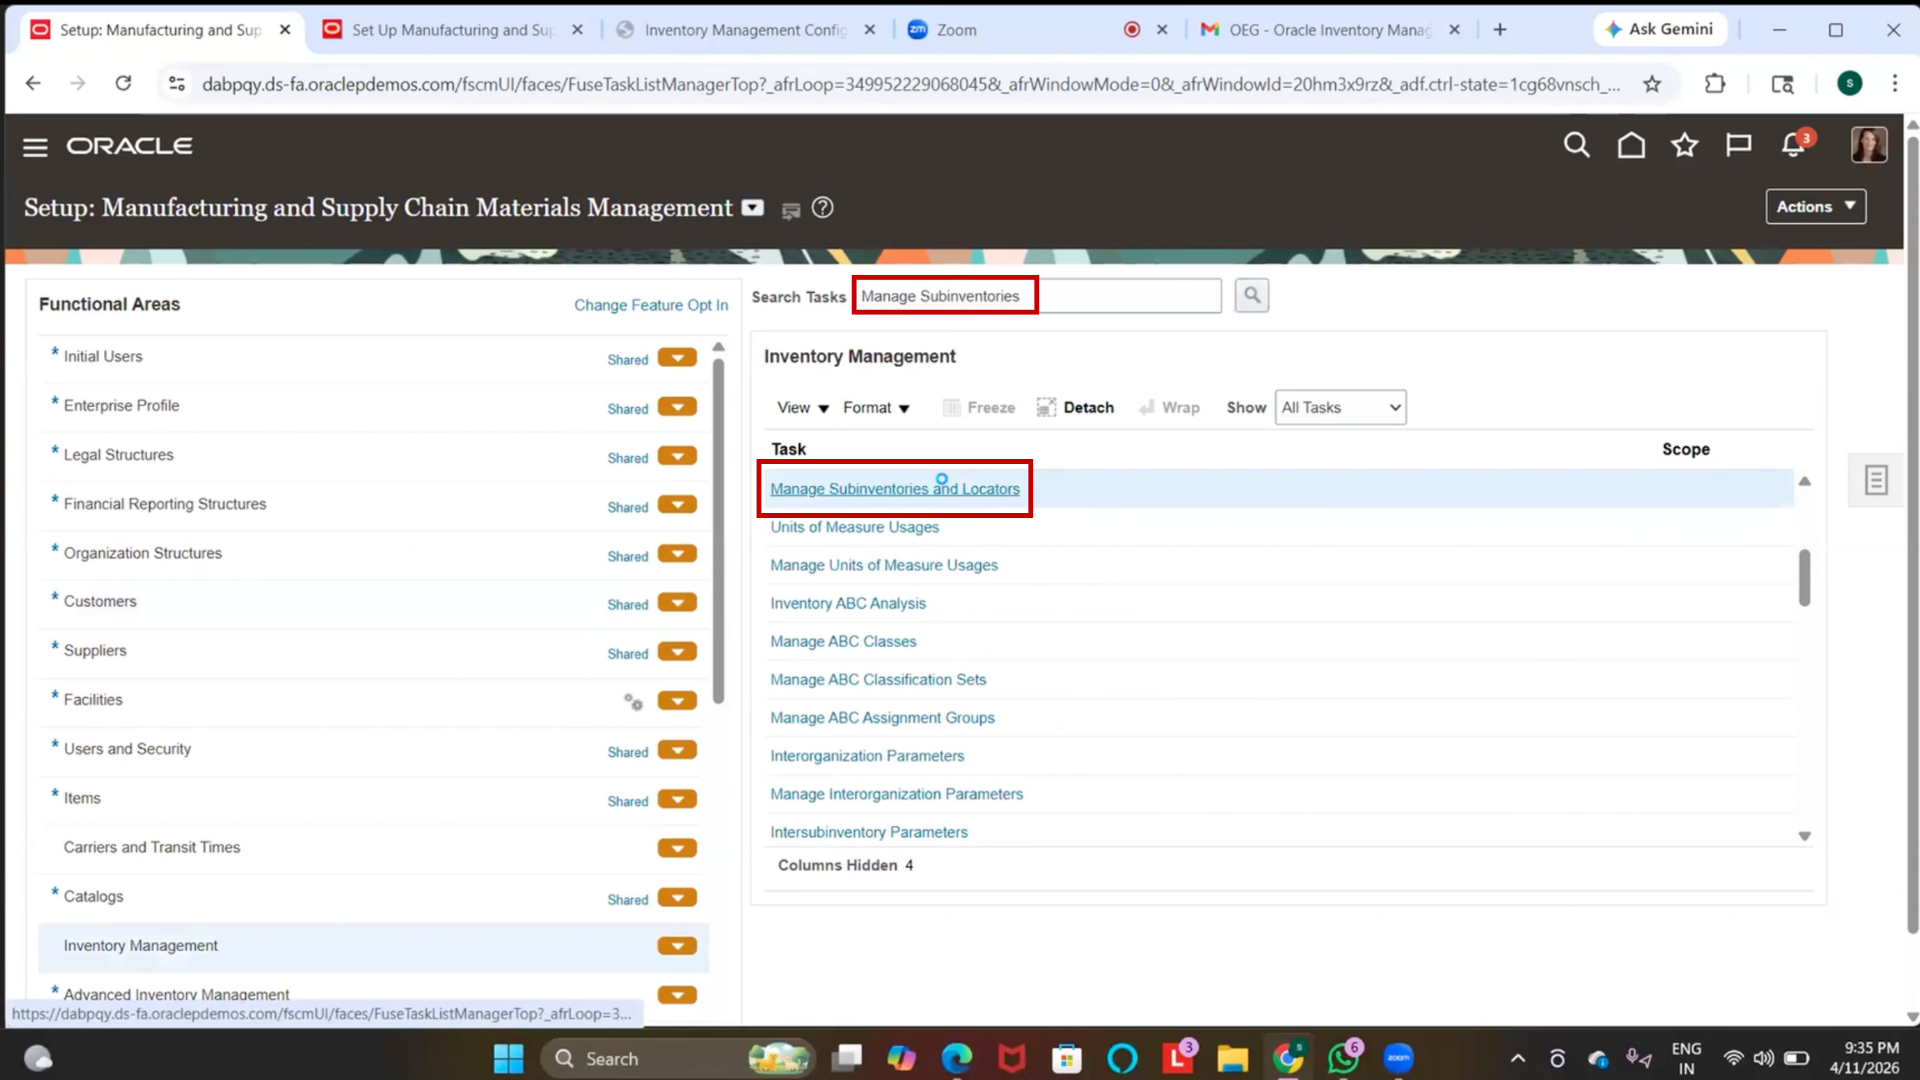
2. Select Inventory Organization = IBM Inventory Org
Step 75: Create Sub-Inventory
1. Click on (+) the plus icon
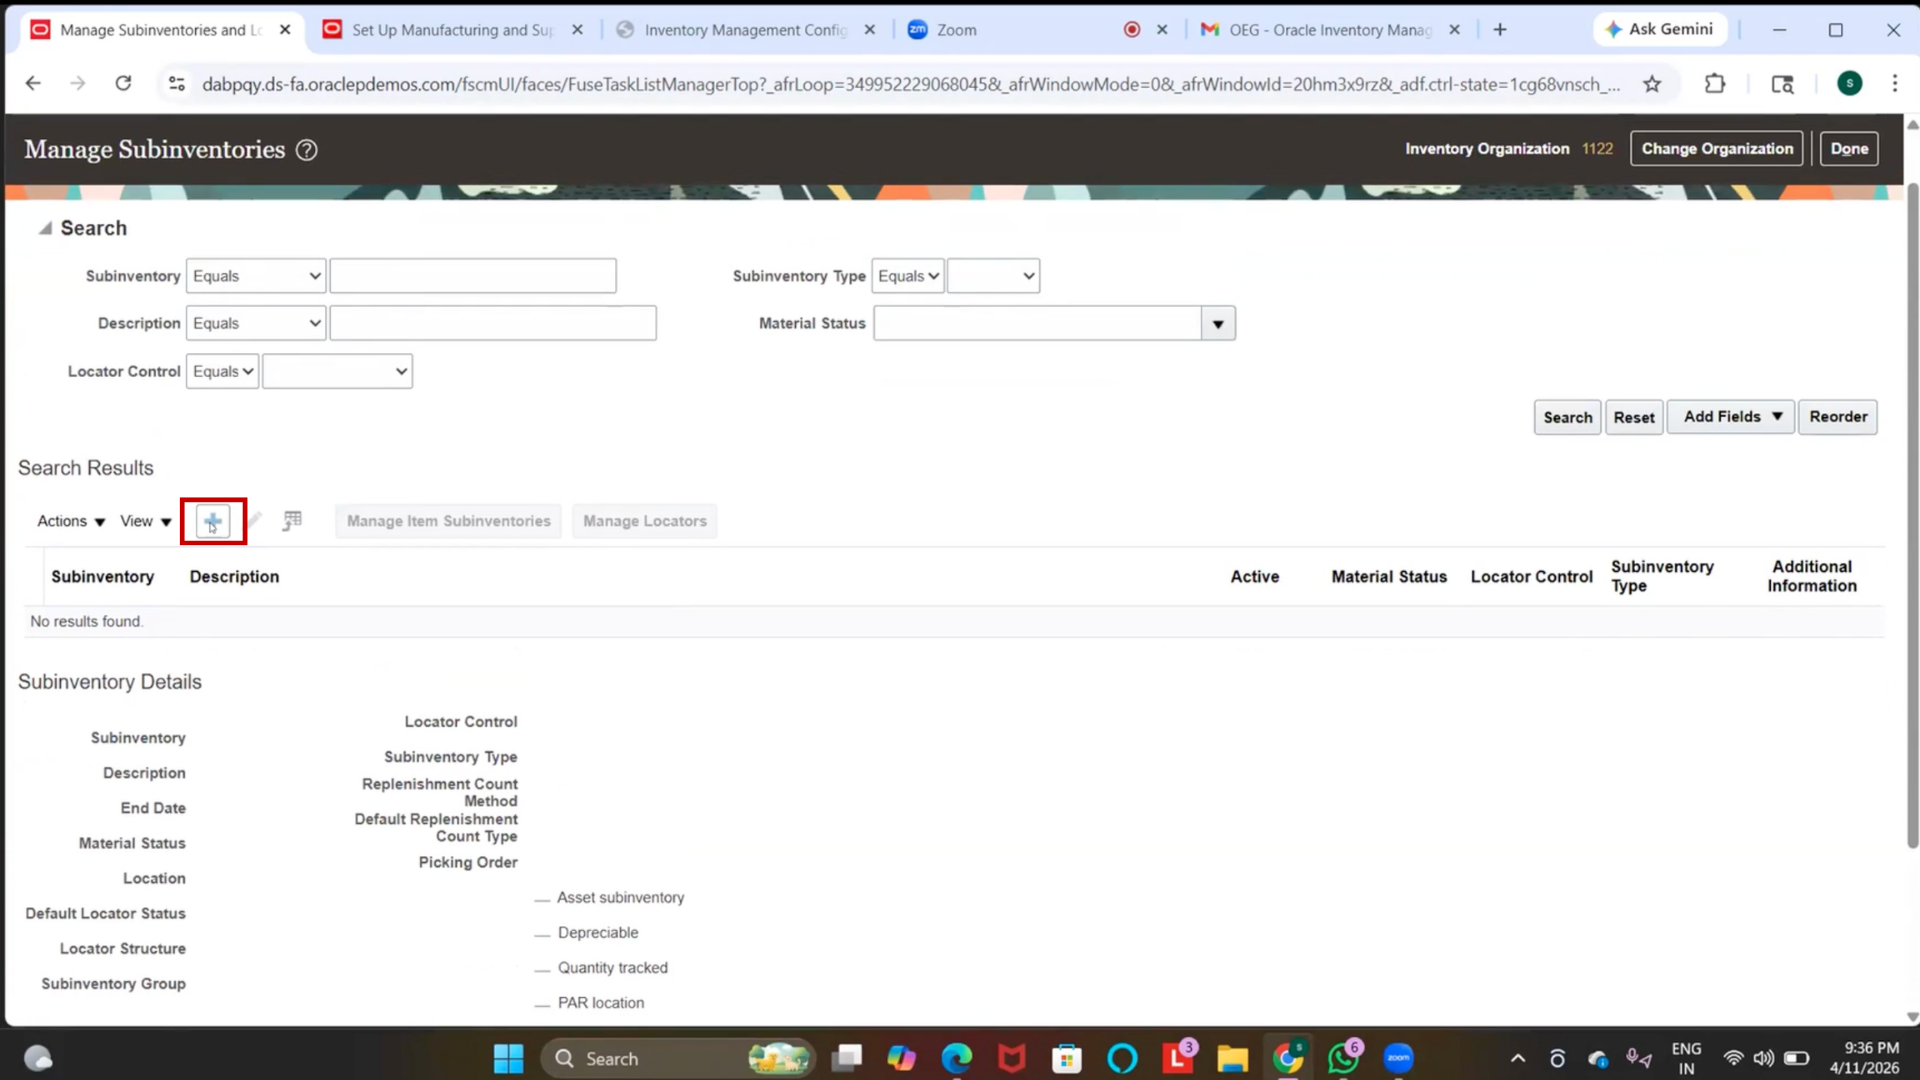
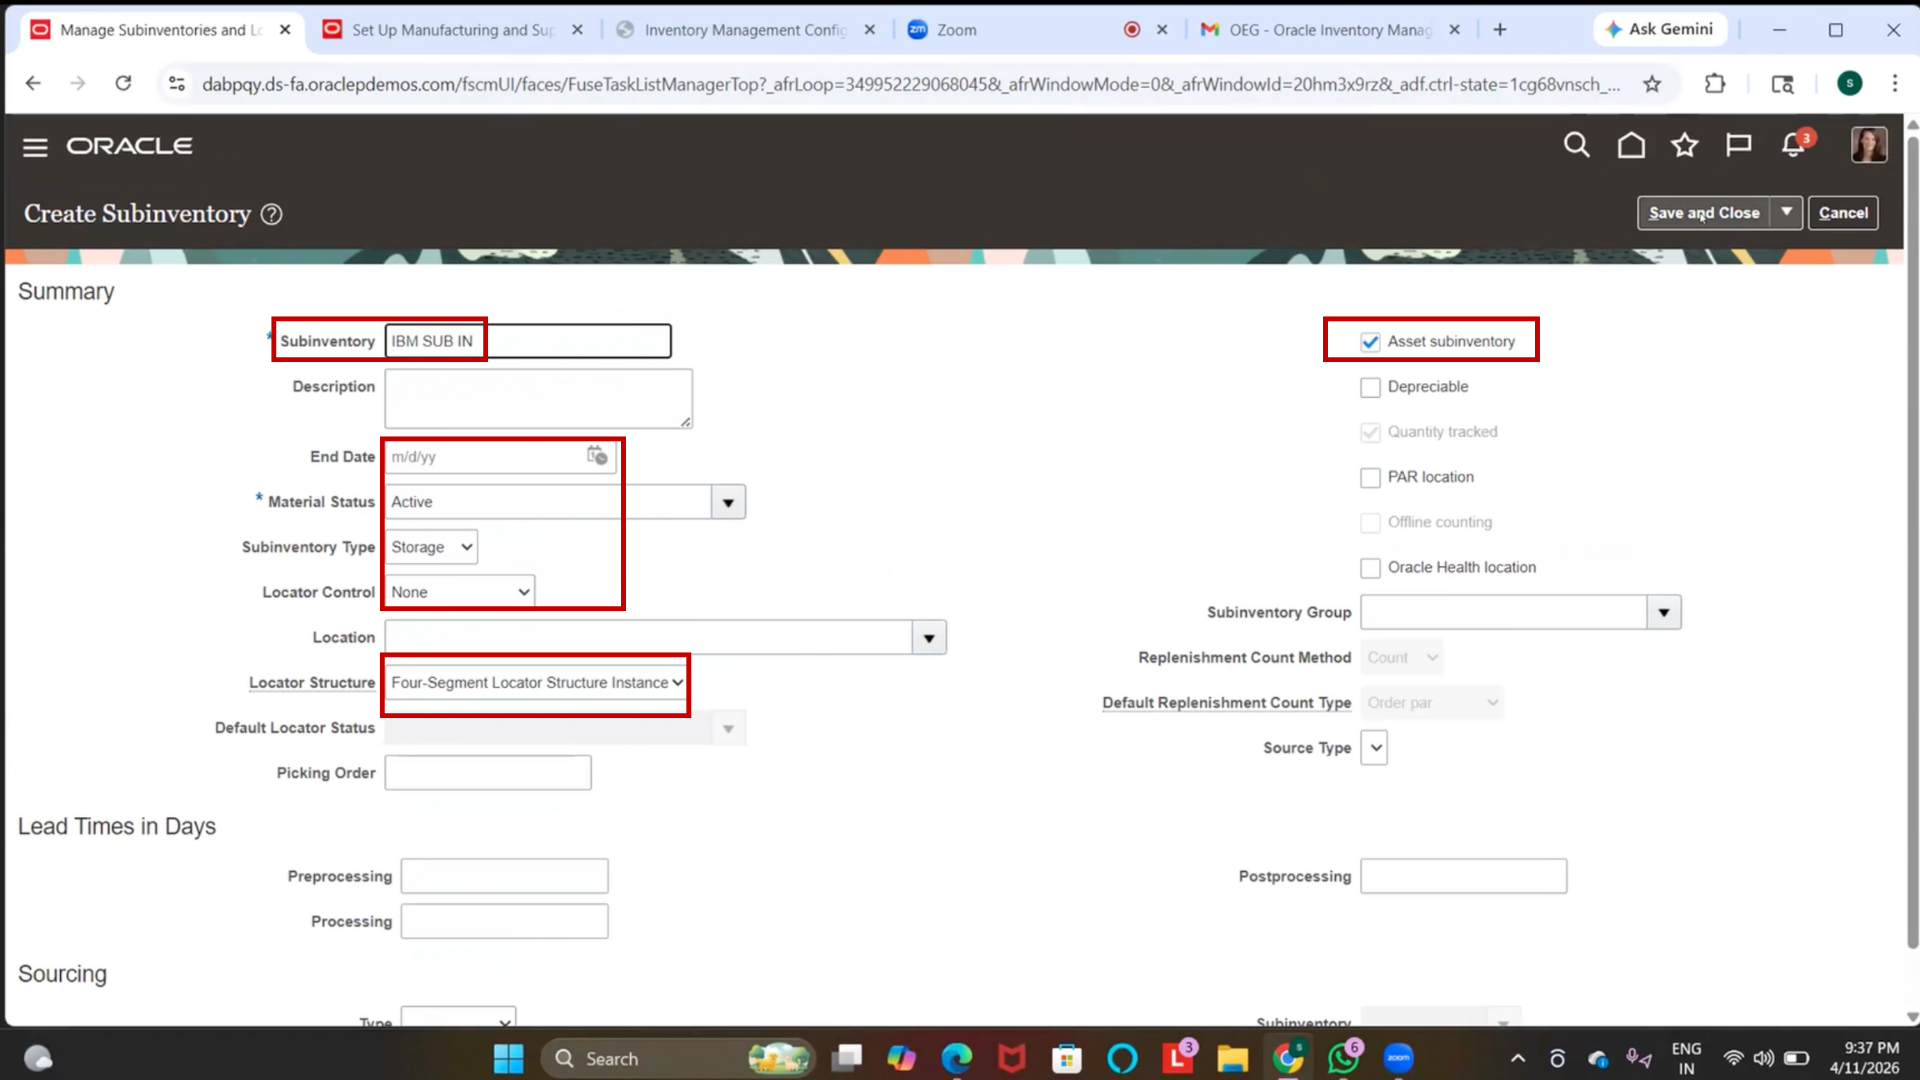
2. Enter Sub-Inventory Name = IBM Sub-Inventory
(Optional) Enter End Date
3. Select Material Status = Active
4. Select Sub-Inventory Type = Storage
5. Set Locator Control = None
6. Ensure it is marked as “Asset Sub-Inventory.”
7. Click on Save and Close
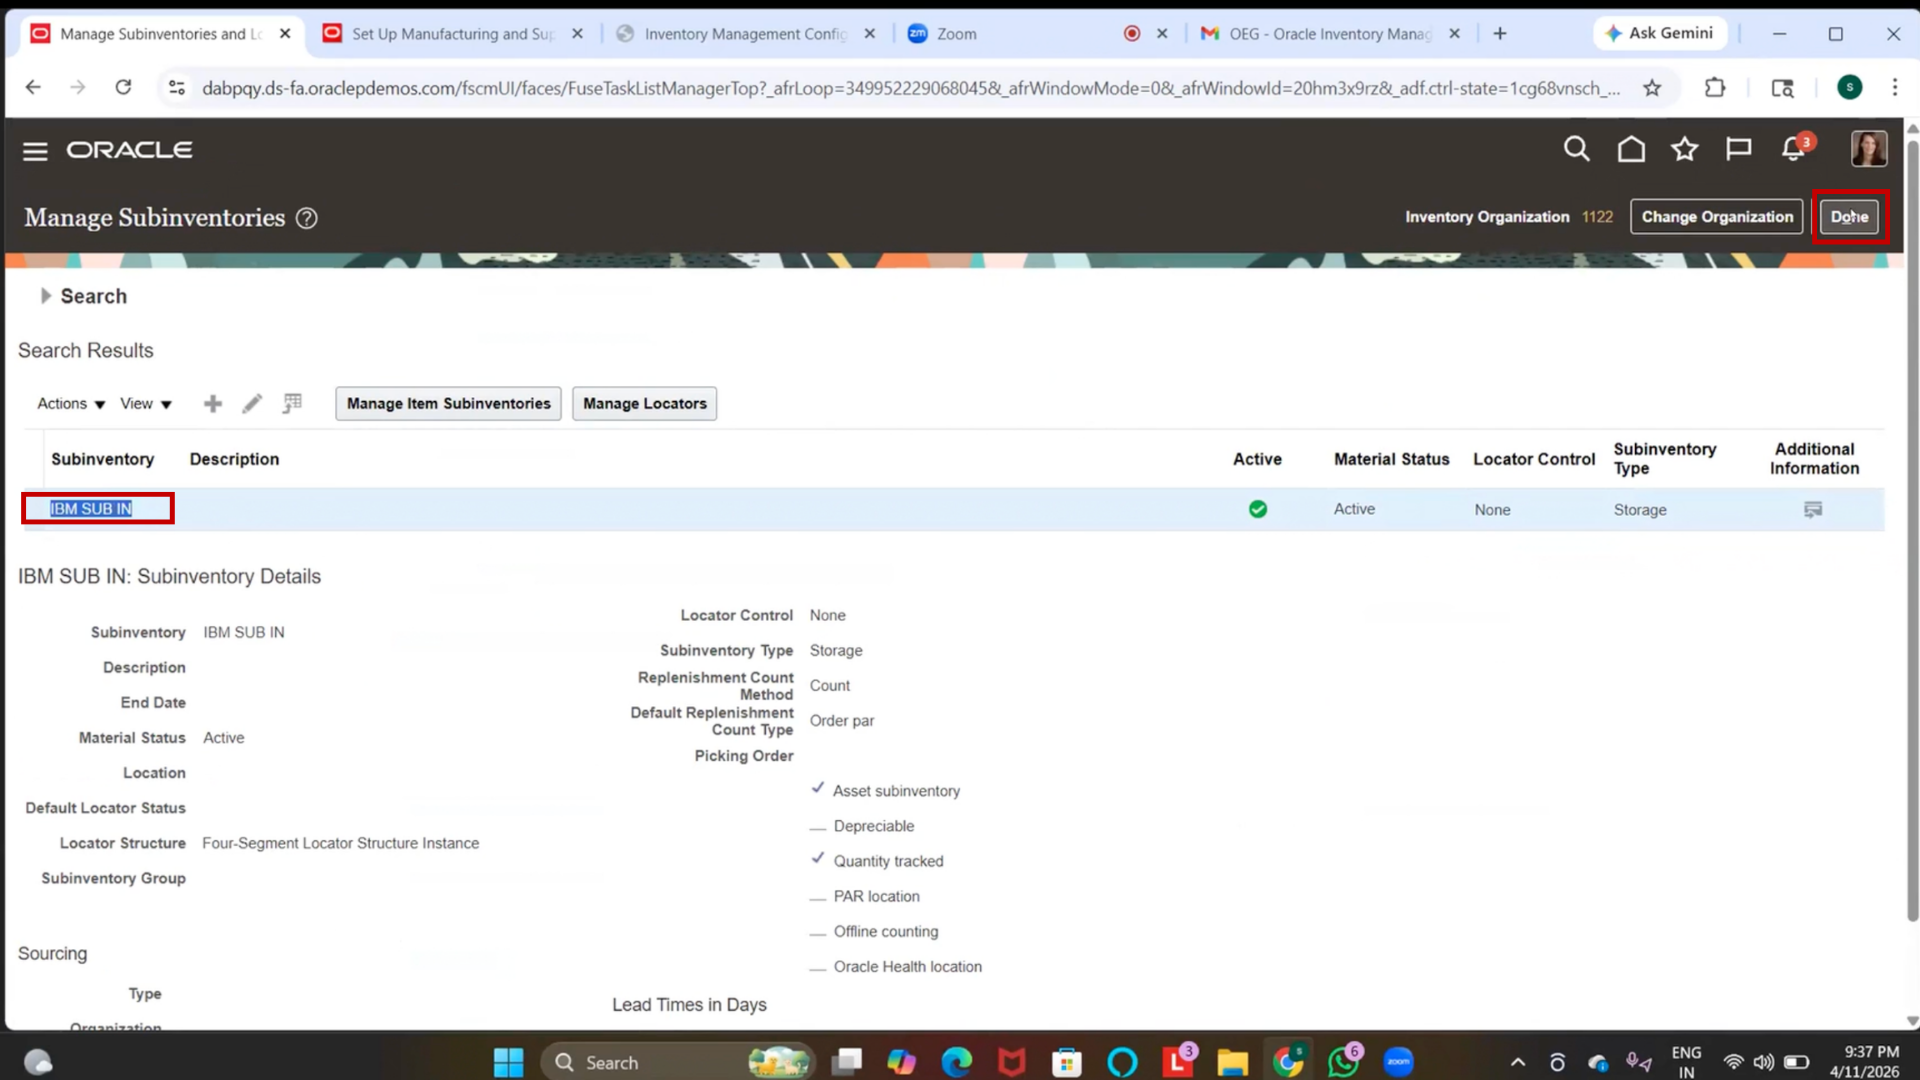
Step 76: Verify Sub-Inventory
1. Confirm the sub-inventory is created
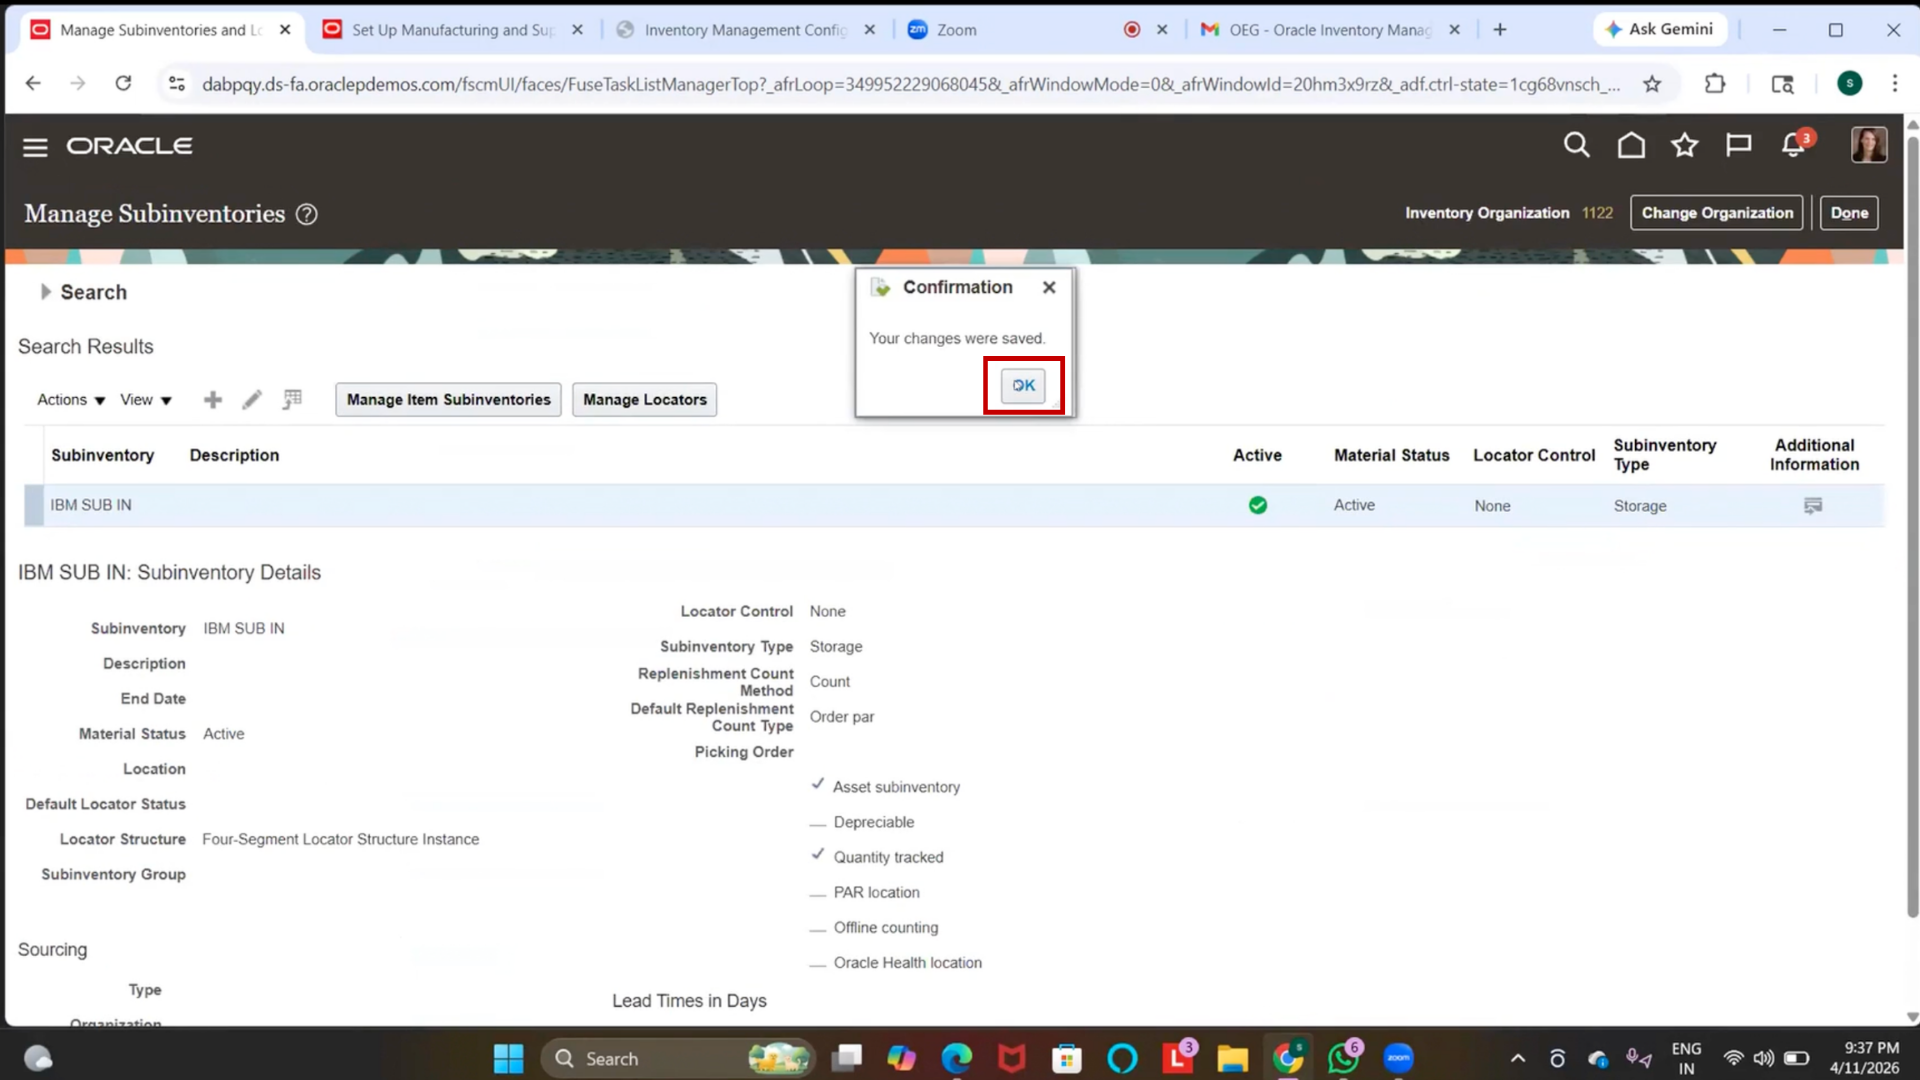
2. Click “Done.”
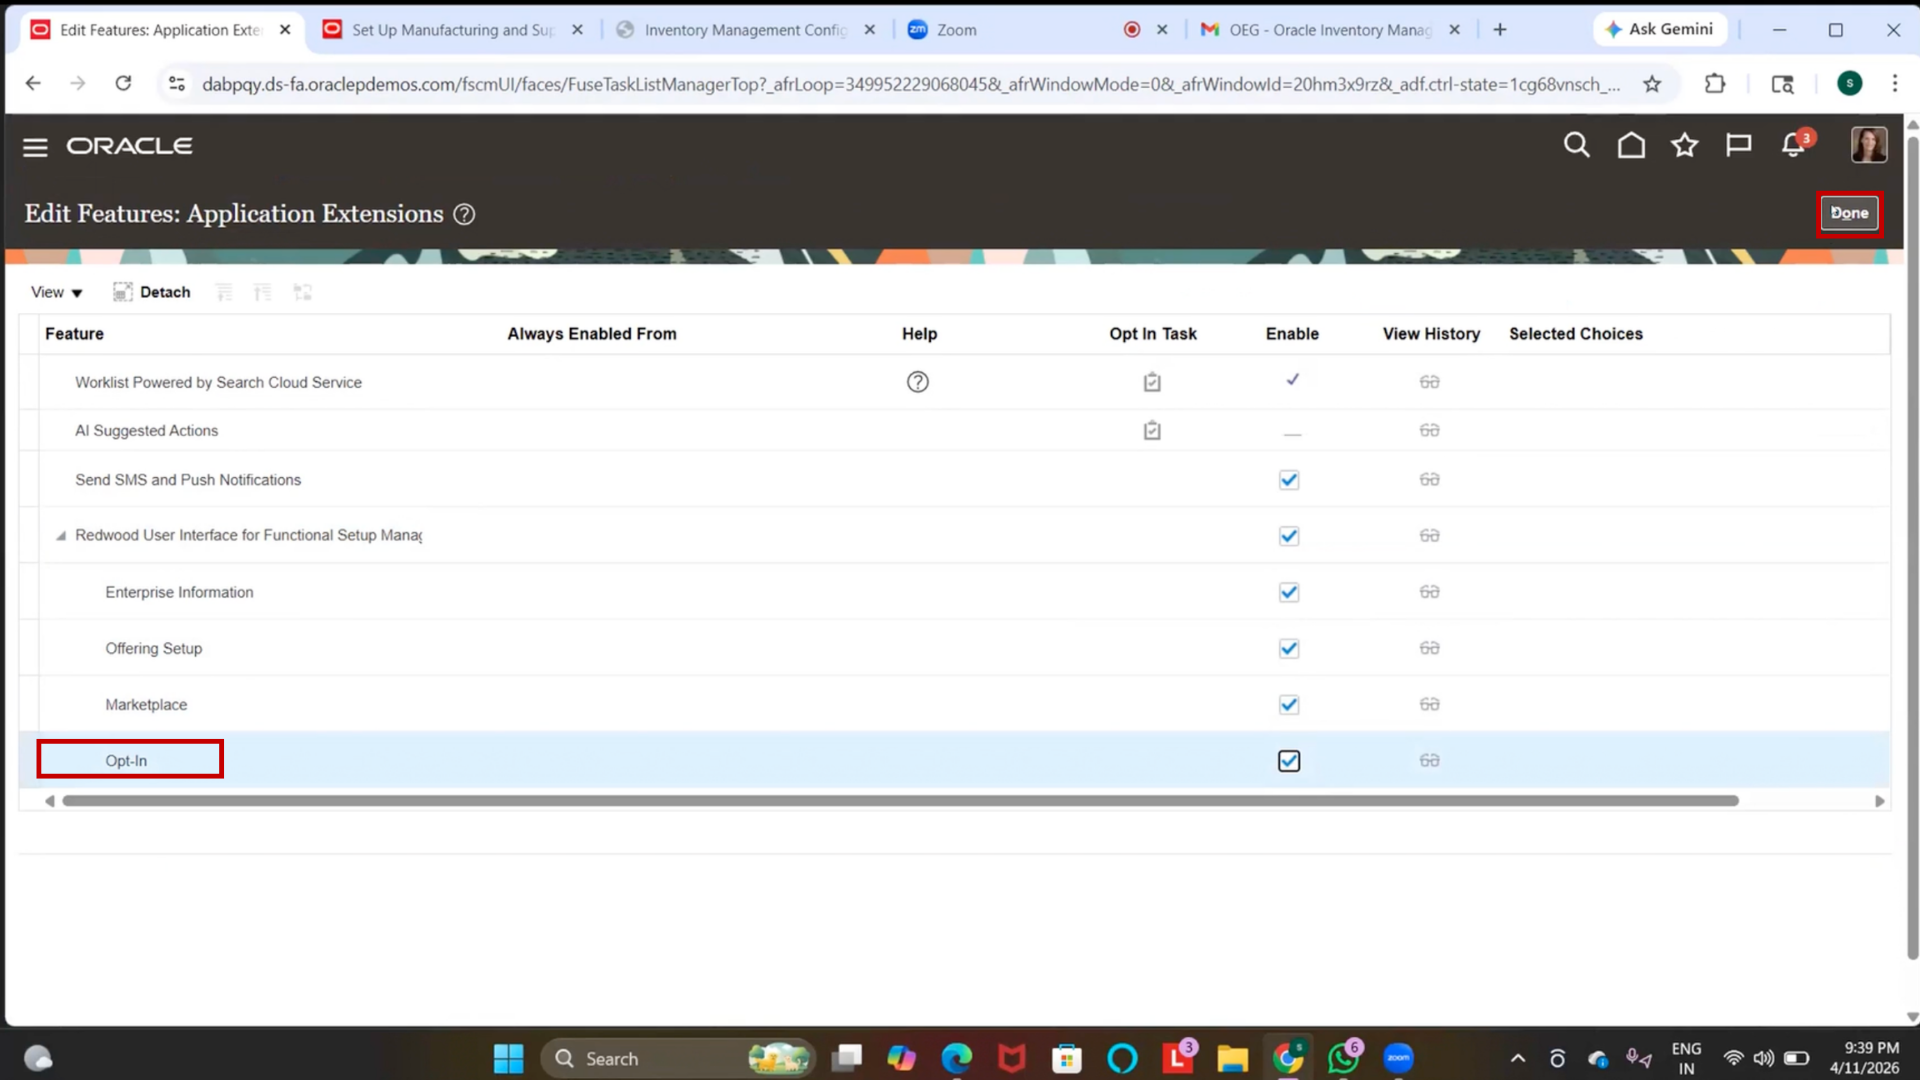
Step 77: Enable Redwood UI
1. Click on Actions
2. Select Offerings
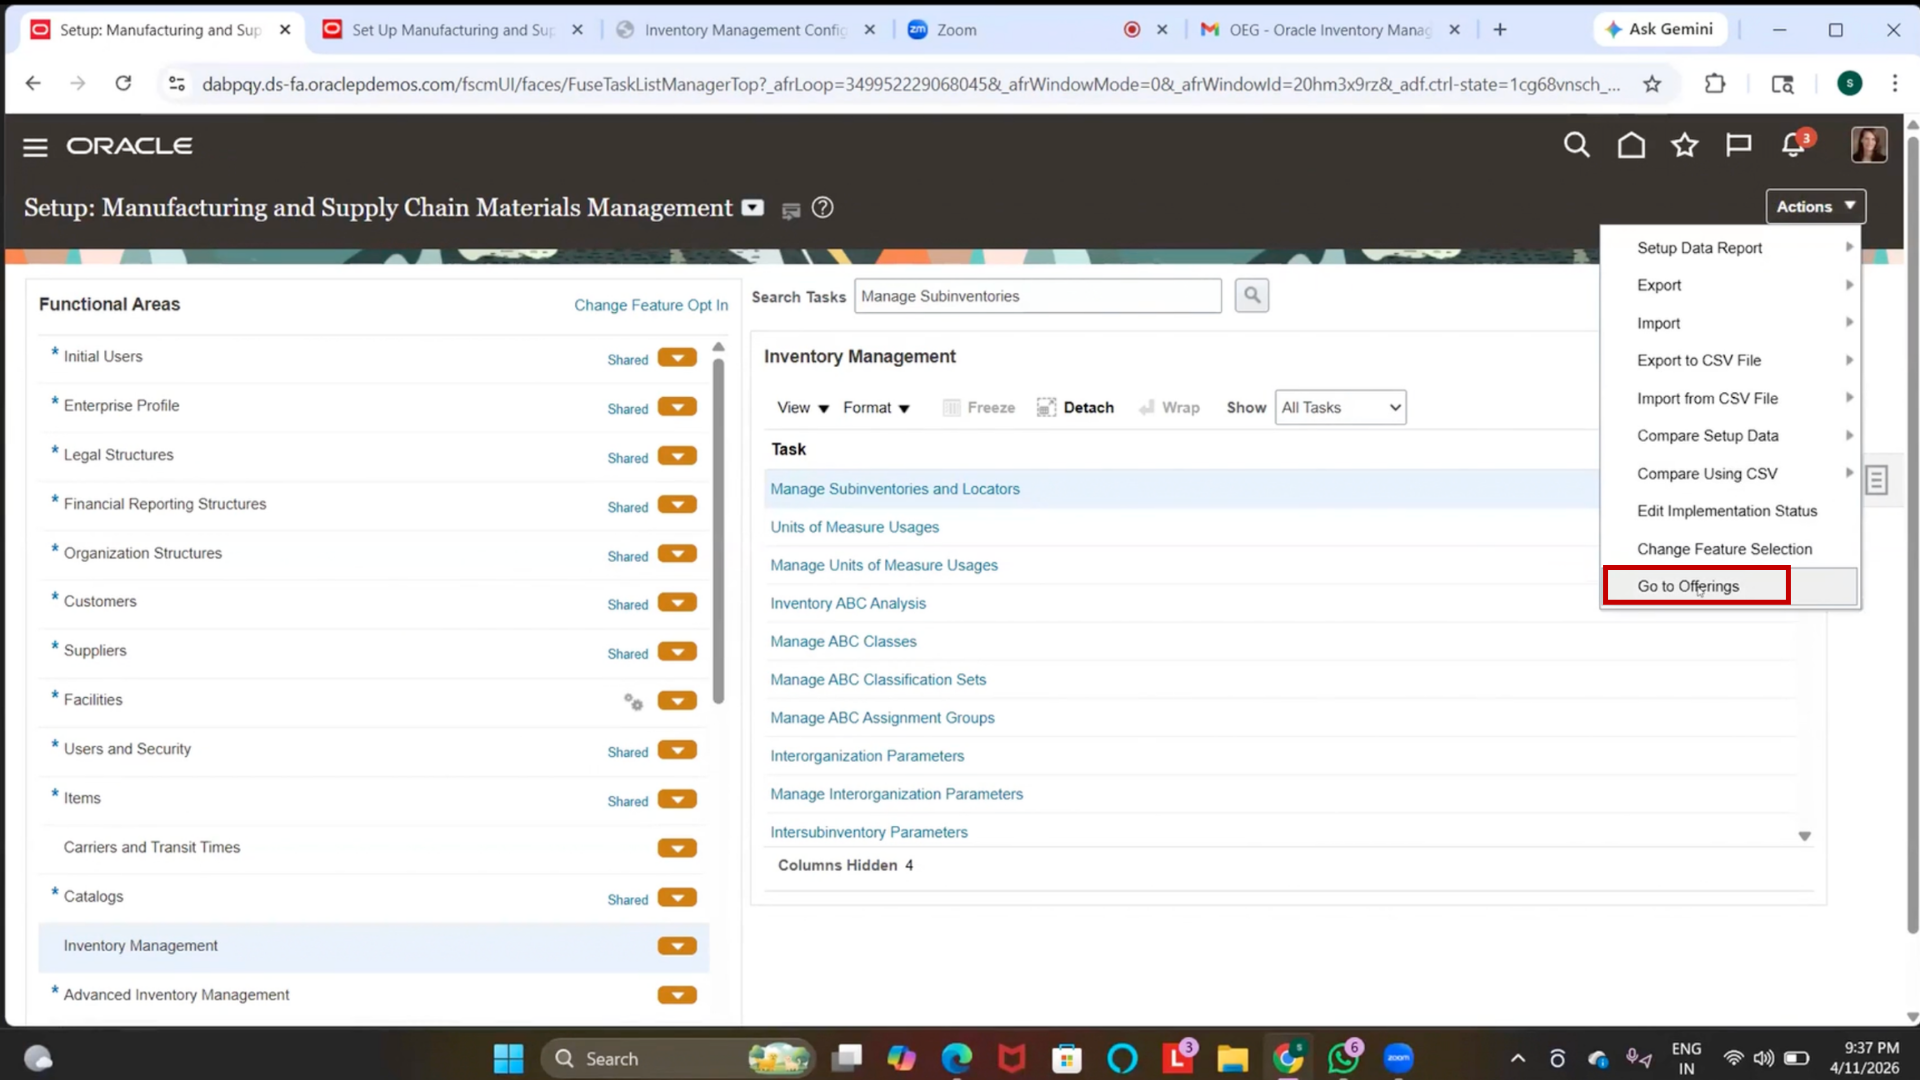
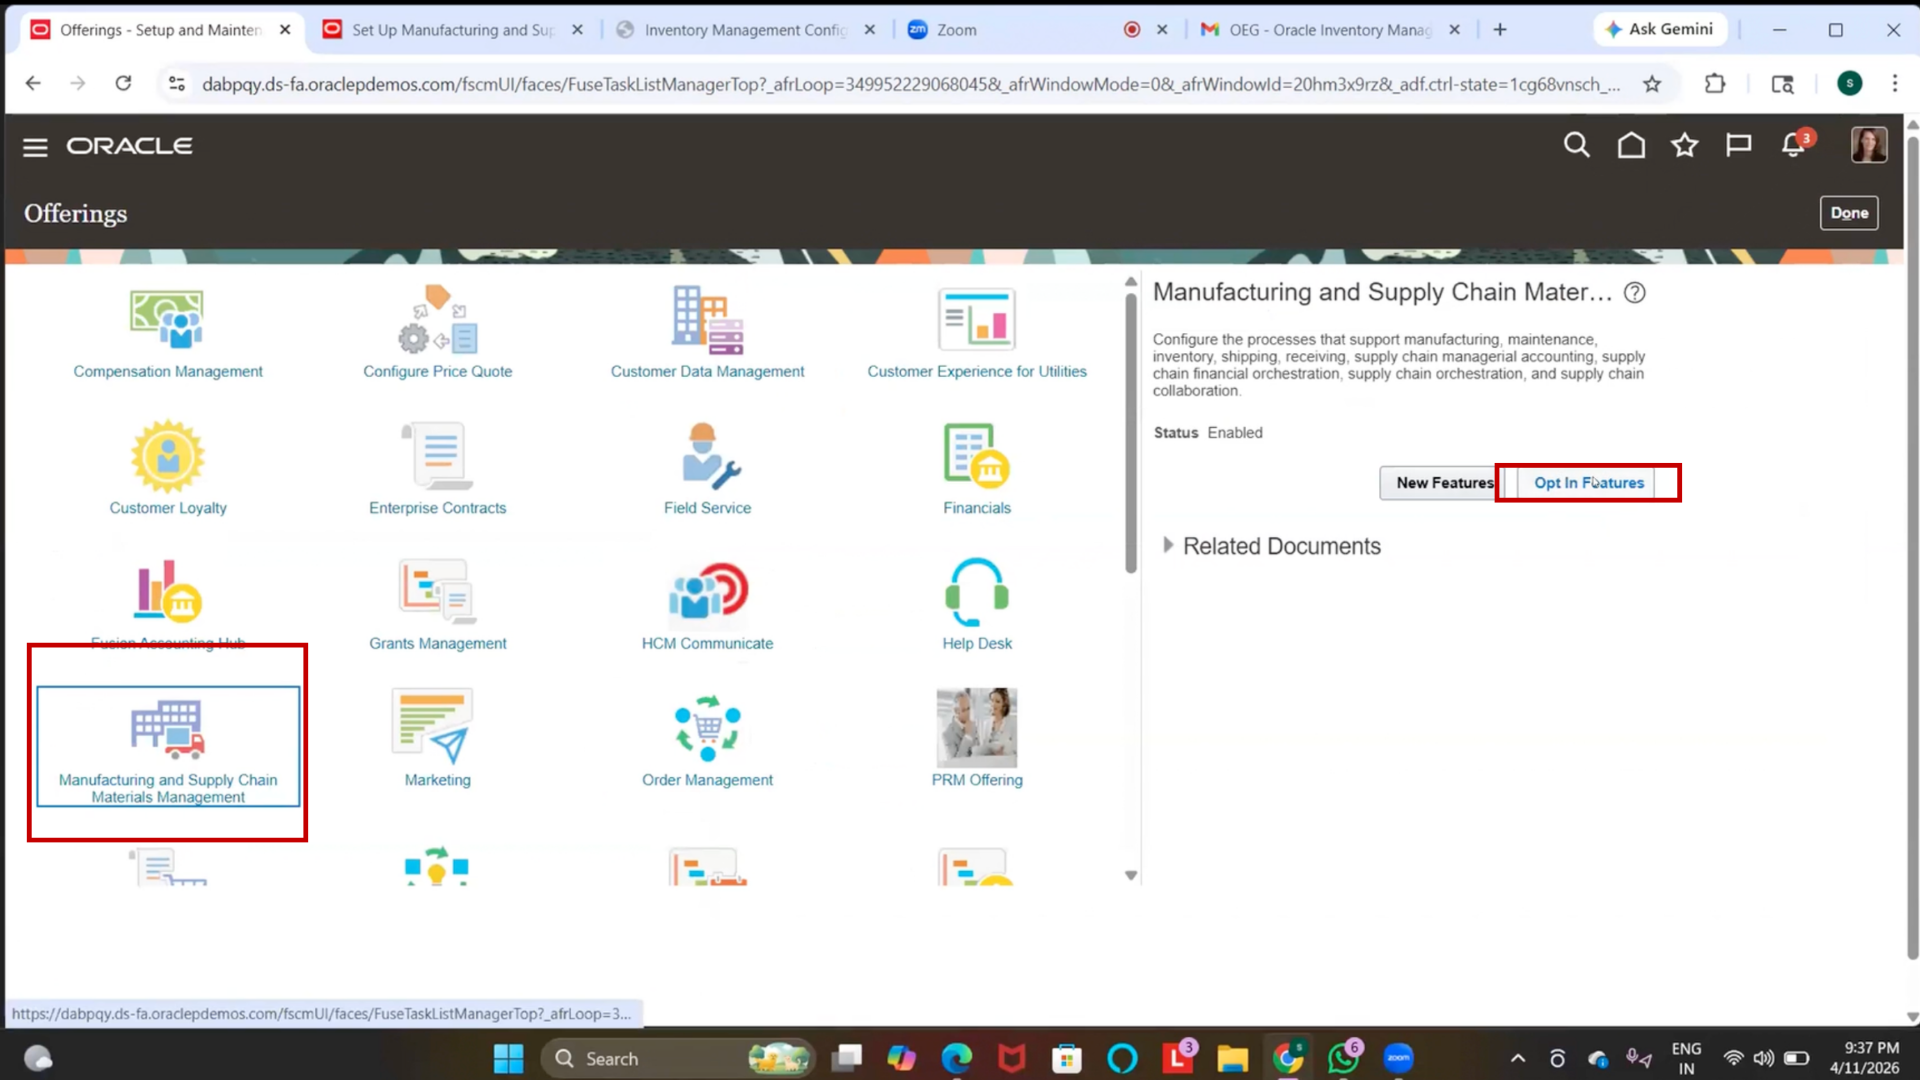
3. Choose Manufacturing and Supply Chain Management
4. Click on Opt-In Features
5. Navigate to Application Extensions
6. Click on “Edit.”
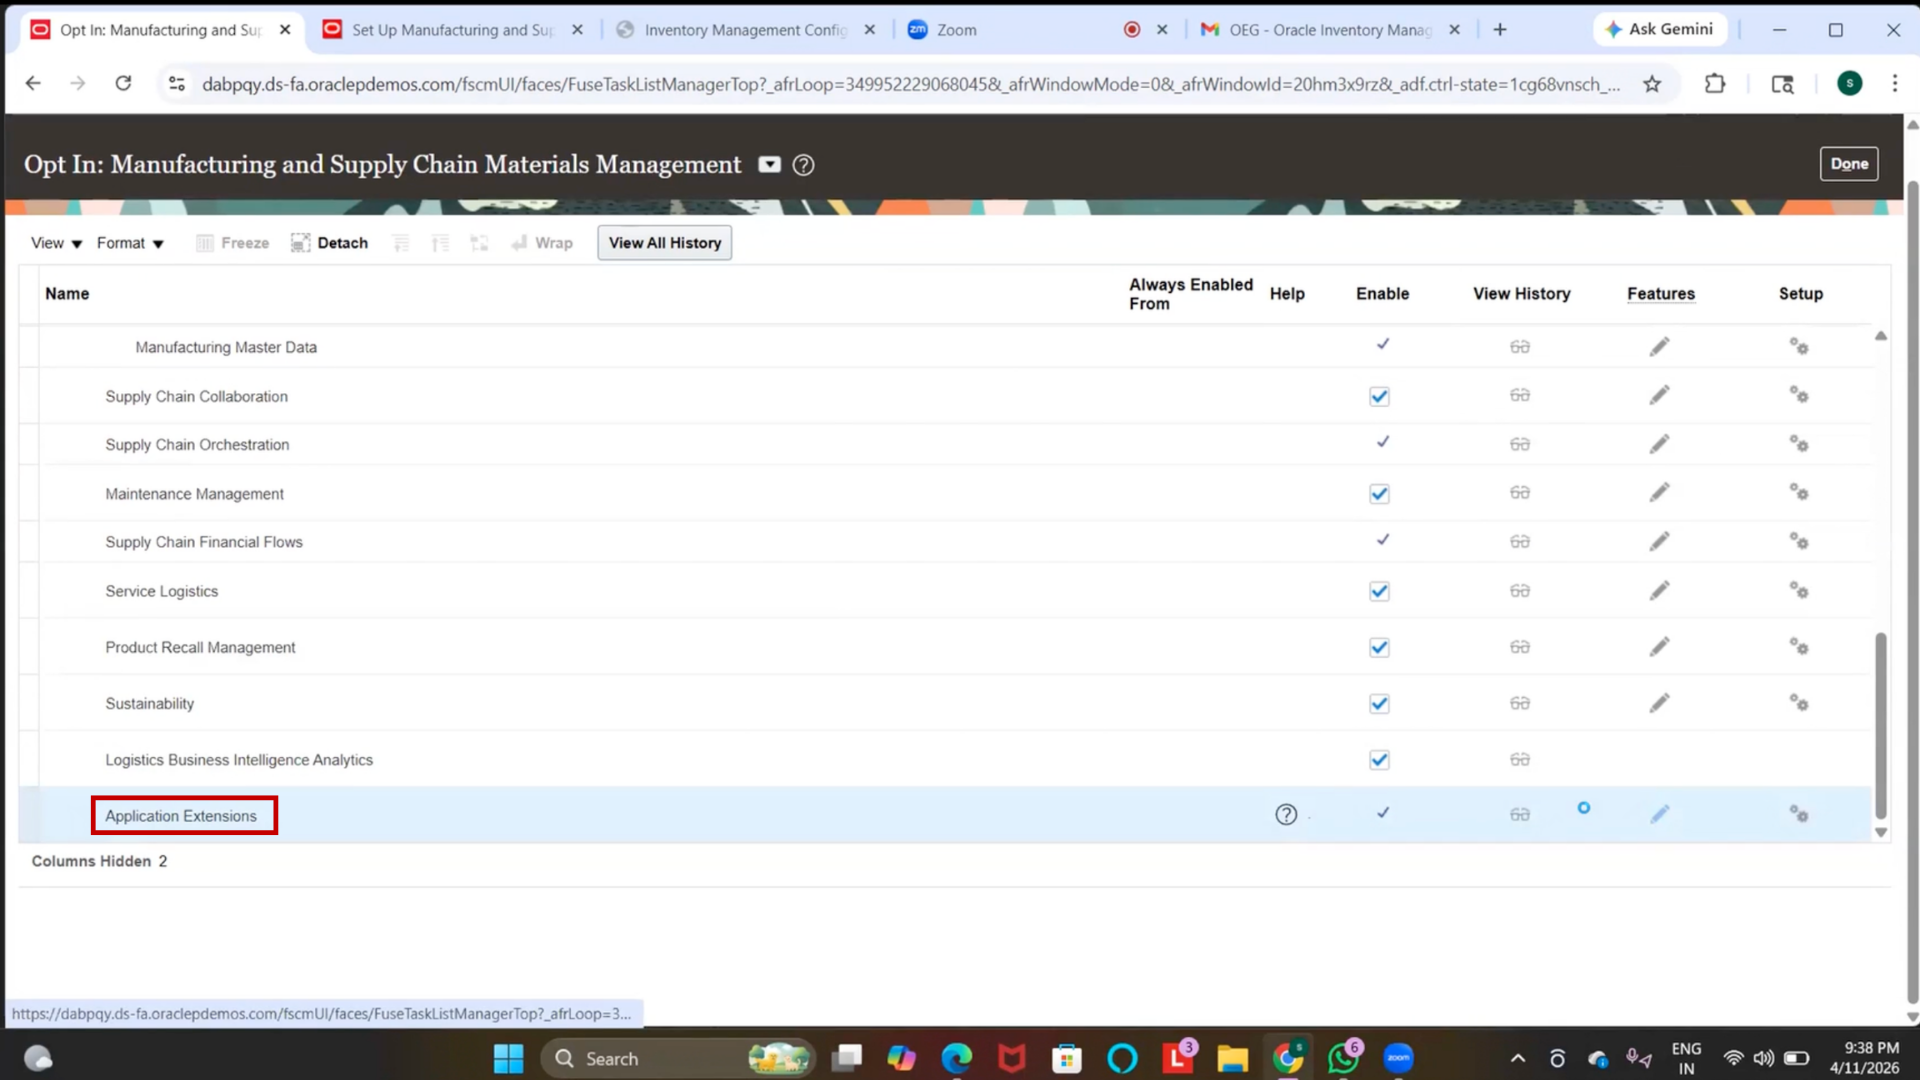
7. Enable Redwood UI for Functional Setup Manager
8. Enable Enterprise Information
9. Enable Offering Setup
10. Enable Marketplace
11. Enable Opt-In Features
12. Click on “Done.”
Step 78: Verify Redwood UI
1. Return to Setup and Maintenance
2. Confirm the UI is loaded in the Redwood interface.
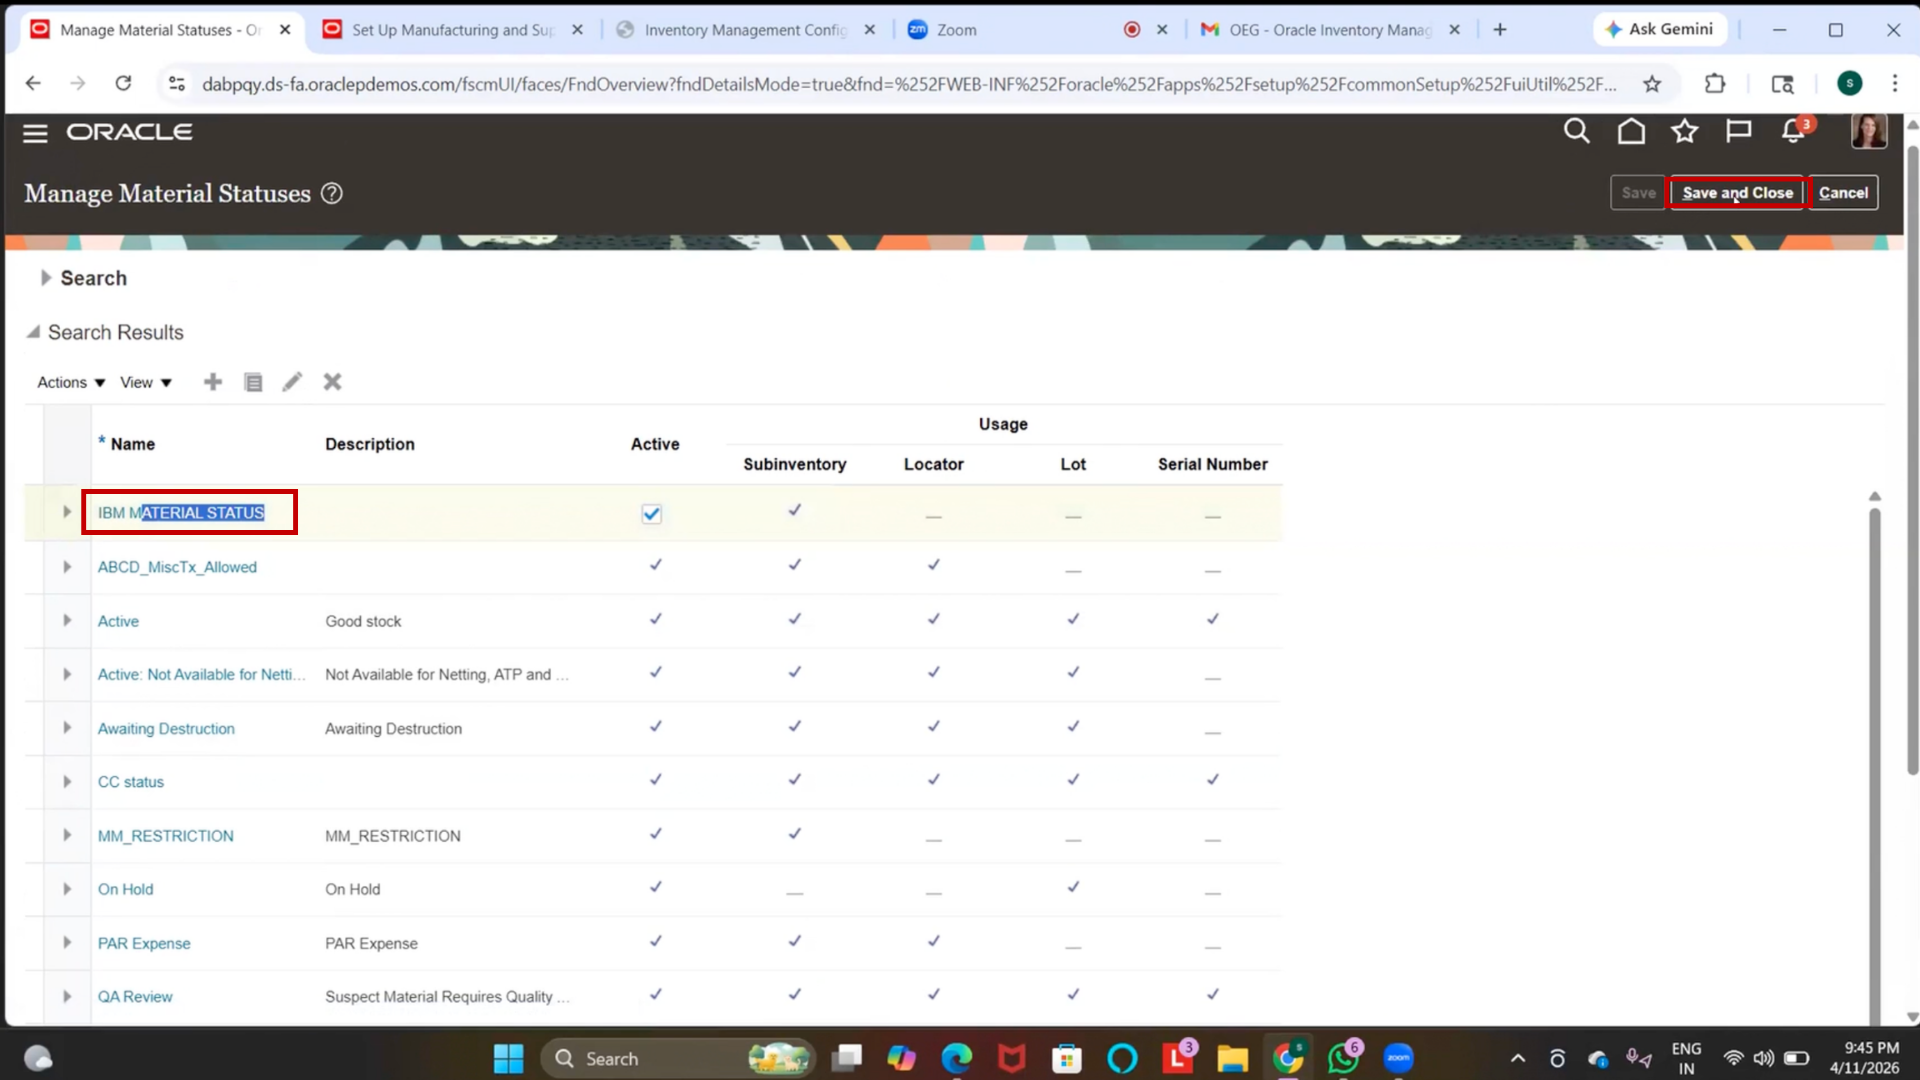
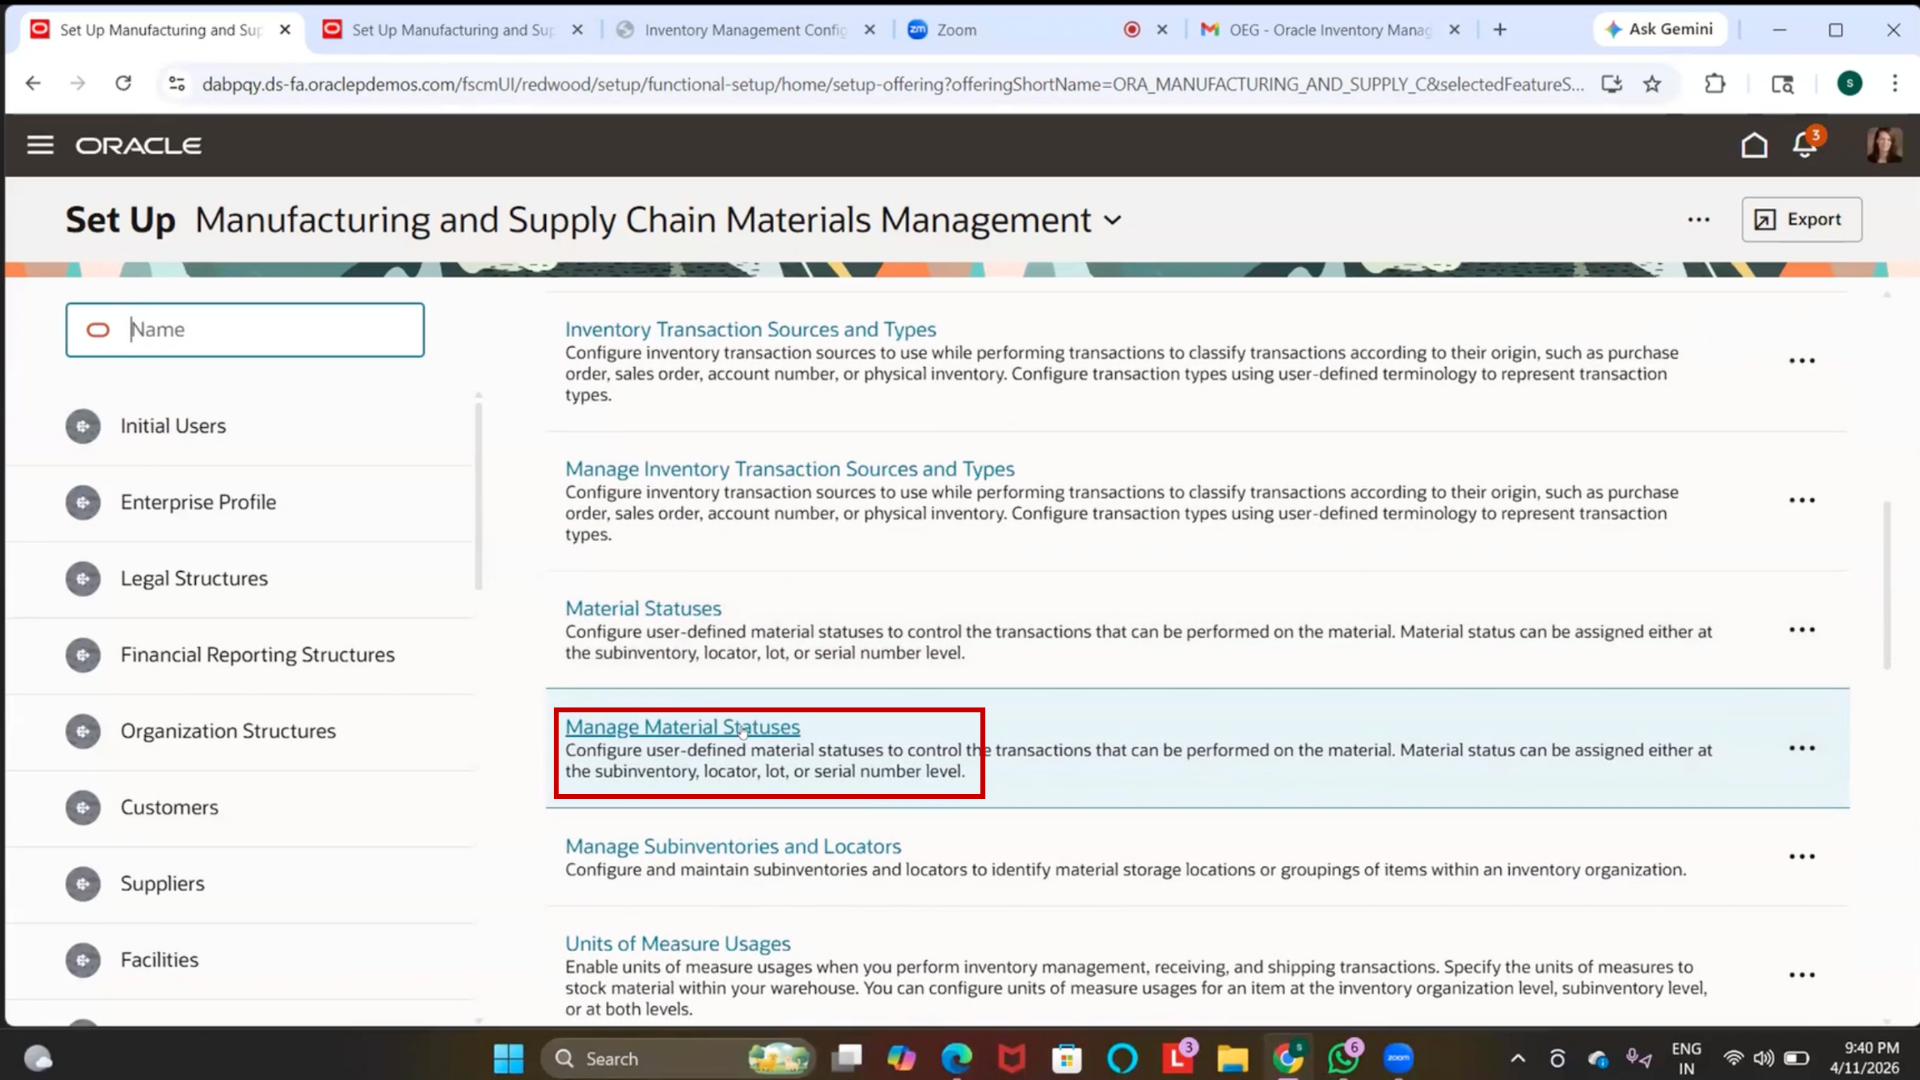
Step 79: Navigate to Manage Material Statuses
1. Search “Manage Material Statuses.”
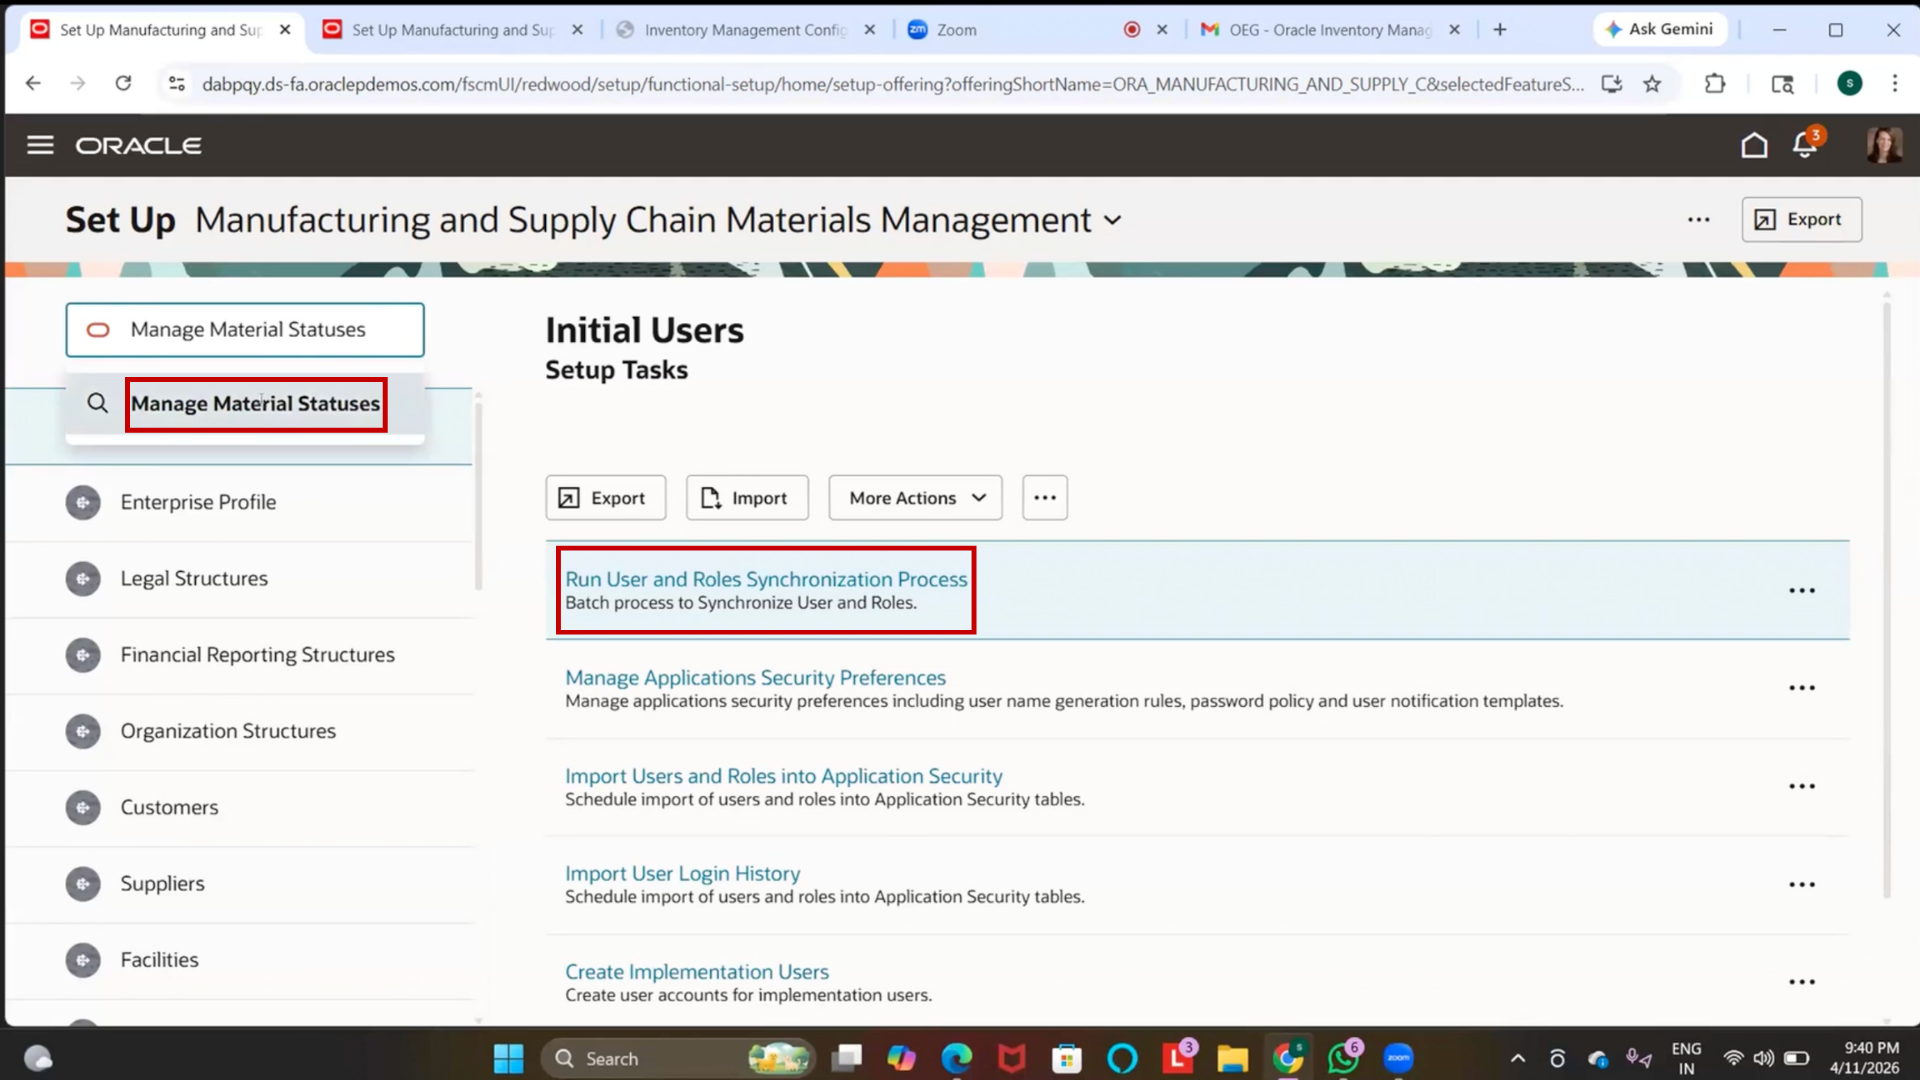
2. Click on Manage Material Statuses
Step 80: Create Material Status
1. Click on “Create” (or relevant option)
2. Enter Name = IBM Material Status
3. Select Usage = Sub-Inventory Level
4. Enable Allow Reservations
5. Enable Include in ATP
Step 81: Configure Transaction Controls
1. Review all transaction options
2. Set selected transactions to Disallow (example):
3. Cycle Count Adjustment
4. Sales Order Issue
5. Movement Request Put Away
6. Project Issue
Step 82: Save Material Status
1. Click on OK
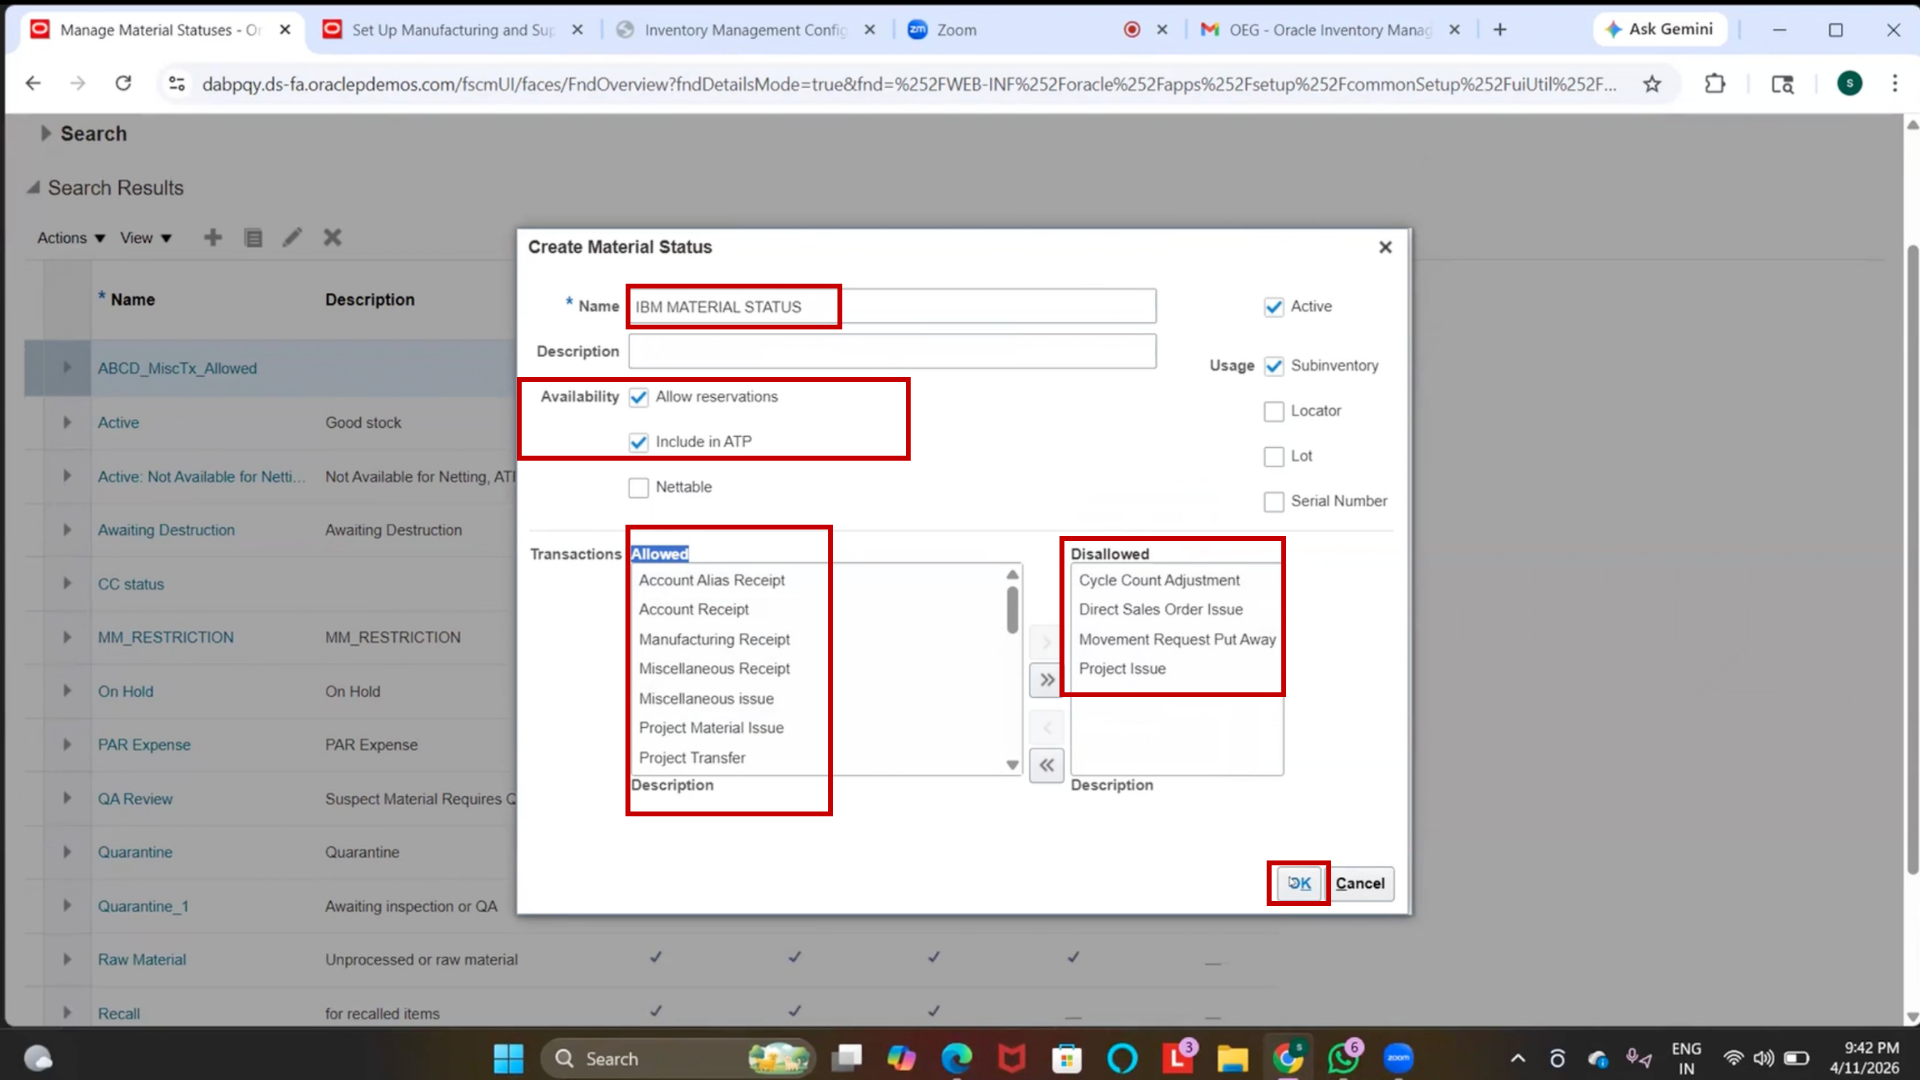
2. Click on “Save.”
3. Click on Save and Close