Inventory Management in Oracle Cloud
Step 83: Navigate to Manage Users
1. Go to Manage Users
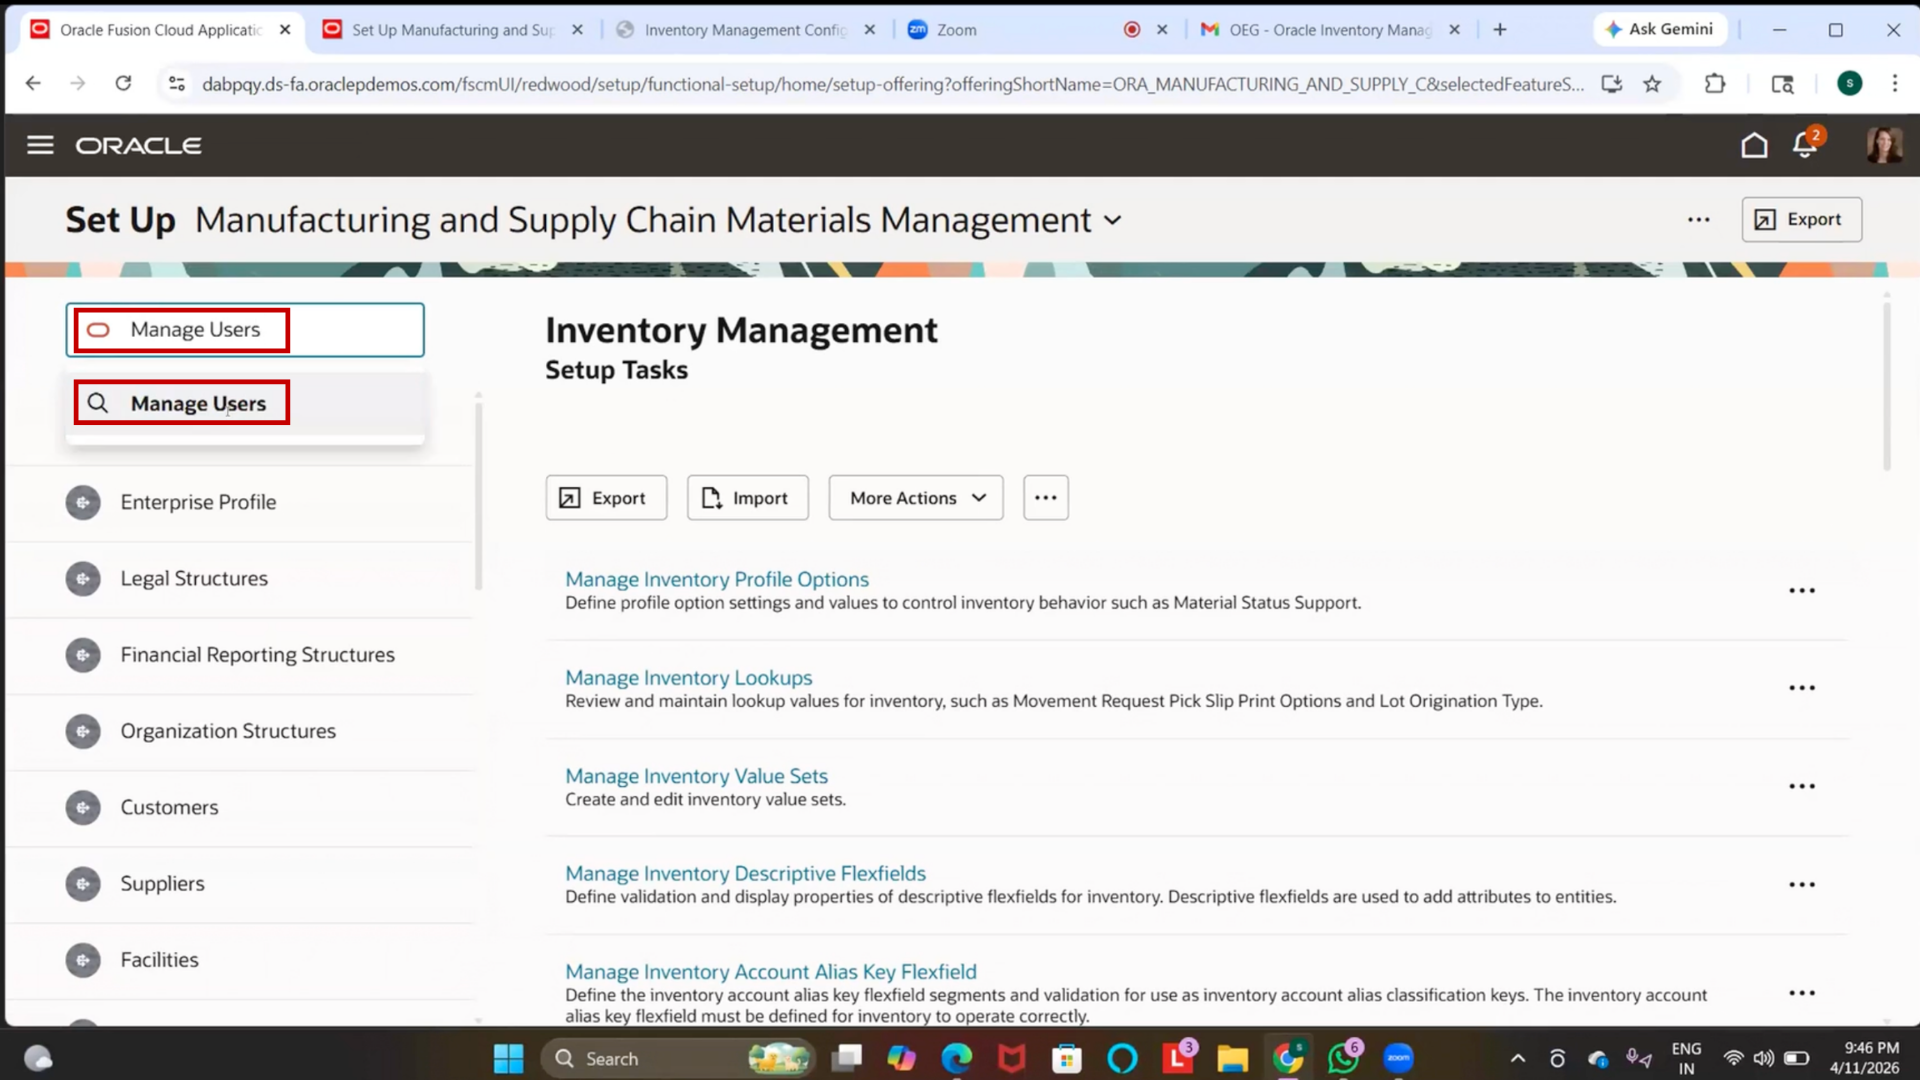
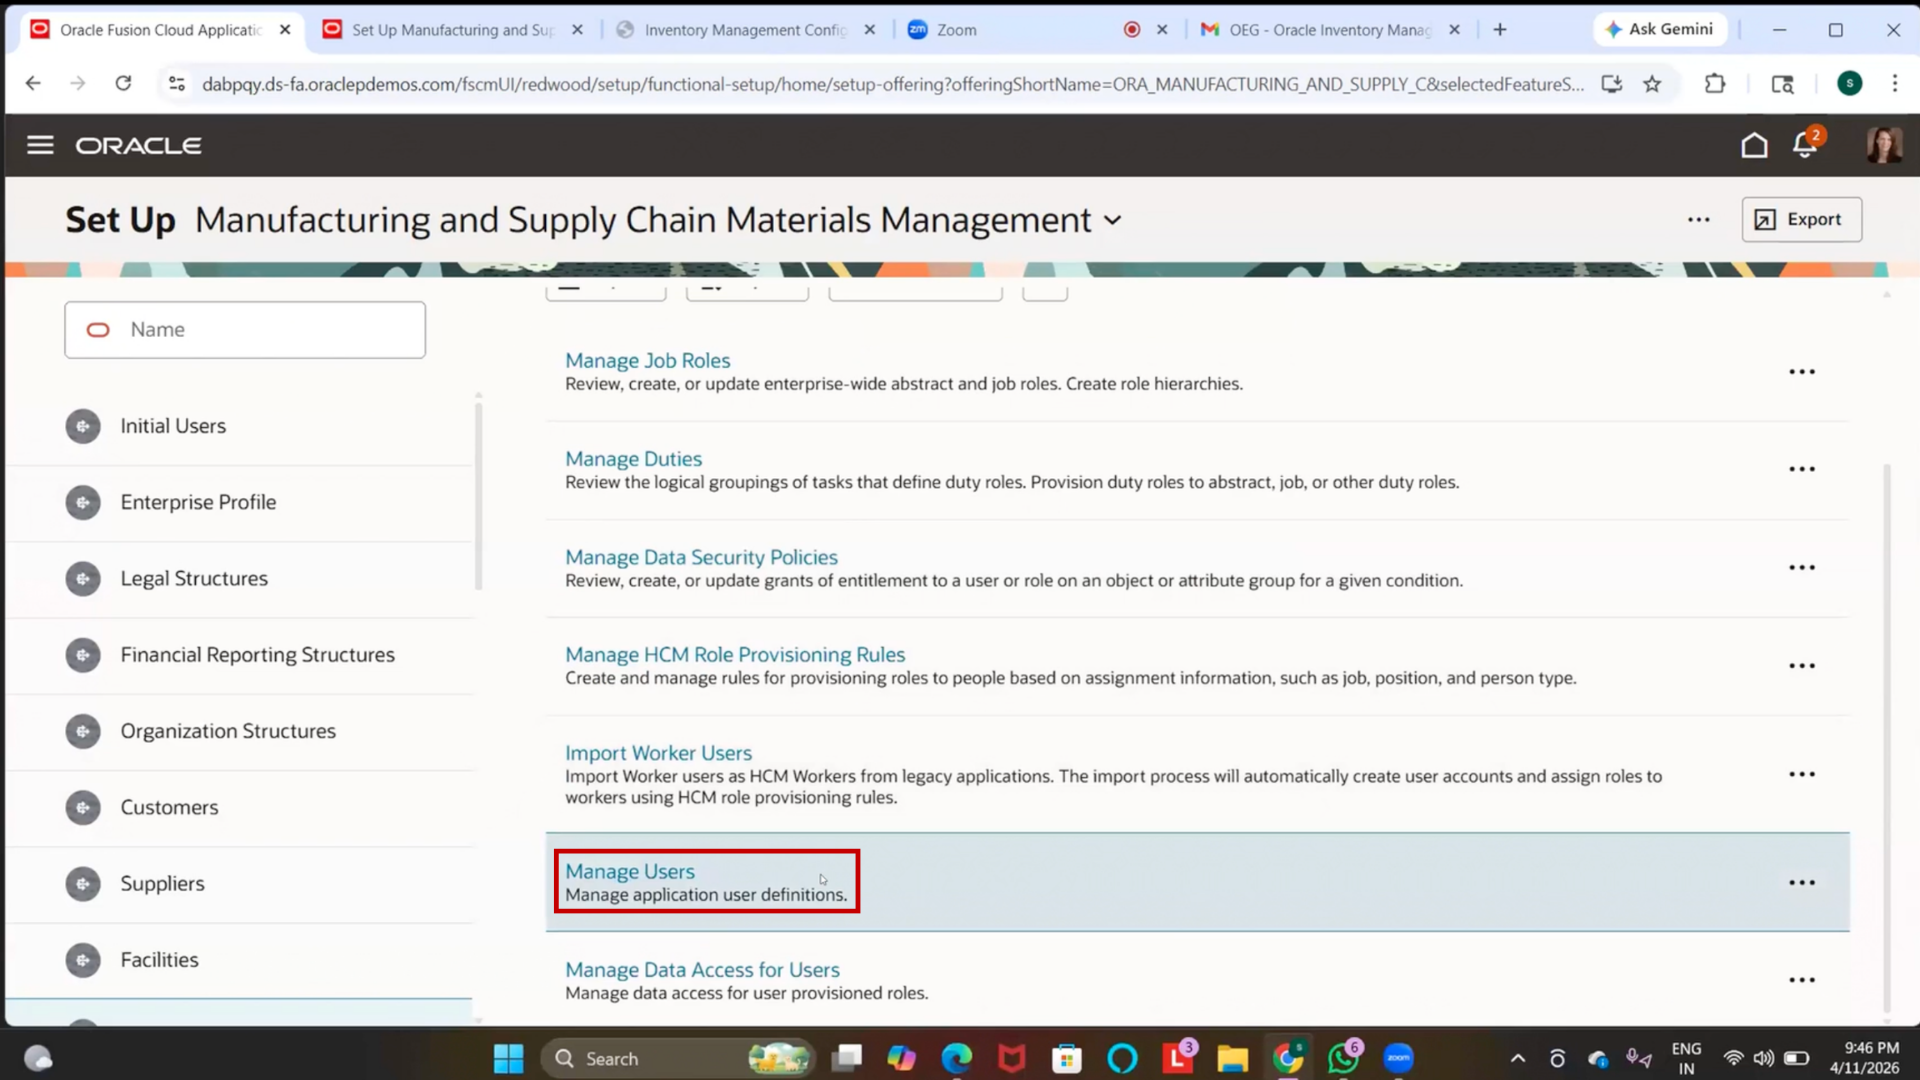
Step 84: Navigate to Manage Users
1. Go to Setup and Maintenance
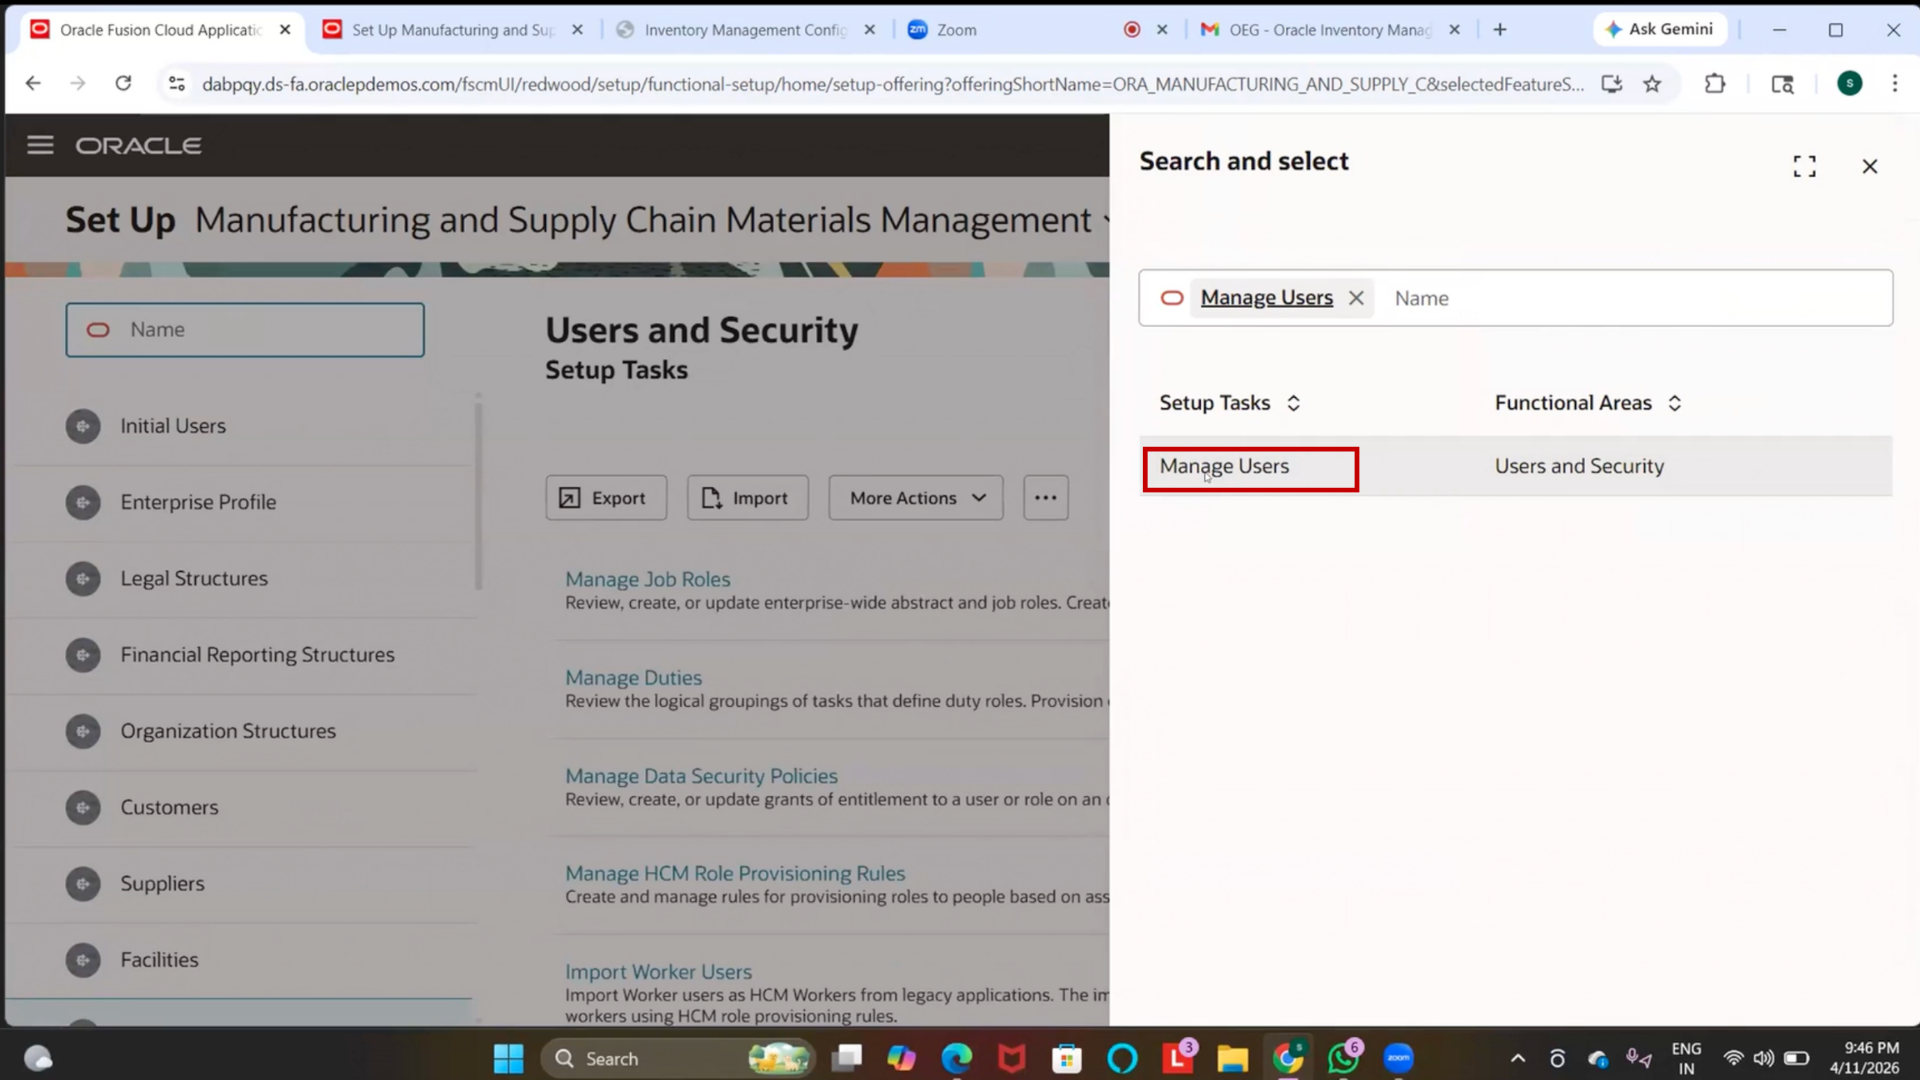
2. Search and select Manage Users
Step 85: Create Employee (User Setup)
1. Click on “Create.”
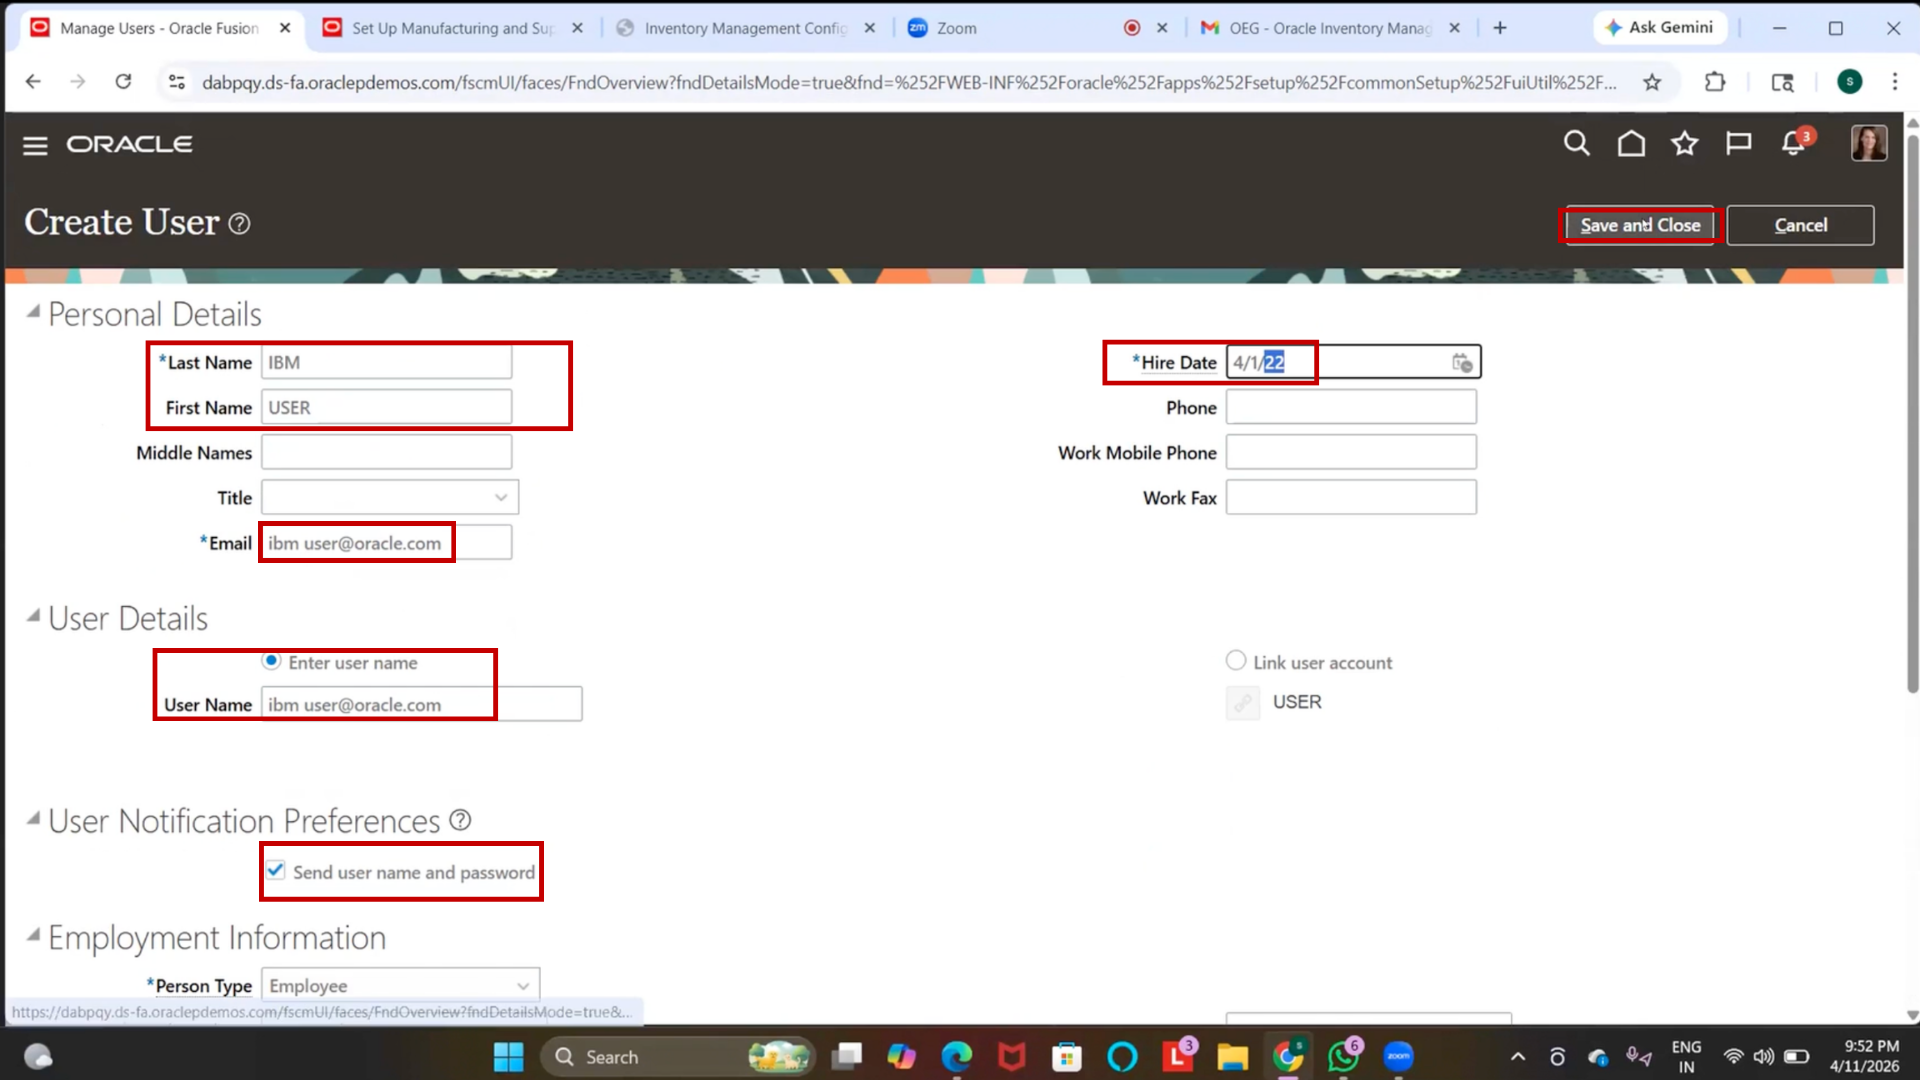
2. Enter Last Name = IBM
3. Enter First Name = User
4. Select Hire Date (e.g., April 1, 2022)
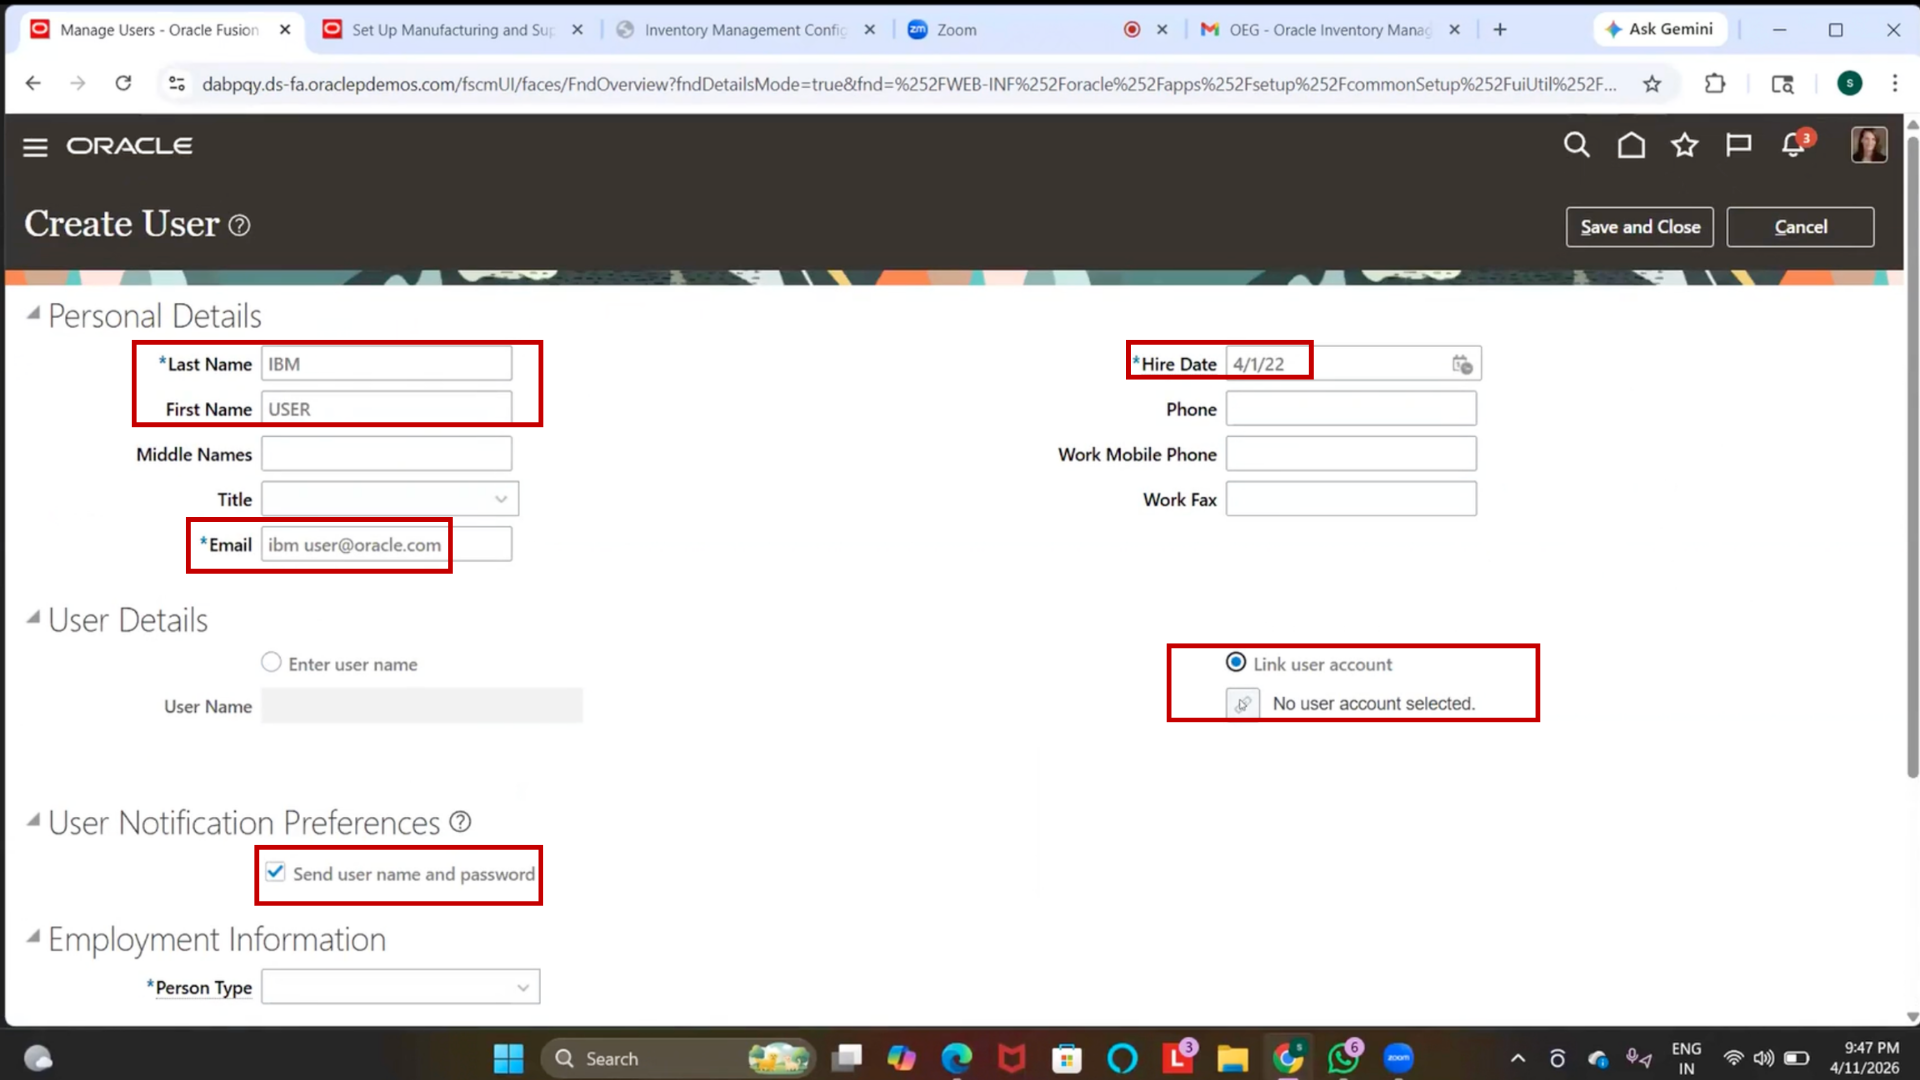
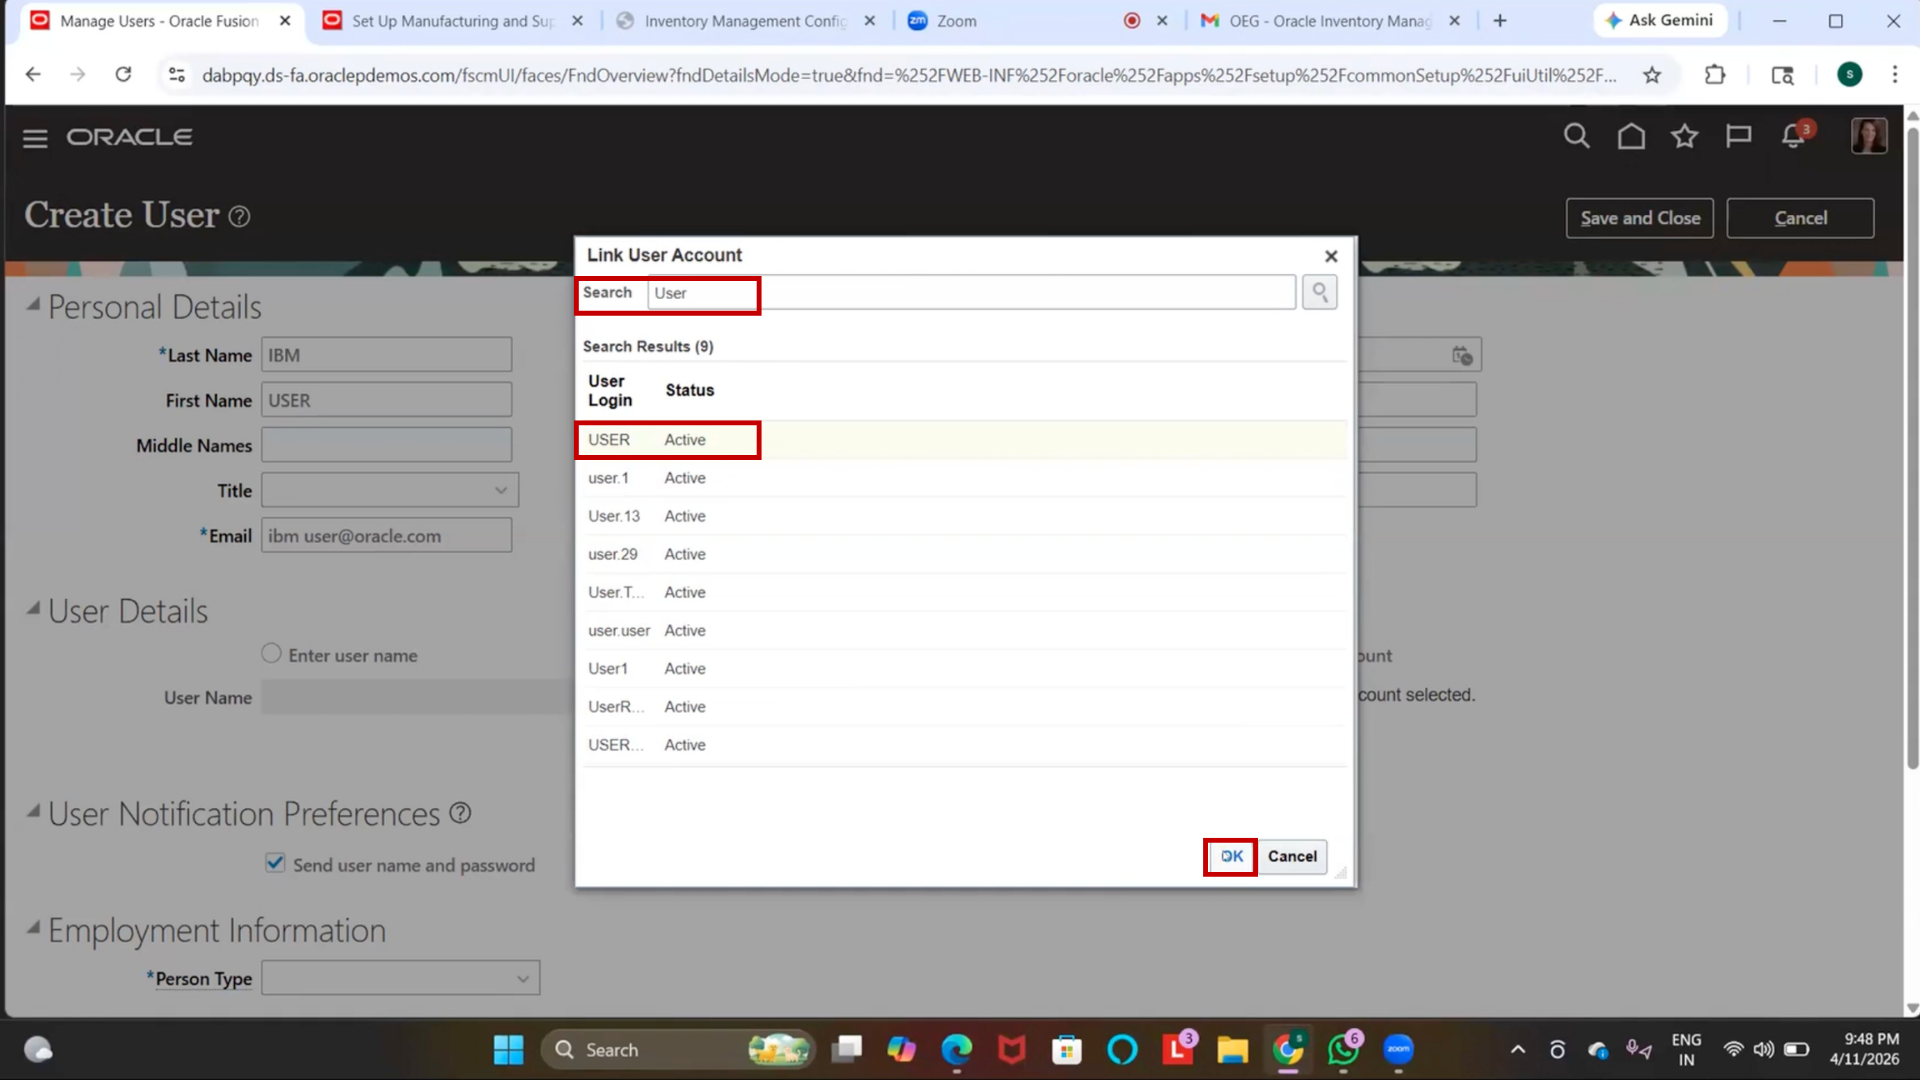
Step 86: Link User Account
1. Search for an existing User Account or leave it blank to create a new one
2. Select a user from the list (if available)
3. (Optional) Enable checkbox to send username and password via email
Step 87: Configure Employee Details
1. Select Person Type = Employee
2. Select Legal Employer
3. Select Business Unit
4. (Note: If not visible, required roles/setups may be missing.)
Step 88: Save Employee Record
1. Click on “Save and Close.”
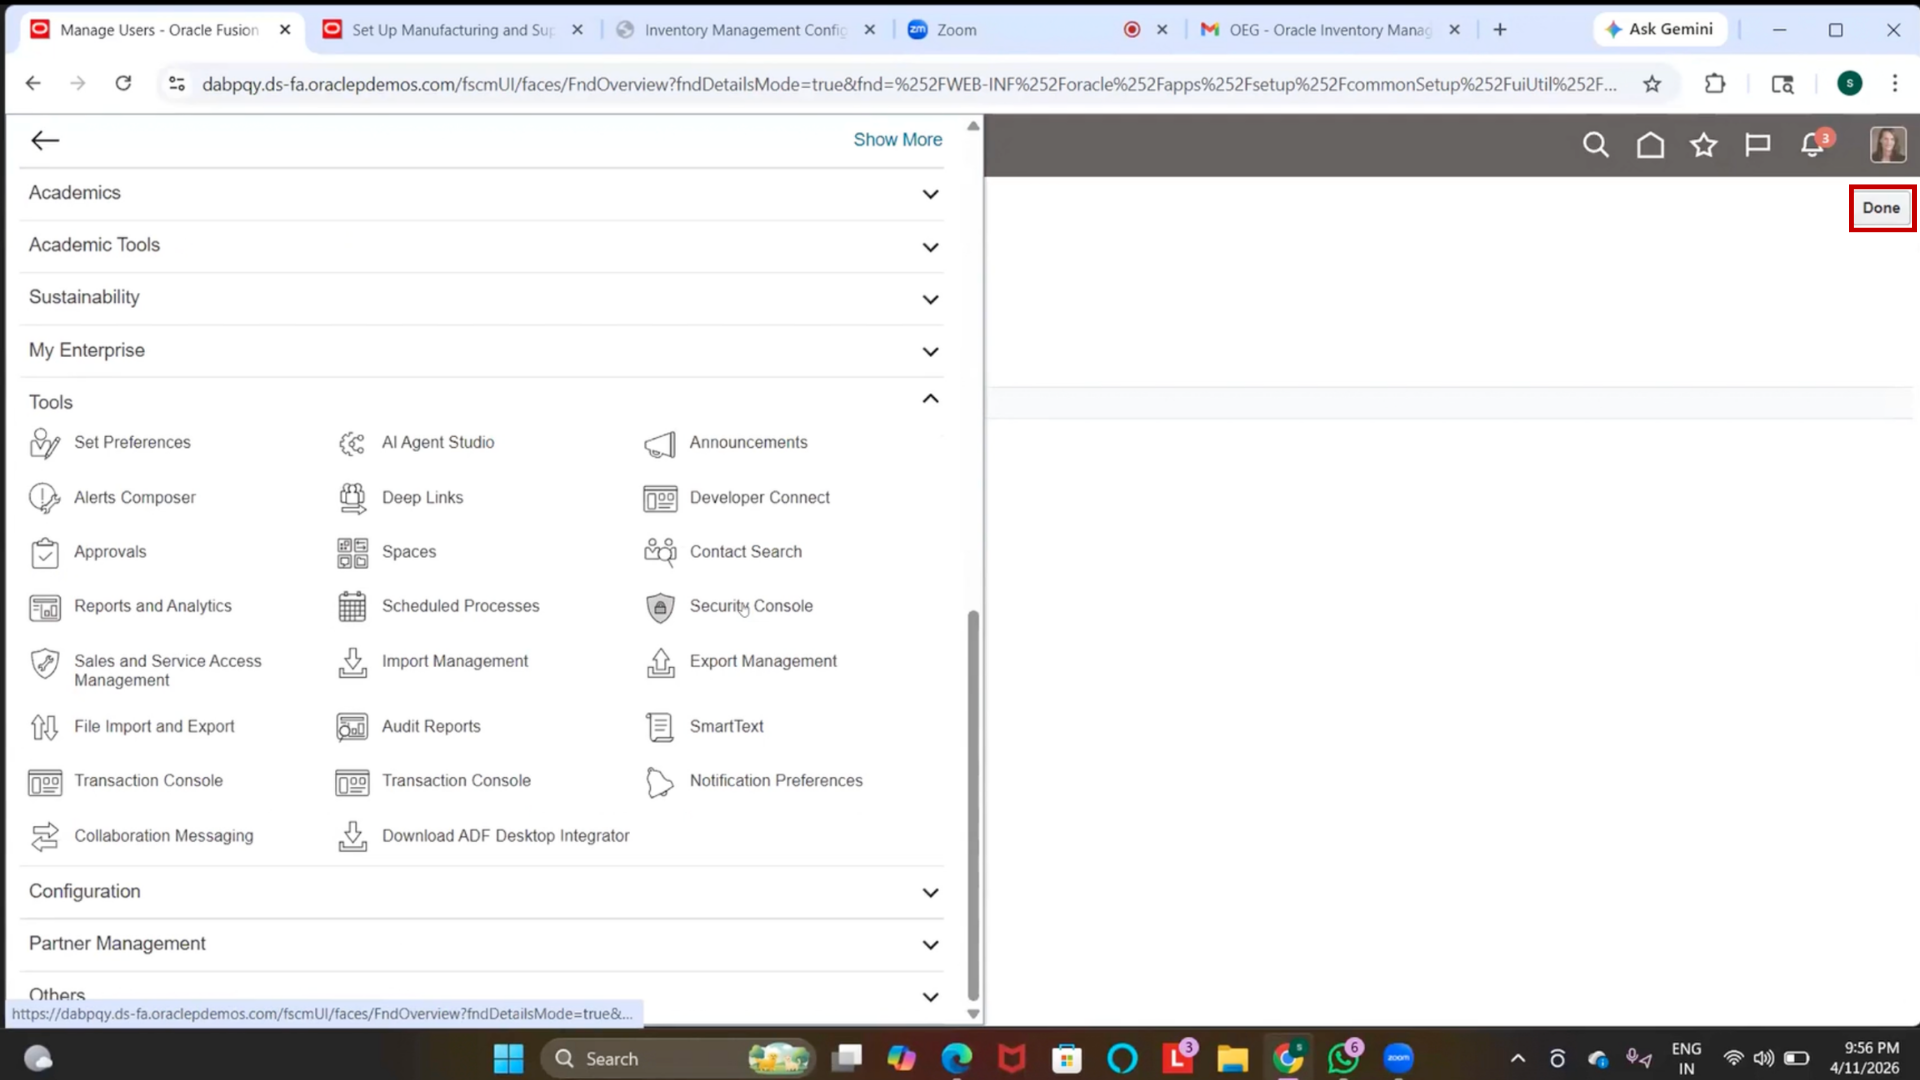
2. Click Done
3. Confirm that the Employee Record is created
Step 89: Navigate to Security Console
1. Go to the navigation menu.
2. Click on “Tools.”
3. Select Security Console
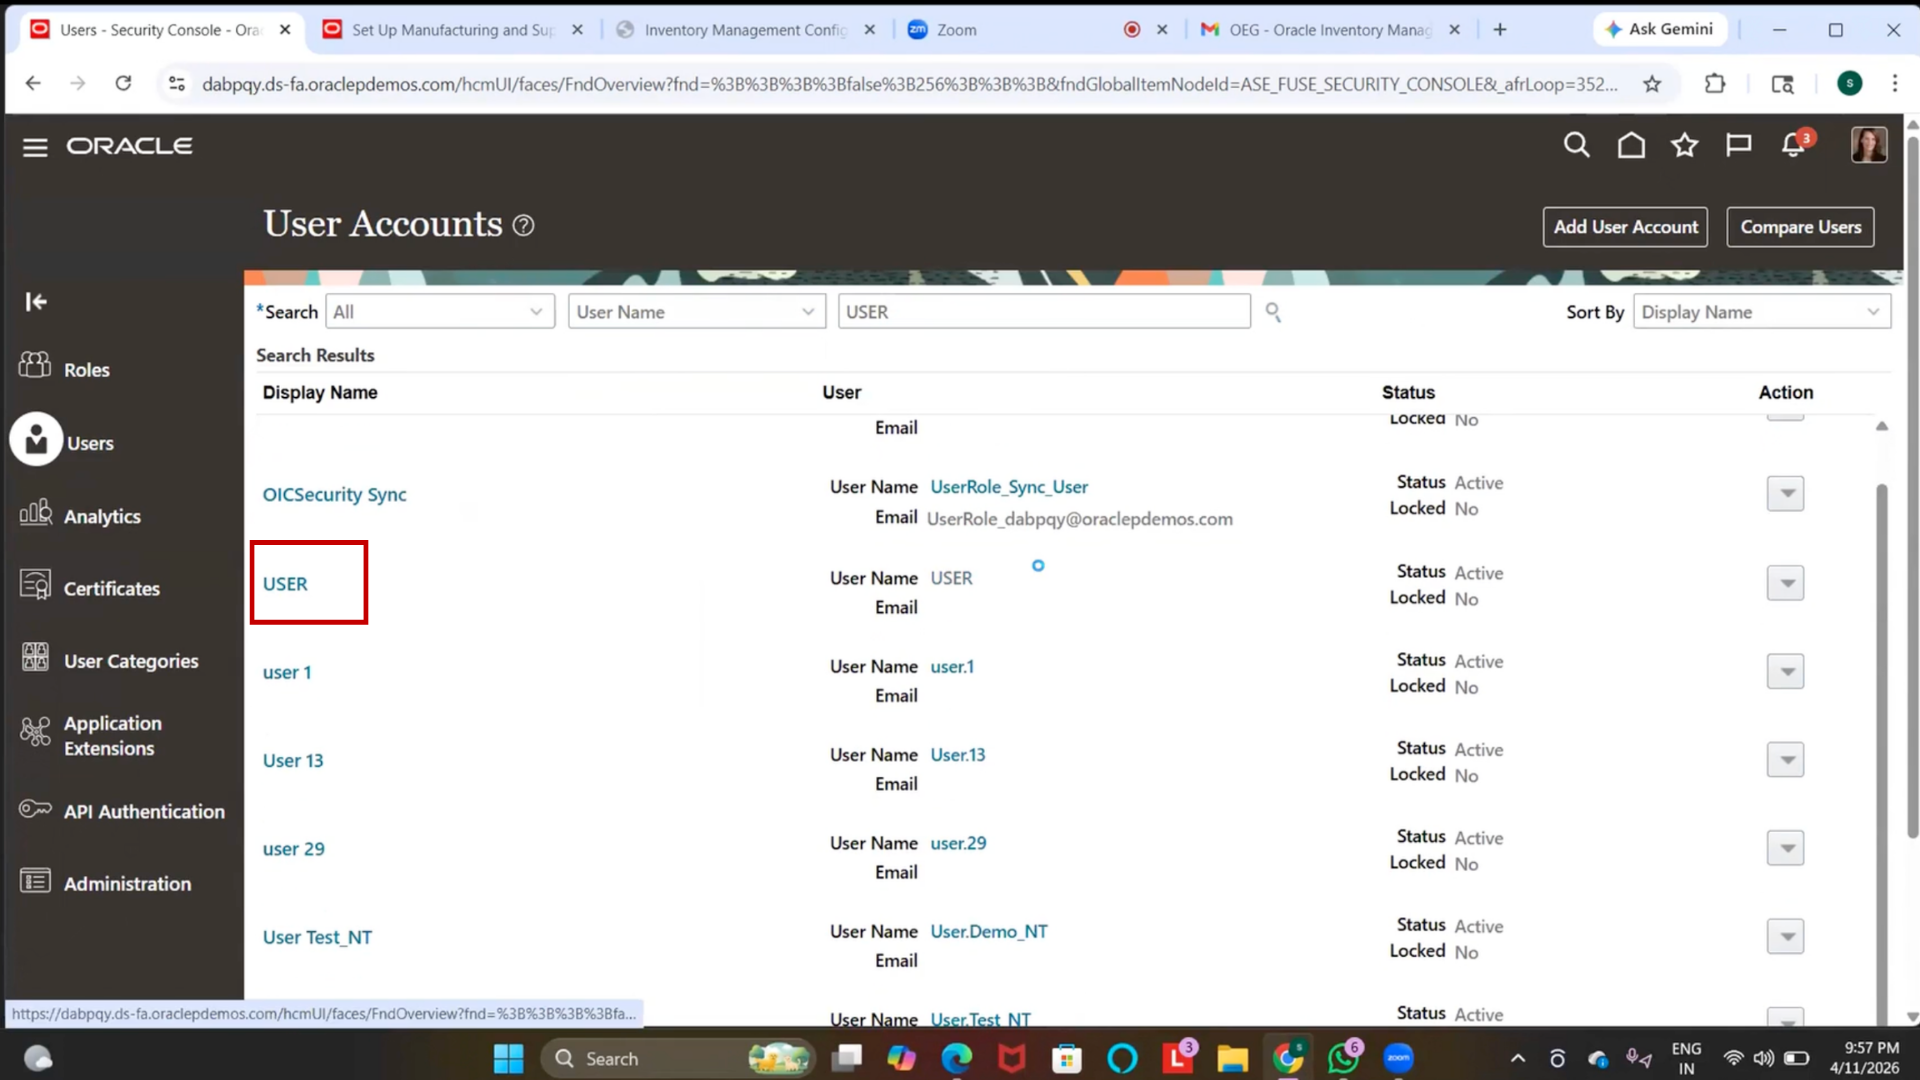
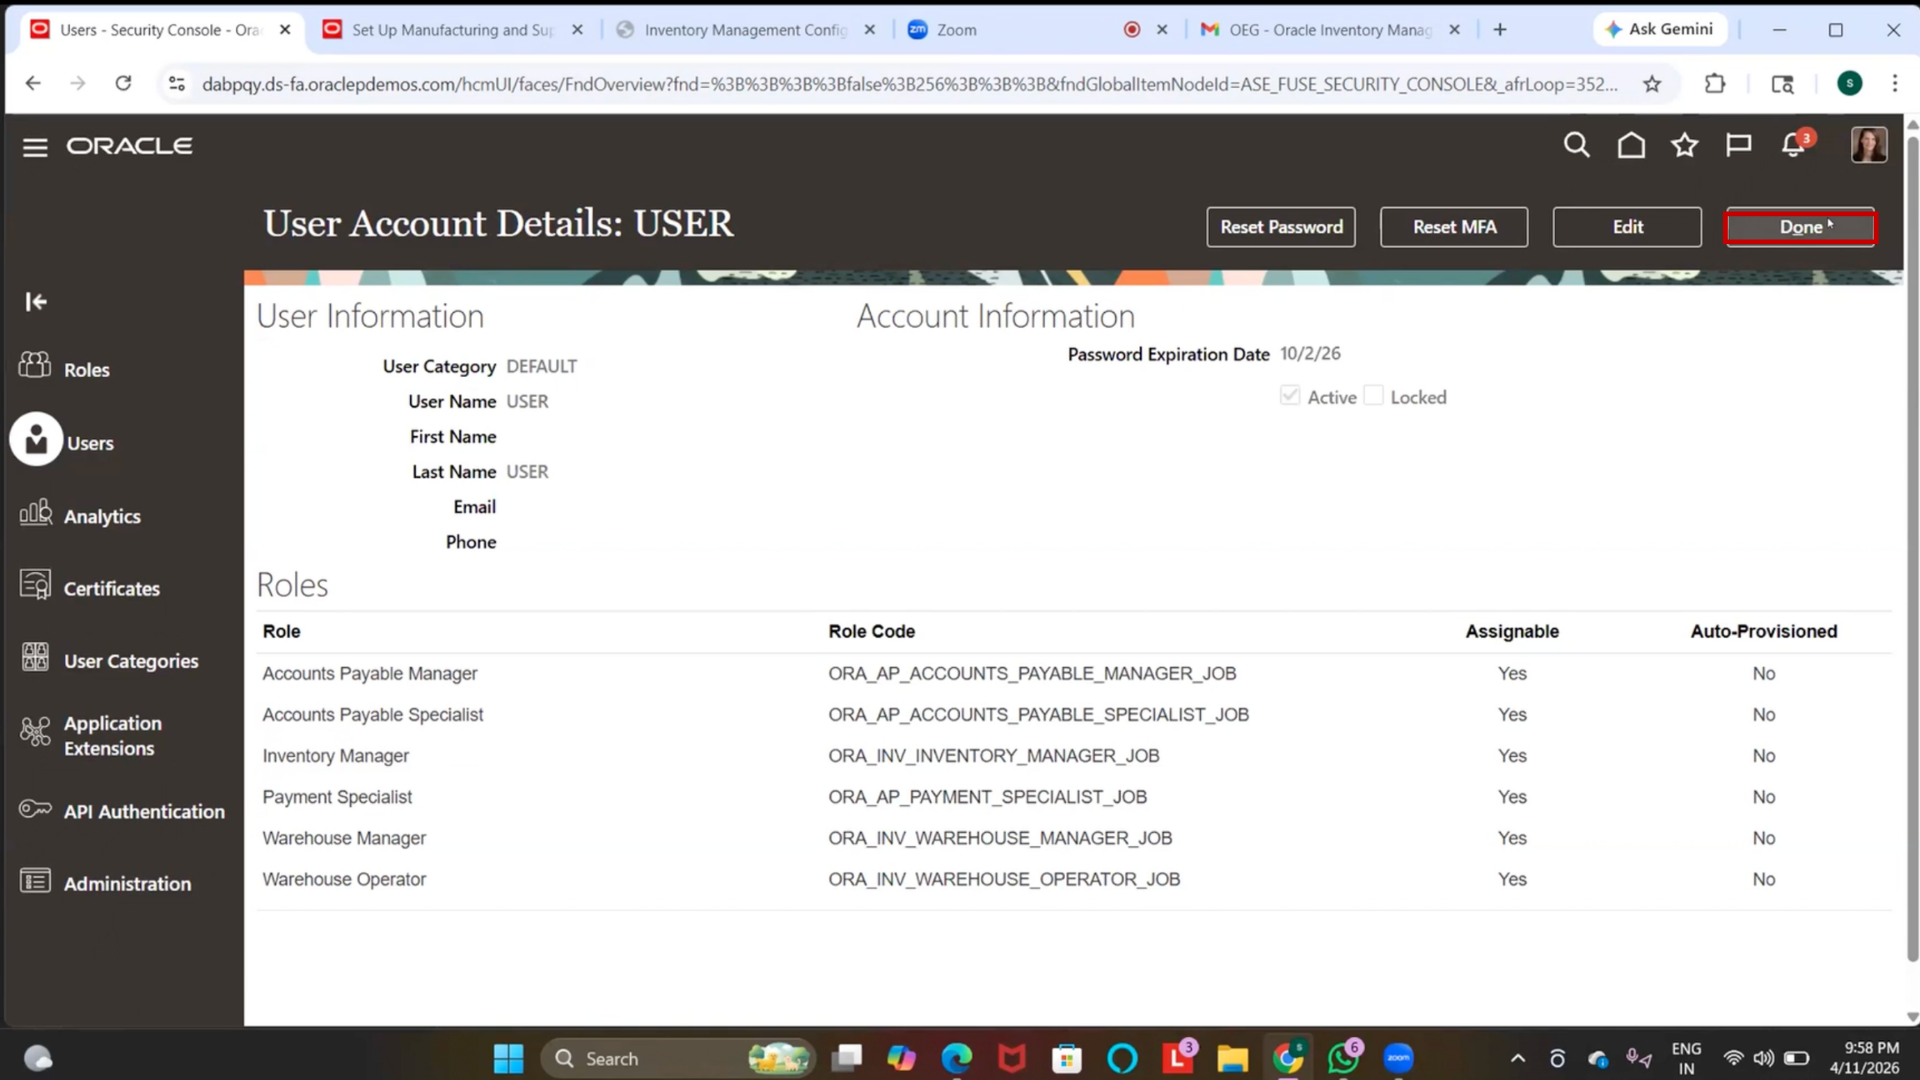
Step 90: Search User
1. Search using Username / Email / Name
2. Select the required user.
3. Click “Edit.”
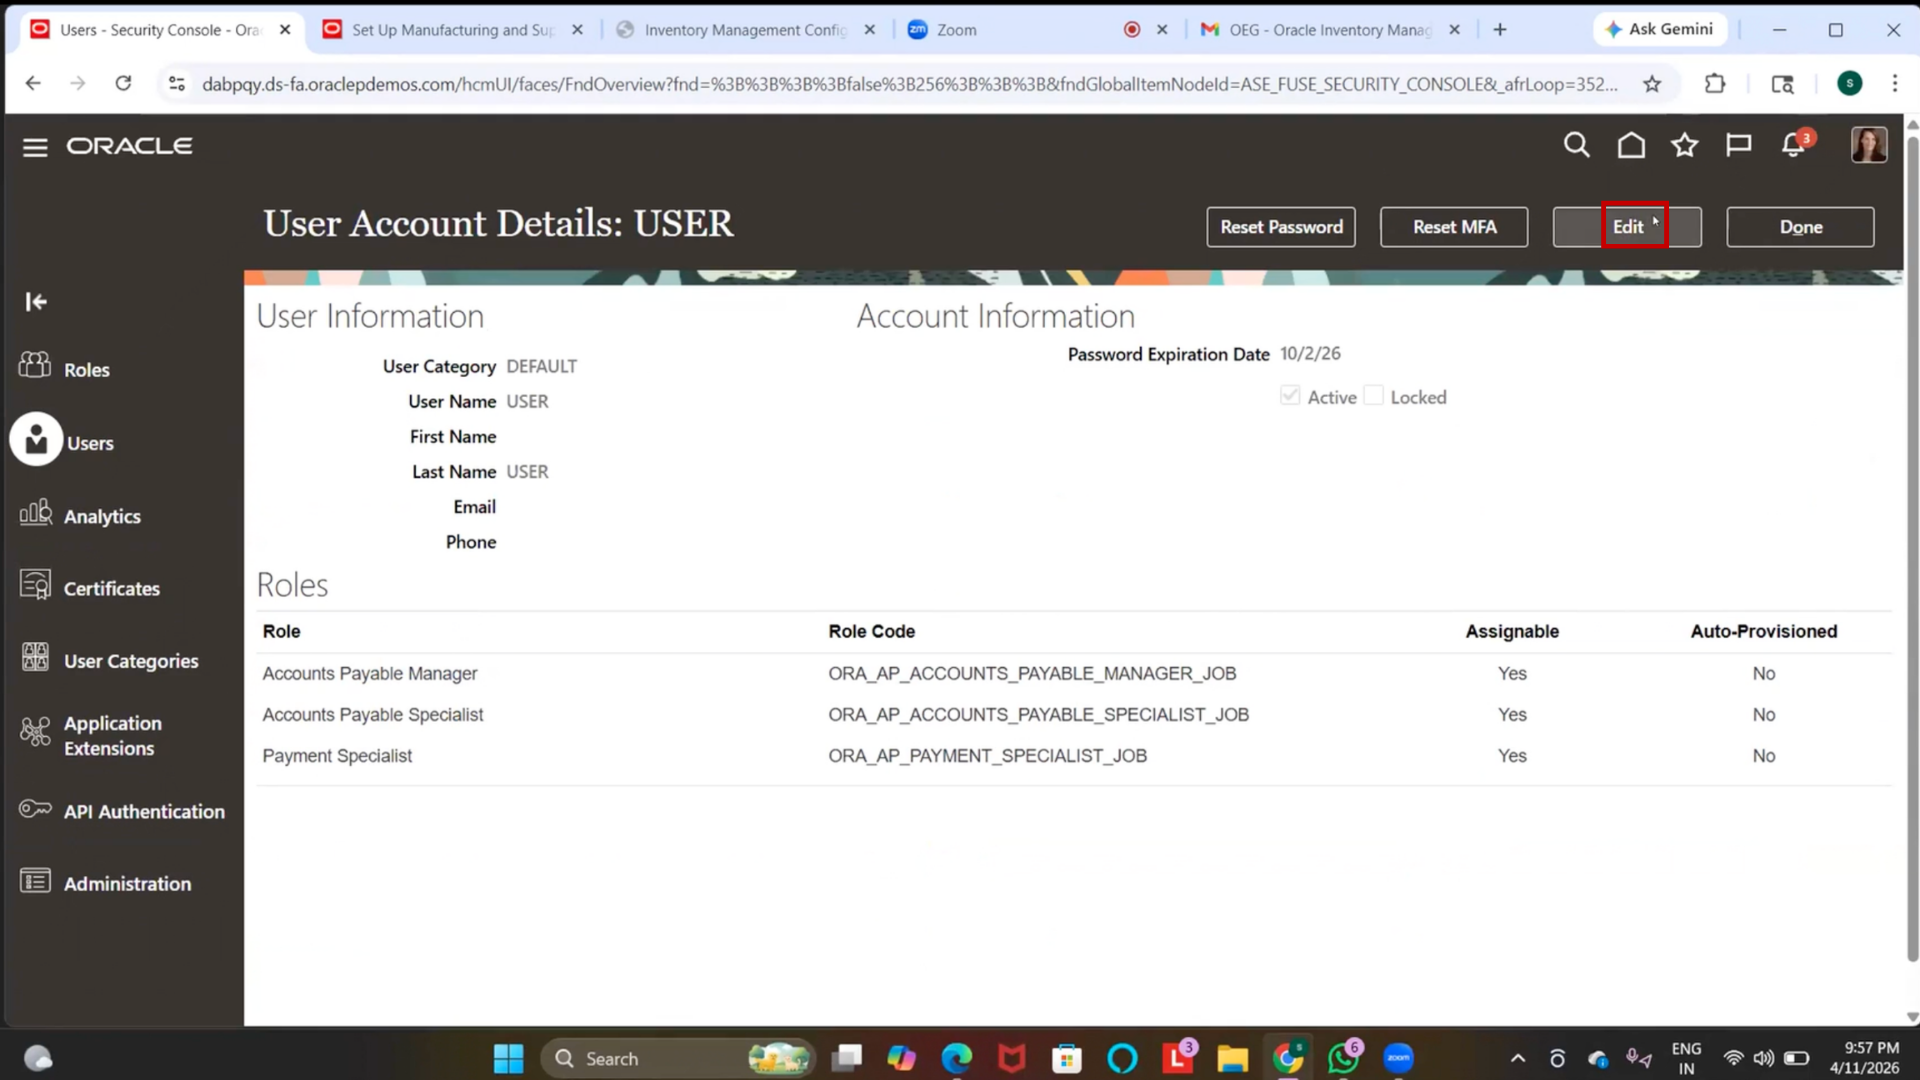
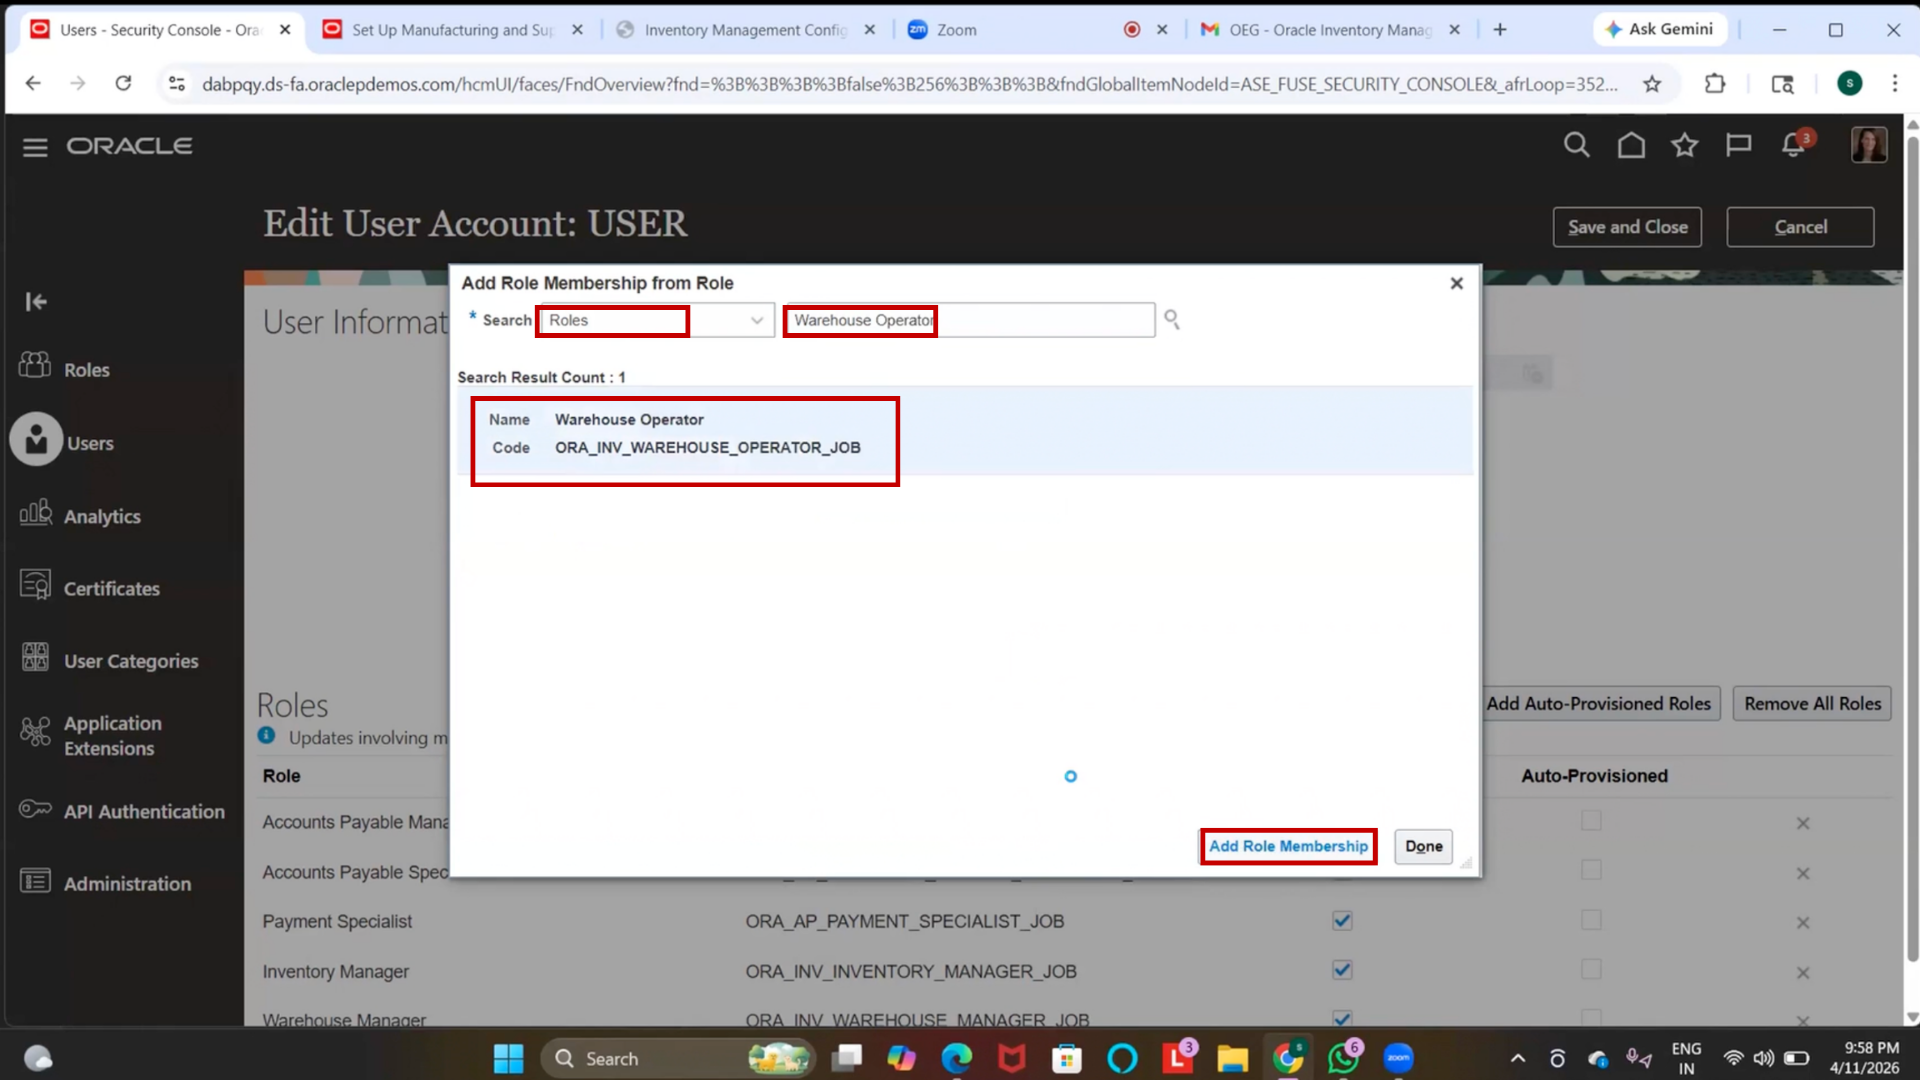
Step 91: Assign Roles to User
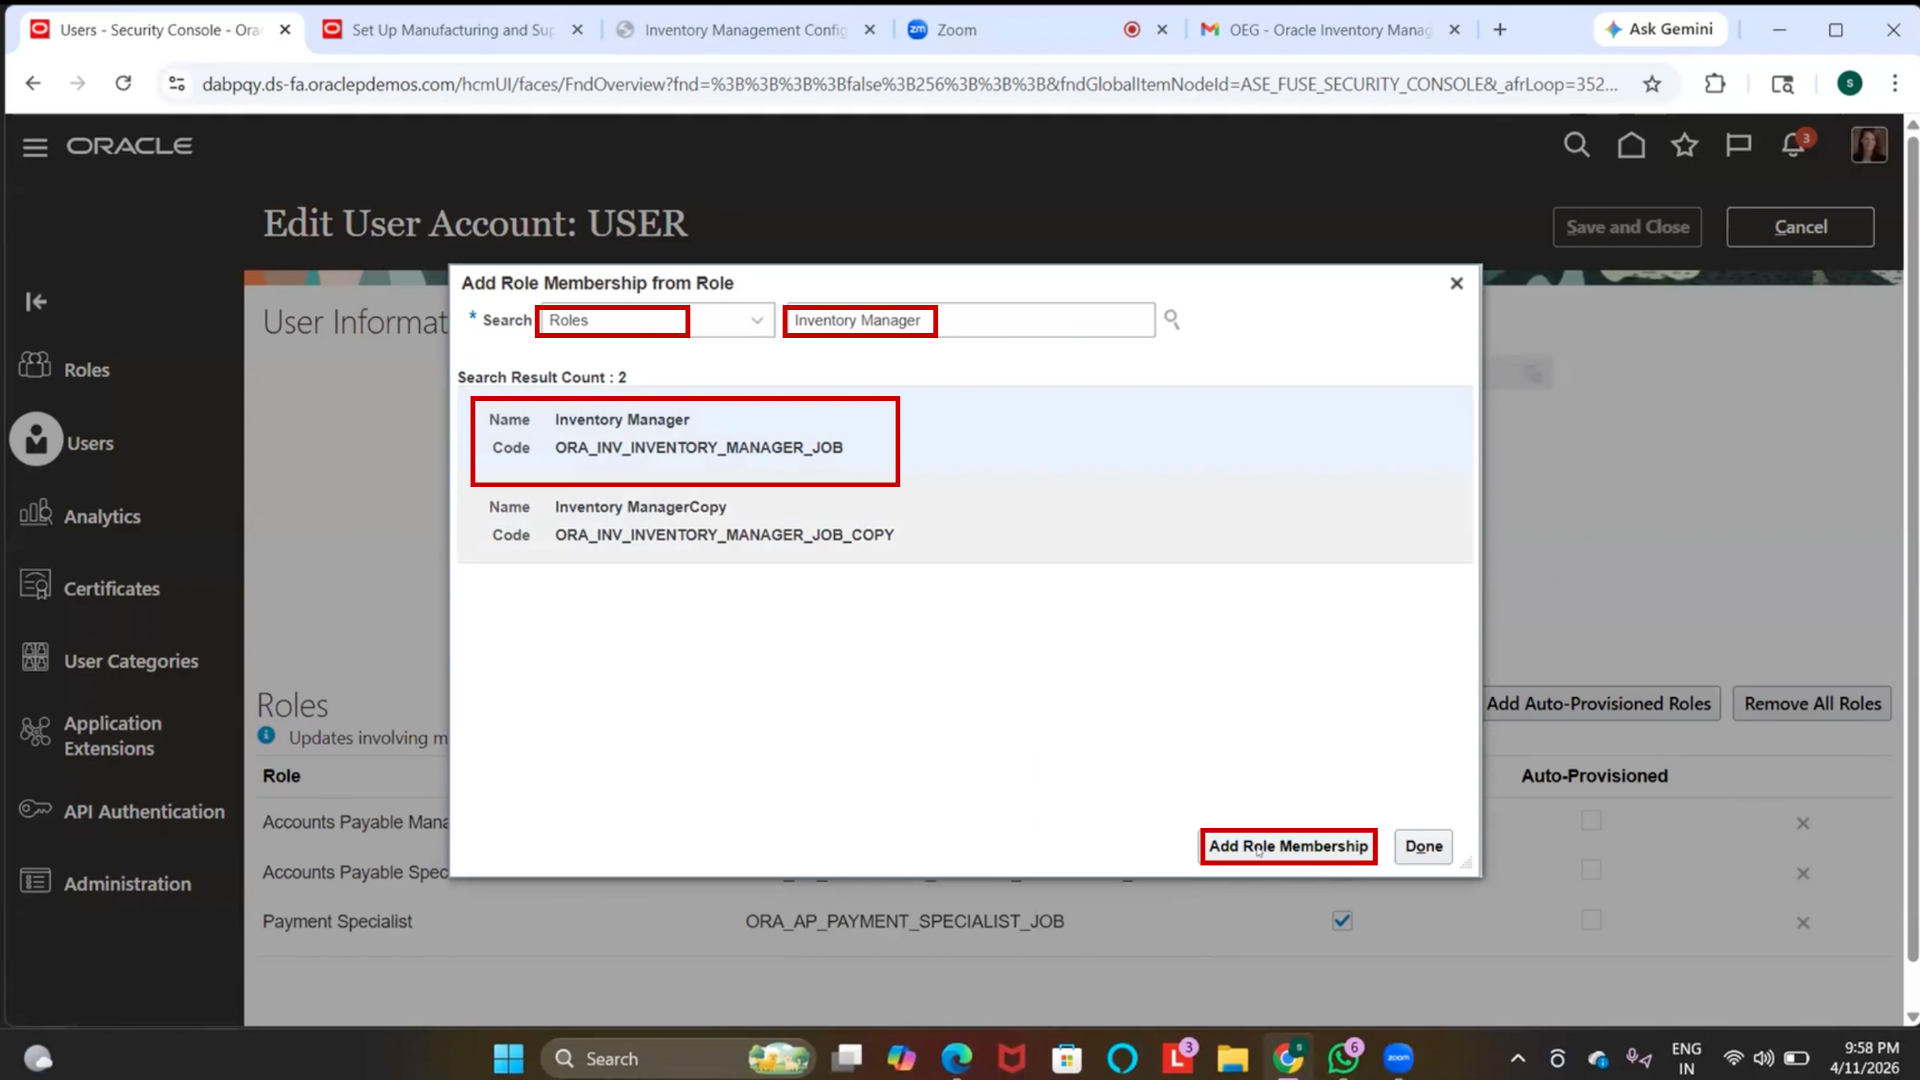
1. Click on “Add Role.”
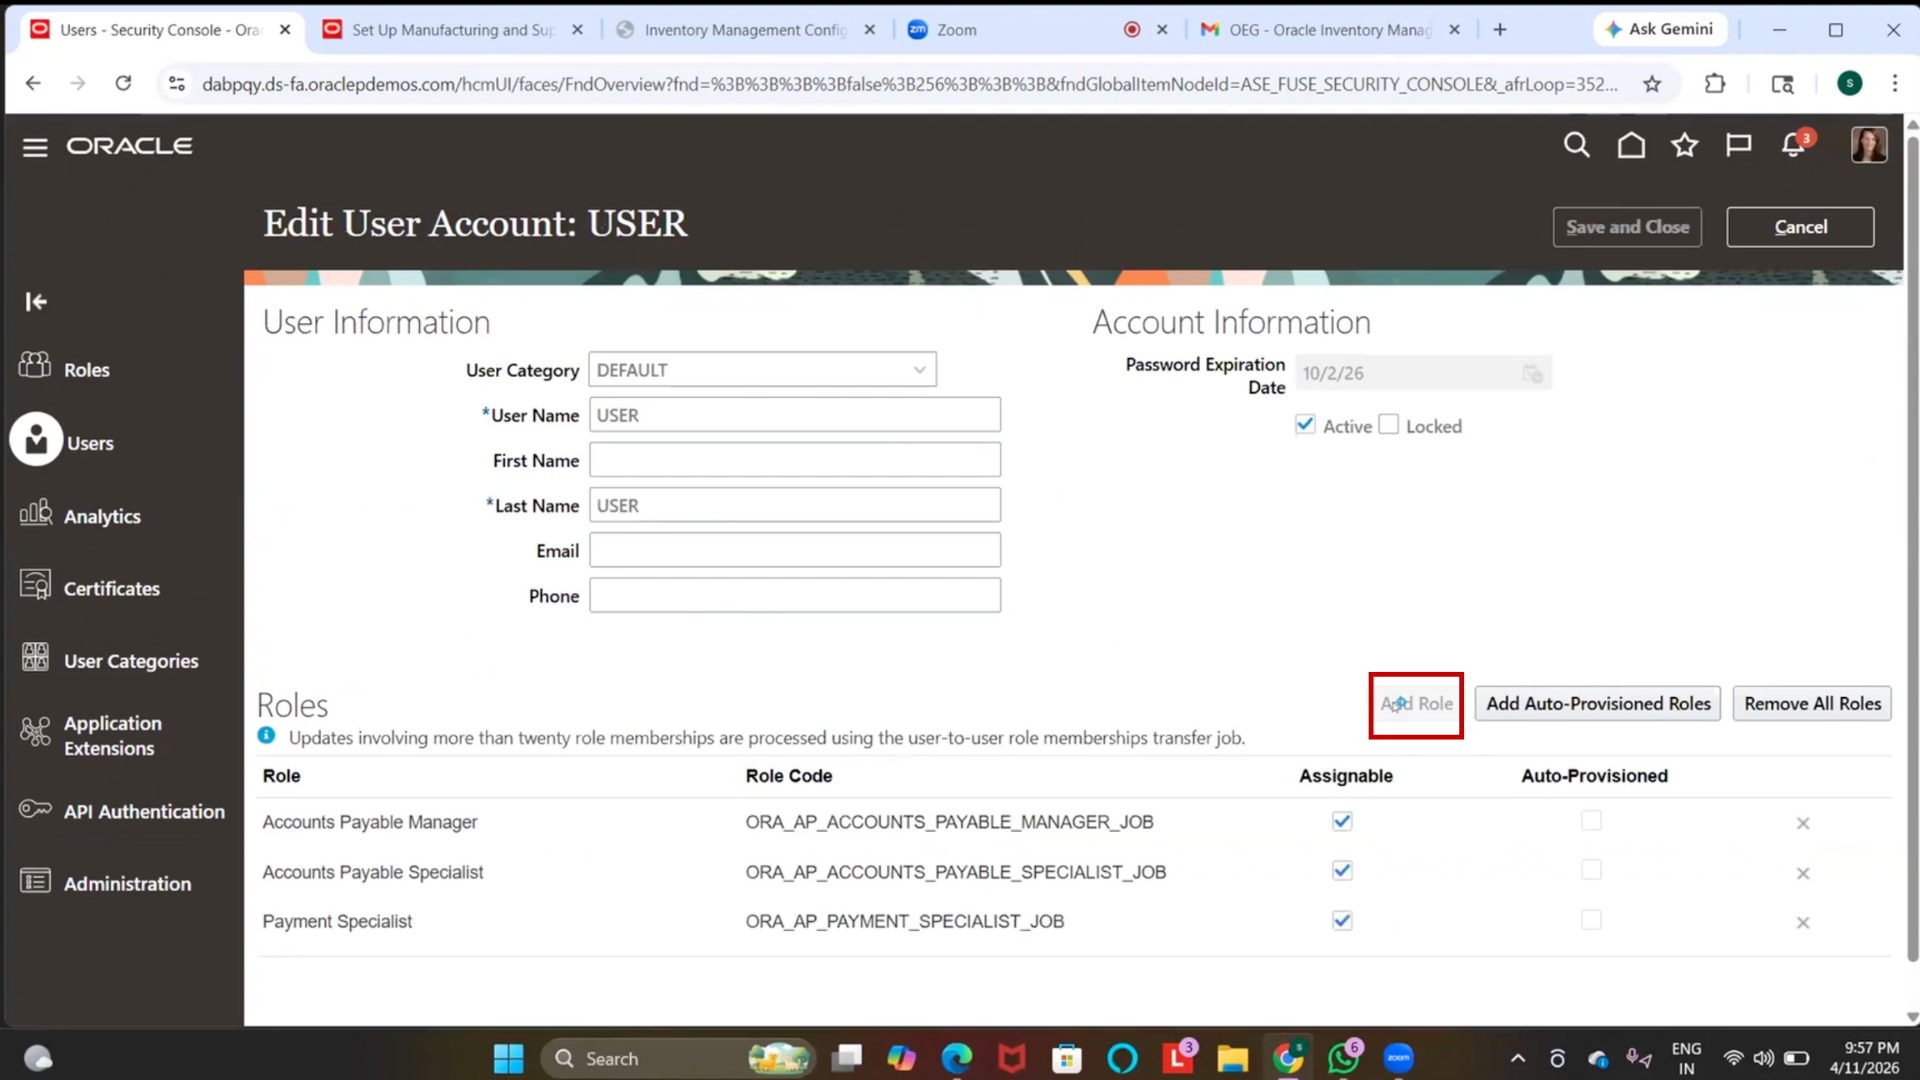
2. Search and add the following roles:
- Inventory Manager
- Warehouse Manager

- Warehouse Operator
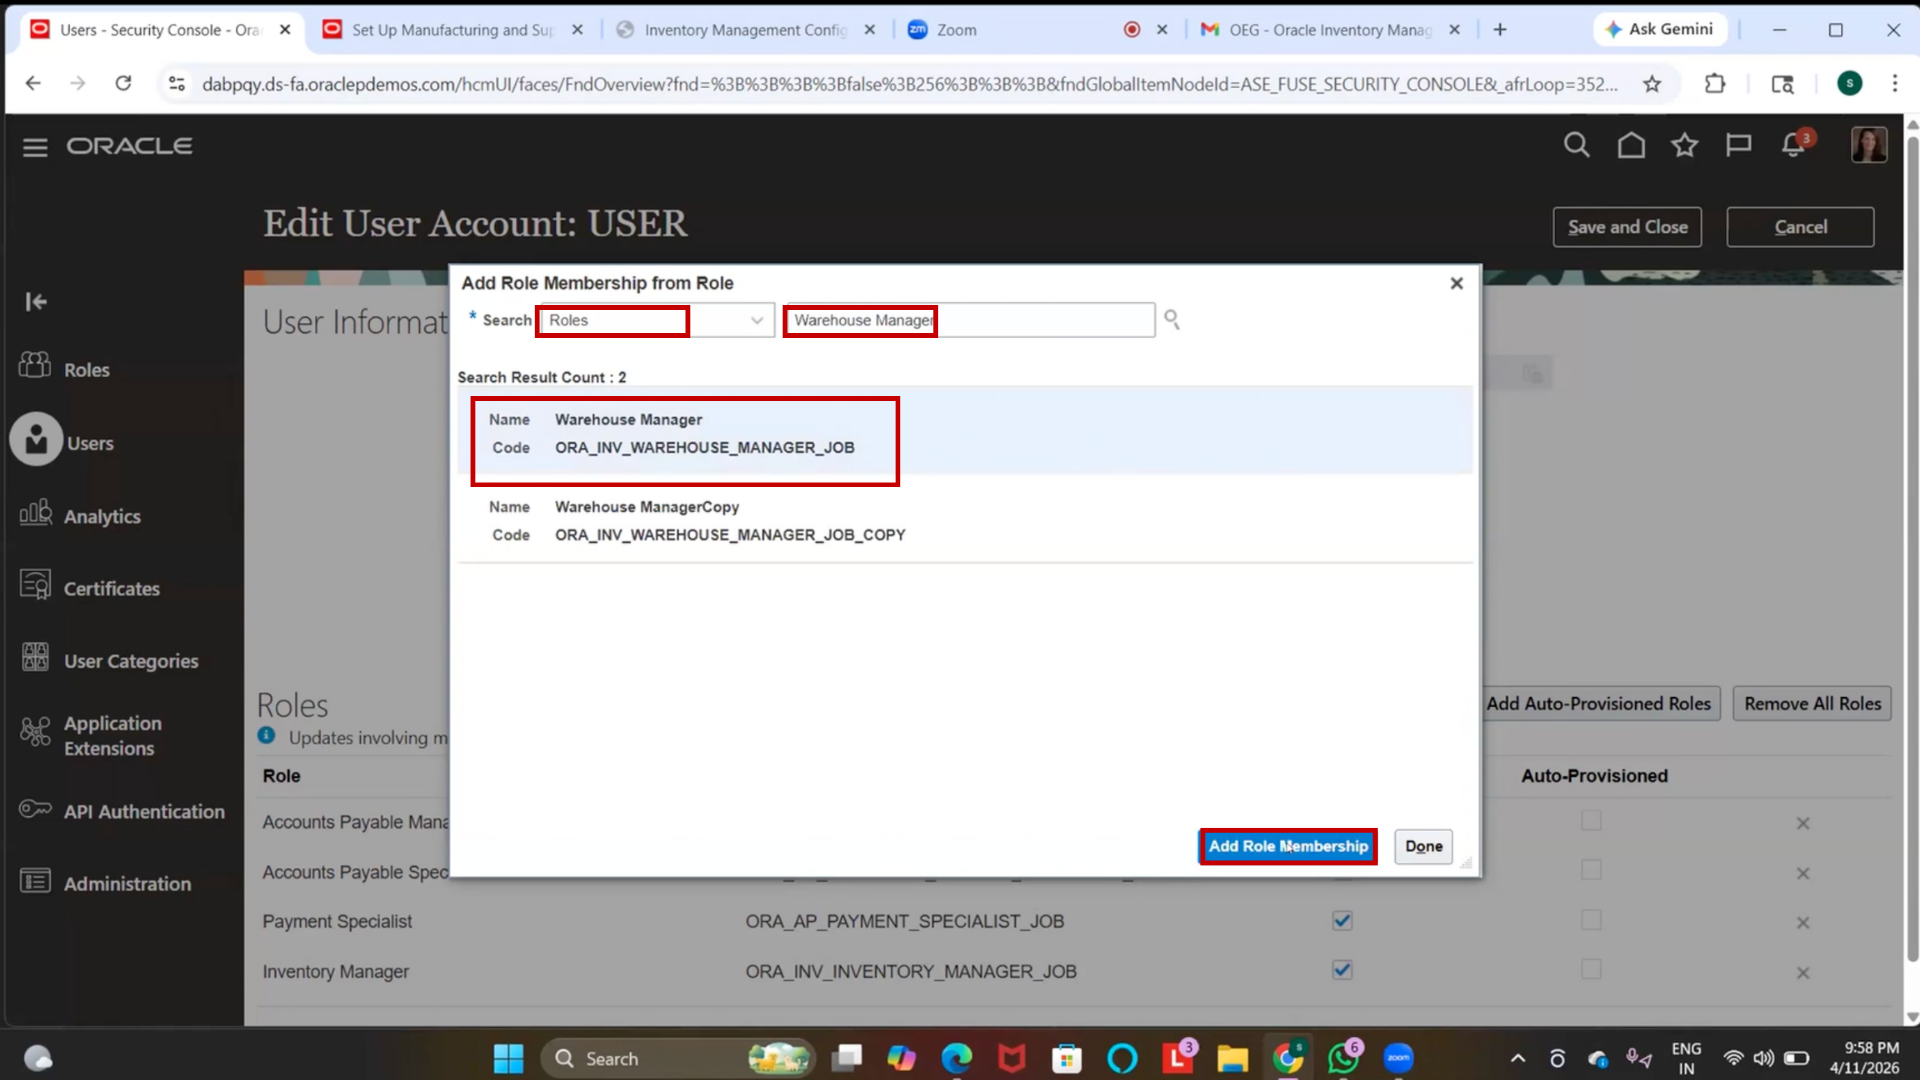
3. Click on “Add Role Membership” for each
4. Click on Save and Close
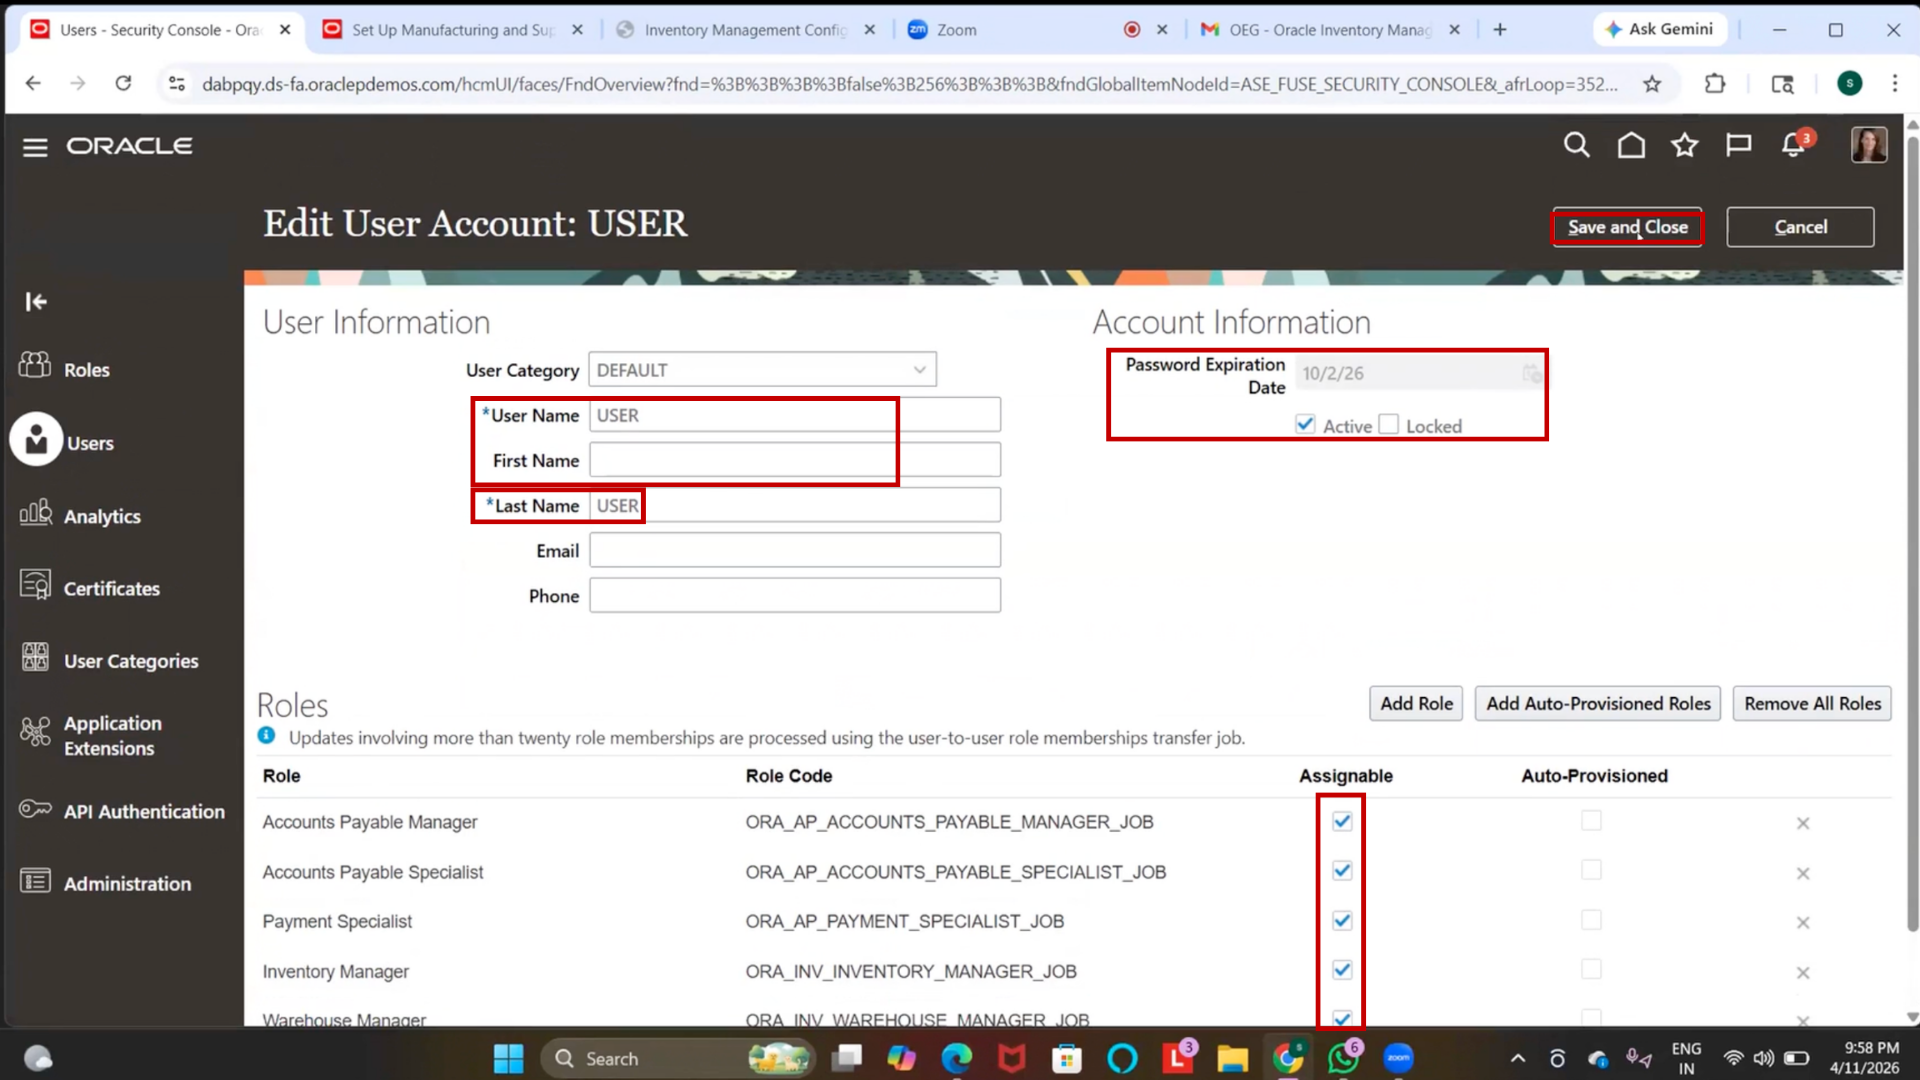
5. Click done
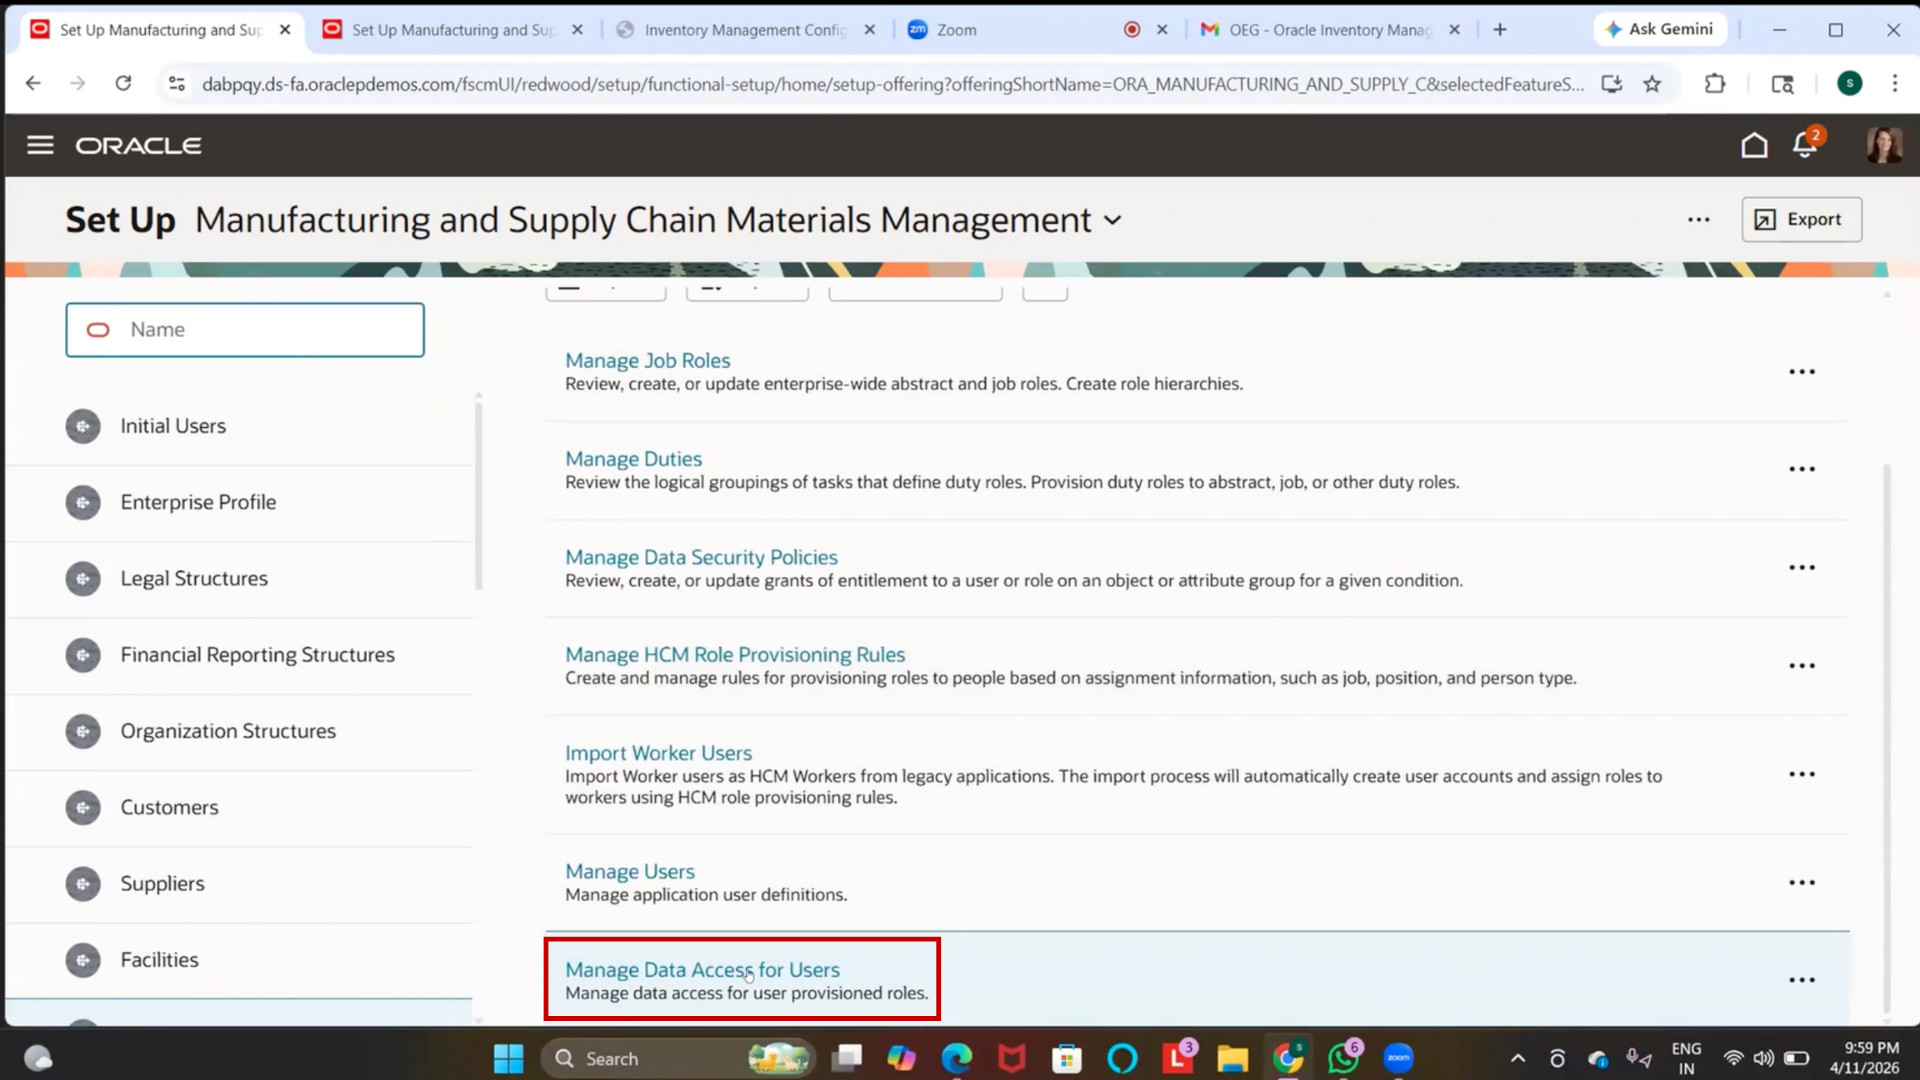
Step 92: Navigate to Manage Data Access
1. Go to Setup and Maintenance
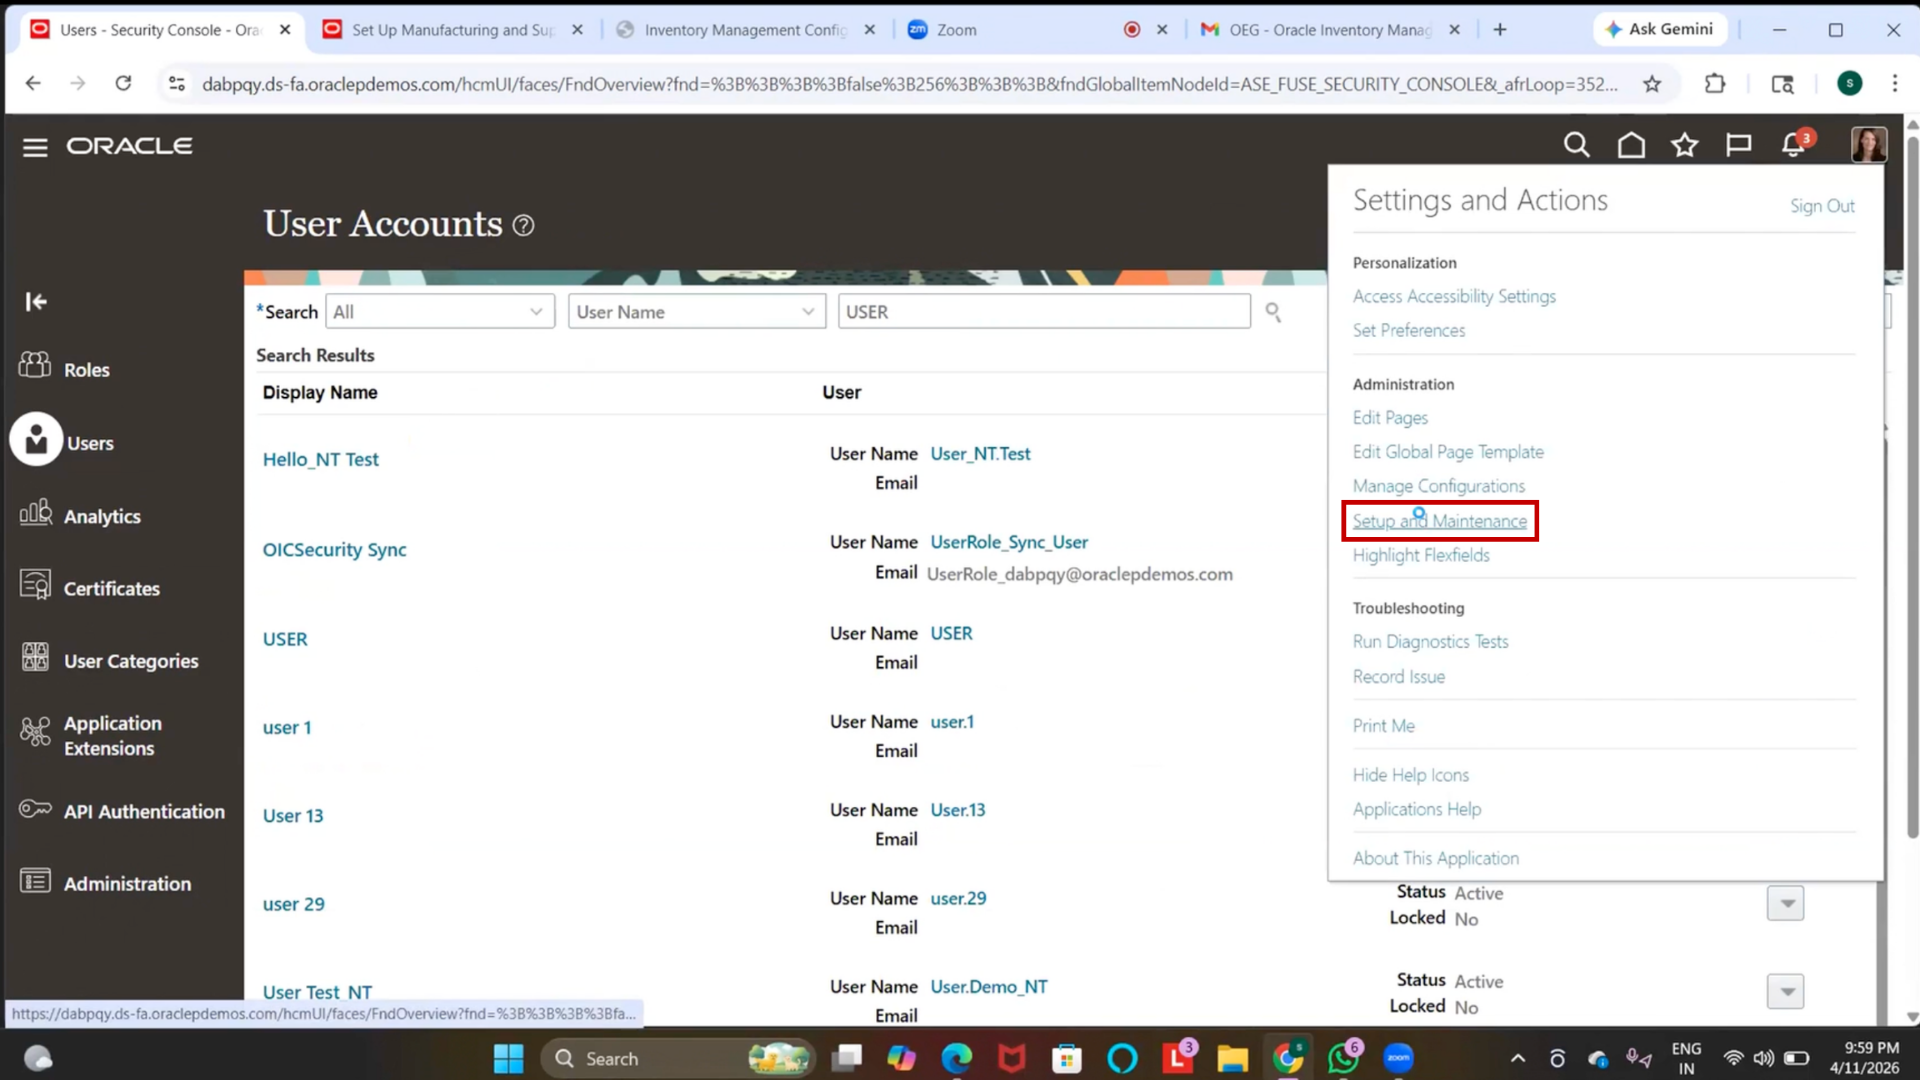
2. Search for Manage Data Access
Step 93: Assign Data Access – Warehouse Manager
1. Click on (+) the plus icon

2. Select User Name

3. Select Role = Warehouse Manager
4. Select Security Context = Inventory Organization
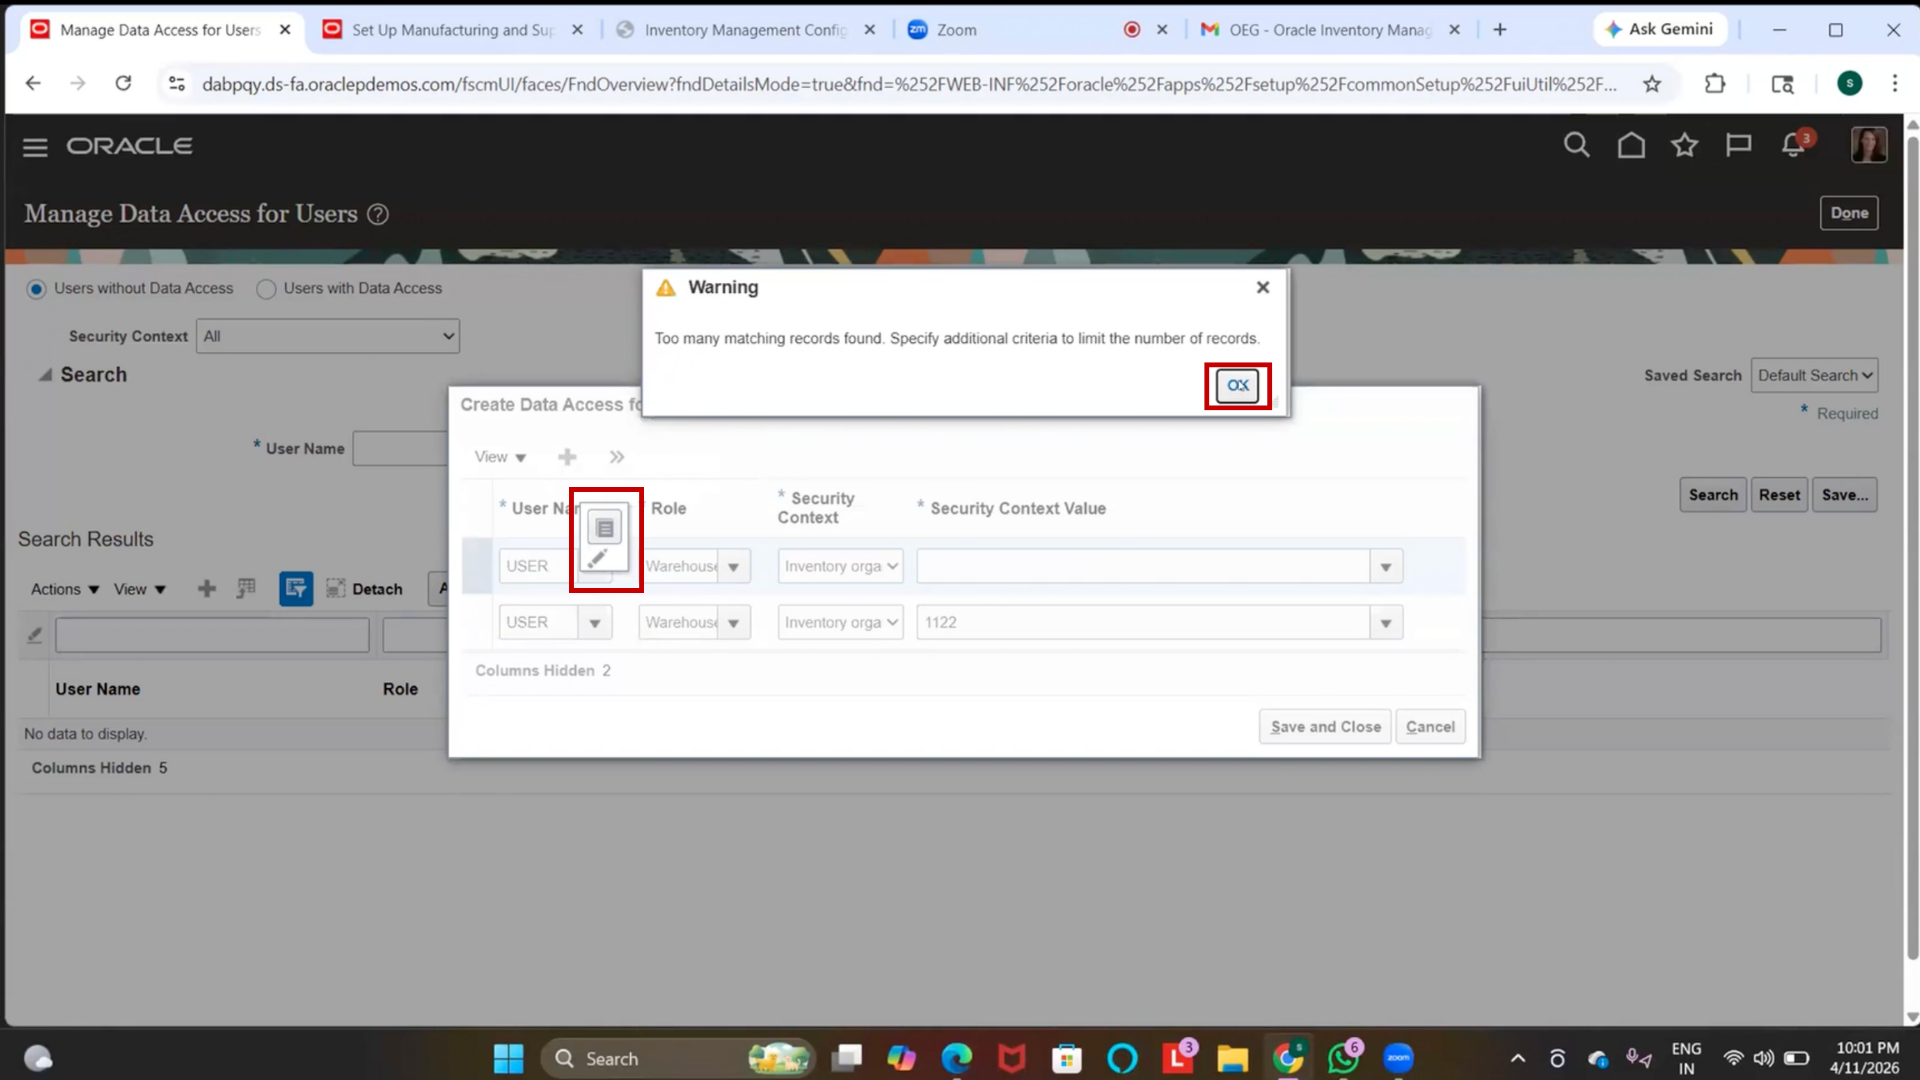
5. Select Inventory Org = IBM Inventory Org (1122)
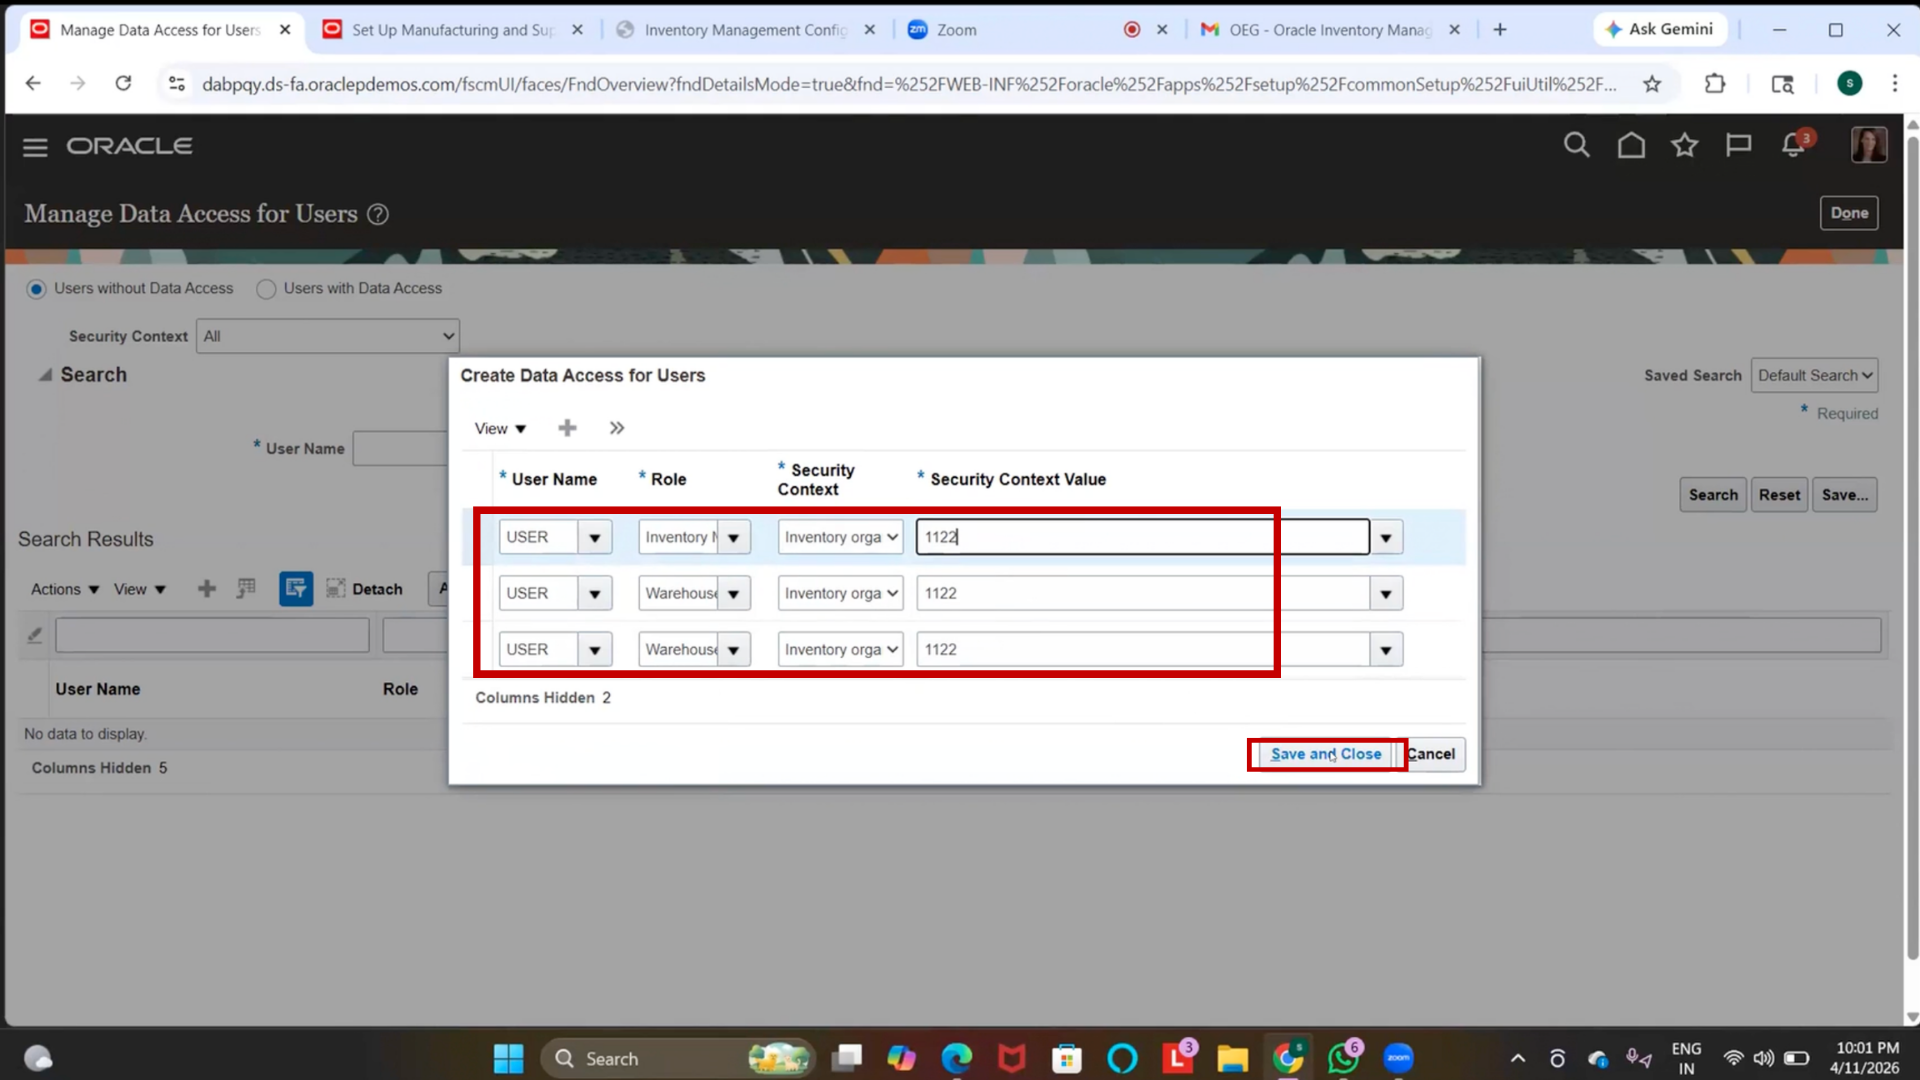
Step 94: Assign Data Access – Warehouse Operator
1. Duplicate the previous record
2. Change Role = Warehouse Operator
3. Keep the same security context and inventory org.
Step 95: Assign Data Access – Inventory Manager
1. Duplicate again
2. Change Role = Inventory Manager
3. Keep the same security context and inventory org.
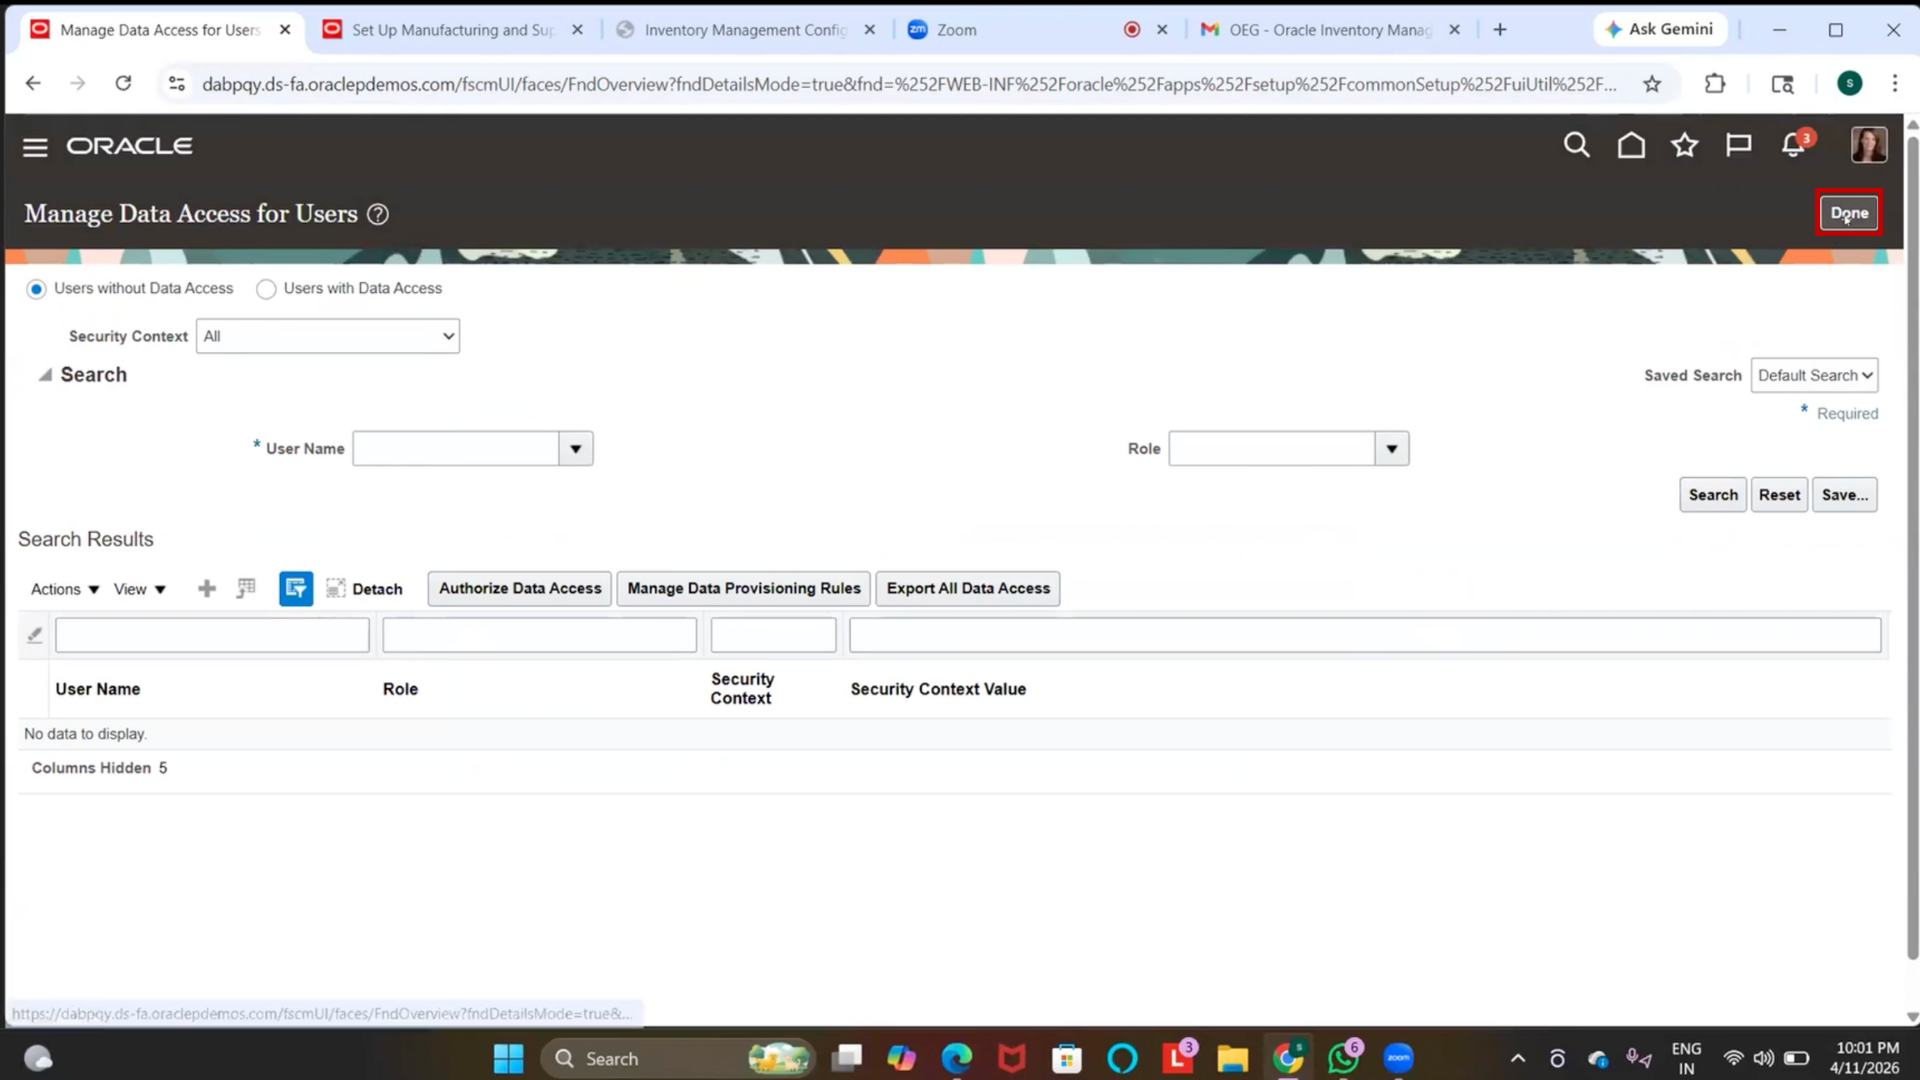
Step 96: Save Data Access
1. Click on “Save and Close.”
2. Click on “Done.”
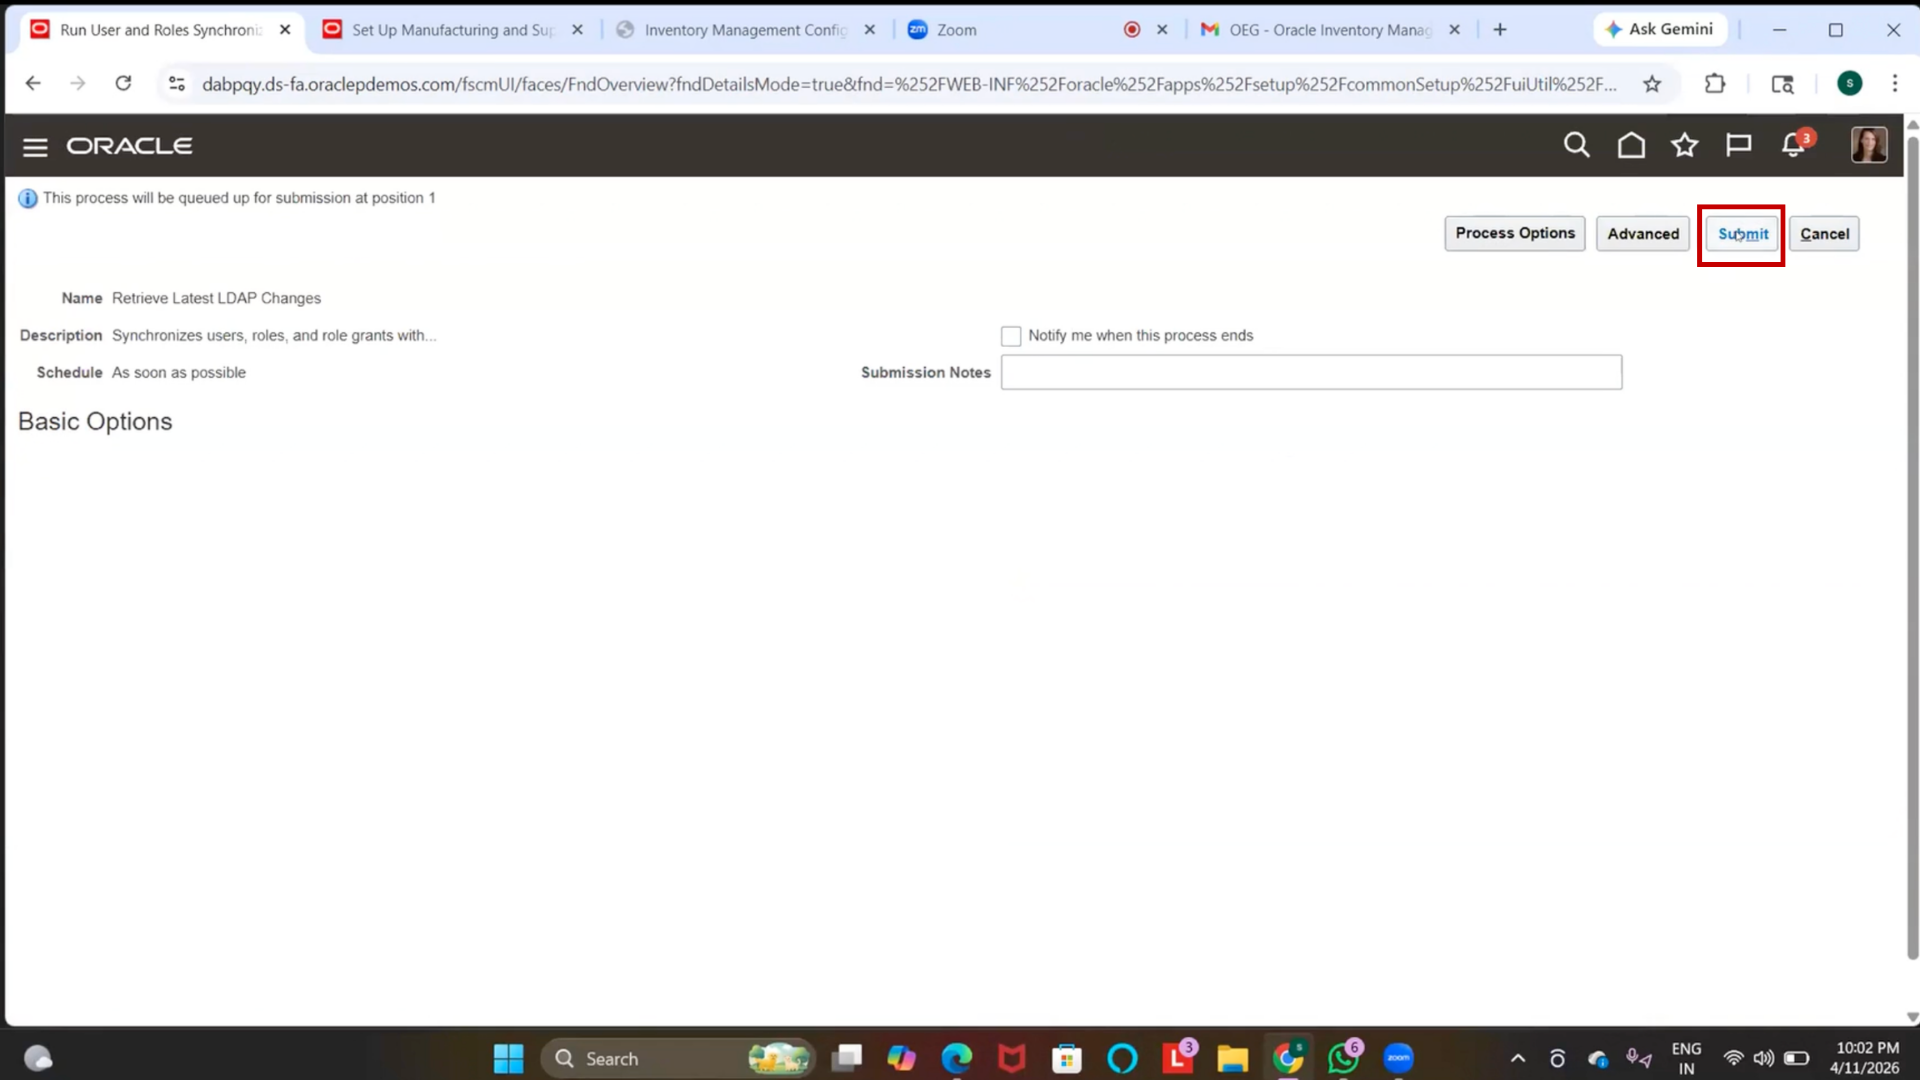
Step 97: Run User and Role Synchronization Process
1. Submit Run User and Role Synchronization Process
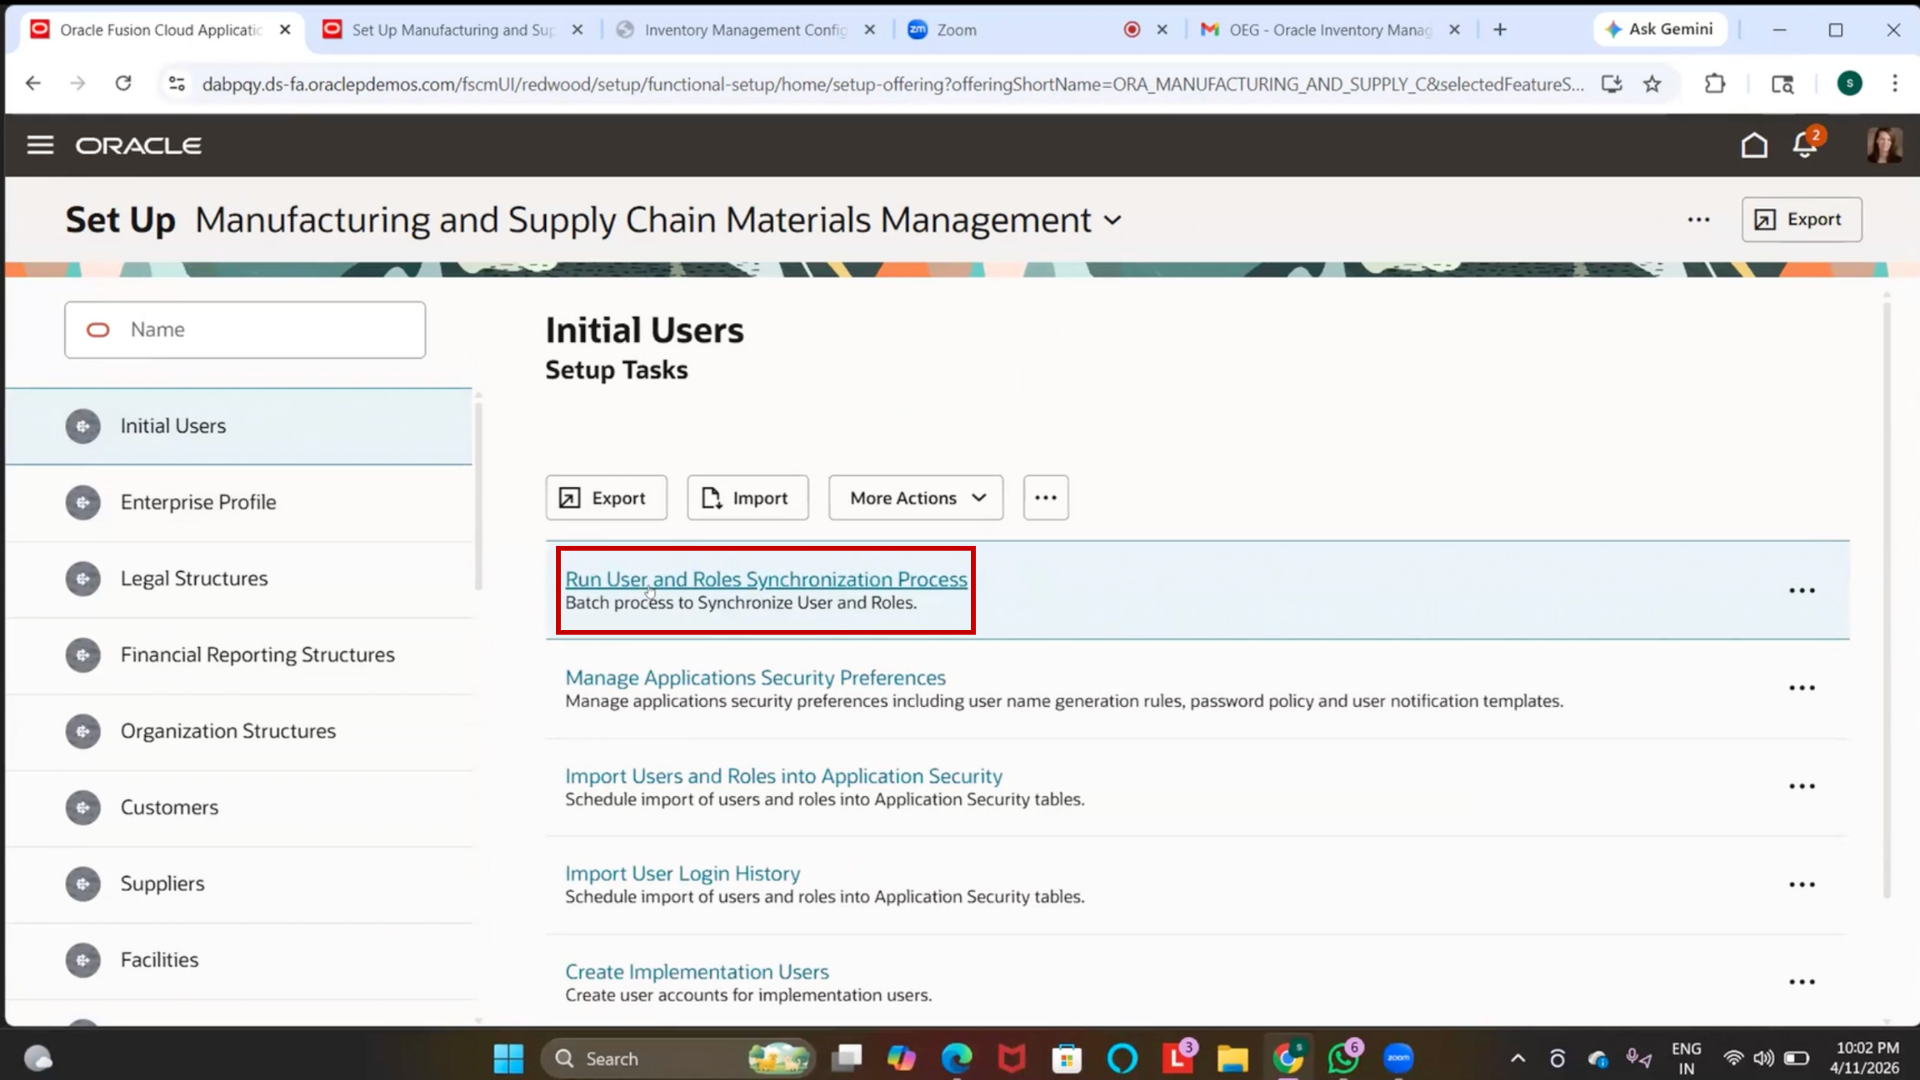
2. If already scheduled, skip this step
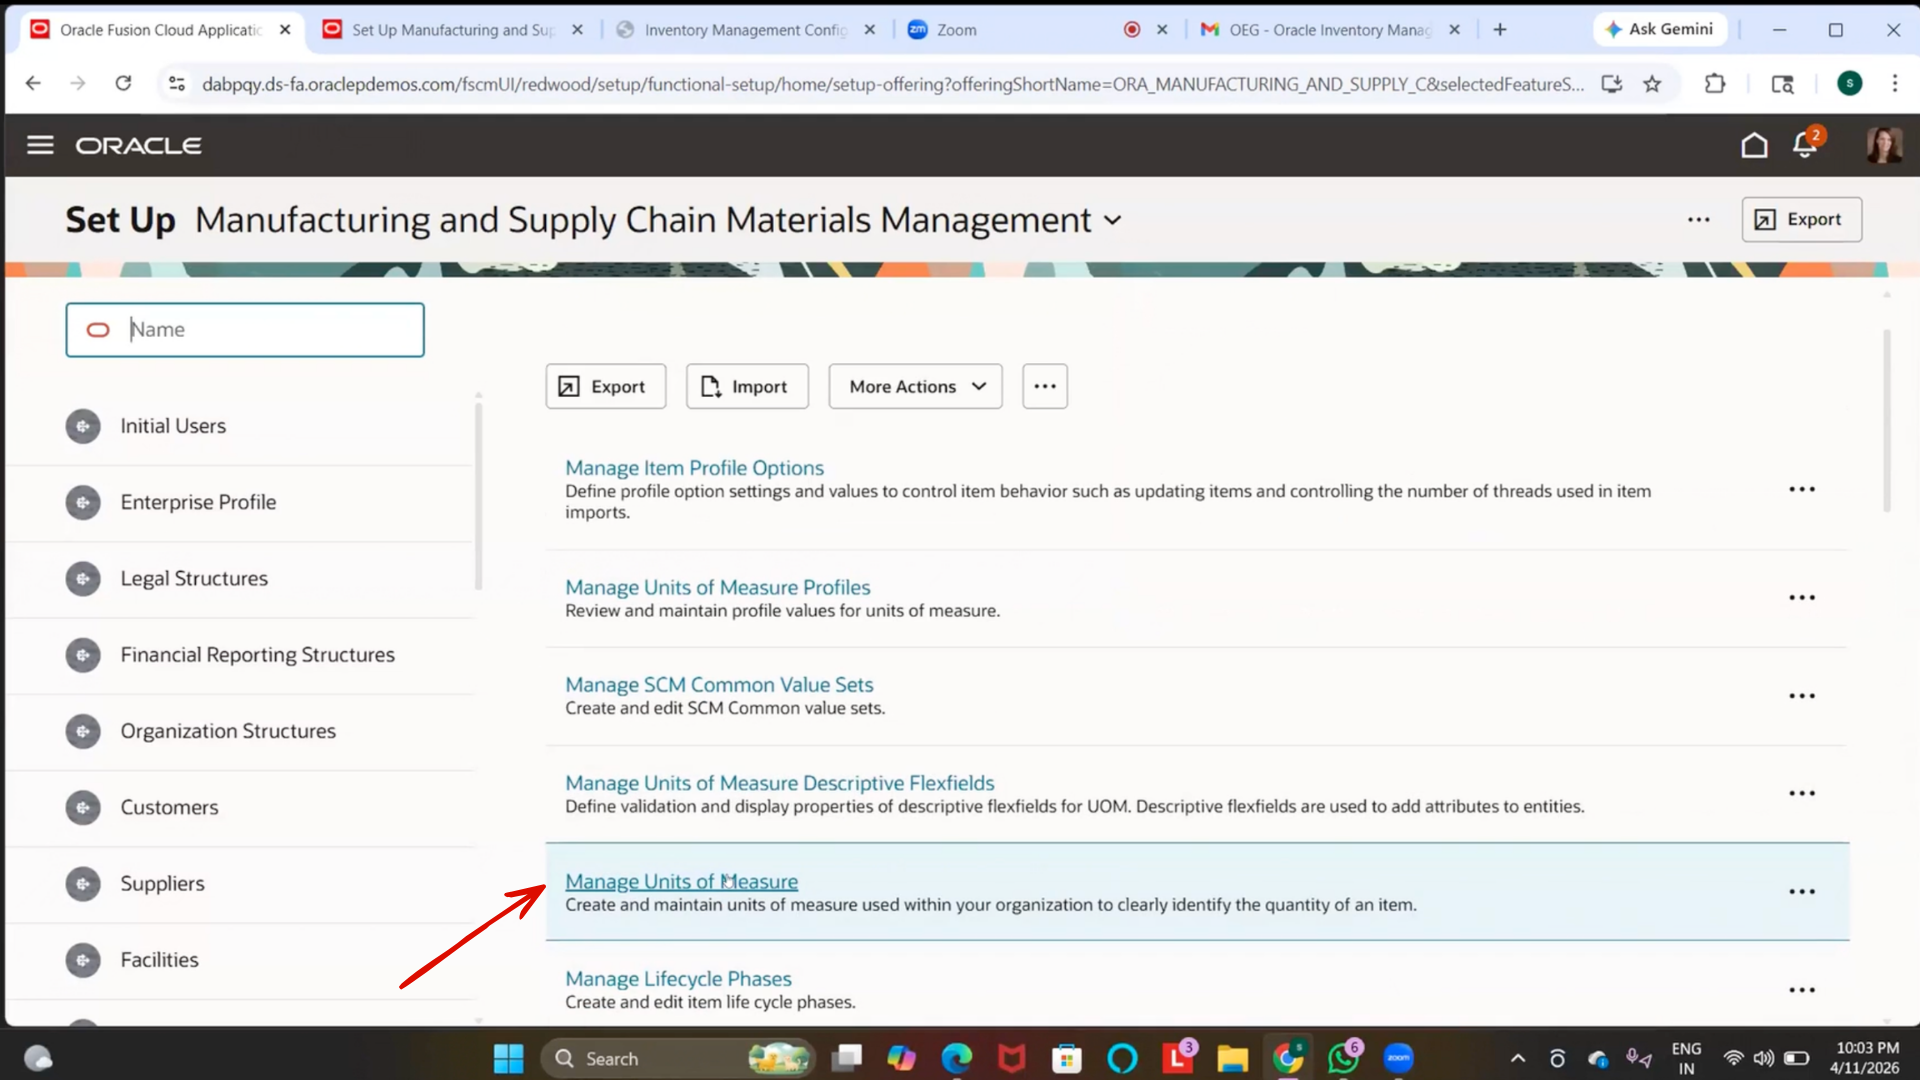
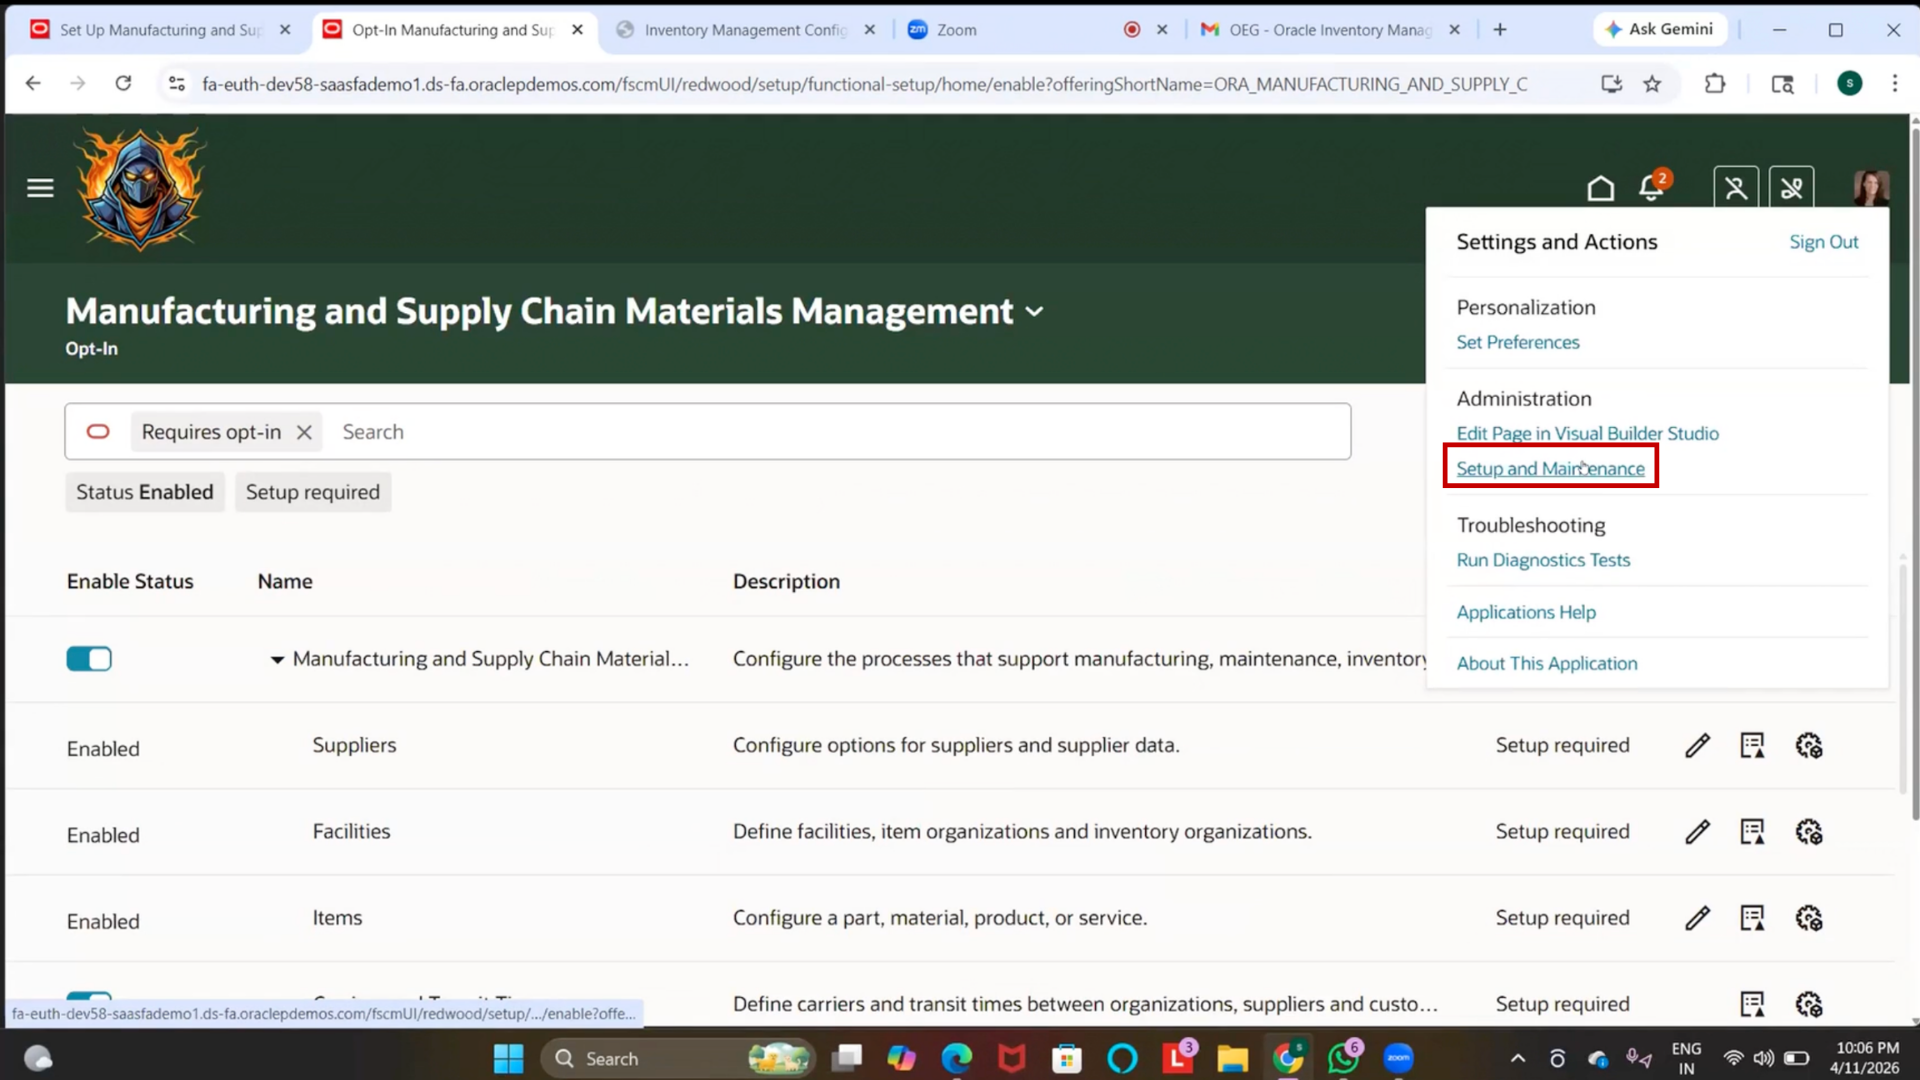
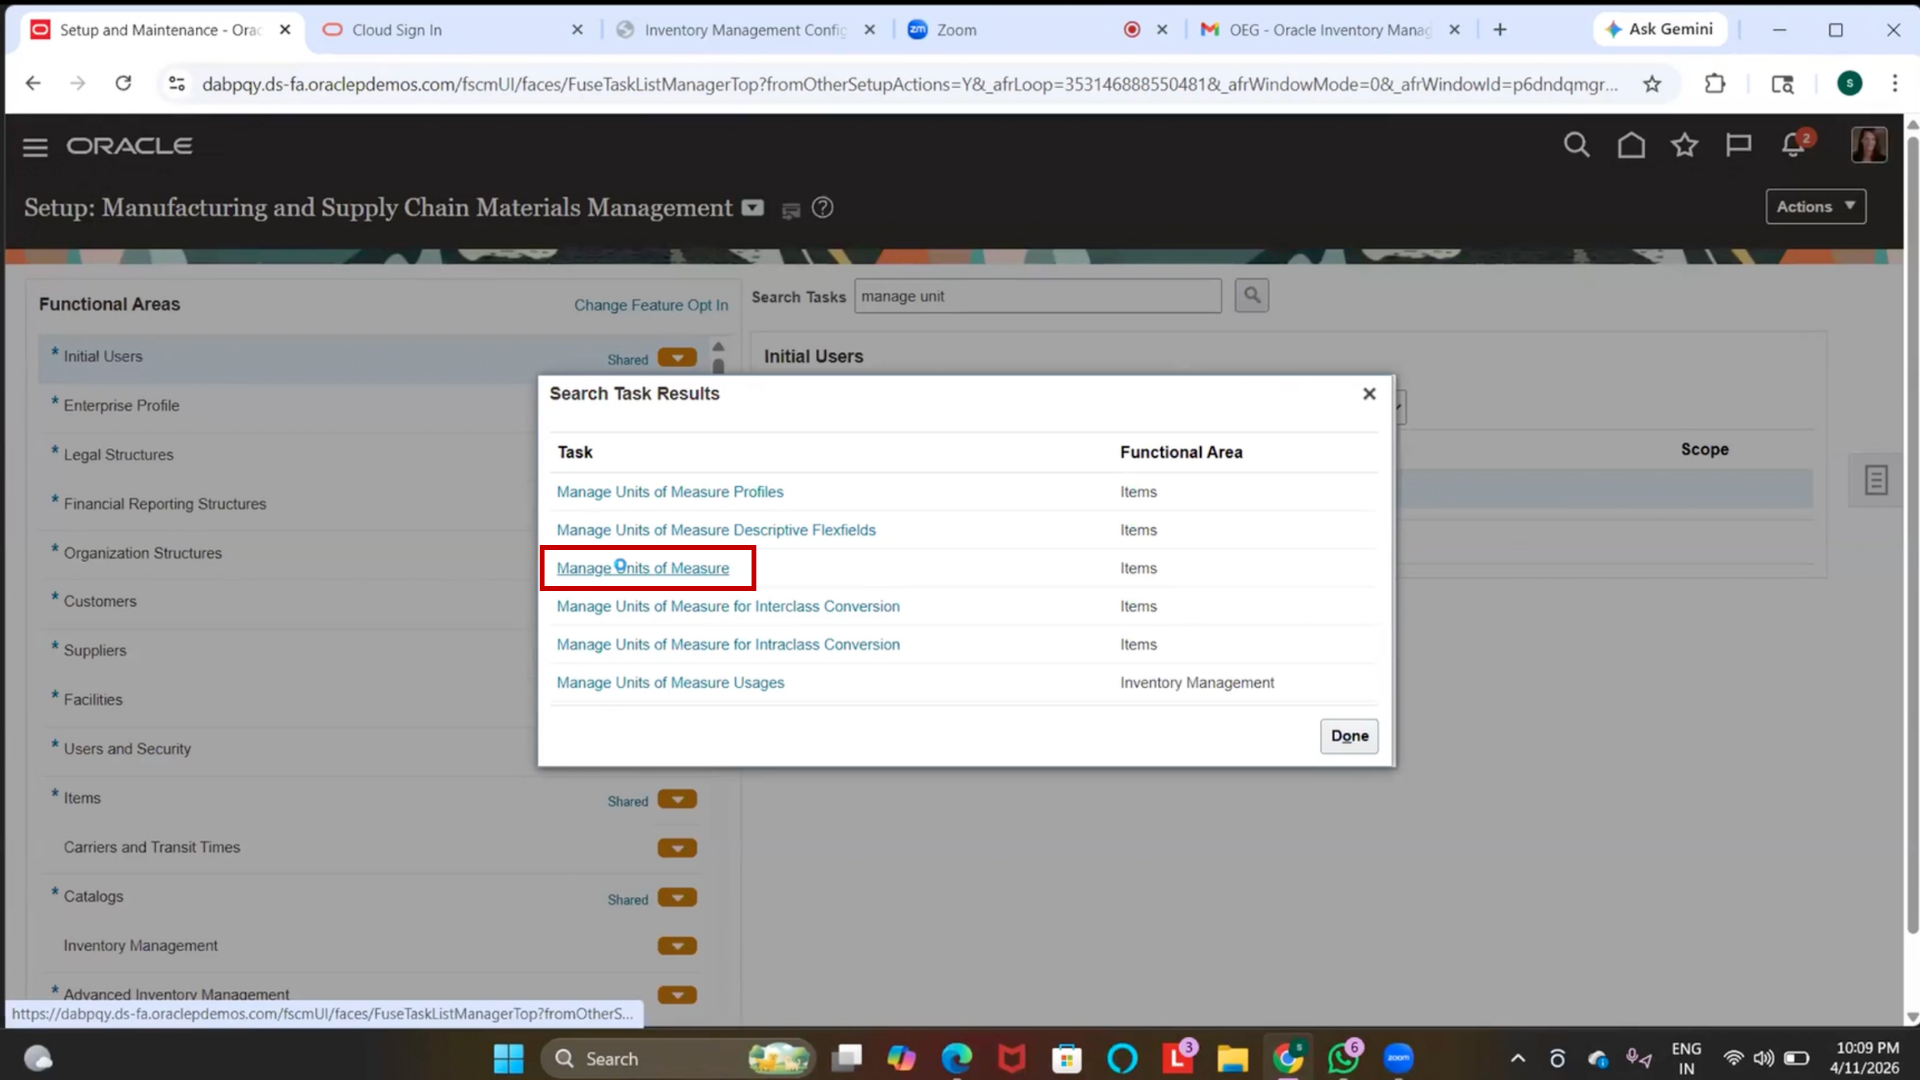
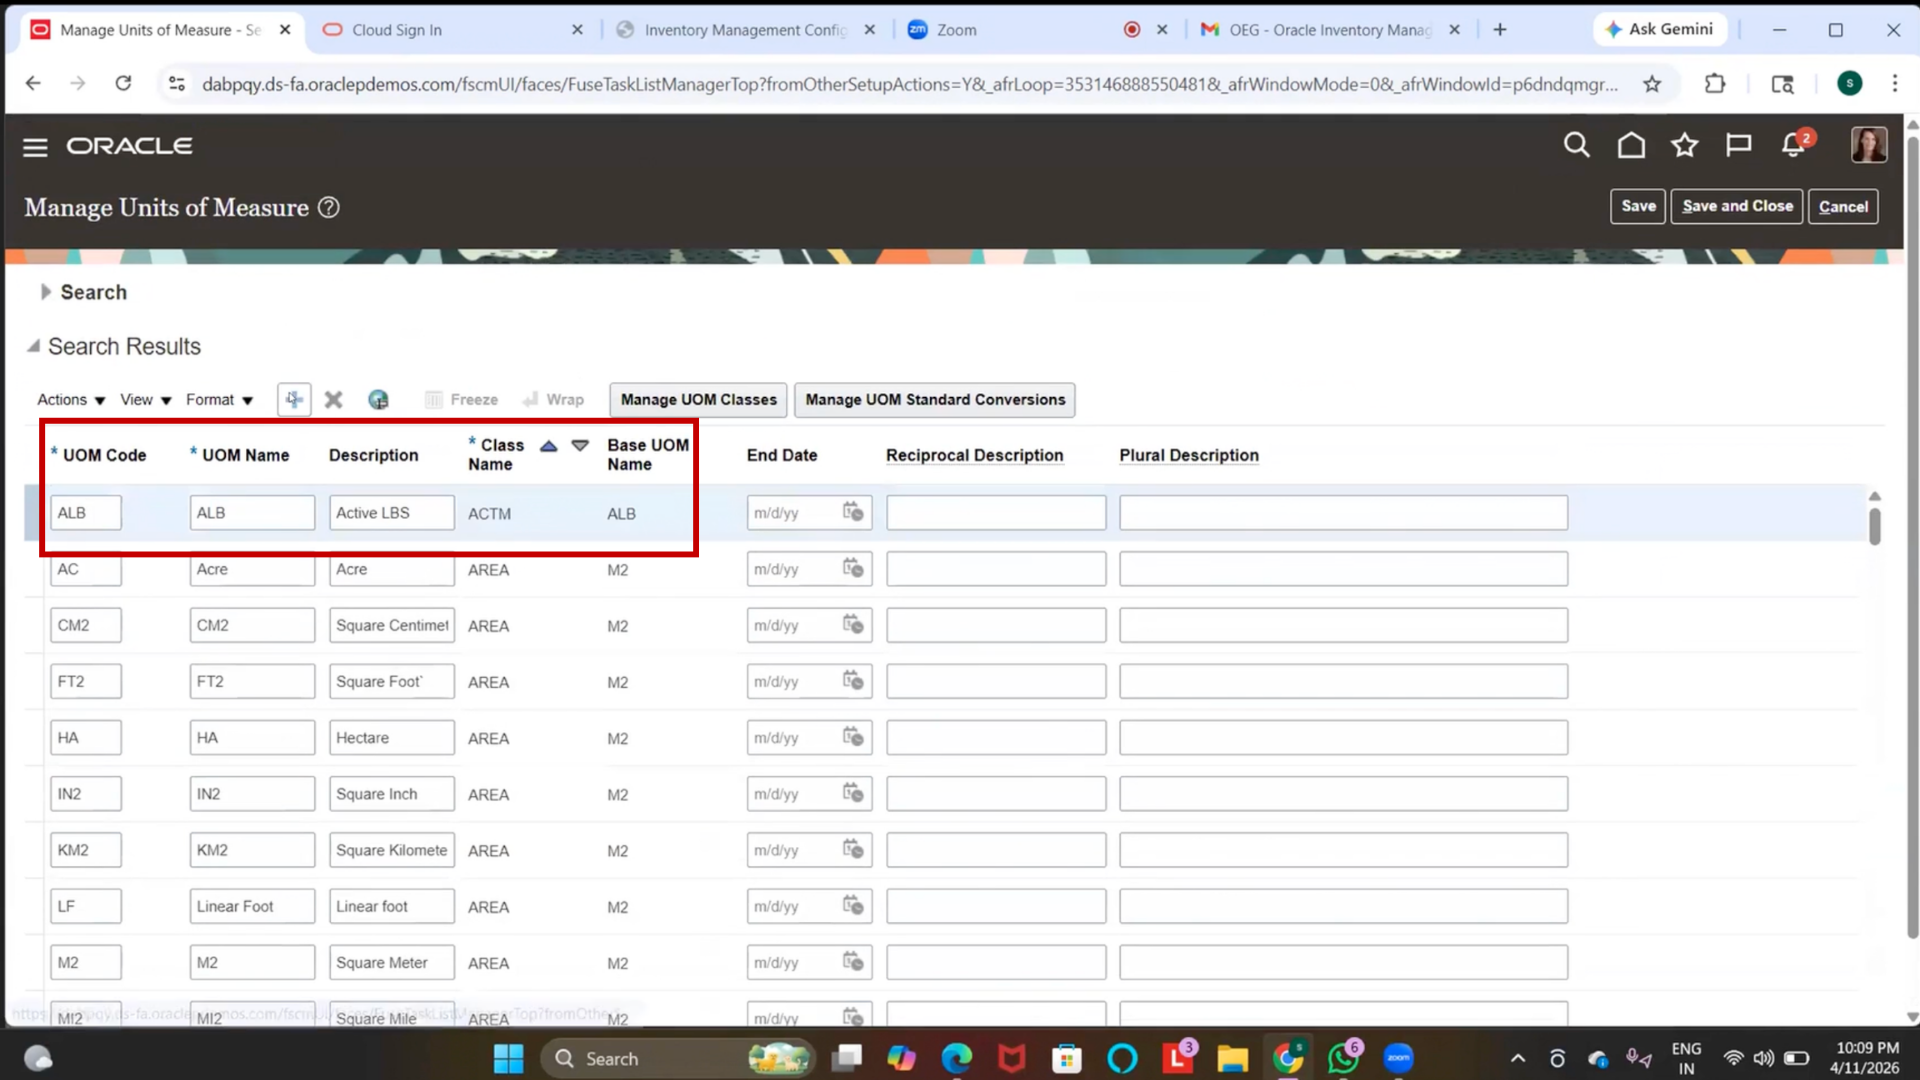
Step 98: Navigate to Manage Units of Measure
1. Go to Setup and Maintenance
2. Search for Manage Units of Measure
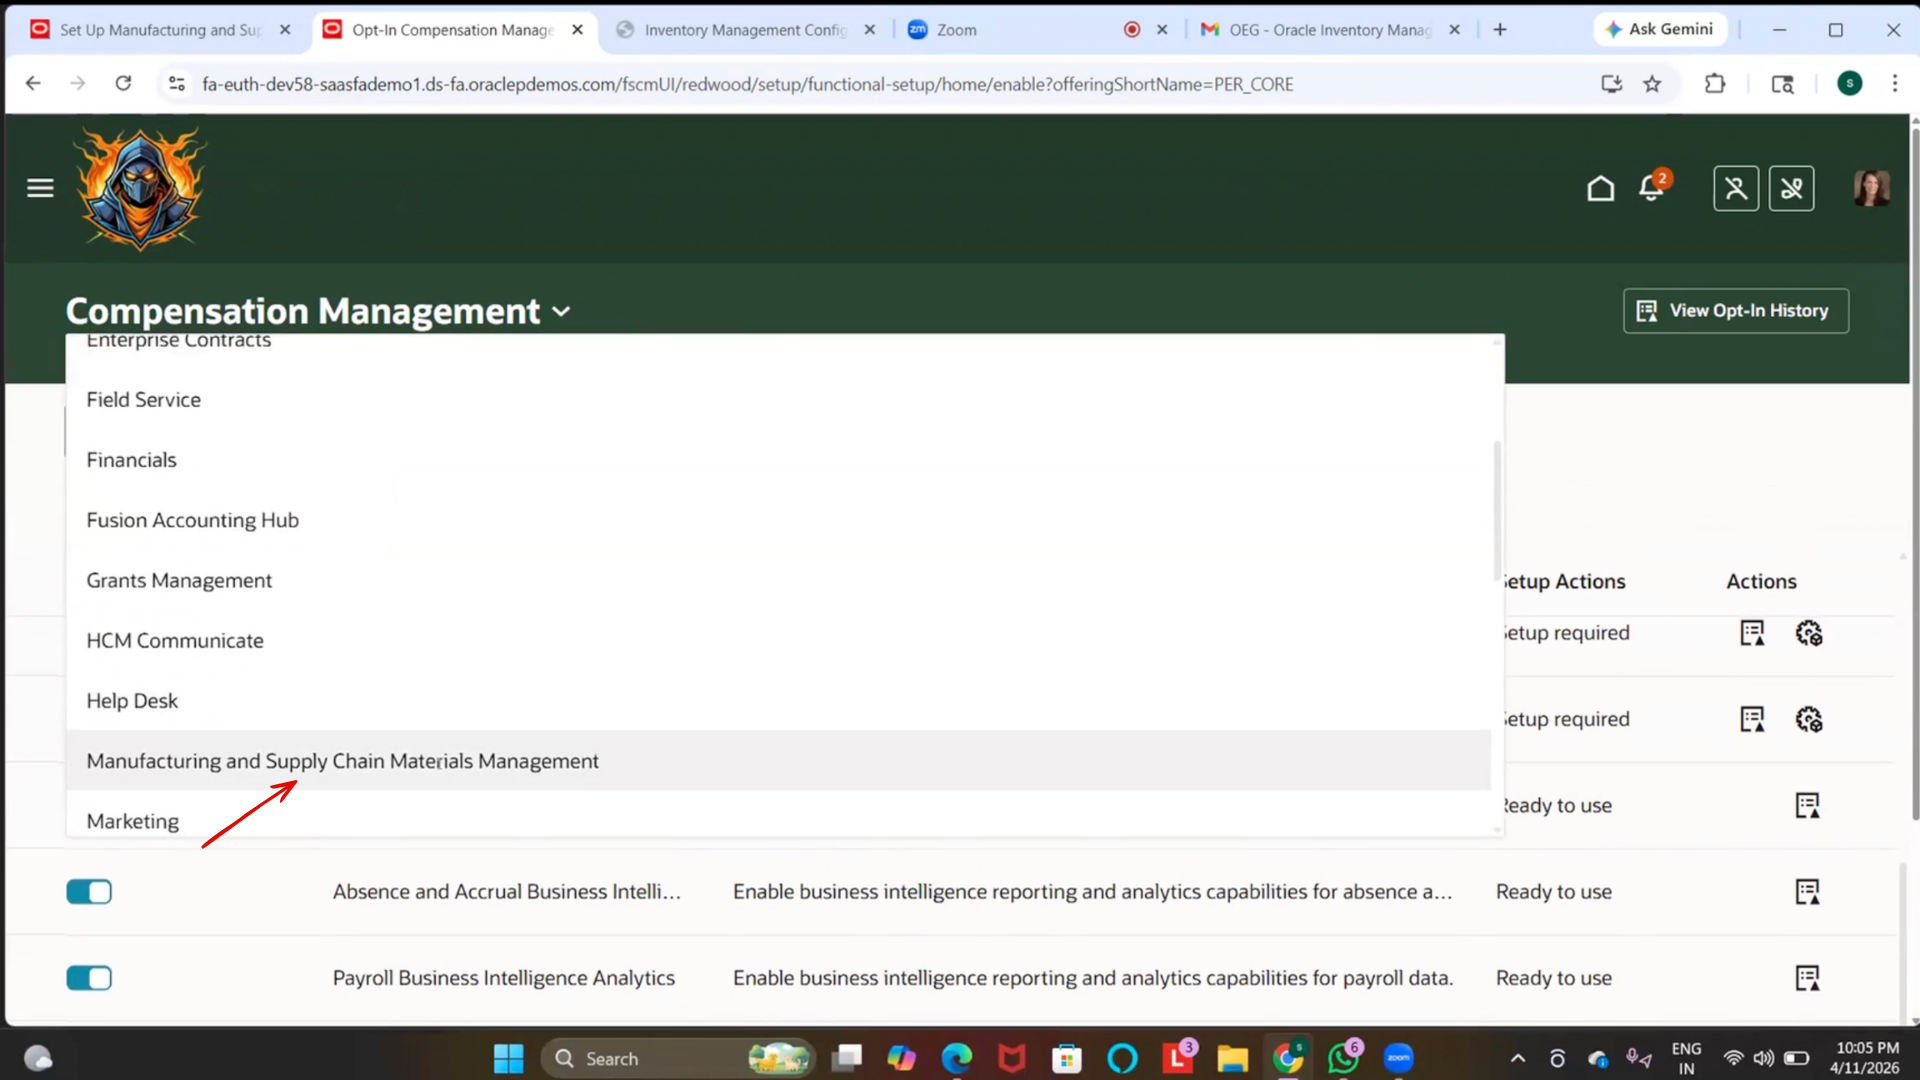
Step 99: Disable Redwood (If UOM Not Accessible)
1. Go to Offerings

2. Select Manufacturing and Supply Chain Management
3. Open Opt-In Features
4. Edit Redwood UI settings
5. Enable status
6. Set Redwood = No
7. Click on Save and Close
Step 100: Access Classic UI
1. Refresh or log out and log in again
2. Navigate back to Setup and Maintenance
3. Open Manage Units of Measure in Classic UI
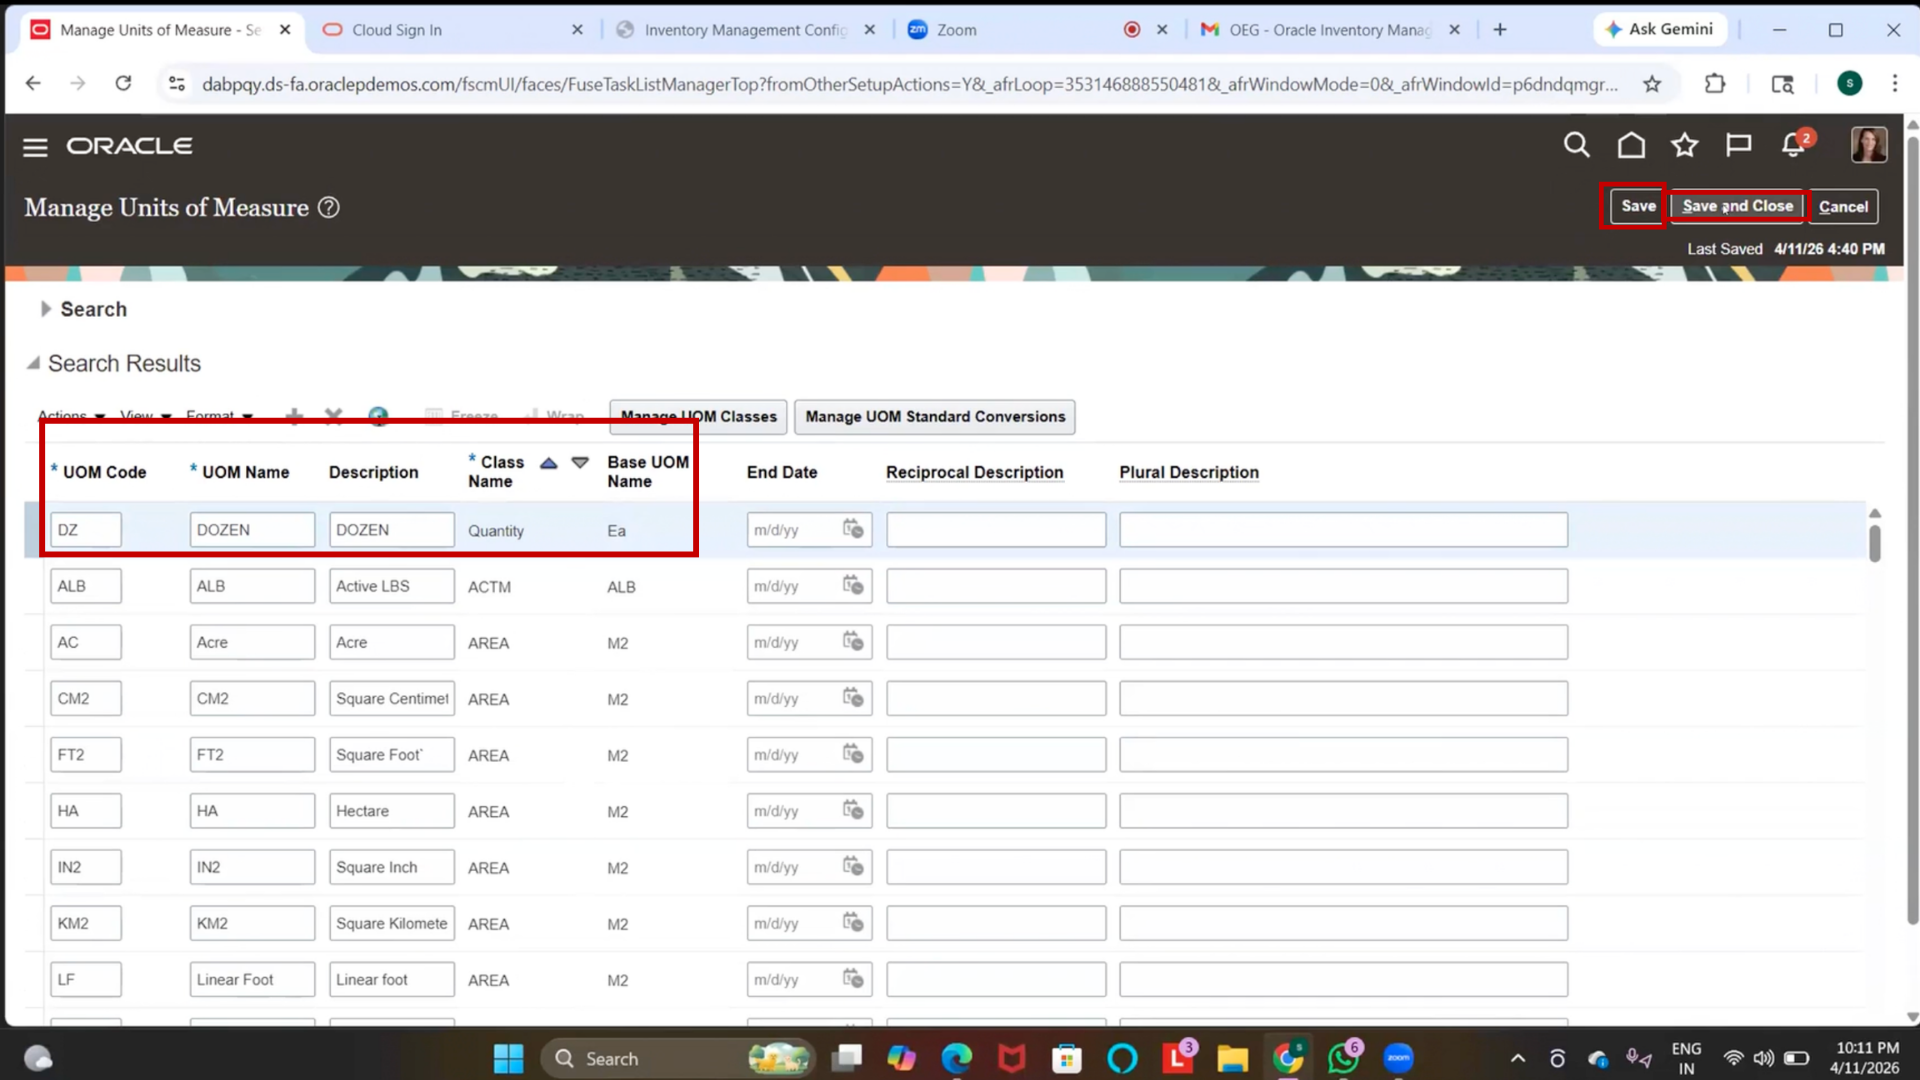
Step 101: Create Unit of Measure (UOM)
1. Navigate to Setup and Maintenance
2. Search for Manage Units of Measure
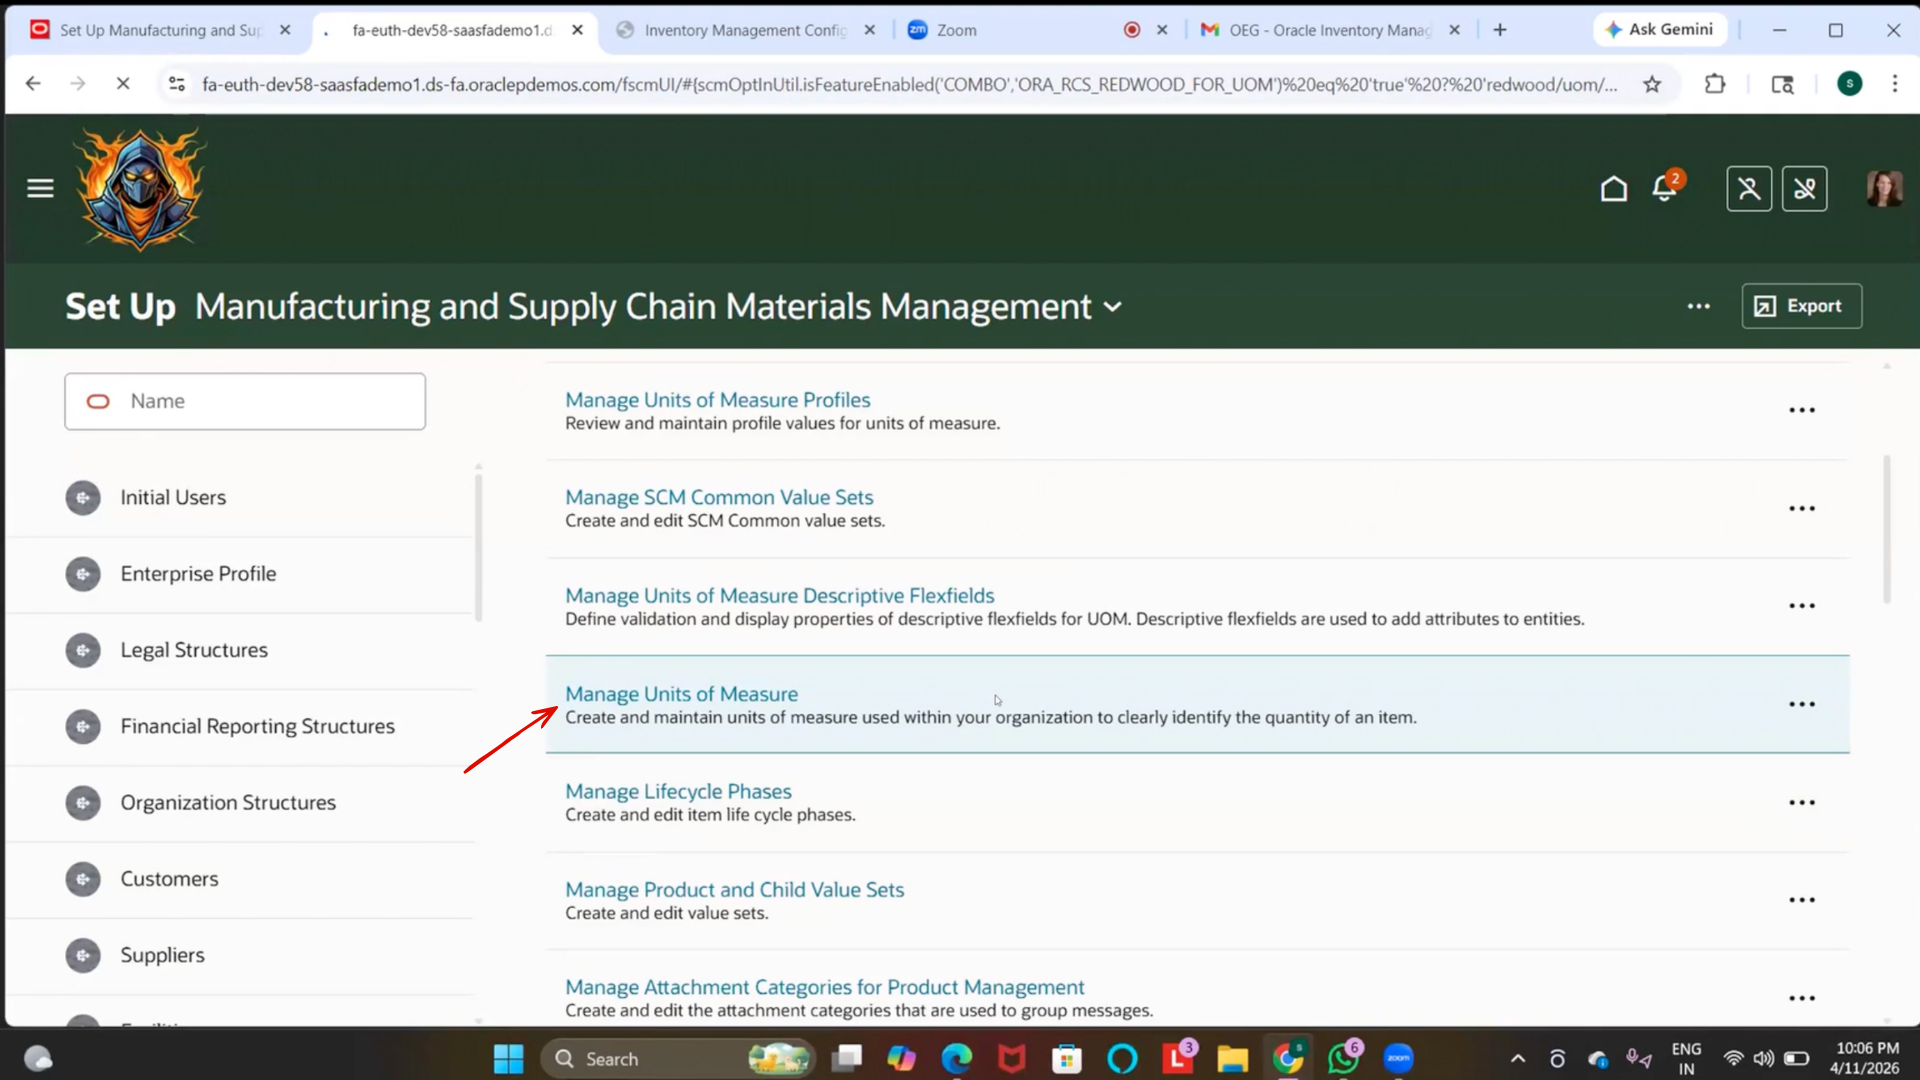
3. Click on “Manage Units of Measure.”
4. Click on + (Create)
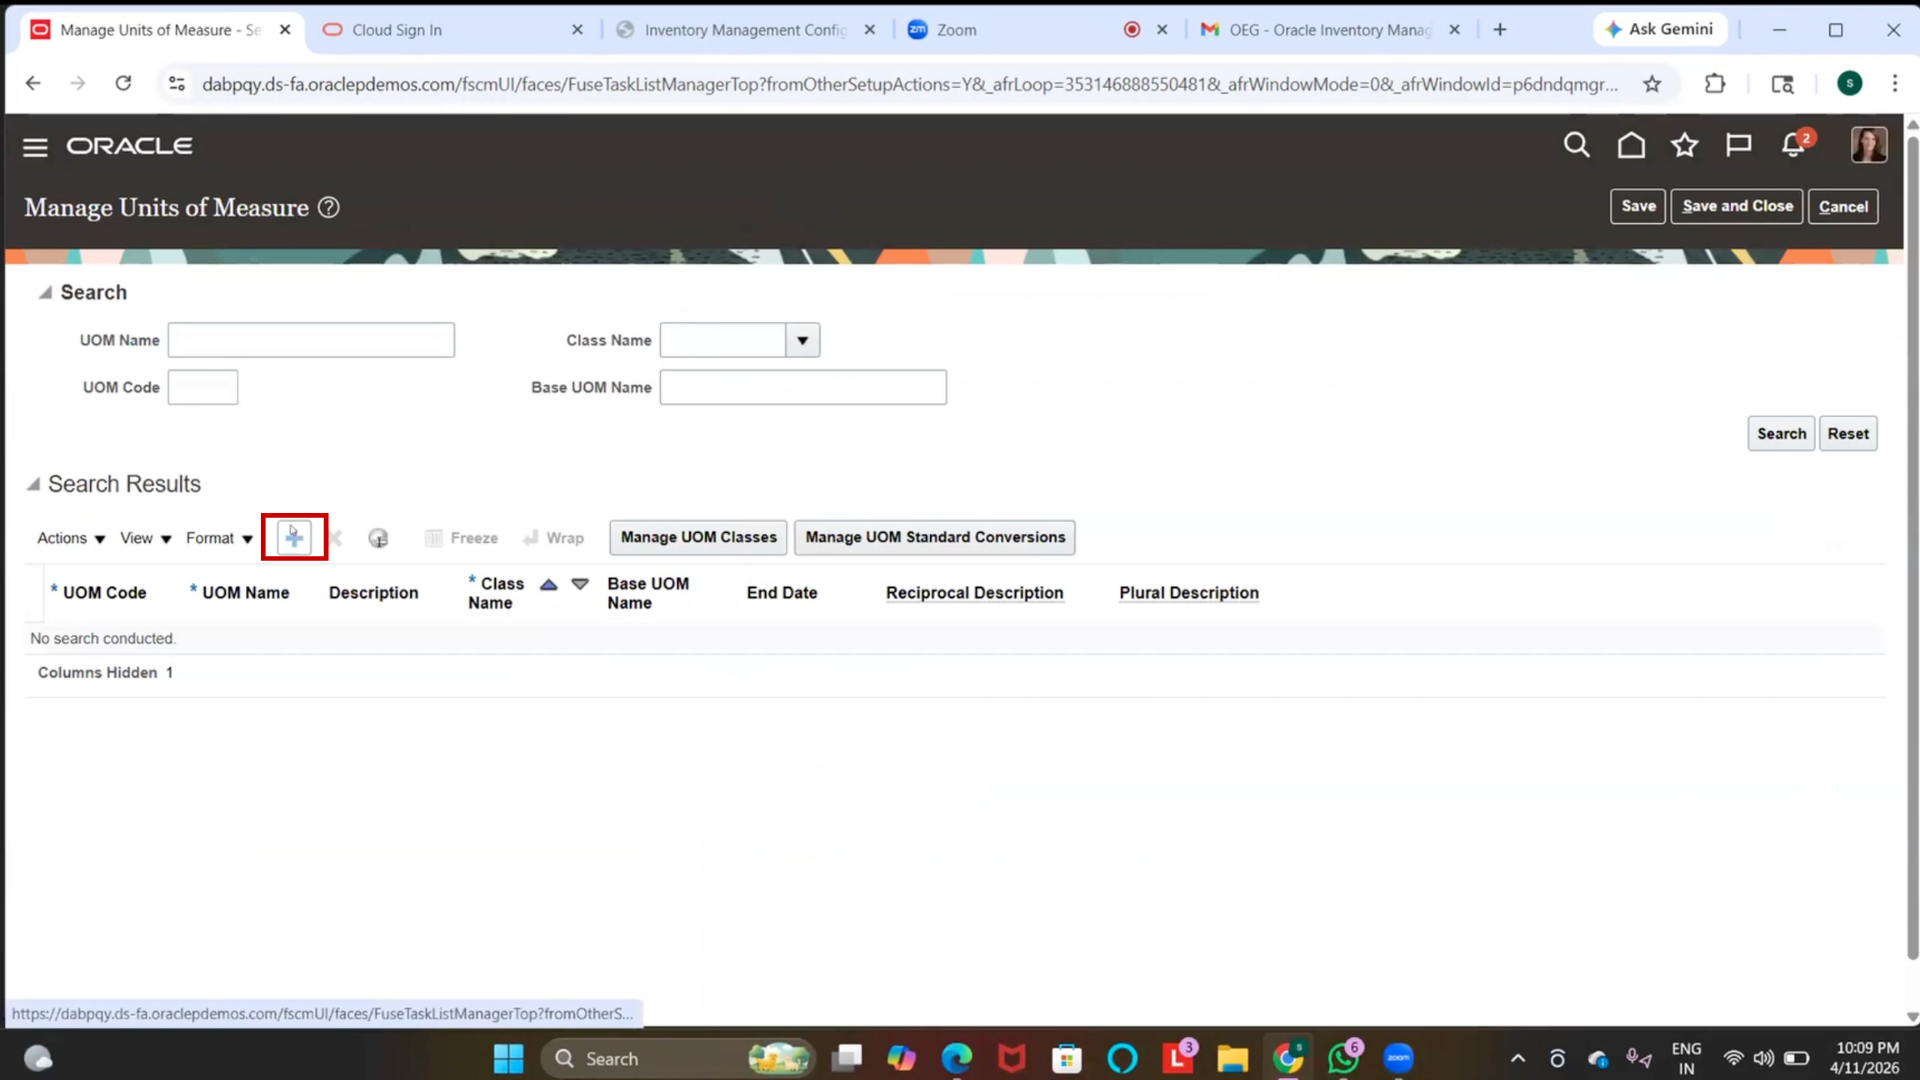
5. Enter the following details:
- UOM Code: Dozen
- Description: Dozen
- UOM Class: Quantity
6. Click on Save
7. Click Save and Close
Note:
- UOM defines how items are measured (e.g., Each, Box, Dozen)
- UOM Class groups units with similar characteristics
Step 102: (Optional) Define UOM Conversion
1. Navigate to Manage Standard UOM Conversions
2. Click on “Create.”
3. Enter conversion details:
- From UOM: Each
- To UOM: Dozen
- Conversion Rate: 12
4. Click Save and Close
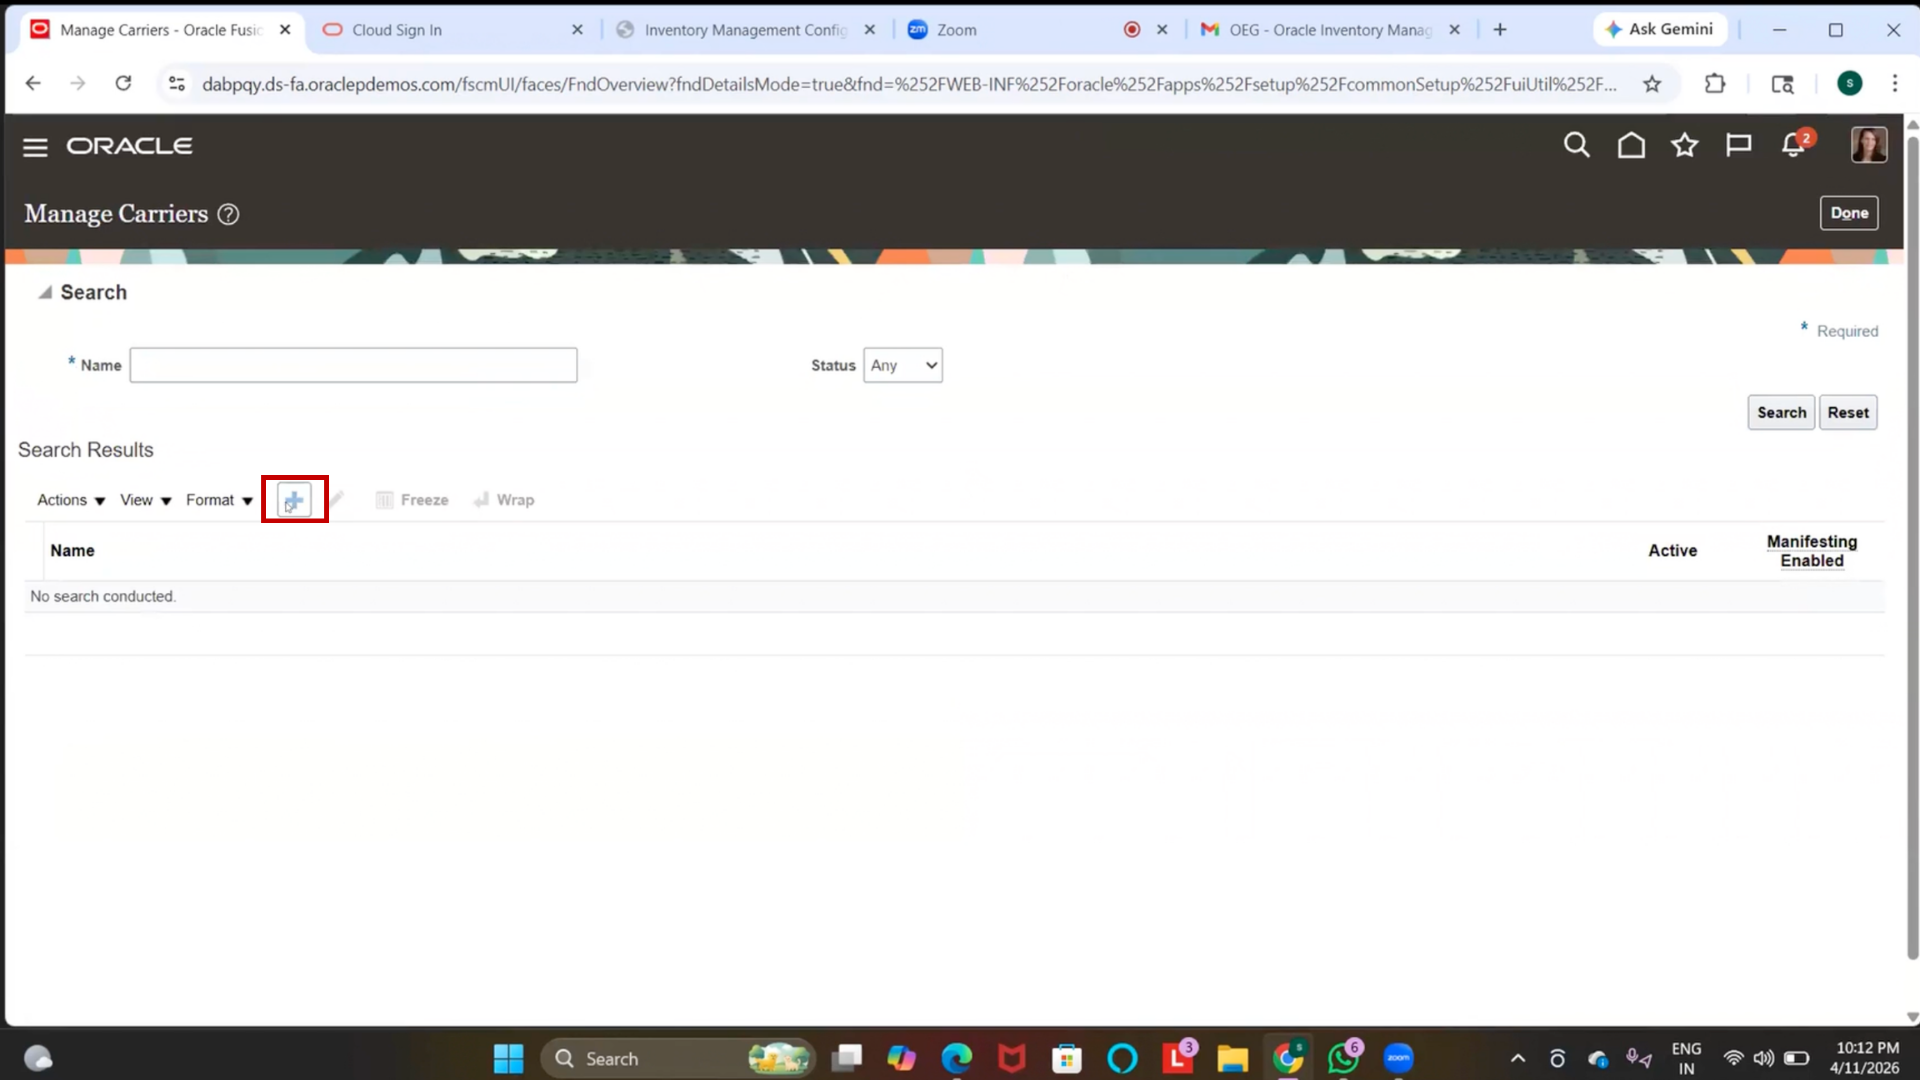
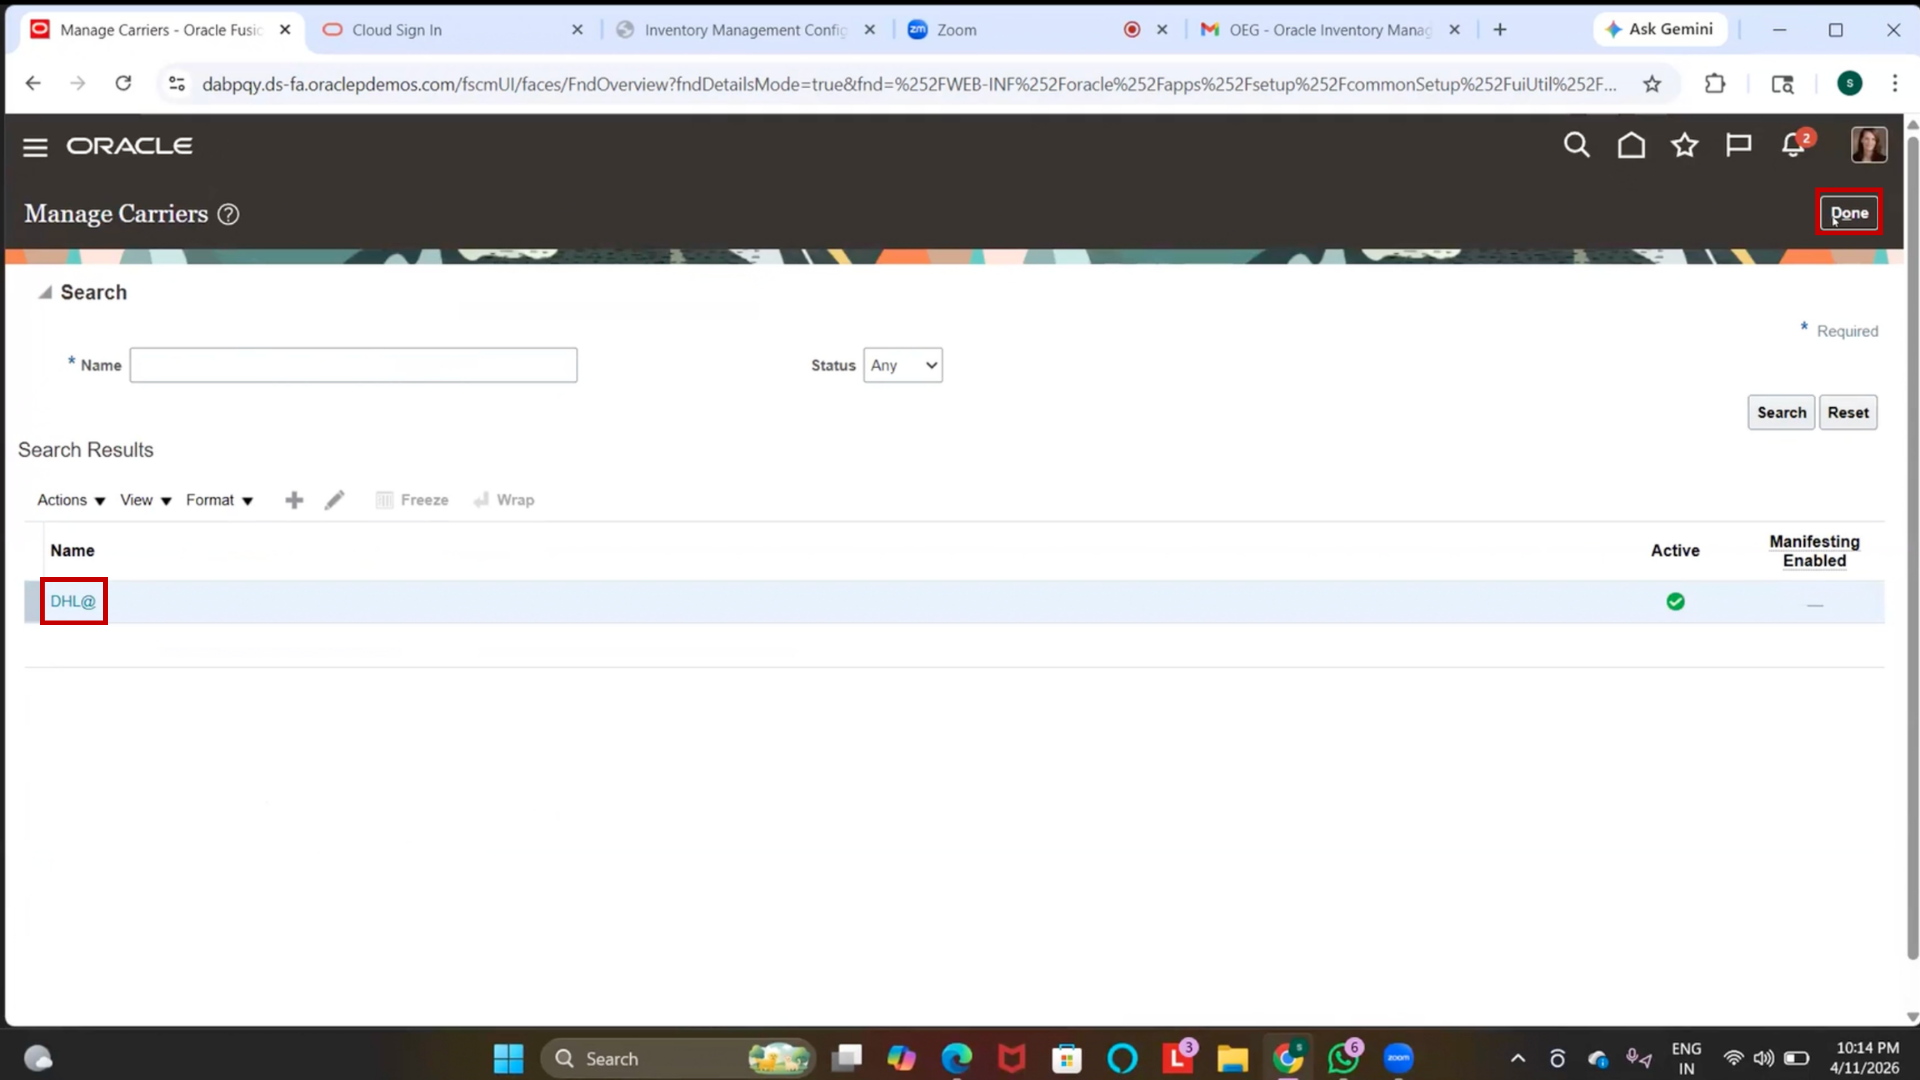
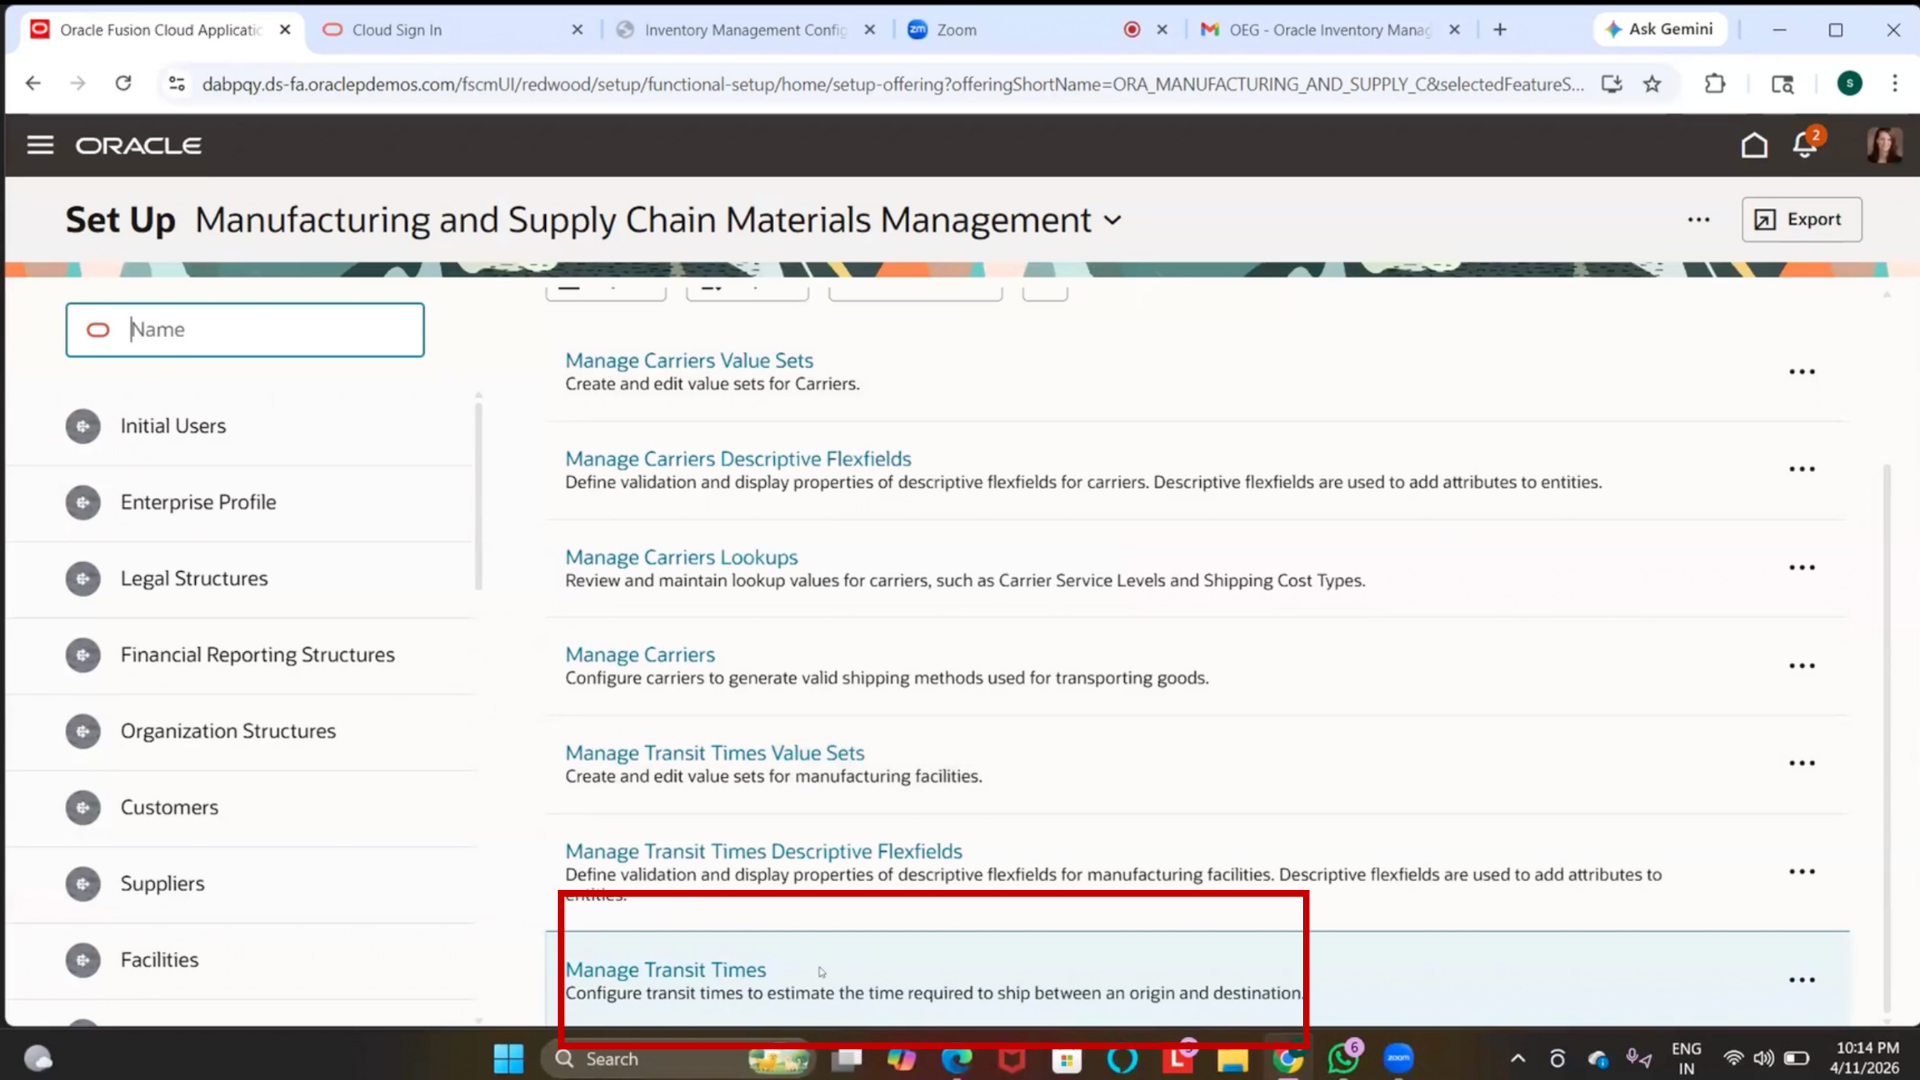
Step 103: Create Carrier
1. Go to Setup and Maintenance
2. Search for “Manage Carriers.”
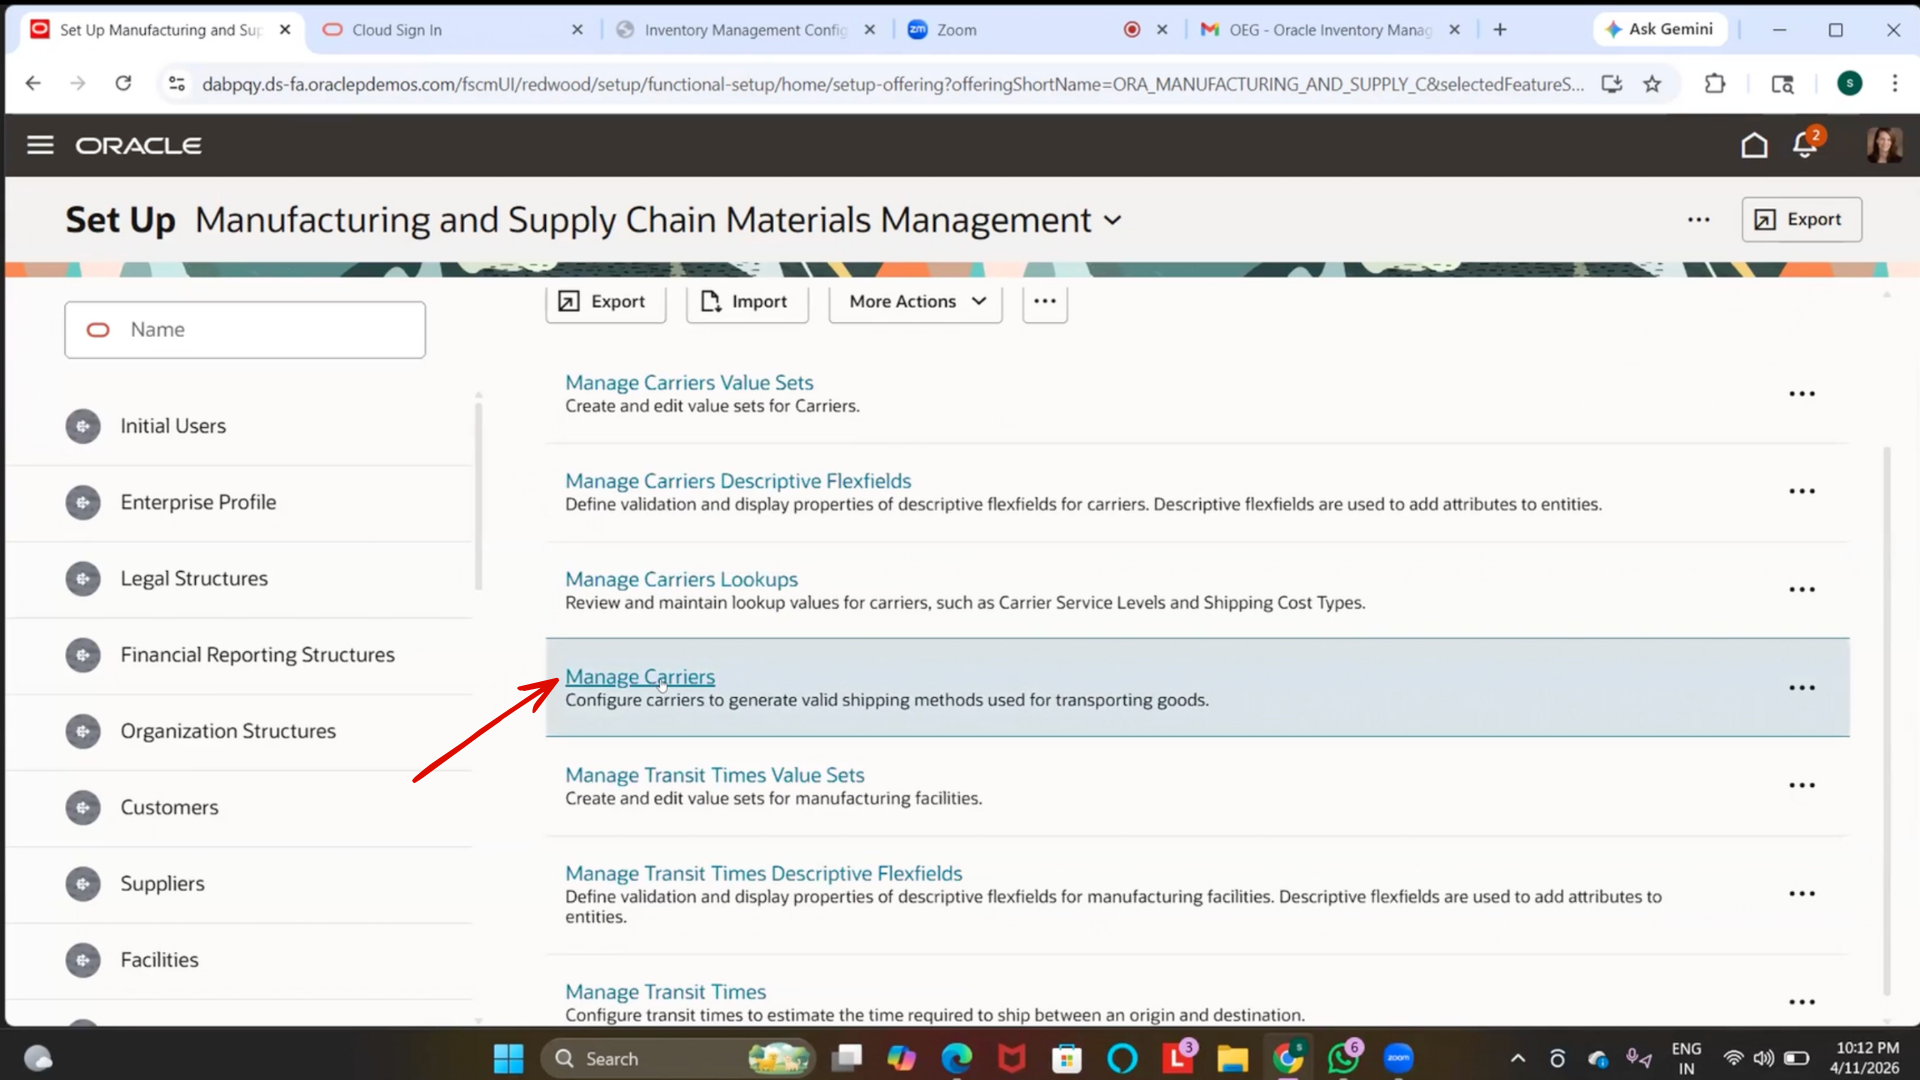
3. Click on “Create.”
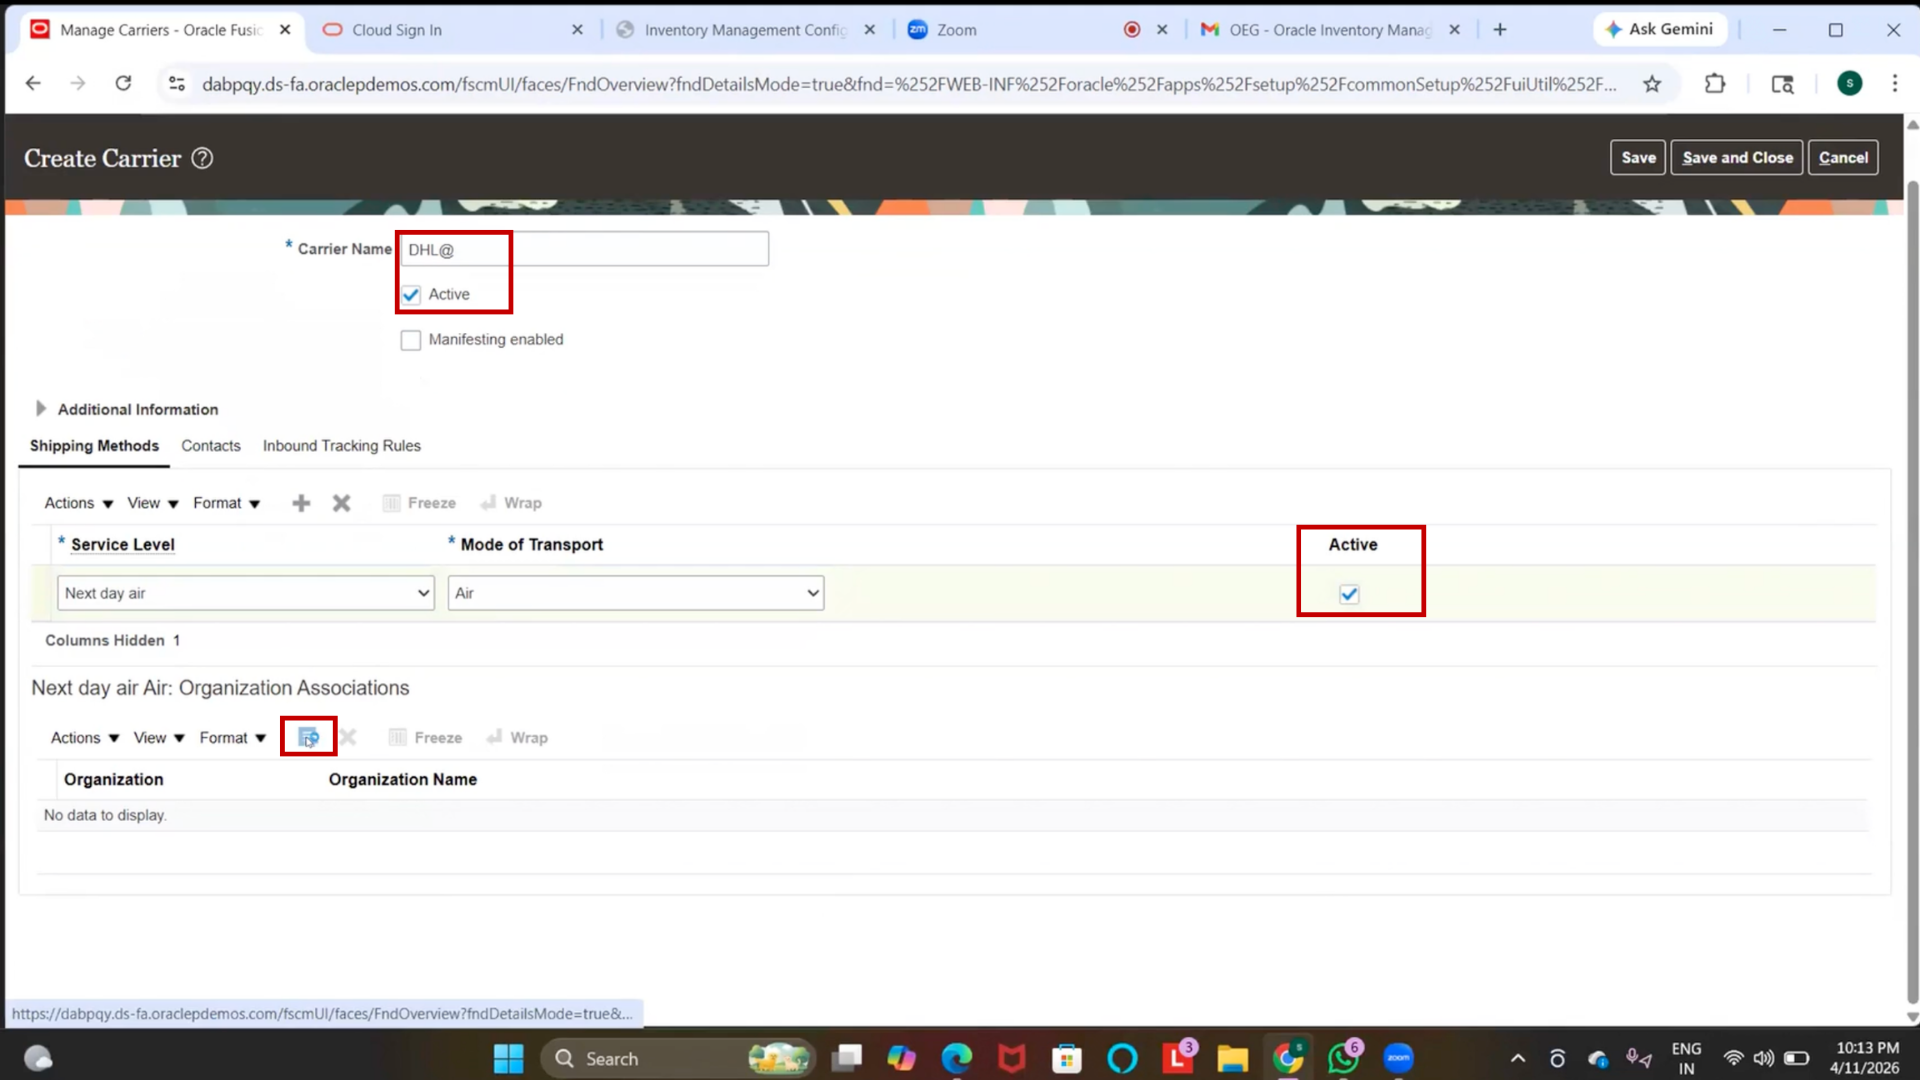
4. Enter details:
- Carrier Name: DHL (or any unique name)
- Service Level: Next Day Air
- Mode of Transport: Air
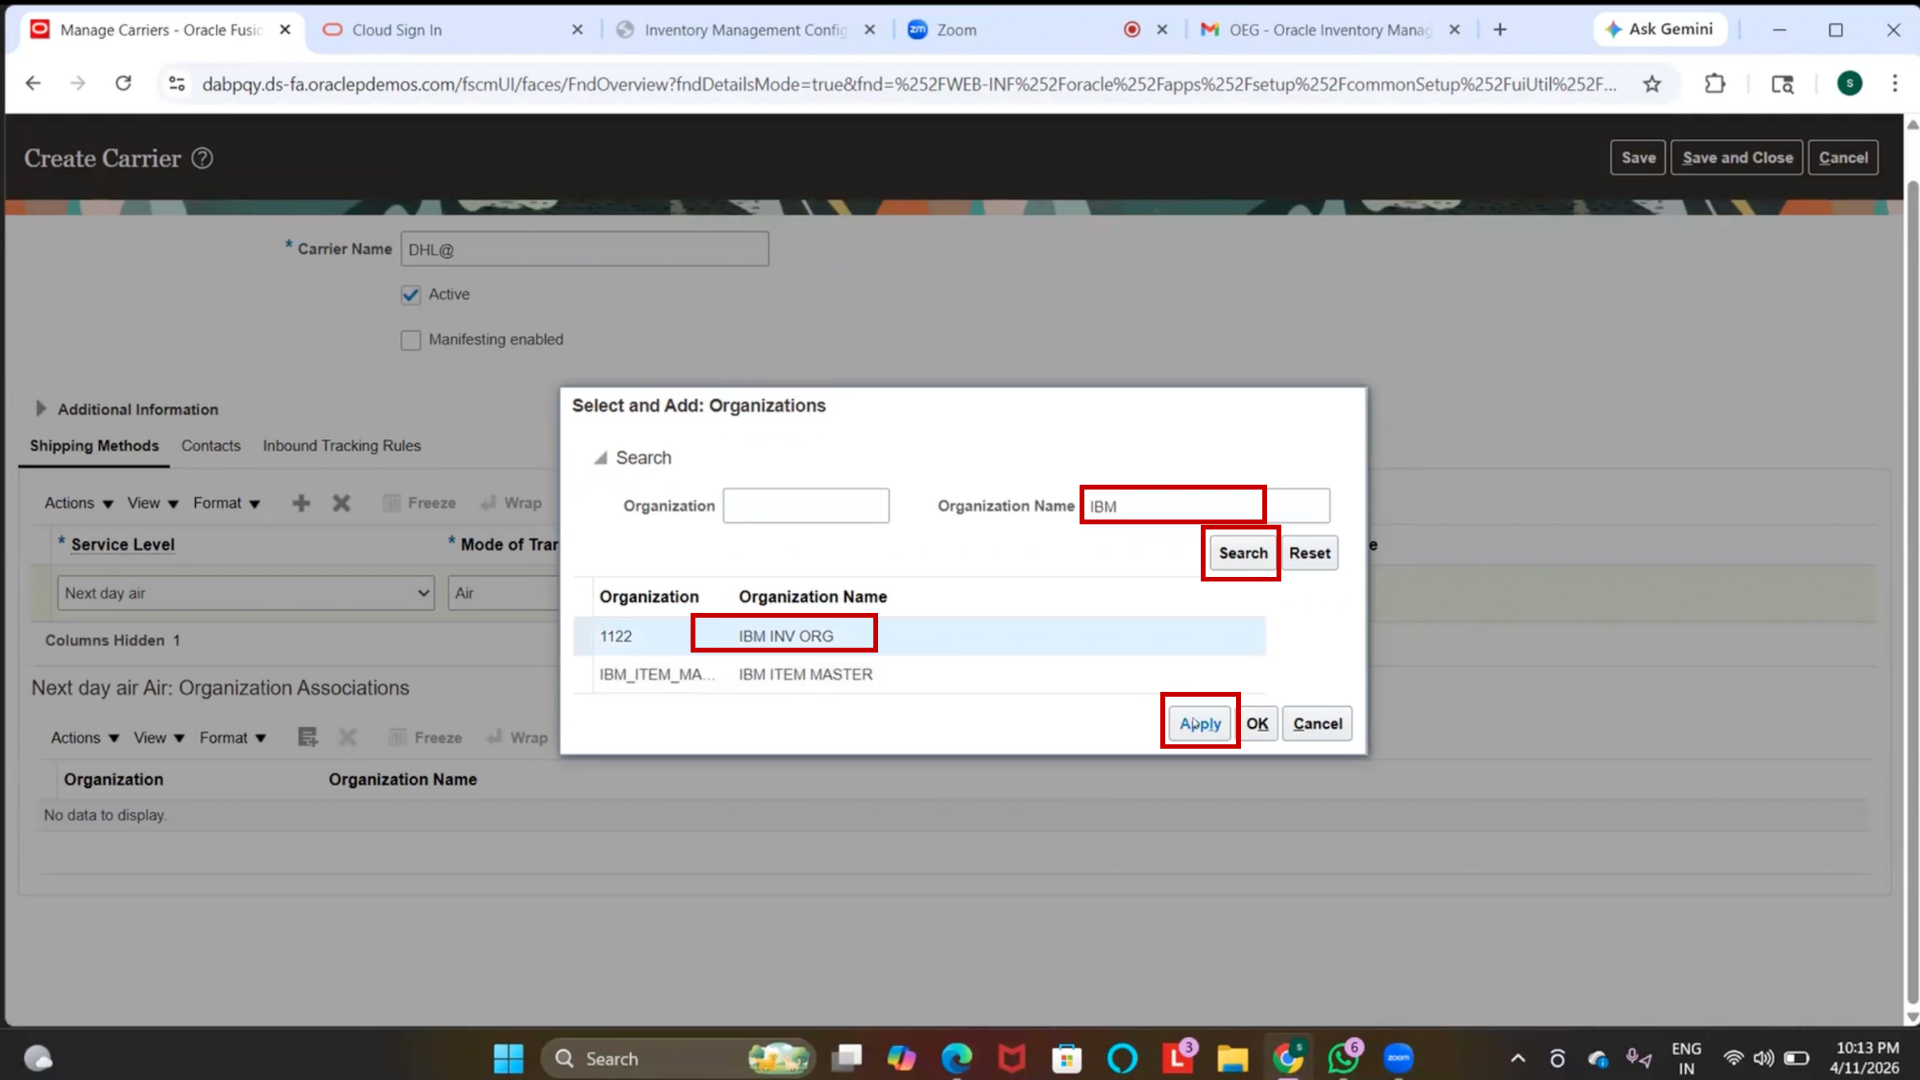
5. Go to Organization Associations
6. Assign the carrier to the required inventory organization.
7. Define the organization name IBM and Click on Search
8. Click on Apply
9. Click Save and Close
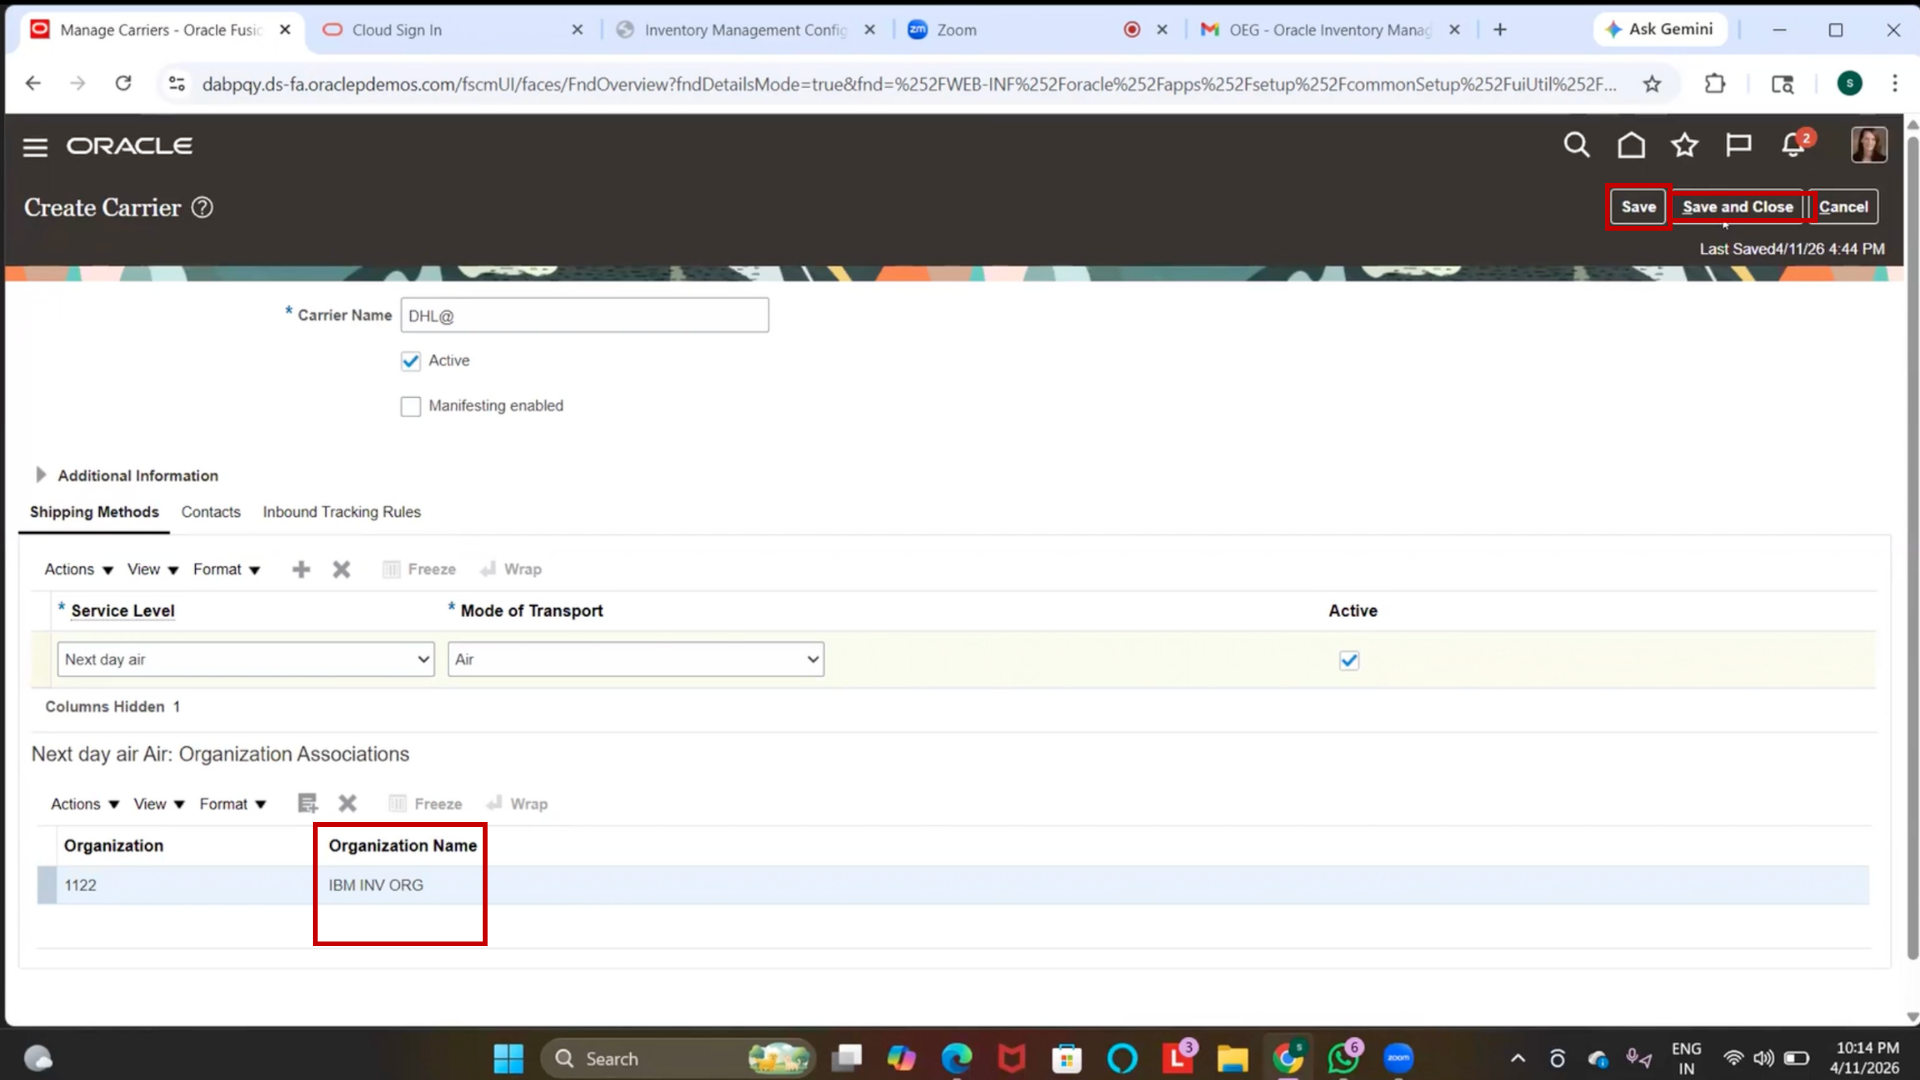
10. Click on “Done.”
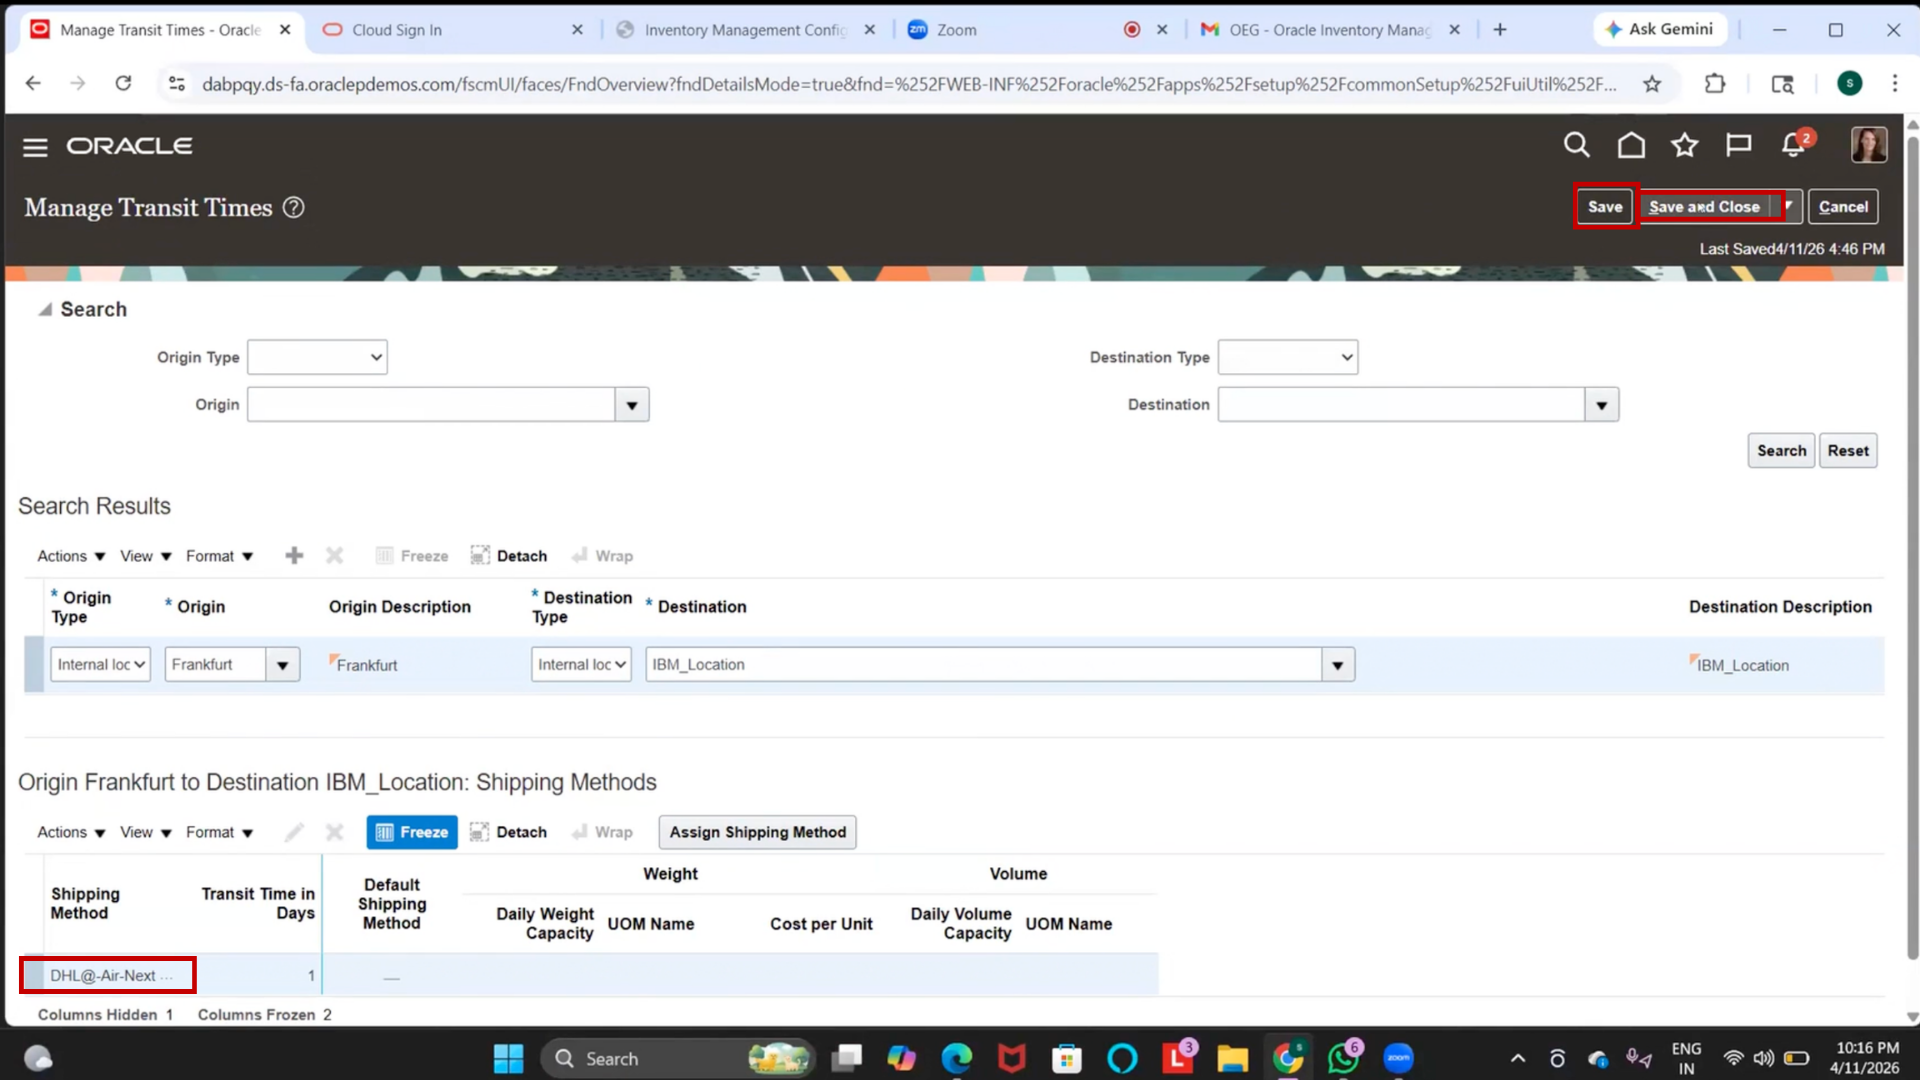
Step 104: Create Transit Time
1. Navigate to Manage Transit Times
2. Click on + (Create)
3. Enter the following details:
4. Origin Type: Internal Location
5. Origin Location: (e.g., Frankfurt)
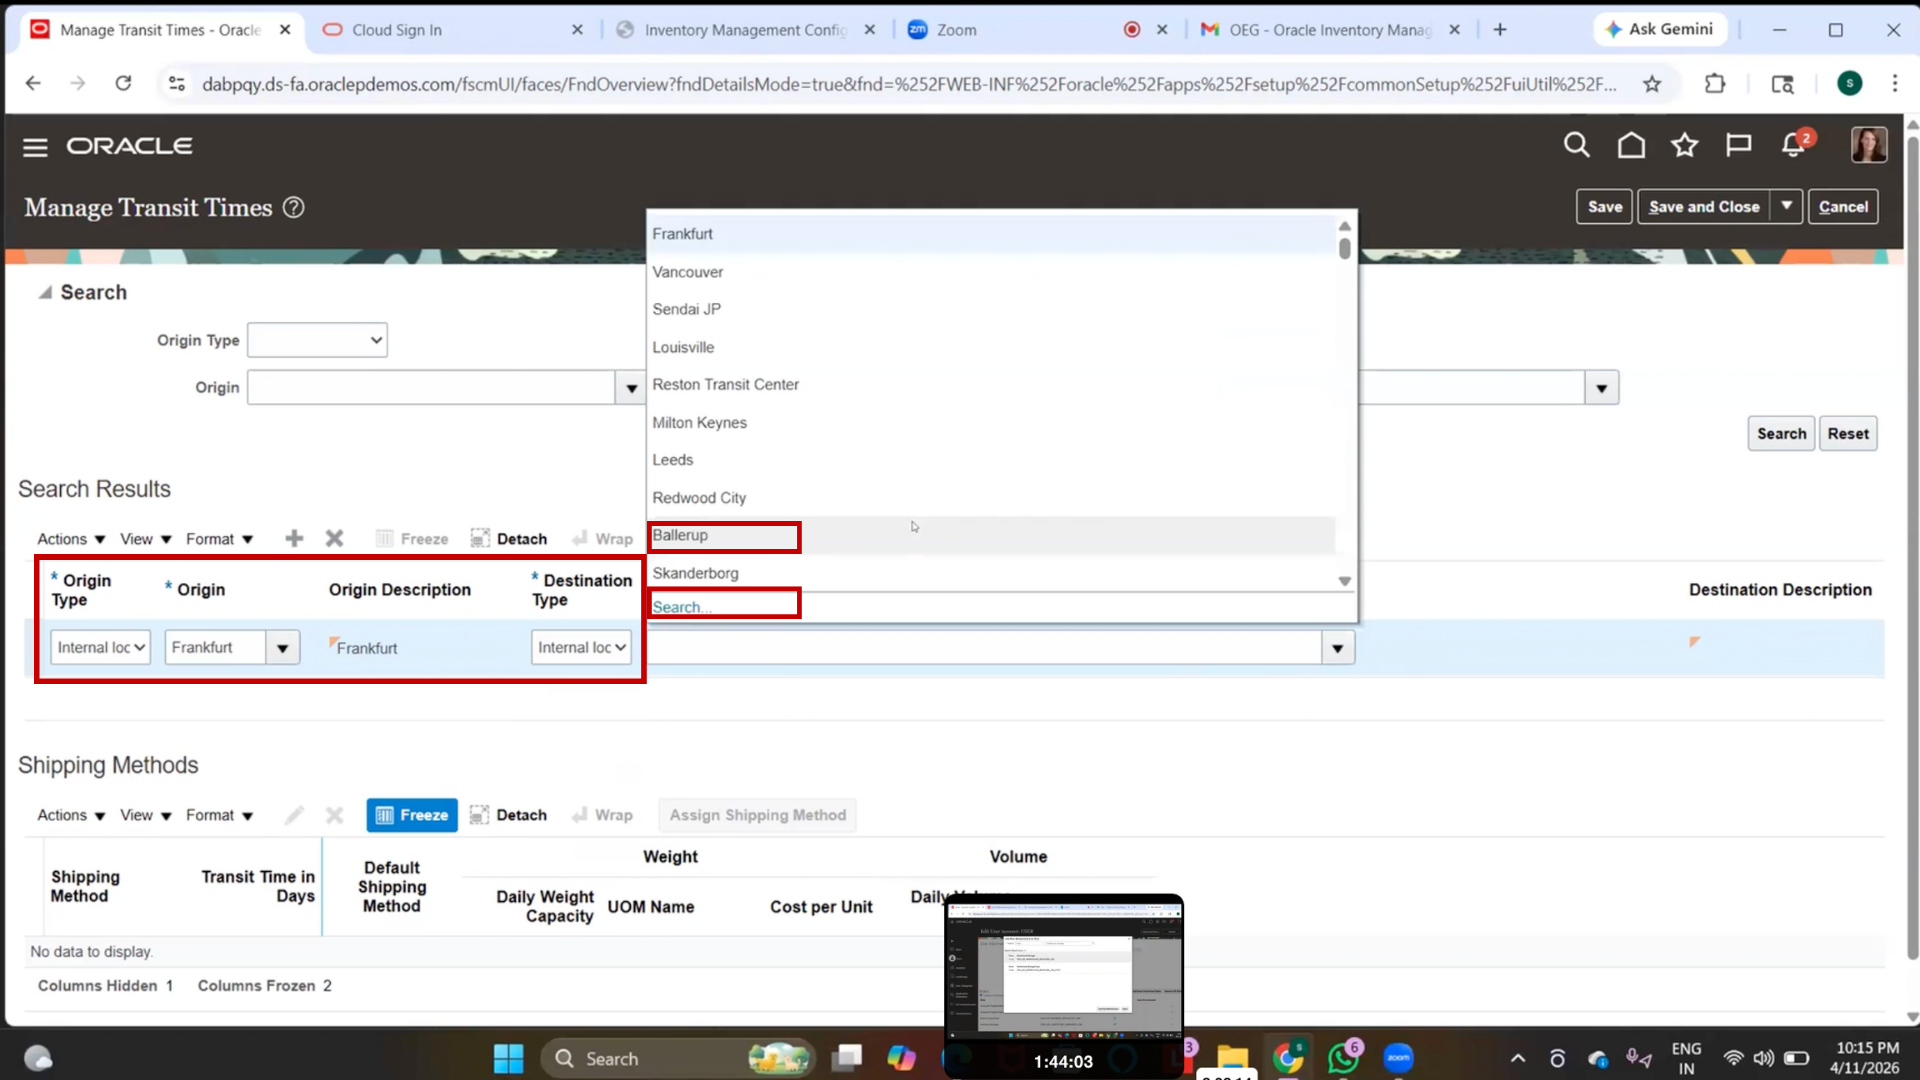
6. Destination Location: (e.g., IBM Location)
7. Select Shipping Method (Carrier created earlier)
8. Enter:
- Transit Time: 1 Day
9. Click Save
10. Click Ok
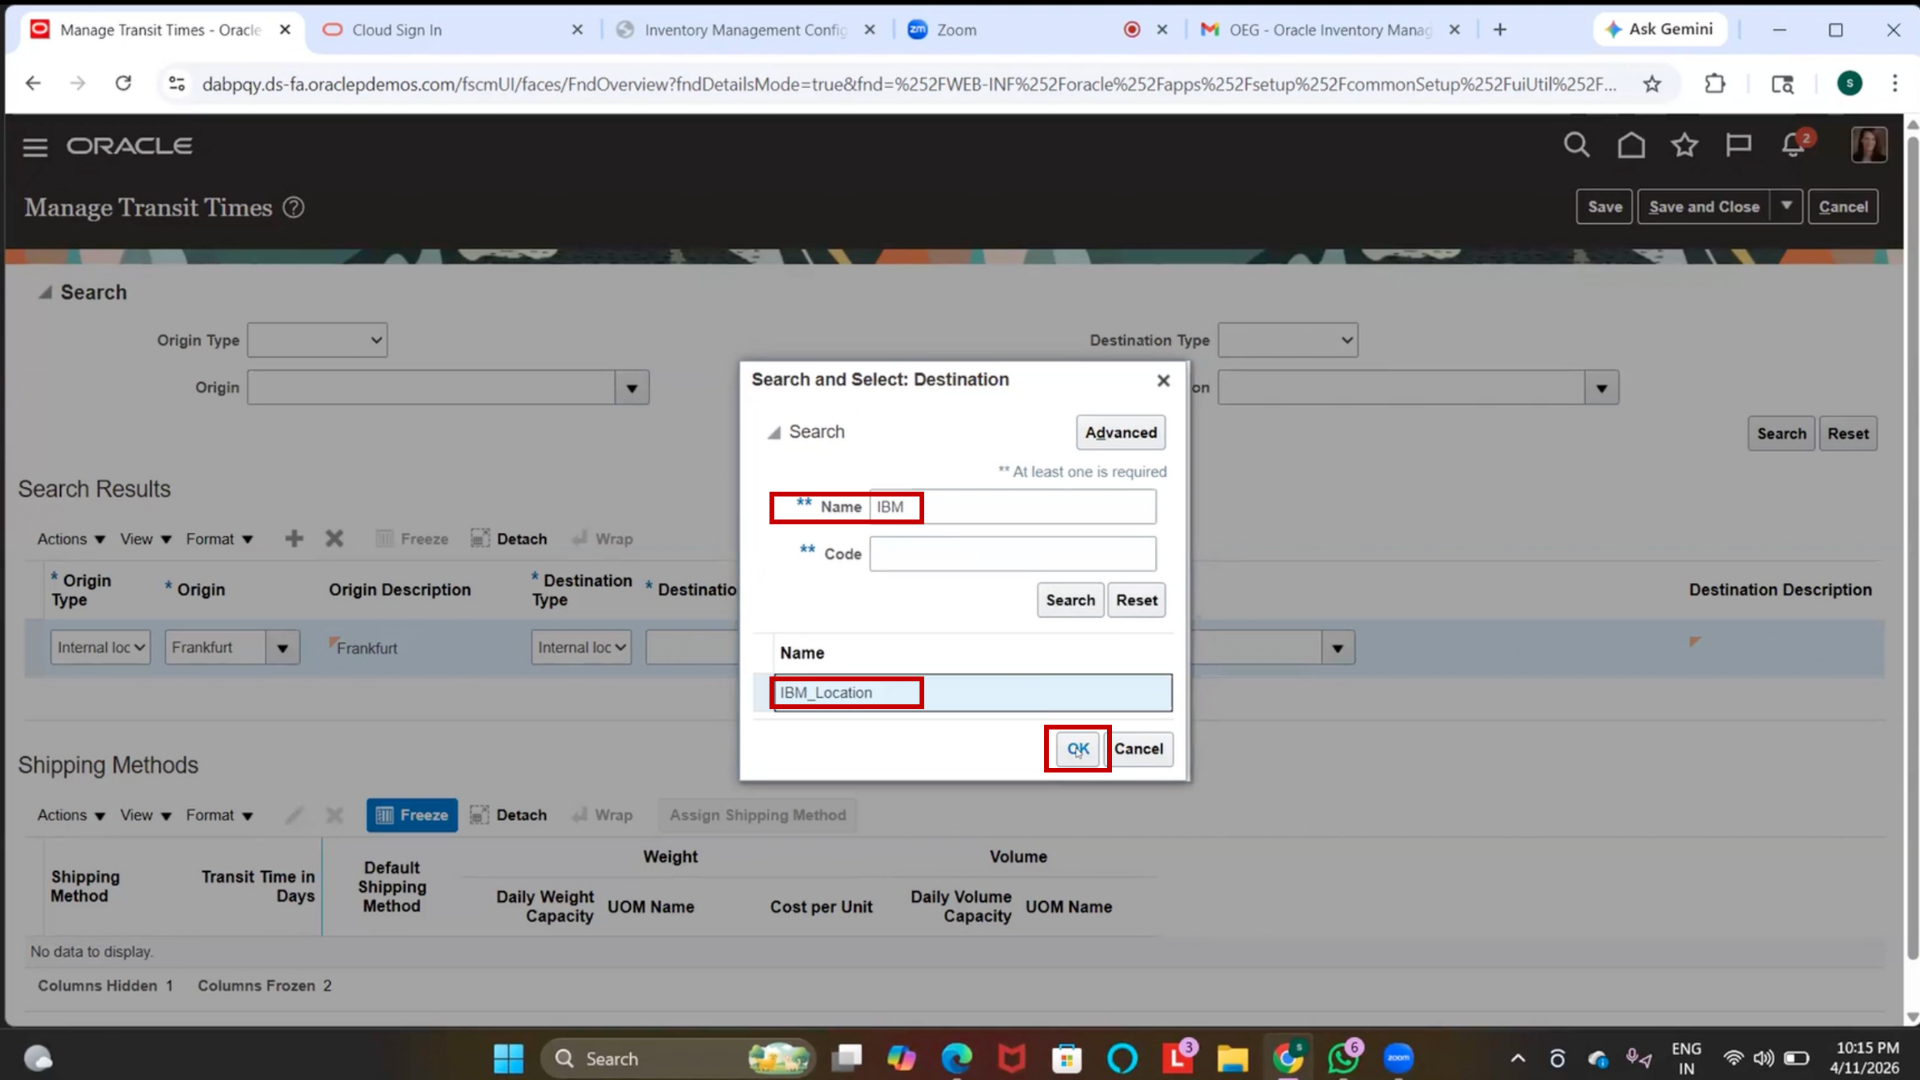
11. Click Save, Save and Close
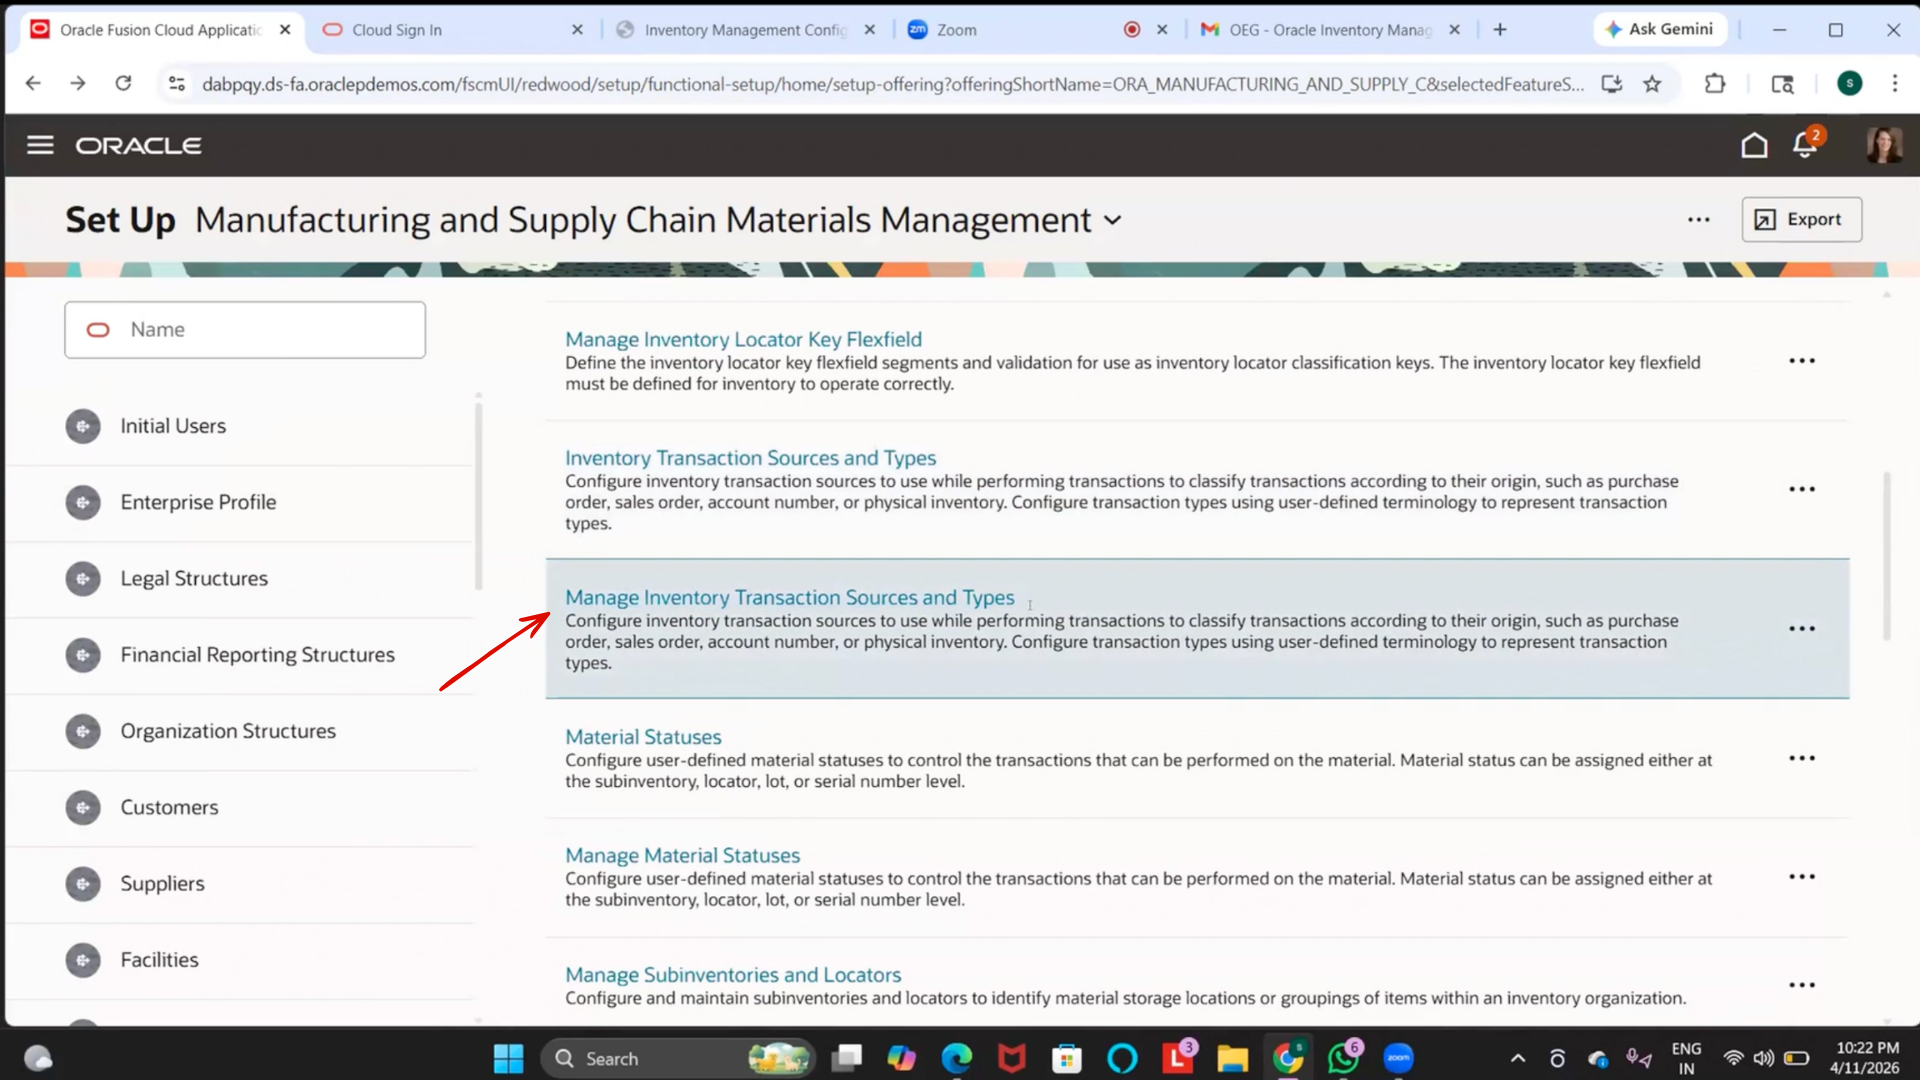
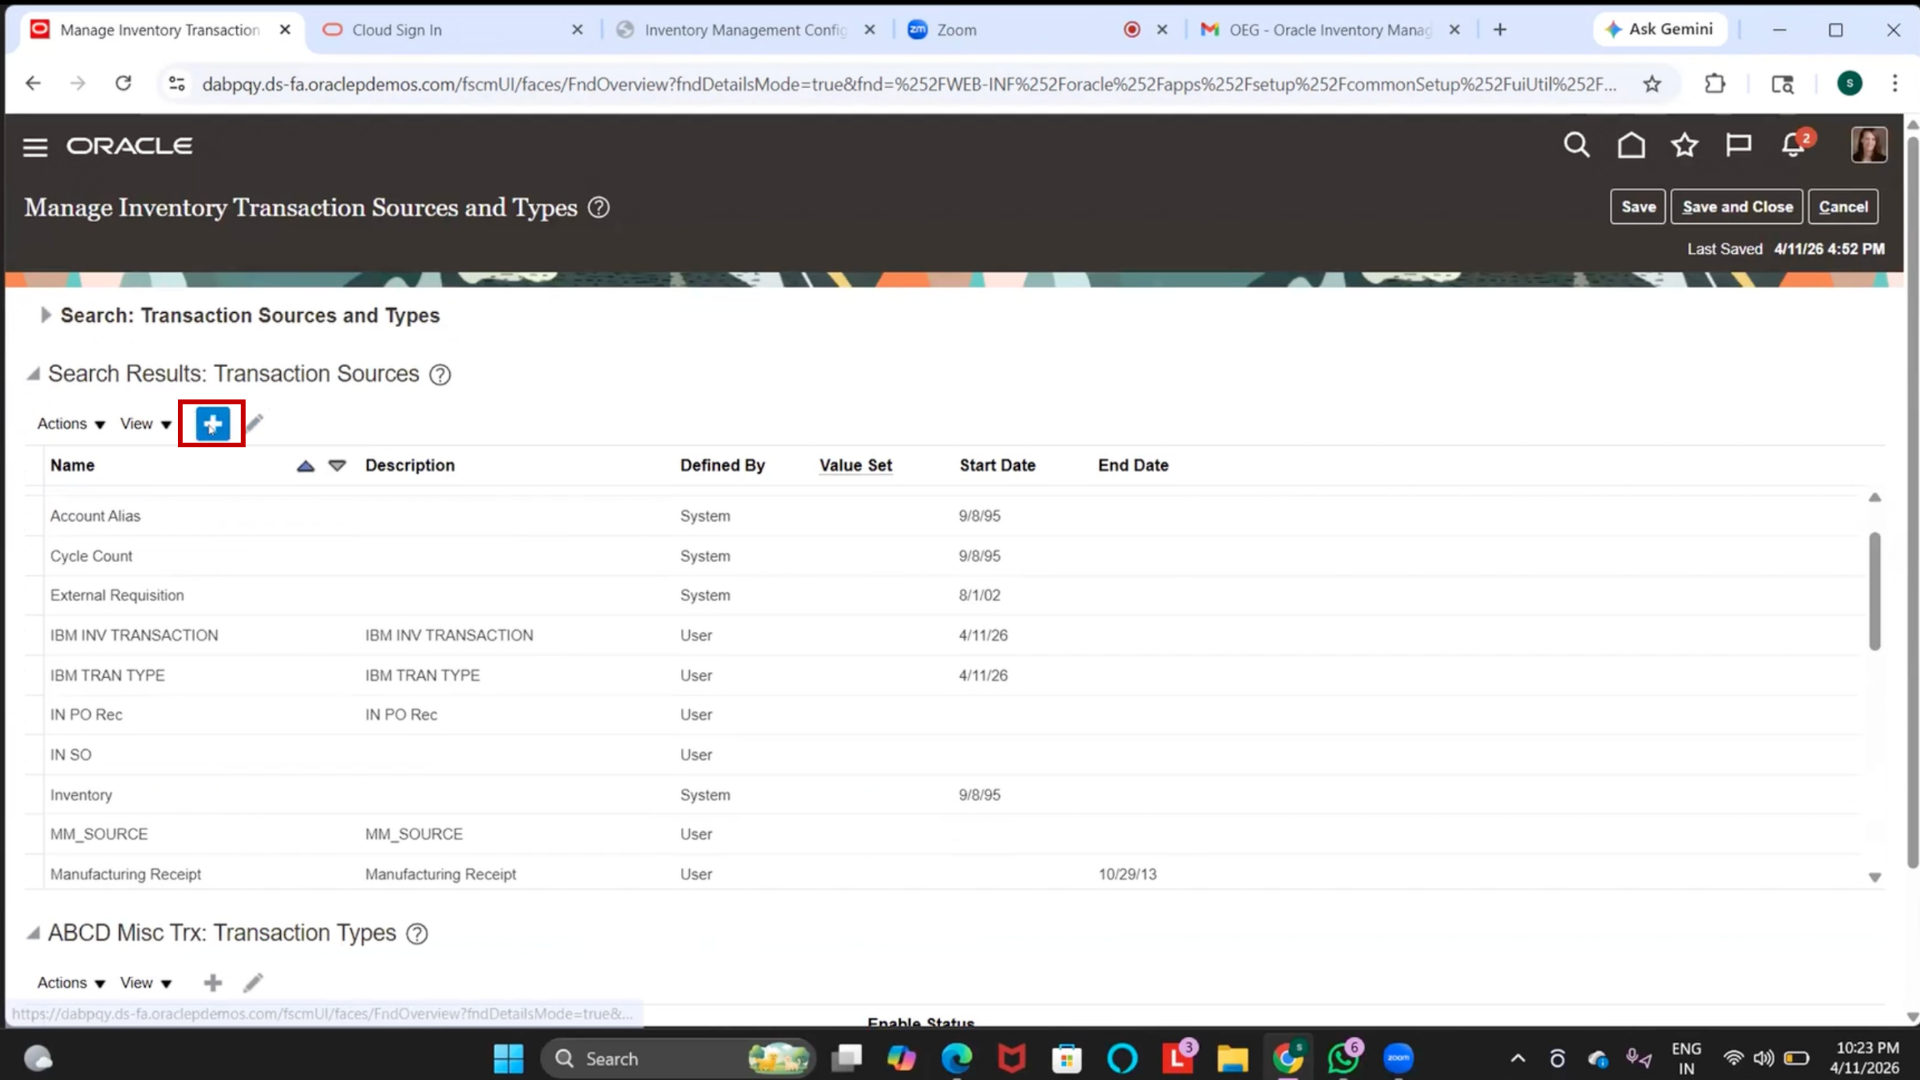
Step 105: Create Inventory Transaction Source
1. Navigate to Setup and Maintenance
2. Search for Manage Inventory Transaction Sources and Types
3. Open the setup (Redwood UI may open by default)
4. Click on “Create” under “Transaction Sources.”
5. Enter the following details:
- Name: IBM Inventory Transaction
- Description: IBM Inventory Transaction
- Start Date: Current Date
6. Click on Create / Save
Note:
- Transaction Source defines the origin of a transaction (business-specific classification)
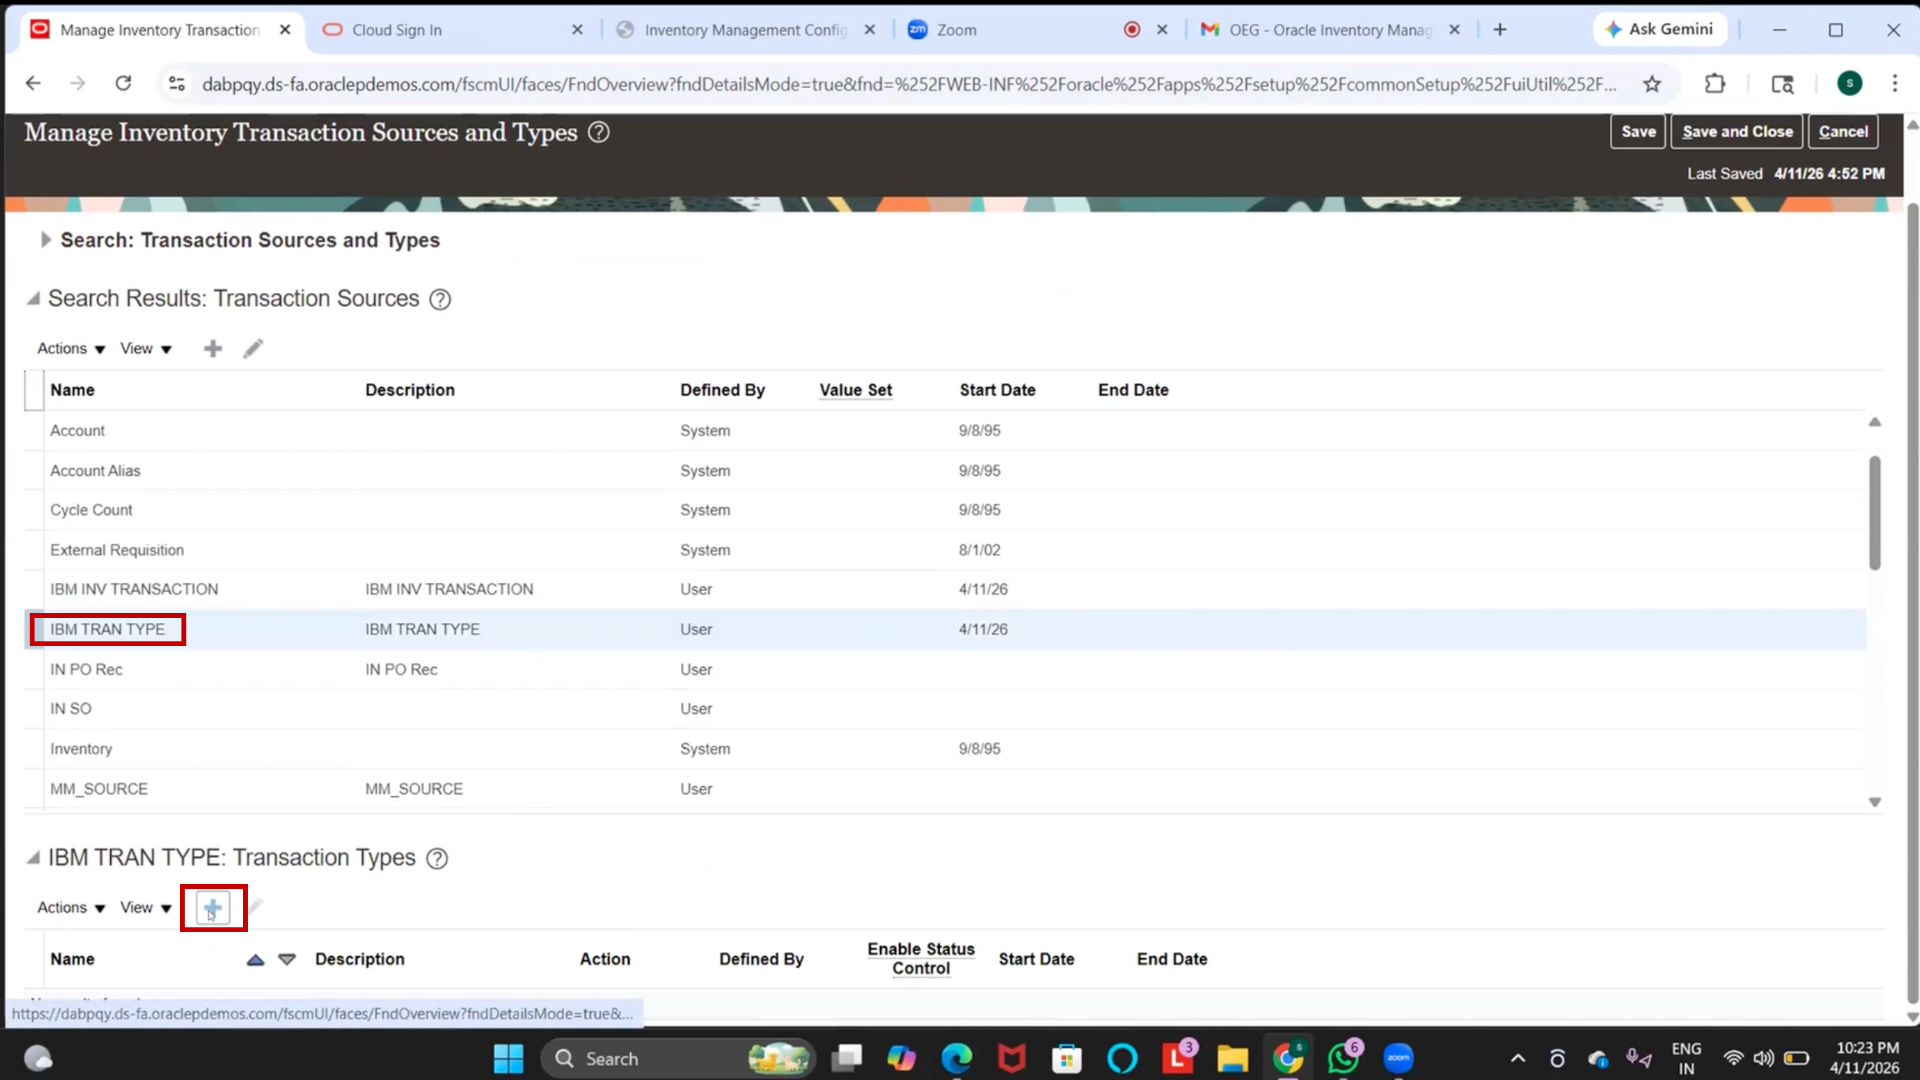
Step 106: Create Inventory Transaction Type (Classic UI)
1. Navigate to Manage Inventory Transaction Sources and Types
2. Click on (+)
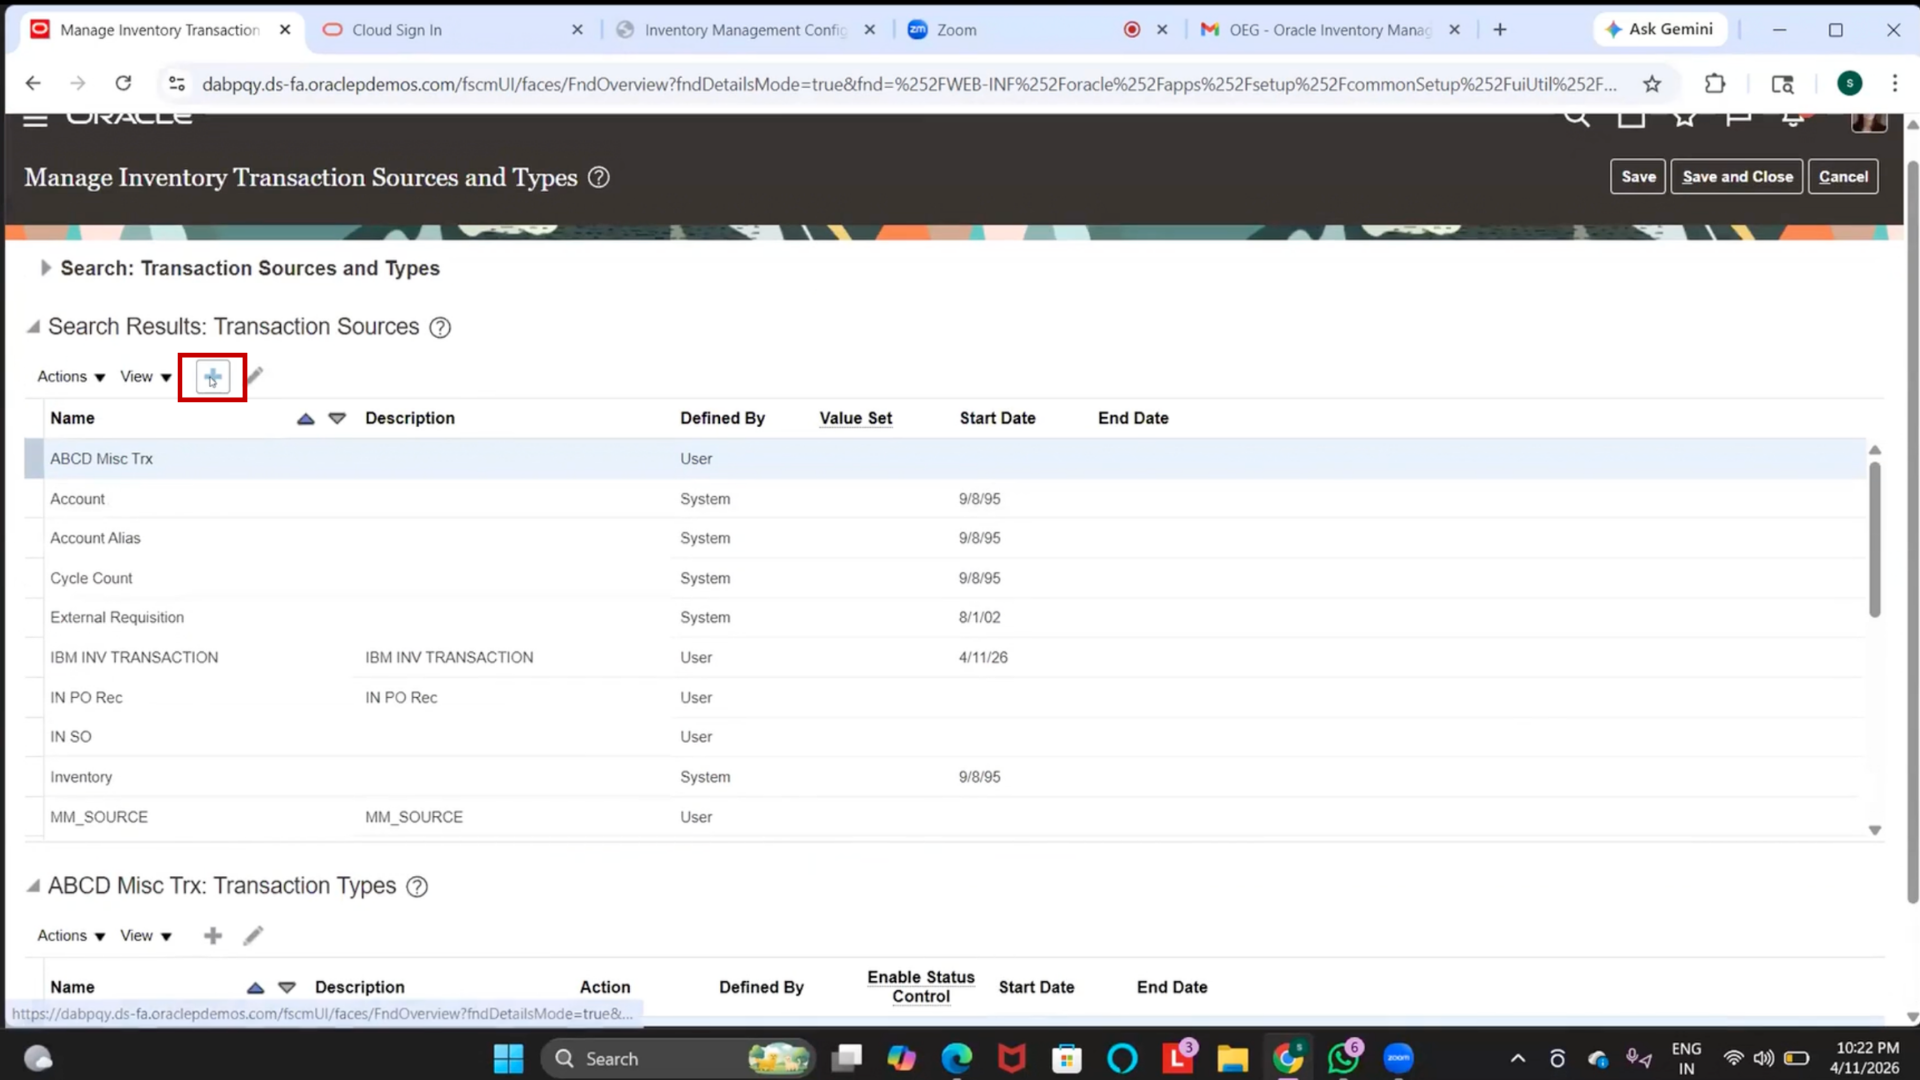
3. Switch to Classic UI (if not visible in Redwood)
4. Select the created transaction source.
5. Click on “Create Transaction Type.”
6. Enter details:
- Name: IBM Transaction Type
- Description: IBM Transaction Type
- Start Date: Current Date
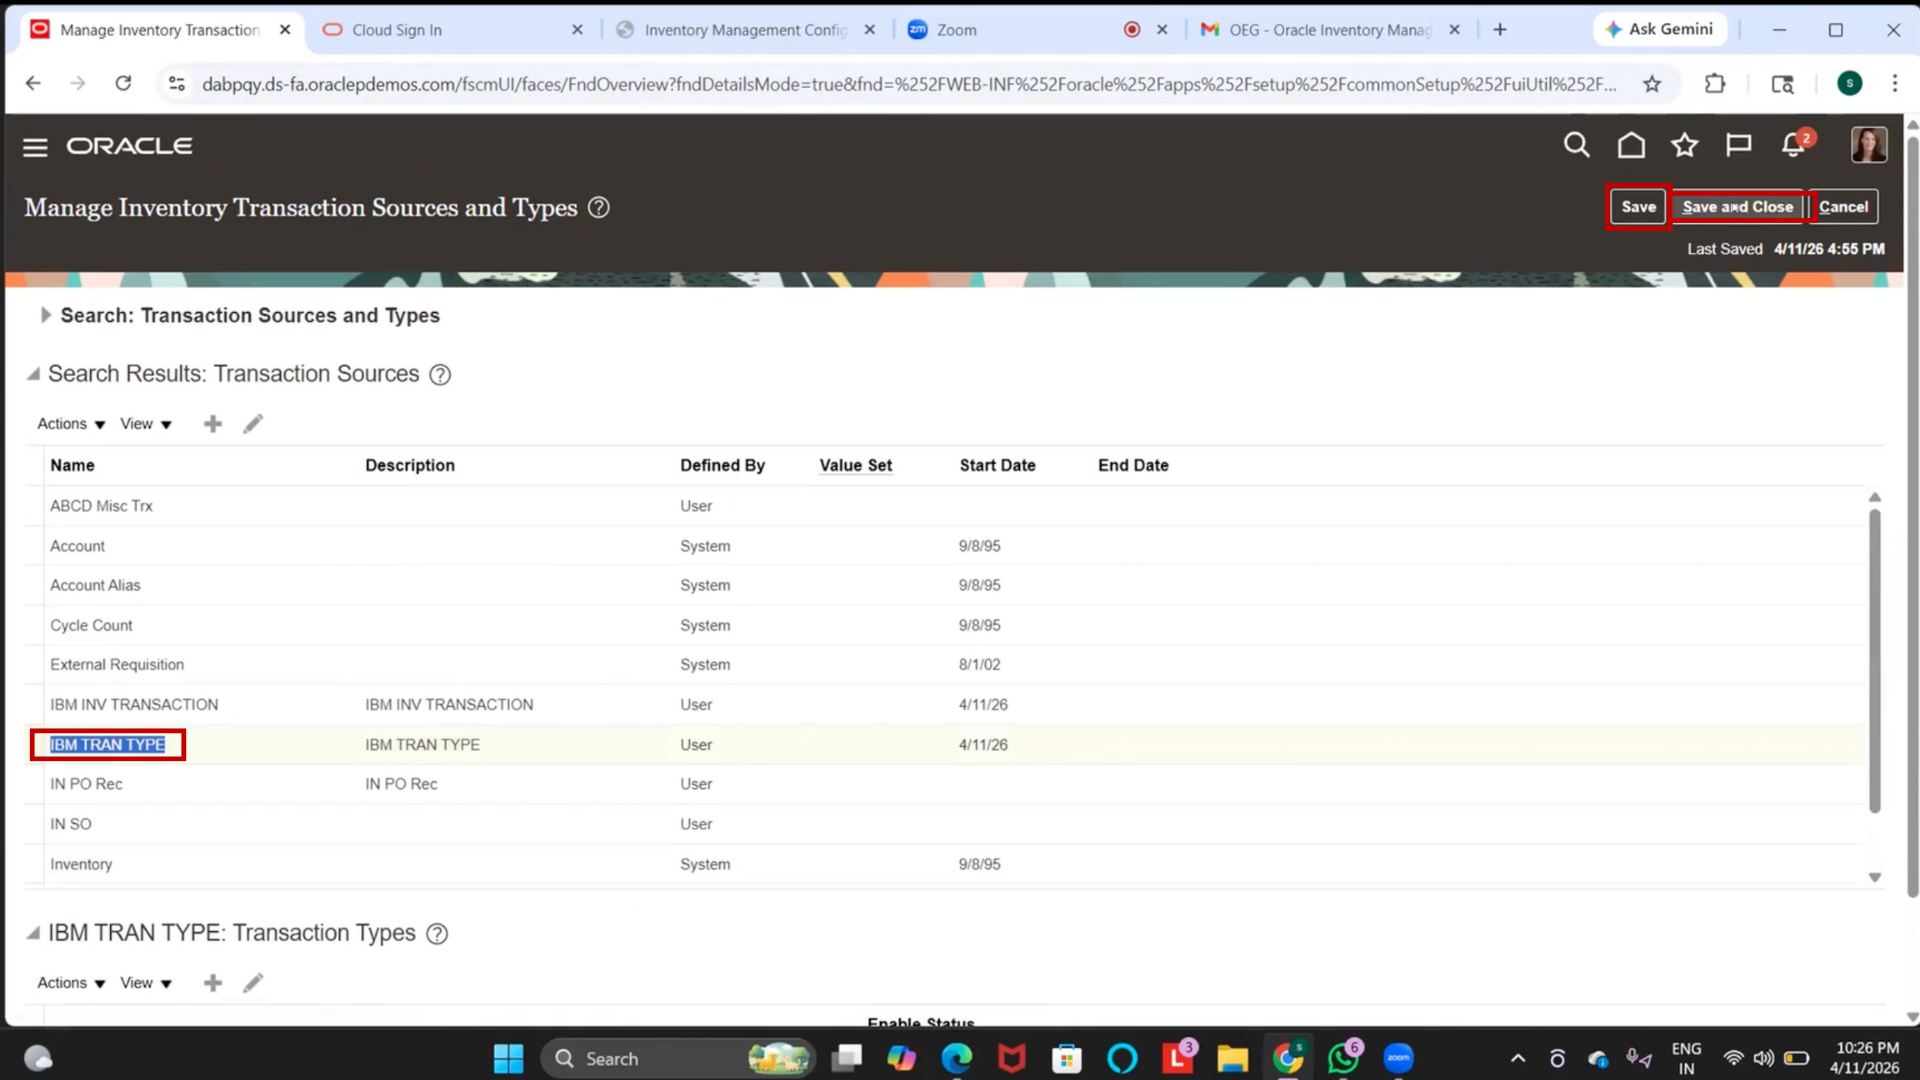
7. Click Save and Close
Step 107: Create Issue Transaction Type
1. Under the same setup, click on Create
2. Select Transaction Action:
- Issue from Stores
3. Enter details:
- Name: IBM Issue
- Description: IBM Issue
- Start Date: Current Date
4. Click Save and Close
Step 108: Create Receipt Transaction Type
1. Click on “Create” again.
2. Select Transaction Action:
- Receipt into Stores
3. Enter details:
- Name: IBM Receipt
- Description: IBM Receipt
- Start Date: Current Date
4. Click Save and Close
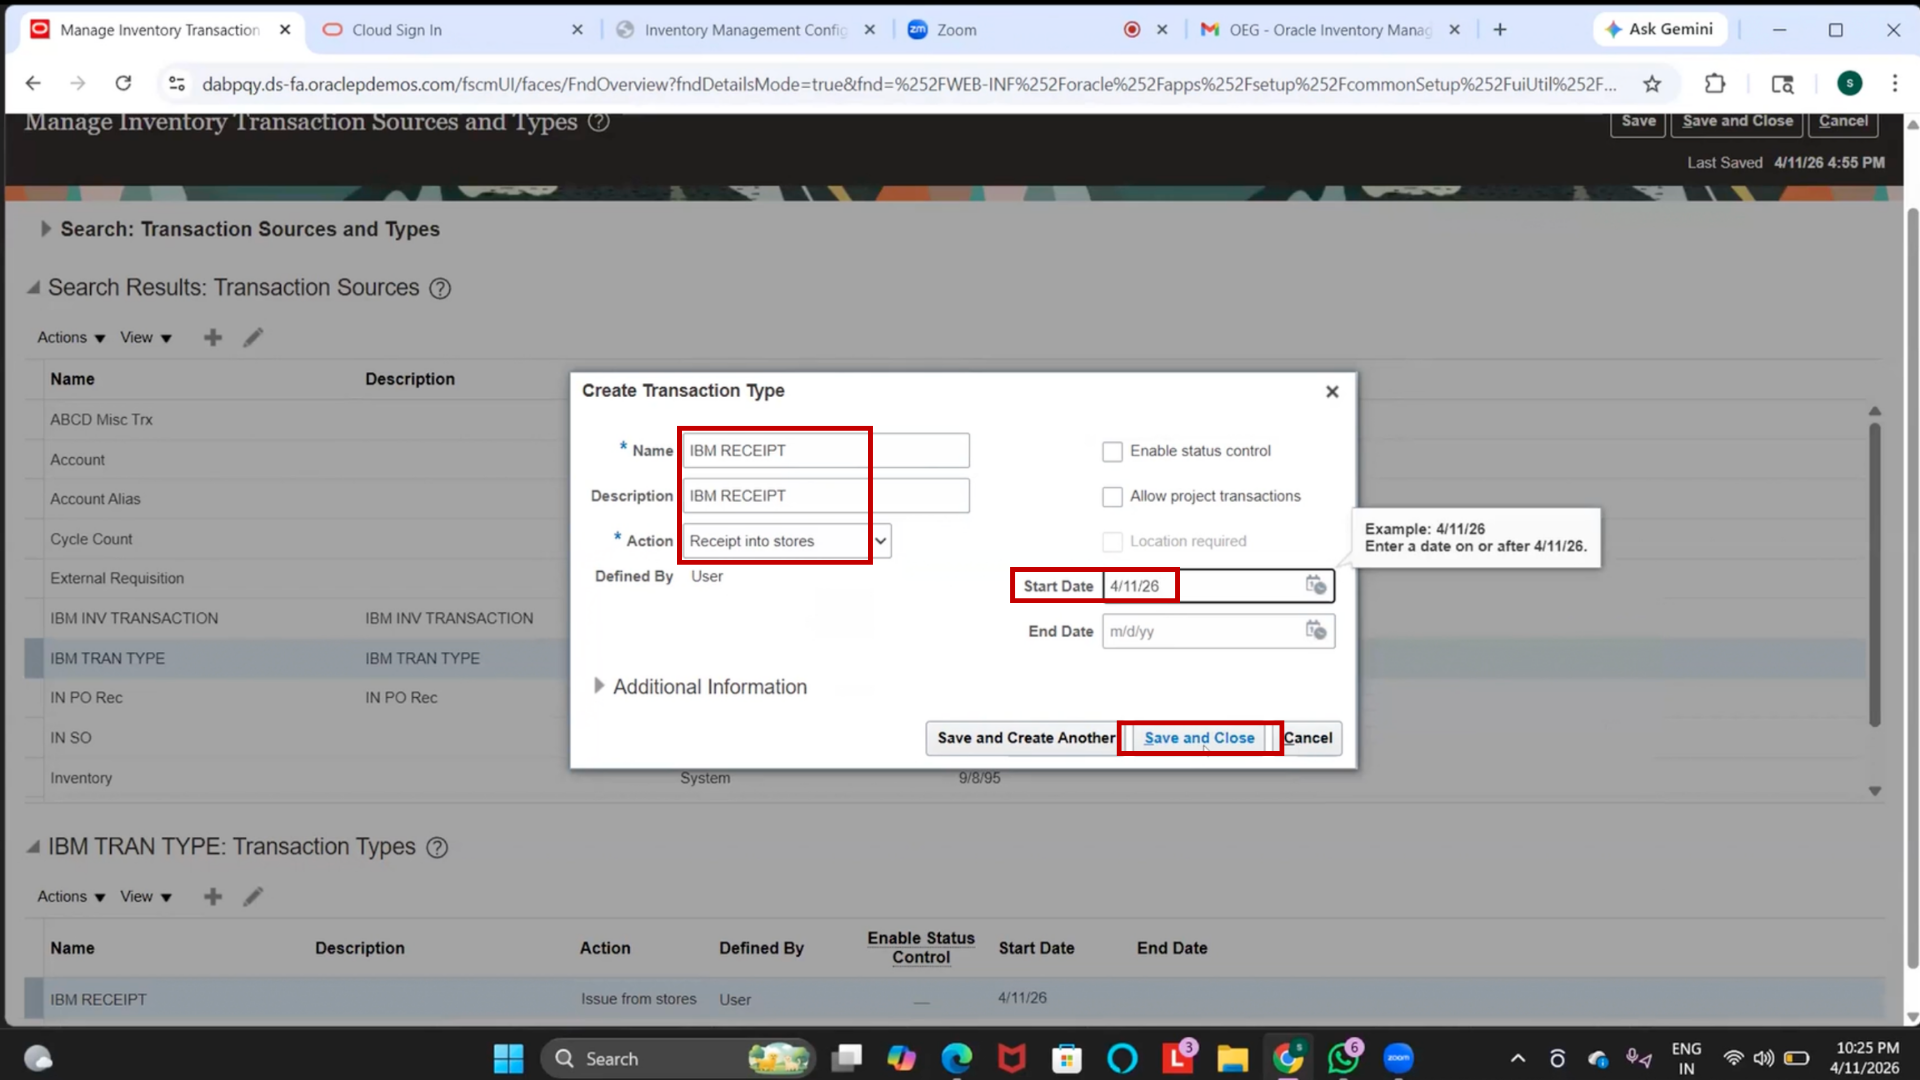
5. Check it has been created
6. Click Save and Save and Close

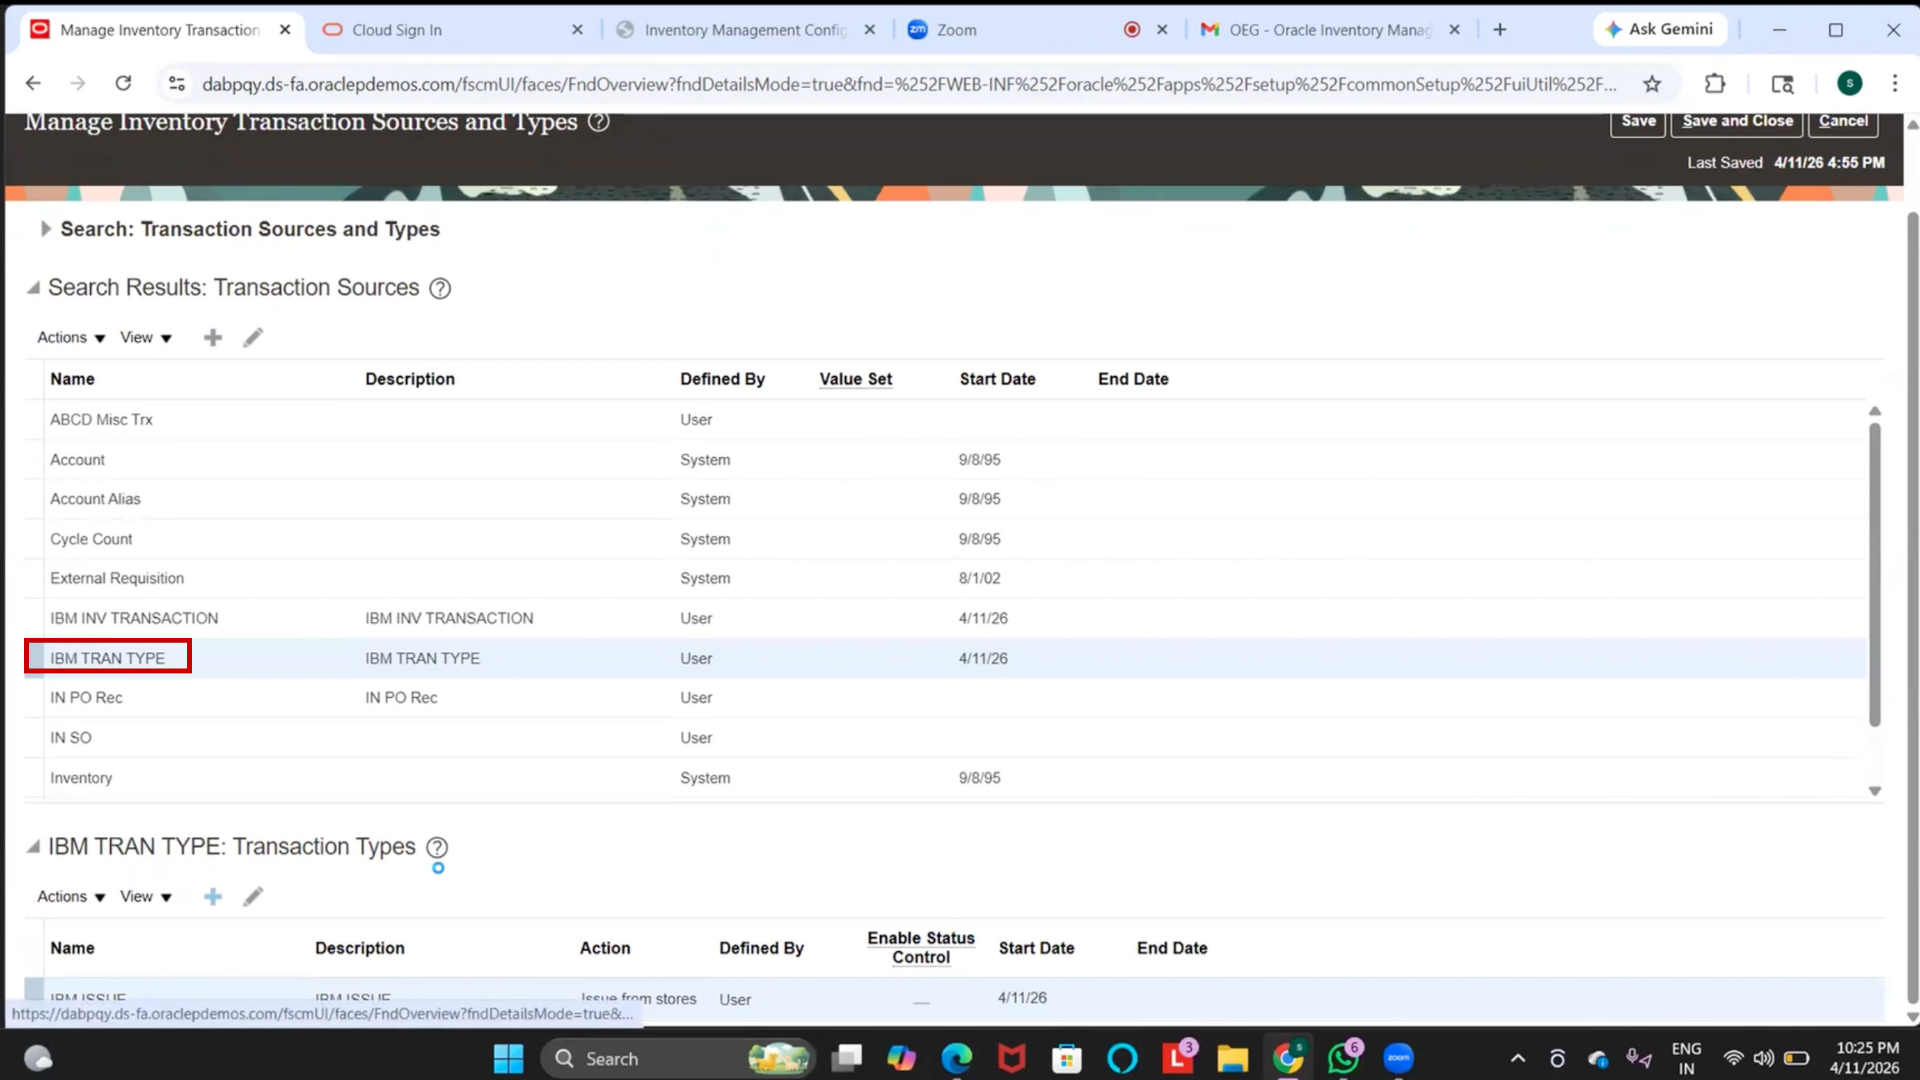
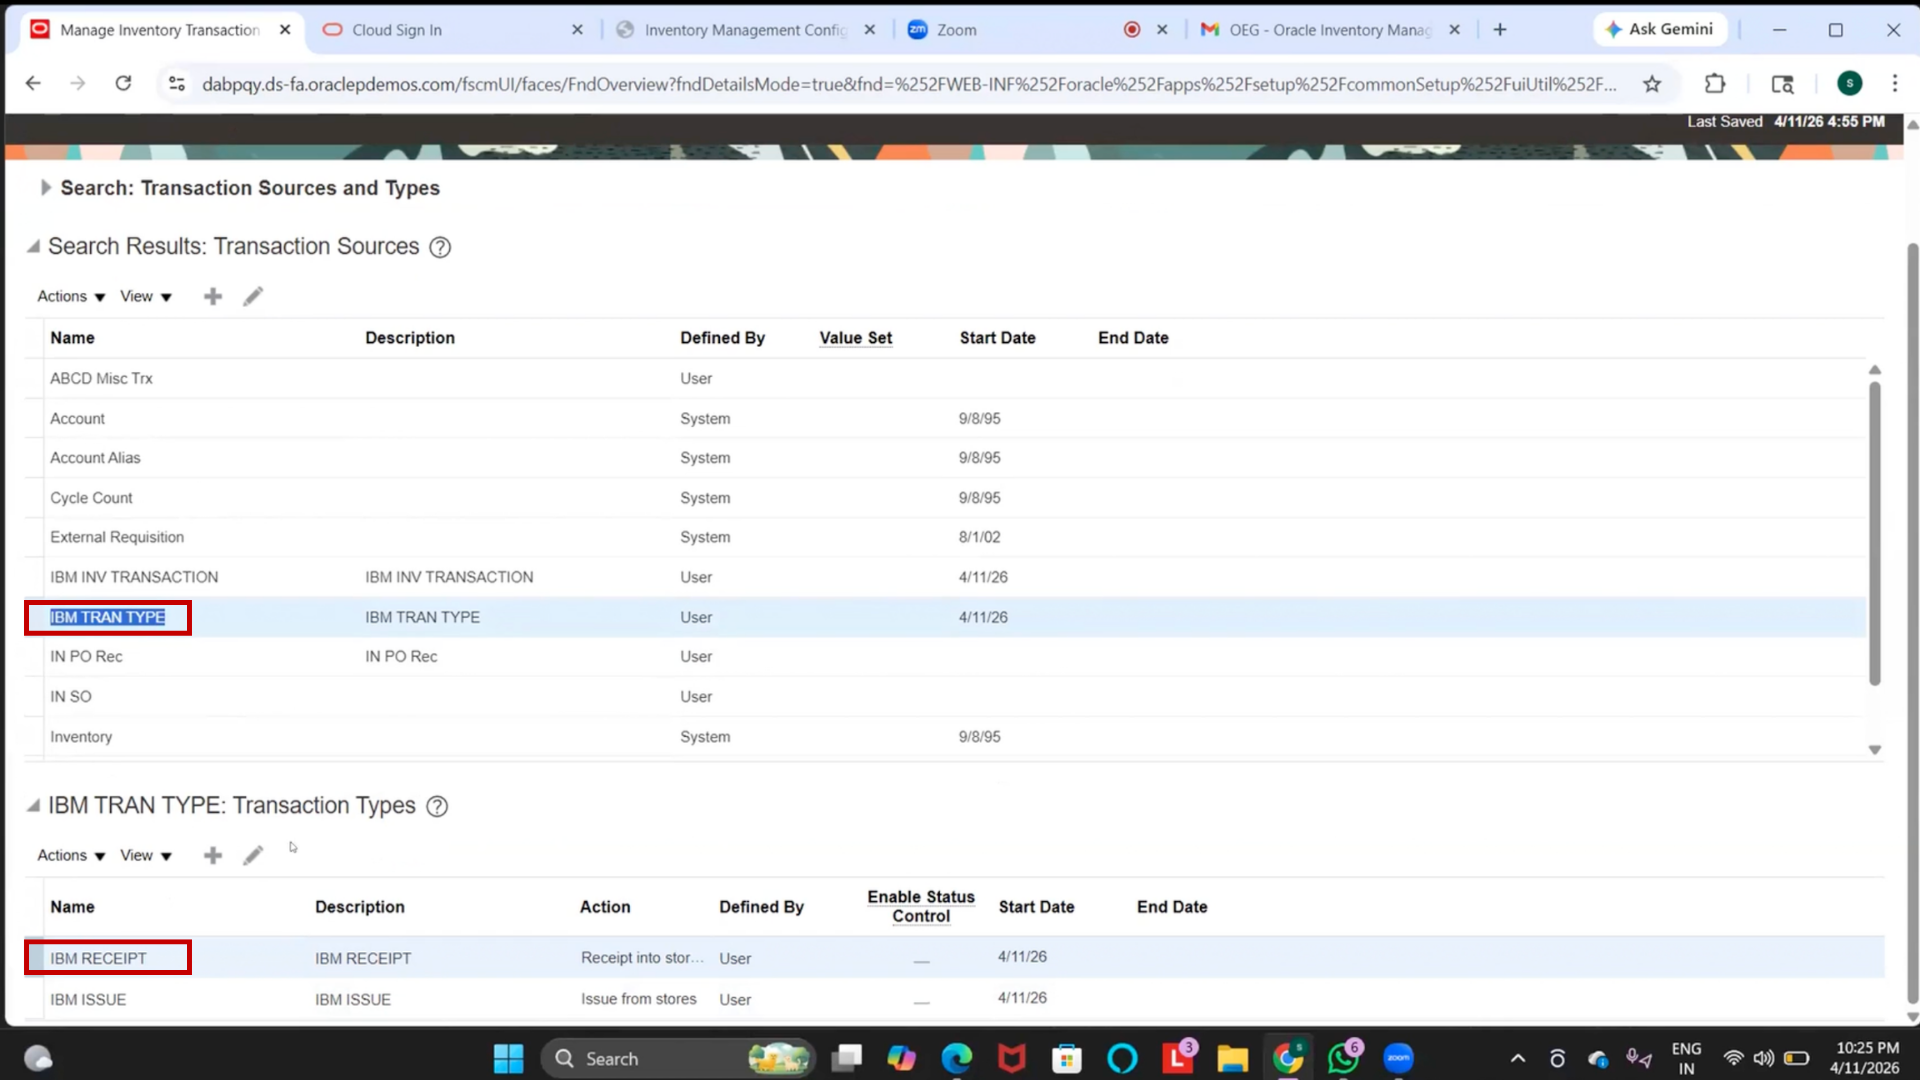
Step 109: Access Manage Inventory Transaction Sources and Types
1. Navigate to Setup and Maintenance
2. Search for Manage Inventory Transaction Sources and Types
3. Click on the setup to open it
4. System may redirect to Redwood or Classic UI depending on the configuration.
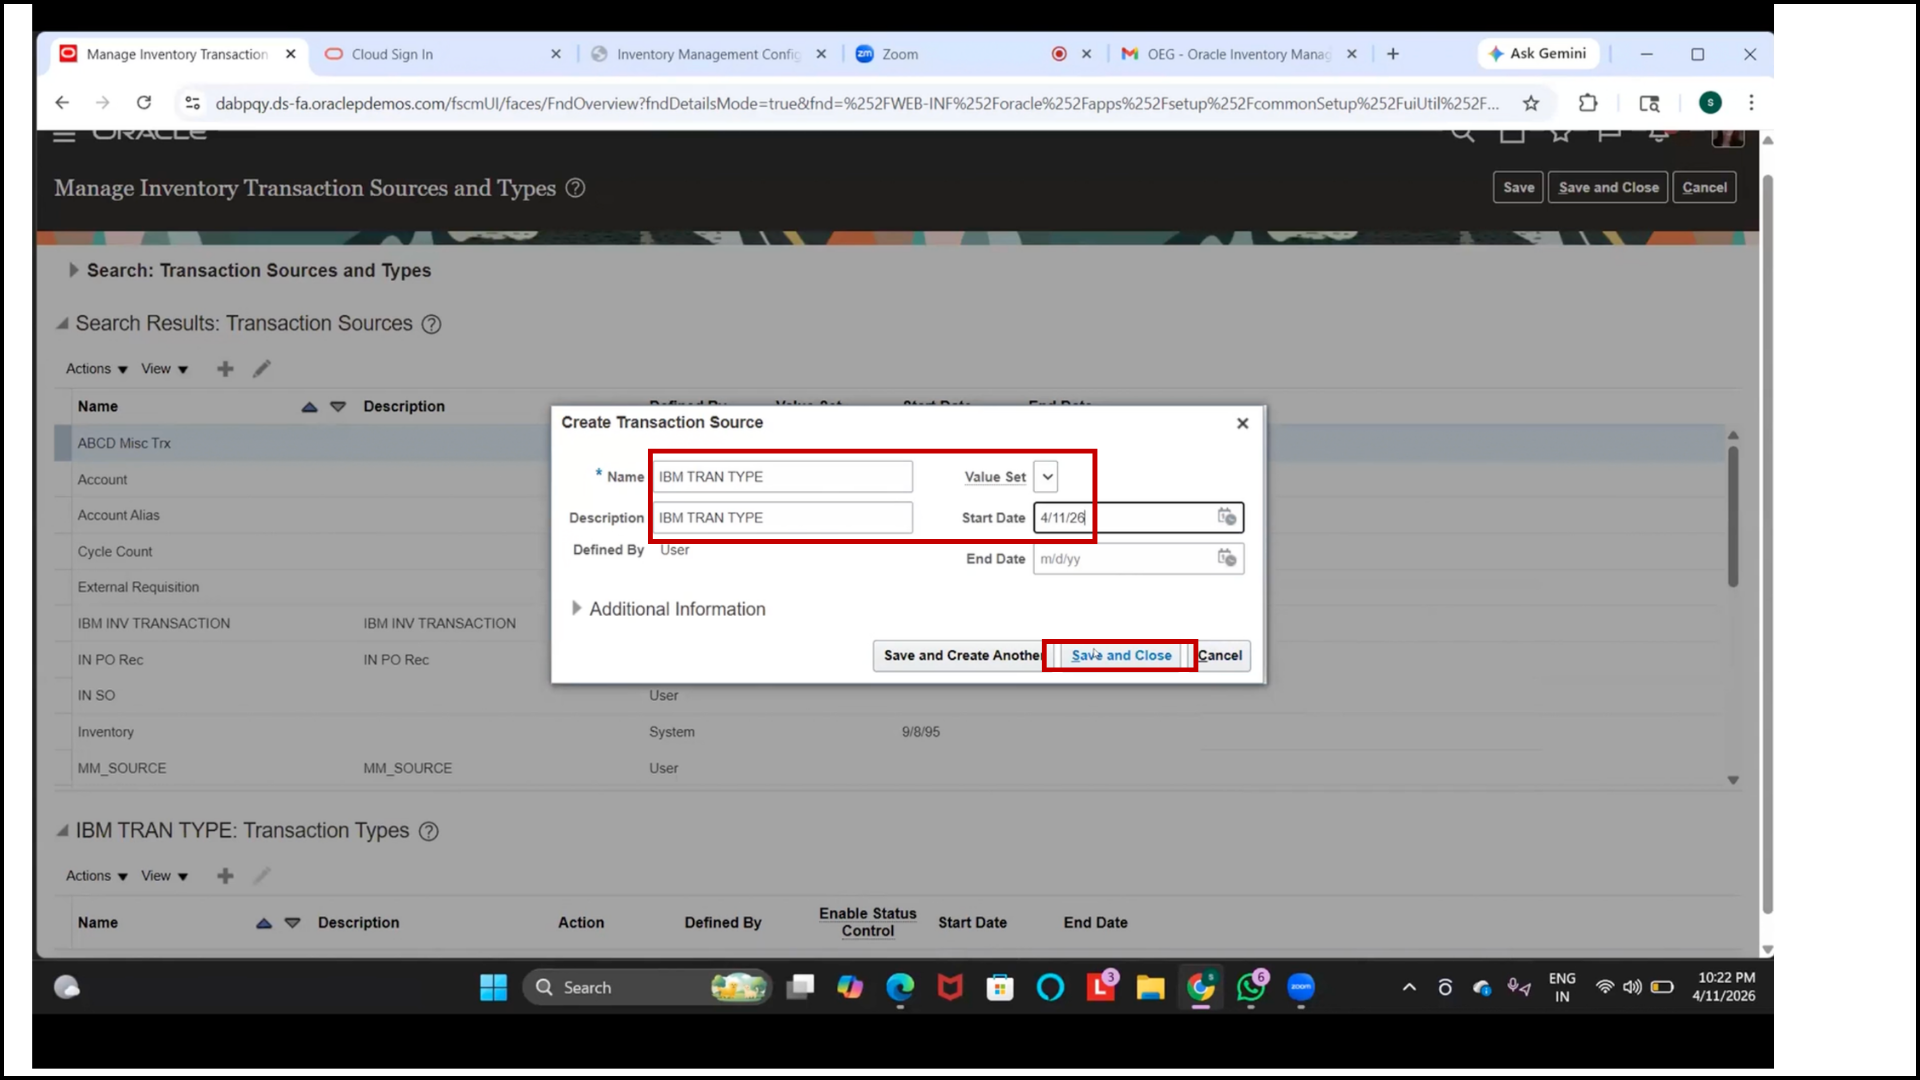
Step 110: Create Inventory Transaction Source (If Not Created)
1. Click on “Create.”
2. Enter:
- Name: IBM Transaction Type
- Description: IBM Transaction Type
- Start Date: Current date
3. Click on Save and Close
Step 111: Create Transaction Type – Issue from Stores
1. Select the created transaction source.
2. Click on “Create Transaction Type.”
3. Choose Transaction Action: Issue from Stores
4. Enter:
- Name: IBM Issue
- Description: IBM Issue
- Start Date: Current date
5. Click on Save and Close
Step 112: Create Transaction Type – Receipt into Stores
1. Click on “Create Transaction Type” again.
2. Choose Transaction Action: Receipt into Stores
3. Enter:
- Name: IBM Receipt
- Description: IBM Receipt
- Start Date: Current date
4. Click on Save and Close
Step 113: Verify Transaction Source and Types
1. Ensure the Transaction Source is created
2. Verify both transaction types are listed under it:
- IBM Issue
- IBM Receipt
Step 114: Understand Transaction Types Usage
1. Receipt Transactions → Used to receive items into inventory
2. Issue Transactions → Used to issue items out of inventory
3. Additional types (optional):
- Direct Organization Transfer
- Sub-inventory Transfer
- Miscellaneous Transactions
Step 115: Save Configuration
1. Click on “Save.”
2. Click on Save and Close
Step 116: Note on Default Transactions
1. System already provides default transactions like
- Miscellaneous Receipt
- Miscellaneous Issue
2. Custom transaction types are created based on business needs
Step 117: End of Session Summary
1. Completed setup:
- Inventory Transaction Sources
- Inventory Transaction Types
2. The next session will cover:
- Item Creation
- Item Classes
- Inventory Transactions (End-to-End Flow)