Building and Configuring Connections in OIC (Part 2)
Step 1: Navigate to OIC Connections
1. Login to OIC – Click on “Project” and create a project by giving it a name “OIC_DateMonth_Purpose.”
2. Click “Designer.”
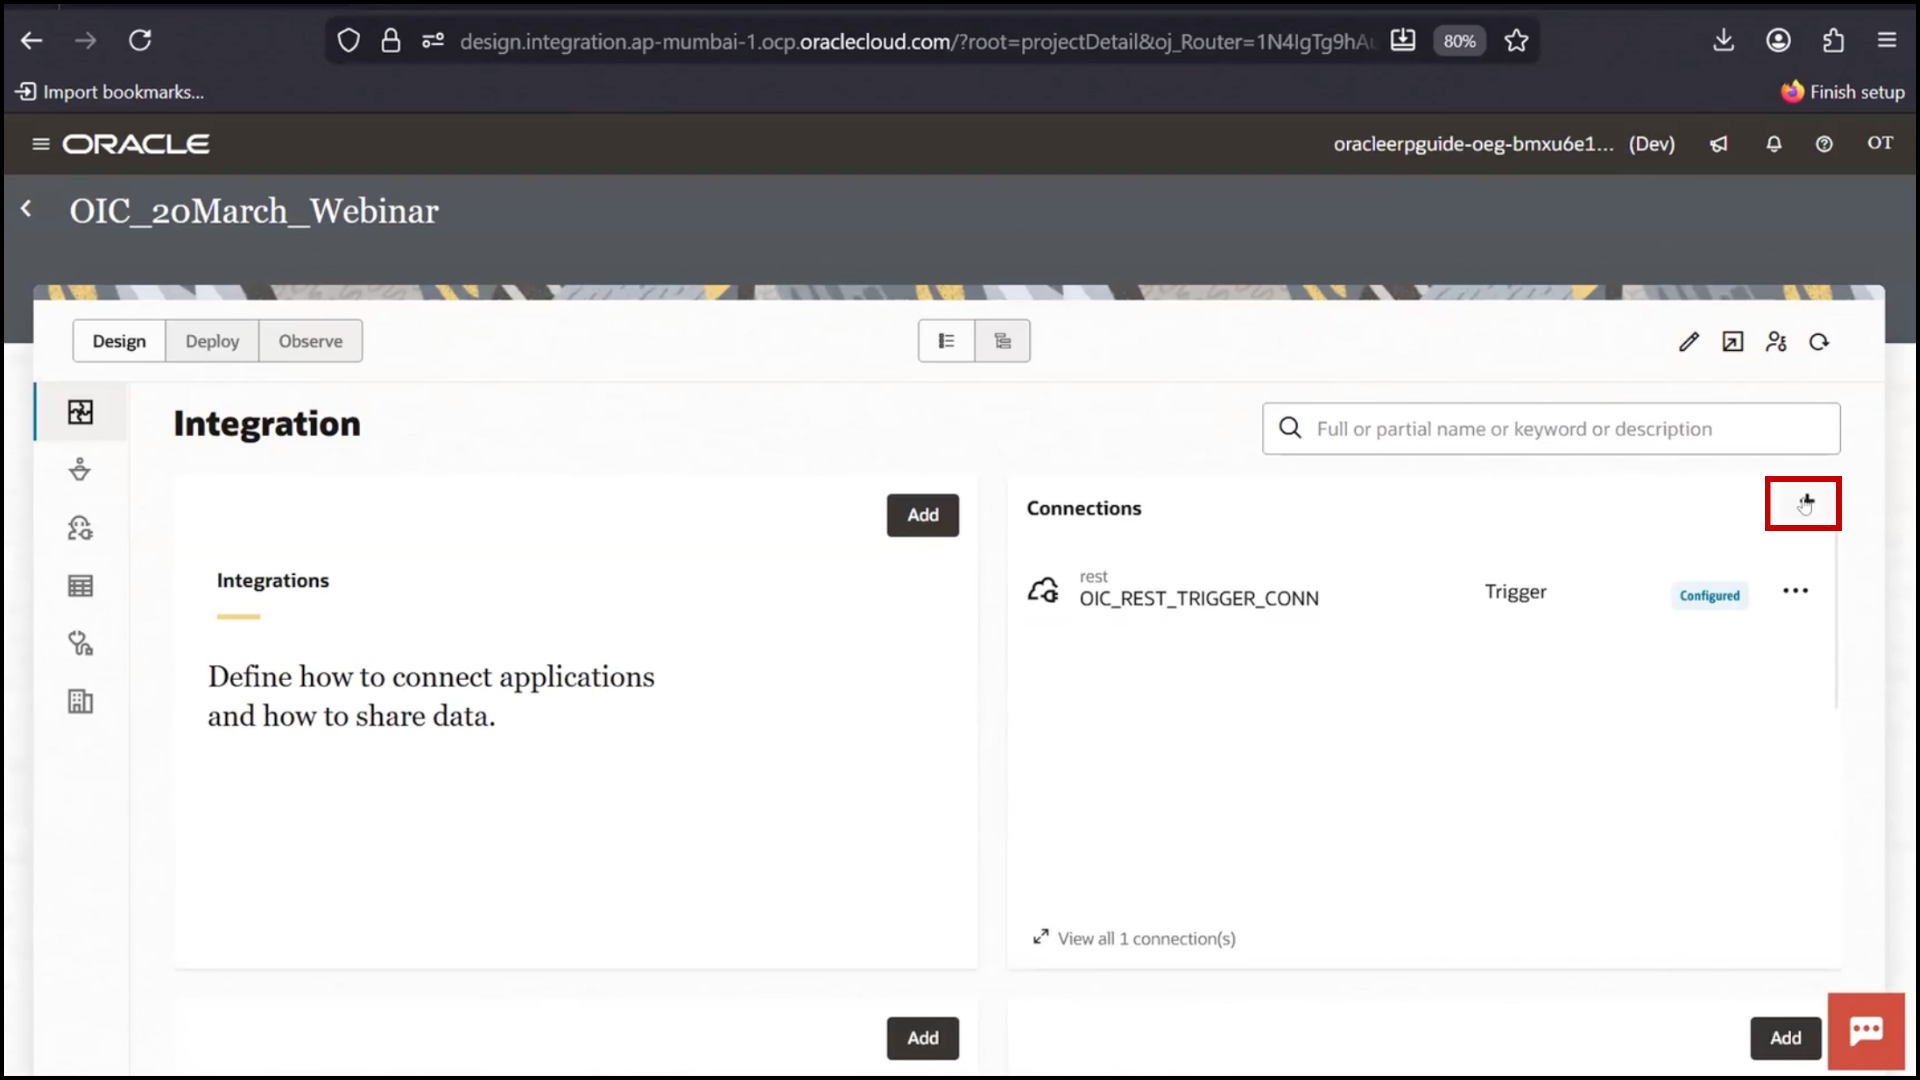
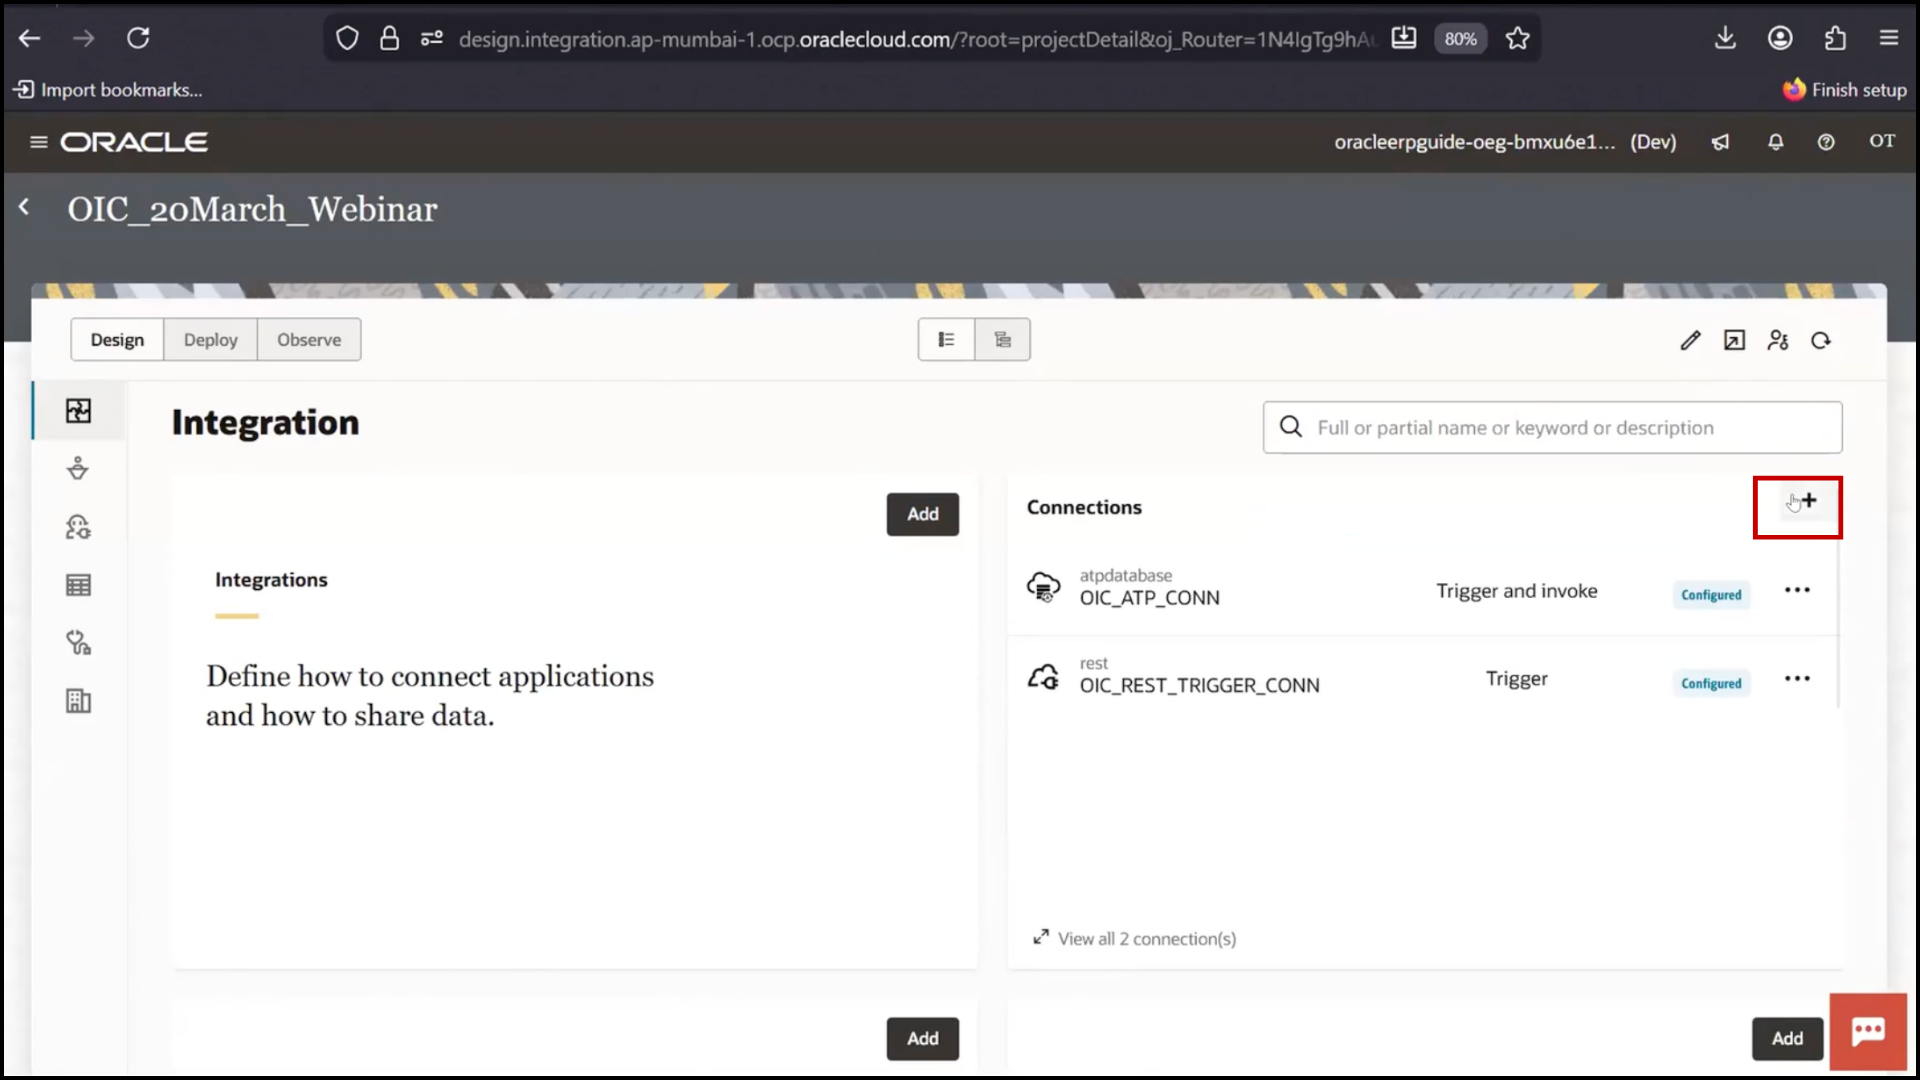
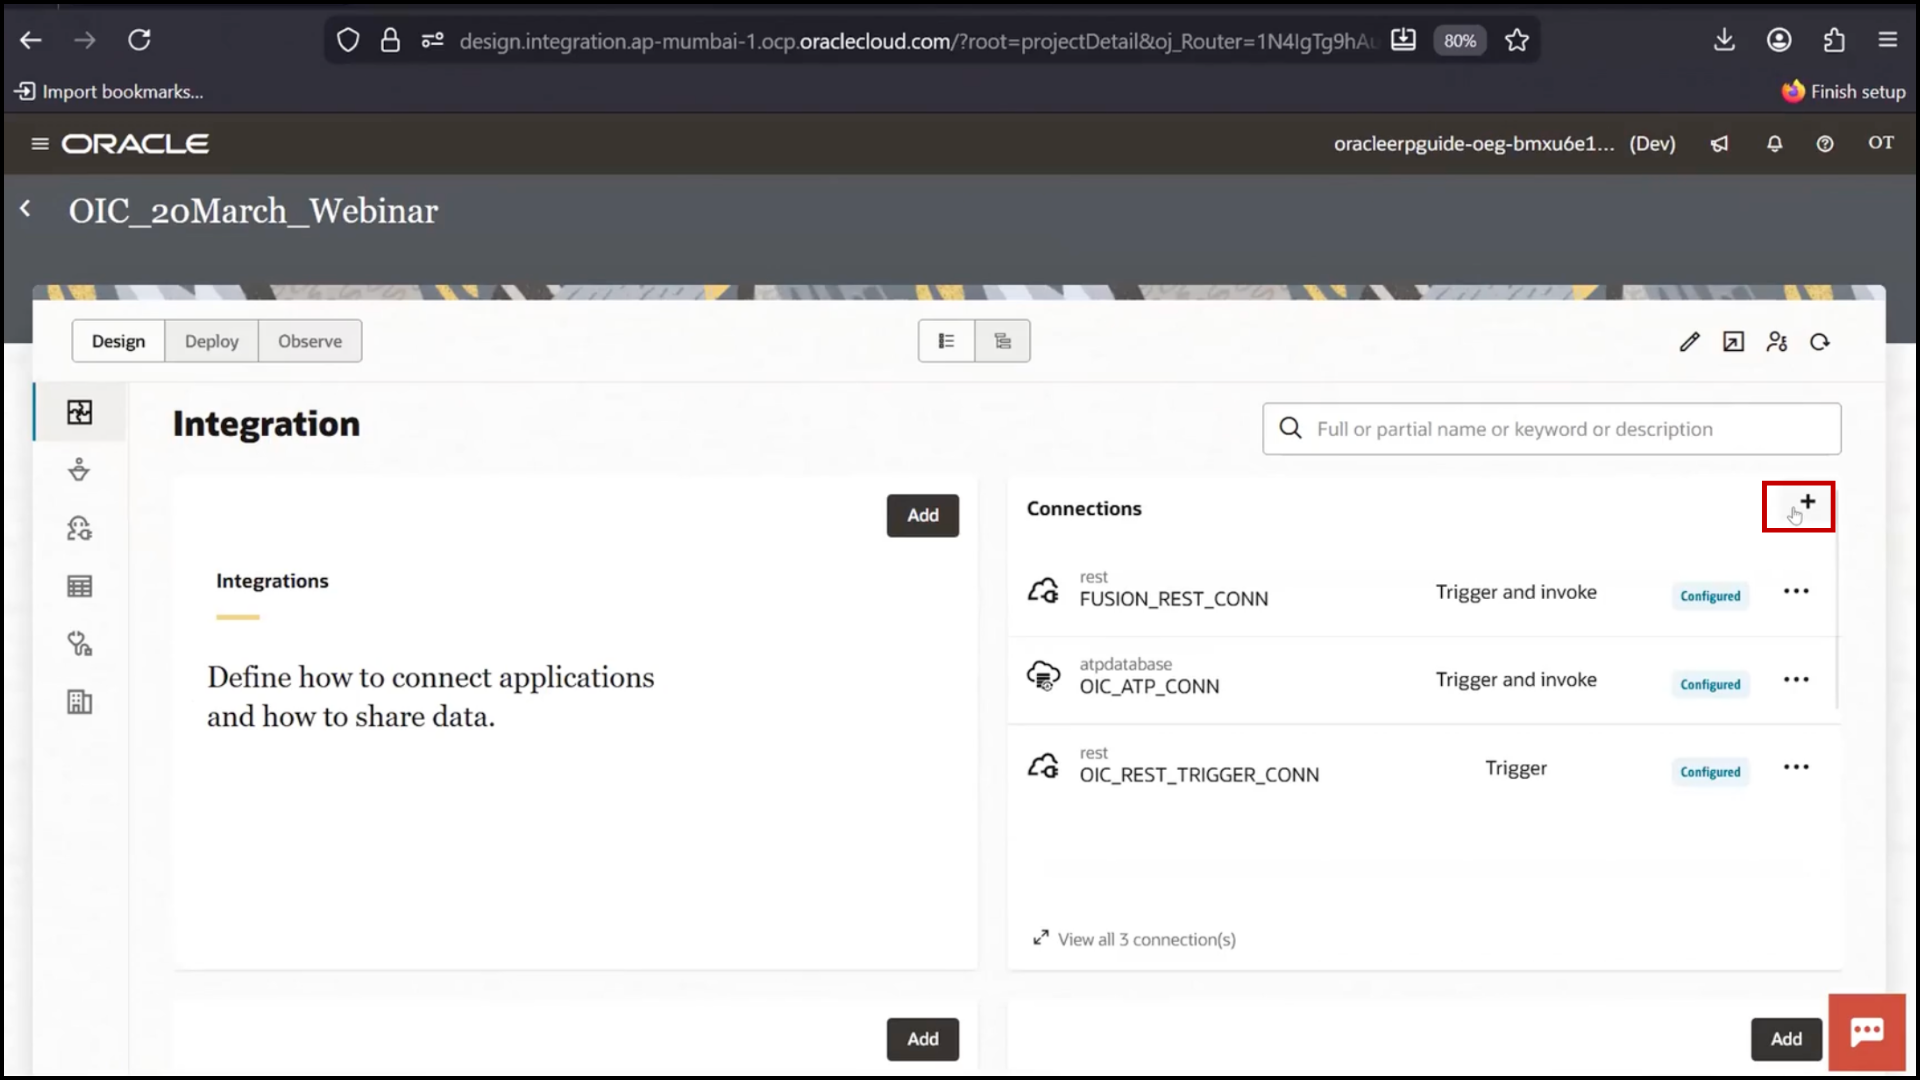
3. Click Connections
4. Click Create5.
Step 2: Create REST Trigger Connection
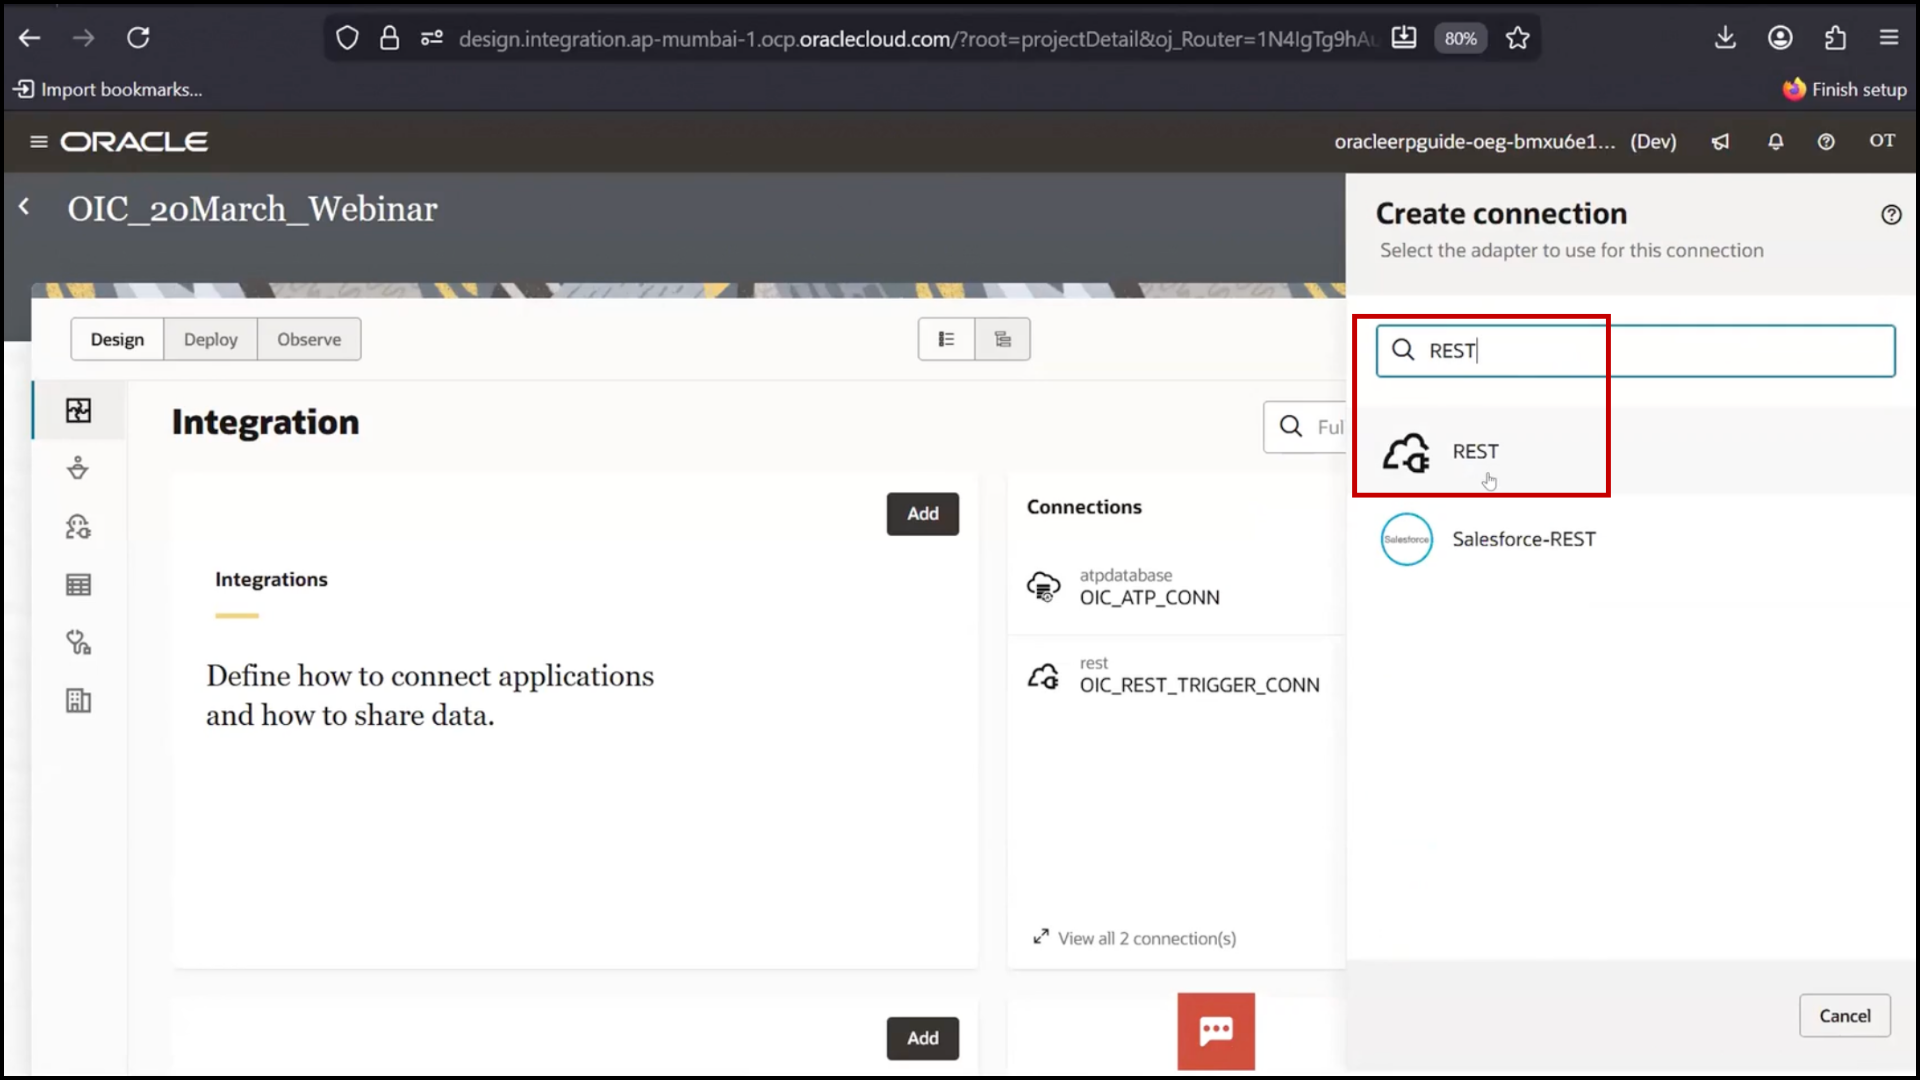
1. Click Create
2. Search and select REST Adapter
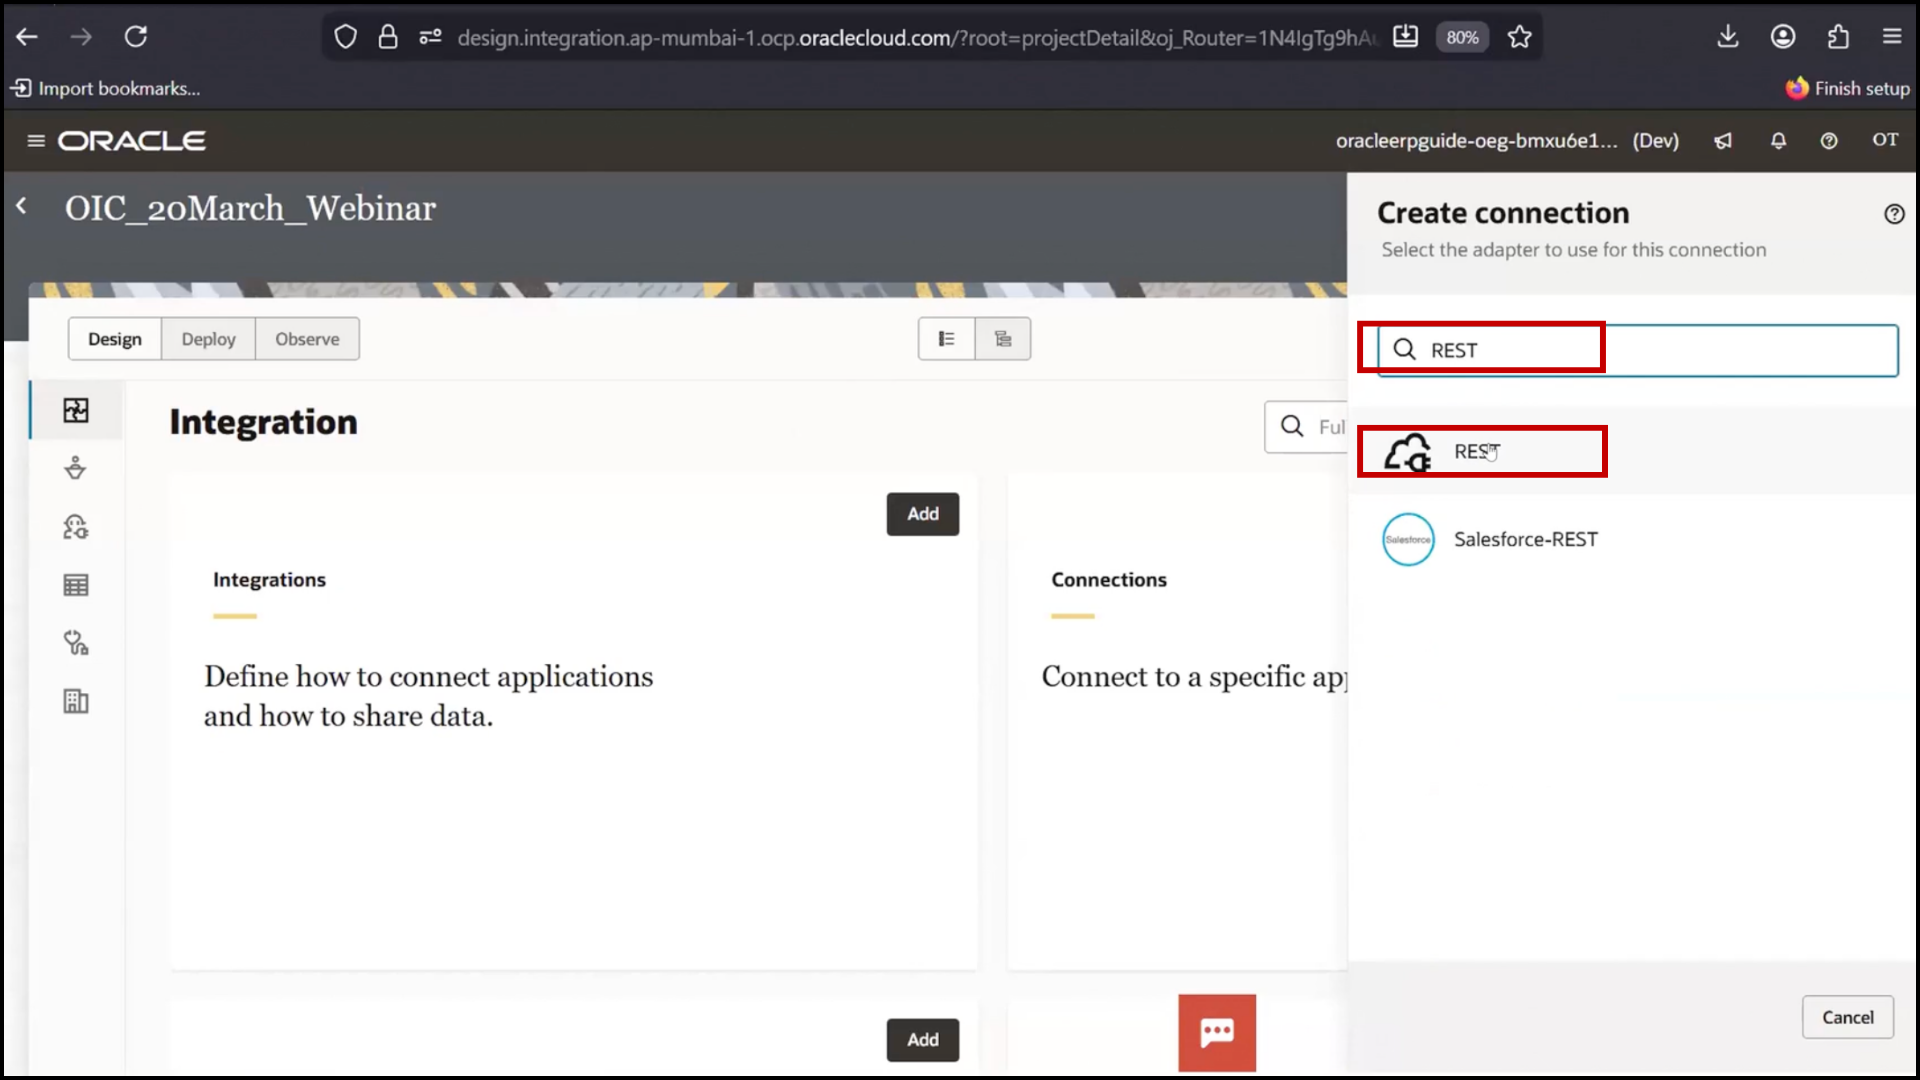
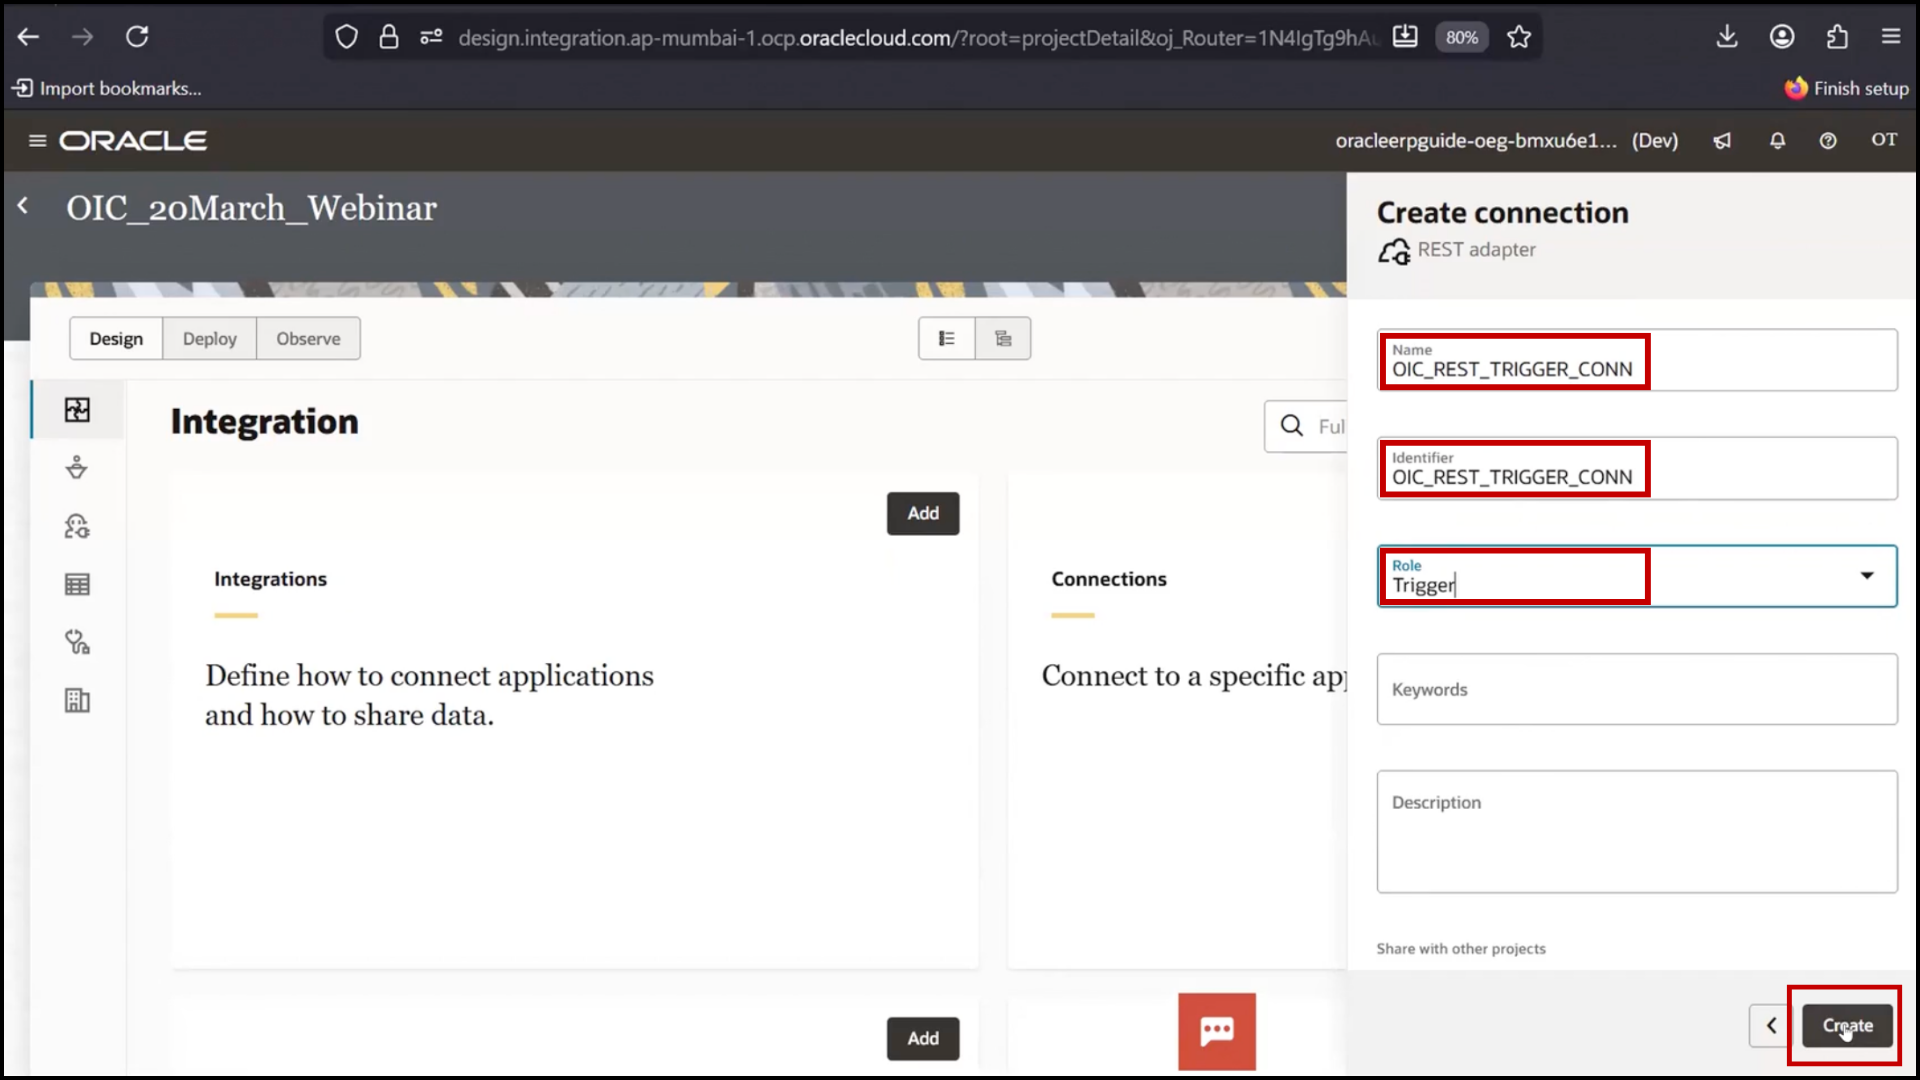
3. Enter:
Name: OIC_REST_Trigger_Connection
4. Role: Trigger
5. Click Create
6. Configure Security:
7. Choose Basic Authentication or OAuth
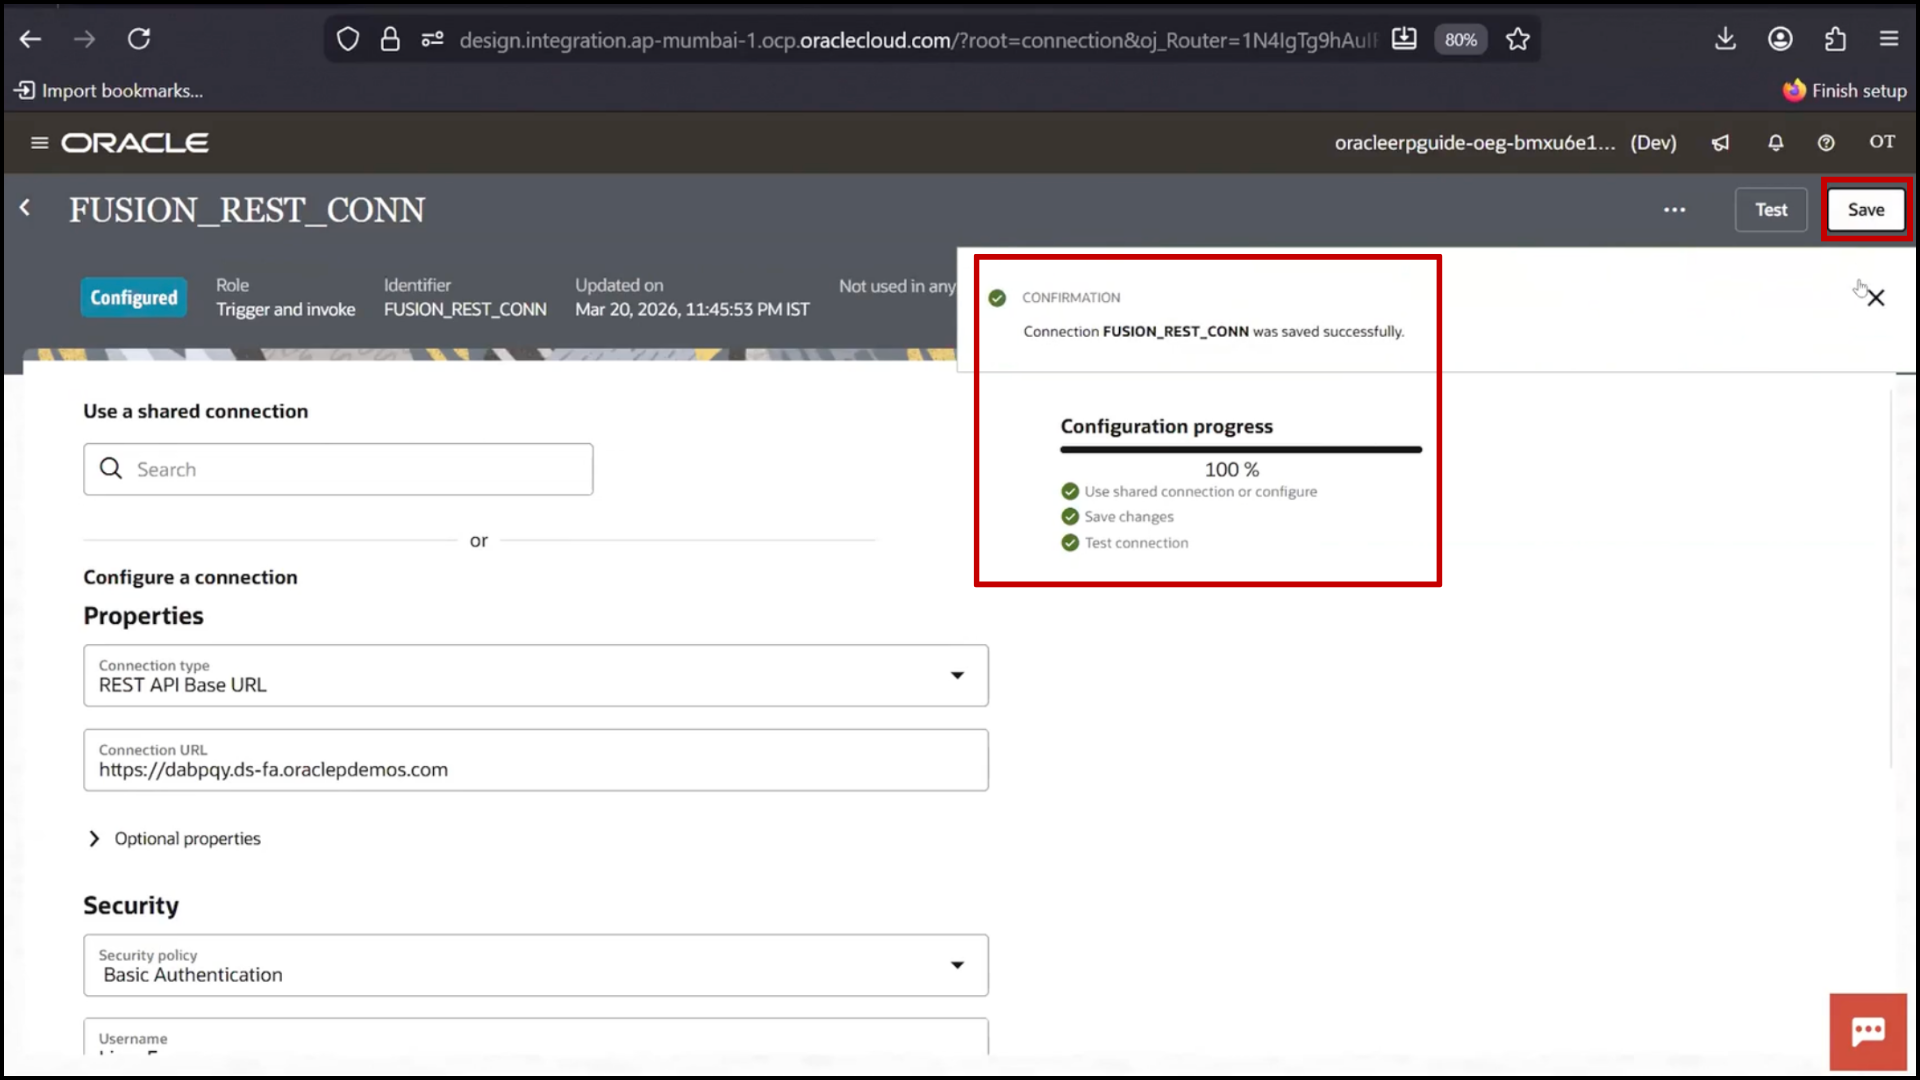
8. Click “Test” since “Test” is a mandatory process
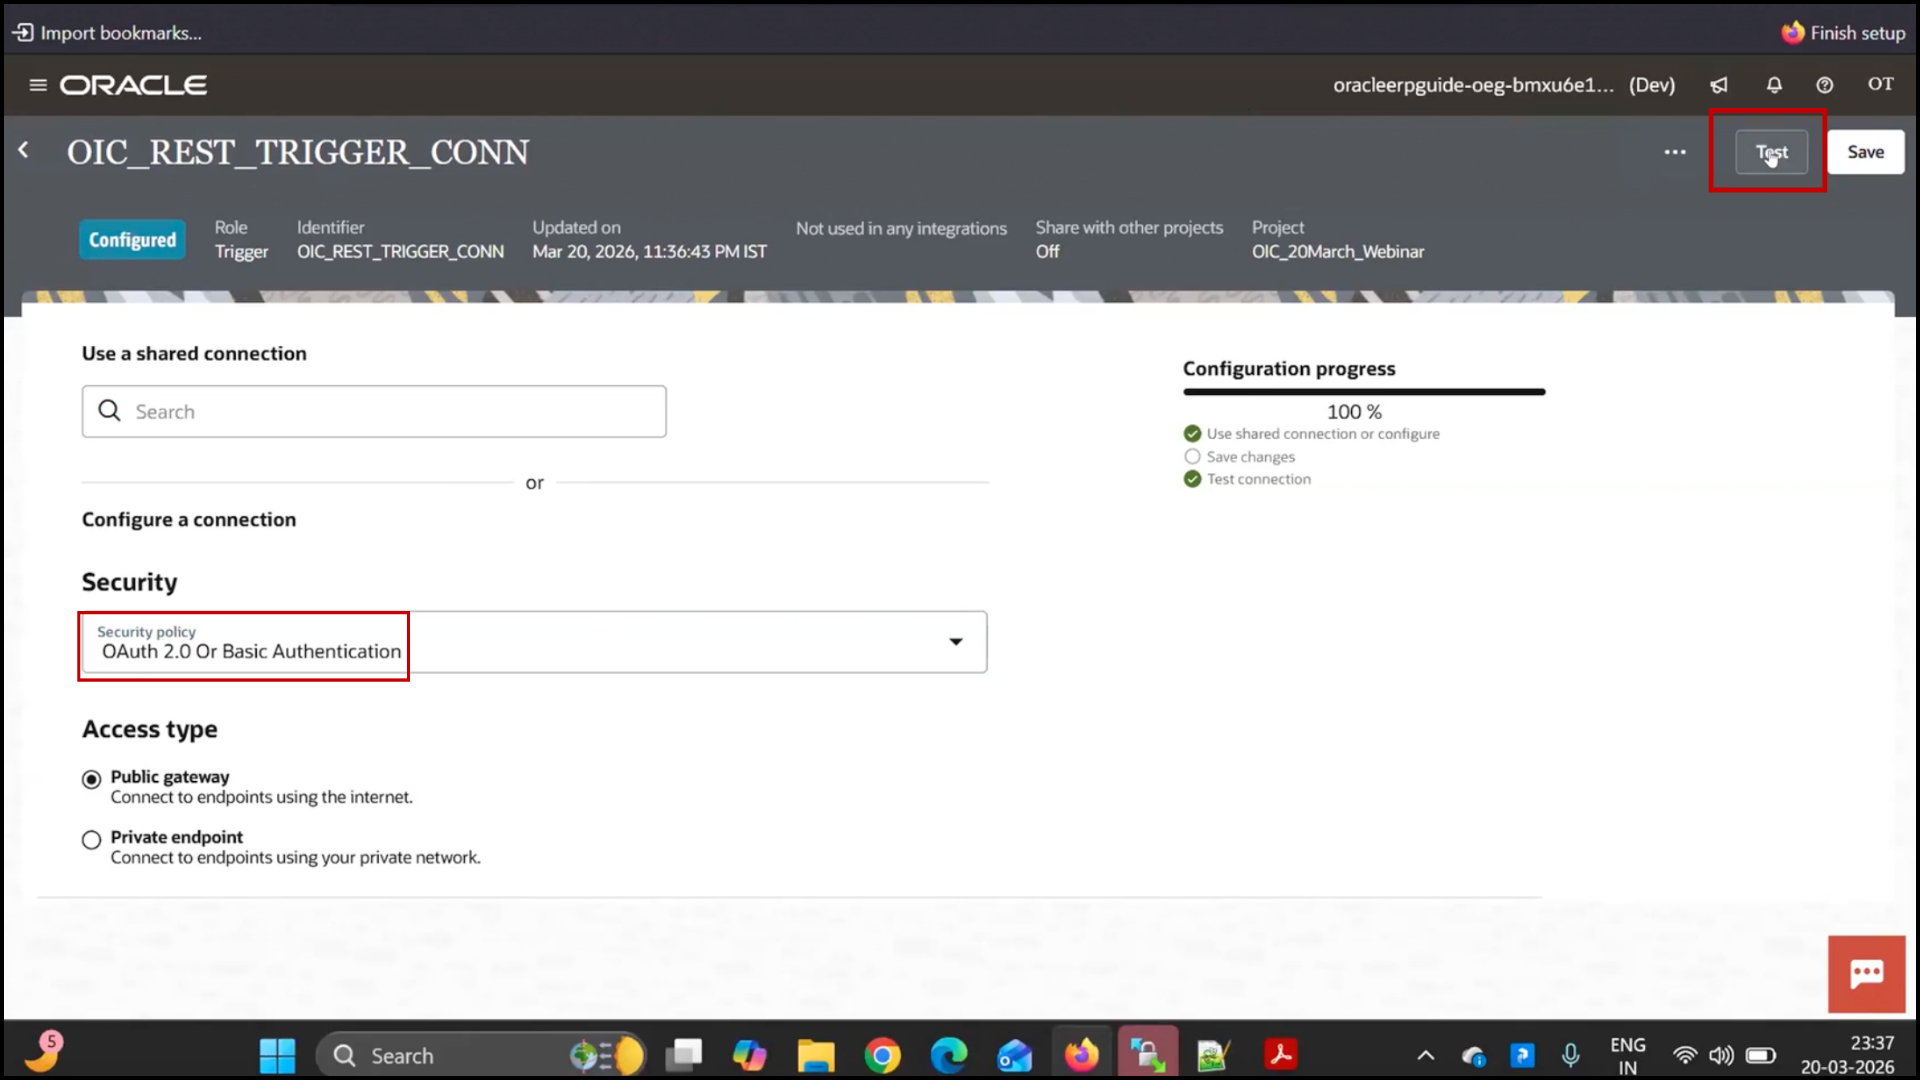
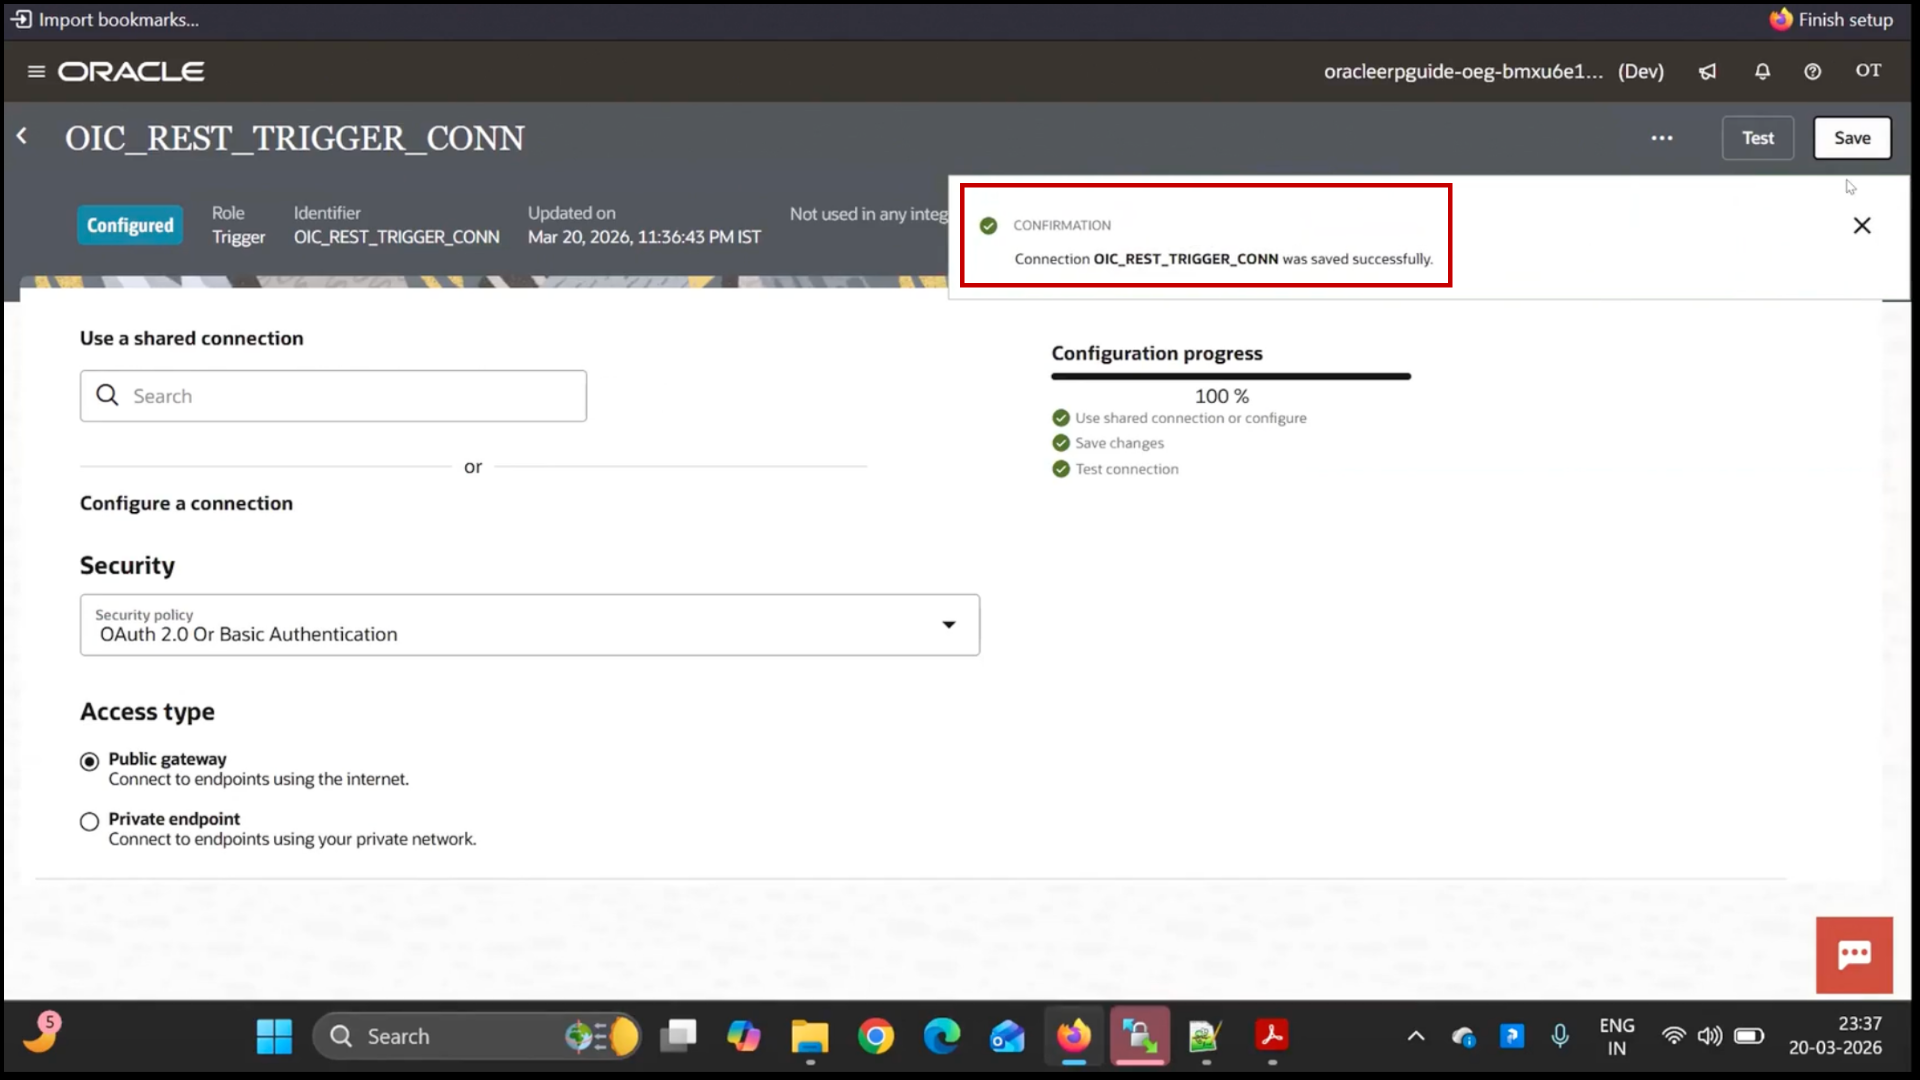
9. Wait for:
Status: 100% Complete
10. Click Save
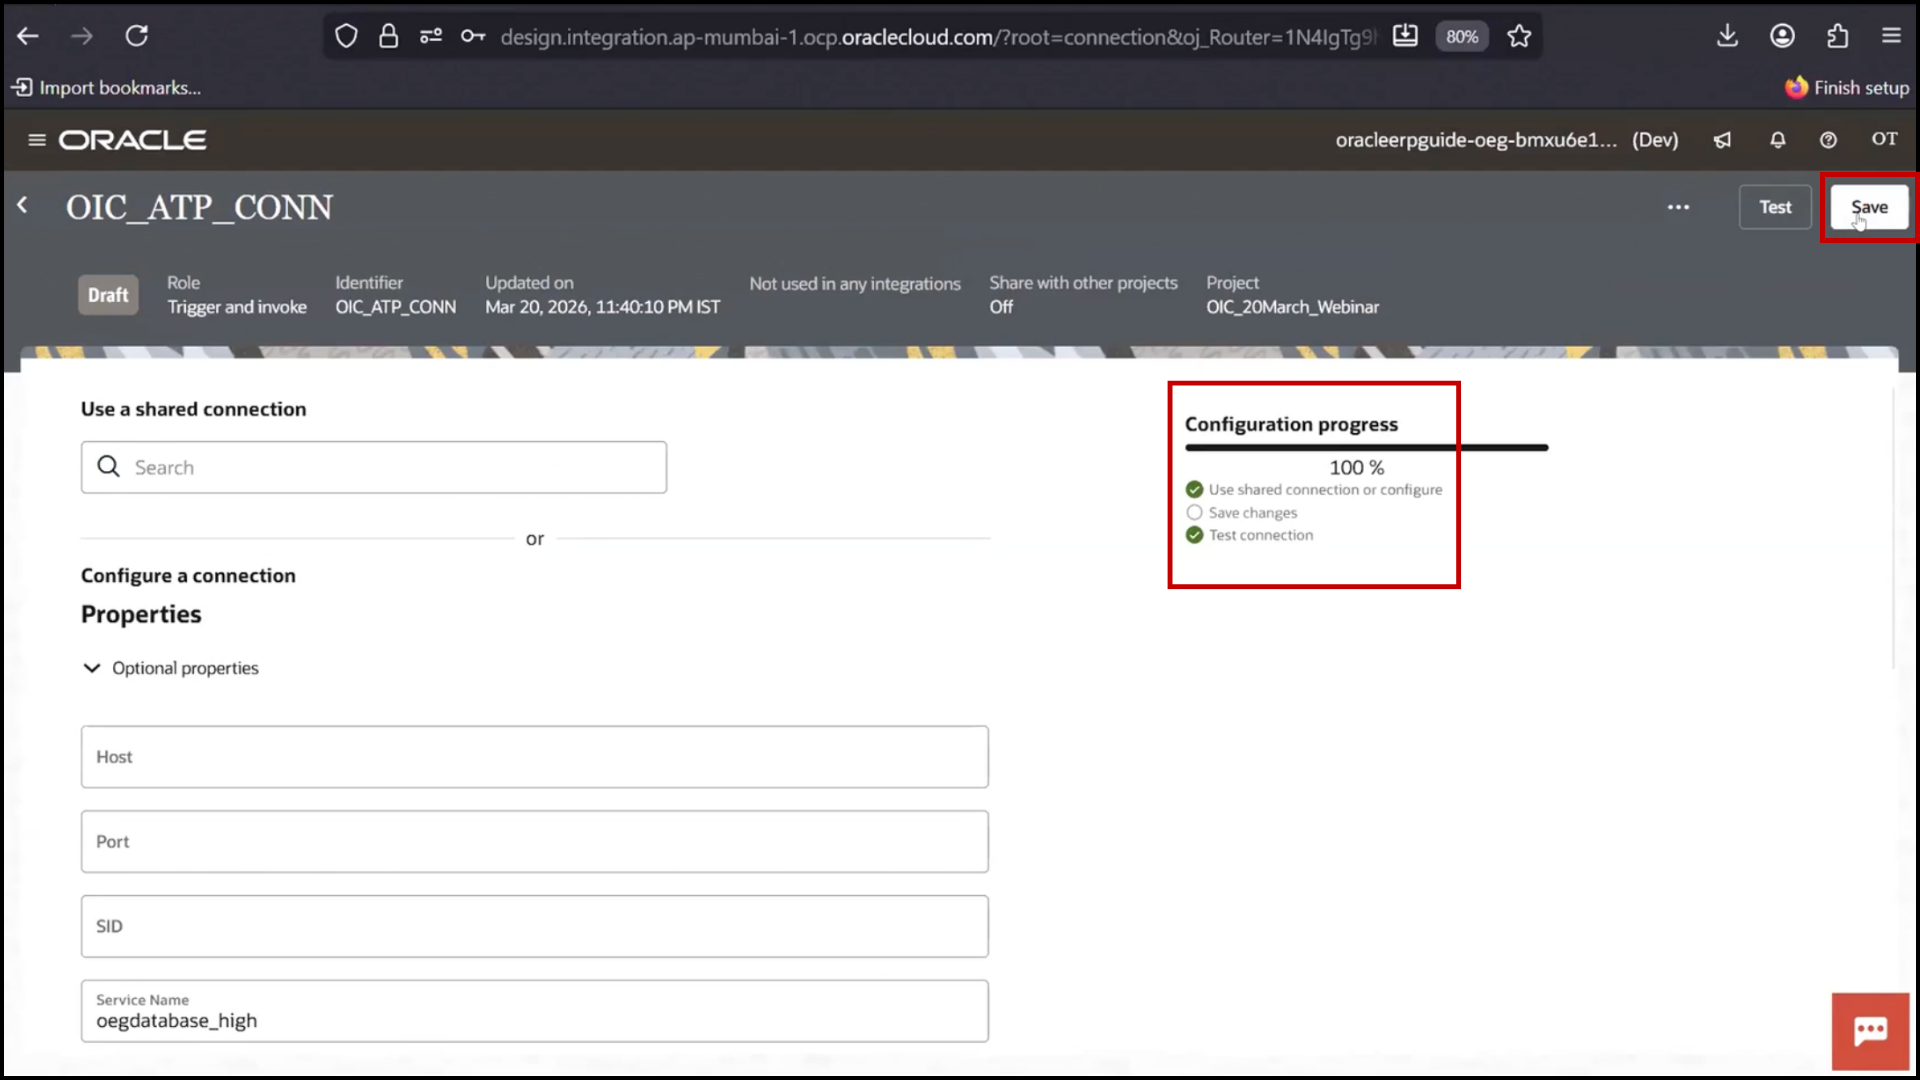
Step 3: Create ATP Database Connection
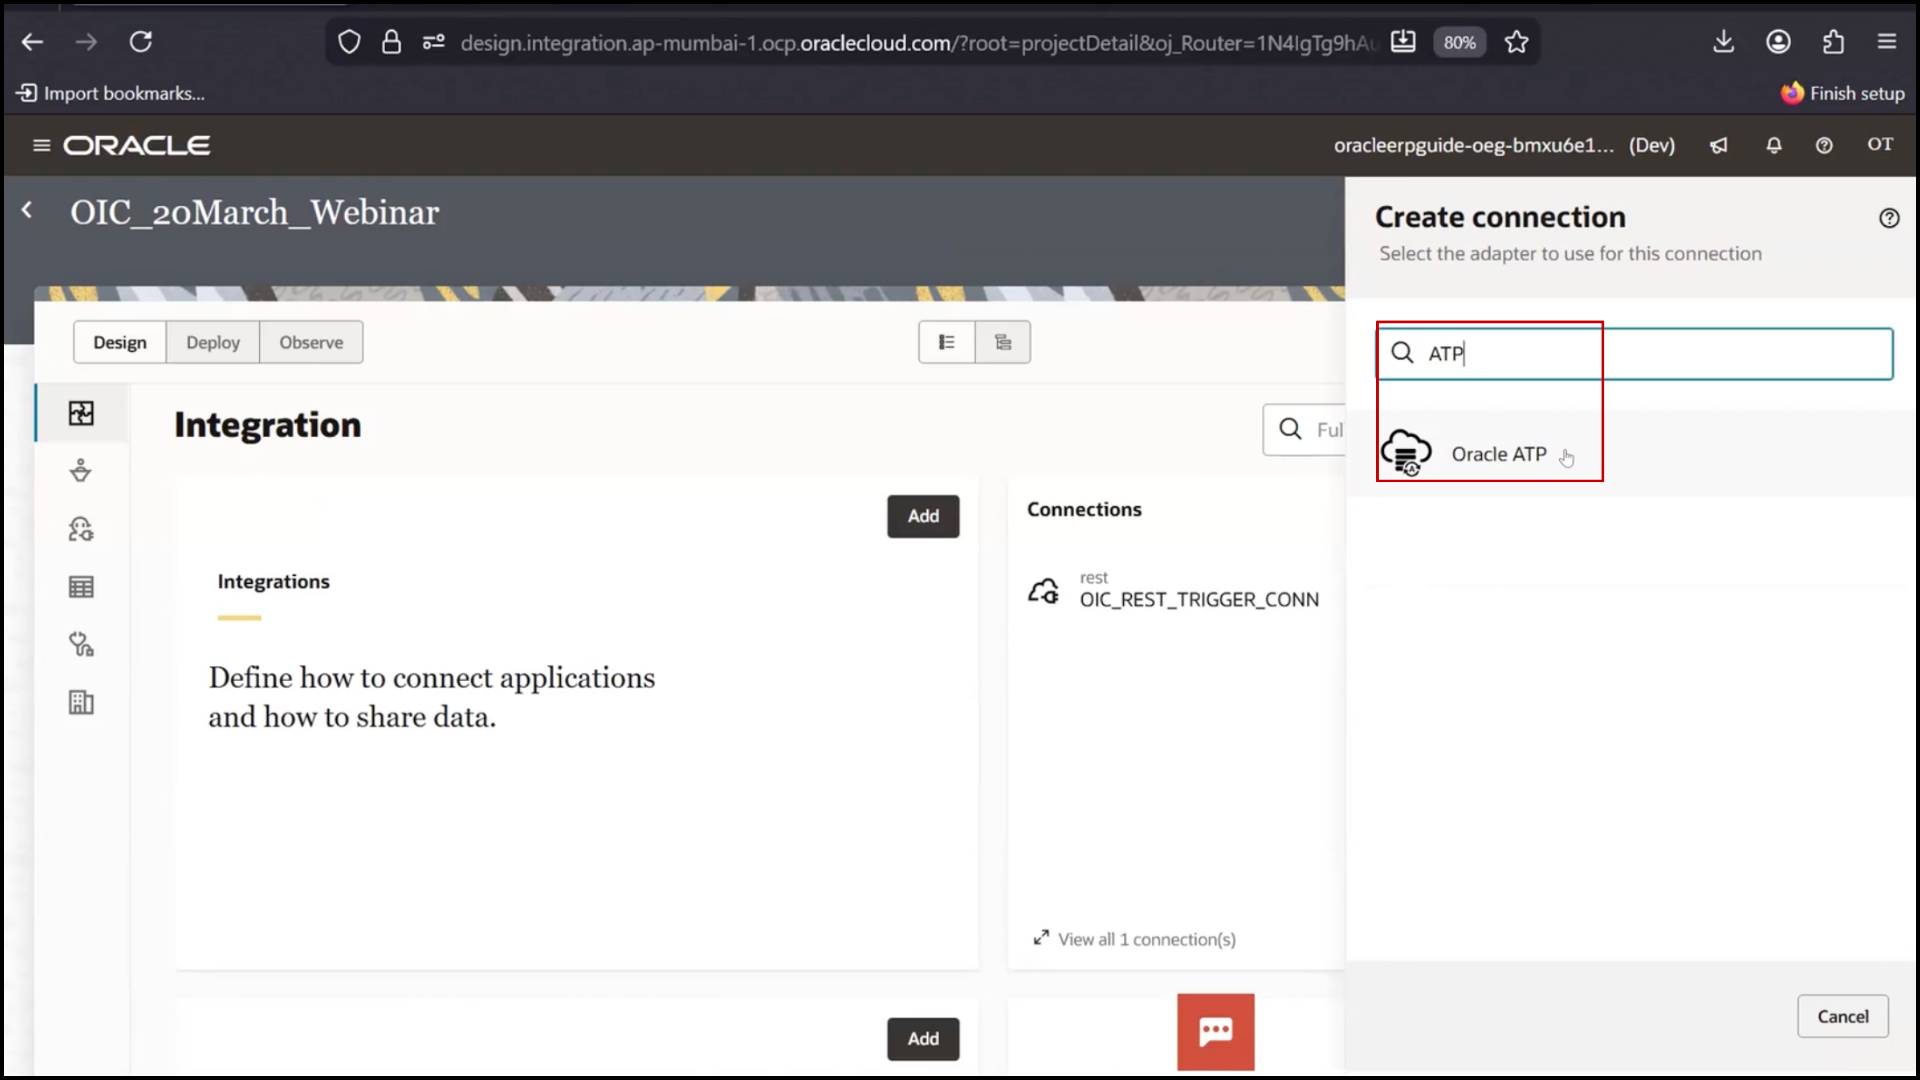
1. Click Create
2. Select Oracle ATP Adapter
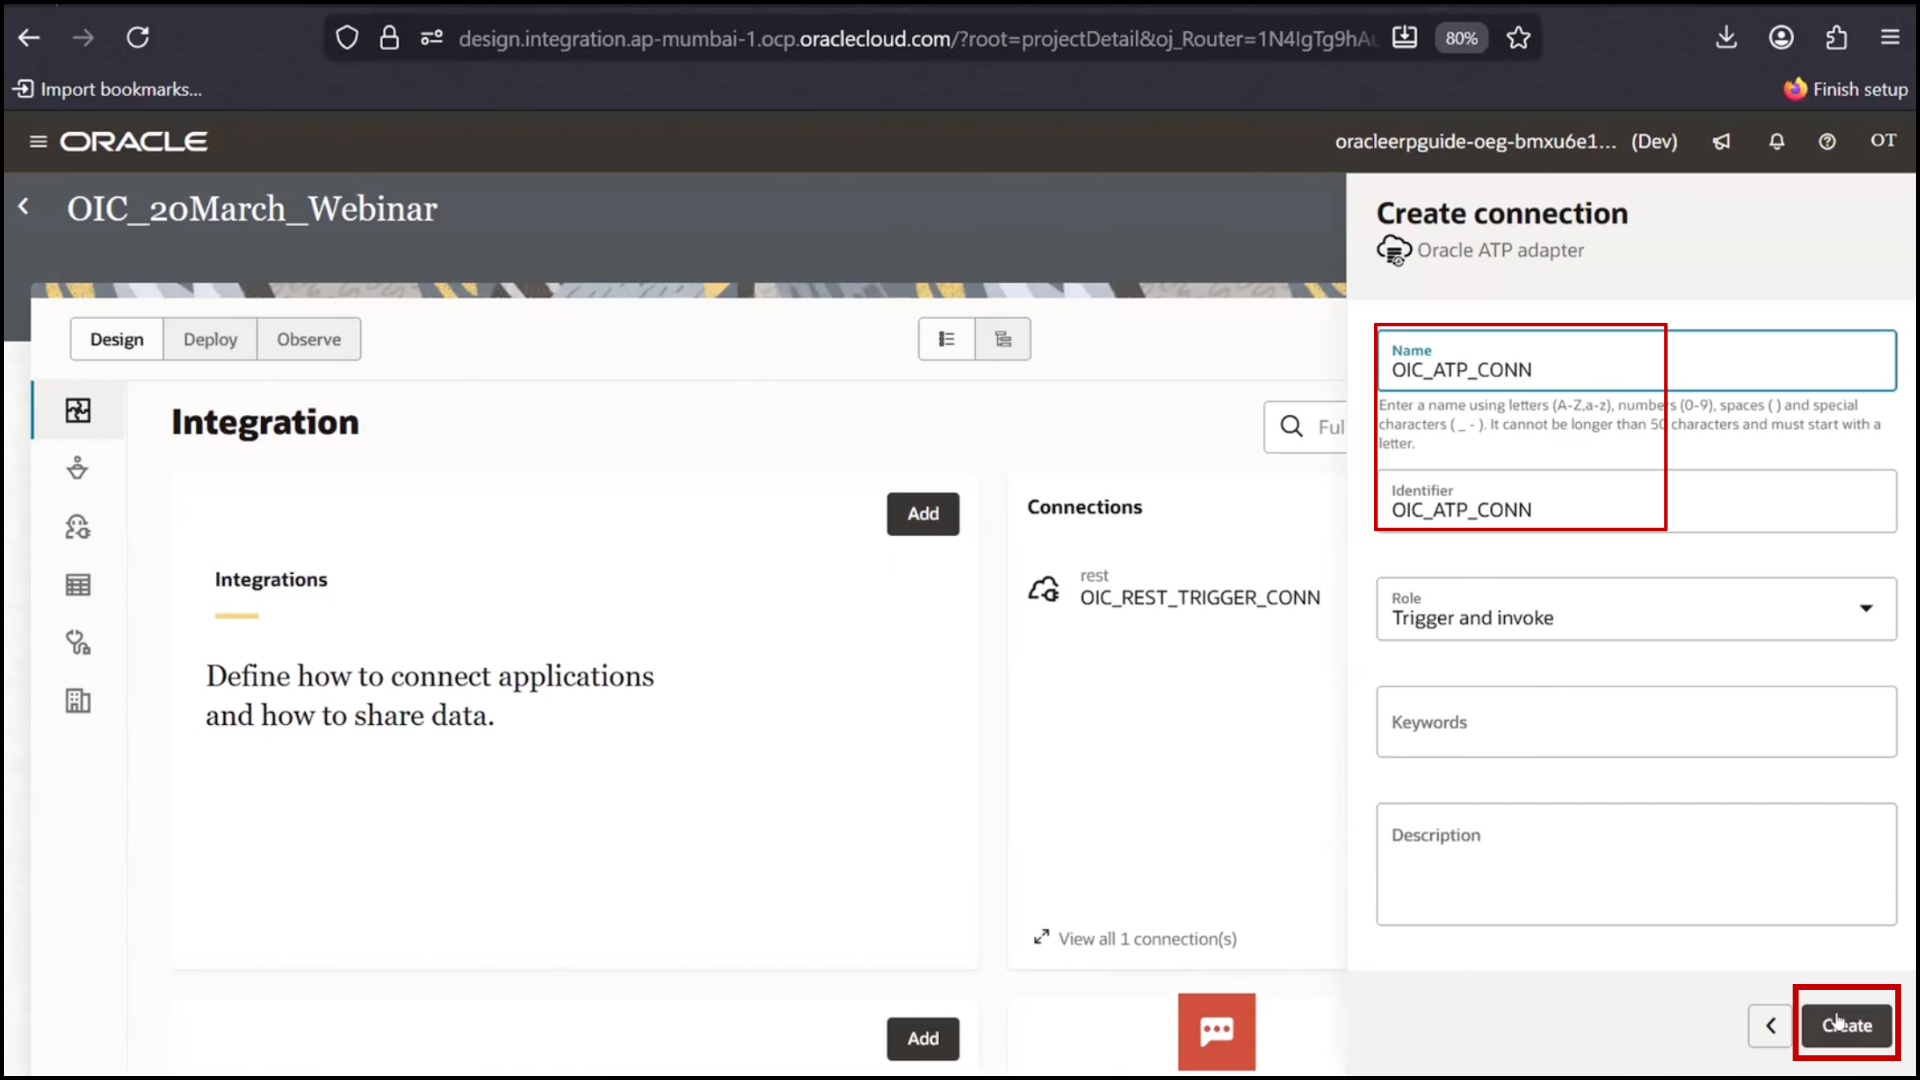
3. Enter:
Name: OIC_ATP_Connection
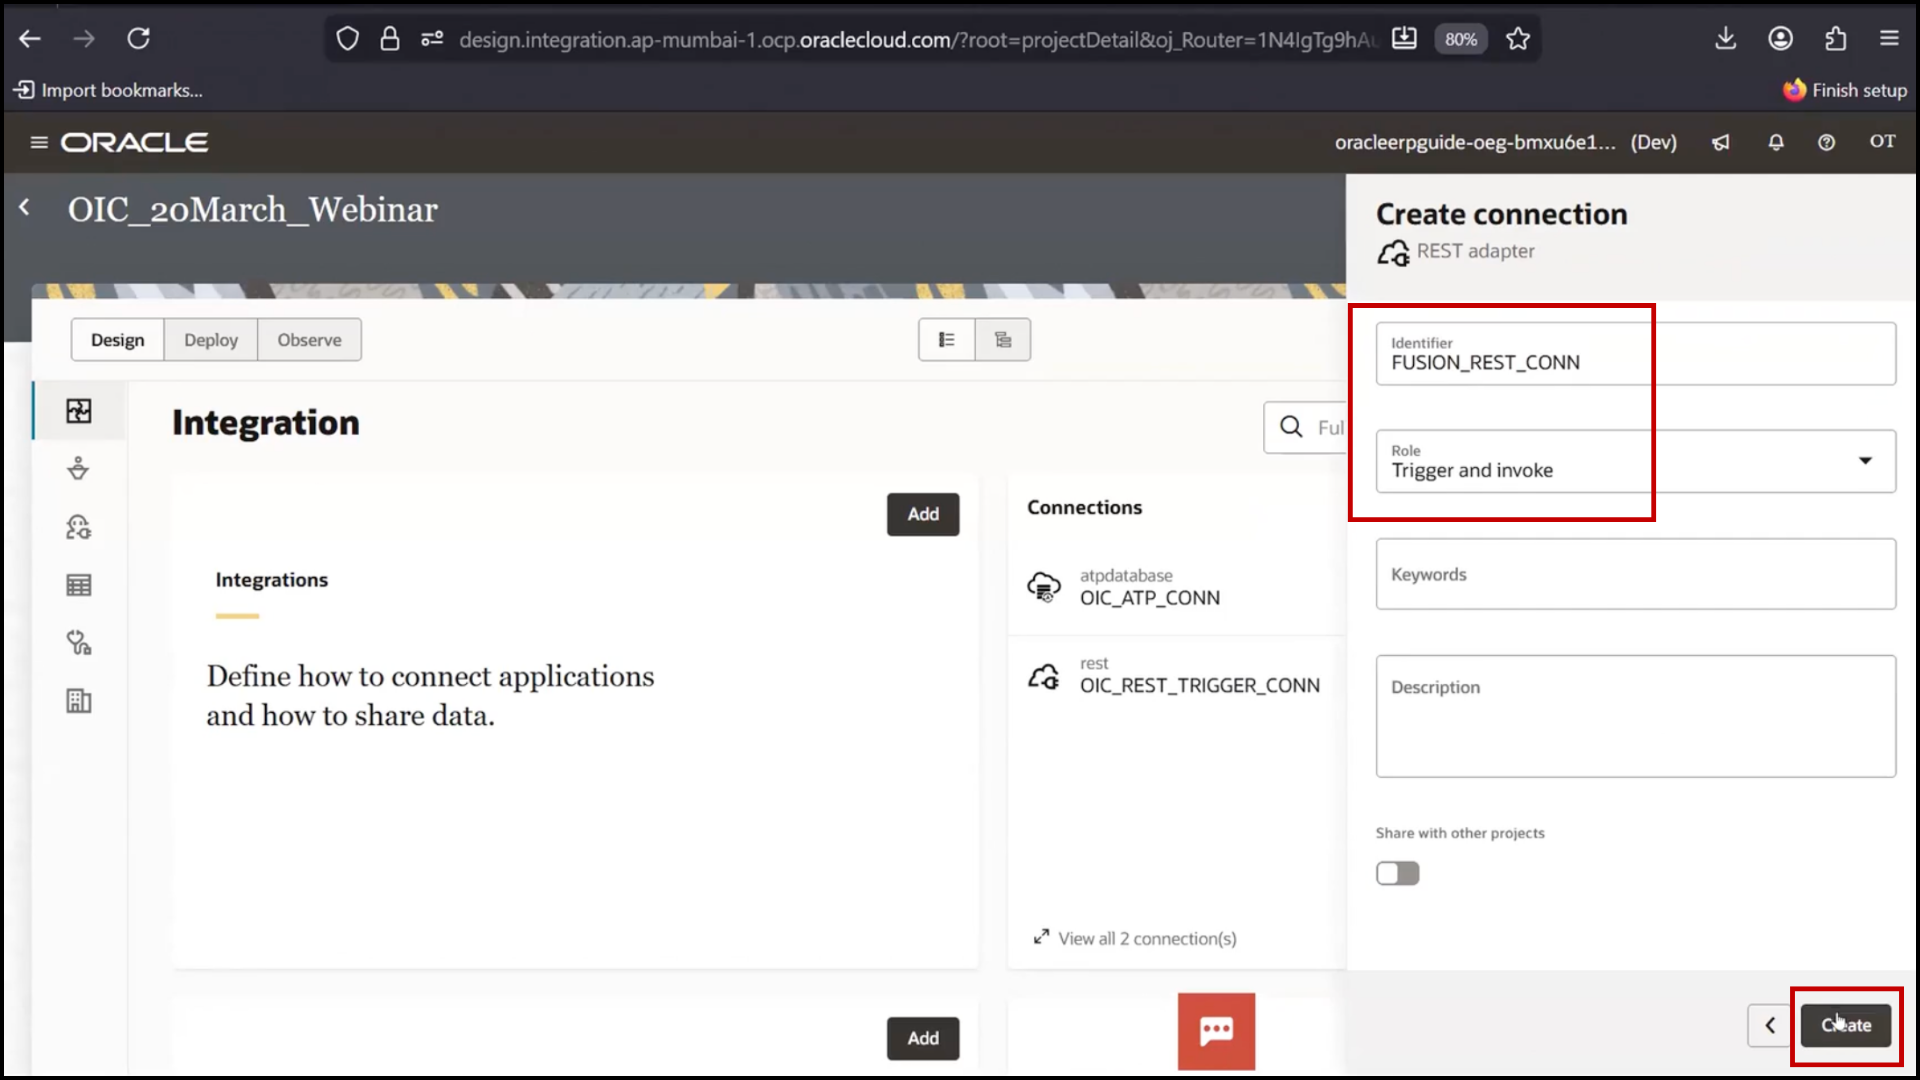
4. Role: Trigger and Invoke
5. Click Create
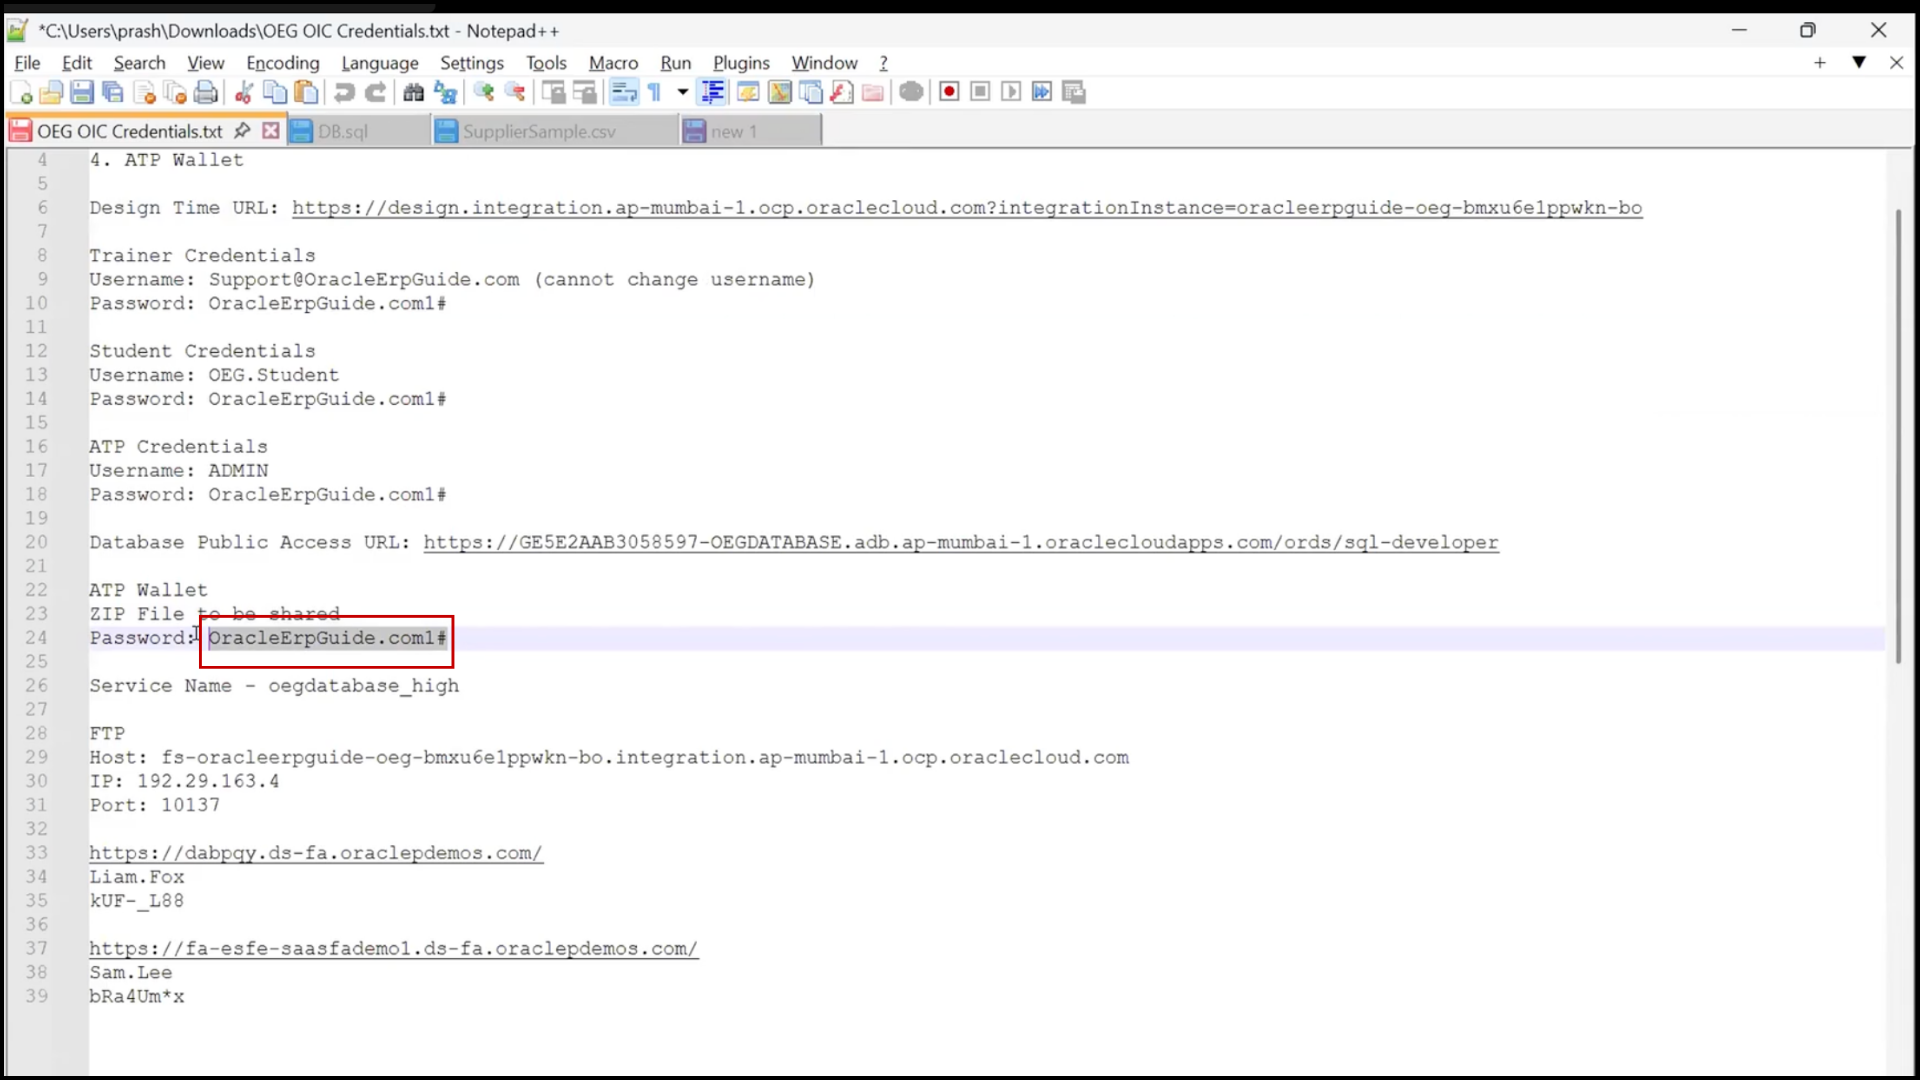
To establish a secure connection with the database, certain credentials and configurations are required. This includes the wallet, wallet password, database username, and database password. Once all these details are correctly provided, the system can successfully communicate with the database.
These credentials are typically obtained from the relevant stakeholders. If the database is managed internally, you should coordinate with the Database Administrator (DBA) or the admin team to request the required access details. In cases where the database is managed by the client, you will need to reach out to the client and formally request the necessary credentials.
Ensuring proper access and secure handling of these details is essential for establishing a successful and secure database connection.
6. Configure:
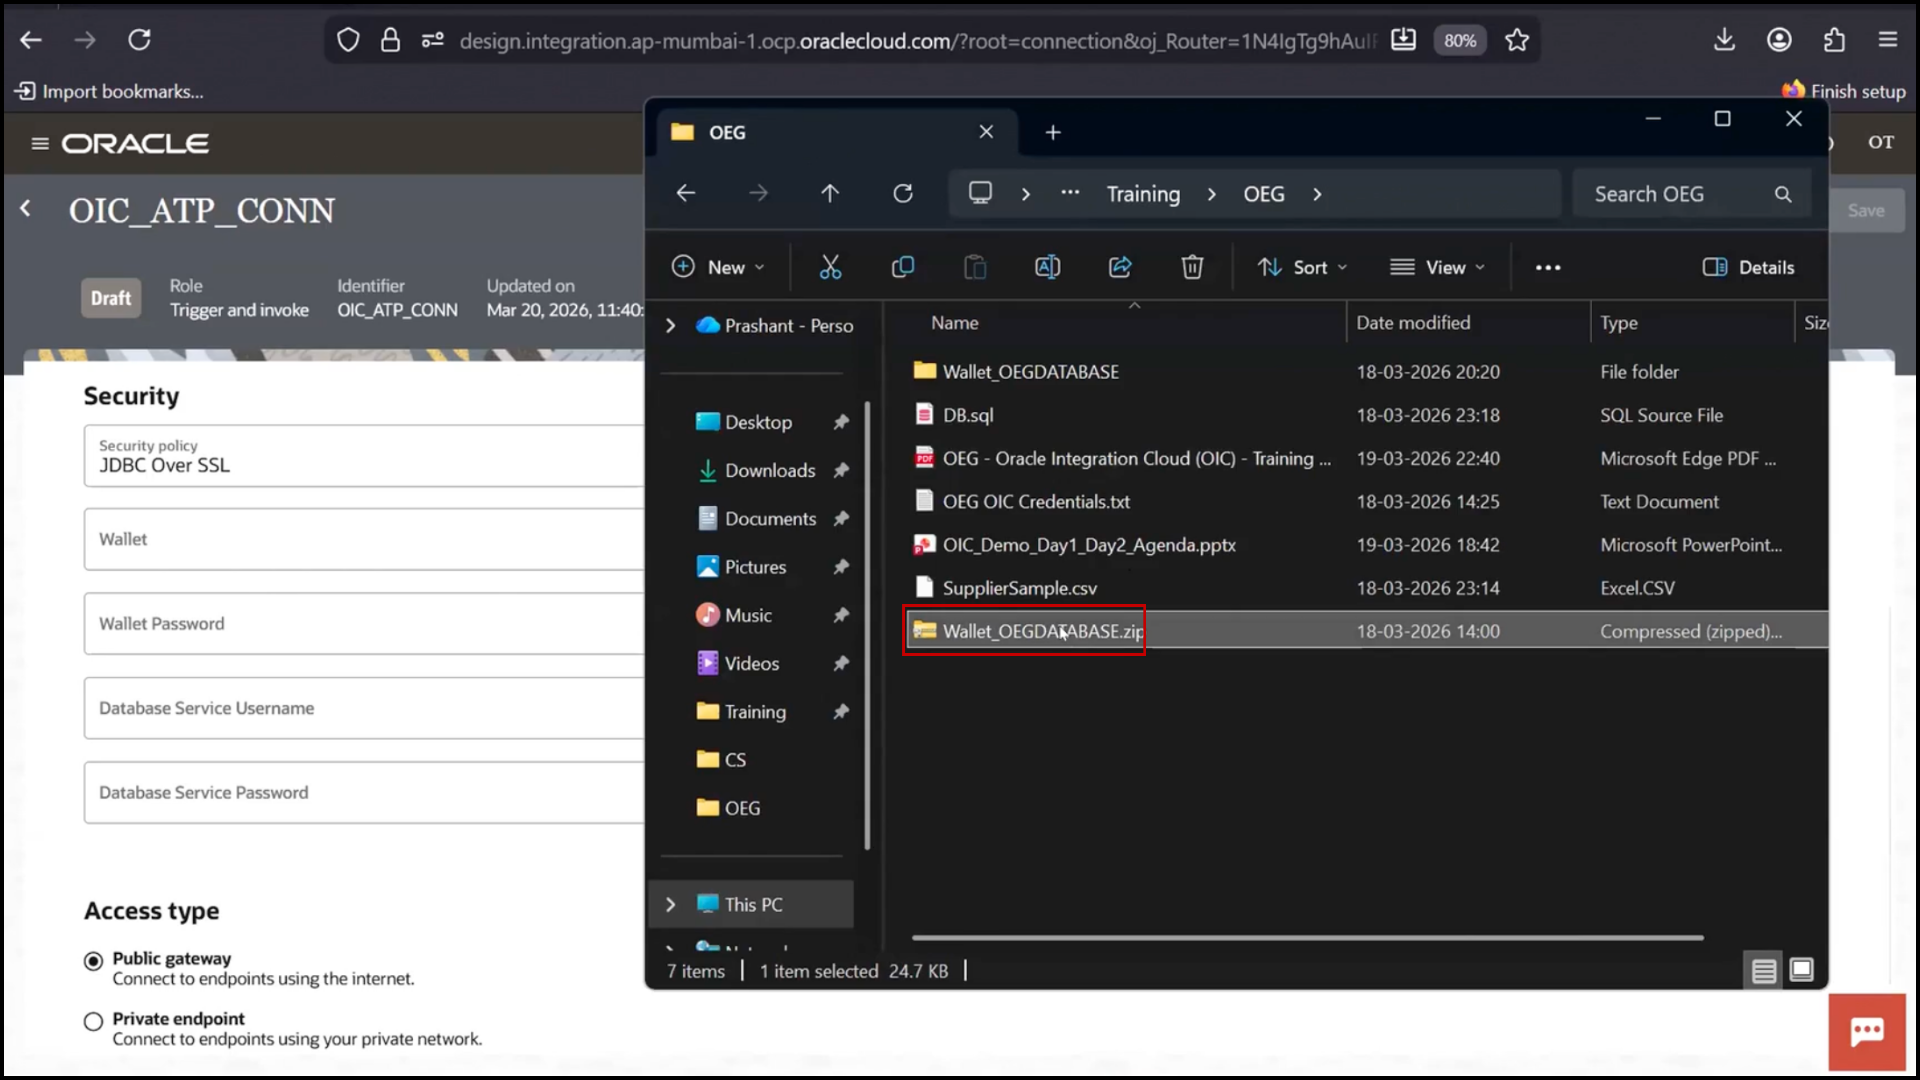
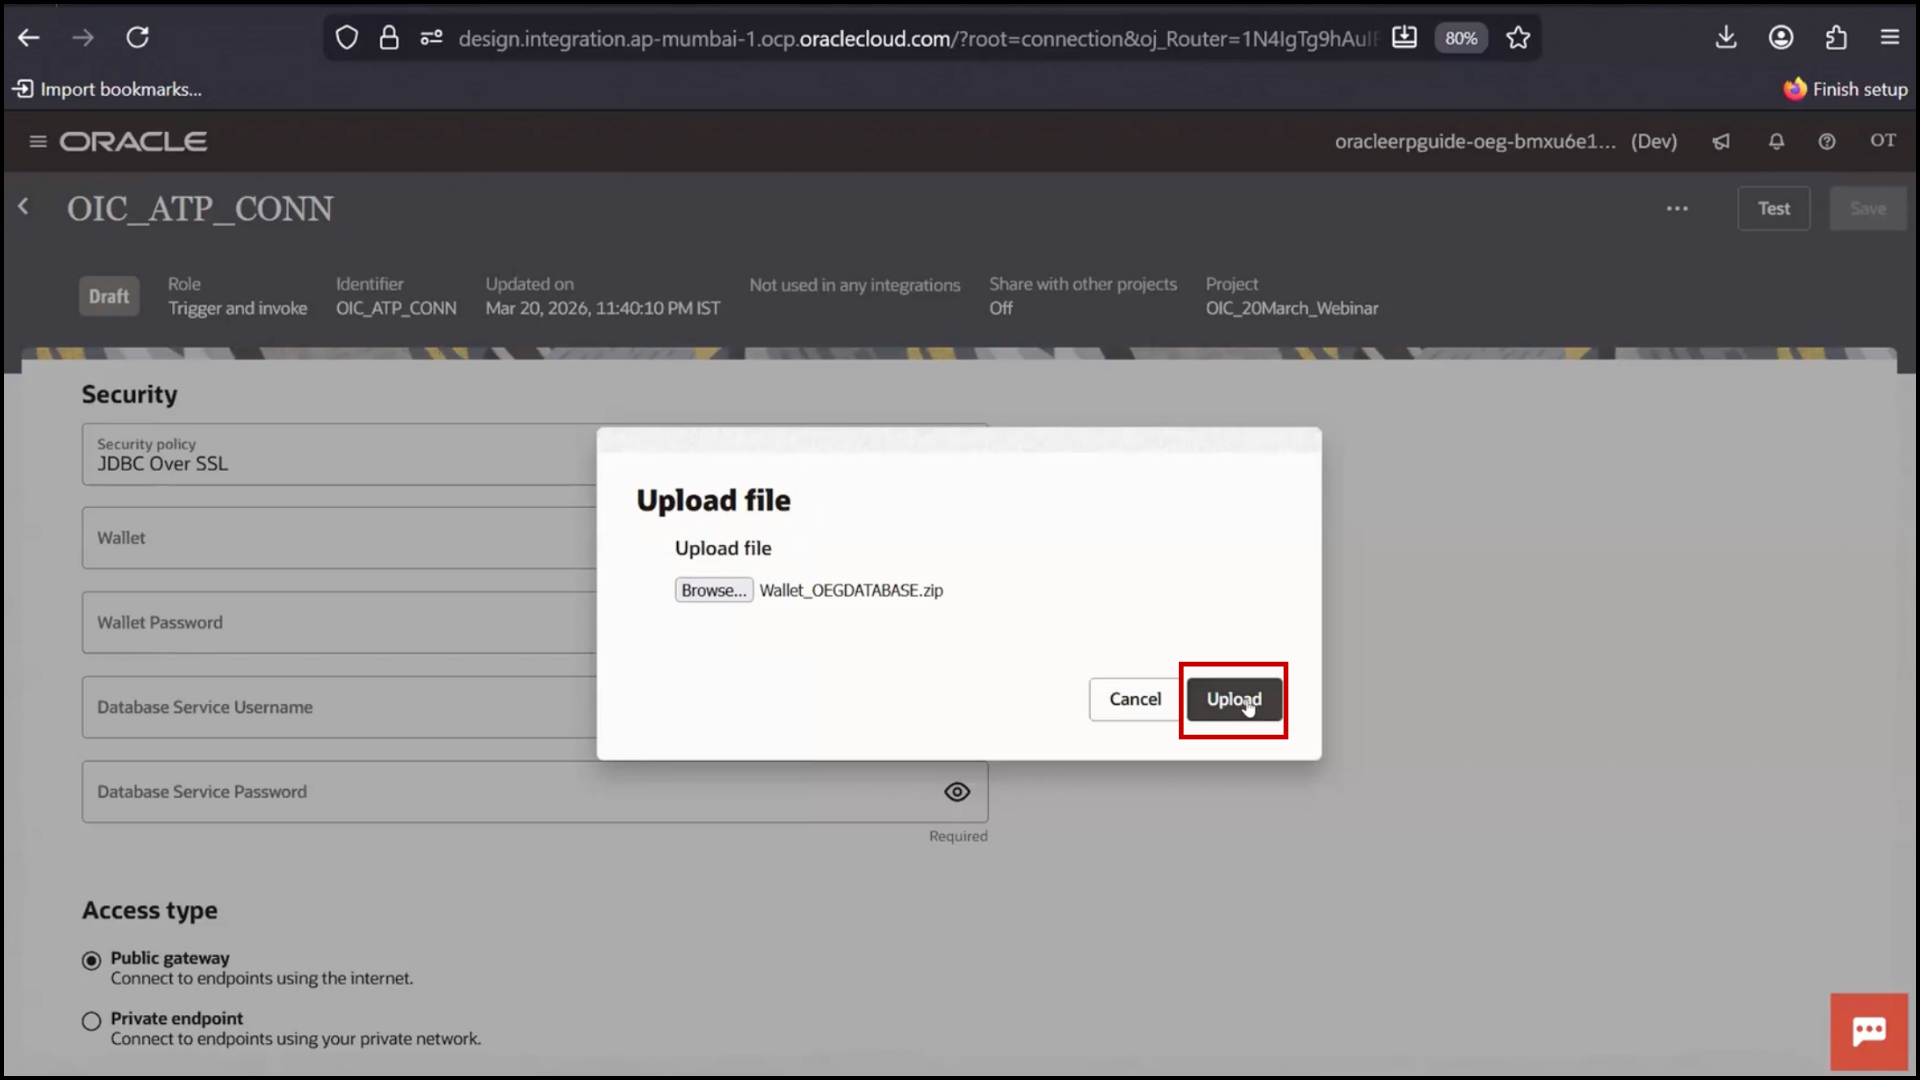
7. Upload Wallet File
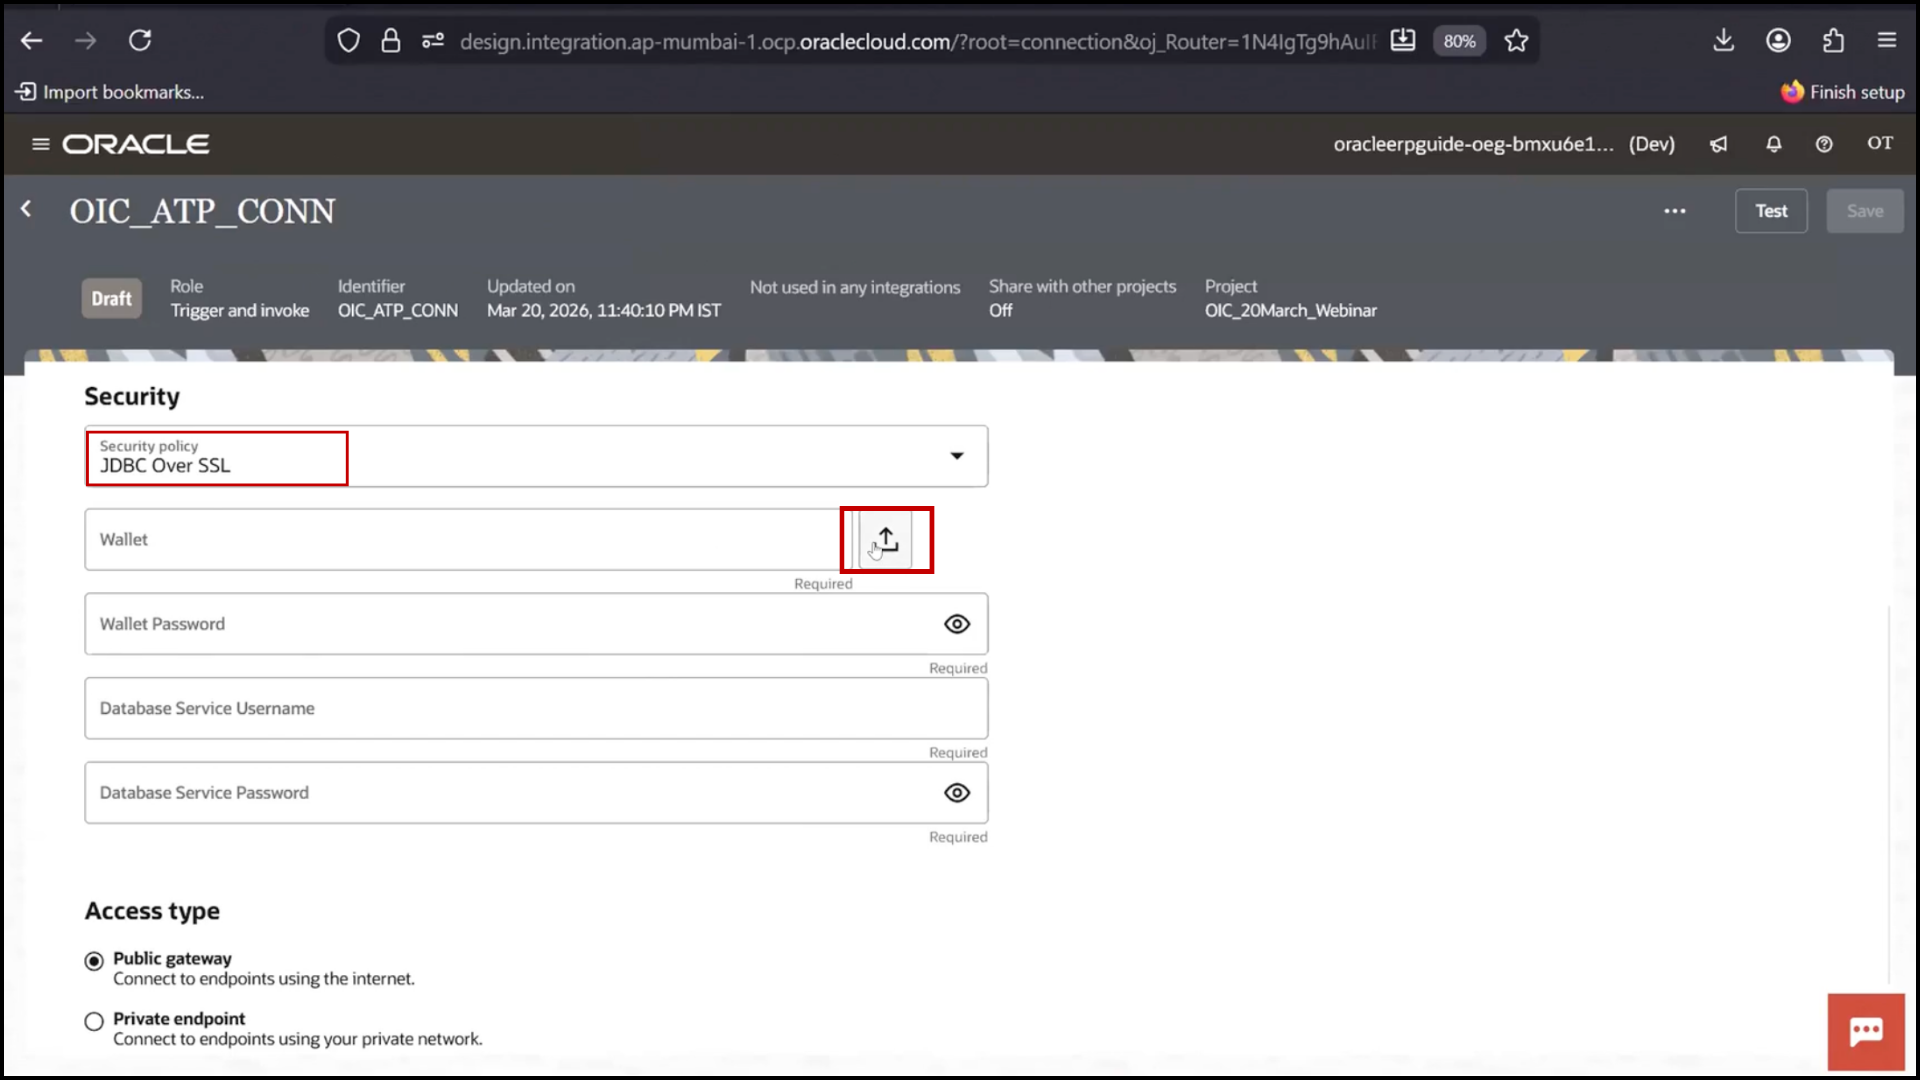
8. Click Upload
9. Enter Wallet Password
10. Enter DB Username (admin)
11. Enter DB Password
11. Important Step:
a. Add Service Name (mandatory in this case)
b. Click Test
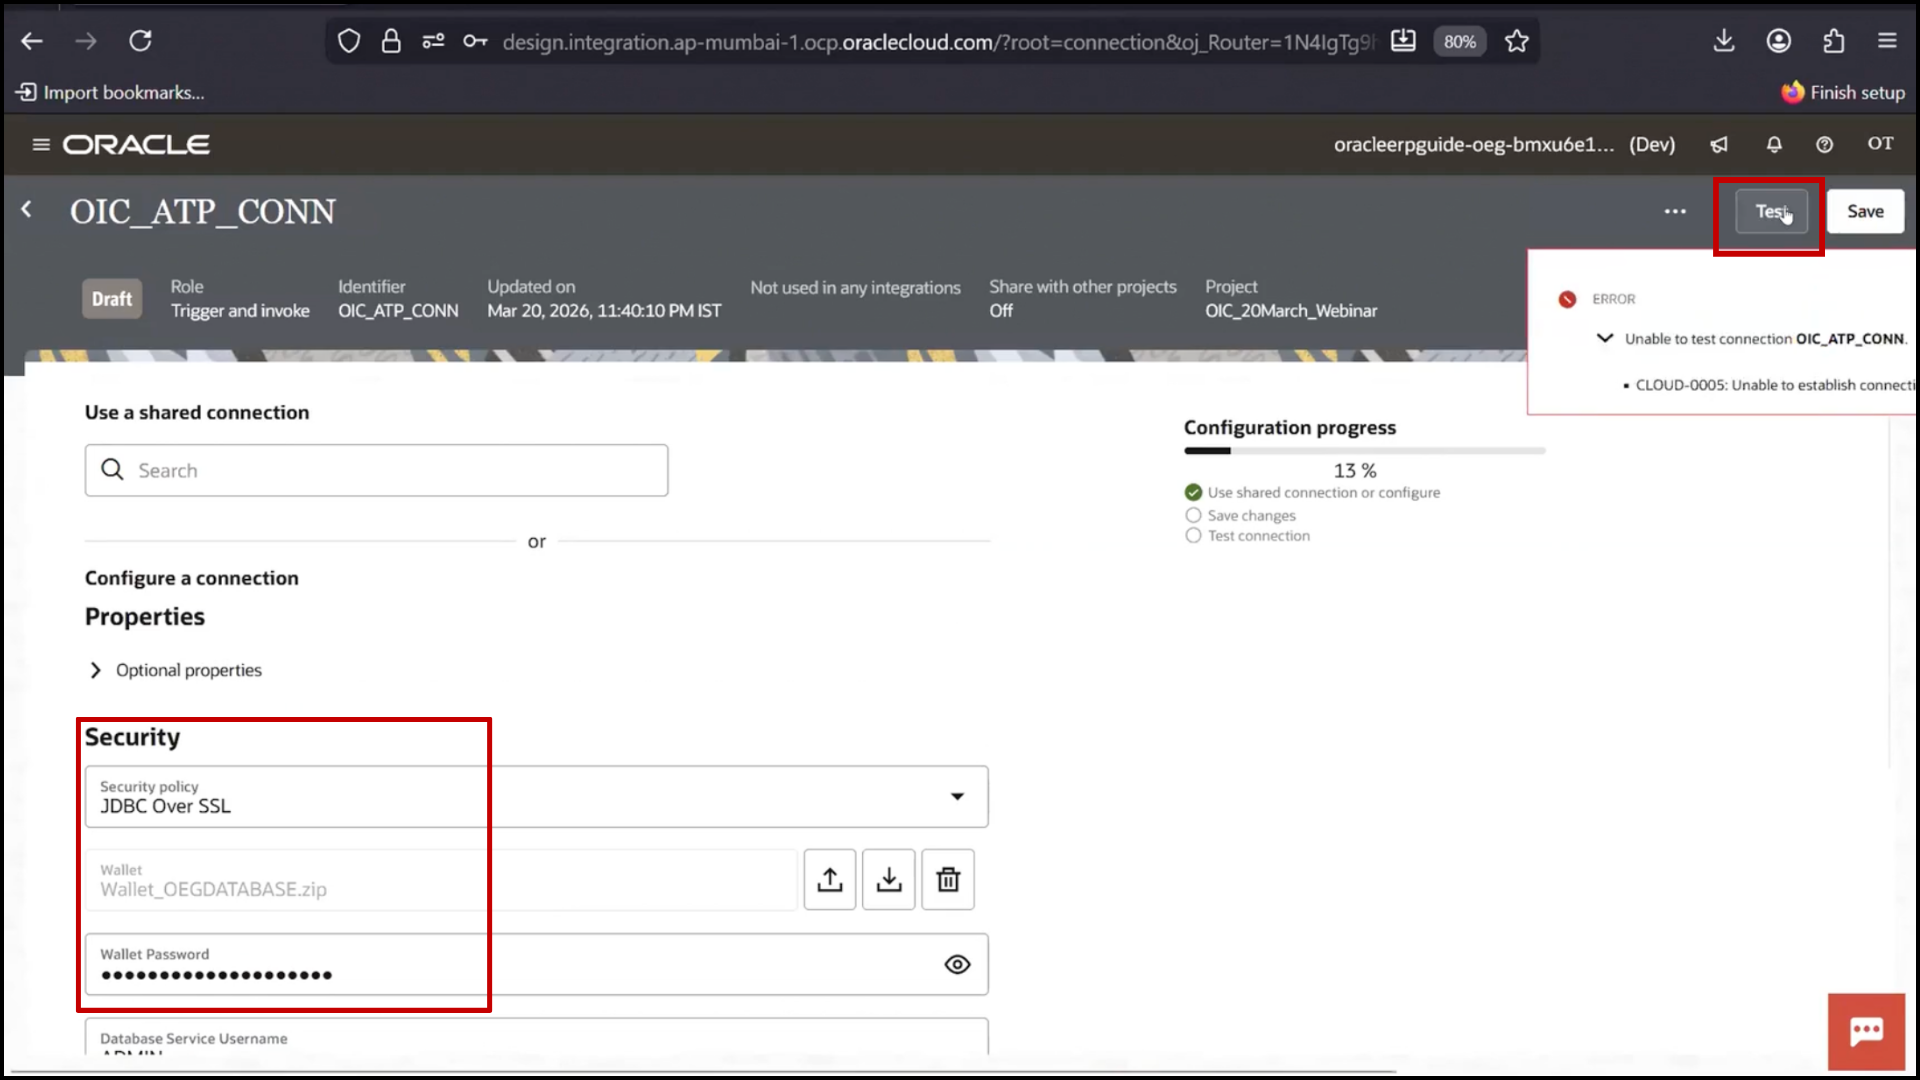
12. If error:
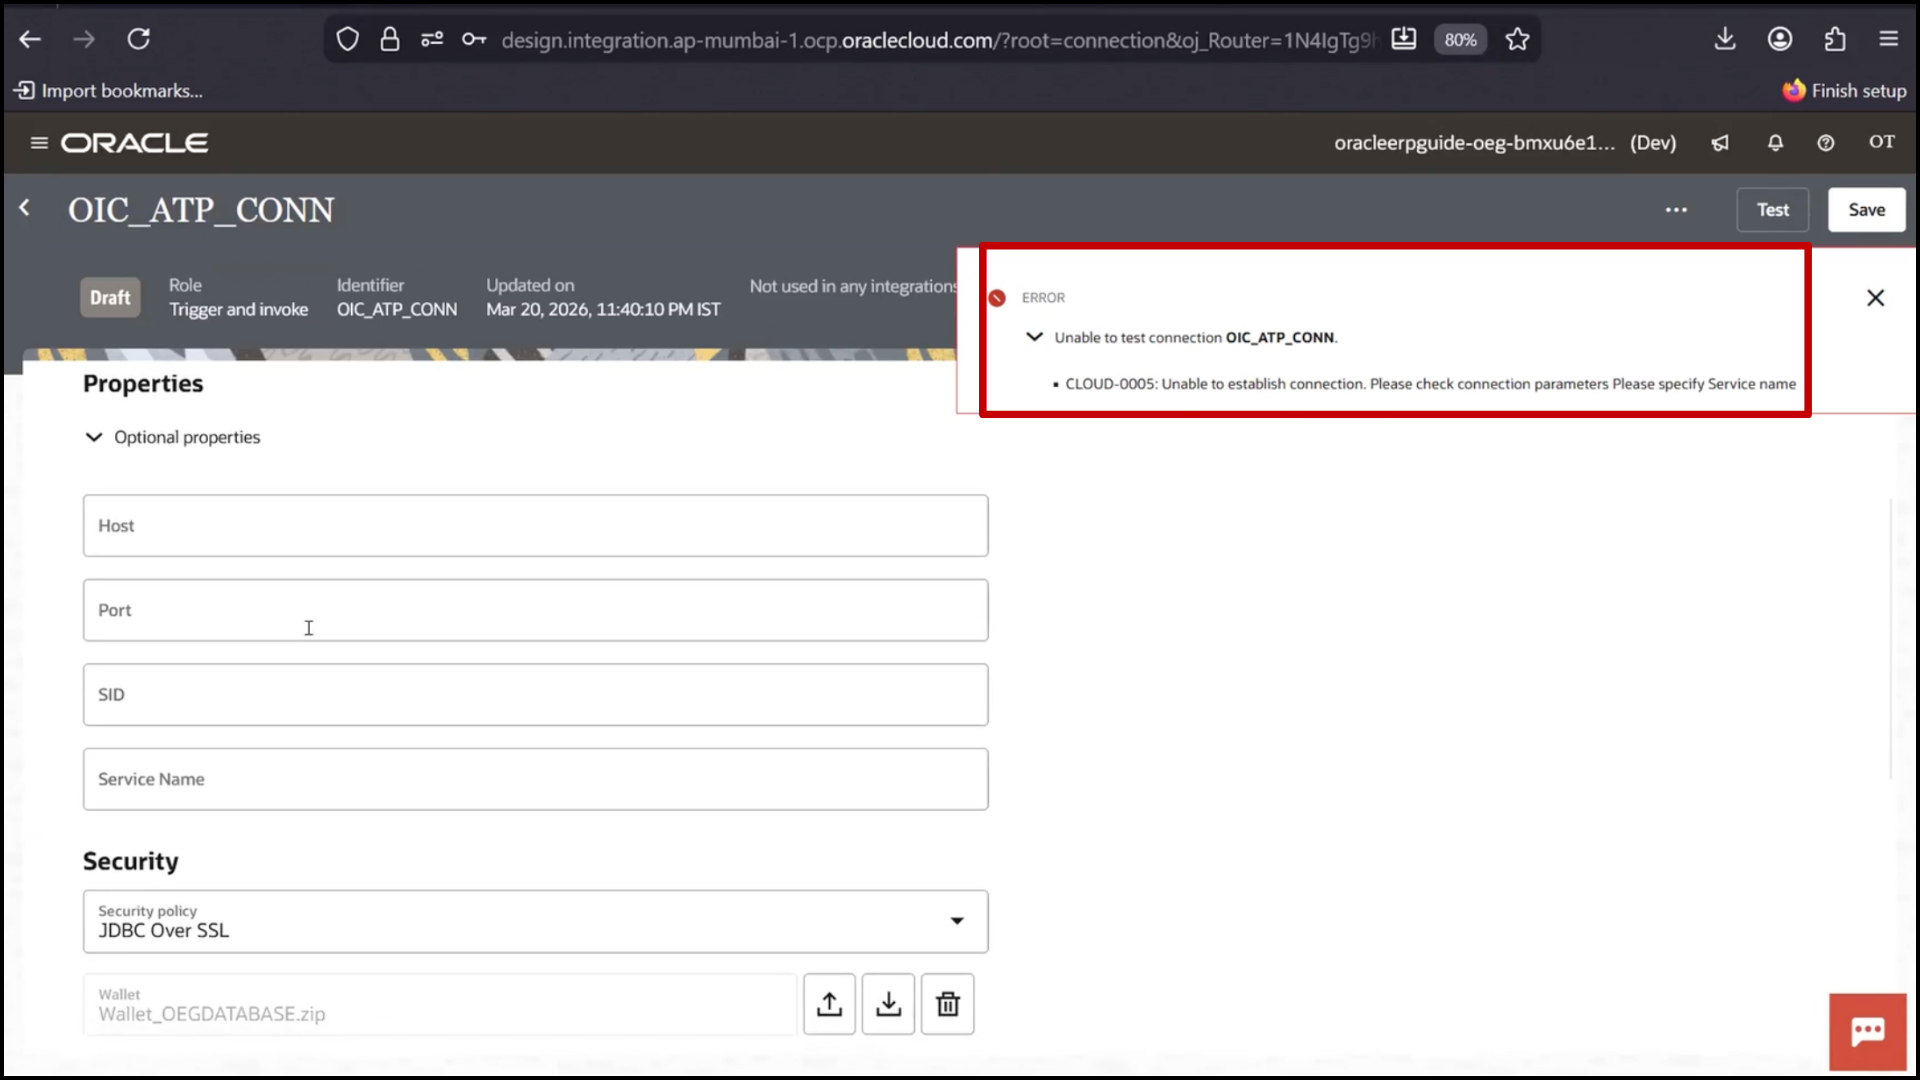
13. Check missing fields
14. Re-enter service name
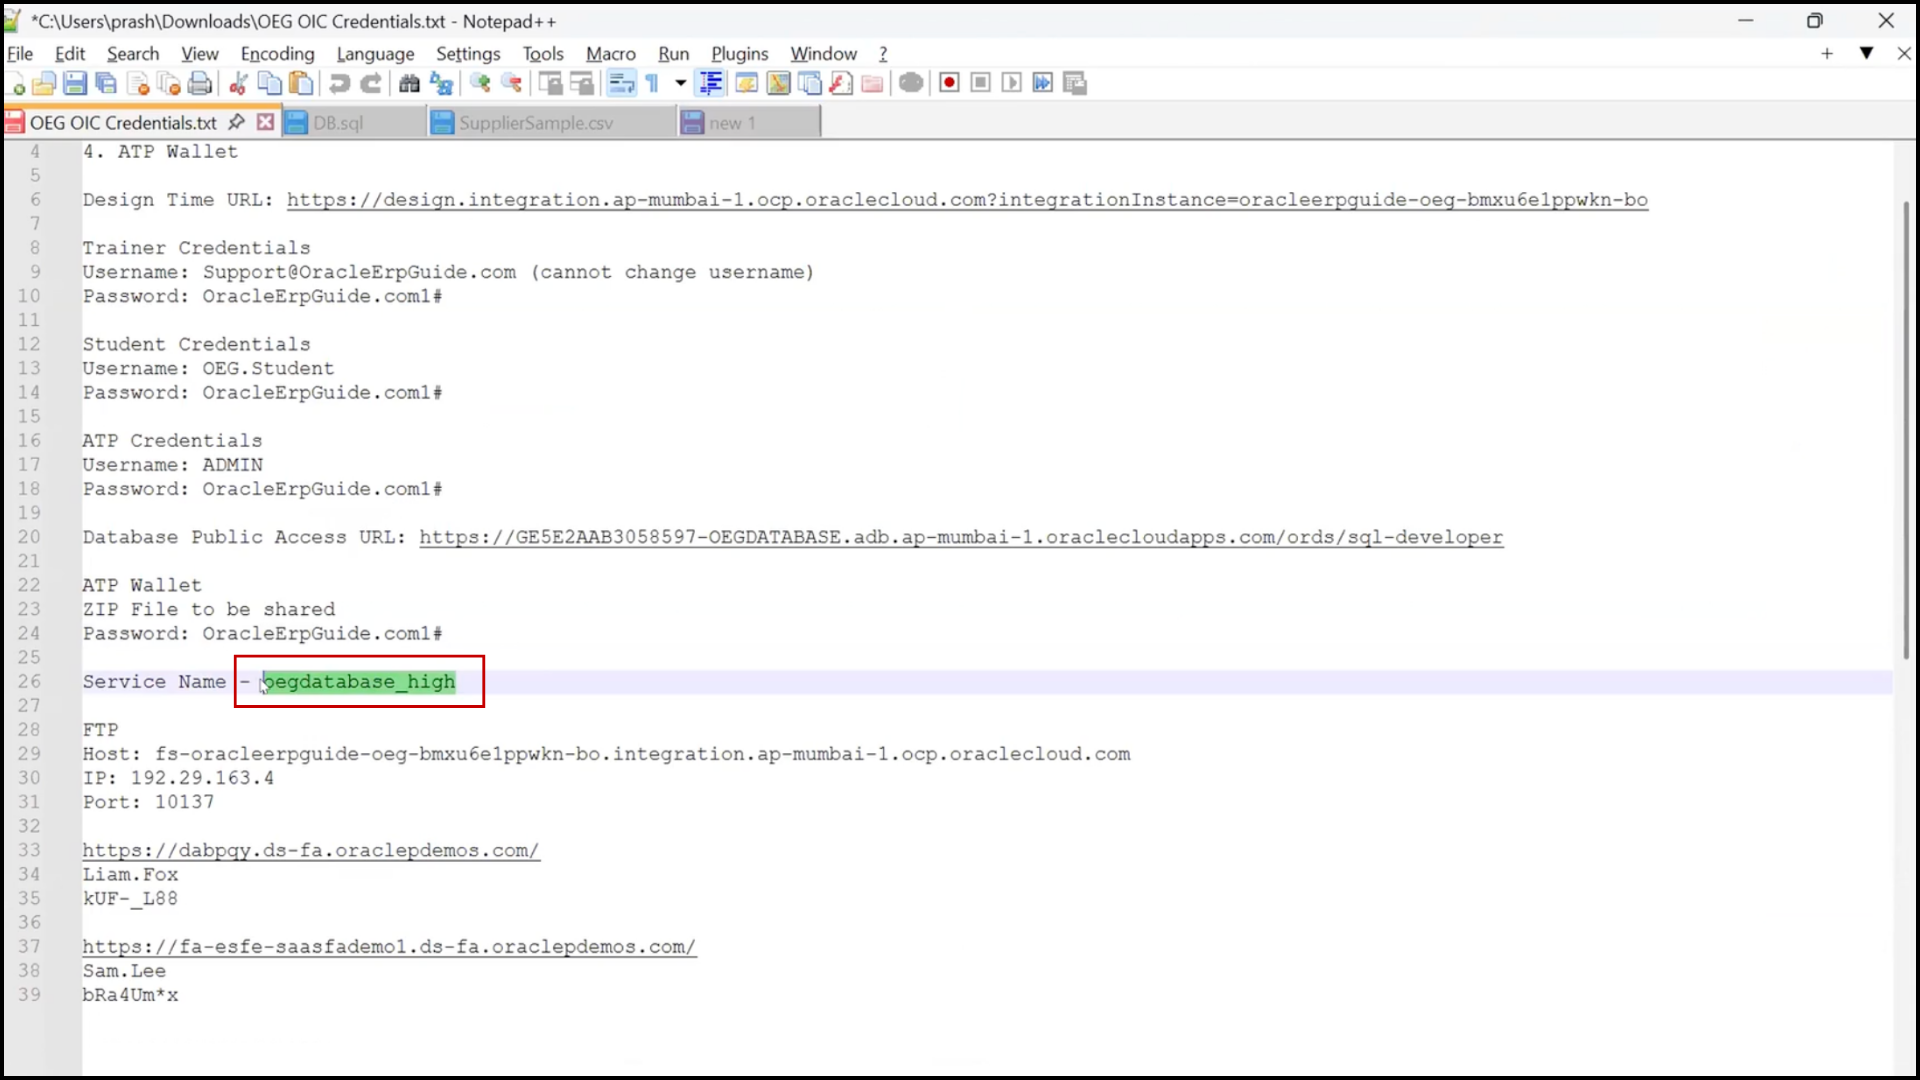
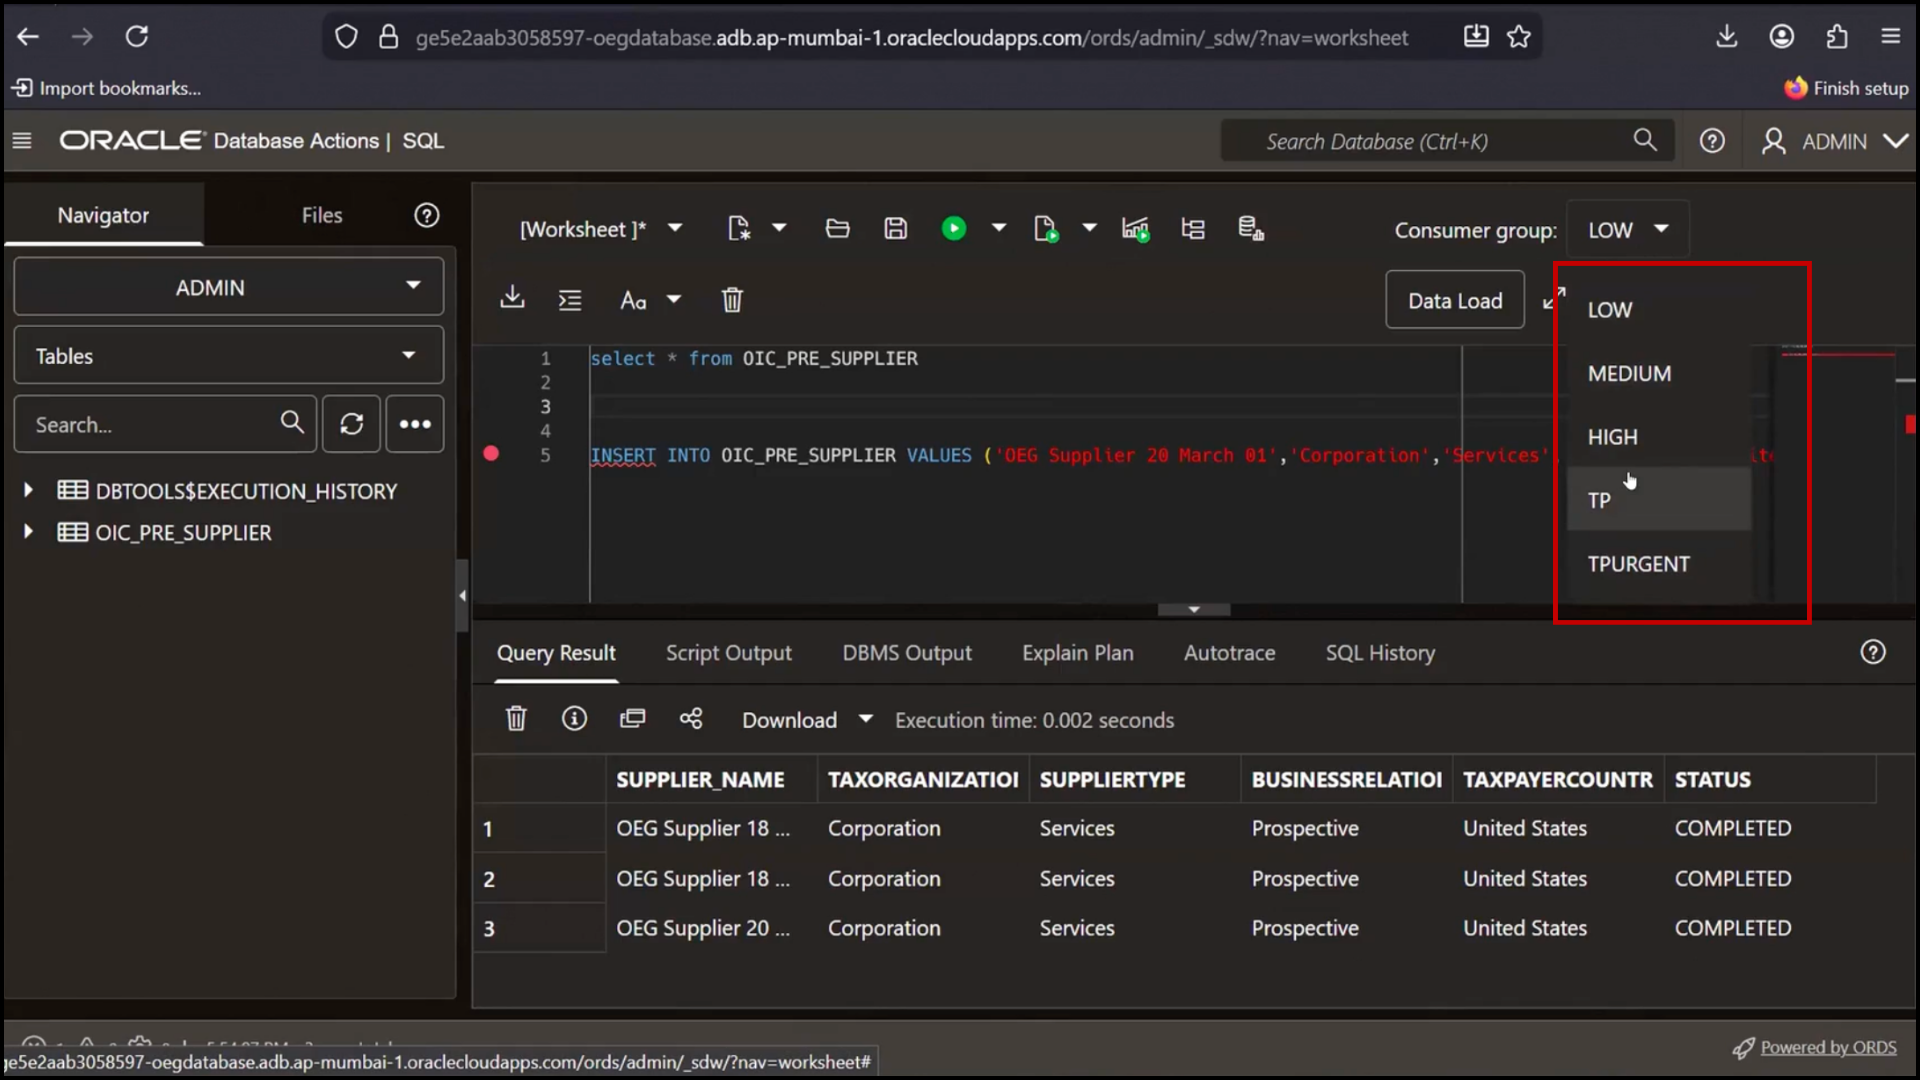
15. Once successful,
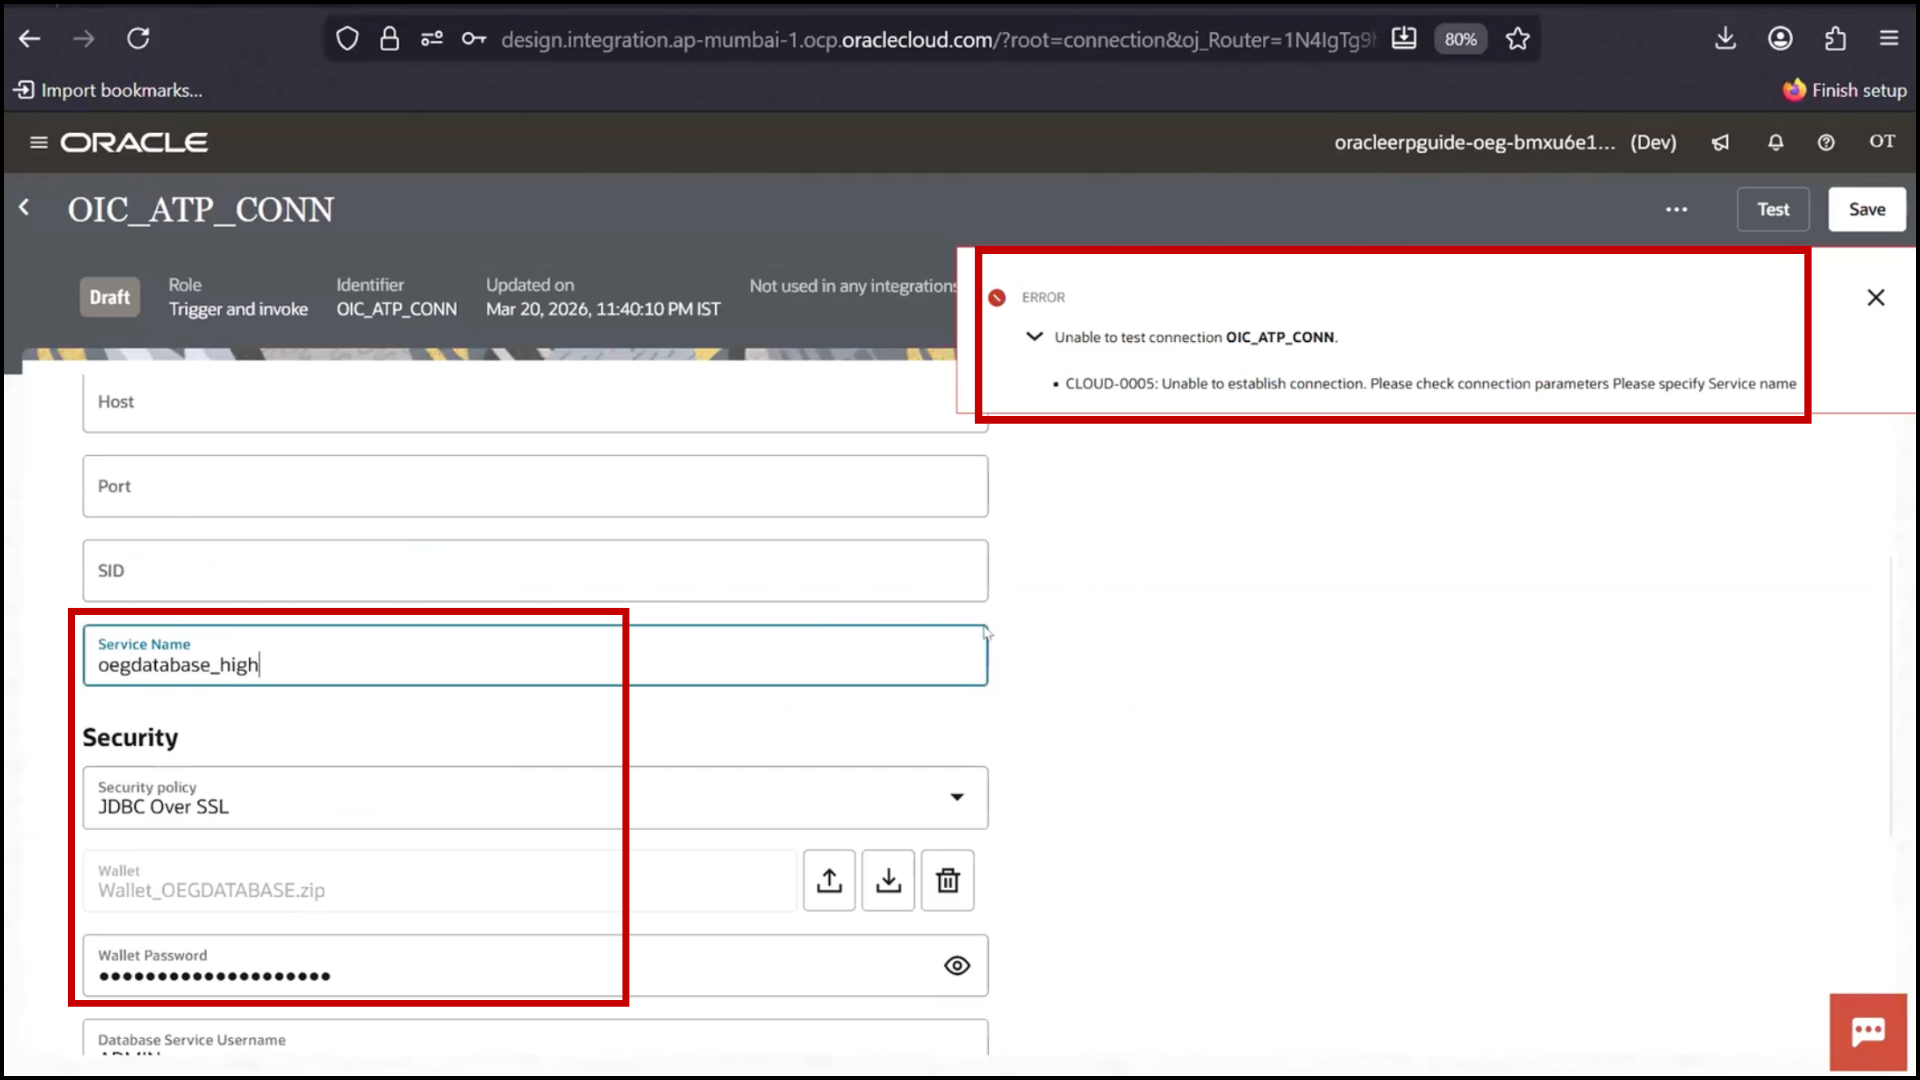
16. Priority can be set
17. Click Test

18. Click Save
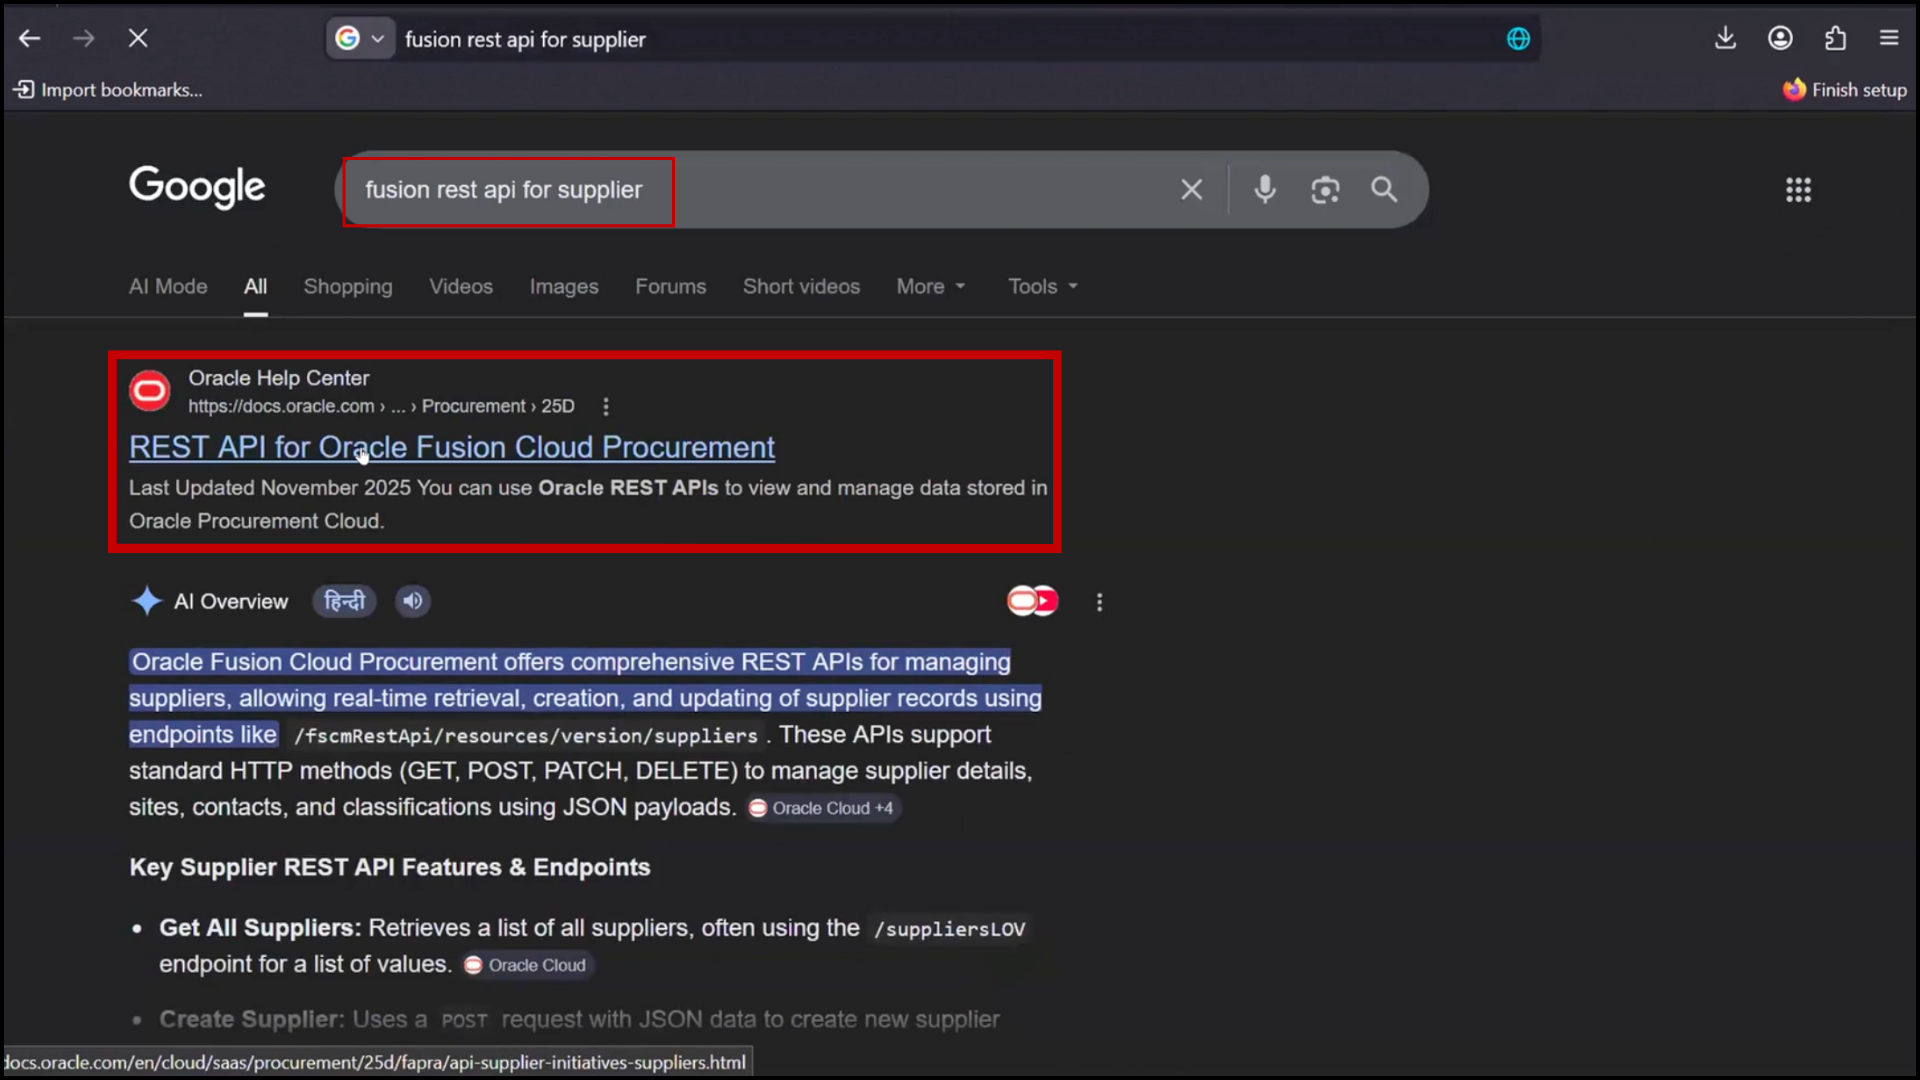
Step 4: Create Fusion REST Connection
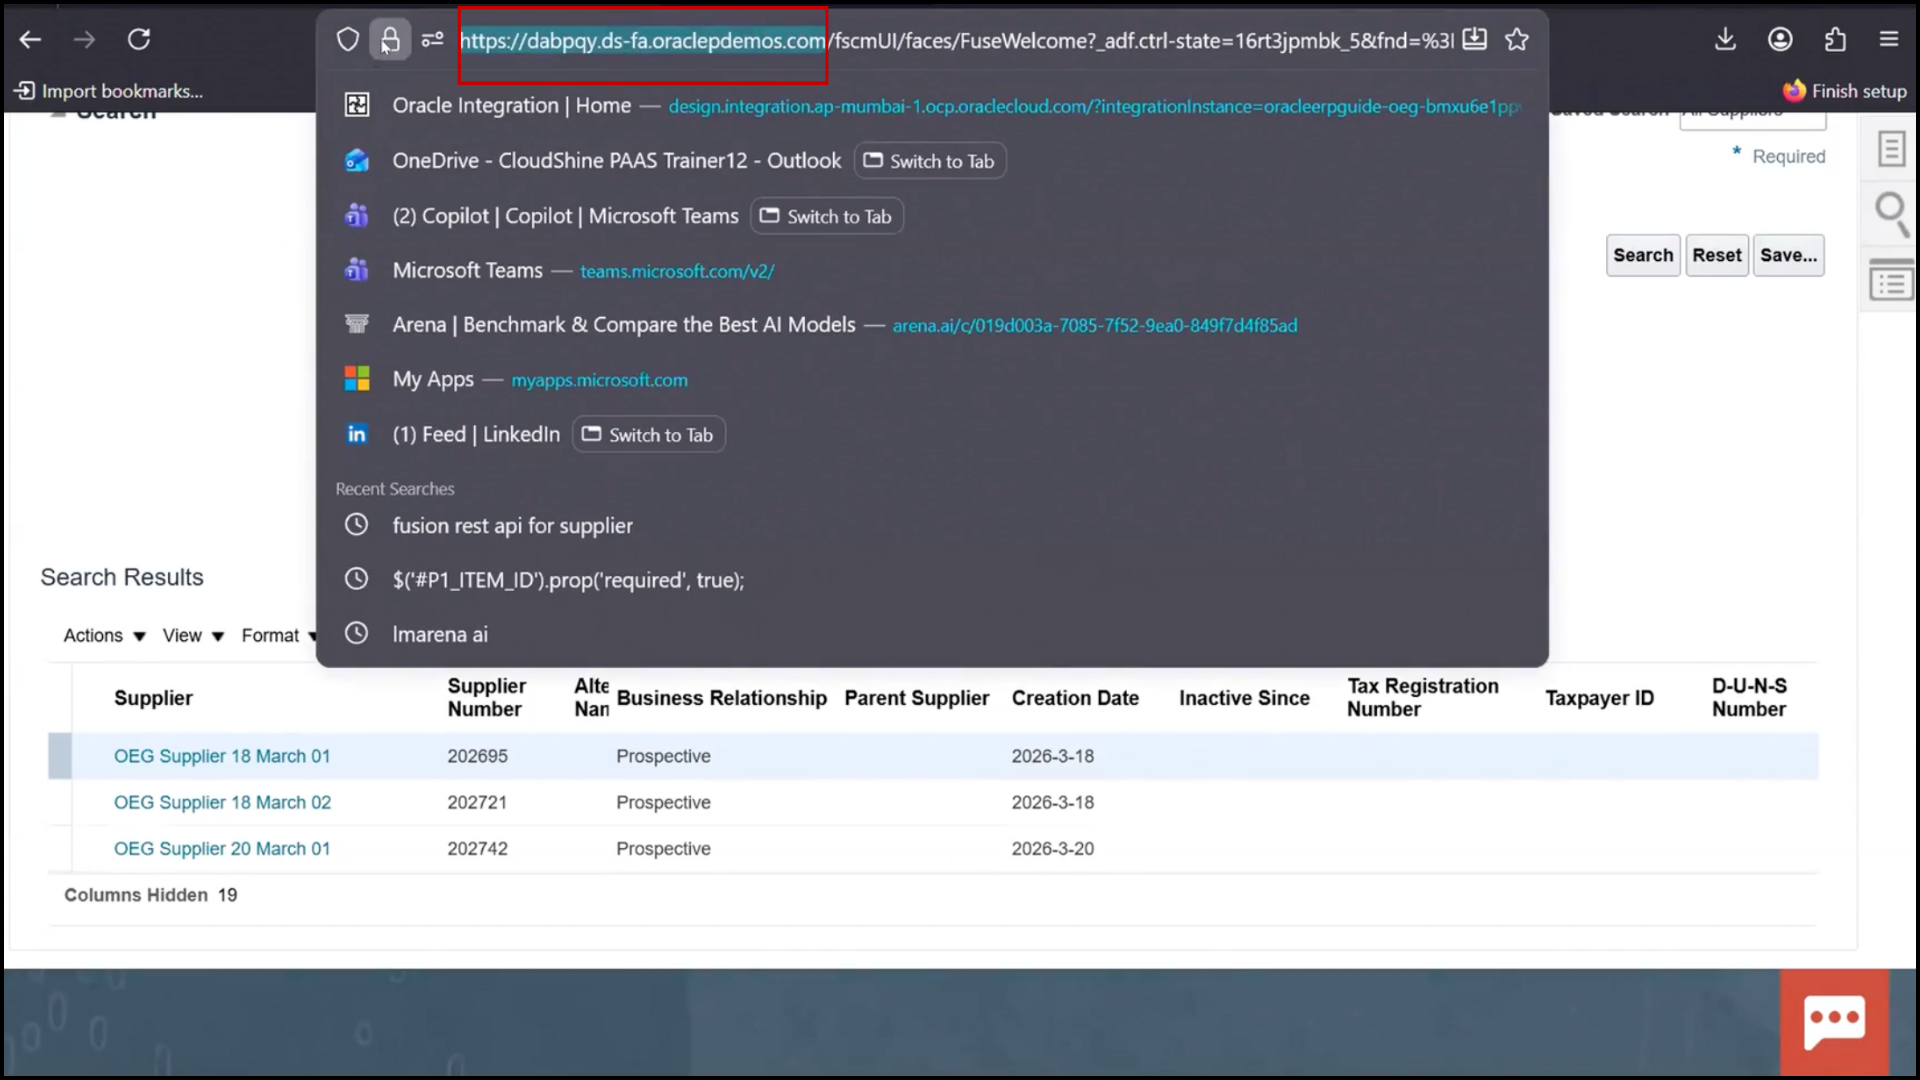
1. You can refer to the official Oracle documentation by searching for “Fusion REST API for Supplier.”
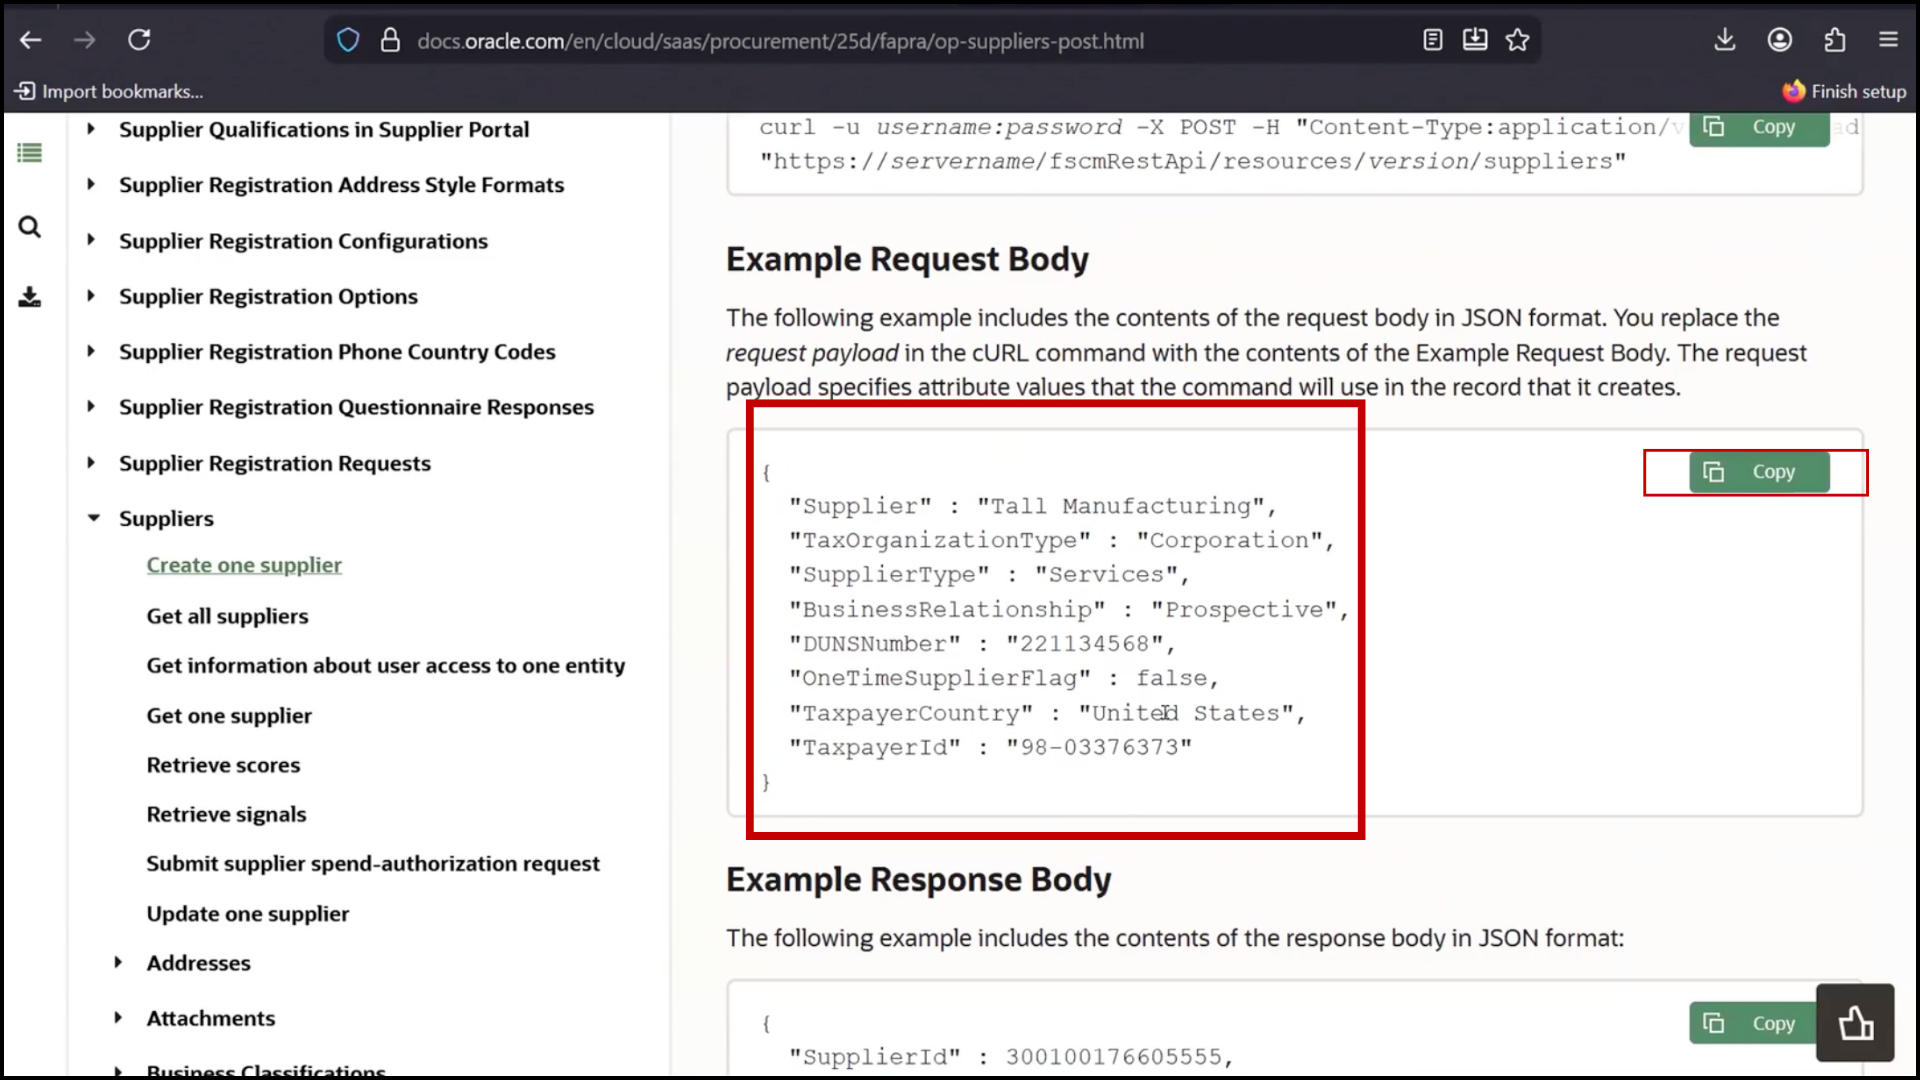
2. Go to Supplier, Create supplier; Post Link
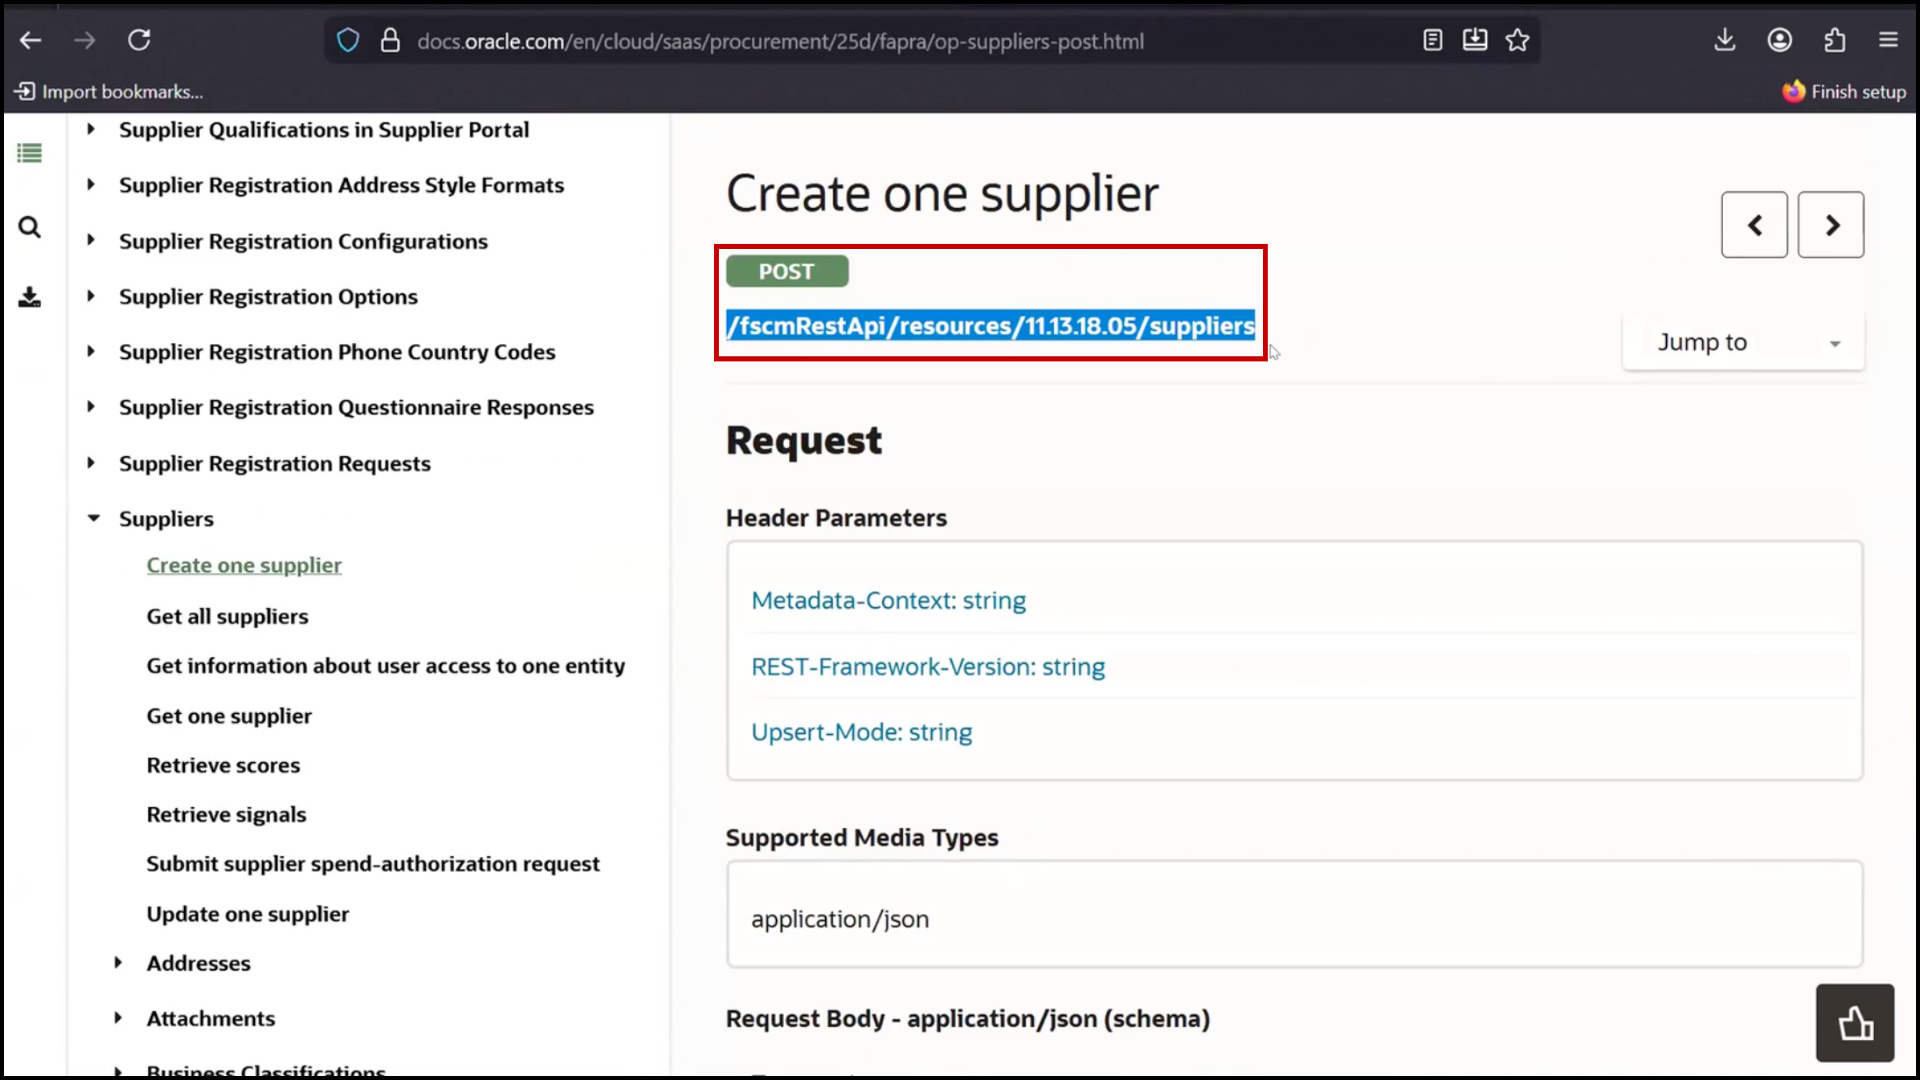
3. Copy Code
4. Click Create
5. Select REST Adapter
6. Enter:
a. Name: Fusion_REST_API
b. Click Create
7. Configure:
8. Base URL (Fusion instance URL)

9. Copy URL
10.Username
11. Password
12. Click Test
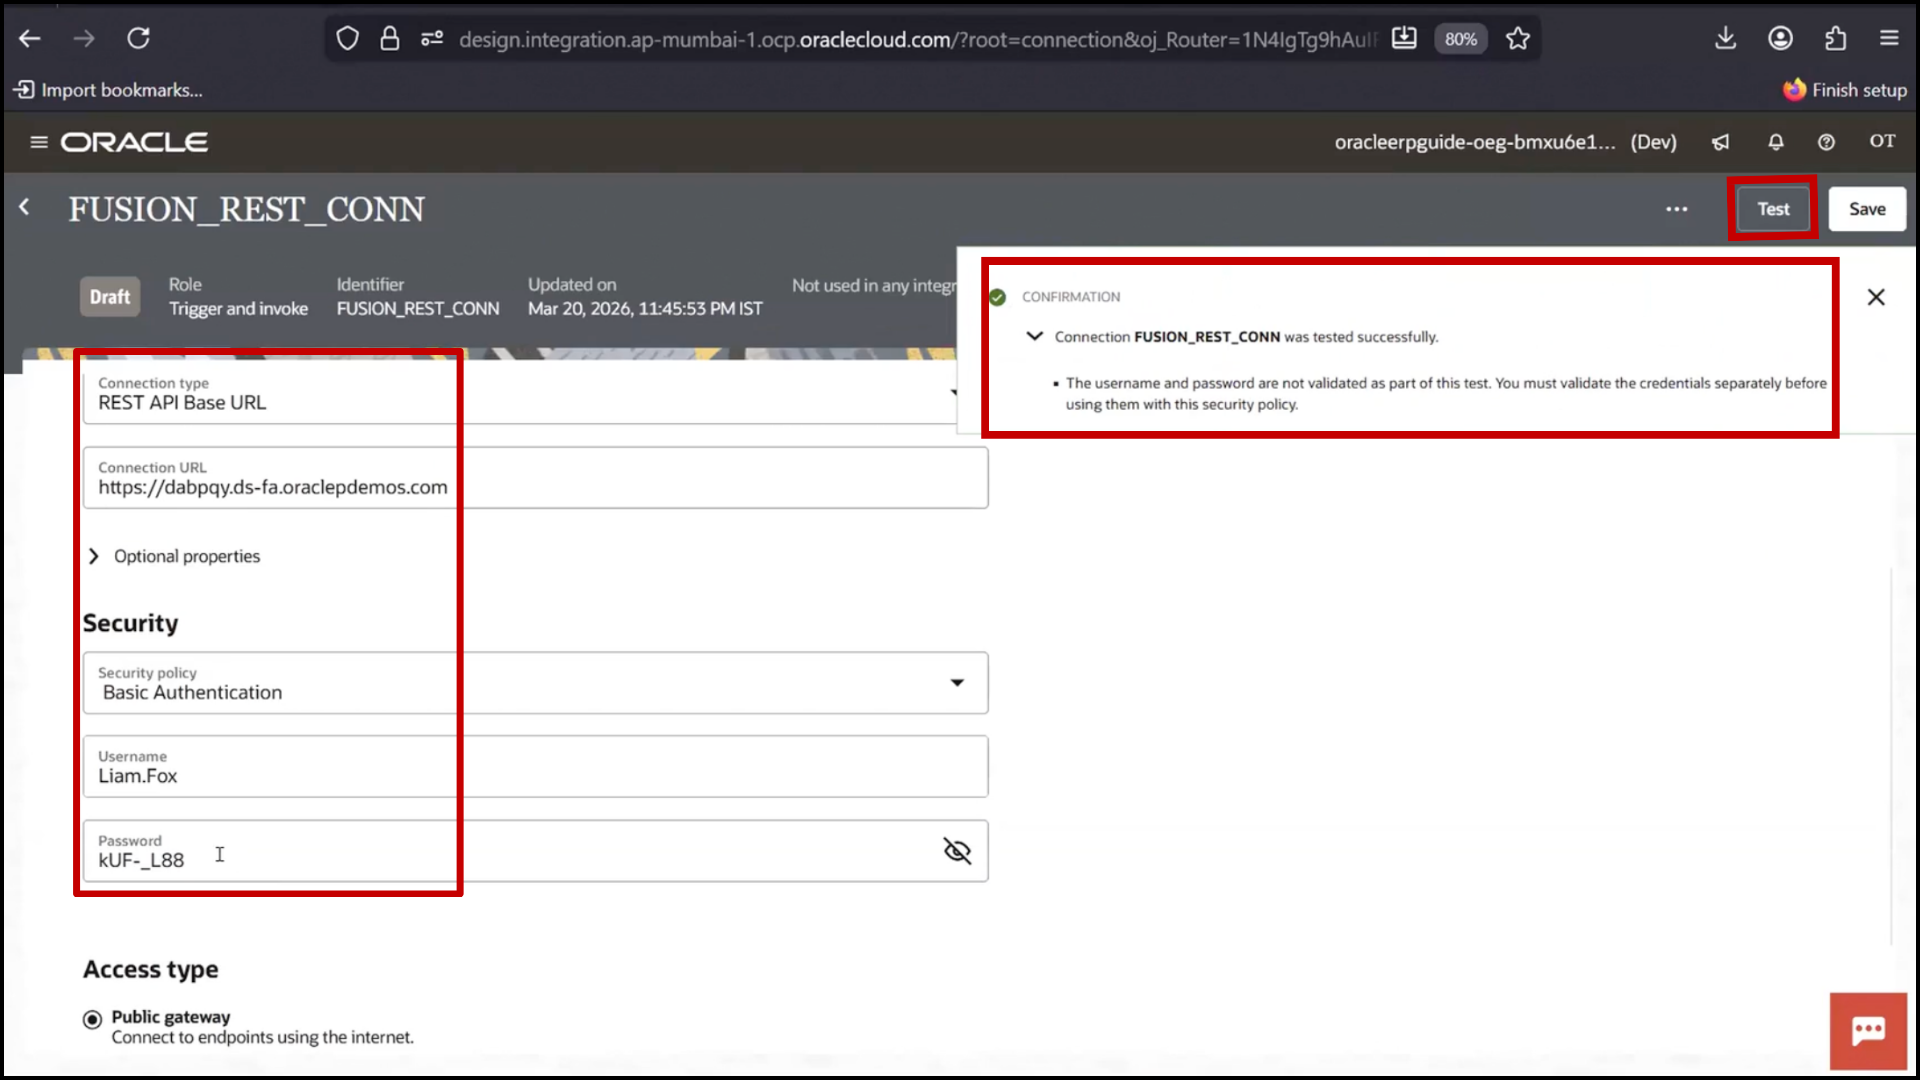
13. If failure:
14. Check credentials.
15. Remove extra spaces
16. Click Save.
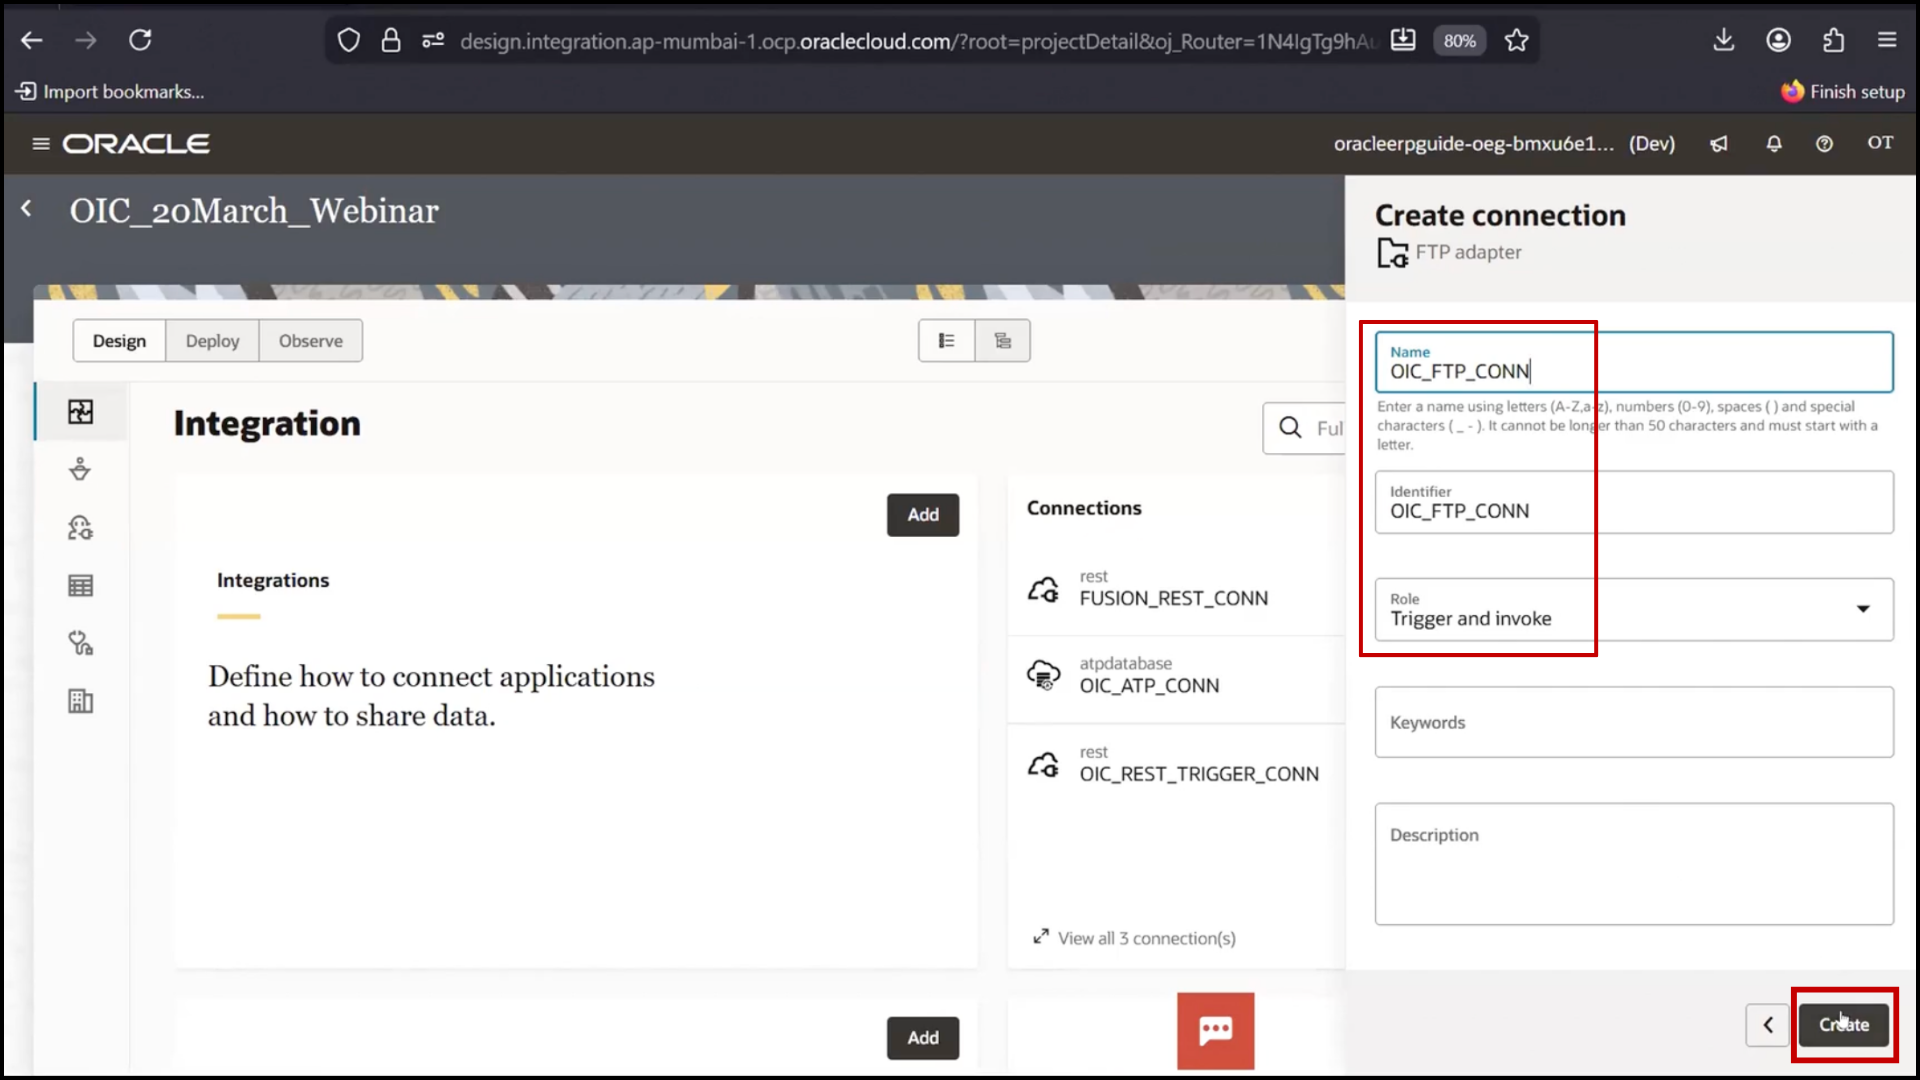
Step 5: Create FTP Connection
1. Click Create
2. Select FTP Adapter
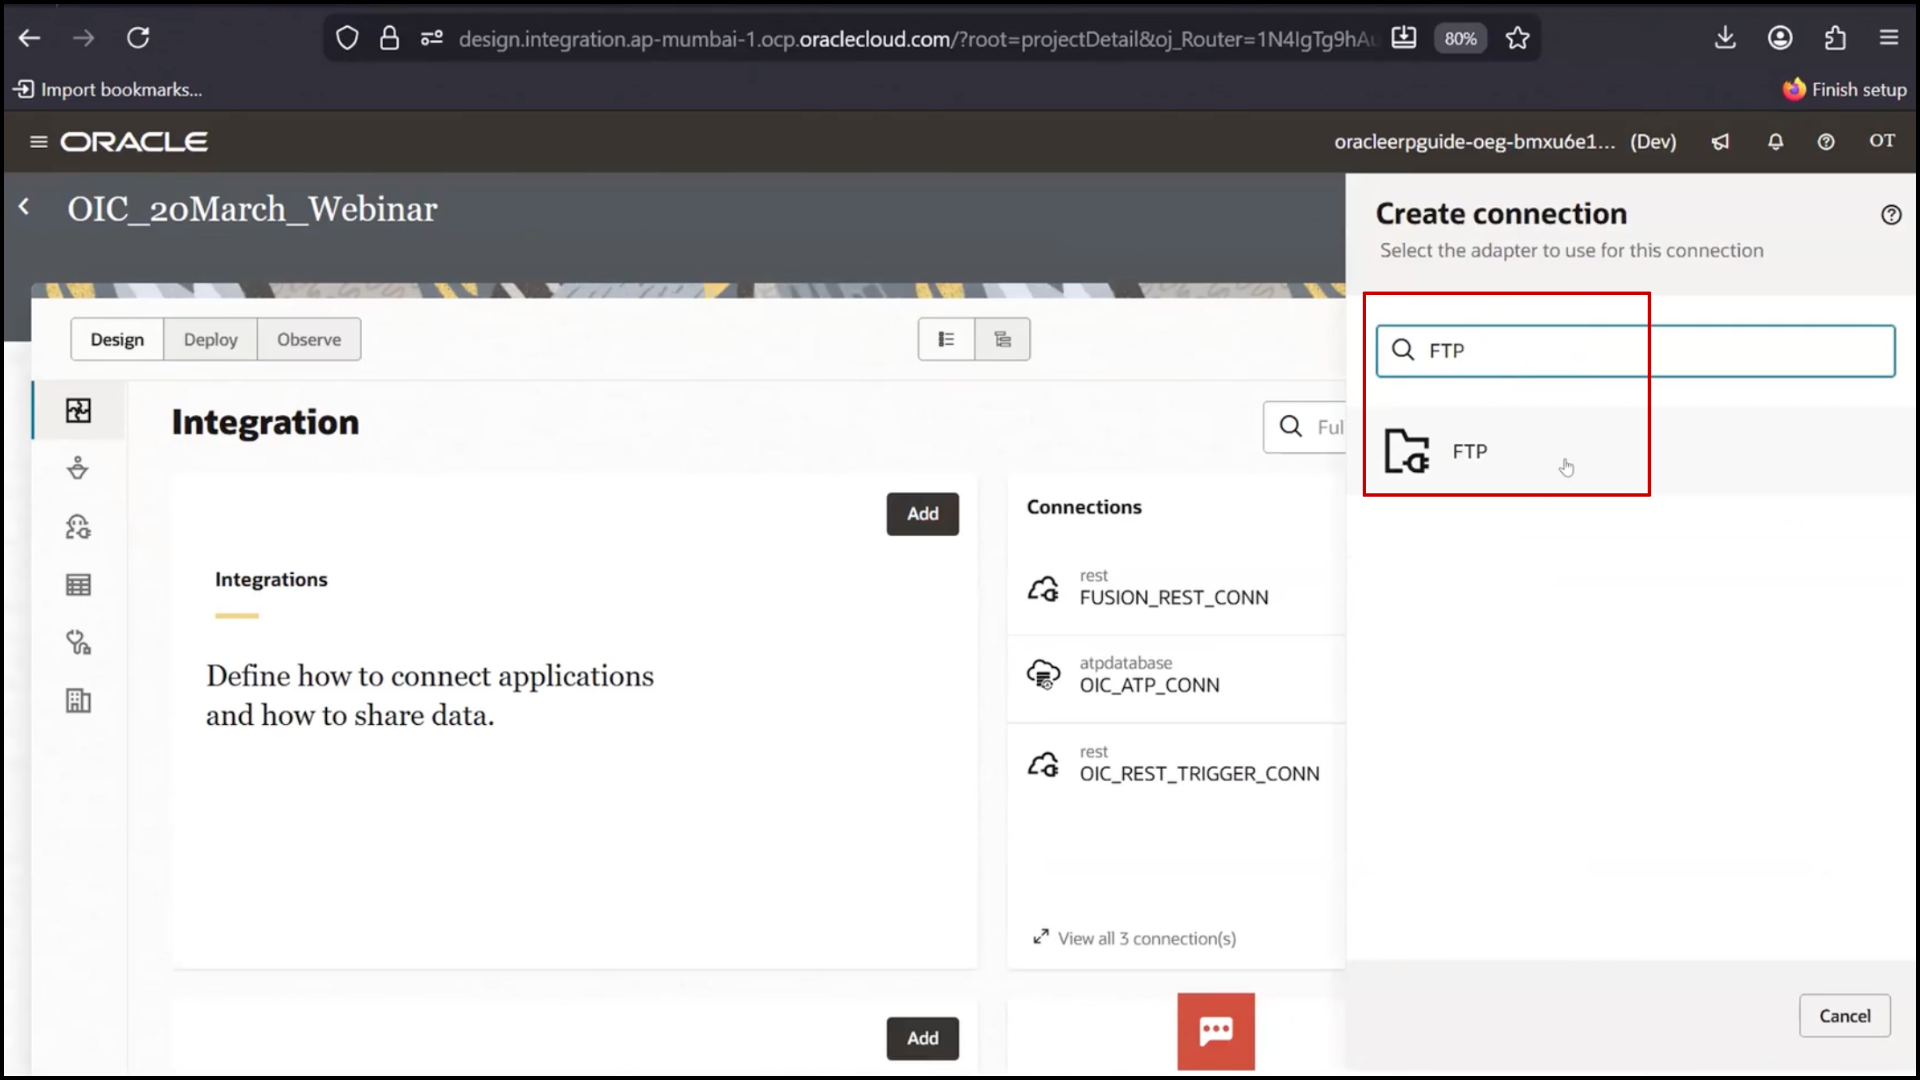
3. Enter:
a. Name: OIC_FTP_Connection
b. Click Create
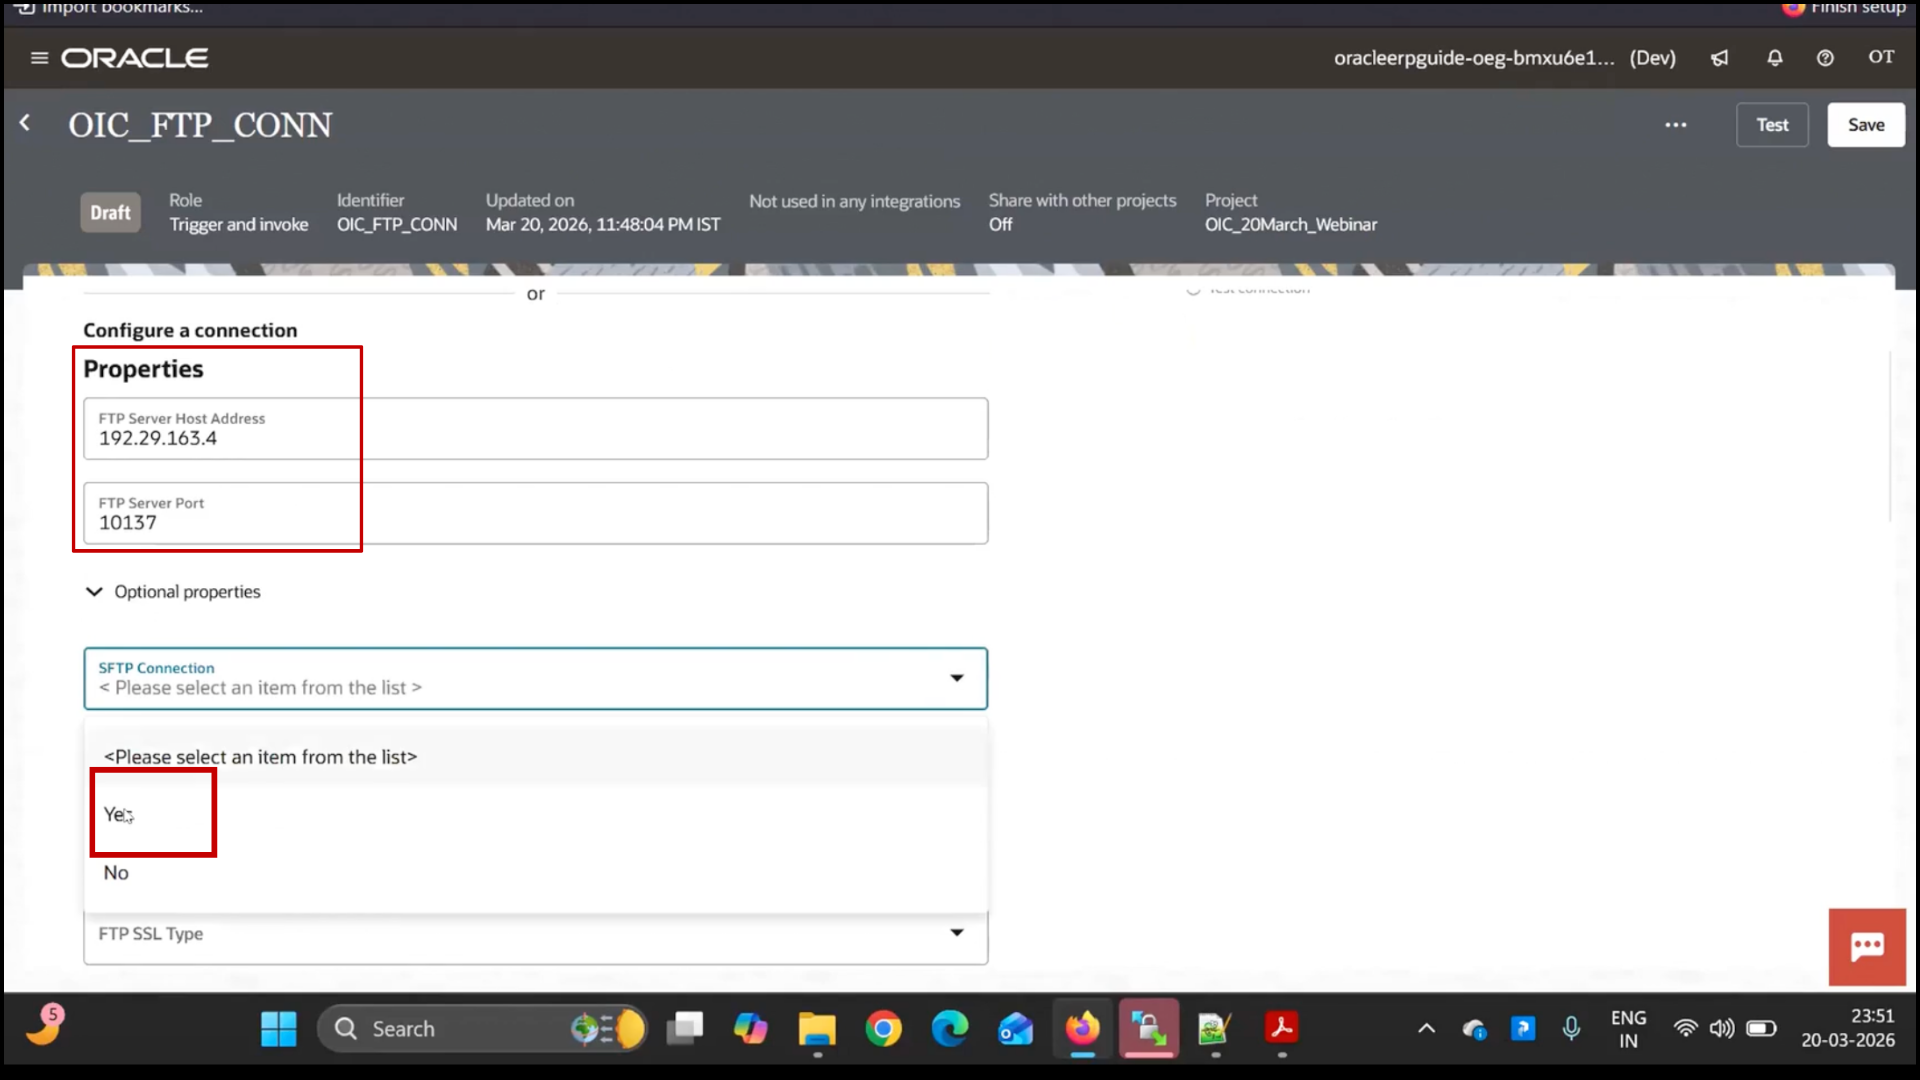
4. Configure:
5. Host (IP address)
6. Port
7.Username
8. Password
9. Important Step:
a.Enable SFTP = Yes
b. Click Test

10. If error:
a. Check host/port
b. Enable SFTP, Say yes
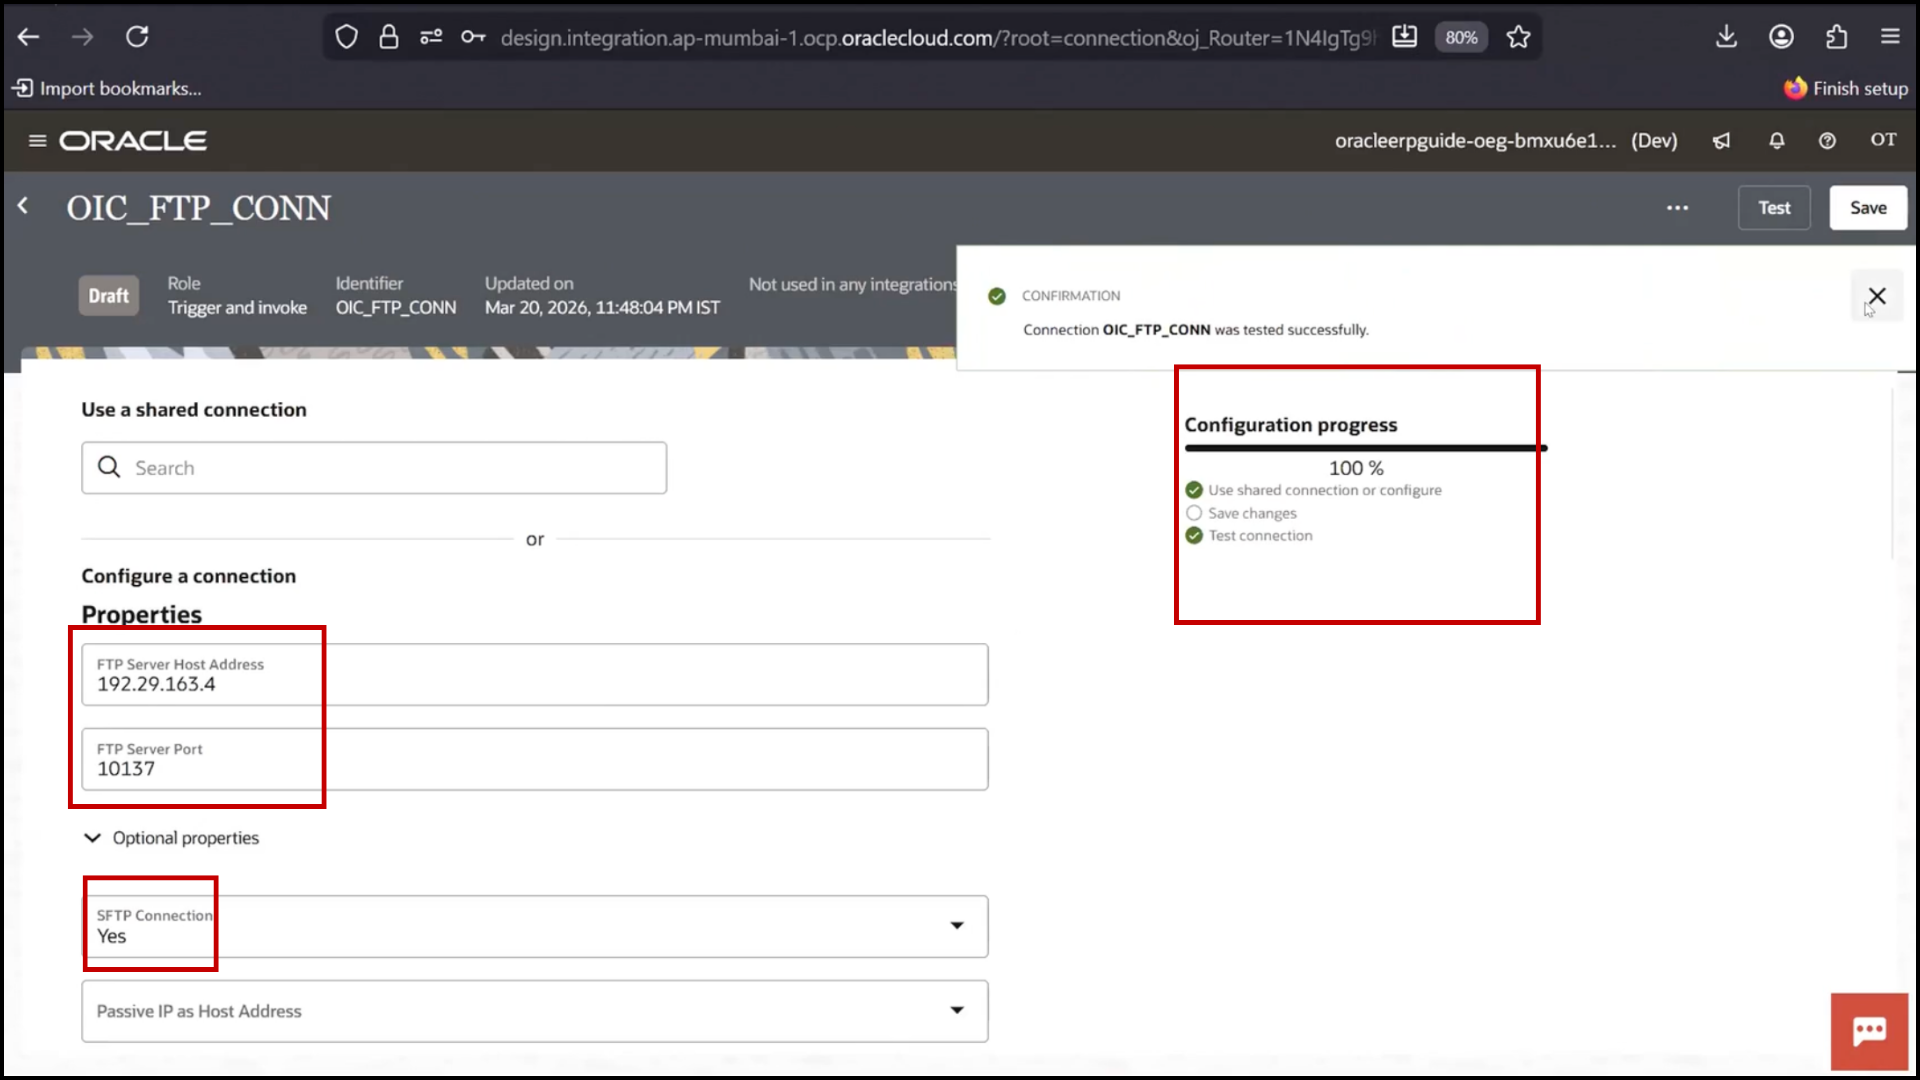
11. Diagnose and Test
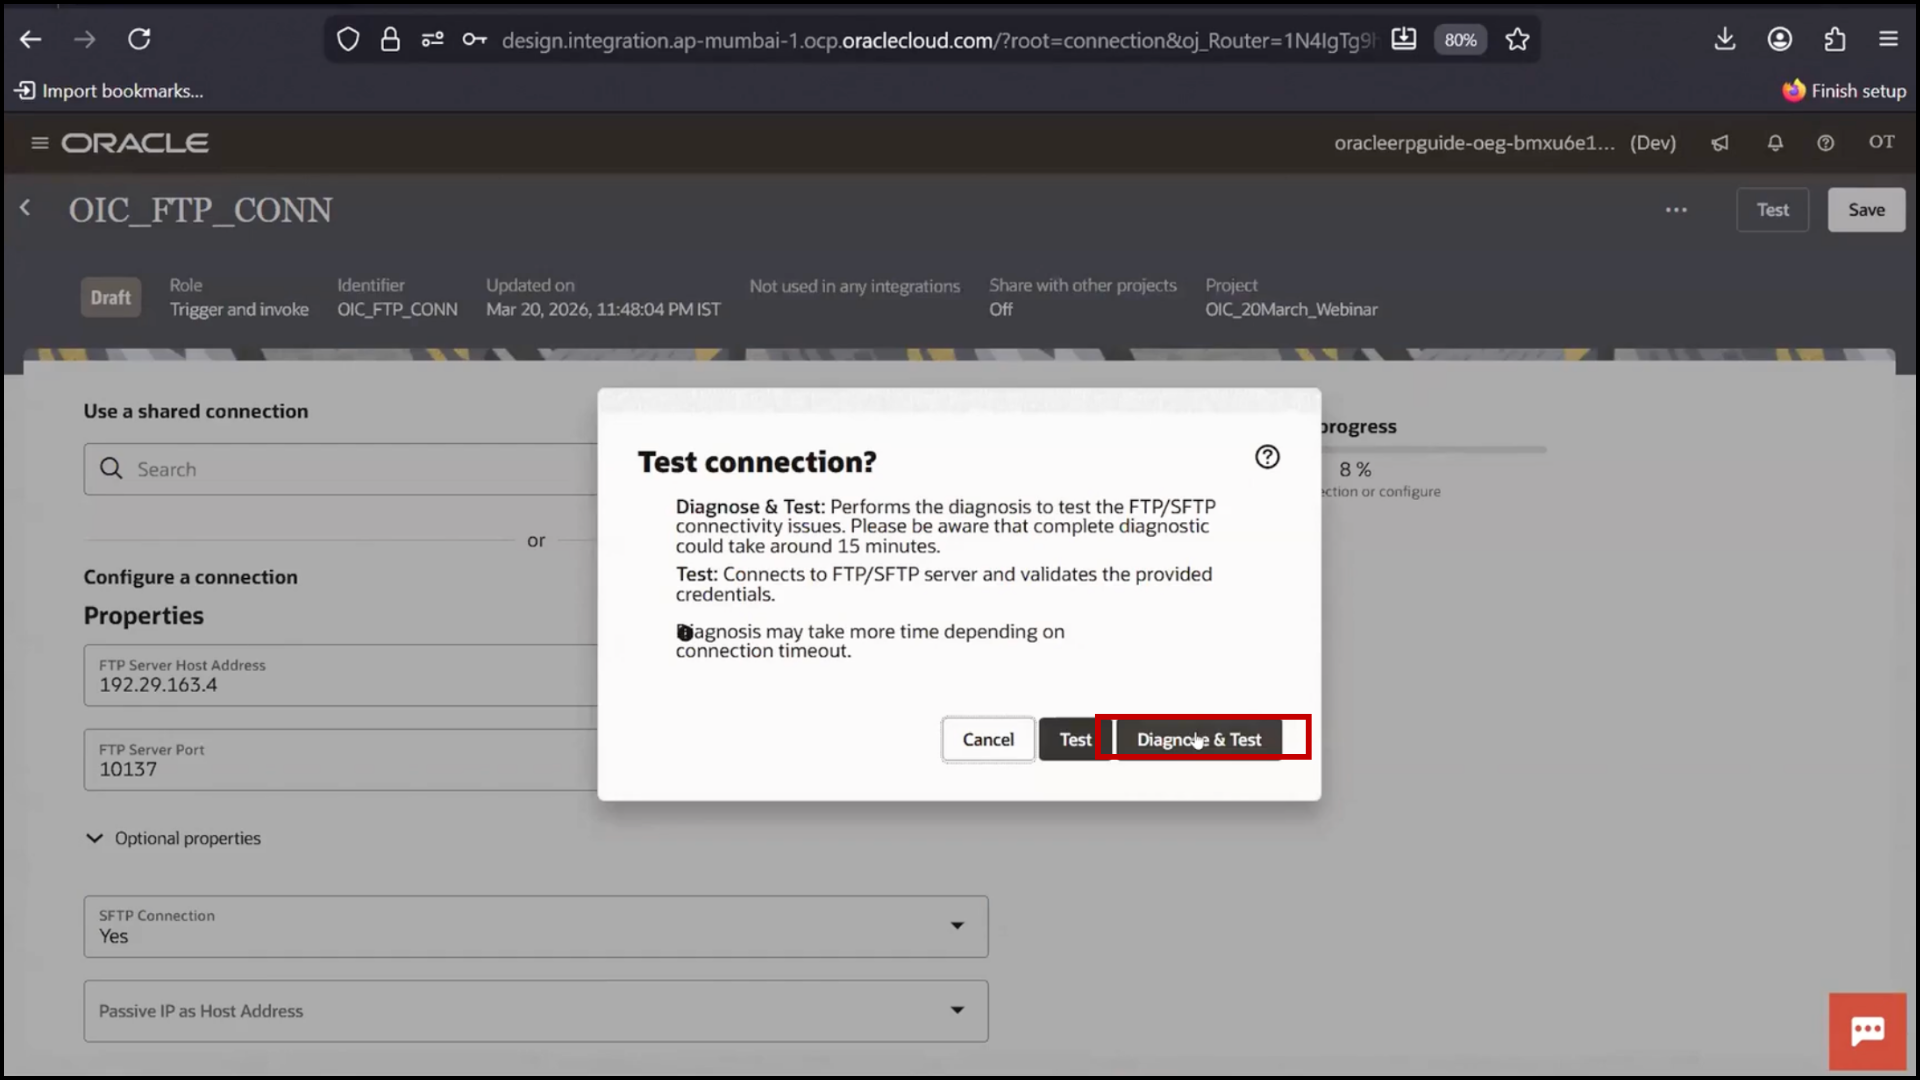
12. Click Test and Click Save
Important Concept Explained by Trainer
Even if a field is marked optional:
It may be required depending on system configuration
Examples:
Service Name in ATP
SFTP flag in FTP
Integration Architecture
The integration includes:
REST Trigger → Starts flow
Database Adapter → Fetch data
FTP Adapter → Upload file
REST Adapter → Push data to Fusion