
Creating and managing a purchase order (PO) in Oracle Fusion is a critical phase of the procurement lifecycle. Executing a PO correctly ensures accurate accounting, proper approvals, and firm budgetary oversight prior to finalizing financial commitments.
This guide walks you through the complete purchase order procedure, covering creation, approval, accounting, and budget impact. The scenario demonstrated is an expense purchase order typically used for services and non-receivable items to show how this activity integrates into the broader Procure-to-Pay (P2P) process.
Overview of the Purchase Order Process
The table below summarizes the key stages involved in processing a purchase order in Oracle Fusion:
| Stage | Description |
| PO Creation | Populate the header and line sections and specify the relevant attributes for expense items. |
| Validation & Fund Check | Verify budget availability through budgetary control. |
| Approval | Route the PO through the automated approval workflow. |
| Accounting | Generate encumbrance accounting entries in Purchasing. |
| Budget Impact Review | Check the budgetary control balances to confirm the obligation impact. |
Set a purchase order approval
1. Navigate to setup and maintenance.

2. Choose offerings as procurement.
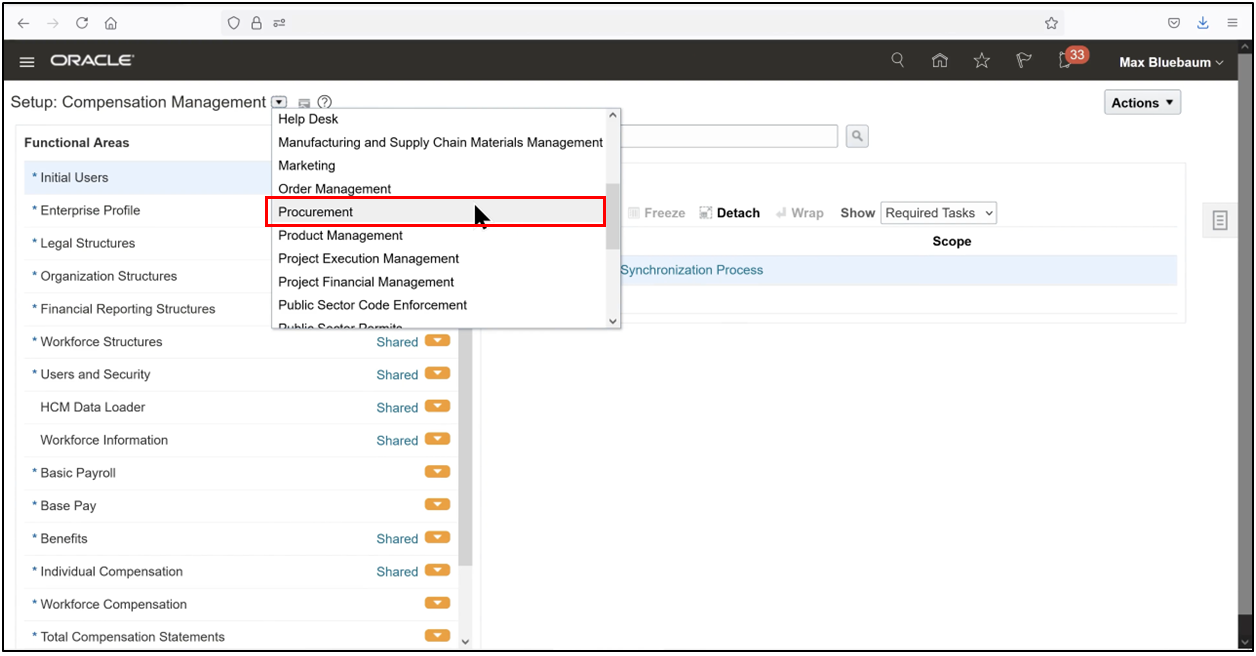
3. Search for the task to manage approval of procurement.

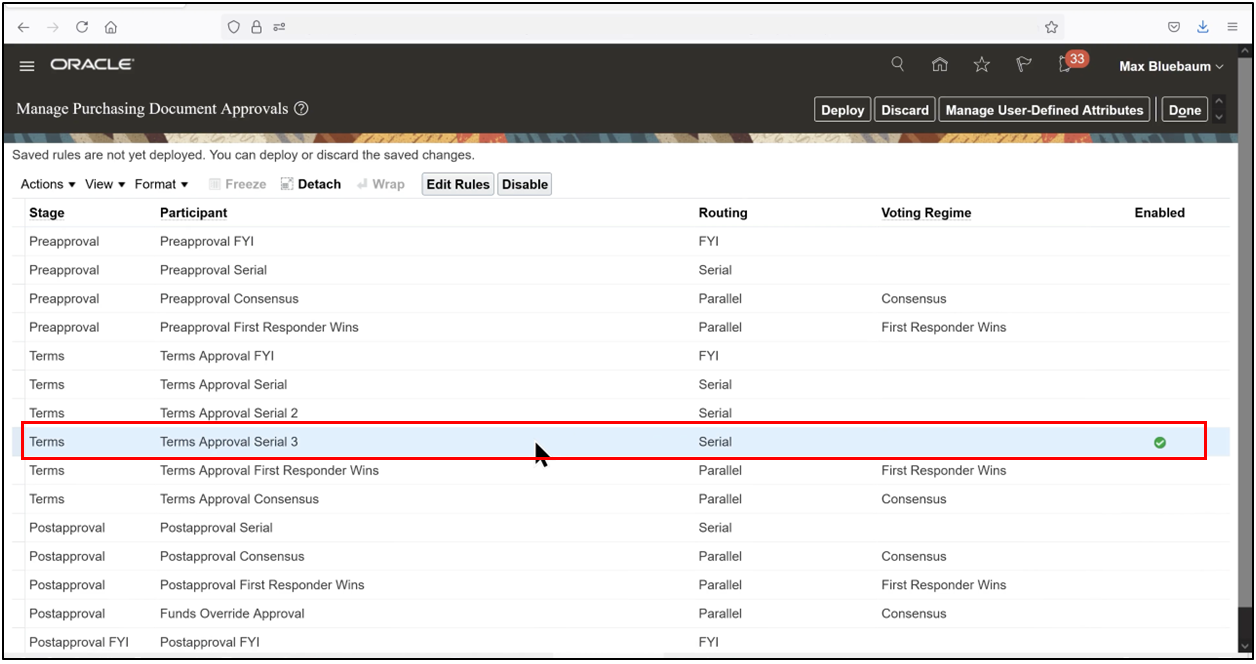
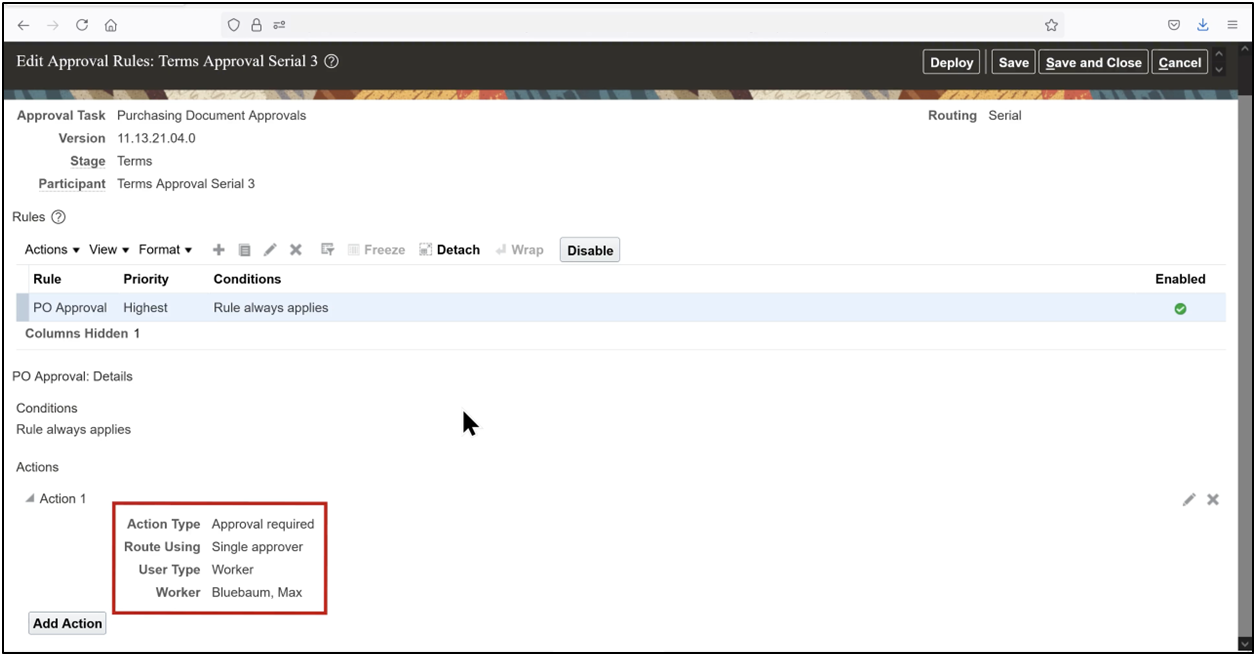
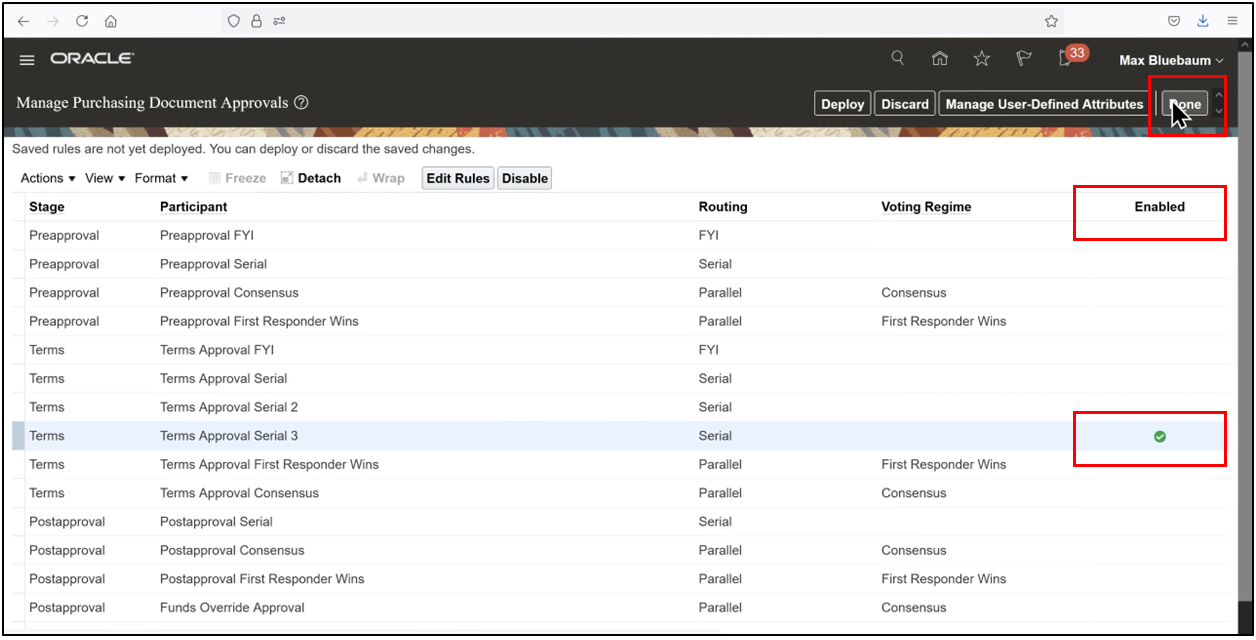
4. Select the tick mark enabled option, which will be only one, and click on Edit rule.
5. Note—For demonstration purposes, we will configure the approval of routing so that the purchase order is routed to our own user, Max Bluebaum. In a real-life implementation, Oracle Fusion supports highly complex approval rules, which are covered in detail in the Oracle ERP Guide’s AMX course, spanning several hours of demonstrations. For a deeper understanding of the approval setup, you may refer to that course.
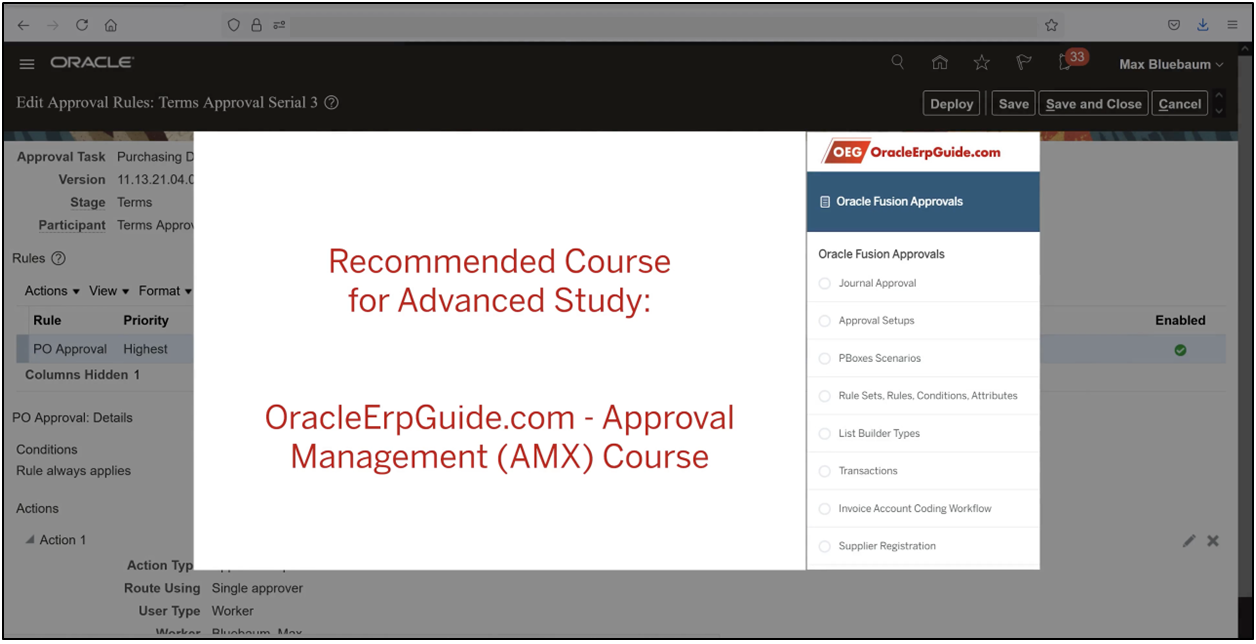
As shown, a rule has been defined to always apply, regardless of any conditions. The action type is set to Approval Required, and approval is required from a single approver, which in this case is our own user, Max Bluebaum.
Scroll up and click Cancel and Done.
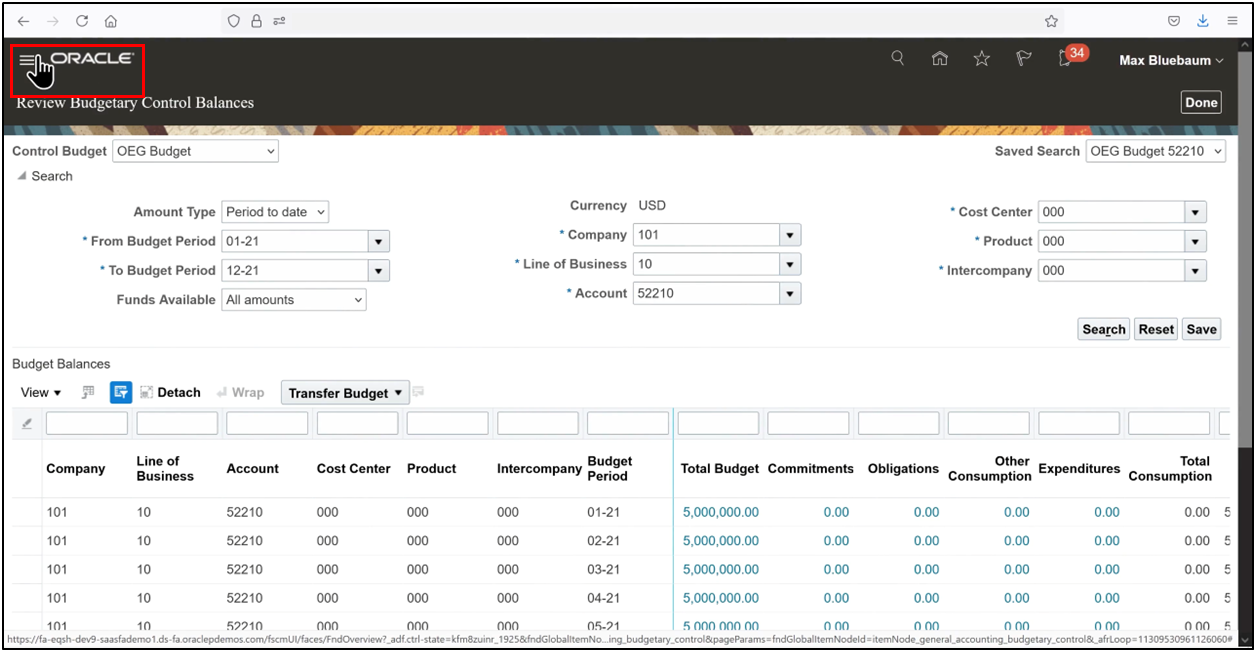
View Budget Balances
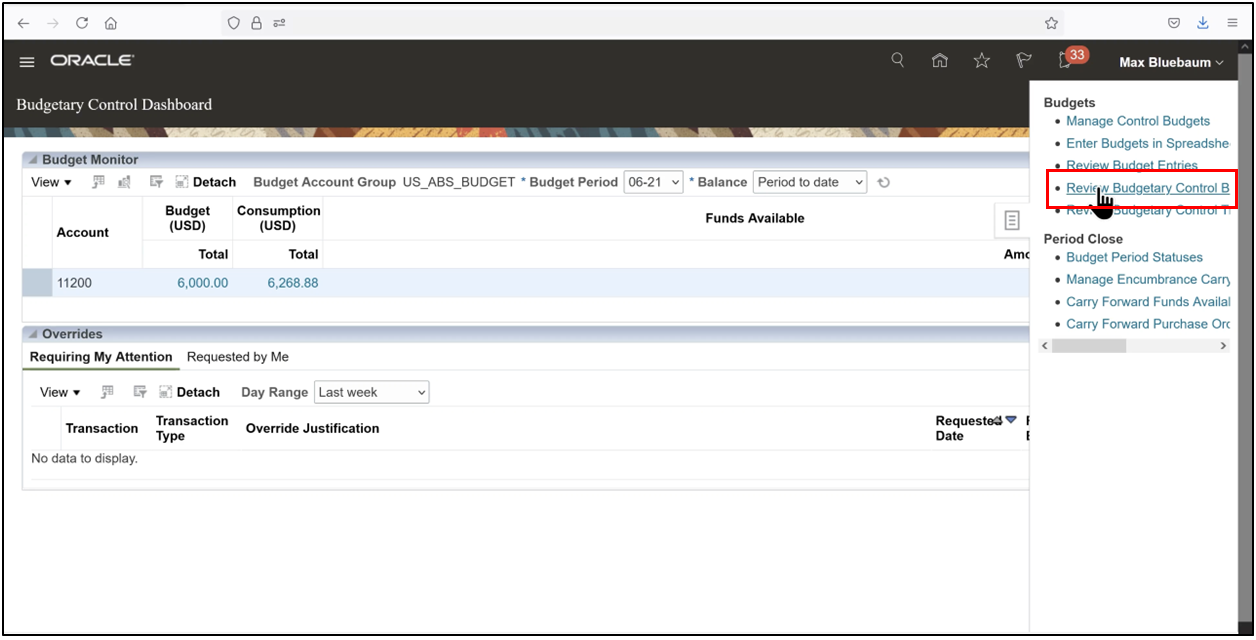
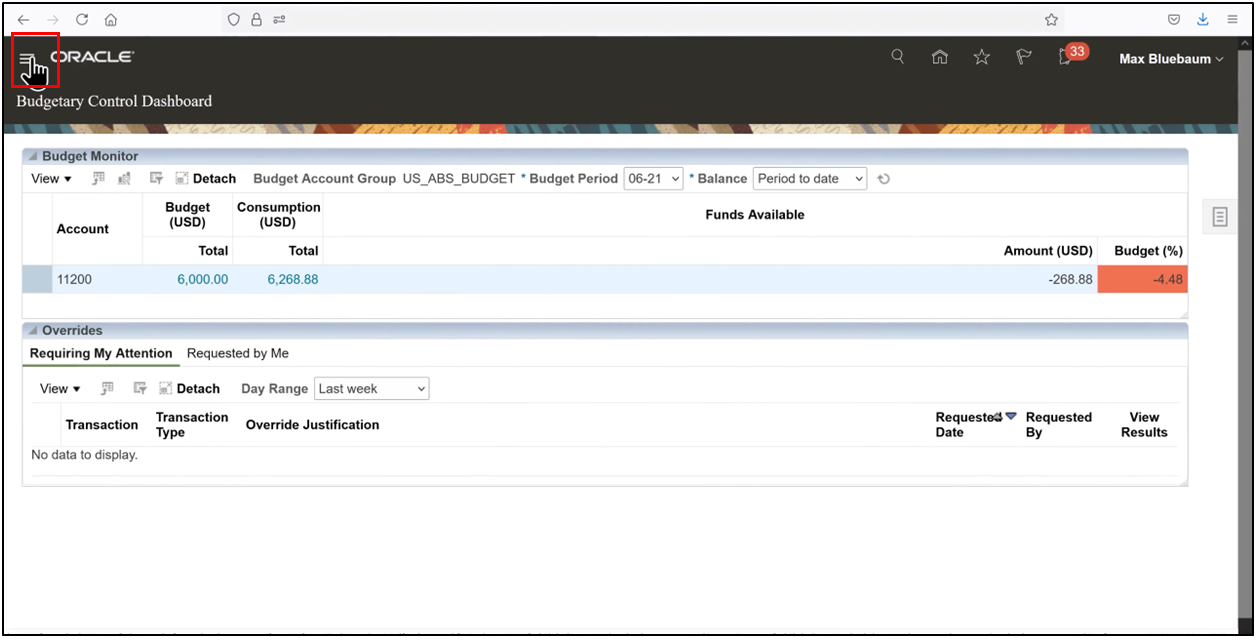
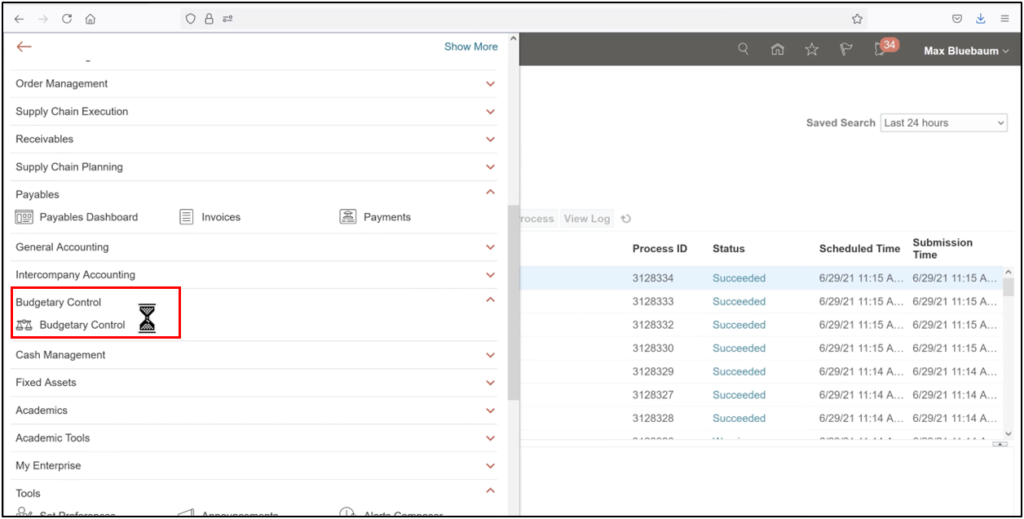
1. Go to the navigator and scroll down, then click the budgetary control.

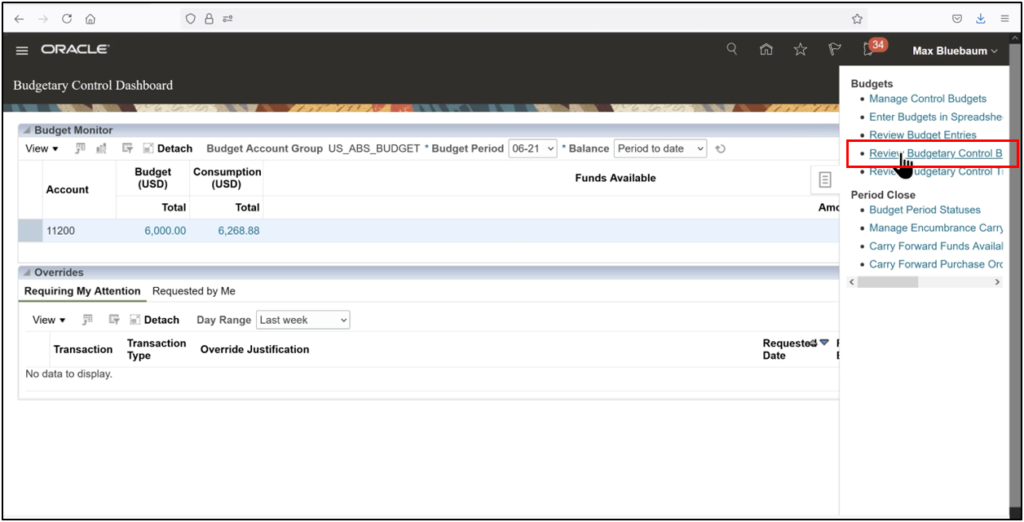
2. Open the task icon and click on review budgetary control balances.
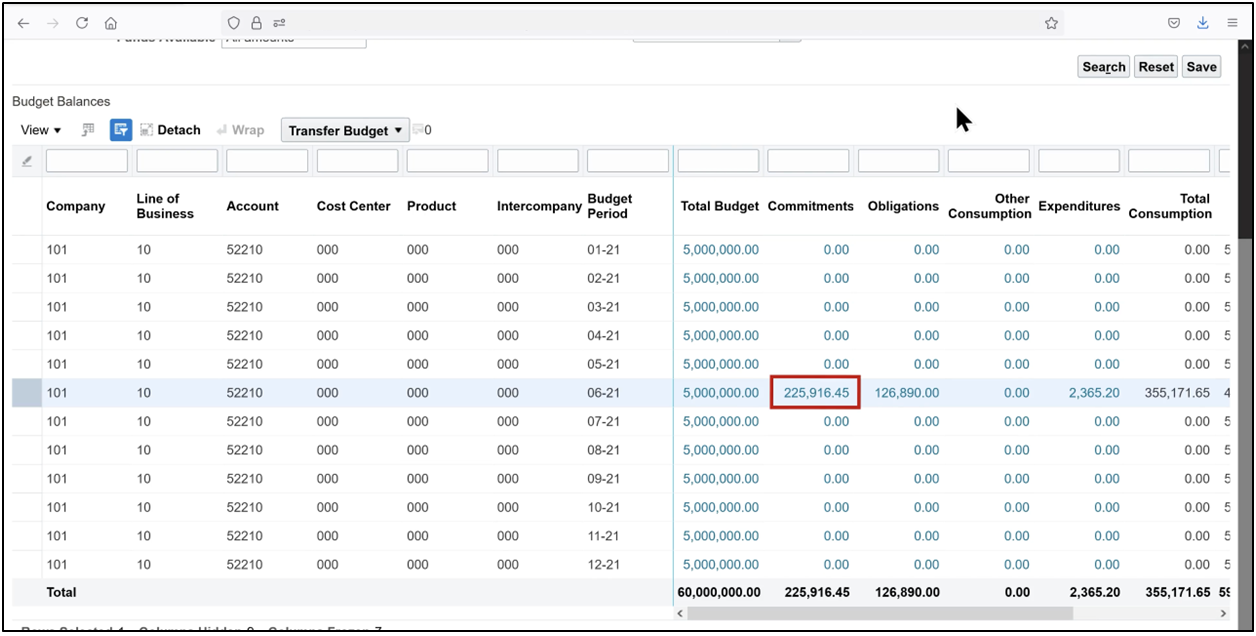
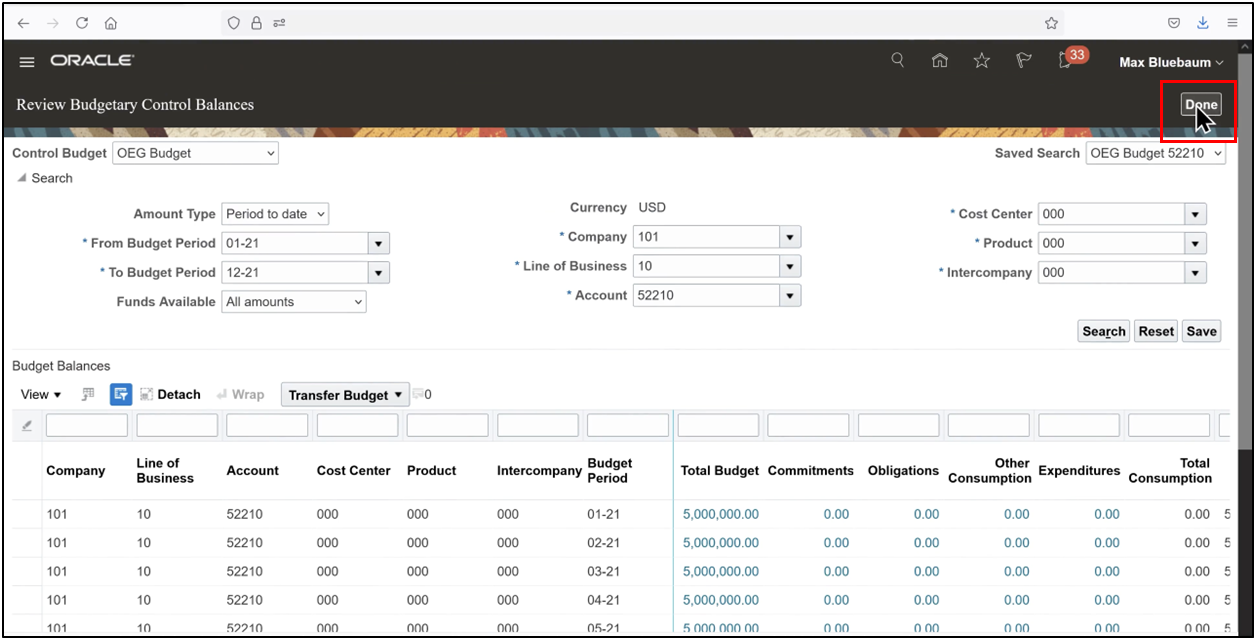
3. Enter the search parameters as shown in the image and click on the search.
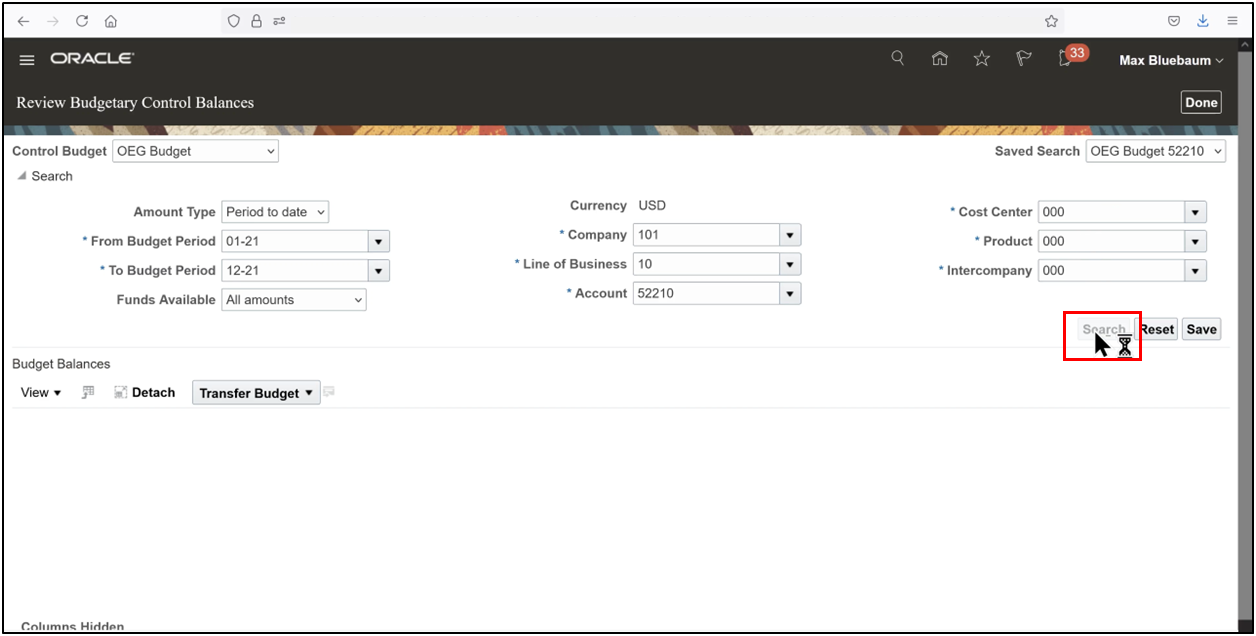
4. Note the number of commitments, obligations, other consumption, and expenditures.
5. Click Done
Step 1: Purchase Order Creation
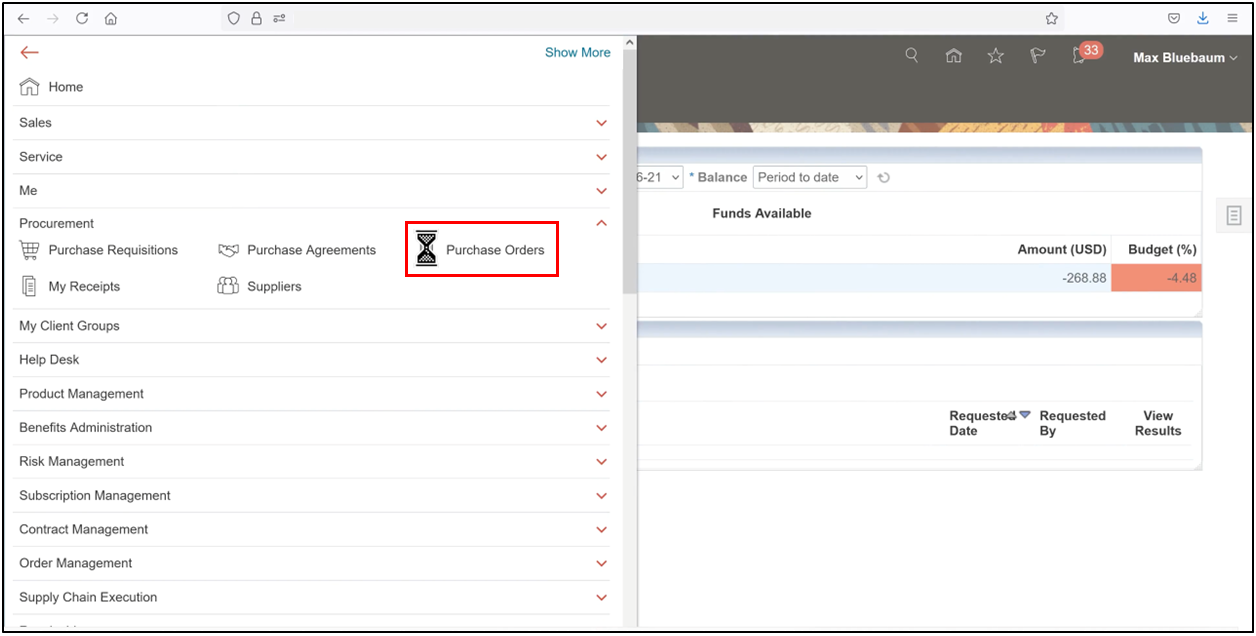
1. From the Navigator, navigate to Procurement and select Purchase Orders.
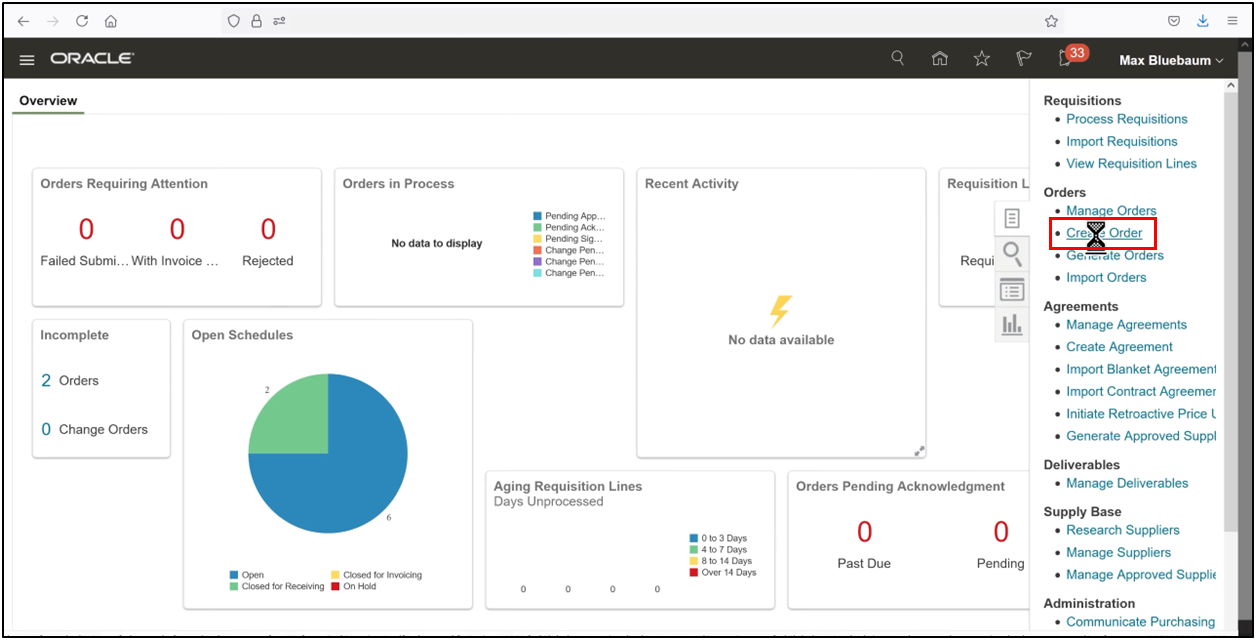
2. Open the Tasks pane and click Create Order.
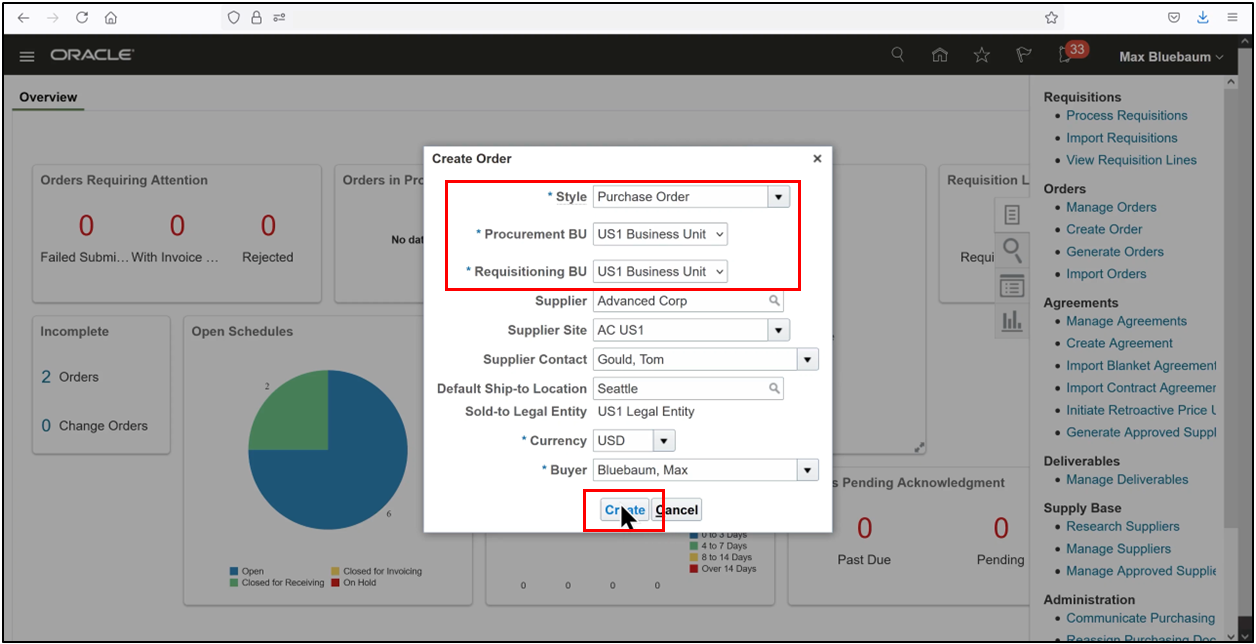
3. Enter the required header details and select the supplier to complete the purchase order header.
4. Click on the Create Order.
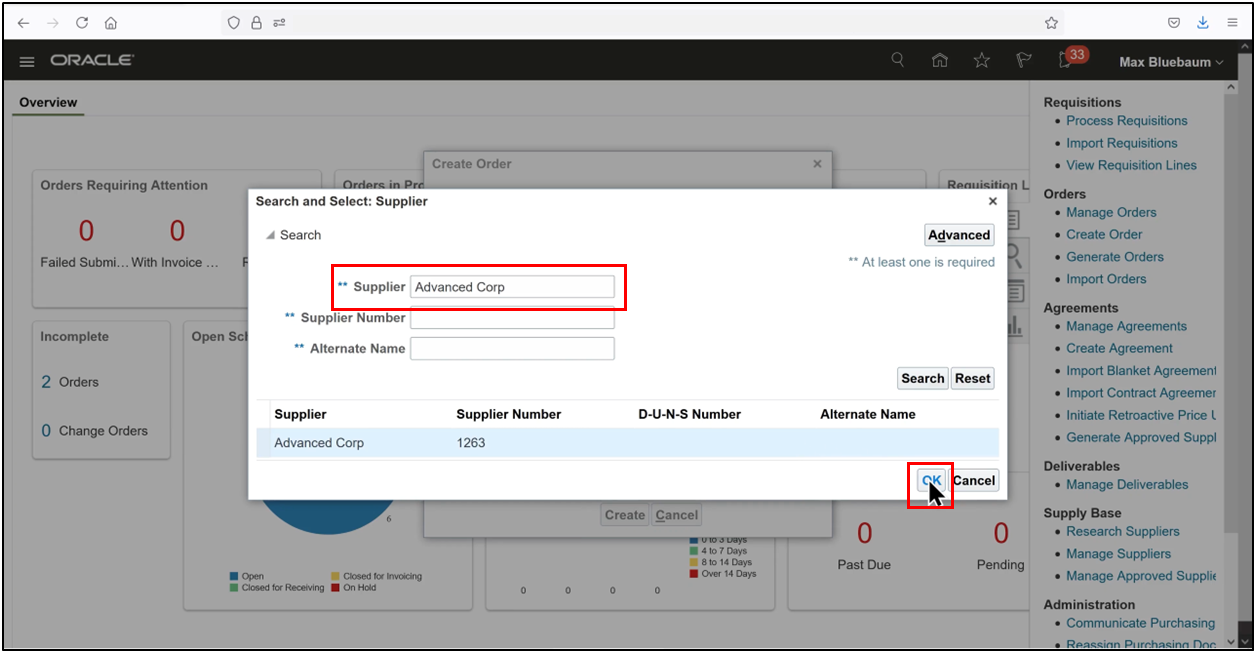
5. Define Supplier and click OK.
6. Verify the entered details and select Create to continue.
A PO can be created manually or generated from a requisition. The method of creation does not change the downstream accounting behavior or budgetary treatment.
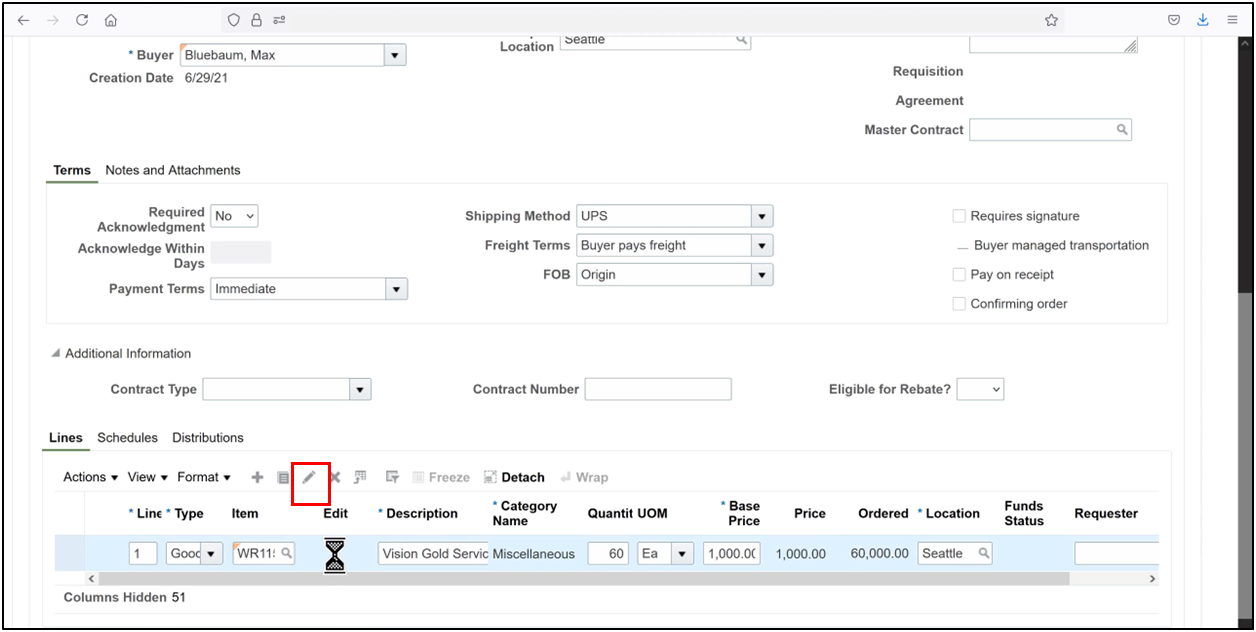
Step 2: Enter Purchase Order Line Details
1. At the line level, confirm that the Pay on Receipt option is turned off.
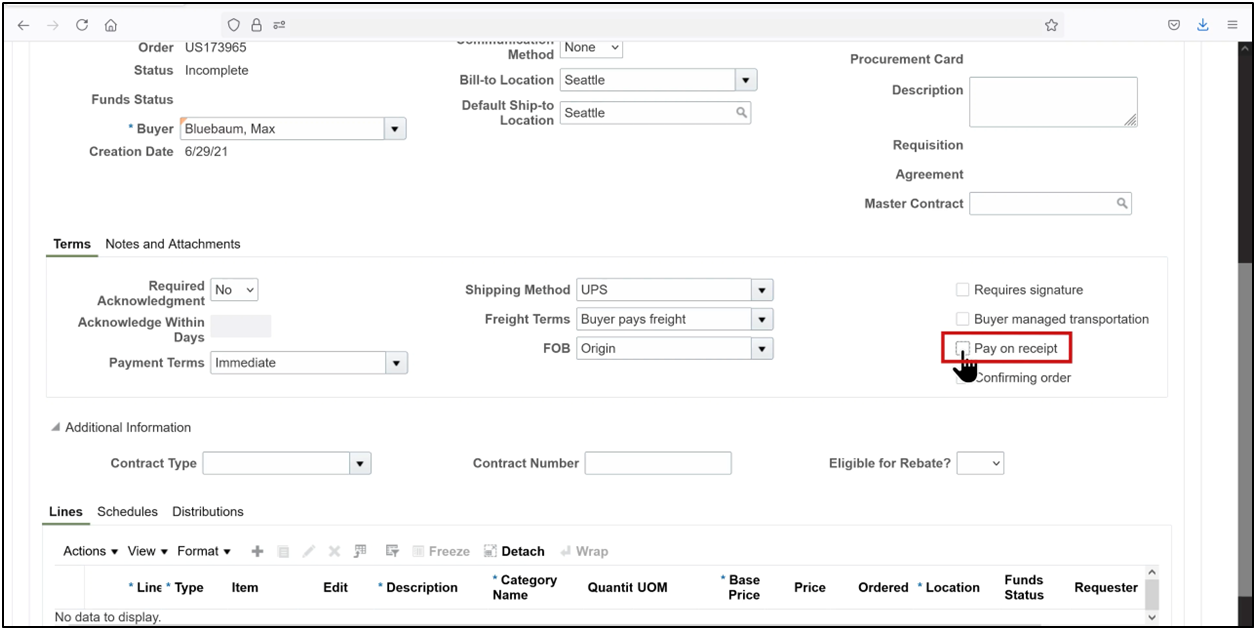
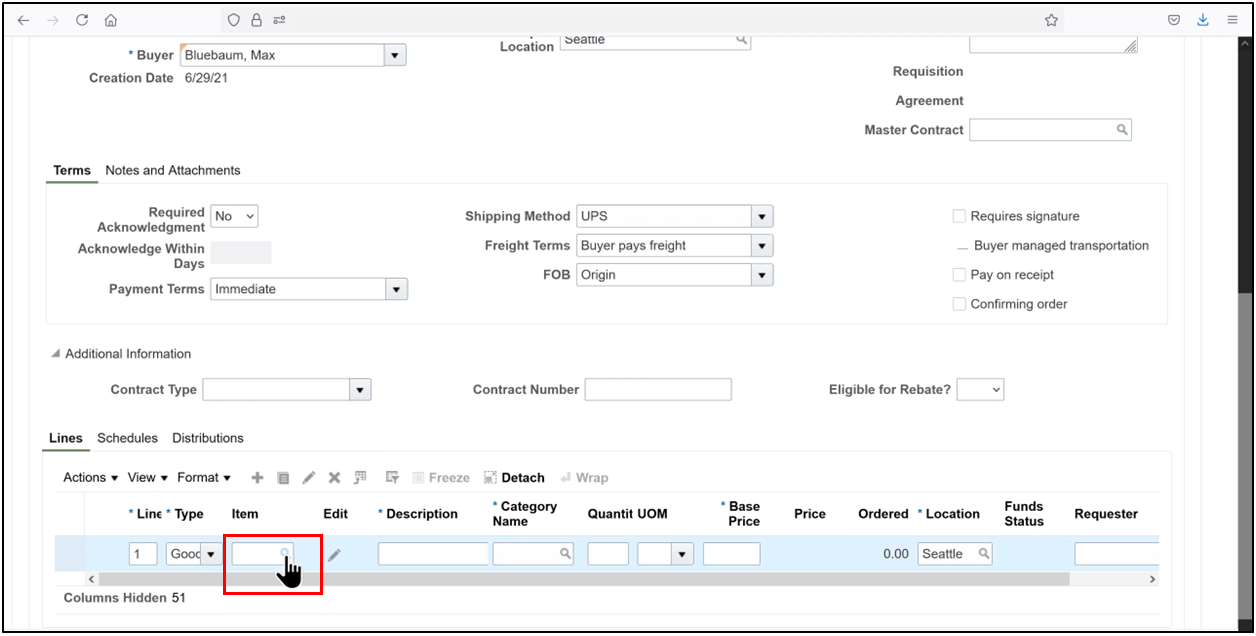
2. Click the plus (+) icon to add a PO line.
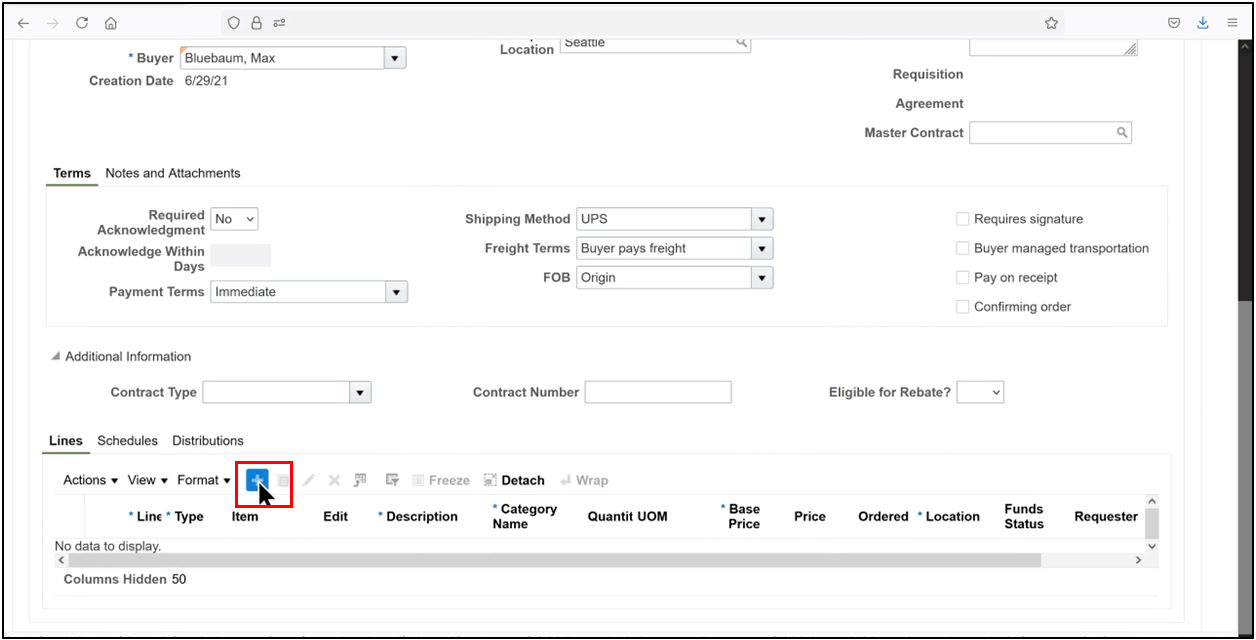
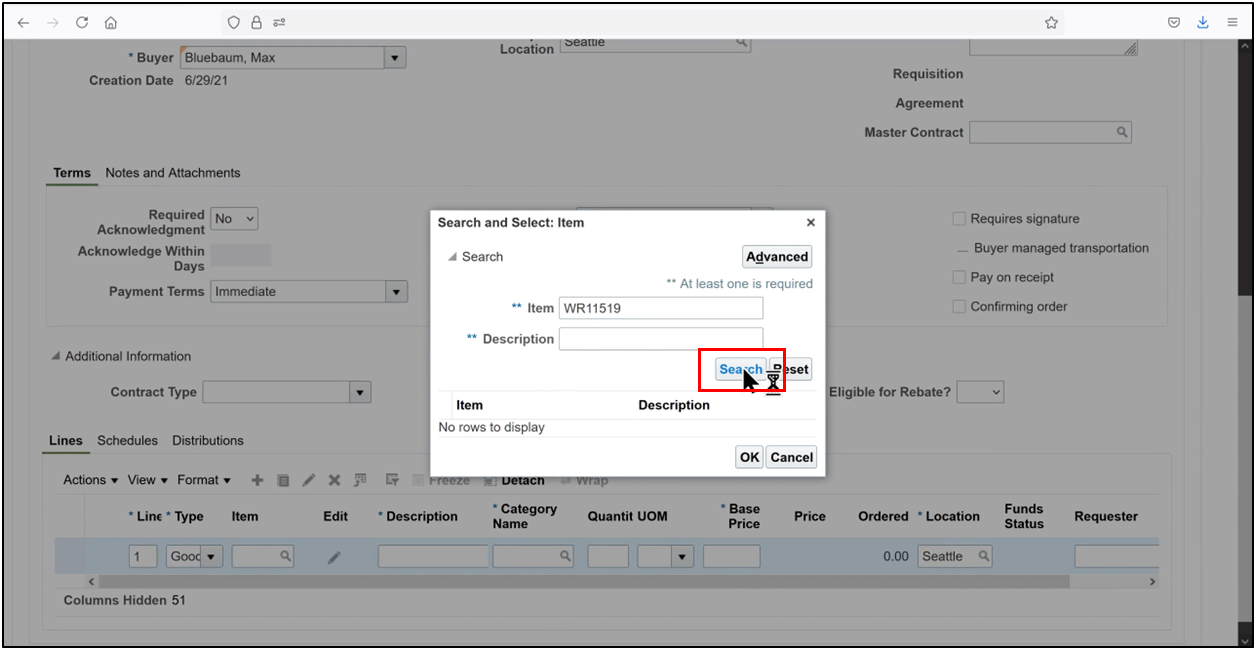
3. Enter the Line Type and Item. Use the search icon to select the correct item code.
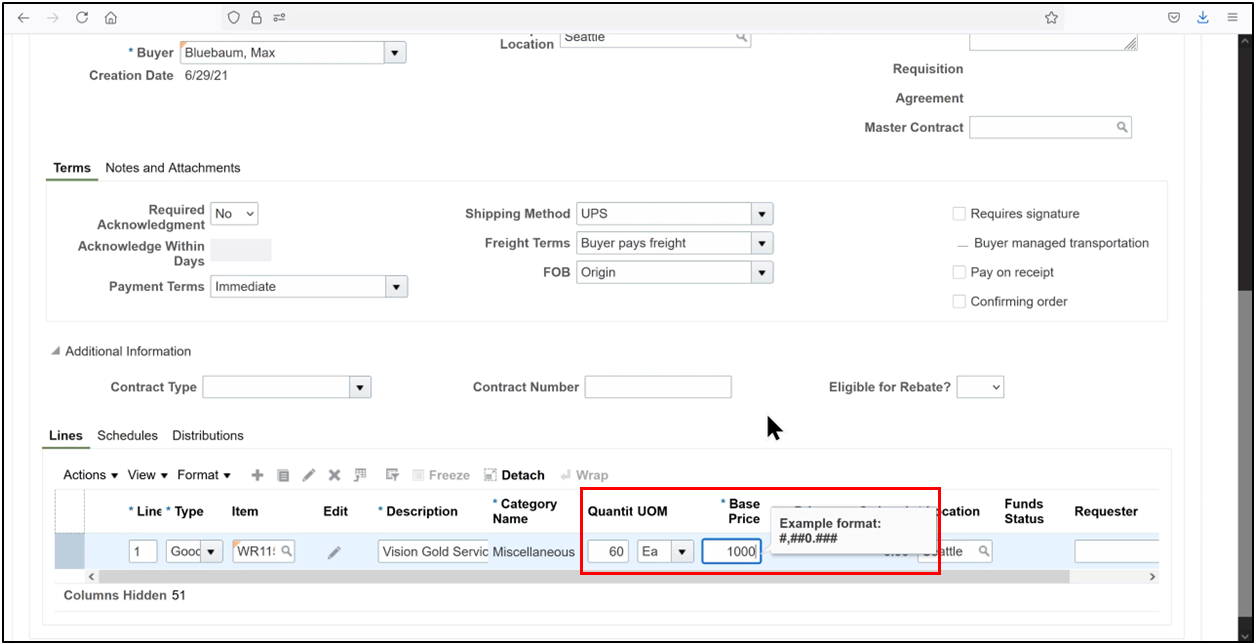
4. Input the quantity and base price.
5. Click on Search.
6. Click the Edit icon to update line details.
7. Set the Destination Type to Expense.
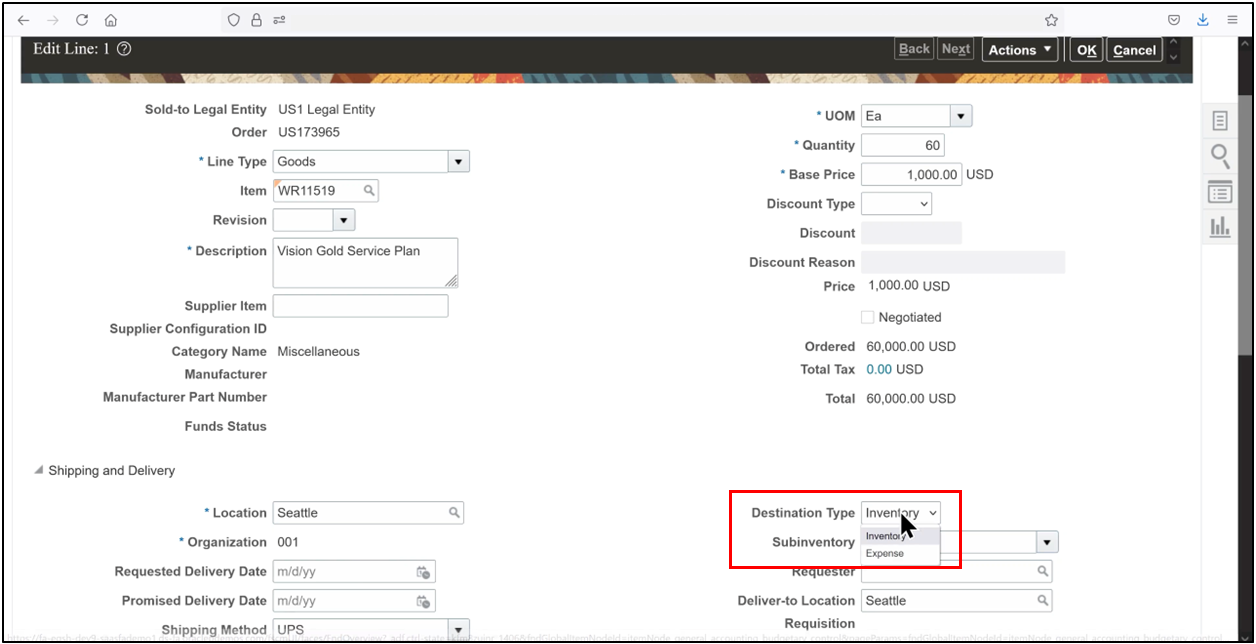
8. Enter the requester’s name.
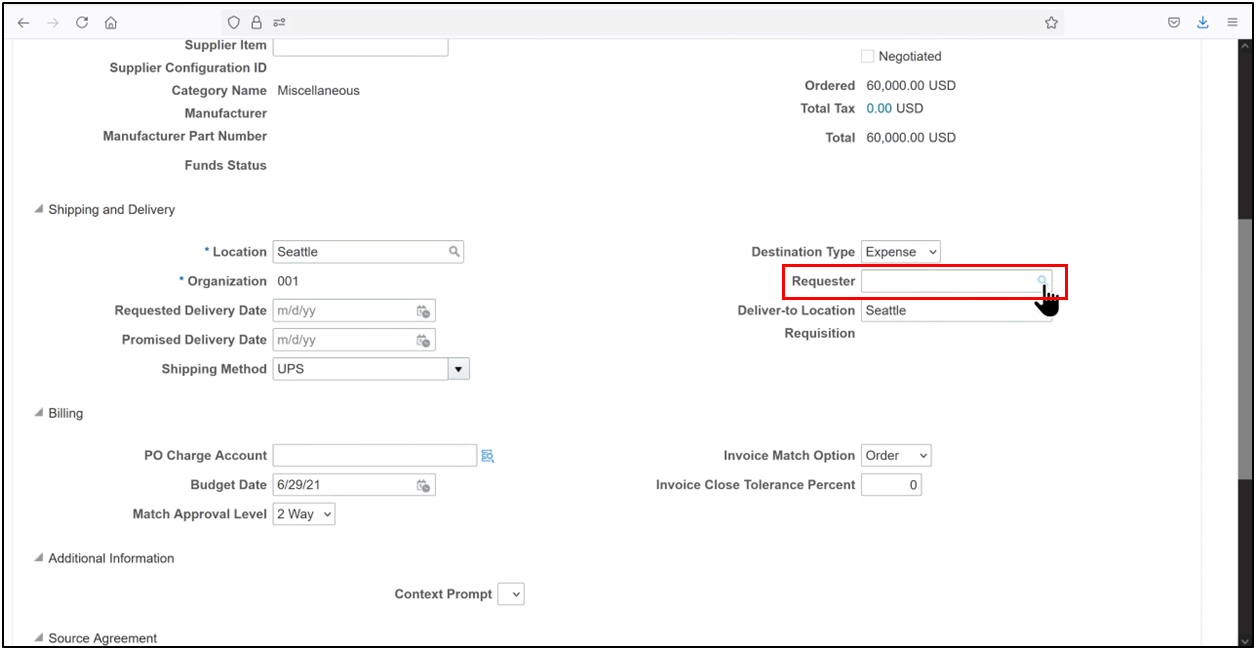
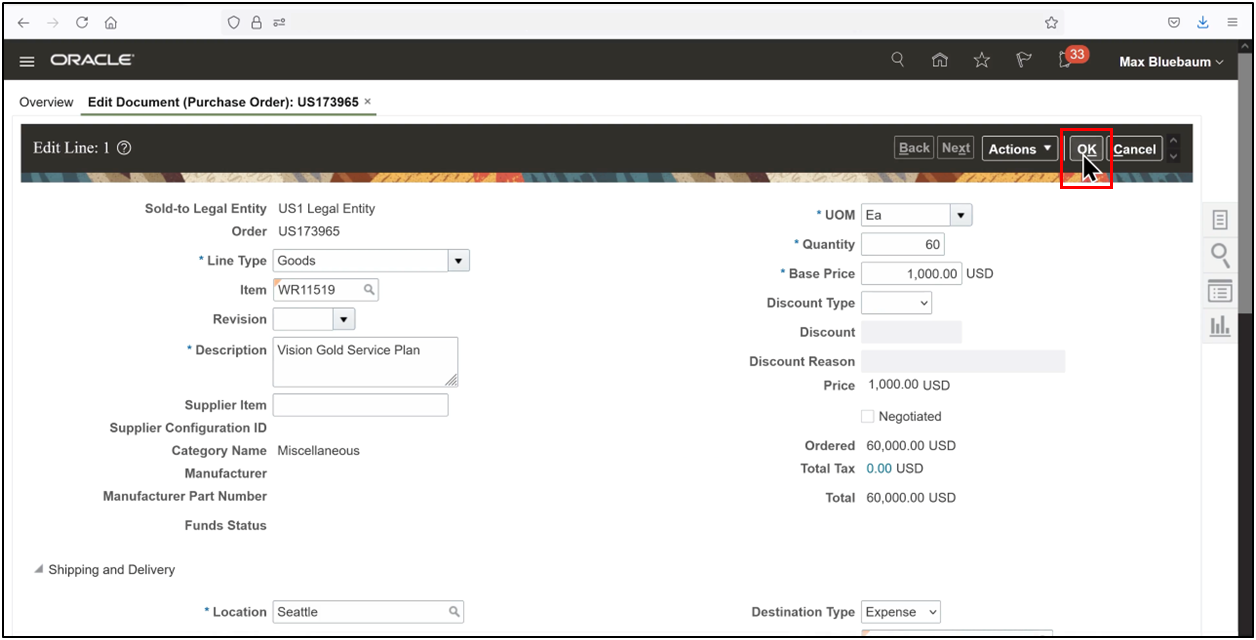
9. Click OK to save the line.

10. Click OK.
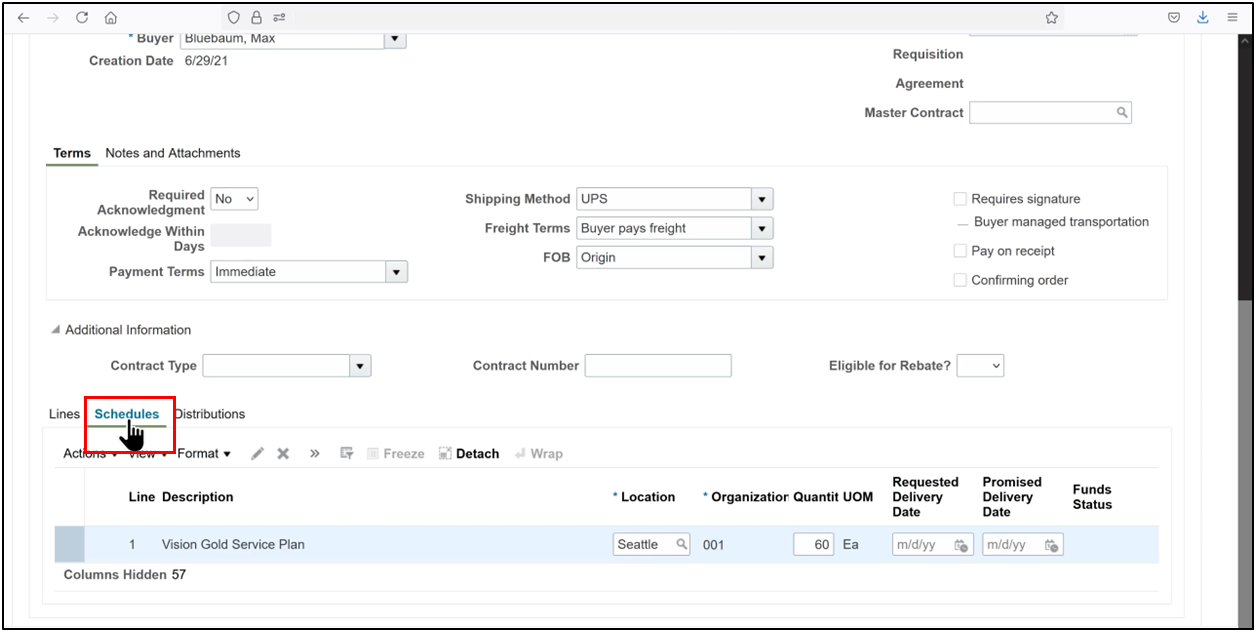
Step 3: Schedule Setup
1. Navigate to the Schedule tab and click Edit.
2. Verify that the Accrue at Receipt option is disabled.
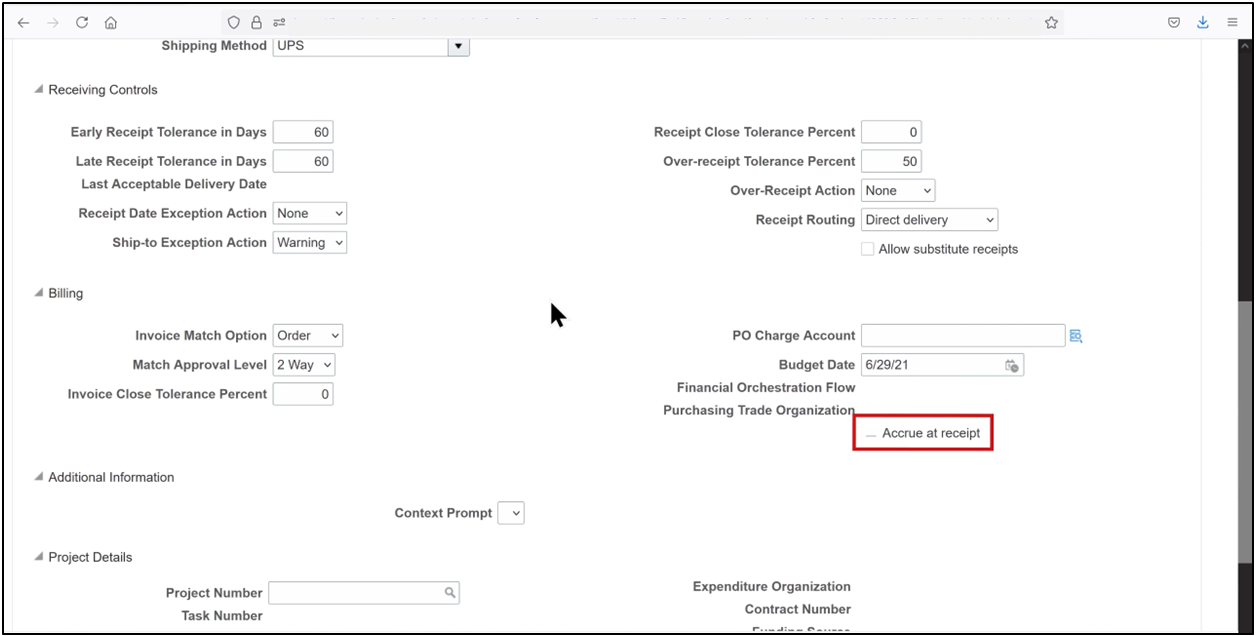
3. For expense purchase orders, accrual accounting is typically performed at period-end based on accounting rules rather than at the time of receipt.
4. Click OK to confirm the schedule.

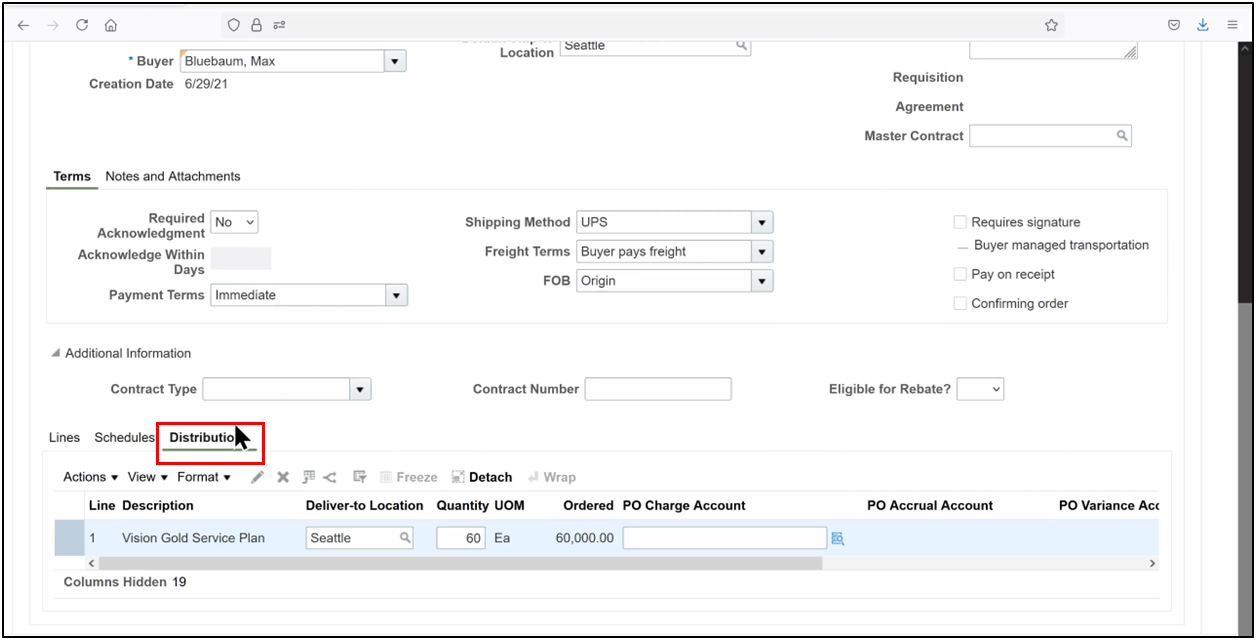
Step 4: Distribution Details
1. Navigate to the Distributions tab. Initially, the charge, accrual, and encumbrance accounts may not be populated.
2. Click Save.
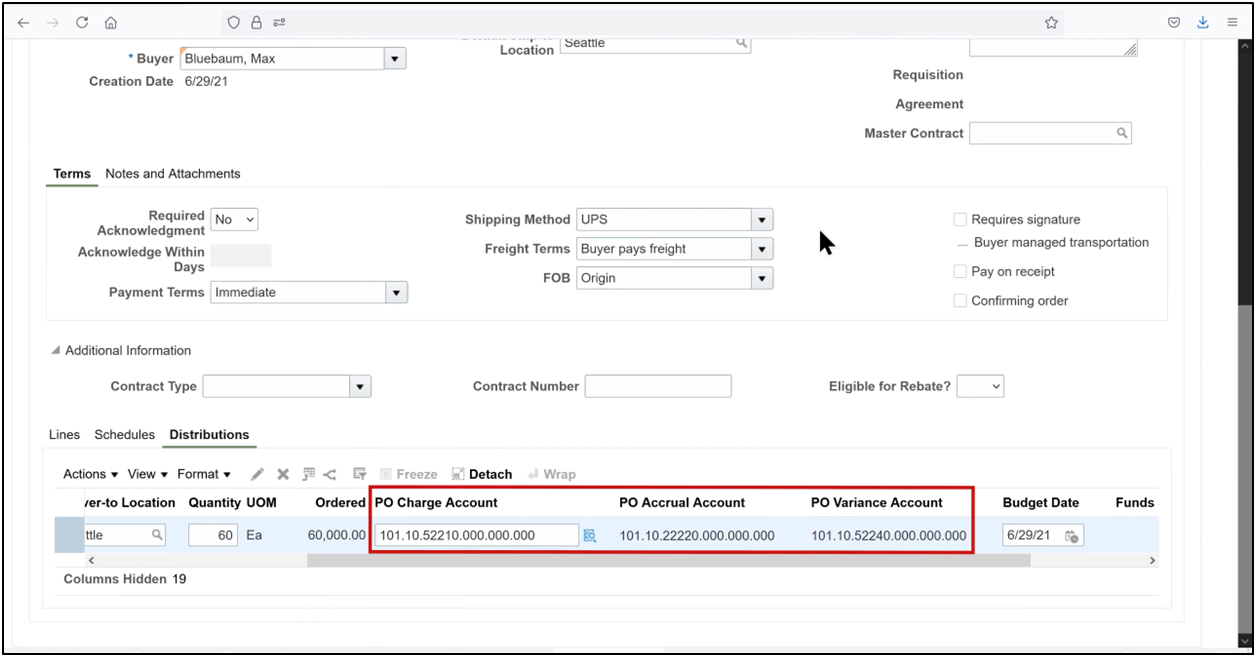
3. Upon saving, Oracle Fusion automatically derives the accounting distributions using the Transaction Account Definitions (TAD). These distributions are vital for downstream invoicing and financial validation.
Step 5: Fund Check and Submission
1. Review the tax amount calculated automatically by the system.
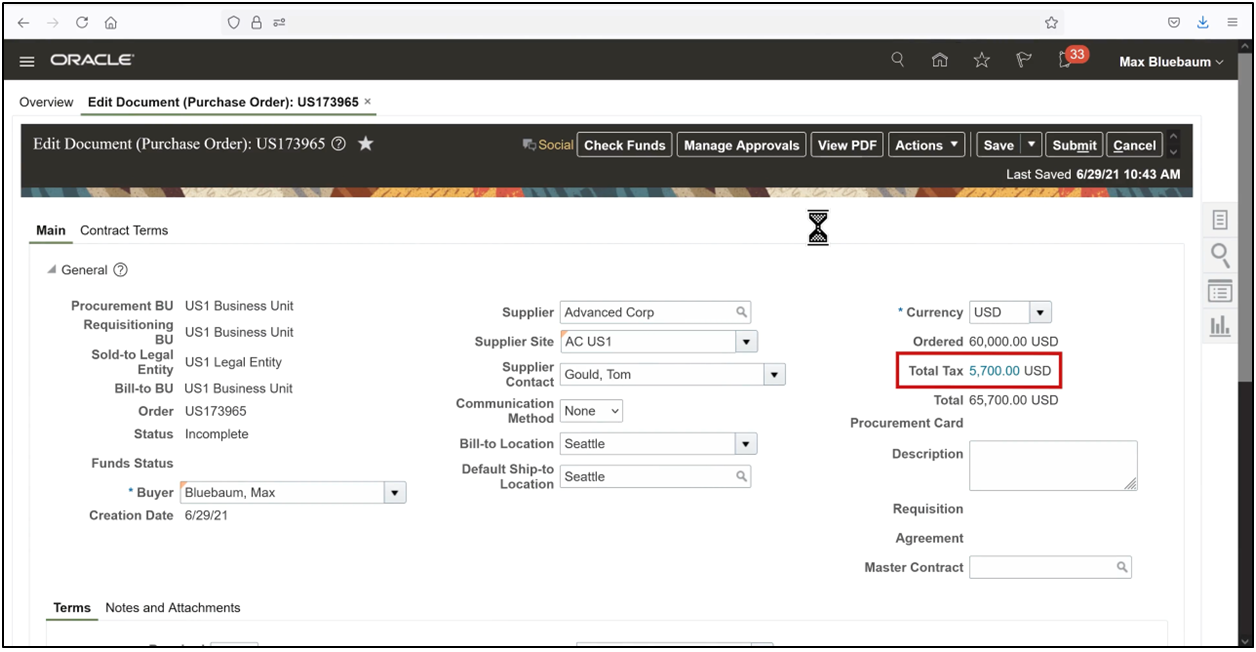
2. They automatically derived accounting entries.
3. Click Check Funds to validate budget availability.
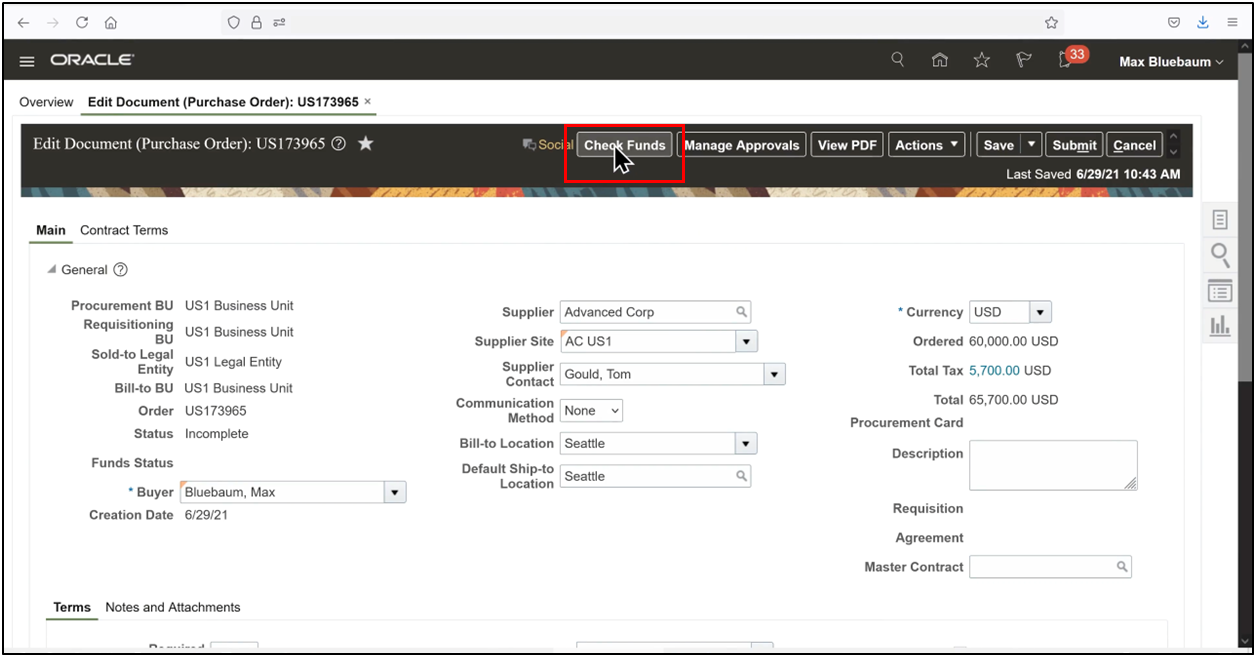
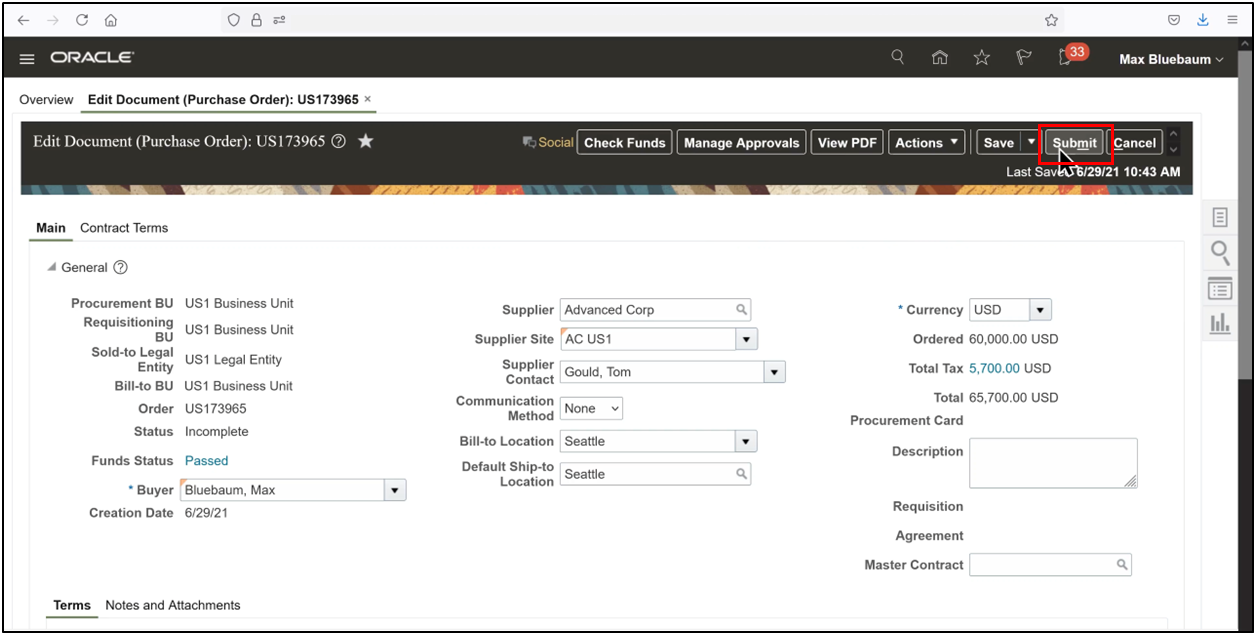
4. Once the document passes the budgetary control check,
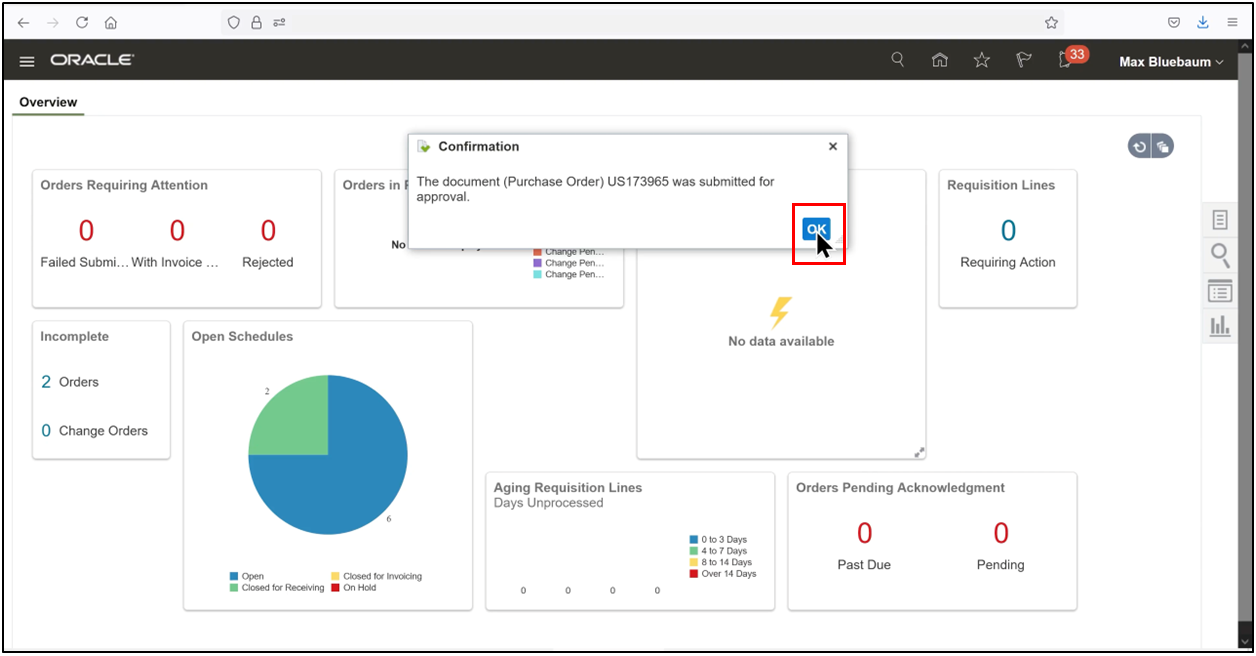
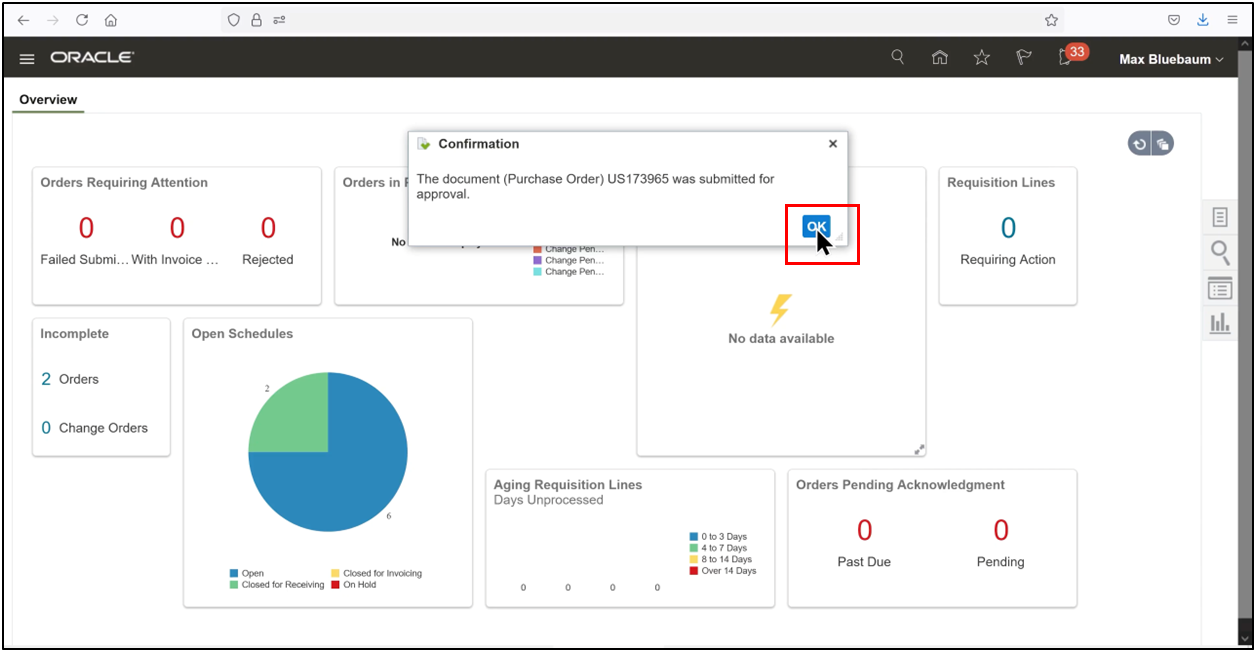
5. Click Submit for approval.
6. Click OK.
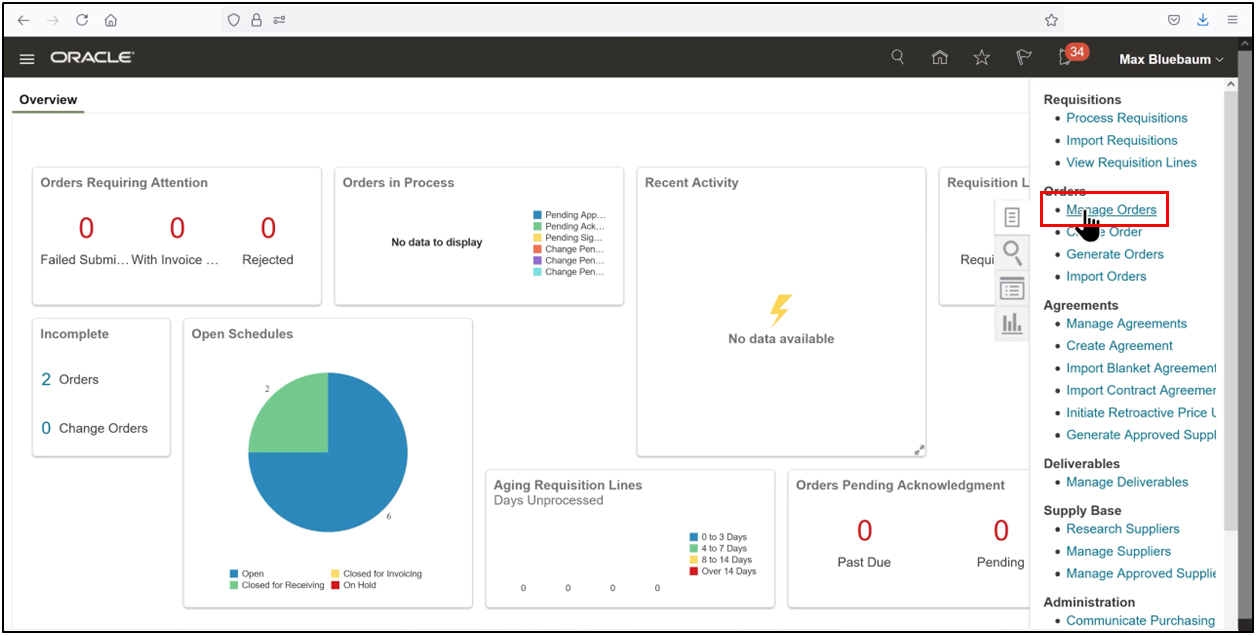
Step 6: Approve the Purchase Order
1. Navigate to Manage Orders in the Tasks pane.
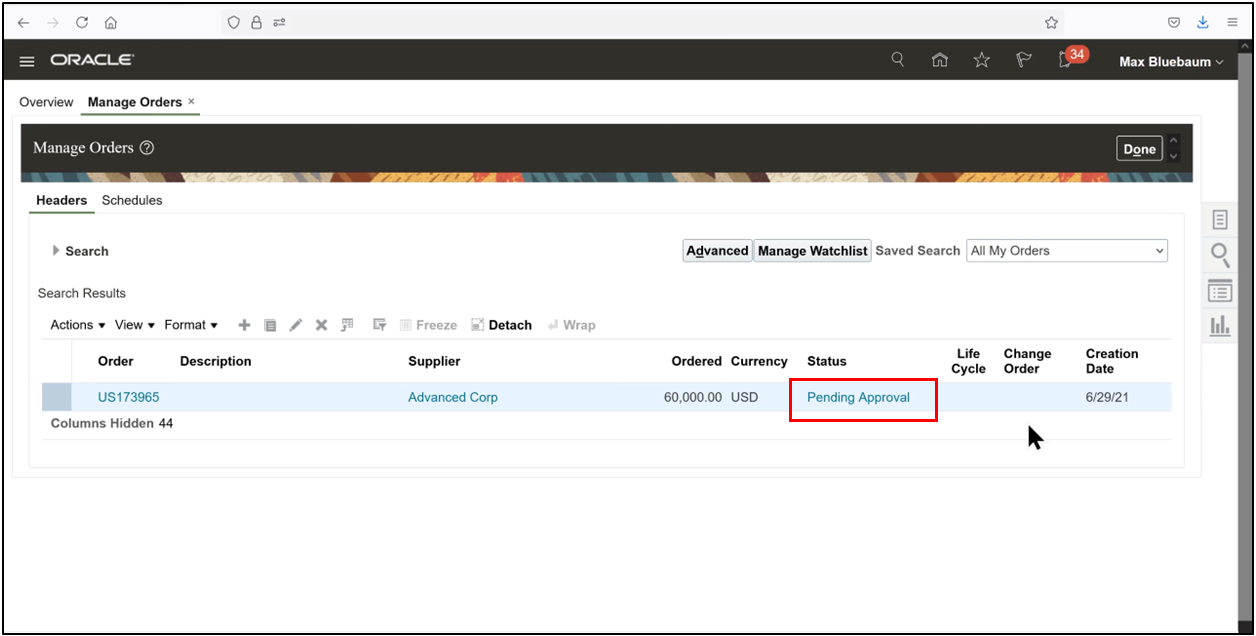
3. Search for the PO number. The status will initially appear as Pending Approval.
4. The designated approver must approve the PO via the notification workflow.
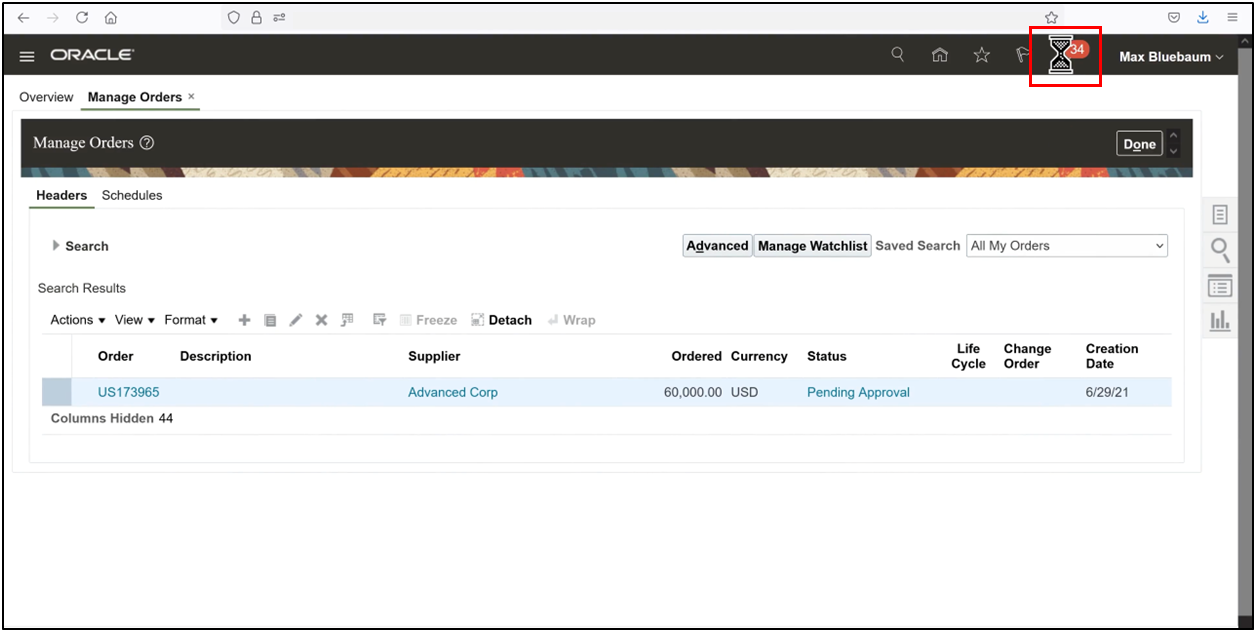
5. Once approved, the status changes to Open, authorizing it for the PO-to-invoice process.

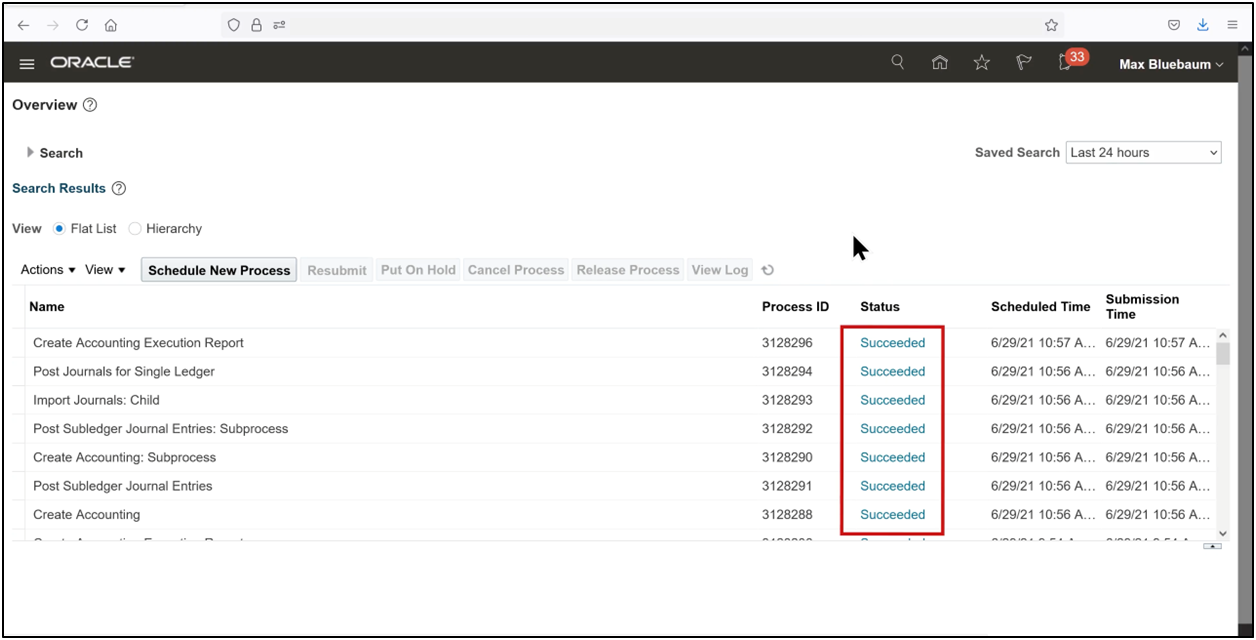
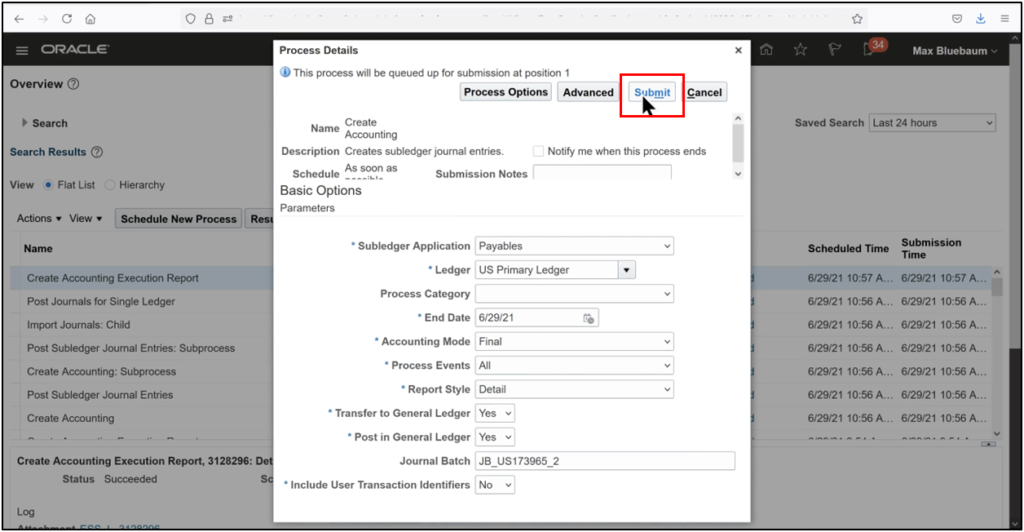
Step 7: Create Accounting
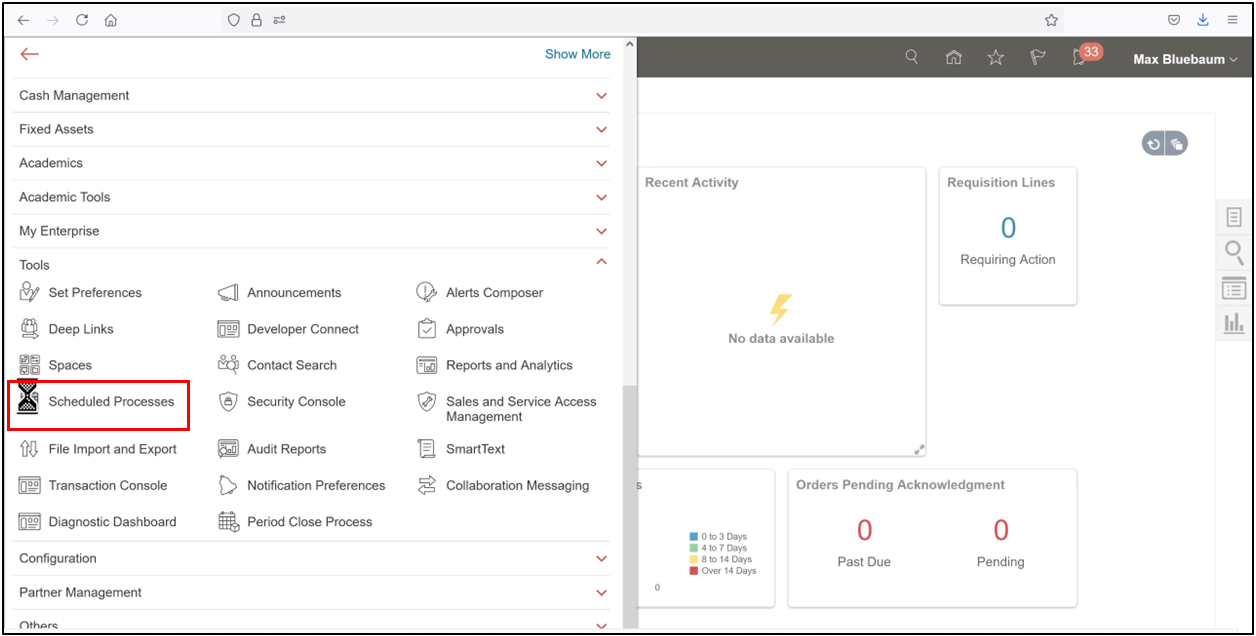
1. Navigate to Tools and select Scheduled Processes.
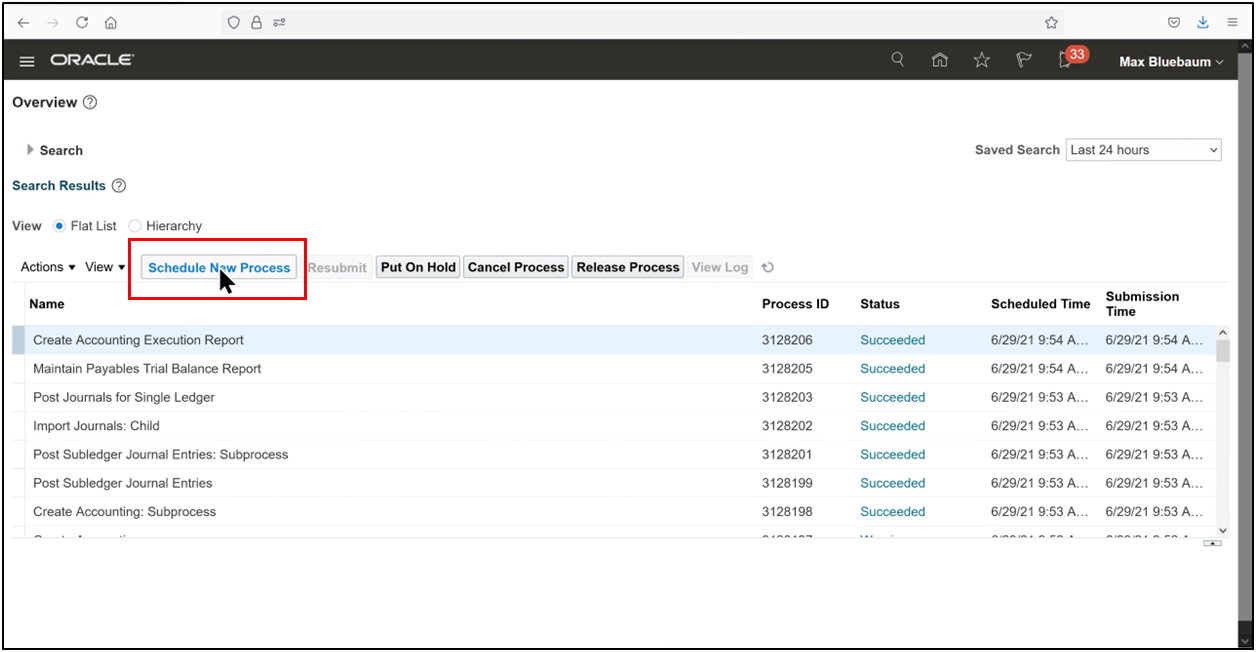
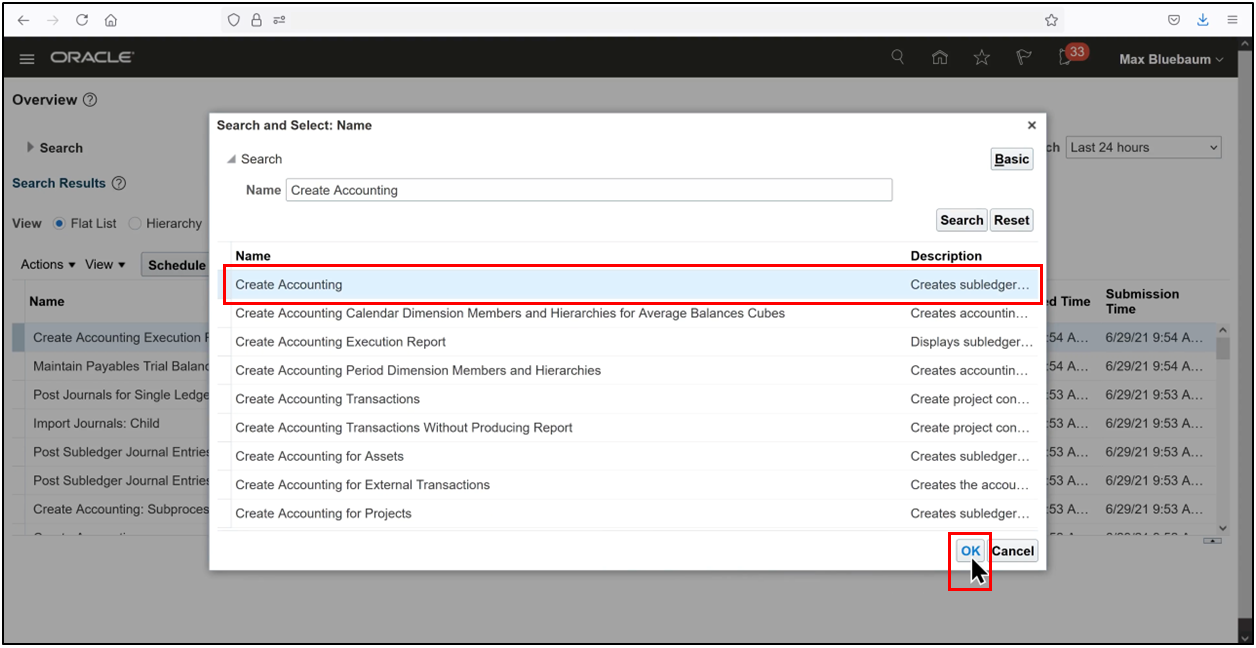
2. Click Schedule New Process and search for Create Accounting.
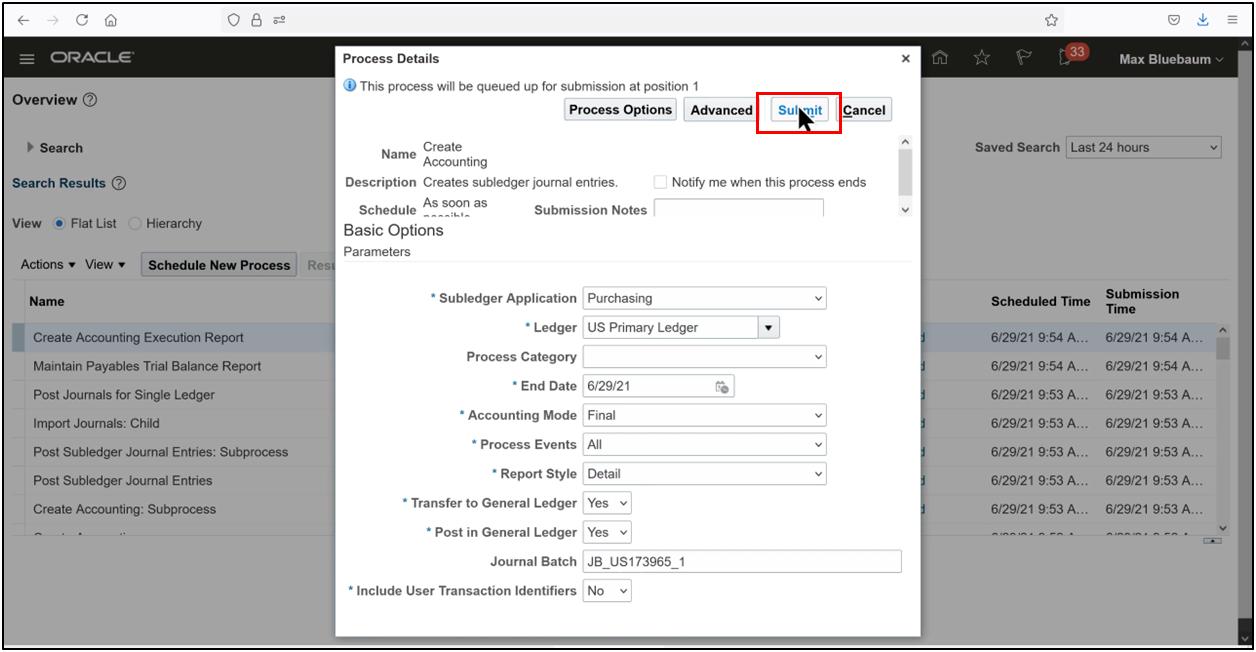
3. Select the process and enter the parameters:
1. Subledger Application: Purchasing
2. Ledger: US Primary Ledger
4. Submit the process
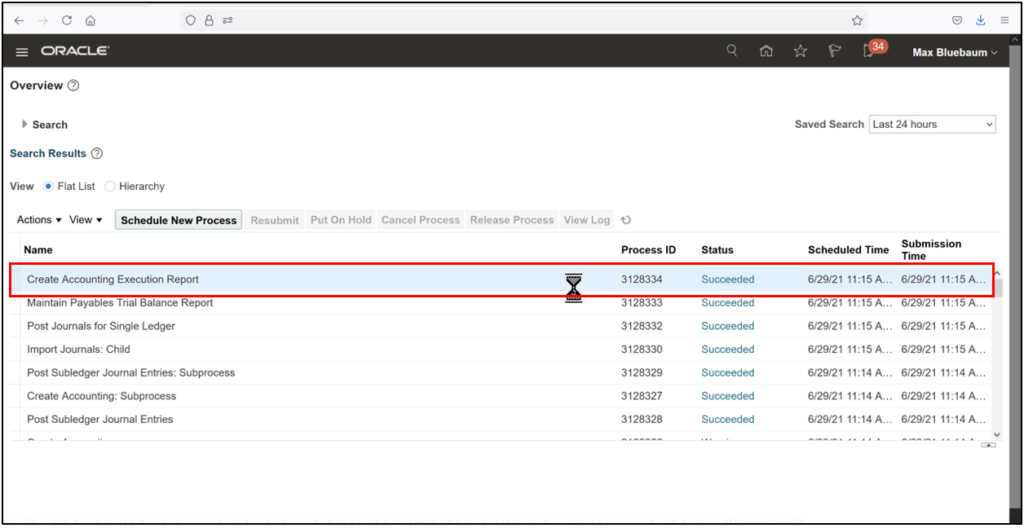
5. Track its progress until the status indicates successful completion.

6. Successful.
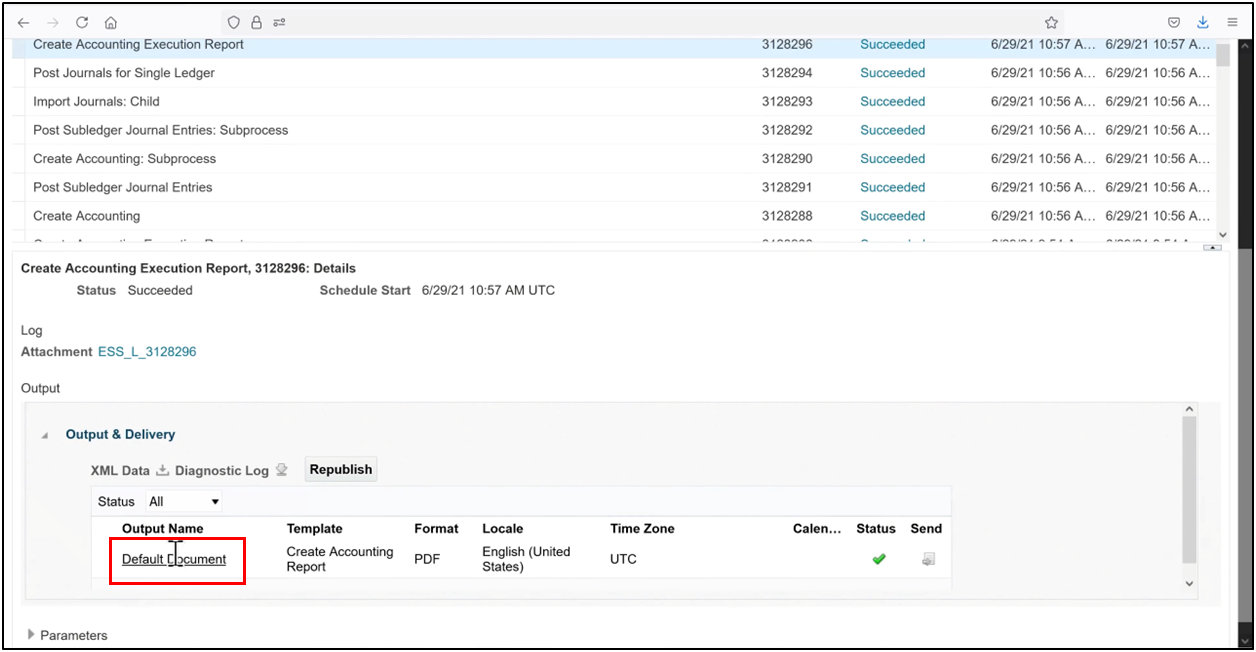
Step 8: Review Accounting Results
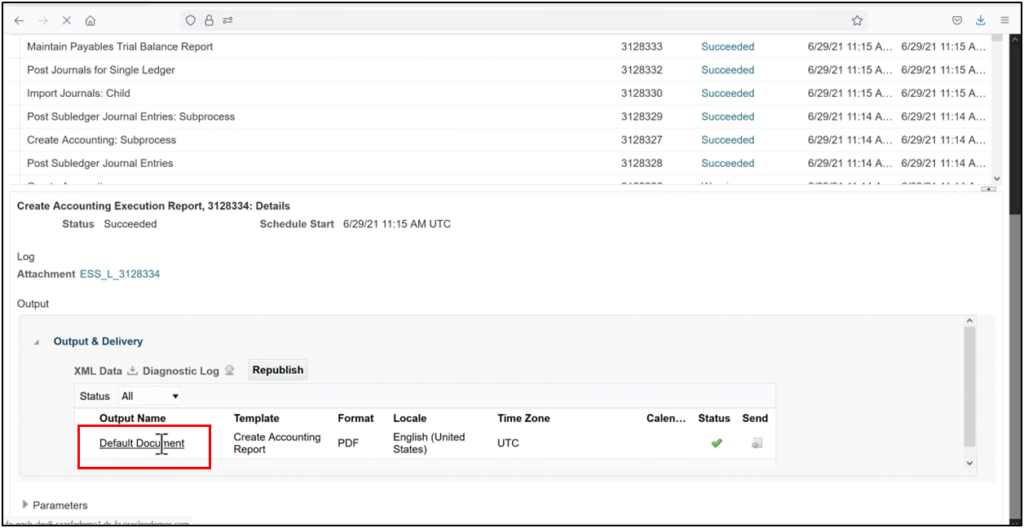
1. Open the Create Accounting Execution Report to review the output.
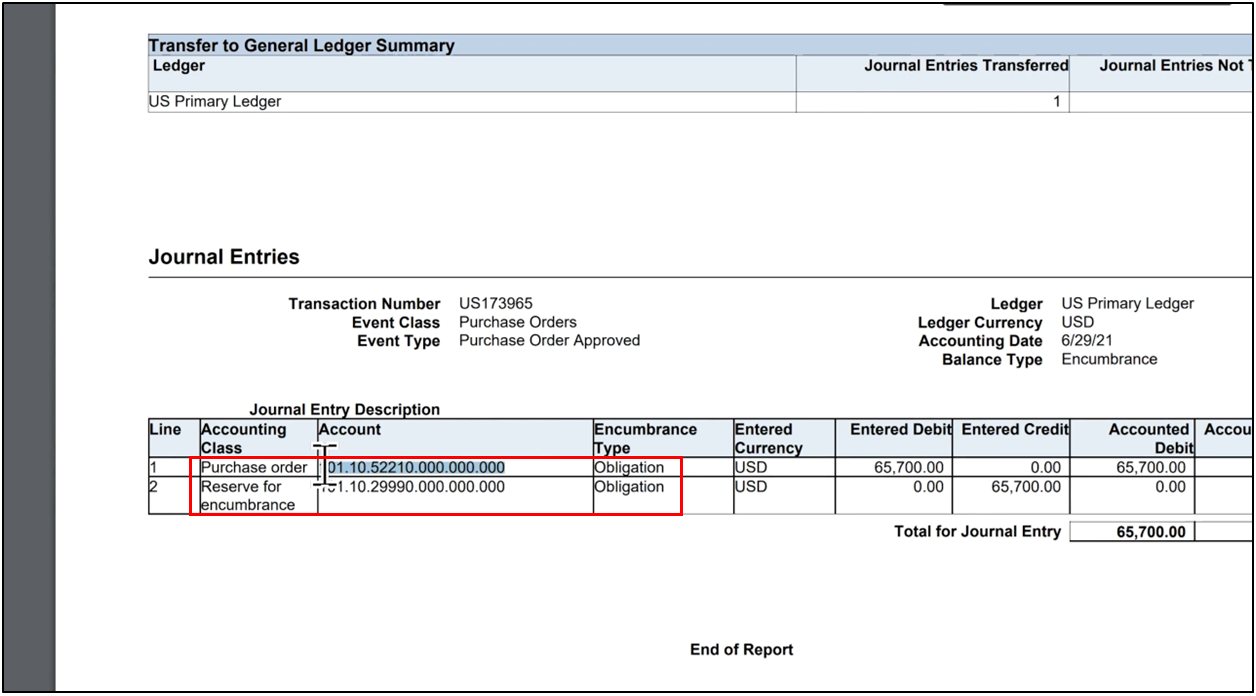
2. The results will include an encumbrance journal with obligation-based accounting.
3. The charge account is debited while the encumbrance reserve account is credited during purchase order accounting.
After successfully reviewing purchase order accounting, we will now learn about accounts payable invoice processing, a fundamental financial function in any organization that ensures supplier invoices are accurately captured, validated, approved, and paid in a timely manner. In Oracle Fusion Cloud ERP, this process is tightly integrated with the purchase order process, enabling strong financial control, audit compliance, and real-time budget visibility.
An accounts payable invoice created against a purchase order (PO) ensures that only authorized and approved spending is paid. Through PO matching, Oracle Fusion validates invoices against purchase order details, quantities, prices, and tax, significantly reducing errors and manual intervention. This also allows seamless integration between invoices and receipts, accounting, and budgetary control.
This guide outlines the complete accounts payable invoice processing lifecycle in Oracle Fusion, from identifying a purchase order and creating an AP invoice to matching it with the PO, validating and accounting for the invoice, and finally reviewing its impact on budgets and obligations. The steps are logically grouped to align with screenshots and training documentation while also helping users clearly understand invoice accounting and purchase order payment behavior.
Creating a Payables Invoice Matched to a Purchase Order in Oracle Fusion
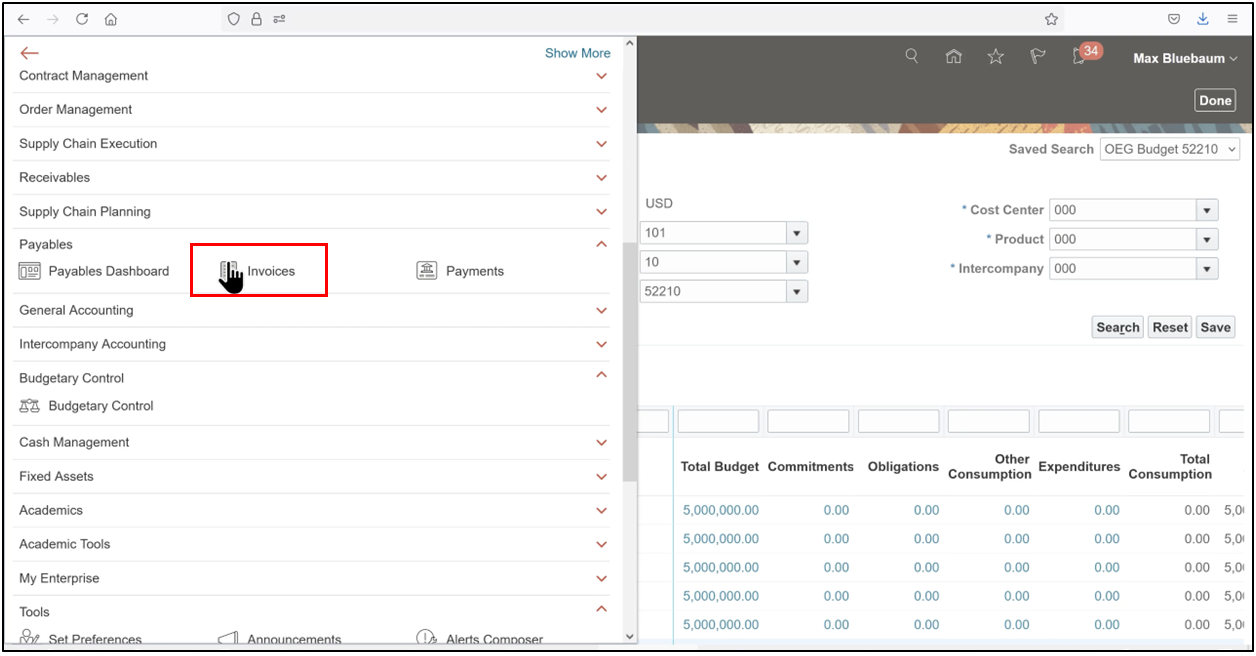
Step 1: Navigate to the Invoices Work Area
1. Open the Navigator, scroll to Payables
2. Select Invoice to begin AP invoice processing.
Step 2: Initiate Invoice Creation
3. Open the Tasks pane, click Create Invoice,
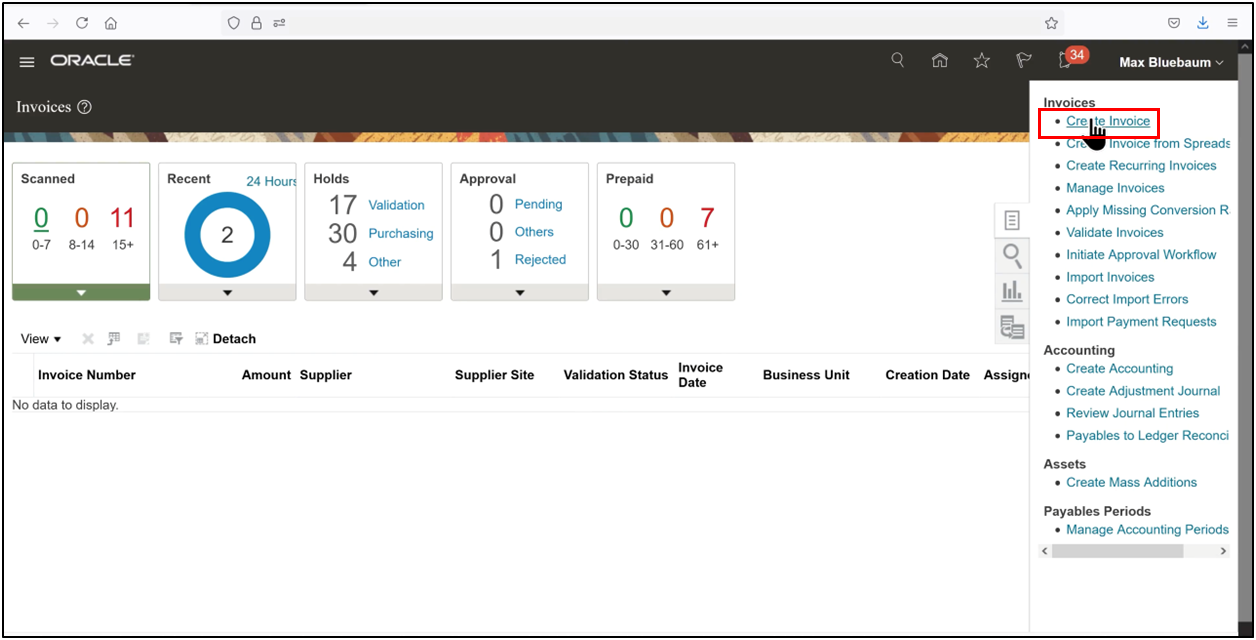
4. Select Show More to access additional invoice options required for PO matching.
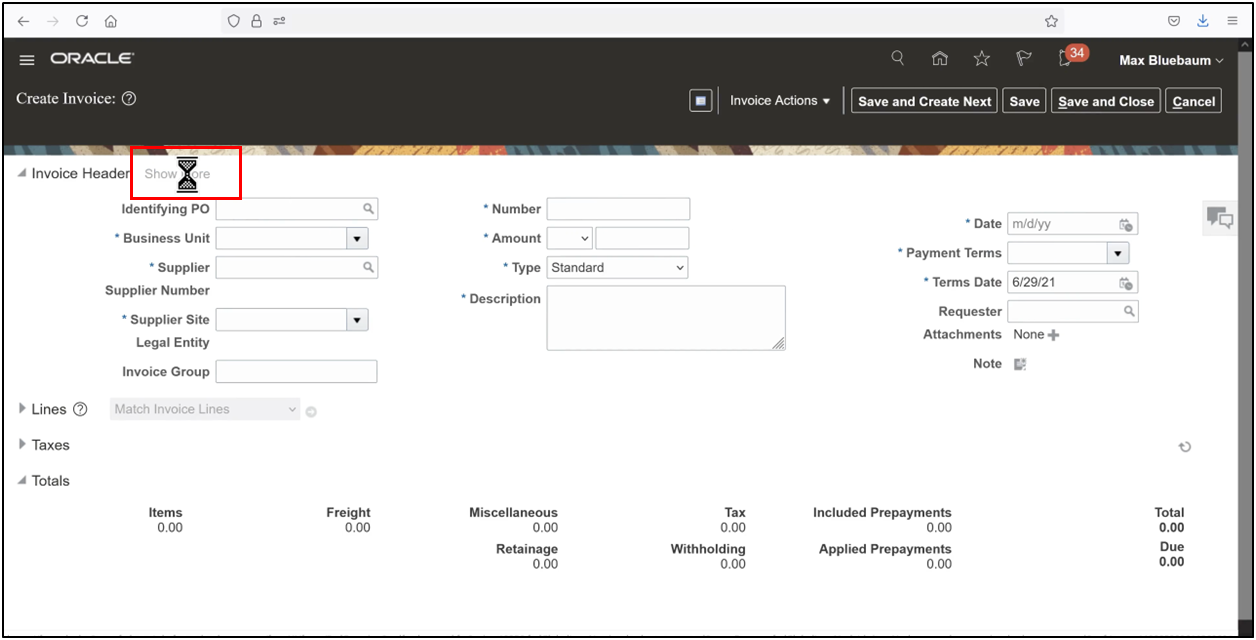
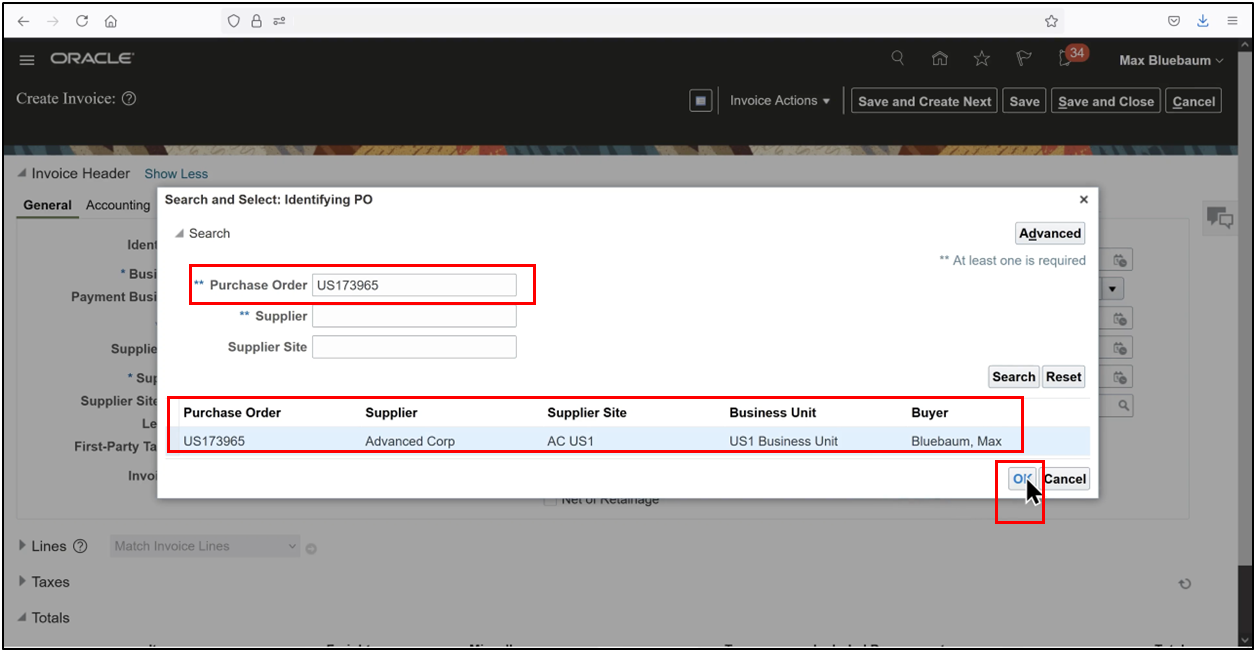
Step 3: Identify the Purchase Order and Enter Invoice Header Details
5. Click the Search icon to find the identifying purchase order (PO), select the required PO order, and click OK.
6. Enter the invoice number and a temporary invoice amount, noting that this will be updated later once invoice lines and tax are finalized.
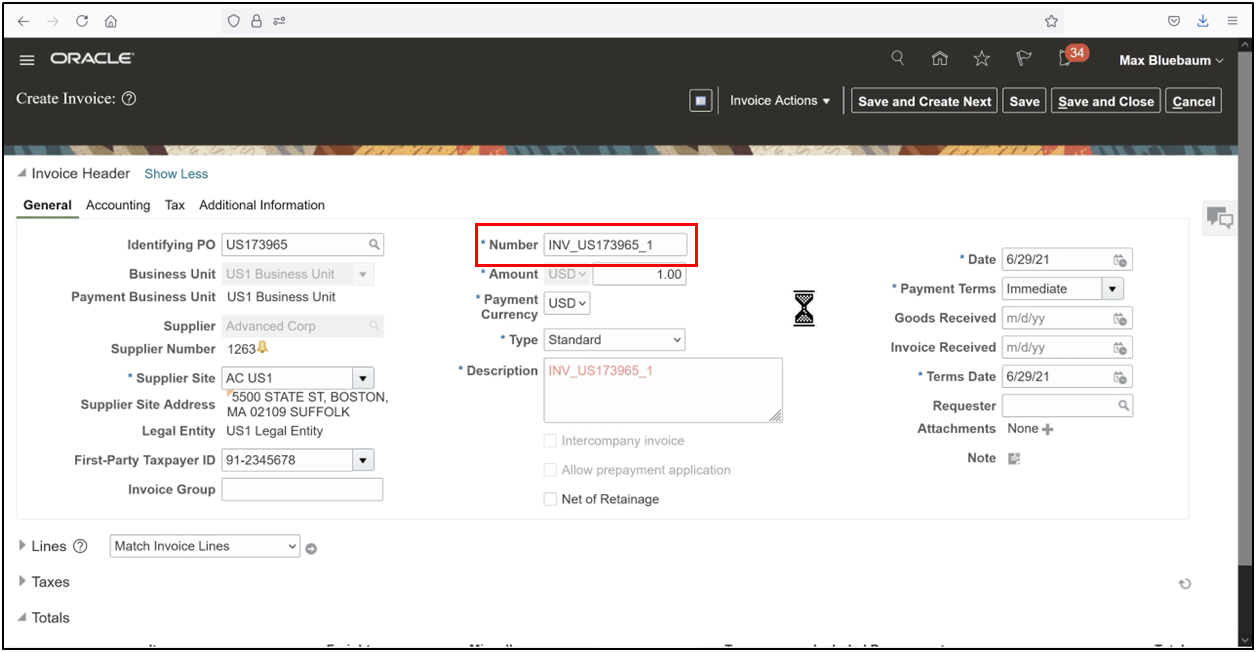
7. Key point: This step establishes the relationship between the AP invoice and the purchase order.
Step 4: Match Invoice Lines to the Purchase Order
8. Scroll down and click the Match Invoice Lines icon to display purchase order lines available for matching.
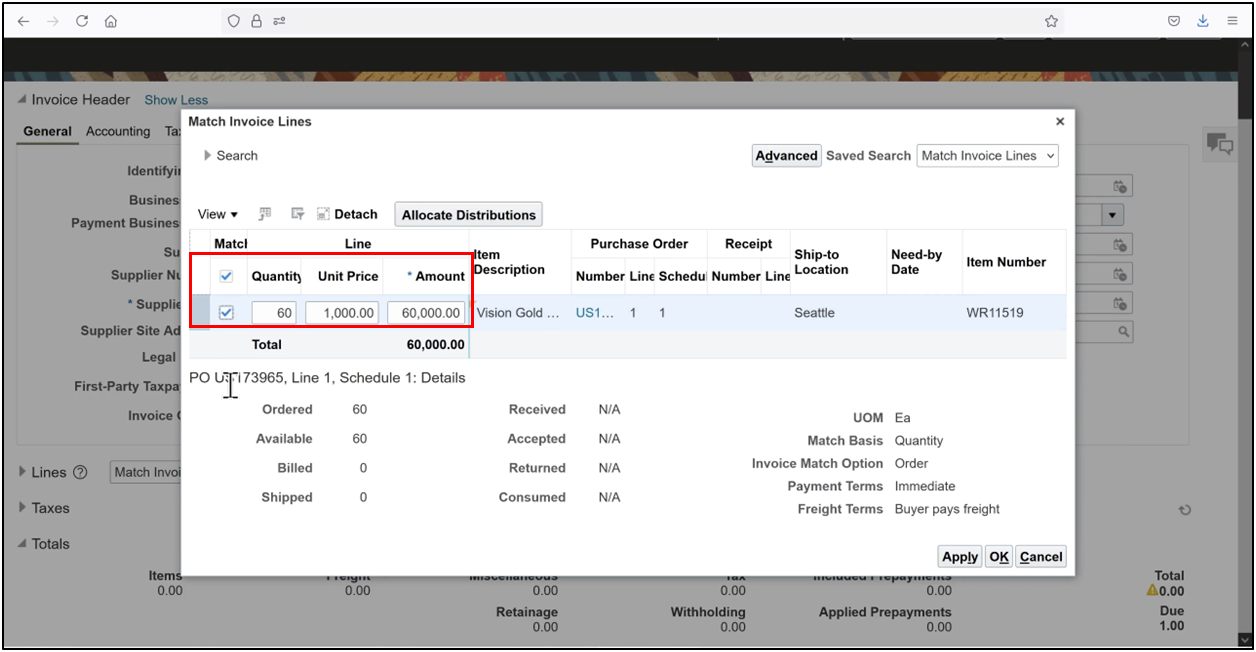
9. Select the Match flag, enter the quantity and unit price to be matched (for example, quantity 10 at a unit price of $1,060), and observe that the invoice price is higher than the purchase order price of $1,000.
10. Click Apply, then OK to complete PO matching.
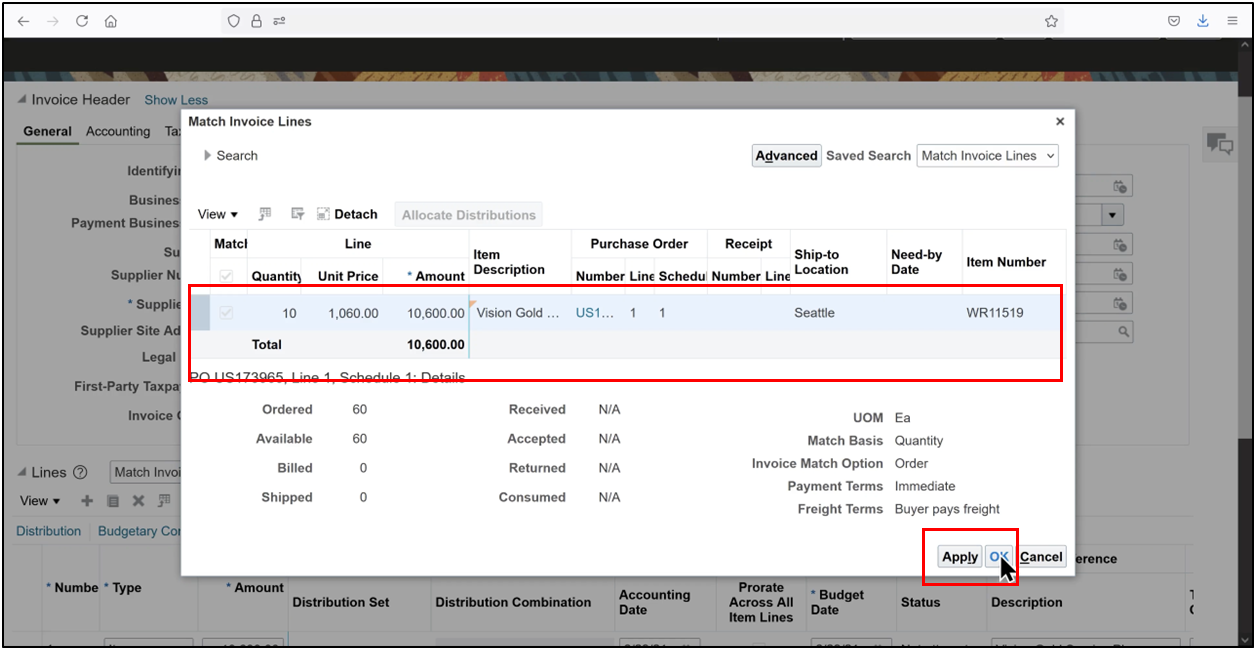
Key point: PO matching is central to accurate accounts payable invoice processing.
Step 5: Calculate Tax and Synchronize Invoice Amounts
11. Scroll up and save the invoice.
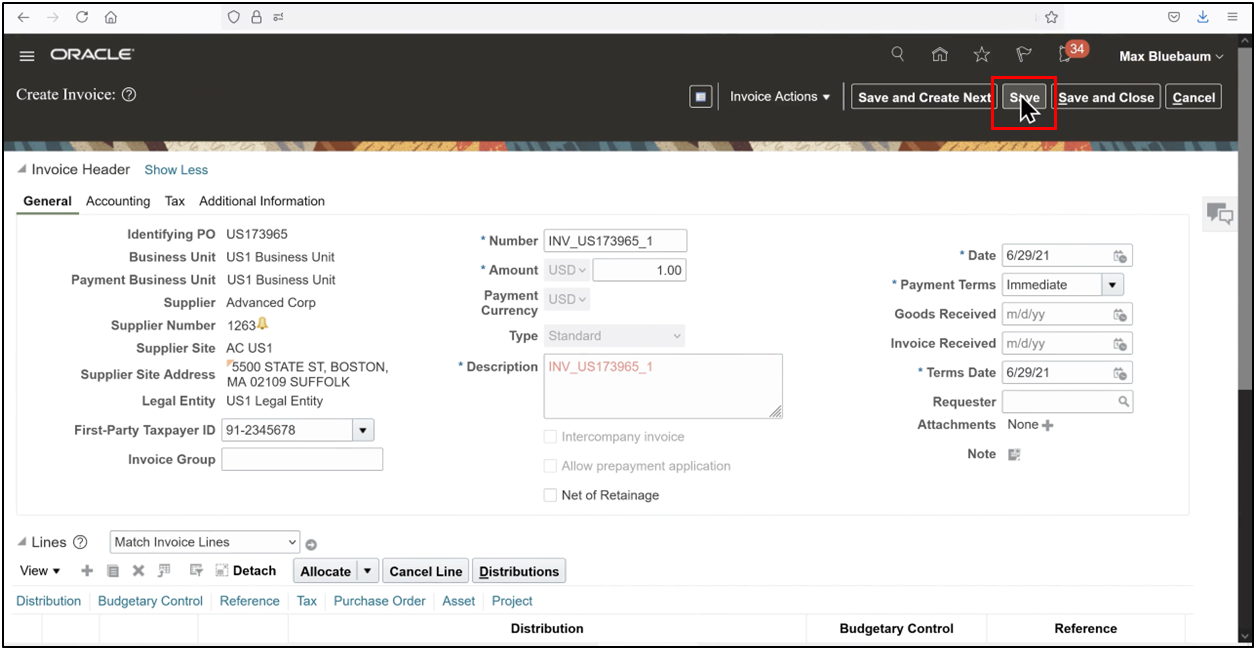
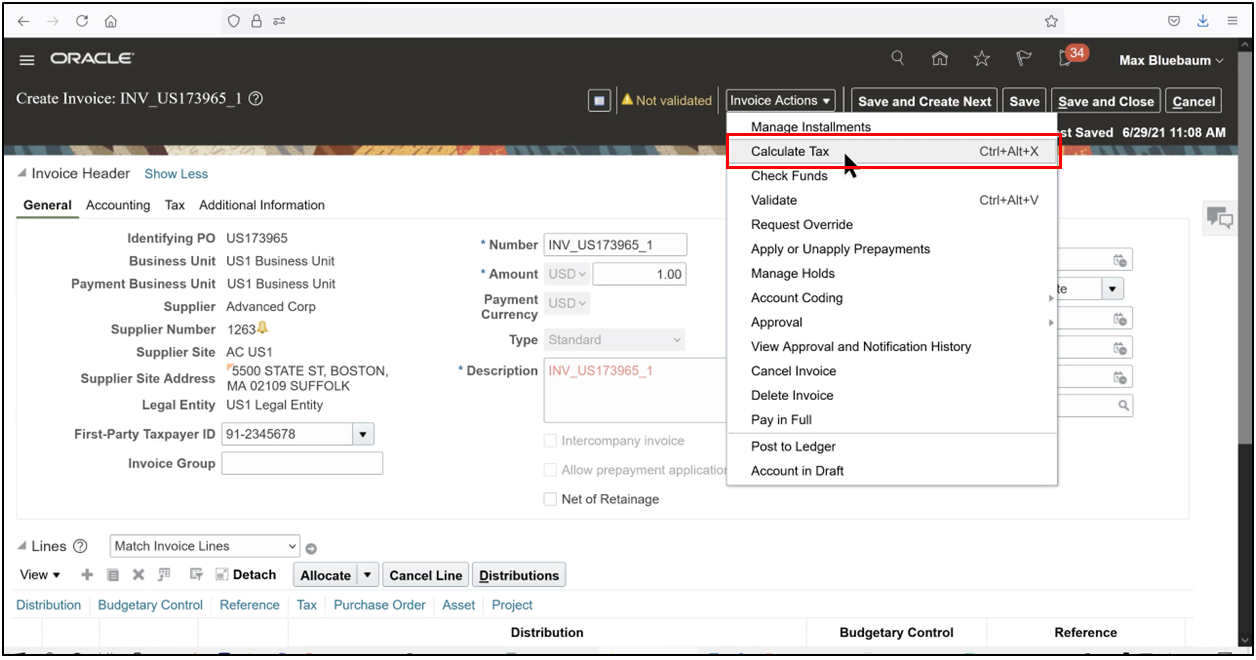
12. From Invoice Actions, click Calculate Tax
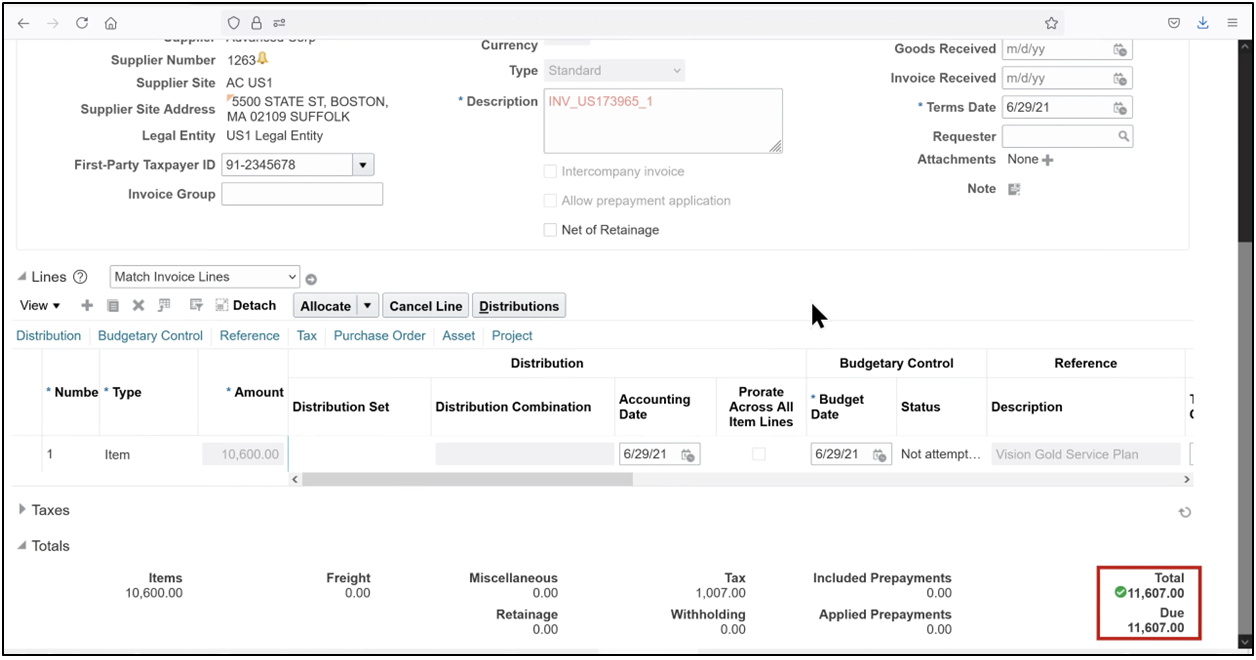
13. Then scroll down to review the updated total invoice amount of $11,607.

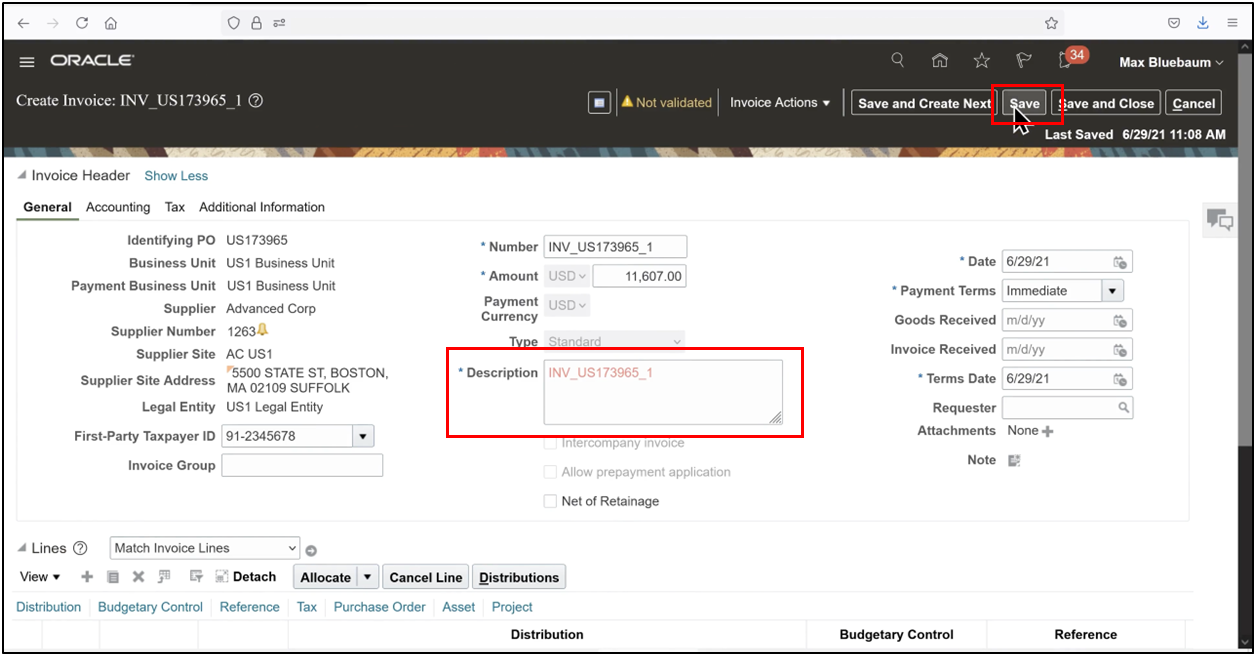
14. Modify the invoice header to reflect the final calculated amount
15. Ensure all values are consistent, scroll up, and save the invoice.
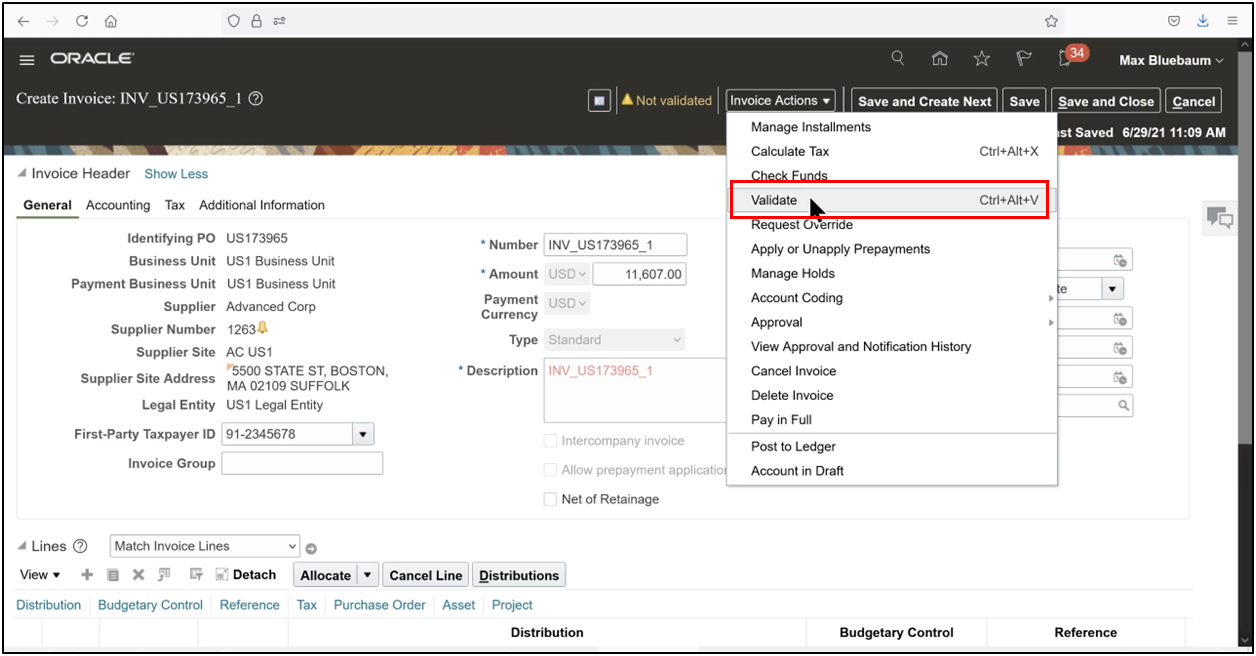
Step 6: Validate and Account the Invoice
16. From Invoice Actions, click Validate to initiate AP invoice approval and validation checks, and confirm that the invoice status changes to Validated.
17. From Invoice Actions, select Account in Draft
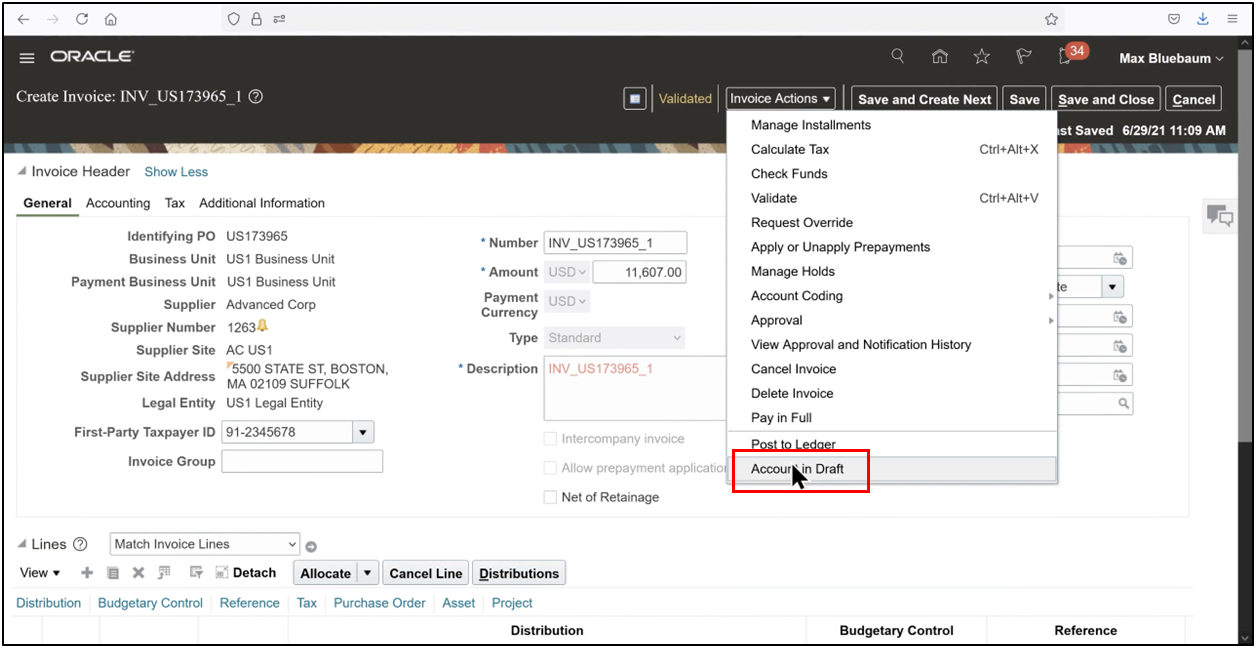
18. Confirm that invoice accounting is complete, click View Accounting
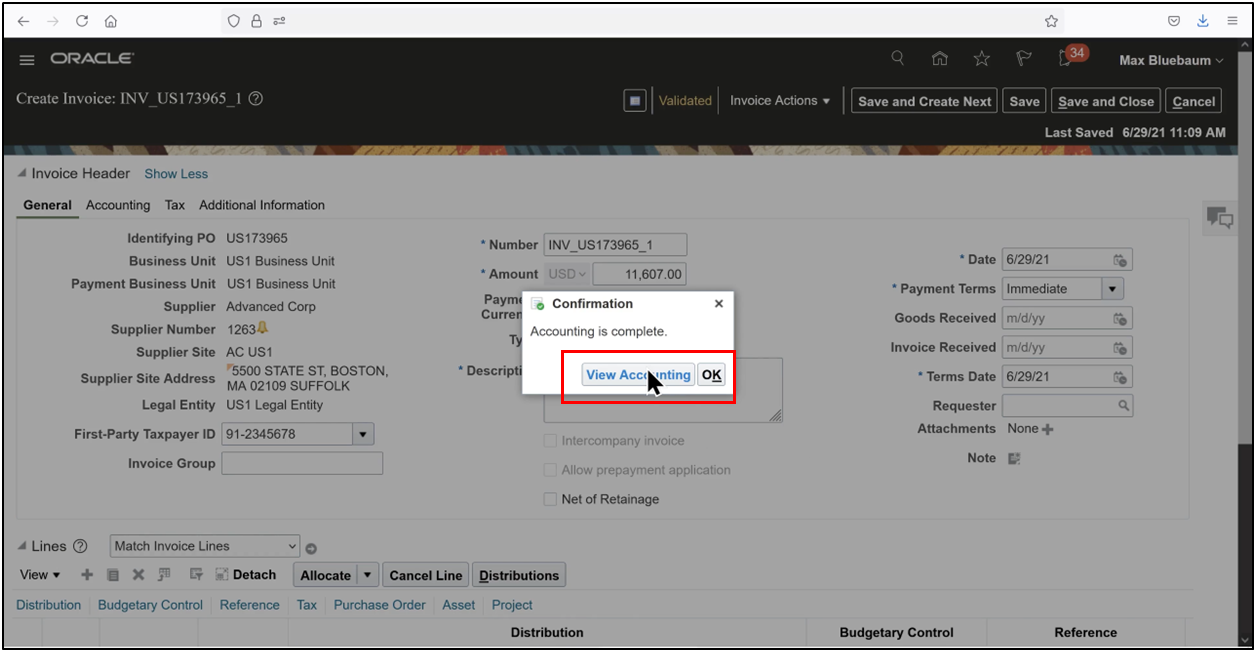
19. Use Detach for a better view.
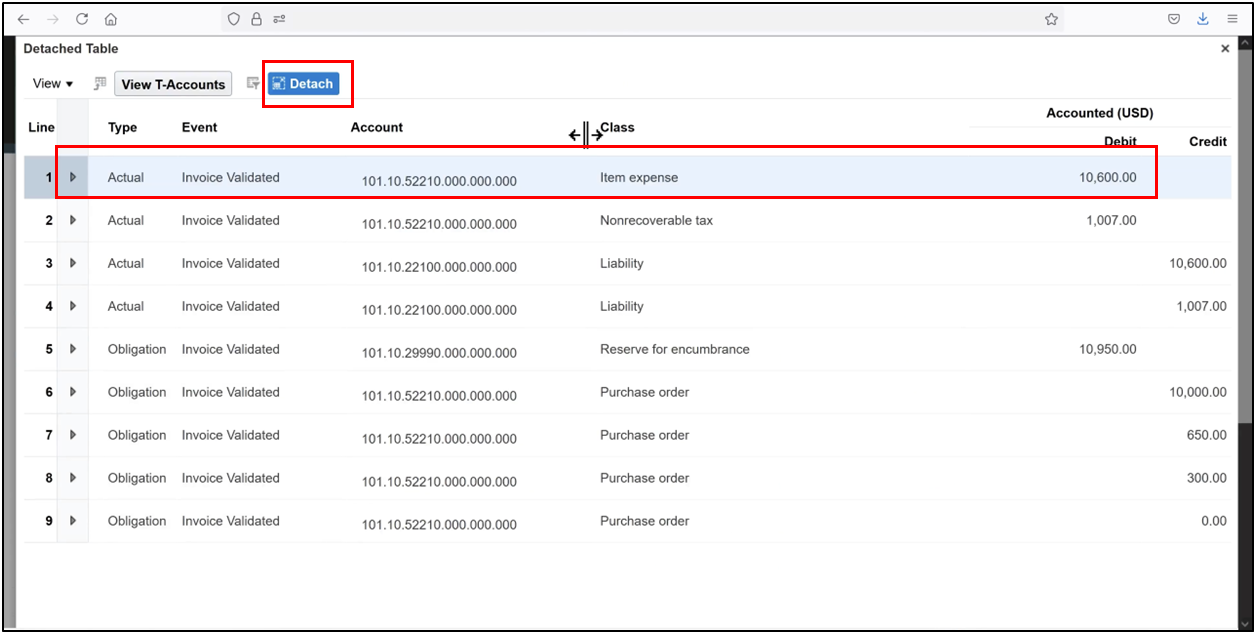
Step 7: Review Invoice Accounting Journals
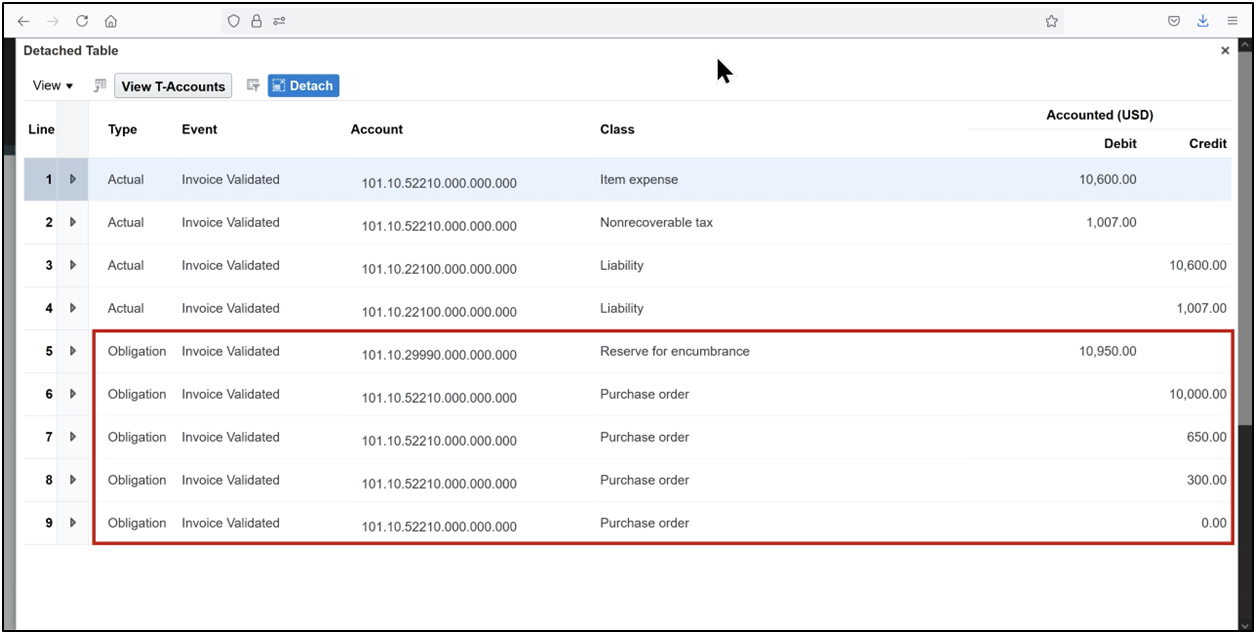
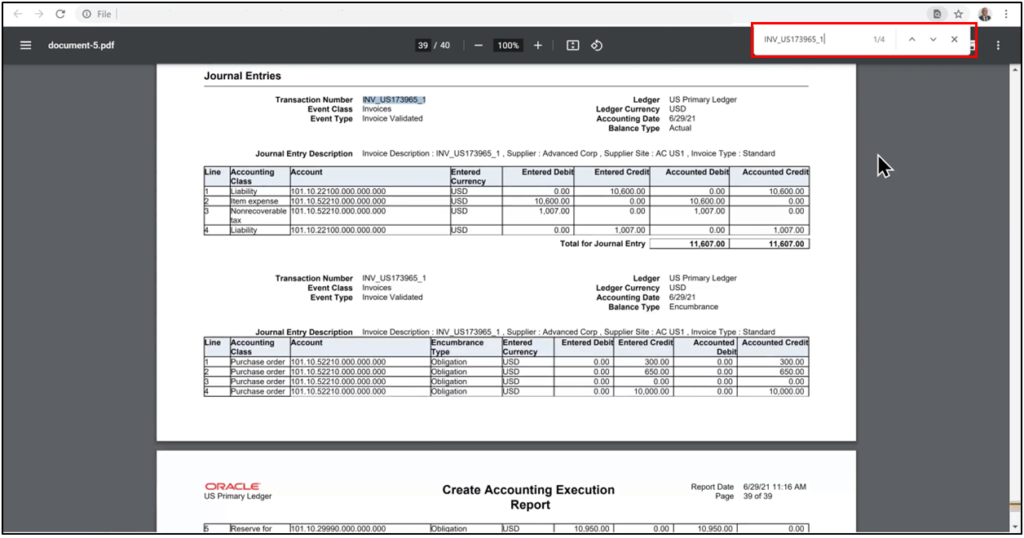
20. Review the two journals created as part of invoice accounting:
21. The actual journal records the accounts payable invoice, where the PO charge (item expense) account and tax account are debited, and the liability account is credited.
22. The Encumbrance (Obligation) journal records liquidation of the encumbrance created during the purchase order process, where the encumbrance reserve account is debited and the PO charge account is credited.

23. Note that the invoice price variance is debited to the PO charge account, which is standard Oracle Fusion behavior when accrual is not at receipt.
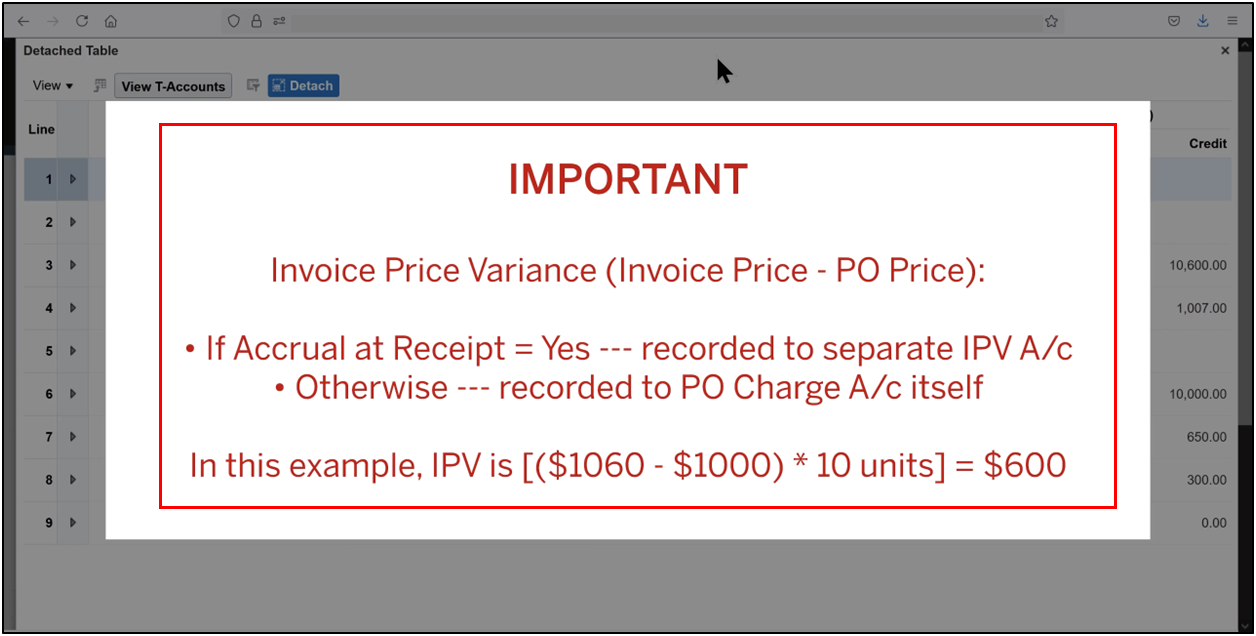
24. This accounting treatment aligns with Oracle-seeded methods such as Standard Accrual with Encumbrances, and in this scenario, invoices and receipts do not require receipt of creation.
25. Close the accounting window and click Done.
Step 8: Generate and Review the Create Accounting Execution Report
26. Navigate to Scheduled Processes, click Schedule New Process
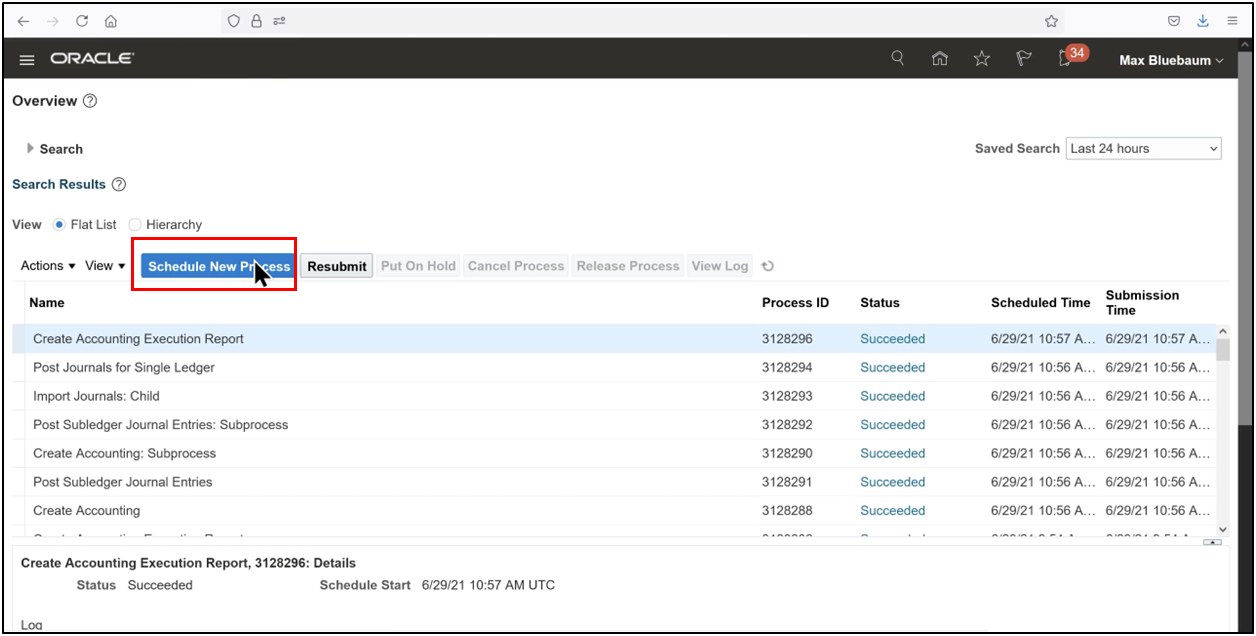
27. Search for Create Accounting and click OK.
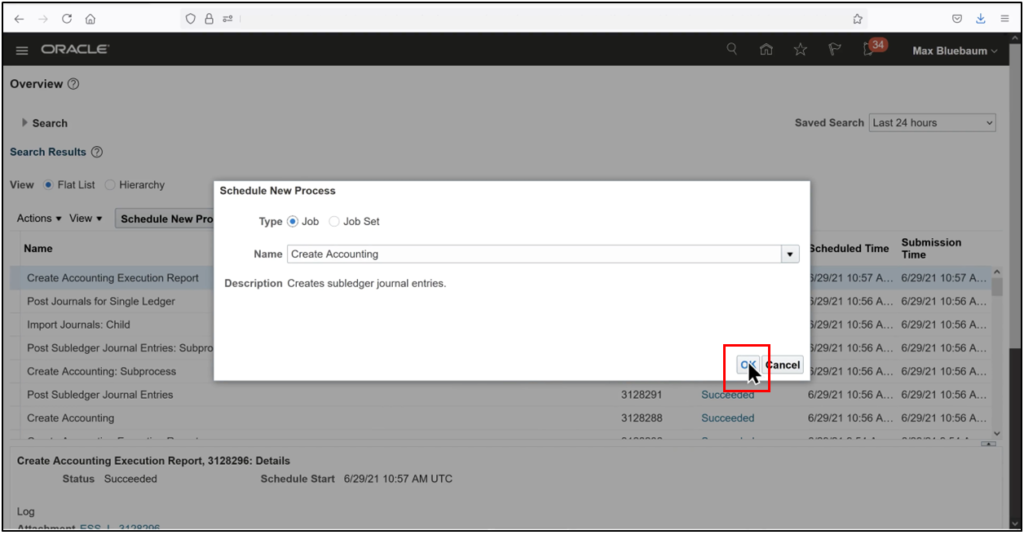
28. Enter the required parameters, click Submit
29. Note the process ID, and refresh until all processes show “Succeeded.”
30. Open the Create Accounting Execution Report
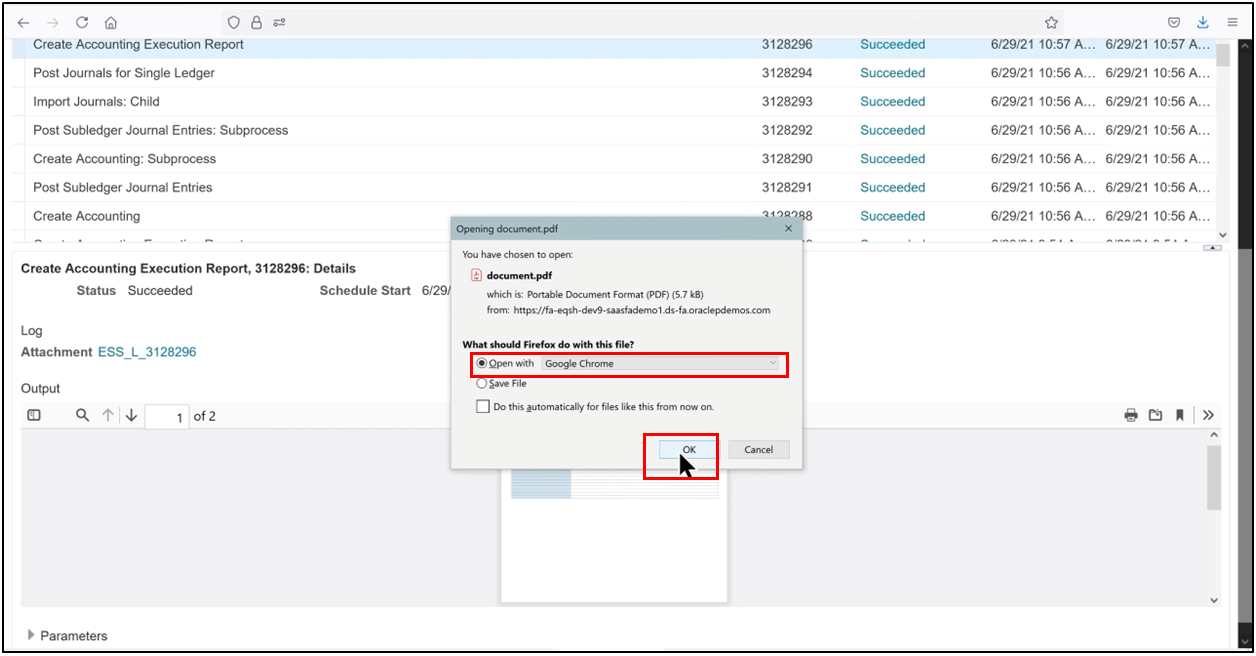
31. Open using Google Chrome.
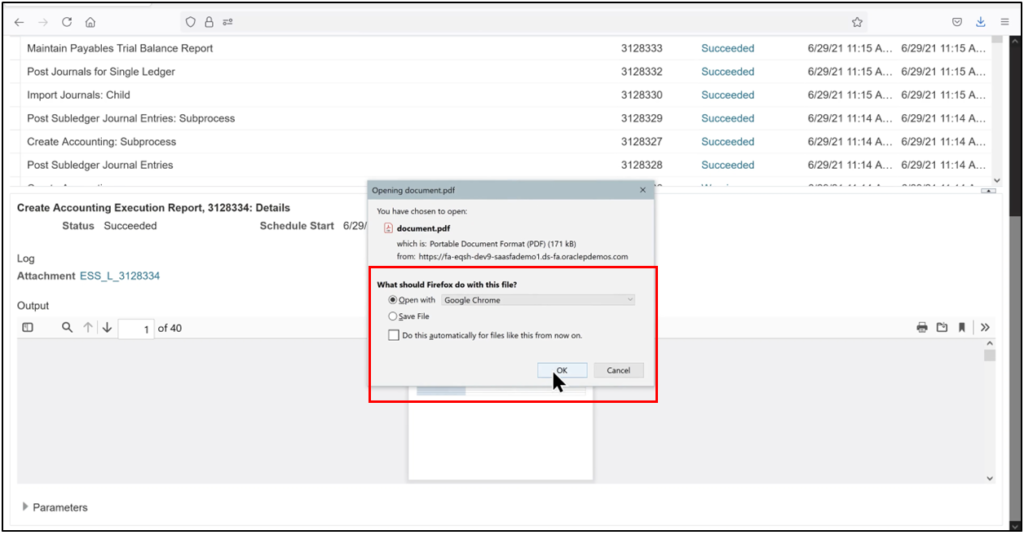
32. Create an accounting execution report.

33. Scroll to the output, and search for the invoice number to confirm that both actual and encumbrance journals have been created.
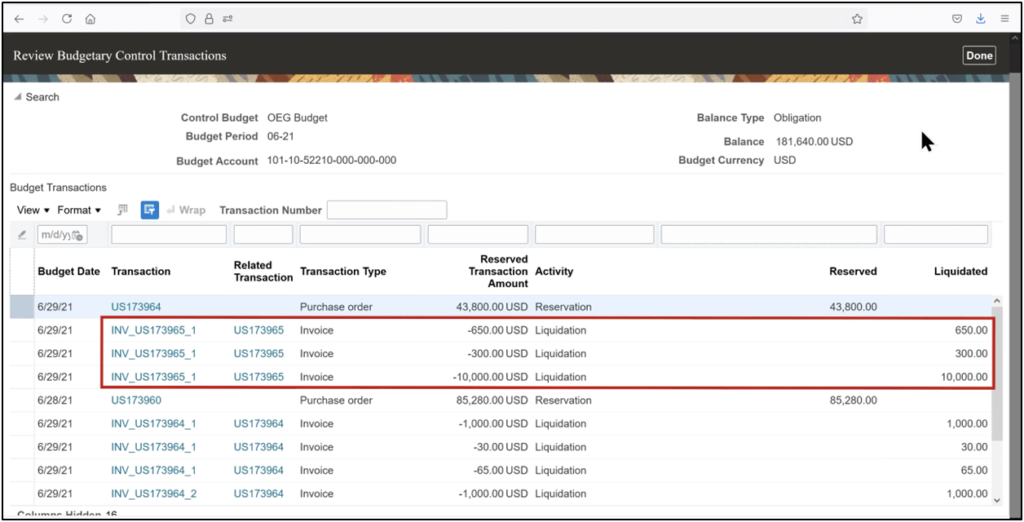
Step 9: Review Budgetary Control Impact
34. From the Navigator, go to Budgetary Control
35. Open the Tasks pane and review budgetary control balances.
36. Enter the search parameters, click Search, and scroll down to see that expenditure budget consumption has increased, reflecting the payable invoice posting.
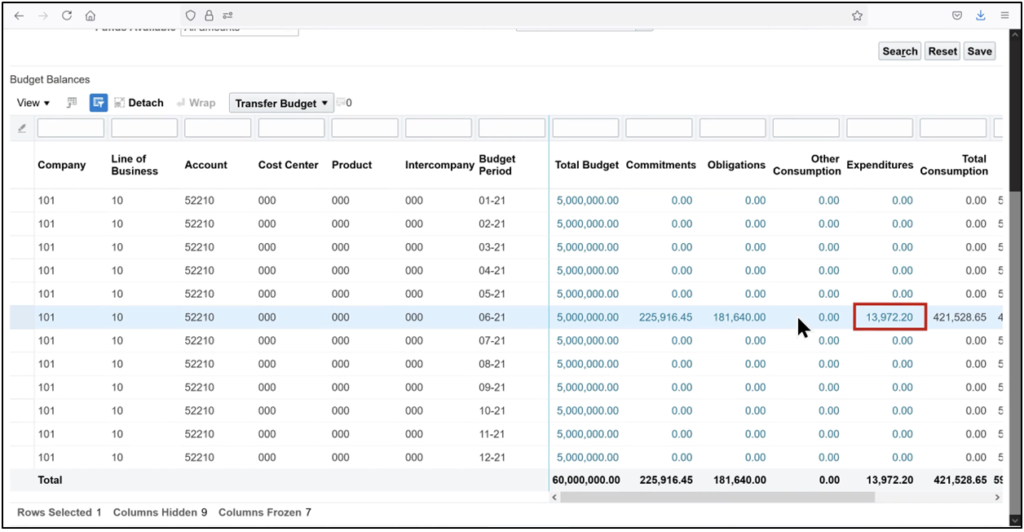
37. Click the Expenditures amount to review the reservation lines created by the AP invoice, then click Done.

38. Click the Obligations amount to review the partial liquidation of the purchase order, confirming progress toward purchase order payment.
Conclusion
This guide demonstrates the complete PO process flow in Oracle Fusion, covering each stage from purchase order creation and approval to accounting and budget validation. By following a structured and well-defined procedure, organizations can gain better visibility into financial commitments, ensure accurate accounting, and maintain effective budgetary control. This approach supports strong financial governance across the entire procure-to-pay lifecycle and helps align procurement activities with organizational financial policies.
This walkthrough demonstrates how accounts payable invoice processing works in Oracle Fusion when an invoice is matched to a purchase order. From invoice creation and PO matching to invoice accounting and budgetary control updates, each step ensures that supplier invoices are processed accurately and in compliance with financial controls.
By leveraging purchase orders, Oracle Fusion enforces disciplined accounts payable processing, improves visibility into commitments and expenditures, and automates critical accounting entries. A solid understanding of these process steps enables finance users, ERP consultants, and organizations to streamline and improve invoice approval and payment cycles.
An effectively managed PO-based AP invoice process boosts operational efficiency while ensuring tighter financial control and governance across the organization.